Lee Celtic
Well-known member
Thanks for this Andy.. It's great to see an old craft still being used for fun and profit.. Great work and very interesting..
When I was learning my trade I was lucky to get into the school of furniture in Manchester (UK) where one of the teachers had a side line in Bodging.. for those who don't know it's actually making furniture from fresh cut green wood.. He had a collection of old tools he'd adapted over the years and at one Trade show I remember him sitting between 100's of £1000's worth of industrial machinery turning a chair leg on what was basically a slow speed electric motor in a wooden box with a chuck attached..
Half way through he stopped and shook his head then reached into a bag of tools and pulled out a hammer. The proceeded to bang another nail into the box due to the thing falling apart.. then went on to finish the job.. That was 30 odd years ago but he helped teach me my trade..
I think you need to pass those skills of yours on so they are not lost. ( a long time in the future I hope)
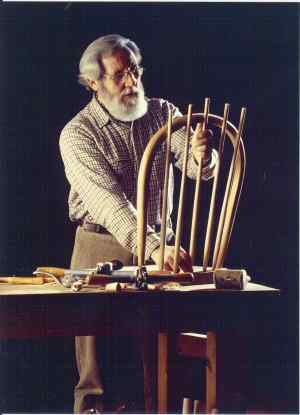
My Teacher Jack Hill at work.
When I was learning my trade I was lucky to get into the school of furniture in Manchester (UK) where one of the teachers had a side line in Bodging.. for those who don't know it's actually making furniture from fresh cut green wood.. He had a collection of old tools he'd adapted over the years and at one Trade show I remember him sitting between 100's of £1000's worth of industrial machinery turning a chair leg on what was basically a slow speed electric motor in a wooden box with a chuck attached..
Half way through he stopped and shook his head then reached into a bag of tools and pulled out a hammer. The proceeded to bang another nail into the box due to the thing falling apart.. then went on to finish the job.. That was 30 odd years ago but he helped teach me my trade..
I think you need to pass those skills of yours on so they are not lost. ( a long time in the future I hope)
My Teacher Jack Hill at work.


")