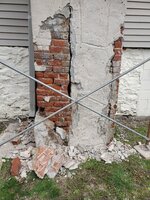
I've done dozens and dozens of these restorations as both a stone mason and later a brick restoration mason though in my younger days. I'll share what I know.
Sounds like what you have is probably pre-portland cement based slack lime mortar. The good news is that this type of old mortar is typically fairly easily removed. Bad news is that it's a very dusty/dirty job. Depending on how degraded the brick joints are, putting any sort of sealer on it will only make the inevitable re-pointing that it needs, harder down the road.
The proper way to restore this would be to remove the mortar back about 1/2 - 3/4 inches from the brick face (there are modified circular saws made for this very task that use stacked carborundum blades, or use a wide chisel and hammer). If it's really degraded, you can do this by hand with pretty much any steel tool. I've encountered mortar so degraded that it was easily and quickly scratched back by hand. Usually it varies from easy to stubborn. Don't go back any further into the joint than needed.
Once this step is finished, vacuum out all of the joints and make sure you didn't leave any brick edges, that are in the joints, with lingering mortar. Prior to pointing, you need to clean out the joints with water. Since it's inside, do a little at a time from the top down using a large sponge. Rinse out sponge, get the right amount of water out of it and just wipe out the joints. The existing mortar will absorb a lot of water which is okay -- you'll want the old mortar damp when you re-point the joints.
For mortar, use a course sand mix (3 part sand, one part portland cement, one part lime) and use a powdered mortar colorant to get whatever antiqued hue you desire. If you do this carefully, you may be able to avoid any acid washing later.
The trick is not to get the mortar too wet and to not over-tool it as both will cause leaching and you'll be acid washing afterward. You simply fill the joints with an appropriate width pointing trowel from a hand-held mortar board. Examples:
3/8 in pointing trowel
Hand-held Mortar Board
If you're right handed, you start at the right and start filling the joint moving from right to left, pressing the mortar in to your previous work. Fill the joint. Don't over tool it as you're going to strike it or skate it later. Once you get a couple of square feet done, when the mortar is no longer "wet", you can either strike it for a full joint or use a skate for a slightly recessed joint. Examples:
Joint Striker
Joint Skate
If you brush the brick face with a stiff brush before it fully sets up and isn't weepy but after you've used your striker or skate, you can get the crumbles off the face and give it a finished look. once it's hardened up, you can wash the wall with a damp sponge similarly to cleaning up after grouting tile. A light acid wash may be needed in a day or so to get the haze off the brick.
Anyway, it's not rocket surgery and anyone can do it with patience and the right tools. Once you get going, you'll think "is this all there is to it?"
Good luck! Use plastic on floor with a painters tarp on top and make a floor to ceiling dust barrier if needed.