To avoid these ads, REGISTER NOW!

How to stabilize old brick mortar?

CN Spots

Well-known member
Joined
Apr 21, 2016
Messages
3,077
Location
NW Mississippi
A friend of mine and his wife bought an older building in a small town and have turned it into a successful business. It has brick walls that they have left exposed inside. They look cool but he's complaining about the 100 year old mortar getting grit everywhere. They are looking for a way to stabilize the mortar. This is out of my wheelhouse so I told him I'd post it here.

My first thought was to buy a 55 gal drum of grout sealer, a pump sprayer and get after it.

What would you recommend?

bricks.jpg
Thanks!
 
To avoid these ads, REGISTER NOW!

K'ledgeBldr

Well-known member
Joined
Aug 22, 2011
Messages
1,925
Location
Johns Creek, GA
Well, grout sealer isn't going to "stabilize" the mortar.
The only way to do it "correctly"- tuck&point. And I'm not talking about the **** in a caulk tube! I'm talking a real mason doing it the old fashion way. When the subject matter is probably close to a hundred yrs old- that's the only way to do it.


After looking at the pics of the business- those are really old- I'd definitely be looking for a "restoration mason".
 
Last edited:

dutchgray

Well-known member
Joined
Sep 28, 2014
Messages
6,469
Location
Dorset. England.
Now you know why masonry work is generally covered over, you will not get it to a point where it is absolutely clean surface that doesn't shed grit, though you can get it much better.

That place needs a proper pointing job done, hack out 1/2" depth minimum and replace with new mortar, the white colour of the original usually means its lime based so you do not use cement to replace, it will change the look as it will be much less rustic.
You can just imagine how much work it is to do and how much mess will be made doing it, any loose brickwork would have to be replaced and I bet there is some areas in there which are.
It still wouldn't be grit free, just much less of it.
 

PoorUB

Well-known member
Joined
Mar 29, 2021
Messages
11,721
Location
Fargo, ND
Repoint, or move! Moving would be less money, but without the "rustic charm"!

You might be able to seal it if it is in good condition, but those 100 year old buildings the motar is always on it's last legs.
 

The Cobbler

Super Moderator
Staff member
Joined
Oct 24, 2013
Messages
25,993
Location
Niagara Region, Ontario, Canada
as others have noted, no easy, cheap, fast solution. it is very labour intensive and probably huge $$ to have it properly re pointed
I know you referenced the inside, but they better start budgeting for exterior repairs too
 

Zeke

Well-known member
Joined
Aug 13, 2009
Messages
17,176
Location
Long Beach CA, the sewer by the sea.
He should consult with the local historical folks, usually a group of nosy people. Therefore, he should keep it theoretical.

AFA as labor intensive, it's a lot less than laying brick. One man can do several yards an hour.
 

rayra

Well-known member
Joined
Dec 1, 2014
Messages
4,724
Location
Escaped from Los Angeles
clear the wall, brush all the loose material off, use a garden sprayer to apply a masonry sealer in their desired finish. two coats.
The sealer will stink like hell, usually, they'll need a down day or an overnight project with a late open the next day. If they are ever closed for a day, it should happen in the preceding overnight. As in start the minute you usher the last customer out at night and lock the door.

That will control 'grit' for a very long time.

If the grout is truly crumbling / failing, nothing will stop it. And the above described masonry work is needed. But will alter all the visual appeal of that crusty wall.
 

Pen & Wrench

Well-known member
Joined
Jan 12, 2015
Messages
661
Location
Huron, SD
I agree, remove the crumbly and loose mortar and tuck point it. We have an 1889 rental home with a rock basement, and while its not brick, I did the same thing, and it really does work. Its a big job, but it really can be done, and it doesn't have to be all done at once. There are people on the East coast that are experts at things like this, and they preserve historical homes. You can find youtube videos about it.
 

olytdi

Well-known member
Joined
Dec 3, 2011
Messages
2,202
Location
Olympia, Washington
I've done dozens and dozens of these restorations as both a stone mason and later a brick restoration mason though in my younger days. I'll share what I know.

Sounds like what you have is probably pre-portland cement based slack lime mortar. The good news is that this type of old mortar is typically fairly easily removed. Bad news is that it's a very dusty/dirty job. Depending on how degraded the brick joints are, putting any sort of sealer on it will only make the inevitable re-pointing that it needs, harder down the road.

The proper way to restore this would be to remove the mortar back about 1/2 - 3/4 inches from the brick face (there are modified circular saws made for this very task that use stacked carborundum blades, or use a wide chisel and hammer). If it's really degraded, you can do this by hand with pretty much any steel tool. I've encountered mortar so degraded that it was easily and quickly scratched back by hand. Usually it varies from easy to stubborn. Don't go back any further into the joint than needed.

Once this step is finished, vacuum out all of the joints and make sure you didn't leave any brick edges, that are in the joints, with lingering mortar. Prior to pointing, you need to clean out the joints with water. Since it's inside, do a little at a time from the top down using a large sponge. Rinse out sponge, get the right amount of water out of it and just wipe out the joints. The existing mortar will absorb a lot of water which is okay -- you'll want the old mortar damp when you re-point the joints.

For mortar, use a course sand mix (3 part sand, one part portland cement, one part lime) and use a powdered mortar colorant to get whatever antiqued hue you desire. If you do this carefully, you may be able to avoid any acid washing later.

The trick is not to get the mortar too wet and to not over-tool it as both will cause leaching and you'll be acid washing afterward. You simply fill the joints with an appropriate width pointing trowel from a hand-held mortar board. Examples:

3/8 in pointing trowel

Hand-held Mortar Board

If you're right handed, you start at the right and start filling the joint moving from right to left, pressing the mortar in to your previous work. Fill the joint. Don't over tool it as you're going to strike it or skate it later. Once you get a couple of square feet done, when the mortar is no longer "wet", you can either strike it for a full joint or use a skate for a slightly recessed joint. Examples:

Joint Striker

Joint Skate

If you brush the brick face with a stiff brush before it fully sets up and isn't weepy but after you've used your striker or skate, you can get the crumbles off the face and give it a finished look. once it's hardened up, you can wash the wall with a damp sponge similarly to cleaning up after grouting tile. A light acid wash may be needed in a day or so to get the haze off the brick.

Anyway, it's not rocket surgery and anyone can do it with patience and the right tools. Once you get going, you'll think "is this all there is to it?"

Good luck! Use plastic on floor with a painters tarp on top and make a floor to ceiling dust barrier if needed.
 

Hank11

Well-known member
Joined
Aug 19, 2019
Messages
1,159
Location
Tennessee
What ever tuck pointing you do its still going to leave brick and mortar dust if its not sealed. Give it a good scrubbing to get the real loose stuff off and then seal it. This is an indoors project and it is not exposed to the elements. A good clear floor sealer will hold up on the wall just fine.
 
To avoid these ads, REGISTER NOW!

stevied916

Well-known member
Joined
Oct 10, 2018
Messages
84
Location
Northern CA
He will probably need to repoint it. And DO NOT use modern type m mortar if it is in fact 100 years old. He will probably need a lime mortar.
 

Zeke

Well-known member
Joined
Aug 13, 2009
Messages
17,176
Location
Long Beach CA, the sewer by the sea.
What ever tuck pointing you do its still going to leave brick and mortar dust if its not sealed. Give it a good scrubbing to get the real loose stuff off and then seal it. This is an indoors project and it is not exposed to the elements. A good clear floor sealer will hold up on the wall just fine.
I don't think so if the mix is correct. Listen to @olytdi above.

 
OP
C

CN Spots

Well-known member
Joined
Apr 21, 2016
Messages
3,077
Location
NW Mississippi
Thanks for all the responses! olytdi, that was very informative! I'll pass that on to him. This building is part of historical rebuilding project by the town/state and had to be inspected and approved before they could purchase/occupy the structure. There were no issues with the building's structural safety. The electrical and plumbing DID have to be re done though. The mortar issue he is referring to is with the inside and is not major (as in chunks falling out... yet) just grit on the floor which is epoxy and was very expensive. Since the ladies have to sweep hair clippings all over the place, it picks up the grit and scours the epoxy.

I'll mention tuck pointing to him so that he can research it. Thanks again!
 
OP
C

CN Spots

Well-known member
Joined
Apr 21, 2016
Messages
3,077
Location
NW Mississippi
Sadly, this problem was resolved by an EF3 that hit his home town of Wynne, AR last Friday.

The 100 year old walls in the photo above are still standing. It was the newer, back and side walls that were blown out. He was over insured and the agent is pretty sure they will write the whole building off. He's more bothered by all of their employees being unable to generate income when they need it the most. He was driving around this morning looking for a place to set up a temporary shop so they could get back on their feet.

His son's house was also destroyed but he made it out without injury. Aside from the property damage, they were very lucky.
 

Zeke

Well-known member
Joined
Aug 13, 2009
Messages
17,176
Location
Long Beach CA, the sewer by the sea.
A shame for sure but if this is a genuine historic building there will be financial aid to go along with the insurance. This was a hair salon, right? Hopefully there is some commercial space available to move whatever equipment is salvable to a new temporary location. Maybe the local authorities will give some slack while the new operation is getting going.

It would seem to me that having the business survive will help in motivating those involved to see that the building is put back to use. Restoring an old theater isn't easy when there is no tenant.
 

Fav Onefour

Well-known member
Joined
Jul 14, 2022
Messages
722
Location
MN cold and hot
Dang, that's not the normal update on a project.

@CN Spots , I'm glad they are OK.

I just saw the original post and started reading through. The response from @olytdi , had me interested too. The business photos showed sections of parge coating and wondered how that would have been addressed.

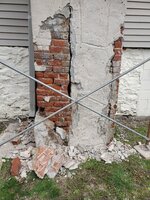
I picked up an old building last year and I'm doing a big tuck point project. This is my first attempt. I had hired a contractor to do the "emergency" repairs on a large ge exterior chimney that had badly failing parge coat.
20220503_112534.jpg
The coating had done a nice job of hiding the poor structure underneath. It certainly would not have stood through a tornado.
In my case, mother nature was preempted on the chimney. The up in the air section was handled by the contractor.
20220503_173931.jpg
I'm going after the rough cut stone foundation myself. Some areas have parge coat, but the structure underneath appears pretty solid. Sealing is not an option.

Again, @CN Spots , I'm glad they are ok. Hope they find a solution to get everyone back on their feet.
@olytdi , I do appreciate the input and information. I will have more questions down the road. Probably need to start another thread.
 

Zeke

Well-known member
Joined
Aug 13, 2009
Messages
17,176
Location
Long Beach CA, the sewer by the sea.
Thanks for all the responses! olytdi, that was very informative! I'll pass that on to him. This building is part of historical rebuilding project by the town/state and had to be inspected and approved before they could purchase/occupy the structure. There were no issues with the building's structural safety. The electrical and plumbing DID have to be re done though. The mortar issue he is referring to is with the inside and is not major (as in chunks falling out... yet) just grit on the floor which is epoxy and was very expensive. Since the ladies have to sweep hair clippings all over the place, it picks up the grit and scours the epoxy.
 

rlitman

Well-known member
Joined
Oct 18, 2010
Messages
24,674
Location
Long Island
...Sounds like what you have is probably pre-portland cement based slack lime mortar. The good news is that this type of old mortar is typically fairly easily removed. Bad news is that it's a very dusty/dirty job. Depending on how degraded the brick joints are, putting any sort of sealer on it will only make the inevitable re-pointing that it needs, harder down the road.
...
For mortar, use a course sand mix (3 part sand, one part portland cement, one part lime) and use a powdered mortar colorant to get whatever antiqued hue you desire. If you do this carefully, you may be able to avoid any acid washing later.
...
Great advice. For those not aware, pre-mixed mortar comes in 5 hardnesses, from M being almost straight portand cement, S, N being what you described, O, and K being straight lime. The important thing to know is to match the strength of your mortar to your bricks. If you use too hard a mortar, you may cause the bricks to spall. Type N (1:1 portand to lime ratio) is the Goldilocks hardness for most bricks, including typical stuff from 100 years back. If you had a 200 year old building with hand made softer bricks, type N mortar could be damaging.

Also, there are tuckpointing tools that are an angle grinder with a shrouded thick diamond wheel and decent dust collection that can make the job a little cleaner. Cleaner being a relative term, as in cleaner than sanding drywall, but nothing will eliminate the dust entirely.
 
OP
C

CN Spots

Well-known member
Joined
Apr 21, 2016
Messages
3,077
Location
NW Mississippi
It was indeed a salon on one side with an attached photo studio on the other. He owned both. Perfect business model. Get prettied up one one side, beauty shots on the other. They made a killing during prom season. He's down about 5k/month in income.

The problem with small towns like that is the limited retail space that's available after a disaster. Most places suffered at least some damage. They're still looking and hope to find something soon.

I believe this was taken a few hours after the storm. That's the high school in the foreground.
wynne-arkansas-tornado-damage-aerial-rt-jt-230401_1680370117813_hpEmbed_3x2_992.jpg
 
To avoid these ads, REGISTER NOW!
Top Bottom