To avoid these ads, REGISTER NOW!

How would you fix this trailer frame

redm18

Well-known member
Joined
Jun 21, 2011
Messages
166
Location
Center Point IA
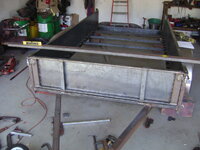
I recently picked up this trailer with a break in the frame. The frame is square tubing and is 3/8 inch thick. It is cracked on the bottom and both sides but holding together at the top. I have a 220 Volt Mig welder. My thoughts are to try to jack it up to align it straight then tack the corners. After the corners are tacked grind out a v shape on each of the edges and run several passes to close it up. Then weld around 3/8 inch thick by inch and a half or so angle iron around all sides of the tube about 6 to 8 inches on either side of the break. Am I way off base here?
 

Attachments

  • PXL_20230809_202737593.jpg
    PXL_20230809_202737593.jpg
    223.3 KB · Views: 310
To avoid these ads, REGISTER NOW!

whateg01

Well-known member
Joined
Mar 13, 2006
Messages
11,484
Location
doo dah, kansas, usa
Would need to see more to really form a solid opinion, but I might do as you suggested rewelding what's there. Instead of boxing it further with angle, weld the angle with a leg going down, thus making the section taller.
 

hefnerconstructionlc

Well-known member
Joined
Nov 1, 2016
Messages
665
Location
Kansas
Cut it out clean. Line it nice and straight and clamp really well then weld it up.I would not suggest adding strengthening strips. As that may cause it to crack in other spots. If it cracks again then you may have to re-engineer it. But I would just clean up and repair. That will likely take care of the problem.
 

whateg01

Well-known member
Joined
Mar 13, 2006
Messages
11,484
Location
doo dah, kansas, usa
Cut it out clean. Line it nice and straight and clamp really well then weld it up.I would not suggest adding strengthening strips. As that may cause it to crack in other spots. If it cracks again then you may have to re-engineer it. But I would just clean up and repair. That will likely take care of the problem.
There's a reason you see fish plates on joints. This should have additional reinforcement, especially if it's used on the road.
 

Kenstone1

Well-known member
Joined
Oct 2, 2015
Messages
734
I recently picked up this trailer with a break in the frame. The frame is square tubing and is 3/8 inch thick. It is cracked on the bottom and both sides but holding together at the top. I have a 220 Volt Mig welder. My thoughts are to try to jack it up to align it straight then tack the corners. After the corners are tacked grind out a v shape on each of the edges and run several passes to close it up. Then weld around 3/8 inch thick by inch and a half or so angle iron around all sides of the tube about 6 to 8 inches on either side of the break. Am I way off base here?
To me it looks more like a weld failure (bad weld), not a crack.
With that, your fix plan is a good one, although if the welding was faulty and corrected, adding material may not be necessary.

Me, I would weld a full width plate over the face edge welded along the top and bottom, if I decided to add material.
This would bridge the welds along the angles so no weld over welds if angle was used.
I would do the same to the inside vertical face too, a plate bent to the angles and welded top/bottom.
And to add to the overall strength a contoured plate could be added to the bottom.
Shaped/contoured/cutout of a wider plate so no welds over welds.
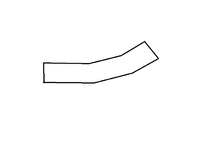
FixPlate.jpg
With a like plate on the inside...
jmo,
.
 
Last edited:

isb cornbinder

Well-known member
Joined
Nov 3, 2010
Messages
7,073
Location
Pacific South West, BC, Canada
I recently picked up this trailer with a break in the frame. The frame is square tubing and is 3/8 inch thick. It is cracked on the bottom and both sides but holding together at the top. I have a 220 Volt Mig welder. My thoughts are to try to jack it up to align it straight then tack the corners. After the corners are tacked grind out a v shape on each of the edges and run several passes to close it up. Then weld around 3/8 inch thick by inch and a half or so angle iron around all sides of the tube about 6 to 8 inches on either side of the break. Am I way off base here?
Grind out a "V" as you suggest. keep the weld low. fit a piece of flat-bar over the new weld and weld the flat-bar in-place. Send it.
Don't weld over a failed weld. You repair is no stronger than the base is goes on.
 
OP
R

redm18

Well-known member
Joined
Jun 21, 2011
Messages
166
Location
Center Point IA
To me it looks more like a weld failure (bad weld), not a crack.
With that, your fix plan is a good one, although if the welding was faulty and corrected, adding material may not be necessary.

Me, I would weld a full width plate over the face edge welded along the top and bottom, if I decided to add material.
This would bridge the welds along the angles so no weld over welds if angle was used.
I would do the same to the inside vertical face too, a plate bent to the angles and welded top/bottom.
And to add to the overall strength a contoured plate could be added to the bottom.
Shaped/contoured/cutout of a wider plate so no welds over welds.
jmo,
.
Yeah its a weld failure for sure that whole section is welded on its kind of odd that the builder did it that way. Its a solid piece from that weld back then that broken weld, then like 8 more inches of straight tube with the indicator light then another weld with the front triangle welded on. I'm not sure what you mean exactly here. Are you just saying get flat stock and weld it on the two verticle faces of the tube? What do you mean no weld over welds?
 

Kenstone1

Well-known member
Joined
Oct 2, 2015
Messages
734
Yeah its a weld failure for sure that whole section is welded on its kind of odd that the builder did it that way. Its a solid piece from that weld back then that broken weld, then like 8 more inches of straight tube with the indicator light then another weld with the front triangle welded on. I'm not sure what you mean exactly here. Are you just saying get flat stock and weld it on the two verticle faces of the tube? What do you mean no weld over welds?
I added a pic for clarity, check it out.
FixPlate.jpg

The bottom plate should be shaped like the contour of the trailer, cut out from wider flat stock, not 3pcs. welded together.

BottPlate.png
.
 
Last edited:

KenC

Well-known member
Joined
Dec 20, 2009
Messages
2,596
Location
oklahoma
IMO, the reinforcement is a good idea. But I would add it to the bottom, where the failure started. Align, vee and weld all the way around then add a flat plate long enough to go past both the welds we can see in the pic. One of them broke making both suspect.

Grind all the welds on the bottom flush, so the reinforcement fits well and flush with the outside of the frame. The weld the edges of the plate. I'm not a good welder so doing the weld on the edges is easier than overhead if the plate is smaller than the frame..
 

Copymutt

Well-known member
Joined
Sep 3, 2016
Messages
3,407
Location
Colorado
B4 I offer my 4 cents (inflation ya know). Tell us more about the trailer. How many axles. Tongue weight. Age. Used commercially? Any brakes?
 

jack stand

Well-known member
Joined
Feb 29, 2012
Messages
3,354
Location
Lakes Region Maine
The important question is what will you be hauling, is it single axle or multiple?
That failure at the tongue is telling and the picture looks like it's severely rusted (but covered in paint).
 
To avoid these ads, REGISTER NOW!

kerrynzl

Well-known member
Joined
Nov 8, 2013
Messages
5,054
Location
Tauranga, New Zealand
I recently picked up this trailer with a break in the frame. The frame is square tubing and is 3/8 inch thick. It is cracked on the bottom and both sides but holding together at the top. I have a 220 Volt Mig welder. My thoughts are to try to jack it up to align it straight then tack the corners. After the corners are tacked grind out a v shape on each of the edges and run several passes to close it up. Then weld around 3/8 inch thick by inch and a half or so angle iron around all sides of the tube about 6 to 8 inches on either side of the break. Am I way off base here?

Why did it break?

Are those pie cuts there so the frame rails "V" together to make the tongue?

The weld can successfully be repaired as you suggested. But understand the weld didn't break, the parent material adjacent to the weld did [a welder's dilemma]
This is because the molten filler actually anneals the material beside it. [you end up with hard material directly against soft material]

You could heat the steel to stress relieve it .

If you decide to add a "Fishplate" to add strength this needs to be on the underneath side [where there is tension] this acts like a flange on an "I" Beam.
The "Fishplate" is only "kicking the can down the road" and where it ends becomes another stressed point [where the steel is elastic, but the plate isn't]

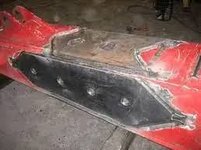
The best method is to use a diamond shape [center photo that @Jim greengo above shows] this allows the stress point to be minimal in width.
A better method of welding a fishplate is to use a parallel plate [to the shape], but you only weld along the sides at the edges [the strongest point of the tubing] and simply urethane the ends to waterproof them.

here is an example of the tongue attached to a frame crossmember [it is only welded longitudinally]
DSC03425.JPG

DSC03369.JPG
 

Mr.N

Well-known member
Joined
Jul 13, 2005
Messages
2,223
Location
Mpls, MN
Why did it break?

If you decide to add a "Fishplate" to add strength this needs to be on the underneath side [where there is tension] .
If you are not an engineer to run the numbers, make sure to get plate thicker than what you are welding to, and go longer than you think.

You don't want to be on the side of the road with your frame broken again and no welder....
 

gearhead1

Well-known member
Joined
Oct 14, 2013
Messages
1,935
Location
NC
Like Kerrynzl said, the bottom is in tension. That’s your most bang for the buck location to add flat bar.

I’d grind the the weld on the bottom. Hook to your vehicle. Jack it up close to the weld area as you can and still have room to weld. This will help close that gap. Weld it on the bottom once the gap is closed. Grind smooth. Then put on the flat bar on the bottom and weld all around. Then do the same for the side. The top is in compression, adding material there isn’t going to help much.
 

kerrynzl

Well-known member
Joined
Nov 8, 2013
Messages
5,054
Location
Tauranga, New Zealand
Like Kerrynzl said, the bottom is in tension. That’s your most bang for the buck location to add flat bar.

I’d grind the the weld on the bottom. Hook to your vehicle. Jack it up close to the weld area as you can and still have room to weld. This will help close that gap. Weld it on the bottom once the gap is closed. Grind smooth. Then put on the flat bar on the bottom and weld all around. Then do the same for the side. The top is in compression, adding material there isn’t going to help much.

This ^^^ except you don't want the ends of the plates welded fully across [if you want to fully weld the plate , taper the ends to a point]
Steel is always flexible, So the last thing you need is an abrupt stop in this flexibility [this become a stress point for metal fatigue]

When we build rollcages for race cars , we need to weld a footplate at the bottom of the cage [to the floor]
The FIA specifies the square area of these plates and they must be stitch welded to the floor [which is stronger than fully welding]

The same applies to "seam welding" the unibody [stitch welding is stronger than fully welding.]

And when it comes to seatbelt anchor points the plates must be stitch welded AND the corners rounded [the stitch welds are not allowed on the corners] They actually prefer doubler plates that are rosette welded together

@redm18 needs to look at how the forces are applied to the steel [which is probably vertical]
With vertical loads, the top and bottom flanges bear the loads [compression and tension] Which explains why structures like buildings and bridges have "I" beams and not "H" beams.
A fishplate on the side is less effective than on the underneath.


Sometimes "Less is More" [I've witnessed tests done to destruction to see how this all works]
AND
Shape is more important than size!!!!
Many engineers will simply overbuild something to compensate for poor design
 

Jim greengo

Well-known member
Joined
Sep 3, 2018
Messages
7,415
Location
Behind my house
Like Kerrynzl said, the bottom is in tension. That’s your most bang for the buck location to add flat bar.

I’d grind the the weld on the bottom. Hook to your vehicle. Jack it up close to the weld area as you can and still have room to weld. This will help close that gap. Weld it on the bottom once the gap is closed. Grind smooth. Then put on the flat bar on the bottom and weld all around. Then do the same for the side. The top is in compression, adding material there isn’t going to help much.
I'd say the sides add as much if not more than the bottom.
 

kerrynzl

Well-known member
Joined
Nov 8, 2013
Messages
5,054
Location
Tauranga, New Zealand
I'd say the sides add as much if not more than the bottom.
No , Shape is more important than size!!!!
The sides [if allowed to] will bow/buckle]

It is very common to put holes in the centers of "I" beams to reduce weight without any compromise to integrity.
The ultimate lightening exercise is a steel "Truss" [this is one area where the construction techniques were used in race car design......space frames]

angle truss.png

But it isn't the "be-all-end-all" rule of thumb.
You can always use the "cowshed engineering" approach of adding more and more steel until it looks strong enough
 

Jim greengo

Well-known member
Joined
Sep 3, 2018
Messages
7,415
Location
Behind my house
No , Shape is more important than size!!!!
The sides [if allowed to] will bow/buckle]

It is very common to put holes in the centers of "I" beams to reduce weight without any compromise to integrity.
The ultimate lightening exercise is a steel "Truss" [this is one area where the construction techniques were used in race car design......space frames]

angle truss.png

But it isn't the "be-all-end-all" rule of thumb.
You can always use the "cowshed engineering" approach of adding more and more steel until it looks strong enough
Sure you can add lightening holes to anything,but if there isn't enough material there it won't support anything.
That's why steel beams and wooden floor joists come in differant heights depending on their use/load.
 

gearhead1

Well-known member
Joined
Oct 14, 2013
Messages
1,935
Location
NC
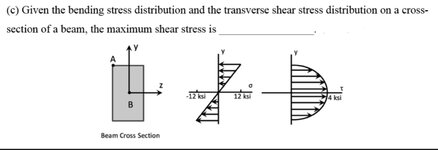
Bending stress is highest on the outermost surfaces. The top in this case is in compression and the bottom is in tension. Shear stress is highest halfway up on the side of the beam. Most of the time bending stress will be the highest stress and thus the limiting factor. Therefore, the most bang for your buck is the plate on the bottom. The bending stress in the side plate would be a gradient, with none at the middle.

Do an experiment to prove it out:
Take a 1/2“ rod 6” long and weld on the side of the member right in the middle horizontally cemeteries on the failed area and see how long it lasts.
Take the same 1/2“ rod and weld on the bottom centered on the failed area and see how long it lasts.

Look at the cross section of an arbor press. The flat part is put on the tension side. Same thing.

IMG_1213.jpeg

IMG_1214.jpeg
 
Last edited:

metlmunchr

Well-known member
Joined
Sep 10, 2011
Messages
1,280
Using the size of the marker light in the pic to judge the size of the tubing, those outside corners look way too sharp for 3/8 wall tubing. Standard outside radius is 2X wall thickness, or 3/4" for 3/8 wall.
 

speed bump

Well-known member
Joined
May 28, 2008
Messages
6,317
Location
Butte Montana
Looks like they didn't get good penetration into the right hand side. I would grind out the weld, see if I couldn't slide in a backer piece, and weld it hot with either stick or dual shield wire. If I got really worried about it I would maybe add a strongback rather than a fishplate.
 

whateg01

Well-known member
Joined
Mar 13, 2006
Messages
11,484
Location
doo dah, kansas, usa
Using the size of the marker light in the pic to judge the size of the tubing, those outside corners look way too sharp for 3/8 wall tubing. Standard outside radius is 2X wall thickness, or 3/4" for 3/8 wall.
Judging by the hole above the light, that might be 11 ga, but I bet it's closer to 14. It's not 3/8" though or, as you noted, the corners of the tubing itself would be more rounded.
 
To avoid these ads, REGISTER NOW!
Top Bottom