To avoid these ads, REGISTER NOW!

Icf garage build. Insulated concrete forms

Firebrick43

Well-known member
Joined
May 12, 2015
Messages
14,166
Location
West central Indiana
Some of you have seen and followed my composite steel deck thread and it has to do with my house. This thread is strictly my garage build and I believe most of you will find it more pertinent.

Friday, I went to Spencer Indiana to pick up foam from the plywood king. They sell reclaimed foam pulled from roofs, I believe commercial roofs, and sell it for $10 a sheet for a 2'x 8' x 3". I really expected it to be beat up but it was actually in very nice shape. 2 inch foam at home cheapo was $32 a sheet for a 4 x 8 so 3 inches was still a significant savings compared to new foam. The subie pulled it fine as long as I stayed below 55. The stack was 72" tall on top of the trailer deck height. There were 49 sheets on the trailer.

If you have a larger project the do deliver. They were loading a cincinatti bound gooseneck trailer while I was there.

http://www.garagejournal.com/forum/picture.php?albumid=5231&pictureid=71190
View media item 71187
Here I am adding number eight Stone and compacting her in 4 inch lifts. There is probably 20 to 25 tons of stone in this floor, some areas in the back corner or 8 inches and because of slope in the front corner 12 inches thick. Each left is compacted three times in different directions .

View media item 71188
Finally I used a transit to measure, and try to get everything within plus zero/minus half an inch of grade which is really hard with number eight Stone.

Next I lay down the foam any cuts went to the next row so none of the joints lined up.

View media item 71190
 
Last edited:
To avoid these ads, REGISTER NOW!
OP
F

Firebrick43

Well-known member
Joined
May 12, 2015
Messages
14,166
Location
West central Indiana
Conduit from basement to garage. One for lights, one for receptacles, and one for a 220 circuit.

View media item 71192

Stegowrap plastic is down and two circuits of "Mr Pex" oxygen barrier pex. The two pieces of PVC conduit are for snow melt heat in the apron latter on if we want to put it in when poured.


View media item 71193
Lot of sweating today, not to hot outside (78) but I think the foam was reflecting my body heat back up at me.

I did not place pex in the back 3' as that is where benches and such will be. From there the first circuit is every 12". This is where I will be working on cars and therefore concentrated it there. The second circuit is on 16" centers except two strips of 8" at the doors to keep them from freezing shut. The few extra feet made a small loop on the right side, which will be below the transmission of a car parked in that bay. I believe nearly all maintence will happen in the right bay.

Keeping the two loops the exact same length means I don't need fancy flow control manifolds which are also high dollar.

View media item 71194

View media item 71195
 
OP
F

Firebrick43

Well-known member
Joined
May 12, 2015
Messages
14,166
Location
West central Indiana
Don't forget to sleeve the tubes where your saw cut joints will be! :)

Your to late. Slab was poured Wednesday. We are not saw cutting it either. Hopefully it won't crack since it was prepped above customary standards and rebar reinforced /+6 bag /crushed stone/not restrained . My basement slab(1450square feet) was prepped the same way has not cracked. The composite steel deck cracked about every 12' but it's constrained and suspended. It didn't crack until after I removed the temporary support wall.

From every thing I have read I thought you really don't need sleeves for saw/crack joints, just expansion joints and were two adjacent pours are done?

Hope not as the suspended slab has no sleeves. It has been pressurized for 6 months now and has not dropped one pound.
 

yeldogt

Well-known member
Joined
Jan 2, 2012
Messages
18,184
With 3" of insulation and constant flow the wide spacing should work.

Closer spacing allows for lower water temps (important for high efficiency boilers) and faster response (important when not using a space full time.

Wide spacing with a high heat load can result in tubing that need to run hotter vs what would be ideal.
 
OP
F

Firebrick43

Well-known member
Joined
May 12, 2015
Messages
14,166
Location
West central Indiana
Just after the concrete finishers finished finishing.
View media item 71266
Trying to keep the slab wet for 7 days to get full strength out of the concrete.
The 4 year old boy loves wetting down the slab and his 3 year old brother loves running through the water.
View media item 71265
Just have the apron to pour now, will let everything settle(back fill on outside) and will do in the fall or next spring. Total concrete in the house/basement/garage is up to 135 yards now
 

wssix99

Well-known member
Joined
Mar 2, 2011
Messages
5,162
Location
Chicago, IL
From every thing I have read I thought you really don't need sleeves for saw/crack joints, just expansion joints and were two adjacent pours are done?

Lots of people don't use them. The slab pulls away from itself at any crack, so the sleeves help relieve that stress. If you have a lot of reinforcement inside, that should help keep any cracking minimal and the stress on the PEX also minimal.


My basement slab(1450square feet) was prepped the same way has not cracked.

If you can provide the compression strength of the slab, thickness, size of rebar and rebar spacing, I can run the calculations and tell you how close you are to being over-reinforced or if you are actually there.
 

Stuart in MN

Well-known member
Joined
Sep 8, 2005
Messages
23,156
Location
Minneapolis
Looks good. Do you have anything posted here on the board about the ICF construction? I've always been interested in it.
 
OP
F

Firebrick43

Well-known member
Joined
May 12, 2015
Messages
14,166
Location
West central Indiana
Lots of people don't use them. The slab pulls away from itself at any crack, so the sleeves help relieve that stress. If you have a lot of reinforcement inside, that should help keep any cracking minimal and the stress on the PEX also minimal.


If you can provide the compression strength of the slab, thickness, size of rebar and rebar spacing, I can run the calculations and tell you how close you are to being over-reinforced or if you are actually there.

4000 psi, crush limestone aggregate, low air. Slab is 6" thick. Reinforcement is a perimeter of 3/8" 12" from edge, a 20' bent 90 degrees in each corner 24" from corner, and a 20' bent into a hairpin (30 degree angle) in each corner with legs towards the center.

I tend to believe that subgrade prep and subgrade thickness is more is the most important aspect of a stable slab. You can reinforce your way out of it to but why. Good subgrade gives you good drainage as well
 

wssix99

Well-known member
Joined
Mar 2, 2011
Messages
5,162
Location
Chicago, IL
I tend to believe that subgrade prep and subgrade thickness is more is the most important aspect of a stable slab. You can reinforce your way out of it to but why. Good subgrade gives you good drainage as well

This is correct. The only purpose the reinforcing serves for a slab on-grade is typically crack control. As it is most commonly used, it does very little for any type of "strength."


4000 psi, crush limestone aggregate, low air. Slab is 6" thick. Reinforcement is a perimeter of 3/8" 12" from edge, a 20' bent 90 degrees in each corner 24" from corner, and a 20' bent into a hairpin (30 degree angle) in each corner with legs towards the center.

I'm not sure I understand the size of your grid, but ACI recommends a grid of 1/2" rebar, spaced at 7" intervals (for 4000 psi, 6 inches thick) before you forego saw cut joints. As the grid gets further and further away from that spacing, you'd have a greater chance of cracks occurring. (The thicker the concrete and the greater the cement content, the more steel would be required.)
 
OP
F

Firebrick43

Well-known member
Joined
May 12, 2015
Messages
14,166
Location
West central Indiana
Emt done in the garage. As some may know, most of the addition the garage is attached to is for my mother. When I stated that I was going to surface mount the emt in the garage she said"like hell you are". Also stated that the drywall was going to be finished and painted not just firetaped like so many around here. (Always the plan).

Here is where the EMT comes from the basement and how it enters the wall. I was going to put benches/cabinets along the back wall so it will be hidden.

View media item 71395
Boxes every 4' on the back wall and 6' on the side. 18 total. Wife shook her head and said I have spent to much time here on the garage journal.

View media item 71394
I am considering swinging carriage doors but just in case I do a roll up, I put a box for an 8500. Really like them, help a friend/neighbor install one in his shop last week. Quiet. Also was impressed with customer service. I hooked every thing up and got working, but left it to him to tidy up and staple all the wires. He was trying to shorten the tension switch wires and somehow broke the control board trying to release the wires. They are sending a new board under warranty even though he explained it was his fault!

View media item 71396
Light emt will be surface mount along with fixture. Considered led cans but I am worried about the fire rating.
 
OP
F

Firebrick43

Well-known member
Joined
May 12, 2015
Messages
14,166
Location
West central Indiana
3 little kids, a horse farm, and a full time job that is picking up and requiring overtime is slowing me down. I have tried to do something every day and have made progress. More of its been on the house part but I passed inspection for rough electrical a few weeks ago.

View media item 86141
View media item 86142
Pretty happy, inspector didn't even want to have the cover off the panel. He stated it "looks like you know what Your am doing" Which is a laugh. It's my first time with emt and wiring a whole house/garage.

Not real happy with the bottom two tubes coming into the right middle side. Really should have bought a hickey to do decreased radius bends. Was going to but my wife and best friend put their foot down and said I need to start drywalling.
 
OP
F

Firebrick43

Well-known member
Joined
May 12, 2015
Messages
14,166
Location
West central Indiana
Here is an update. Terribly slow I know. Work is booming and I am required to work a significant amount of overtime. Three little kids, 10 acres, 4 horses, and a reading/participating in this forum doesn't help either.

So to close off the soffits we put 3/4 foam boards cut to shape and foamed in. Also put a 3/4" foam board to cap the wall core. When I say we I really mean my wife for the most part. While lending a hand when called upon every where, she volunteer to do all of this work.

View media item 87276
To attach the wall to the ceiling I used a product called X crack from straight flex. It probably wasn't neccessary on the wall supporting the trusses but was needed on the gable wall and the wall seperating the garage and house.

View media item 87275
It allows the corners to float and stay independent of the trusses yet remain solid to each other preventing cracks.

Instead of landing the **** ends of the drywall on a truss I used trimtex **** boards

View media item 87277
They pucker the joint up (like a tapered joint) so it's filled instead of feathered and a bump.

View media item 87278
The one face is tapered to cause this. It allows some flexibility as well as you don't need to trim a sheet back to the last truss nor try to screw the seam to a place 3/4" wide. It saved significant material for me as it allowed me to use an 11', a 12', and a 6' piece where I would have another joint/ more than half sheet of I had to land on trusses. I glued and screwed the boards to the butts. I also glued every truss to the drywall as well.
 
Last edited:
OP
F

Firebrick43

Well-known member
Joined
May 12, 2015
Messages
14,166
Location
West central Indiana
I am really pleased with my door track hangers as well. I made these two part brackets out of Stainless steel. The top piece was measured and removed. After the sheet was hung the measurement was marked and used a Milwaukee cordless drywall router(roto zip style) to cut the slot guiding off of the 2x4 cross brace above.

Bracket was slid in and bolts reinstalled from above. Very clean looking. View media item 87274
View media item 87273
 
To avoid these ads, REGISTER NOW!

wssix99

Well-known member
Joined
Mar 2, 2011
Messages
5,162
Location
Chicago, IL
Here is an update. Terribly slow I know.

My progress is about the same. lol (About the speed of my significant other/help...)

To attach the wall to the ceiling I used a product called X crack from straight flex.

Interesting product. We had to spend a ton of time putting up blocking. :(

The extra time for your walls to cure is probably serving you well. We put our drywall up within a few months of our pour and the walls gave off so much moisture, the drywall (it was cheap stuff) partially liquefied and slid down the wall 1/16". ... So, we've had to delay paining and have a ton of drywall touchup everywhere we go.
 
OP
F

Firebrick43

Well-known member
Joined
May 12, 2015
Messages
14,166
Location
West central Indiana
Getting the heat hooked up. I have a good start and should be done with the copper work in a day or two and then focus on the controls and gas piping.
View media item 88766
I bent all the 1/2 and 3/4 pipe with ridgid ratchet benders, use a ridgid expander to do the couplers, and rothenberger tee pullers for the tees on the manifolds. The pulled tees are silver brazed and everything else is silver bearing soldered.

My wonderful wife helped me hang the heat exchanger last night as the SS bracket and heat exchanger was quiet heavy.View media item 88765 After it was in place and I was soldering she asked "Did you see a system done this way on that Garagejournal forum?"

If you have a meth addict friend, please don't show them this!
 
Last edited:
OP
F

Firebrick43

Well-known member
Joined
May 12, 2015
Messages
14,166
Location
West central Indiana
So what are you exchanging heat from/to ?

the main system will be water(in the house) because who wants to have 70+ gallons of antifreeze.

The HX will be for the garage system and Ice melt on the apron with antifreeze. I still have to plumb up that side of the system .

the Far right pump is a priority zone for DHW which will be a coil HX in a tank. None of the main systems water will be mixed in the domestic water, its an entirely closed system.

Thanks for the complements. I made it as if I was servicing it and layed it out as logically as possible. I dont really understand why plumbers in the USA dont use benders, tee pullers, and expanders. I guess the math scares them??? Less joints to leak, better flow, and less fittings to carry.

I wish I had an imperial bench bender to do the 1" pipe but I dont yet so I had to use fittings there and some on transitions.
 

theoldwizard1

Well-known member
Joined
Feb 22, 2011
Messages
43,243
Location
SE MI
I dont really understand why plumbers in the USA dont use benders, tee pullers, and expanders. I guess the math scares them??? Less joints to leak, better flow, and less fittings to carry.
What is a tee puller ?

Did you get your training on the other side of the pond ?

From a couple of plumbing videos that I have seen from Great Britian/Ireland it seem like compression fitting even on "hard" (not annealed) copper are very common. It took me awhile to understand what an "olive" was. Also, I had never seen an olive remover tool.

If I ever build a house or am doing major rough pluming, I think I will use PEX with those pre-bent copper 90° stub outs. Then compression to 1/4 turn stops. Every multi-turn stop in my house leaks when you turn them off.
 
OP
F

Firebrick43

Well-known member
Joined
May 12, 2015
Messages
14,166
Location
West central Indiana
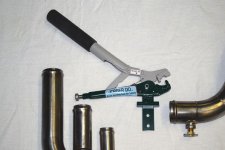
Here is a tee puller/extractor.

Nah. I haven't learned anything from those ****** limies except to gaurd your boots as they stole mine one night in 2003 while I was taking a shower. Had to walk 400 yards barefoot across the Kuwaiti desert.

The worst (by a far margin) machine we have at work is British built. As reliable as an MG with lucas electrics.

No I learned to bend steel tubing working on aircraft and part of my current job as a mech on CNC equipment. Bending copper pipe is not much different.

The compression fittings you are talking about are probably EO? We use them on some of our German machinery. Sort of **** for repair work as the tube goes inside the fitting just enough that you have to some time disassemble a lot to get a tube out. And removing an olive *****. We just trash the tube most of the time. It is easy to make a new tube however. I have only seen them in metric tubing however.

Don't remember where I learned about ridgid expanders as its been 10+ years ago. Here is a video.
While the guy need a new cutting wheel on his tubing cutter and should have annealed the pipe first it shows how it's done.


The domestic water in the house is mainly going to be ProPEX. As is the tubing in the floor is oxygen barrier pex View media item 88790
The quarter turn valves or "stop *****" I am quite fond of as well. I prefer Dahl valves personally (picture above)
 
OP
F

Firebrick43

Well-known member
Joined
May 12, 2015
Messages
14,166
Location
West central Indiana
Most of my system has caleffi components, grundfos pumps, and webstone valves. I don't know why the companies don't pre wire their valves and pumps with connectors. Here I have added expanded poly braid jacket and a Deutsch 4 pin DT series connector. I picked them simply because I have the crimp tool(same as used on aircraft cannon plug pins) and assembly is easy and a very good connector. They are used on a lot of off-road equipment and even HD motorcycles.

View media item 88795
 

theoldwizard1

Well-known member
Joined
Feb 22, 2011
Messages
43,243
Location
SE MI
Here is a tee puller/extractor.
Excuse my ignorance, but WHY ? Sure you don't have the cost of a tee and only 1 joint, but the labor time would kill that !
No I learned to bend steel tubing working on aircraft and part of my current job as a mech on CNC equipment. Bending copper pipe is not much different.
Good bender are not cheap, but manual ones are affordable. What is really expensive is having the correct dies/mandrels !
The compression fittings you are talking about are probably EO?
I don't know what EO is. I am referring to standard compression (not flare) fitting you buy in a hardware store. If you are lucky on water pipes you can usually reuse the olive. Maybe a dab or so of pipe dope on the olive and you can put dope/tape on the new threads.

We use them on some of our German machinery. Sort of **** for repair work as the tube goes inside the fitting just enough that you have to some time disassemble a lot to get a tube out. And removing an olive *****. We just trash the tube most of the time. It is easy to make a new tube however. I have only seen them in metric tubing however.
Don't remember where I learned about ridgid expanders ...
Copper is fading fast. The only place you typically see it is in factory made manifolds.


Segue - Seeing as you are "experienced" in these type of work, in the field how do you make the little "ridge" on small (below 1/2") hard and annealed copper and steel tubes that is used at a hose connection to prevent the hose from sliding off ?
 
OP
F

Firebrick43

Well-known member
Joined
May 12, 2015
Messages
14,166
Location
West central Indiana
Excuse my ignorance, but WHY ? Sure you don't have the cost of a tee and only 1 joint, but the labor time would kill that !
not really. It especially gets skewed on pulling tees on 1"+ trunk lines were tee fitting can be 15$ plus (reducing tees are expensive and sometimes not available from big box stores) and prepping/solder three joints vs 1 brazed/pulled tee is not a different as you think. Also pulling a tee is realitively easy on an existing pipe. It can be damn difficult to get a tee in some places. It took some time to find my pullers for around 100$. I think they paid for themselves on this install. Plus this is the Garagejournal and I want to!


Good bender are not cheap, but manual ones are affordable. What is really expensive is having the correct dies/mandrels !

I use ridgid ratchet benders, one size only. If I remember correctly 358 for 1/2 pipe(5/8 OD) and 378 for 3/4" pipe(7/8 OD). Again bought off eBay for $125 if really nice condition.

I don't know what EO is. EO is a European compression fitting good upto 3000psi plus that uses a rubber olive like you saw in you Limey plumbing video. American compression uses brass or some $&!' Use plastic olives. I am referring to standard compression (not flare) fitting you buy in a hardware store. If you are lucky on water pipes you can usually reuse the olive. Maybe a dab or so of pipe dope on the olive and you can put dope/tape on the new threads.

We use them on some of our German machinery. Sort of **** for repair work as the tube goes inside the fitting just enough that you have to some time disassemble a lot to get a tube out. And removing an olive *****. We just trash the tube most of the time. It is easy to make a new tube however. I have only seen them in metric tubing however.

Copper is fading fast. The only place you typically see it is in factory made manifolds.

yea, it's not cheap. Cost unfortunately drives many decisions. But pex fittings are expensive in 3/4 and bigger sizes. I imagine my copper piped panel cost no more than equivalent pex and its layed out better and better flow dynamics. I Wouldnt dream of using copper in the floor loops however.


Segue - Seeing as you are "experienced" in these type of work, in the field how do you make the little "ridge" on small (below 1/2") hard and annealed copper and steel tubes that is used at a hose connection to prevent the hose from sliding off ?

cheap way is to make a double flare but don't finish it. You would be basically be making a bubble flare. I only have tools to do up to 3/8" tube (remember pipe is sized by approximate ID diameter and tube by true OD) this way with a copy of the Sykes-Pickavant flaring tool(Eastwood). A master cool hydraulic flaring tool has the tools to do it correctly. 1/2" would need to be done on a roller I imagine. Copper probably would have to be annealed.
 
Last edited:

theoldwizard1

Well-known member
Joined
Feb 22, 2011
Messages
43,243
Location
SE MI
It especially gets skewed on pulling tees on 1"+ trunk lines were tee fitting can be 15$ plus (reducing tees are expensive and sometimes not available from big box stores) and prepping/solder three joints vs 1 brazed/pulled tee is not a different as you think. Also pulling a tee is realitively easy on an existing pipe. It can be damn difficult to get a tee in some places. It took some time to find my pullers for around 100$. I think they paid for themselves on this install. Plus this is the Garagejournal and I want to!
On copper >1" it make sense. They do look very nice with all of your bend !

EO is a European compression fitting good upto 3000psi plus that uses a rubber olive like you saw in you Limey plumbing video. American compression uses brass ...
The few videos I saw were for residential plumbing and used brass olives.

yea, (copper is) not cheap. Cost unfortunately drives many decisions. But pex fittings are expensive in 3/4 and bigger sizes. I imagine my copper piped panel cost no more than equivalent pex and its layed out better and better flow dynamics. I Wouldn't dream of using copper in the floor loops however.
3/4" PEX fitting aren't badly priced. Never seen anything bigger than 3/4" and you are absolutely correct on flow !

In the late 50s, my uncle (a master plumber) laid copper (annealed ?) on top of his basement floor, connected it to his boiler, and poured an additional 2" of concrete. It made a WONDERFUL warm floor !
 

theoldwizard1

Well-known member
Joined
Feb 22, 2011
Messages
43,243
Location
SE MI
cheap way (to make a tubing bead) is to make a double flare but don't finish it. You would be basically be making a bubble flare.
Cheap, but it looks like it works ! Clearly won't work n anything less than about 1/2".

$7 DIY Tubing Bead Roller From Harbor Freight

EDIT : Minimum tube size on this one is 1-1/4". Steel/stainless or thick walls take multiple passes.
 

Attachments

  • Capture.JPG
    Capture.JPG
    63.3 KB · Views: 50
Last edited:
OP
F

Firebrick43

Well-known member
Joined
May 12, 2015
Messages
14,166
Location
West central Indiana
Cheap, but it looks like it works ! Clearly won't work n anything less than about 1/2".

$7 DIY Tubing Bead Roller From Harbor Freight

EDIT : Minimum tube size on this one is 1-1/4". Steel/stainless or thick walls take multiple passes.

Thank you for that pic and link. I do enough water necks from time to time that jobber do would be warranted. The last water neck I made out of BOM SS bend tig welded I used a pretty heavy guage and turn the ends (before welding the elbows on) with a shallow groove for the clamp to set in but it was excessively heavy. I had been looking at bead rollers or making one but that would be a good low cost alternative. Might have to try the HF crimper mods as well but for some reason I can not recall ever having to do a pipe for a 1/2-1"" hose. Most all I have done are radiator to block pipes.

I did think of another reason for a tee puller and expander over copper fittings. No $&:&) stickers to remove and then their associated residue.


Looks like artwork! Beautiful. I'm constantly amazed at the work some GJers are able to produce.

Thank you for the complement.

Just as a humble note, everyone here CAN do it. It's mainly reading directions, measuring, layout, and some basic math.
 
Last edited:

wssix99

Well-known member
Joined
Mar 2, 2011
Messages
5,162
Location
Chicago, IL
How did your ICF hold up through the Polar Vortex?

We were, of course, fine and toasty but had a lot of snap, crackle, and pop as our siding shrank around the house. (I assume the pops were screws backing out of the ICF substrait by a single thread.)
 
OP
F

Firebrick43

Well-known member
Joined
May 12, 2015
Messages
14,166
Location
West central Indiana
Everything has been great! The temp is so even and the most amazing thing is the instant recovery from the blast of cold air. Shut the door and is if it never happened where a forced air/ low mass house takes a while to mix air and come back up to temp.

I actually still need to finish hooking up the controller. I have everything ran except the thermostat wire. Now the pump is circulating 24/7 and the water temp (~73)was adjusted down (via thermostatic valve). so it maintains air temp of 67. It feels as warm as the original house at 72. Very stable. If I was doing a shop I don't think I would even do a controller. Just would set the water temp at 65 and be done with it.

The htp Phoenix light duty I used is quieter than I expected. And powerful. Almost to powerful. I programmed it to only run at 60 percent and may drop it down more to get cycle times up. Once I get the thermostat and controller going it should help in this regard.
I did hear some faint pops on start up but not during this cold burst.
 
To avoid these ads, REGISTER NOW!
Top Bottom