To avoid these ads, REGISTER NOW!

JBMatth's Garden Shed

OP
J

jbmatth

Well-known member
Joined
Jun 3, 2013
Messages
5,686
Location
Northern Ok.
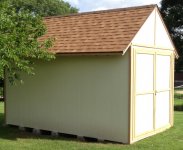
I was able to get the rest of the trim boards for the shed picked up and painted, but haven't gotten a chance to install them yet. I was also able to tweak the doors a little so they now close much better.

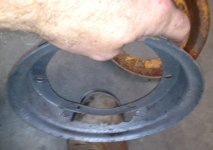
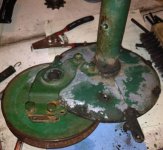
I was also able to take some of the parts from my Handi-Ho in to bead blast them, I forgot to take pictures of all of the finished parts, but did get one of the blasted wheel half and an non-blasted wheel half. Looks like I'll get to fire up the welder and try out my skills, or lack thereof.
attachment.php

attachment.php

attachment.php

attachment.php


It is just a small hole right? Great news is every other part looks amazing other than the wheel. The tire and wheel had some water and maybe antifreeze in it and that caused the majority of the rust.
attachment.php
 

Attachments

  • IMG_1883.jpg
    IMG_1883.jpg
    94.8 KB · Views: 870
  • IMG_1884.JPG
    IMG_1884.JPG
    111.6 KB · Views: 868
  • IMG_1885.JPG
    IMG_1885.JPG
    87.7 KB · Views: 868
  • IMG_1886.JPG
    IMG_1886.JPG
    77.3 KB · Views: 868
  • IMG_1887.JPG
    IMG_1887.JPG
    69.2 KB · Views: 864
To avoid these ads, REGISTER NOW!
OP
J

jbmatth

Well-known member
Joined
Jun 3, 2013
Messages
5,686
Location
Northern Ok.
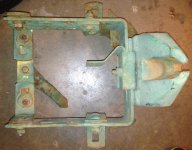
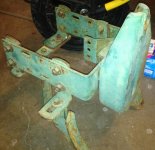
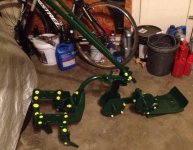
I was able to get a little bit of painting done on the Handi-Ho this weekend, I was pleased with the way it turned out, but did have a few oops moments. Because I was painting all sides of the parts I didn't let it dry enough on one side before I painted the other and had some warts that pulled up off of my painting boards. Oh well I was able to fix most of them. I must say I love the way this sand blasting works, this is the first time I've done that on a project, and it makes the parts so nice and clean and ready to just go to town on. Enough talk, here are the pictures.

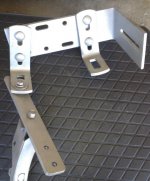
Here are some parts after blasting
attachment.php


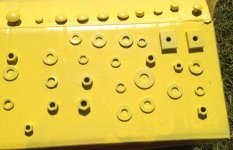
I used an old diaper box with some holes to paint the bolts and other hardware.
attachment.php


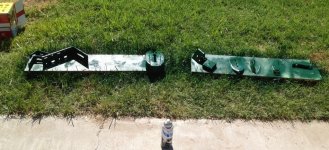
The boards I used to paint some of the green parts, and yes it is time to cut the grass.
attachment.php


I still have more to take apart and get ready for painting, but the list is getting shorter.
attachment.php


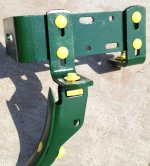
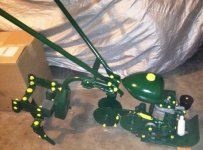
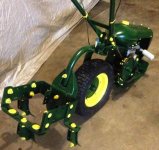
I'm pleased with how the cultivator came out after paint and assembly, new the hardware wasn't yellow, but I thought it would make it look pretty cool anyway.
attachment.php

There is more to come as I do more work, but I think as long as the weather holds I'll be finishing the trim on the shed today after work.
 

Attachments

  • IMG_1895.JPG
    IMG_1895.JPG
    80.3 KB · Views: 817
  • IMG_1895.1.JPG
    IMG_1895.1.JPG
    113.4 KB · Views: 814
  • IMG_1894.JPG
    IMG_1894.JPG
    102.4 KB · Views: 7
  • IMG_1893.JPG
    IMG_1893.JPG
    143.2 KB · Views: 815
  • IMG_1892.JPG
    IMG_1892.JPG
    76.3 KB · Views: 815
  • IMG_1891.jpg
    IMG_1891.jpg
    80.1 KB · Views: 814
OP
J

jbmatth

Well-known member
Joined
Jun 3, 2013
Messages
5,686
Location
Northern Ok.
That thing is cool. I would have struggled between leaving it as is and redoing it. I look forward to see your build!

I thought the same thing, but with as rough as the rim was I didn't have a lot of choice. I wanted to get it running and that would have meant some replacement parts so I just decided to clean the entire thing up and go for it as a mini resto job.
 
OP
J

jbmatth

Well-known member
Joined
Jun 3, 2013
Messages
5,686
Location
Northern Ok.
I finely managed to finish up the trim on the shed and adjusted the doors a little more now they close up tight. I was getting a little rain coming in at the top of the left door and running on the floor. Even with some heavy rains it wasn't very much, but enough I didn't like it, but hopefully it is now fixed. So I can check that off of my list.

Here is a completed overall picture with all of the trim. It is kinda washed out on my cell phone pictures, but you get the idea anyway.
attachment.php


Here is what I did with the latch, I wanted to have as much of the latch covered as I could and this was the best I could do with what I had at the time, I may clean it up later. (Which means I'll probably never get to it.) I drilled holes in the trim for the slide to go into so it hides it pretty well.
attachment.php


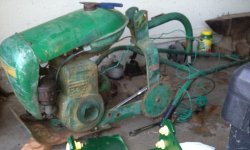
On the Handi-Ho front, I have everything completely disassembled and will be blasting one more round of parts today and may even be able to paint them this afternoon. The worst news is that the engine is seized, I could use the pull rope and get it to rotate some but not very much, then realized the piston wasn't even moving in the cylinder. I've got it soaking with PB Blaster now and will try to free it later this week. But even if I can't get it to run I will just pay someone to do it. I hate to pay someone to do something I think I could do, but will just have to see what happens. If anyone has any recommendations please let me know.
 

Attachments

  • IMG_1897.JPG
    IMG_1897.JPG
    95 KB · Views: 757
  • IMG_1896.JPG
    IMG_1896.JPG
    99.4 KB · Views: 756
OP
J

jbmatth

Well-known member
Joined
Jun 3, 2013
Messages
5,686
Location
Northern Ok.
So now that the Garden Shed is done I've been putting more time in on the Handi-Ho. I usually get about an hour in the morning before it is time to tend to the children, and then another hour or two in the afternoons before they get home. I have all of the parts blasted and painted other than some of the engine, that will have to wait until some parts come in. Sorry for some of the pictures, I usually paint in the afternoons and assemble in the morning so there isn't much light in the garage. (Lighting will be my next project out there.)

Here is the initial gear box picture, and later you can see about how it turned out.
attachment.php


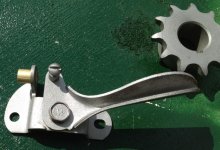
This is a picture of the throttle lever before paint, I love how the brass turned out.
attachment.php


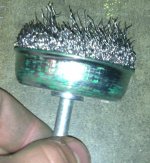
I couldn't fit the handlebars into the blast cabinet so I had to strip it by hand, I thought great I'll just use a wire wheel on my drill and take it off in 10 minutes. Wrong, 4 hours of stripping later this is what I came up with.
attachment.php


This is all that was left of my wire wheel, I think it is time for a new one.
attachment.php


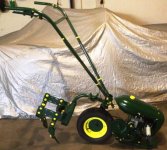
Here are a couple of pictures of the semi-finished product, it is turning out great I think at least.
attachment.php


attachment.php


Ok, here is the pop quiz for the day, whoever answers it right gets bonus points, and I'll buy them a beer the next time you come visit. How does this work, I'd buy gas by the litre if it were me, how about you? (loaded question, but easy)
attachment.php
 

Attachments

  • IMG_1900.jpg
    IMG_1900.jpg
    73.3 KB · Views: 718
  • IMG_1913.JPG
    IMG_1913.JPG
    52.8 KB · Views: 715
  • IMG_1915.jpg
    IMG_1915.jpg
    77.9 KB · Views: 713
  • IMG_1914.jpg
    IMG_1914.jpg
    98 KB · Views: 713
  • IMG_1910.jpg
    IMG_1910.jpg
    85.3 KB · Views: 715
  • IMG_1909.jpg
    IMG_1909.jpg
    60.5 KB · Views: 715
  • IMG_1902.jpg
    IMG_1902.jpg
    113.5 KB · Views: 716

Zeke

Well-known member
Joined
Aug 13, 2009
Messages
17,176
Location
Long Beach CA, the sewer by the sea.
That Handi Ho contraption is very cool and you're doing a fantastic job on it. I can't see why they don't' still make those. I've always thought that rototillers should have attachments for grading or moving snow, plowing and straight cultivating. I guess some do but they are massive, complicated and expensive. That little dude would be a great power base for all I mentioned.
 
OP
J

jbmatth

Well-known member
Joined
Jun 3, 2013
Messages
5,686
Location
Northern Ok.
That Handi Ho contraption is very cool and you're doing a fantastic job on it. I can't see why they don't' still make those. I've always thought that rototillers should have attachments for grading or moving snow, plowing and straight cultivating. I guess some do but they are massive, complicated and expensive. That little dude would be a great power base for all I mentioned.

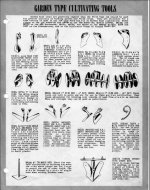
I was amazed by what all you could buy as attachemts for this little machine, it had two types of snow blades, a snow blower, reel and sickle mowers, and all of these for cultivating. I know Gravely made a little better machine for this, but they get pretty expensive.
attachment.php
 

Attachments

  • Cultivating Tools.jpg
    Cultivating Tools.jpg
    122.9 KB · Views: 703
OP
J

jbmatth

Well-known member
Joined
Jun 3, 2013
Messages
5,686
Location
Northern Ok.
Ok first of all I'll talk about my Handi-Ho, I was able to finish the last of the major painting done. Now all I have left is the stuff for the engine. I'm working on the carb now and will have it back together in the next few days then I'll start tackling the engine itself.

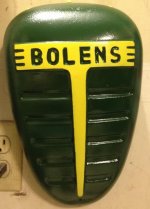
Here is the grill for the Handi-Ho
attachment.php


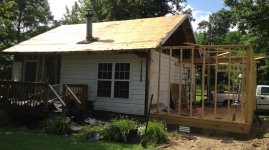
Now onto the whole project for the week of the 4th. I took the whole week off to help my parents put a metal roof on their house. Well one of my younger brothers decided to rebuild the old farmhouse next door to my parents house so he could live there while teaching at my old high school. That turned into a major project. He decided to add a room, new metal roof, flooring, sheet rock, floor structure, wiring, everything except the kitchen cabinets, but also the kitchen sink.

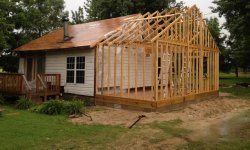
This is where 3 of my brothers and my father started before the week of work began.
attachment.php


Shingles removed in 3 hours with 2 of us working the remover tools. We are now ready for the new trusses for the addition...or so we thought.
attachment.php


I didn't get a picture, but they were a foot too tall! The 8/12 pitch was actually a 7/12. Being in a small town on a Saturday afternoon with rain in the forecast we had to work with what we had. They gave me a pencil and notebook to redesign them. We got three of them modified before the rain came, but not quick enough to save the new sheet rock on the ceiling and in the kitchen. Well now it was a complete gut job and rebuild.
attachment.php


We ended up moving or replacing 70% of the studs in the exterior walls by the time we were done. You may be able to see that we used jacks to support the roof while we replaced those and while we repaired some of the floor joists.
attachment.php


With the last of the OSB about to go up on the walls, here you can see how much we had to replace in just this one wall in the kitchen, basically every stud!
attachment.php


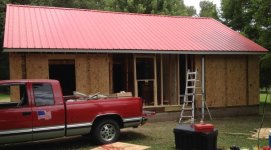
We framed in all new windows and doors, it was just one LONG week with lots of fun and bonding time. We did manage to get my parents roof on in the middle of all of this, despite the 3 rain delays. Also the older Chevy truck was my late grandfathers, it only has 75,000 miles and is in great shape other than that it has been used to haul way too much stuff in the past few years. I'd love to get that at some point to rebuild it.

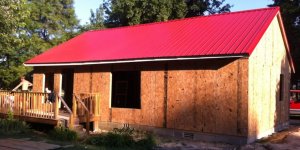
This is where we ended up when I had to leave. This was 5.5 days from 6:30-8 every night with my daughters and a brothers daughters there being taken care of by my mom and sister-in-law. They were great and fed us very well the whole time!
attachment.php


Well I had just about 80 hours in my 5.5 days, and the others had over 100 in 8 days, I love my family and can't wait to call in these favors for my future home/garage project. (whenever that may be)
 

Attachments

  • IMG_1928.JPG
    IMG_1928.JPG
    95.4 KB · Views: 647
  • IMG_1922.JPG
    IMG_1922.JPG
    110.2 KB · Views: 647
  • IMG_1921.JPG
    IMG_1921.JPG
    129.6 KB · Views: 647
  • IMG_1917.JPG
    IMG_1917.JPG
    115.9 KB · Views: 645
  • IMG_1930.JPG
    IMG_1930.JPG
    137.7 KB · Views: 649
  • IMG_1931.JPG
    IMG_1931.JPG
    103.4 KB · Views: 647
  • IMG_1932.jpg
    IMG_1932.jpg
    73.2 KB · Views: 649
OP
J

jbmatth

Well-known member
Joined
Jun 3, 2013
Messages
5,686
Location
Northern Ok.
The carb for the briggs model 8 is rebuilt, and the engine is partly disassembled. I'm having fits with the fuel petcock, I can't get anything to blow through it. I've got it soaking in carb cleaner now, are there any suggestions on what I could use, I don't want to have to buy a new one if I can help it. I'll get pictures of the carb tonight hopefully.
 
OP
J

jbmatth

Well-known member
Joined
Jun 3, 2013
Messages
5,686
Location
Northern Ok.
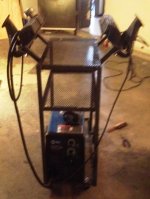
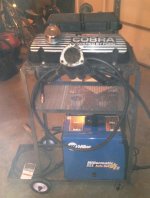
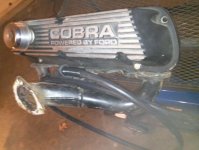
Yep, I'm slacking on the pictures of the carb, but I had a win today. I was able to disassemble the petcock and filter a little more and get it cleaned out, so now it will flow fuel when I hook it back up. I'm assembling the engine now as well I stripped it all down and cleaned it before painting it the same green. I've painted the last of the hardware and am about to get it completely back together. The only thing I have left other than assembly is to fix the wheel. I went back and forth on whether or not to buy a new one that might fit, and have decided to just try to repair the one I have first. It'll be my first real test with my welder other than the welding cart I built after I got it for Christmas.

Here is a picture of the cart built on new years day 2013: (sorry for the old crappy cell phone pictures)

attachment.php

attachment.php

attachment.php


I've changed it a little for space reasons, but looks mostly the same.

I also managed to help a fraternity brother out with his Jeep Grand Cherokee, the boots on his front axle were shot so we replaced both axles, wheel hubs, rotors and pads. They are all better now, but it didn't fix the problems he was having so we get to keep working on them. I managed to get him a job working in the same place I do after his unit in the AF was all but eliminated, he was thrilled to have a job again and more than doubled his pay so he was pretty grateful with the way things have worked out for him.

PS thank you to all of the vets out there for everything you have done, if anyone is in the area I'll gladly buy you a beer and meal for your service to our country!
 

Attachments

  • IMG_0965.jpg
    IMG_0965.jpg
    97.2 KB · Views: 582
  • IMG_0966.jpg
    IMG_0966.jpg
    88.3 KB · Views: 582
  • IMG_0967.JPG
    IMG_0967.JPG
    98.1 KB · Views: 580
OP
J

jbmatth

Well-known member
Joined
Jun 3, 2013
Messages
5,686
Location
Northern Ok.
So yes I have been slacking on the updates, but have gotten a few things done one the Handi Ho, shed, house, garage, and I even have an update for the house my brother is working on.
Here are a couple of pictures of the engine all reassembled and ready to install:
attachment.php


attachment.php


I did get it fully assembled, but somehow managed to miss that photo, here is one with everything other than the hood and grill. I'm still working on the wheel, but it has been put on the back burner while I finish a few other things.
attachment.php


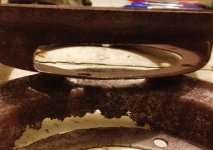
This is what I'm dealing with on the wheel:
attachment.php


I managed to get all of the old rust cut out and all of the pin holes welded up. I formed some little metal strips out of a garage door sensor bracket and tacked them in. I'm going to blast them before I finish welding them in, smooth out the welds, blast again, primer and paint. The reason I'm applying primer this is because of the severe pits in the metal, I'd like to have the rim as smooth as possible within reason before I paint it.
 

Attachments

  • IMG_1948.JPG
    IMG_1948.JPG
    98.3 KB · Views: 545
  • IMG_1942.JPG
    IMG_1942.JPG
    123.2 KB · Views: 547
  • IMG_1940.JPG
    IMG_1940.JPG
    100.1 KB · Views: 547
  • IMG_1937.jpg
    IMG_1937.jpg
    83.4 KB · Views: 548
OP
J

jbmatth

Well-known member
Joined
Jun 3, 2013
Messages
5,686
Location
Northern Ok.
As promised here is an update on the house my brother is rebuilding.

This is a pretty cool before and after shot of the outside of the house:
attachment.php


As of today the drywall crew will be done then it'll just be finish out time for the rest of the house, which is quite a bit of work still yet.

He is getting married this weekend and I took a part of the old floor framing that was rotten and decided to make a sign for his wedding. Plus it gave me an excuse to buy some new tools, router, bits, and a lettering kit. I think it turned out pretty well so far. You can tell this picture is much brighter than before, I installed a 2 bulb 4' T8 fixture over the work bench with 6500k lights, and I love the brightness of it all.
attachment.php


I still plan to burn the letters and edge before I clear it and give it to them, but time is running out fast!

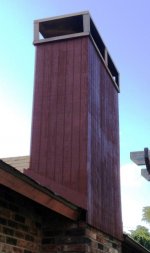
My weekend project last week was to repair some storm damage to my chimney. I didn't realize how rotten the wood was under there until I grabbed a piece of the T111 and it disintegrated!
attachment.php


Here it is stripped back to the framing and ready for new material:
attachment.php


Finely a shot of the new and improved model completed:
attachment.php
 

Attachments

  • IMG_1958.JPG
    IMG_1958.JPG
    130.1 KB · Views: 544
  • IMG_1954.jpg
    IMG_1954.jpg
    79.1 KB · Views: 545
  • IMG_1953.jpg
    IMG_1953.jpg
    121 KB · Views: 542
  • IMG_1961.JPG
    IMG_1961.JPG
    65.2 KB · Views: 543
  • IMG_1959.JPG
    IMG_1959.JPG
    119.7 KB · Views: 546
OP
J

jbmatth

Well-known member
Joined
Jun 3, 2013
Messages
5,686
Location
Northern Ok.
Ok, I have the sign done for them just in time for their wedding, I'm pretty pleased with how it turned out and am glad to be able to do something like this for them. I've never tried to really do anything like this before and I'm pretty pleased with how it ended up turning out, not perfect, but still acceptable for a 1 attempt.

attachment.php
 

Attachments

  • IMG_1964.JPG
    IMG_1964.JPG
    42.3 KB · Views: 509
OP
J

jbmatth

Well-known member
Joined
Jun 3, 2013
Messages
5,686
Location
Northern Ok.
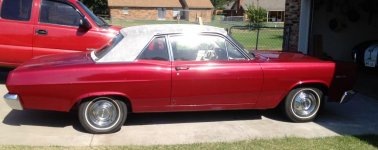
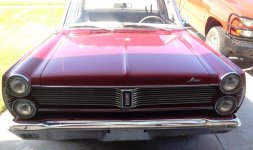
I haven't had a whole lot going on in the garage or shed front lately so I decided to cure that. I rode my bike to work last week and this little fella followed me home.

attachment.php


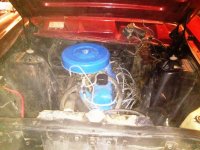
It is a 1967 Mercury Comet, with 67K miles (it very well could have rolled over, but I don't know for sure either way), 200 CID I-6, C-4 trans, power steering, 4 wheel non-power brakes, and the AM radio. It has some rust and needs new paint, a new vinyl top, and new seats and carpets. However, everything works and I mean everything from blinkers to the dome light, no drips, and is all numbers matching. I know they aren't really collectables, but it is fun to putter around in until I decide what to do with it.
attachment.php

attachment.php

attachment.php


So should I drive it as is as a cheap beater, sell for a quick little profit (hopefully profit), fix it back to near stock, or go crazy and dump a junkyard LS with a turbo in it, IFS, disk brakes, new interior, and make it a scary sleeper? Let me know if you have any opinions. I have to keep in mind the cobra is quietly waiting its turn as well.
 

Attachments

  • IMG_2004.JPG
    IMG_2004.JPG
    67.2 KB · Views: 455
  • IMG_2005.JPG
    IMG_2005.JPG
    94 KB · Views: 454
  • IMG_2007.JPG
    IMG_2007.JPG
    136.3 KB · Views: 455
  • IMG_2008.JPG
    IMG_2008.JPG
    128.3 KB · Views: 457
To avoid these ads, REGISTER NOW!

madoc1

Well-known member
Joined
Dec 11, 2012
Messages
1,242
Location
spicewood, tx
clean the engine bay and engine, get some replacement upholstry, add some later model power disc brakes and drive it. it should get fairly good gas mileage.
 
OP
J

jbmatth

Well-known member
Joined
Jun 3, 2013
Messages
5,686
Location
Northern Ok.
Thanks for the input 48RON54, and Madoc1! I've been having a lot of trouble finding simple things like the window and door moldings, also it seems like no one makes seat covers for the bench seat, only the buckets. I'm not sure I want to drop the kind of money needed at an upholstery shop to have the seats recovered, so I may be cheap an throw a Mexican blanket down on there or get a cheap seat cover. Do ya'll happen to know where I might be able to find the moldings?
 
OP
J

jbmatth

Well-known member
Joined
Jun 3, 2013
Messages
5,686
Location
Northern Ok.
Sorry for the double post, but the engine bay is actually really clean and in great shape, the picture was "enhanced" because it was a night shot in the garage. The only part showing much age is the top of the radiator, which is easy enough to paint in place.
 

48RON54

Well-known member
Joined
Dec 27, 2013
Messages
2,666
Location
Inland Empire, CA
Not being a ford/lincoln/mercury guy I'm not entirely sure where you would find that stuff but I would hope or assume there are forums on the internet dedicated to that body style. Ebay is your friend when looking for old car parts. Even if you don't find exactly what you need, ask someone who is selling other parts off the same car, he may have the parts you need or at least point you towards someone who does.
 

48RON54

Well-known member
Joined
Dec 27, 2013
Messages
2,666
Location
Inland Empire, CA
Car swap meets can be helpful as well. The only issue with them is I find you pay a premium many times at those. But, if you need the part you need the part, know what I mean? lol You can also ask around at those.
 
OP
J

jbmatth

Well-known member
Joined
Jun 3, 2013
Messages
5,686
Location
Northern Ok.
The only comet forums I've been able to find are pretty much dead for the 66-67 model years, there are only a few guys posting in them. I haven't asked them yet as I'm not sure I want to restore it very much as it'll eat up my cobra budget. I was able to find them finely, the seals were on ebay, I just wasn't searching the right terms. Thank you for the help!
 
OP
J

jbmatth

Well-known member
Joined
Jun 3, 2013
Messages
5,686
Location
Northern Ok.
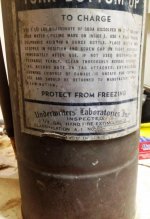
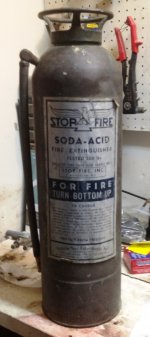
Well I managed to get a little bit of garage art this past weekend I scored this old extinguisher at the scrap yard, I basically traded scrap for it.

attachment.php

attachment.php
attachment.php


Then the big news, my family will be moving in a few weeks, and I'm really excited! We signed a contract on a place in the country near here. I've wanted to live back in the country since I moved to Oklahoma 5 years ago and it looks like I'll finely be able to. Yeah there is a house and a slightly over sized one car attached garage, but there is this little gem as well.

attachment.php

attachment.php


I'm not sure how to insulate and cover those curved walls on the inside, suggestions? The pad is nearly 12" thick, and is a small 46' wide and 76' long, I think I can handle that. Needless to say I'm stoked and can't wait to move in and do a burnout inside that big old building!

Thoughts on how to handle the curved walls, it was built in the 50's I've been told, and I have no idea how to cover them and make it a usable space.
 

Attachments

  • IMG_2022.jpg
    IMG_2022.jpg
    76.7 KB · Views: 478
  • IMG_2021.jpg
    IMG_2021.jpg
    91.8 KB · Views: 476
  • IMG_2020.JPG
    IMG_2020.JPG
    131.1 KB · Views: 477
  • Shed Side.jpg
    Shed Side.jpg
    111.1 KB · Views: 478
  • Shed Front.jpg
    Shed Front.jpg
    62.9 KB · Views: 478

PanelDeland

Well-known member
Joined
Mar 24, 2007
Messages
184
Great thread. I'm contemplating a shed like yours. I share my birthday with your brothers anniversary.
On the insulation, I would look around for someone who does the spray on.It sprays like paint then turns to a foam insulation.Works as a sealer also so it would stop any small leaks and improve the roof.

What part of OK are you in. I have a sister in process of moving from Cordell to the OKC area, and her son lives OKC metro. A B I L who lives in OKC area, two nieces in Waynoka and a sister in Amarillo Tx. You might say "I'm from the area".
 
OP
J

jbmatth

Well-known member
Joined
Jun 3, 2013
Messages
5,686
Location
Northern Ok.
PanelDeland,
I really like the spray foam, but am concerned with the cost as well as then what to cover the walls with so I can use them. I just have no experience with curved walls and don't know where to begin, but I'd rather not loose any more space than I have to.

I'm basically from the Ponca City area now, I grew up in SE Mo. I have brothers living in Georgia, Arkansas, Missouri and Tulsa, Ok as well. If you are ever around the area you are welcome to stop by, I'll even buy you a coffee or beer depending on the time of day.
 

motorbreath53

Well-known member
Joined
Sep 3, 2010
Messages
113
Location
SoCal
I did a similar shed at my last place. Yours turned out awesome. Strong work.

The new one though... MAN, thats a lot of room! Congrats.
 
OP
J

jbmatth

Well-known member
Joined
Jun 3, 2013
Messages
5,686
Location
Northern Ok.
Motor, I'm so excited about the new shed I don't even know what to do with it all yet. The first order of business will be to do a big smokey burnout and donut right in the middle before it gets filled with who knows what. I was surprised my wife was the one that said to take a look at the house, and said I'd probably like the shed too. Man was she ever right!
 
OP
J

jbmatth

Well-known member
Joined
Jun 3, 2013
Messages
5,686
Location
Northern Ok.
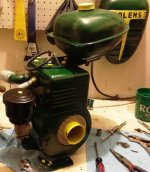
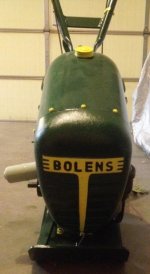
I wanted to do a quick update on the Handi-Ho progress. After much pain and time I was able to get patches welded into the rim halves. I was surprised at how much time I had to spend on these, I probably have more time in the rim than I have in the entire engine. Oh well that is how it goes sometimes. I got them all painted up and installed on the Handi-Ho. Pictures to follow, but you can mark this one off the list, it is done! :beer:
attachment.php

attachment.php

attachment.php


Now I guess it will just be lots of packing and cleaning to get our house ready to sell and moved into the new one.
 

Attachments

  • IMG_2075.JPG
    IMG_2075.JPG
    110.5 KB · Views: 380
  • IMG_2076.jpg
    IMG_2076.jpg
    59.8 KB · Views: 379
  • IMG_2077.JPG
    IMG_2077.JPG
    104.8 KB · Views: 380

cagullett1

Well-known member
Joined
Sep 29, 2013
Messages
2,203
Location
North Texas
Just curious, do you plan to take the shed you just built with you somehow? I would like to build a small lean to (6x8) but we plan to move in the next year or so. Not sure if it is worth it or not. I figure if it's easy/reasonable to move, it might make it easier to convince my wife. She thinks that lawn equipment is perfectly fine in the garage.
 
OP
J

jbmatth

Well-known member
Joined
Jun 3, 2013
Messages
5,686
Location
Northern Ok.
Just curious, do you plan to take the shed you just built with you somehow? I would like to build a small lean to (6x8) but we plan to move in the next year or so. Not sure if it is worth it or not. I figure if it's easy/reasonable to move, it might make it easier to convince my wife. She thinks that lawn equipment is perfectly fine in the garage.

I do plan to move it to the new house if there isn't a deal made by the buyer of our current house. I'll first strengthen the entire shed by running 2x4's in an X pattern across the door, side walls, and floor. Then my plan is to use jacks and blocks to raise the shed off of the concrete blocks. I'll move the concrete blocks that need moved and back a trailer under the shed, lower it on the trailer, strap it down, then it is off to the races...err new house. That is the plan, but it'll be a lot of work and I'll have to remove some fence and have a dry day and hopefully a helper or two. Soooooo I hope the new owner wants the shed because it'll be a pain to move this 3,000 pound beast 30 miles through a couple of towns.
Hope that helps some,
JB
 
To avoid these ads, REGISTER NOW!
Top Bottom