To avoid these ads, REGISTER NOW!

Lenny's ManCave (40x60 + 40x30)

LennyTheLizard

Well-known member
Joined
Oct 25, 2010
Messages
325
Location
Southeast MO
Thought I would start documenting my build. I started about 2 months ago, and it's going pretty slow. Mostly the timing is due to me not making decisions very quickly. I've been soaking up tons of good stuff on this site, and trying to do it right the first time.

I've wanted a shop since I bought this house over 10 years ago, but now is the time to start.

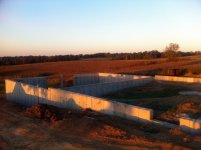
I have 7 acres, but there's not really any flat land. I had to build a little closer to the house than I liked. Due to the amount I was going to spend on fill to get a level floor, I decided to put in a basement on 1/2 the building.

I will have approx. 40'x30' basement with 7'8 ceiling height. There is a suspended concrete reinforced floor above that. The upper "barn" part will be 40'x60' built panel building style with 12' walls.
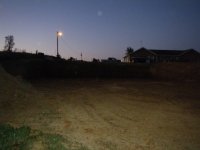
 
To avoid these ads, REGISTER NOW!
OP
L

LennyTheLizard

Well-known member
Joined
Oct 25, 2010
Messages
325
Location
Southeast MO
Here are some of the first pictures of the dirt work and forming the foundation walls.
 

Attachments

  • Shop 00.jpg
    Shop 00.jpg
    114.4 KB · Views: 558
  • Shop 01.jpg
    Shop 01.jpg
    129.8 KB · Views: 588
  • Shop 02.jpg
    Shop 02.jpg
    112.6 KB · Views: 665

JC23

Well-known member
Joined
Dec 31, 2009
Messages
11,719
Location
Northcoast
SBJ! 40 X 60???

This ought to be cool. What all do you plan to do with your 'hangar' when it's done?
 
OP
L

LennyTheLizard

Well-known member
Joined
Oct 25, 2010
Messages
325
Location
Southeast MO
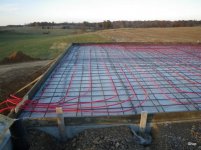
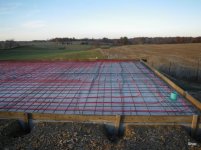
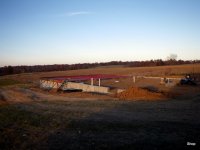
Here are pictures after the foundation walls were finished.

Forms are installed for suspended floor, rebar in, PEX pipe laid out for radiant heat flooring. I ran water and drain pipe. There will be a floor drain in the center of "front" section, and rough in for bathroom. You can also see where the 2 - 12' x 10' doors will be located in the front of building.
 

Attachments

  • Shop 03-1.jpg
    Shop 03-1.jpg
    133.7 KB · Views: 435
  • Shop 03-3.jpg
    Shop 03-3.jpg
    49.3 KB · Views: 553
  • Shop 03-4.jpg
    Shop 03-4.jpg
    46.5 KB · Views: 475
  • Shop 03-5.jpg
    Shop 03-5.jpg
    136.5 KB · Views: 481
OP
L

LennyTheLizard

Well-known member
Joined
Oct 25, 2010
Messages
325
Location
Southeast MO
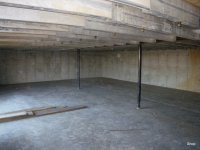
Here are a few pictures from the basement with the aluminum beams still in. The telescoping beams sit on top of the concrete foundation and steel I-Beam across the middle of building, then they put down plywood with plastic sheating over it. R-Bar on 8" Centers and 6" minimum concrete in the middle of floor. It's at least 7" thick on top of the walls and I-Beam.

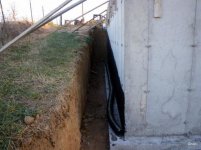
I put drain tile all the way around basement portion and tarred the walls where they will be backfilled.
 

Attachments

  • Shop 03-9.jpg
    Shop 03-9.jpg
    37.4 KB · Views: 796
  • Shop 03-8.jpg
    Shop 03-8.jpg
    46.5 KB · Views: 817
  • Shop 03-7.jpg
    Shop 03-7.jpg
    136.8 KB · Views: 961
  • Shop 03-6.jpg
    Shop 03-6.jpg
    130.2 KB · Views: 840
OP
L

LennyTheLizard

Well-known member
Joined
Oct 25, 2010
Messages
325
Location
Southeast MO
I'm going to use the basement part mostly for storage, lawmower, atv's, lumber, maybe a small woodshop area and a place for my compressor. Hopefully that will leave me a lot of space to work on things upstairs. After the shop's done, I'll have to find me a project car (Either ~70 442 Cutlass or maybe a 4WD Jeep). Maybe one day I will start some side business that makes money instead of spending all of it.
 

eldirector

Well-known member
Joined
Sep 18, 2008
Messages
608
I'd vote for both (you have the room!).

Sounds like this will be a nice shop when done. Keep us updated!
 

mpire

Well-known member
Joined
Nov 21, 2008
Messages
1,861
Location
Florida
I like the 442....
HIJACK ALERT!

I am working on the budget for my Fathers 1970 442 that he bought new. My mother wants it gone.

So you should definitely do the Cutlass if you can get your hands on one. Its got a unique style and doesn't feel as common as all the Chevelles out there.

Also, you can get every part on the car short of a whole new body from various catalogs. AFAIK.

I was thinking of something kinda like this, but I will stick with the stock motor with a freshening.

 
OP
L

LennyTheLizard

Well-known member
Joined
Oct 25, 2010
Messages
325
Location
Southeast MO
I'd vote for both (you have the room!).

Sounds like this will be a nice shop when done. Keep us updated!

I'm liking this idea, but the funds are gonna be a problem. I have '79 Z28 right now that is a pretty fun little toy. It needs to have a little work done, but I would rather start another toy from scratch. After it's done, then I'll start restoring the Camaro. My dad gave it to me and I plan to give to my son, but he has to get his hands dirty beforehand. He's only 6 now, but he already loves that car!
 

Attachments

  • Jace & Daddy 038.jpg
    Jace & Daddy 038.jpg
    89.2 KB · Views: 545
  • Jace driving Camaro 01.jpg
    Jace driving Camaro 01.jpg
    38.8 KB · Views: 307
OP
L

LennyTheLizard

Well-known member
Joined
Oct 25, 2010
Messages
325
Location
Southeast MO
I was thinking of something kinda like this, but I will stick with the stock motor with a freshening.

[/QUOTE]

Must admit that I'm no expert about Olds', but that's a later model right? I thought the '70 had more rounded off rear quarters. I had a '72 Cutlass in high school. It wasn't a 442, but it had the cool ram air fiberglass hood (aftermarket). It was a $250 beater, but I really liked it! I think it would be cool to have the Chevelle style, but something a little different than what everyone else has. I haven't pegged down what year I would want yet, but someday I'm going to have another of these.
 
OP
L

LennyTheLizard

Well-known member
Joined
Oct 25, 2010
Messages
325
Location
Southeast MO
OK, so I get side tracked easily! Maybe that's why my build is going this way!!!

Currently, all the concrete is finished. I have my "basement" O/H door on order, and hopefully I'll get a trench dug this week, so I can run some power and start using the bottom half soon. If I ever get home before dark, I'll try to take some more pics of the current status.
 
OP
L

LennyTheLizard

Well-known member
Joined
Oct 25, 2010
Messages
325
Location
Southeast MO
HIJACK ALERT!

I am working on the budget for my Fathers 1970 442 that he bought new. My mother wants it gone.

.....

I was thinking of something kinda like this, but I will stick with the stock motor with a freshening.

OK, 1 more off topic!

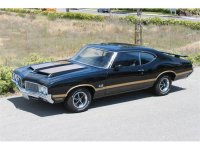
This is what I'm talking about!
 

Attachments

  • 169955_11041676_1970_Oldsmobile_442.jpg
    169955_11041676_1970_Oldsmobile_442.jpg
    64 KB · Views: 167

mpire

Well-known member
Joined
Nov 21, 2008
Messages
1,861
Location
Florida
Must admit that I'm no expert about Olds', but that's a later model right? I thought the '70 had more rounded off rear quarters. I had a '72 Cutlass in high school. It wasn't a 442, but it had the cool ram air fiberglass hood (aftermarket). It was a $250 beater, but I really liked it! I think it would be cool to have the Chevelle style, but something a little different than what everyone else has. I haven't pegged down what year I would want yet, but someday I'm going to have another of these.

Well, thats a 71 that I posted. Its the same as a 70, but the changed the bumpers. The rear fenders are "Supreme" trim that was offered from 70-73. I prefer the regular F85 trim myself. I also much prefer the 70 bumpers and taillights. However, click the link and see the build process, that was the point of posting.

Here is an article on the car:

0909phr_01_z+1971_oldsmobile_cutlass+front_angle.jpg


http://www.popularhotrodding.com/features/0909phr_1971_oldsmobile_cutlass/index.html
 
Last edited:

jktruck150

Well-known member
Joined
Oct 19, 2009
Messages
835
Location
Outskirts of Jackson, MS.
You know, I was just thinking how cool it is that you have a garage/shop ready now (the basement) and you haven't even build the full size garage/shop yet! So you can start using it now. Go get the jeep/olds before you realize your complete budget is blown!! Man that place looks great!
 
OP
L

LennyTheLizard

Well-known member
Joined
Oct 25, 2010
Messages
325
Location
Southeast MO
Haven't updated my build in a long time!

Works been chaotic, but it looks like due to the big earthquake in Japan, I'm going to be seeing plenty of downtime over the next month or two.

Currently, I have all my basement doors installed, power ran into the basement (200 A service). I built several shelves for "Junk Storage", and scavenged some Fluorescent fixtures from work that were going to be thrown away.

I'll try to get some pics next week while I'm off. Looks like I need to save some more money before I build my building, but the 40 x 30 basement should be enough room for a while. Although it doesn't take long to fill up I've been noticing.
 

BEAVO

Well-known member
Joined
Aug 9, 2010
Messages
239
Location
wash ch ohio
nice!! i know what ya mean about the earth quake slowing work down!! what kind of work do you do? me and my wife both work for companys that supply parts to honda amungst other companys and shes prob gonna get laid off until end of june.im still getting my 5 days and lets hope it stays that way lol. luckily i work on a ford f150 line and were uneffected as of now
 
To avoid these ads, REGISTER NOW!
OP
L

LennyTheLizard

Well-known member
Joined
Oct 25, 2010
Messages
325
Location
Southeast MO
Beavo,

I work as a manager for a Tier 1 automotive supplier. Toyota represents about 70% of our business. Everyone is on pins and needles right now wondering how everything is going to unfold. I think it will be a couple months with a lot of downtime, and then 24/7 trying to catch up, so I'm just going to try to enjoy the time off while it lasts.
 
OP
L

LennyTheLizard

Well-known member
Joined
Oct 25, 2010
Messages
325
Location
Southeast MO
I haven't made an update to my build in quite a while. If I ever make it home when the daylight's shining, I'll try to snap some new pics. Right now, I still haven't started anything upstairs.

I think I have all the wiring I need for the basement done (but lots of empty space in the panel). My lights are installed. Built a driveway down to the basement ($$$). I have small area set-up for getting a little work done, but haven't got the organization down too well yet.


In the middle of doing all this work, my wife decided we should fix up the attached garage. So everything was moved out of there and is laying all around in my shop.
 
OP
L

LennyTheLizard

Well-known member
Joined
Oct 25, 2010
Messages
325
Location
Southeast MO
Sam,

Nothing of huge significance.

I've been using my basement shop for the past couple winters. I'm hoping to build my building still this year if I can find a contractor to work in the cold. Should get funding from the bank in the next 2 weeks and waiting on a competitive quote before I decide on contractors.

I just don't have the available time right now to build it myself.
 

sam2145871

Member
Joined
Oct 15, 2007
Messages
12
Sam,

Nothing of huge significance.

I've been using my basement shop for the past couple winters. I'm hoping to build my building still this year if I can find a contractor to work in the cold. Should get funding from the bank in the next 2 weeks and waiting on a competitive quote before I decide on contractors.

I just don't have the available time right now to build it myself.

Thanks for the update. I'm looking foward to this once it gets rolling.
 

bigbubba

Well-known member
Joined
Jul 12, 2010
Messages
2,884
Location
Poplar Bluff Mo
I see you are in Semo,In the pic with you and your son with the Z28 where is that at? It looks familiar but i can't place it.Puxico maybe?
 
OP
L

LennyTheLizard

Well-known member
Joined
Oct 25, 2010
Messages
325
Location
Southeast MO
Finally signed a contract on my building. I didn't expect to wait this long to build it, but having that basement shop for the last couple years allowed me to wait until all the financing was right. They are supposed to start next week, although there is about a foot of snow on the ground right now. I'll try to keep a pictorial history of the progess.
 

USAF_POL

Active member
Joined
Nov 26, 2012
Messages
41
Congrats! The wait will make it worth it as well as making sure the funds were there the proper way instead of rushing and not getting the shop the way you want it. Keep us posted! We LOVE pics :)
 

chico0511

Member
Joined
Sep 3, 2012
Messages
24
I'm sorry I was looking at the join date should I just wave the stupid flag now and get it over with
 
OP
L

LennyTheLizard

Well-known member
Joined
Oct 25, 2010
Messages
325
Location
Southeast MO
Bluegiller - I'm way over budget. :)
I originally planed to spend $30k.

Due to lay of my land, the 1/2 basement just seemed the way to go:


Concrete was ~$25k (It was going to cost $17K + rock for backfill if no basement)
Building cost for 40x60x12, 6 windows, 2 insulated overhead doors with openers, 1 man door = $23k installed (also includes wainscot side and 18" overhangs all the way around.

I've spent more on wiring, landscaping, driveway, etc. I did all the interior stuff myself but haven't really kept close track of all the material expenditures. I just saved money for that particular purpose and spent it if I had it.
 
OP
L

LennyTheLizard

Well-known member
Joined
Oct 25, 2010
Messages
325
Location
Southeast MO
Left for work this morning with a pile of wood on my foundation, came home with four walls framed up. Unfortunately, it was too dark to get any good pictures. I'll try to snap some in the morning. This is the awesome part about hiring a contractor I guess.
 

cdoug

New member
Joined
Dec 31, 2012
Messages
4
hey, i am planning a 40x60 and have a few questions. For the PEX floor heating whats the spacing between the tubes? What boiler do you have for it and how many btu's is it?
 
OP
L

LennyTheLizard

Well-known member
Joined
Oct 25, 2010
Messages
325
Location
Southeast MO
hey, i am planning a 40x60 and have a few questions. For the PEX floor heating whats the spacing between the tubes? What boiler do you have for it and how many btu's is it?

I haven't designed the total system yet. I just made sure to put in the PEX in the concrete (can't go back and do that later. I found a pattern online that I used. I can send it to you if you have email. I think that I spaced mine a little farther apart than recommended, but it's also important how you wrap your loop (hottest water goes closest to outside walls).

I'm probably going to get an outdoor wood furnace and build my own heat exchange system.
 
OP
L

LennyTheLizard

Well-known member
Joined
Oct 25, 2010
Messages
325
Location
Southeast MO
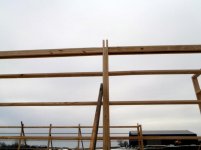
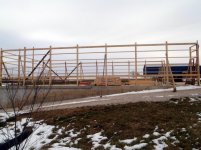
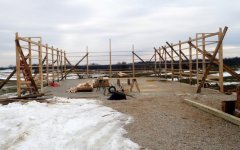
Snapped some pictures today of the wall framing.

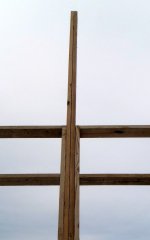
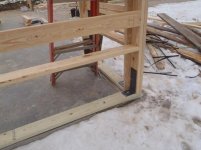
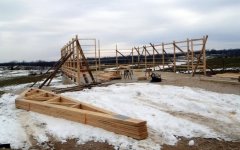
Around here, they call this method Panel Building Style. A little like stick built, but all the "studs" run horizontal (2" x 6") like a book case. The posts are 3 2"x6" 's stacked together. The middle one is shorter, and the truss will be sandwiched in the middle.

Anchor bolts are epoxied into the concrete through seal plate and heavy steel angle bracket. All three 2X6 posts are lagged through the angle bracket also.

HUHHHH!. I didn't realize till I just posted these pictures that they didn't frame out the man door in the front left corner! That will have to be fixed Monday!
 

Attachments

  • P1040590.JPG
    P1040590.JPG
    132.3 KB · Views: 192
  • P1040589.jpg
    P1040589.jpg
    47.4 KB · Views: 242
  • P1040588.jpg
    P1040588.jpg
    37 KB · Views: 216
  • P1040587.jpg
    P1040587.jpg
    58.7 KB · Views: 243
  • P1040586.jpg
    P1040586.jpg
    74.8 KB · Views: 245
  • P1040584.jpg
    P1040584.jpg
    61.3 KB · Views: 245
  • P1040583.jpg
    P1040583.jpg
    59.6 KB · Views: 262
OP
L

LennyTheLizard

Well-known member
Joined
Oct 25, 2010
Messages
325
Location
Southeast MO
I was searching through my thread this weekend and realized I hadn't posted many pics of what I've been doing for the last 1-2 years. I snapped some of the basement tonight, but they didn't turn out real well.

I changed a lot of things in the last few weeks, but unfortunately I don't have before pictures.

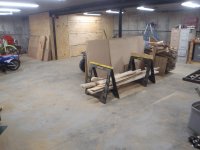
1. Picture of basement entrance facing towards back of our house.
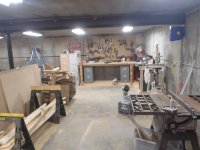
A. Next 3 pictures are standing just inside the man door snapping pics right to left.

2. This is my work bench / wood shop area. I plan to leave the wood shop part here after top is done.

3. Middle bay is just for parking / working on projects. I used to have 2' wide shelves going around front corner and left wall, but it never looked good. I didn't like all the open shelving. I moved all the shelves to the back corner in a square, and put plywood on the backs. Now I have a storage / utility room.

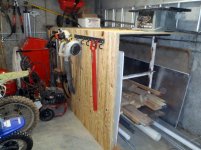
4. Front Left corner is where I have all my garden / power tools / wood storage. I had a steel frame that always looked cluttered for wood storage / kayaks / canoe, etc. I moved it all the way in the corner and put a plywood top and front on to hide most of what it is holding. Now I can only see boards that are longer than 8'. Also the front wall gave me another place to hang items like my weed eater, leaf blower, etc. All my garden tools used to be just inside the man door, and this looks 10 times better.
 

Attachments

  • P1050591.JPG
    P1050591.JPG
    136.4 KB · Views: 493
  • PC300553.JPG
    PC300553.JPG
    144 KB · Views: 511
  • PC300552.JPG
    PC300552.JPG
    139.8 KB · Views: 568
  • 003.jpg
    003.jpg
    133 KB · Views: 507
OP
L

LennyTheLizard

Well-known member
Joined
Oct 25, 2010
Messages
325
Location
Southeast MO
Here's part of my 5S projects I've been doing over the last week or two.

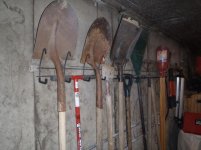
1. Found some tool holders at Wal Mart on clearance. They don't look too heavy duty, but they get the job done and were dirt cheap! The two sets of hooks allow to alternate handle down, handle up.

2. View of my material rack from side view. spare lumber on horizontal racks. There is about a 8" gap on each side that can store sheet stock standing up. Top rack right now just has items to be sold on Craigslist or oversized storage. S-Hook rack on front is holding landscape power tools.

3. I hated to post this, but I guess you need a before picture sometime. All these 2' wide lumber racks used to be up against the wall with no backs. I hope to organize all this stuff better using storage totes.

4. Finished my air compressor hook up today and anchored to concrete. This is not the final pipe layout, but it will work until I run air to the top. I have 200A service coming in to this panel. I will put another panel in the top shop and run 100A breaker from bottom to top through the 8" opening in concrete. My air supply will also go through that opening.

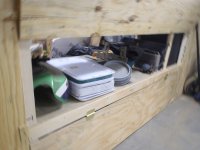
5. On back of storage wall, I built some 8' swing up doors instead of solid panels. Thought being that I could access stored items from the middle of shop without walking around the wall all the time. I hope to organize so that things I might need to service a vehicle will be handy at the door.

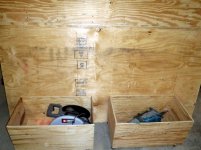
6. 2 carts I built today that will roll under bottom shelf. I plan to make 9 of these and there will be nothing sitting on the floor only inside these carts. 16" x 16" x 32". I was going for function more than fancy!

Next time my kids ask for money, there's going to be a painting party!
 

Attachments

  • P1050592.jpg
    P1050592.jpg
    58.8 KB · Views: 235
  • P1050593.jpg
    P1050593.jpg
    73.6 KB · Views: 233
  • P1050594.jpg
    P1050594.jpg
    68 KB · Views: 244
  • P1050596.JPG
    P1050596.JPG
    138.6 KB · Views: 256
  • PC300555.JPG
    PC300555.JPG
    127.2 KB · Views: 236
  • P1050597.jpg
    P1050597.jpg
    64 KB · Views: 217

cdoug

New member
Joined
Dec 31, 2012
Messages
4
I haven't designed the total system yet. I just made sure to put in the PEX in the concrete (can't go back and do that later. I found a pattern online that I used. I can send it to you if you have email. I think that I spaced mine a little farther apart than recommended, but it's also important how you wrap your loop (hottest water goes closest to outside walls).

I'm probably going to get an outdoor wood furnace and build my own heat exchange system.

That would be great if you could send me it [email protected]
-thanks
 
To avoid these ads, REGISTER NOW!
Top Bottom