JeremyBurke
Well-known member
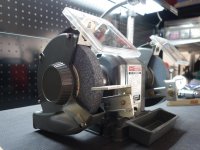
I picked this guy up today. I hadn't seen one like it before and it is my first block grinder. I am very happy with it but would also love more information if people have it. Thanks. 


I picked this guy up today. I hadn't seen one like it before and it is my first block grinder. I am very happy with it but would also love more information if people have it. Thanks.
.....
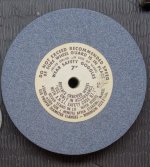
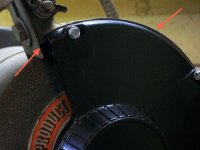
I did notice that yours has the optional disk sander attachment. Nice find ! What size is the disk ?
anyone in utah I just found this posted what do you think
http://www.ksl.com/index.php?nid=218&ad=28496924&cat=&lpid=2&search=CRAFTSMAN&ad_cid=43
I think its about 3X too much money...

TSquare:you stepped up to the plate and maybe paid 5 times what the original owner did, but i for one think you scored a home run. that is an awesome grinder and brand new out of the box 50 years old. Sweeeeeet
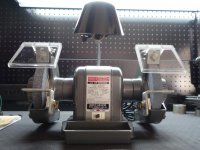
i'm guessing the peg board with Craftsman insignia on it is part of a bench you bought or do they sell peg board like that for us Craftsman lovers?
Congrats on remembering to check your grinding wheels for a ring before installing them just in case.

 , I only have five blocks, some other old iron in the picture with them.
I did a BAAAAAAAAD thing !
So, is it wrong to order $70 (w/shipping) in parts for a grinder that cost $25 ?
Here's the story (yeah, I know I can be long winded in my posts, I'll try to keep it short. But stick with me, it might be worth it)
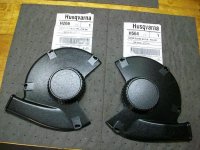
Recently, tedsters acquired a model 397.19591 grinder. A few weeks ago, I picked up a 397.19590 model. Hey, they're only one model number apart, the parts should be the same, right ?While looking up the part number for a quench tray for his grinder, I noticed that the side covers for his model were listed as available for order as well. Oooooooooooooo!
Both grinders use 7" wheels and have side covers with exhaust ports. These are the later style covers with the Princess Leia buns, not the rounded bulges.
So, after checking eReplacementParts.com and searspartsdirect.com for availability, I ordered from Sears to cut down on the shipping time (eRepacement would be ordering them from Sears anyway). Oddly enough, the screws are listed as discontinued.I'm still not certain that these parts are available, but I thought that I'd take a chance. I'll let you know how it turns out once the parts arrive, or the order gets cancelled.
The moral of the story - don't just search for your own model number when looking for parts. Try searching similar models, the parts might still match.
Oh, and here are the links for the side covers.
http://www.searspartsdirect.com/partsdirect/part-number/4971514/0009/397&blt=04
http://www.searspartsdirect.com/partsdirect/part-number/4971517/0009/397&blt=04
i haven't read this entire thread for a while, but i'm guessing you might be the first one to find one of these old Craftsman block grinders in a box so why not shoot for the moon and find another 50 year old Craftsman machine new in the box.
are you going to keep grinding wheels on both or exchange for a wire wheel or just get another grinder for wire wheeling like a lot of GJ members do? check out the thread CBacres started by asking how many grinders does a normal person have in their garage or shop. then he shows pictures of maybe 8 block grinders on a bench.
again nice find and thanks for the tease with one photo per post and spaced out over a week or so.
, even if it for being a deranged grinder owner ( I think my own family thinks along these lines)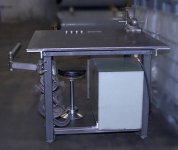
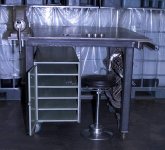


Jake: sorry to hear you didn't get exactly what you were hoping for. did you order from Sears or another online source because you might have said and i can't remember while i'm typing this. also nice work bench and is that a nice shop towel or a piece of thin rubber you use to protect it?
need help
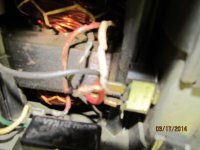
i picked this up last night and it does not work the guy told me it ran good and was smooth, got there plugged in and all it does is hum it free wheels great and you can spin it by hand to even try to help it when you turn the switch on it stops and hums he said he bought it like this but used it on his bench, no tape on bare connection or nothing you can see there is bare wires all over the place
i don't know if something is burnt up or hooked up wrong either way i only ended up giving $5 for it after pulling the bottom cover off worst thing is keep it for parts no wheel guards or eye shields the tool rest are there
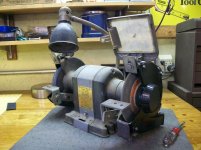
whats the black box on the right
whats the black box on the right
That is the start relay. It activates the start-up winding and deactivates (Opens) the circuit at about 80% of the operating speed.
If the relay is not working or not wired into the circuit (that is a very dangerous grinder on many counts) the grinder will not spin, and will just hum as rotor does not have the torque offset needed to move through the induced EMF.
I will check to see if I have a schematic for this grinder to help you out with rewiring it safely.
Until then see page 4 "Split-Phase AC Induction Motor" in the following document, which describes your motor. The difference is your Relay takes the place of the Centrifugal Switch in figure 4.
http://jimfranklin.co.uk/microchipdatasheets/00887a.pdf
If it turns out your relay needs service, see the following link on a CM 1 HP Grinder relay clean-up. {Page 5}
Note: the hand drawn schematic in the thread is different from your grinder in several important ways. It should not be used to wire your grinder at this point, with out further review.
« Reply #62 on: August 11, 2013, 08:15:26 PM »
Link to: "Topic: Block Grinder rescue - UPDATE: Go-Blue! 1 H.P. Model 257.191600"
http://tinyurl.com/Go-Blue-Block-Grinder


This might help, I gave my brother this grinder, so I know it's correct.
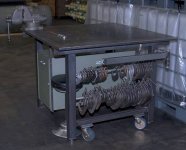
Drivesitfar- not taking anything wrong at all, I got a good laugh out it, you would have to hear some of my conversations around here. That is a nice compact table, a lot in a little space.
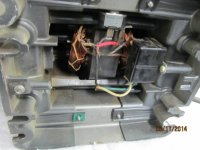
Tedsters/Tourqe, my 1/3 HP is identical down to the design #, I'll try to copy the wiring layout and post later tonight. Still working some tonight. I'll post a picture too.
I noticed my pictures have the switch at the bottom, the windings are not tied with 'string', and the label does not say 'Industrial'.cbacres torquemans is different looking i think inside i tried taking my laptop in my pole barn and lost my internet maybe i will bring the grinder in the house to get a better look


I noticed my pictures have the switch at the bottom, the windings are not tied with 'string', and the label does not say 'Industrial'.
But, if the number of wires from the field windings are the same, and the number of relay terminals are the same, electrically they may be the 'same'.
See if you can find a p/n on the relay and any terminal numbers.
Isn't this stuff fun?
Your always just a 1/2 step ahead of me.
Electrical wiring is a blast, I'll spend hours doing my best to be sure before the switch flips, nasty things happen in a hurry.