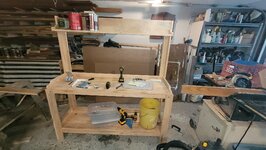
My work bench is a Gorilla bench from 20-ish years ago. The bench top is a Husky 1.25” thick “butcher” top I cut to fit. I’ve got a 4.5” Wilton Cadet vise painted blue to match my Park Tools and highlights of my other favorite tools include a restored vintage Craftsman soft mallet, old USA Craftsman metric and Blackhawk by Proto SAE combination wrenches.
A second vise, Capri Tools, is mounted on a Black and Decker Workmate 300. A Park Tools bike stand gets moved out when I need to work on a bike. On the left is a Baldor bench grinder I picked up cheap, cleaned up and put on a side table I made out of iron pipes and the rest of the Husky work bench top. On the right above my cabinet I have a wood top made from IKEA bed slats. On top of that is a Wilton Bullet 9300 vise.
It’s a small and cramped space, but I absolutely love it. One day I’ll clean out some junk, so I can have some more room.