To avoid these ads, REGISTER NOW!

Lets see your workbench

BHR4CE1

Well-known member
Joined
Sep 13, 2010
Messages
952
Location
Long Beach, CA
Trying to follow in the shadow of the Grand Poo Baa Olsen, I ordered the 8 ft. long butcher block top from Sears as I found it for 115.00 shipped to the store.

That looks a lot like the top on the workbench I got from Lista.

4eeb2730.jpg
 
To avoid these ads, REGISTER NOW!

MD11

Well-known member
Joined
Oct 30, 2009
Messages
1,228
Location
USA
my most recent photo...
 

Attachments

  • photo.jpg
    photo.jpg
    138.1 KB · Views: 692

american3.14guy

Active member
Joined
Nov 18, 2011
Messages
44
Location
Southwest Kansas
I had a workbench that I made a new top for out of studs of "beetle-kill" pine, coloring is grayish. On one end, I hung a woodworking vise. The height of the bench is about 1/8 inch lower than my table saw, making it an outfeed table if needed. One end of the trolley, made out of 1 1/2 inch tube, are a set of fixed casters. The other end has the "rotating" casters that flip out of the way to sit on a set of 1 1/2 inch tube legs. There is a little storage in the drawers and on the pegboard door.
 

Attachments

  • user102697_pic17187_1330918165_thumb.jpg
    user102697_pic17187_1330918165_thumb.jpg
    4.2 KB · Views: 9,380
  • user102697_pic17185_1330918076_thumb.jpg
    user102697_pic17185_1330918076_thumb.jpg
    4.8 KB · Views: 9,385
  • user102697_pic17184_1330918076_thumb.jpg
    user102697_pic17184_1330918076_thumb.jpg
    4.8 KB · Views: 9,398

rquackenbush

Well-known member
Joined
Sep 18, 2010
Messages
161
Location
Raleigh, NC
Here is a workbench that I built a couple houses ago... Very simple - just lagged some 2x4's to the wall and cut a melamine laminated sheet for the top. That way I was able to use a dry erase marker on it while I was working.

GarageWorkbench.JPG
 

corey4x4man

Well-known member
Joined
Mar 26, 2012
Messages
58
Location
Beaverton, OR
Hello all, I have been lurking for some time now and now have come to the point where I needed a work space and a larger tool box. SO i picked up a HF 13 box and built a workbench around it. So far so good.


ARbuilder223

Well-known member
Joined
May 12, 2011
Messages
357
few pix..
 

Attachments

  • 2012-02-26_19-28-47_183.jpg
    2012-02-26_19-28-47_183.jpg
    141.2 KB · Views: 555
  • 2012-02-26_19-27-48_777.jpg
    2012-02-26_19-27-48_777.jpg
    141.3 KB · Views: 717
  • 2012-02-26_19-28-01_159.jpg
    2012-02-26_19-28-01_159.jpg
    143.2 KB · Views: 618
  • 2012-02-26_19-28-32_160.jpg
    2012-02-26_19-28-32_160.jpg
    142.5 KB · Views: 812

gabedad

Well-known member
Joined
Mar 10, 2009
Messages
357
Location
Massachusetts
Here's mine. I got it from our shipping Dept when we moved to a new building
 

Attachments

  • 20111114_080650.jpg
    20111114_080650.jpg
    87.5 KB · Views: 707

GN4WHLN

Well-known member
Joined
May 8, 2009
Messages
2,073
Location
Alta Loma, CA
Here is one I am building. I just coated it so I'll add another pic when it's all in. I plan on topping it with 3/4 oak flooring.

It's 10'X2', 36"high. The right side will house a cut down shelving unit, the left is for my roll out metal working bench. It has a receiver for using a vice, bender, or whatever. I welded mounts to the back so it can be bolted to the wall. Tubing is 2" sq with the end legs being 1.5"X3" rec. (had it sitting around) .090 thk.

FxG6F7-SQfYP_H92_Px6Ps4dSIAOT9Oo_jeZJMa28ZI


Tacking it up.

aQm1zWD95rAlfhvZSZ3ceM4dSIAOT9Oo_jeZJMa28ZI


Getting there

cWL7Xu5aZ1Va-muZ0NWGEc4dSIAOT9Oo_jeZJMa28ZI
 

rouseyss

Active member
Joined
Feb 6, 2012
Messages
40
Im gonna share mine. Me and my father built it in a few hours and that includes us bs'in around and it being 103* outside when we did it. Im pretty happy with our results
workbench1.png

workbench3.png

workbench2.png


The next one I build is going to be a little different though. Im buying a tool chest and Im going to build it with enough room for the tool chest plus a work area where I can sit. These tool boxes are old and ****** ones but thats all he needs hes retired lol.
 

rouseyss

Active member
Joined
Feb 6, 2012
Messages
40
I like it, very utility and yet attractive.

Thanks a lot. I hope my second one turns out as good if not a tad better. I made all the plans for that one myself as I will for the second one also.
 

Worsedog

Well-known member
Joined
Mar 2, 2008
Messages
1,508
Location
Central FL
This is the bench that came with the garage. It was nailed right to the framing.

Garage159.jpg


Garage154.jpg


Since it was so big it became a catchall.

Garage75.jpg


So I rebuilt it slightly smaller and stronger. Almost none of the fasteners carry any actual load. They are just there to hold the sticks in place.

Garage189.jpg


Since I like a deeper bench the wall space behind it is pretty much only good for shelves. I hung a pair of 4 ft. twin bulb T-8 fixtures so there are no shadows on the bench from lights on the ceiling.

Garage199.jpg


Garage195.jpg


The shelf will hold 10 of the large plastic containers. I climbed on it after I built it and it didn't even creak.
 
To avoid these ads, REGISTER NOW!

mysta2

Well-known member
Joined
May 9, 2007
Messages
115
how do you get the bikes up on the stands? Thanks.

Exact same way you might get them up into a truck, aluminum folding ramp and brute force. There is a "locking" chock on the end of each table so once the tire drops into that you can let go of the bike and it will hold just fine. I also bolted eyelets into the tops so that I can strap the bike down if I feel it's necessary, but I rarely do.
 

jesse72

Well-known member
Joined
Sep 26, 2011
Messages
352
Location
California
Here is mine...Just a simple 2x4 set up that is about 24" deep and 8' long. 40" high if I remember right.
Now I just need to find a good stool for it. Anyone have any ideas on where to get a cool older shop stool, possiblly with a back rest? Wheels or no wheels I dont care either way. Thanks!

IMG_5178.jpg
 

dave67fd

Well-known member
Joined
Apr 25, 2011
Messages
872
Location
Southern NH
I'm looking for ideas for a wood top about 27" deep and spans 11' long. I would like to do a couple pcs of stacked 3/4" oak board but they and others i can only seem to find come in 4x8 sheet. I would like it to be seamless if possible or an idea to somewhat hide the seem. It will be stained and poly'd.

I don't want to buy custom butcher block top as i can't justify the price.
 

icecactus

Well-known member
Joined
May 17, 2011
Messages
302
I'm looking for ideas for a wood top about 27" deep and spans 11' long. I would like to do a couple pcs of stacked 3/4" oak board but they and others i can only seem to find come in 4x8 sheet. I would like it to be seamless if possible or an idea to somewhat hide the seem. It will be stained and poly'd.

I don't want to buy custom butcher block top as i can't justify the price.

You can get plywood in 4x12 at lumber yards. If they don't stock it they can usually order it.
 

MichaelUser

Active member
Joined
Aug 18, 2008
Messages
40
Location
Fullerton, Ca
I had this old metal bench with a steel top for 20+ years. I think it's a Dayton brand. I paid $60 for it. It has served me well and it's easy to moved from house to house throughout it's life.

However I got tired of the sound (getting older) of the metal top and wanted a more warm looking and quiet bench. The design came from two things.

The look of something study and industrial.

I made the edge out of 1-1/4 x 3 white oak. Then attached it with the Kreg mounting system to 3/4 sign plywood (its plywood with very thin paper laminated to the top surface for a smooth finish. Then I glued 1/4" Masonite to the top and flush routered the edge and then used a 3/8 radius round-over to finish it off. Cleared it with satin Varathane.
 

Attachments

  • IMG_1119.jpg
    IMG_1119.jpg
    141 KB · Views: 857
  • IMG_1120.jpg
    IMG_1120.jpg
    141.5 KB · Views: 764
  • IMG_1117.jpg
    IMG_1117.jpg
    142.5 KB · Views: 713
Last edited:

evan_880

Member
Joined
Nov 4, 2010
Messages
20
Hey guys,
here is one of my first posts from my garage that is finally "wrapping up" (i say that as it is never going to really be finished)

i welded together some frames for tool boxes and removed the wheels. works great.
i still have to cover the MDF with something gauge metal.
IMG_1165.jpg


I got the tool boxes at peavey mart in canada (SK)
IMG_11701.jpg


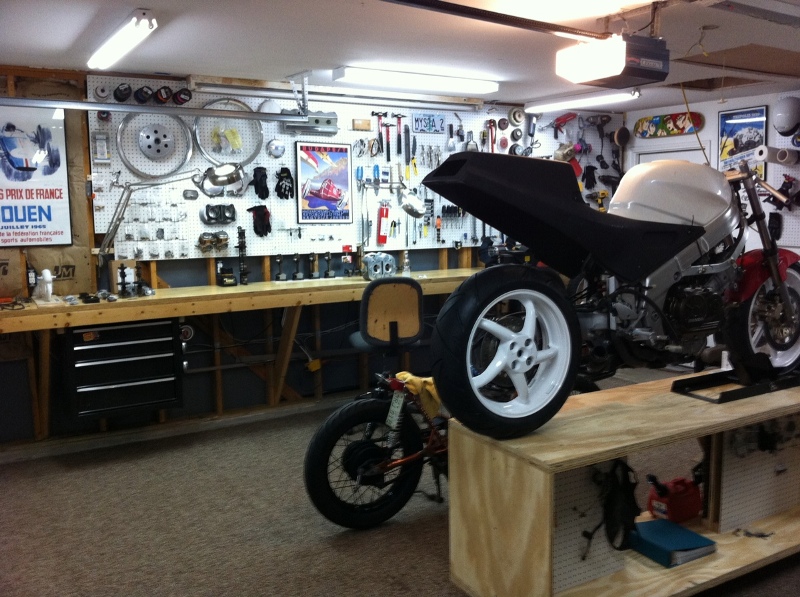
This is where my soldering/electronic area is going to be. need to find a wire rack i can hang there yet, but the pegboard is working thus far.
IMG_1167.jpg


beside the electrical station is the sink/first aid kit/hand cleaners and the air line that has yet to be completed.
IMG_11681.jpg


on the opposite end i built in my parts washer. it will be usable once wired, and once the top is covered with metal.
IMG_1166.jpg


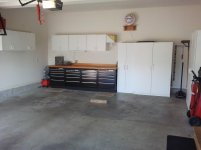
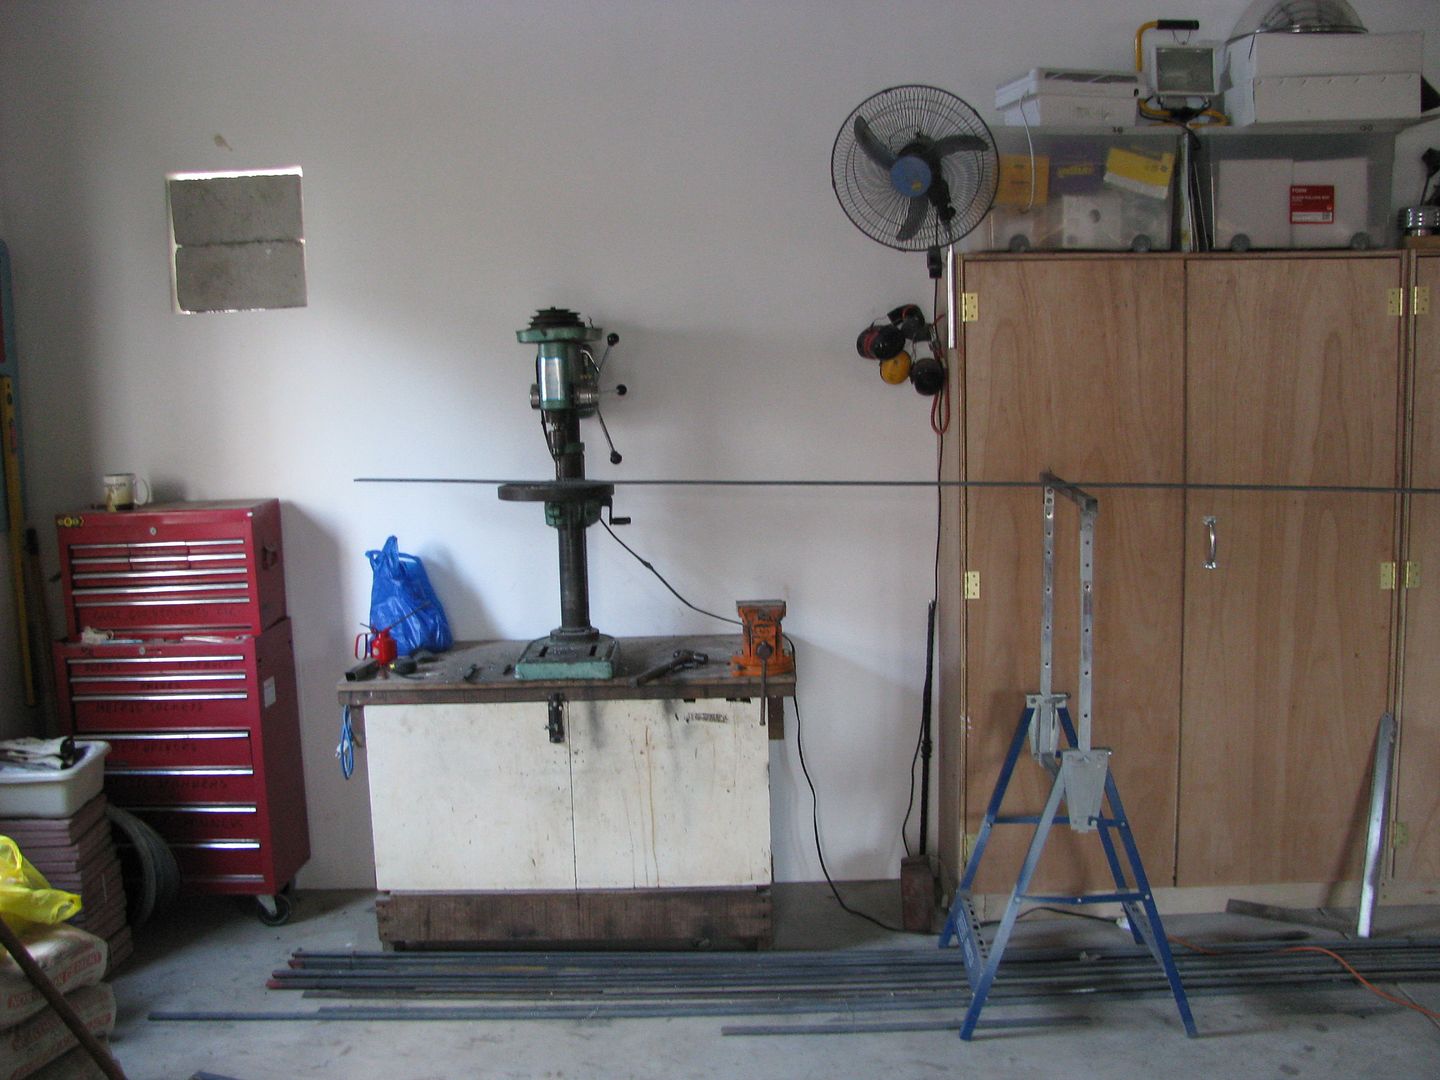
another pic of it all
IMG_1197.jpg


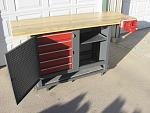
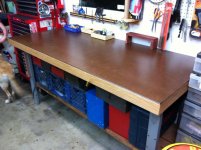
Then my other work bench opposite side of the shop,which is for reloading and firearm repairs
IMG_1173.jpg


the top of one of those other toolboxes i had previously bought came in useful
IMG_1174.jpg


the red box can slide in and out so you can sit there without bashing your legs.
IMG_1176.jpg


the reloading press and bulk bullets/brass
IMG_1175.jpg


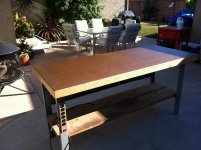
and a picture of what the framework looked like before hand
IMG_1190.jpg
 

Steevo

Well-known member
Joined
Aug 18, 2009
Messages
8,738
Location
43.49600, -112.04300
Hey guys,
here is one of my first posts from my garage that is finally "wrapping up" (i say that as it is never going to really be finished)

i welded together some frames for tool boxes and removed the wheels. works great. . . .

That came out really nice.
I like those Eagle boxes, they look great.
 

Corsario

Well-known member
Joined
Apr 4, 2010
Messages
136
The progress of my shop is not as fast as I wish, but here it goes. Bench finally done. I still need to finish cabinets interiors. All done by myself.
I have to put some light below the top cabinets, too. I haven't decided yet what to put in the back wall. Enjoy!

img0434ka.jpg
 

y2knole

Well-known member
Joined
Oct 25, 2010
Messages
83
built this last weekend.

Its not quite finished. I need to choose a material for the top, I am going to hang some pegboard above/behind it, and im going to put a sheet of plywood on drawer slides on the farthest right side by the shelf, on which to mount some nut/bolt bins, so they can be easily accessed, but mostly out of the way.

Its built of 2x4 studs, attached to the wall w/ lag screws. the front legs are 4x4's left over from a deck I built 4 or 5 years back. and the top is 3/4" plywood.

and when I have time next (maybe later this summer) im going to build a rolling work table to fit in the left-hand side of it. trying to maximize my work surfaces in a 2 car garage that also stores a jeep (thats perpetually in some state of disassembly), a riding mower, and all the **** that comes iwth having 2 kids... strollers, tricycles, bikes, etc etc etc...

edit: I forgot the 'this' part of my post...

bench.jpg
 

evan_880

Member
Joined
Nov 4, 2010
Messages
20
That came out really nice.
I like those Eagle boxes, they look great.


i copied your bench, so thanks for the inspiration!
yours looks much better.
i used the same tube inserts and feet from the company you got yours from also.

for the price you cant go wrong with those boxes. regular 799 on sale for 499 and i already had one with the top and bottom.
 

Gizzy

Well-known member
Joined
Jan 18, 2009
Messages
159
Location
NW Ohio
Here's my set up.Two CL Craftsman cabinets/benches bolted together.A quick coat of Rustolem saftey red.No high dollar stuff,I've got maybe $150 in everything.
 

Attachments

  • HPIM1029.jpg
    HPIM1029.jpg
    145.9 KB · Views: 767

Morrisman

Well-known member
Joined
Nov 7, 2006
Messages
424
Location
Angeles City, Philippines
Here's my old faithful workbench, built 15 or so years ago in the Philippines, then shipped to the UK when we moved a couple of years later. It lived there for 8 years, through 3 different 'shops, then 2 years ago it was shipped back to the Philippines with us and now sits in my new shop.

I've done so much work on this little bench, spent thousands of hours leaning over it, sweating, cutting, drilling etc.

It has become a dedicated drill bench now, and the vice will eventually go on the new big bench I'm planning.

If benches could talk, this one would have some tales to tell. :thumbup:

bcfdeca3.jpg


Some day soon these sacks of cement will be gone, and a big wide steel topped timber bench will sit under the window:

7b3f30c7.jpg
 

Maexle

Well-known member
Joined
Apr 9, 2012
Messages
900
Location
https://t.me/pump_upp
That's how the mess at the top of it looks right now (in the middle of my project - 1970 FLH shovelhead bulid....)
 

Attachments

  • work bench 2 old small.jpg
    work bench 2 old small.jpg
    85.5 KB · Views: 232

y2knole

Well-known member
Joined
Oct 25, 2010
Messages
83
added this touch to my new bench last night(plain plywood **** up the page)

bin-drawer1.jpg

bin-drawer2.jpg


used $10 worth of drawer sliders from home depot, and some bins that used to be on the wall... saves pegboard space for hanging tools and such.

since I had to have 2 sets of drawer sliders (to get two right hand slides) I think I'll do another one on the left hand side when these run out of room...
 
To avoid these ads, REGISTER NOW!
Top Bottom