To avoid these ads, REGISTER NOW!

Lets see your workbench

G20-Budo

Well-known member
Joined
May 31, 2013
Messages
987
Location
Chandler, AZ
Outstanding thread guys. Really enjoying all of the different designs and ideas for how to make cabinets (And what to make them out of).

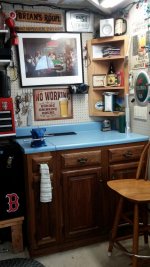
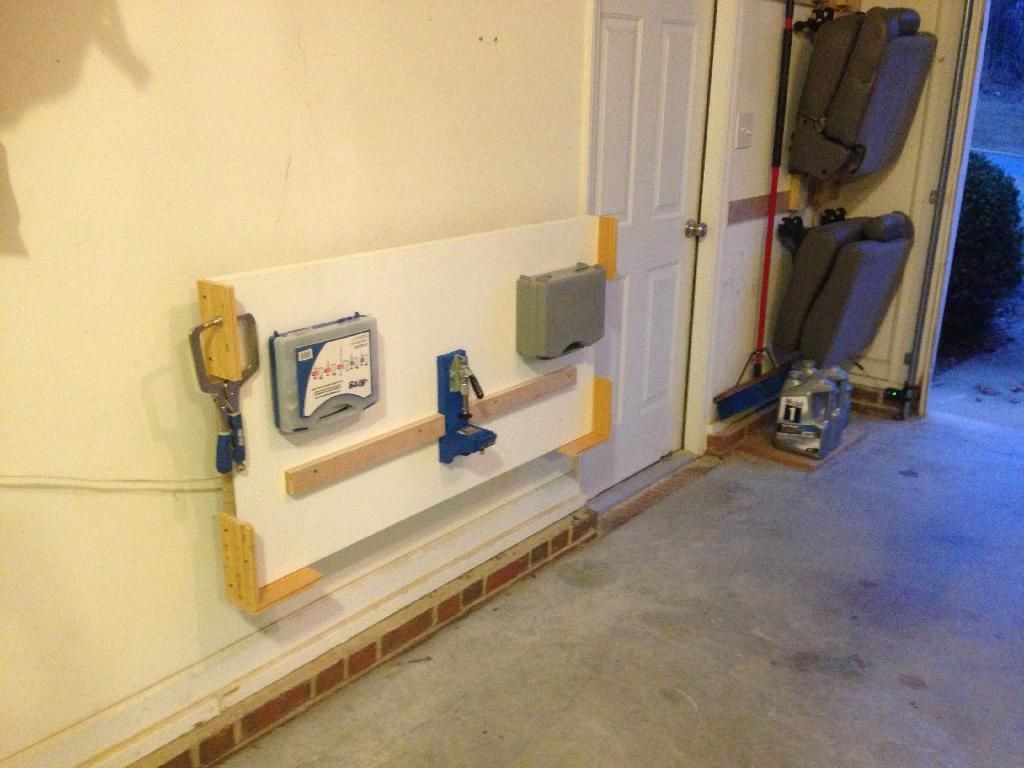
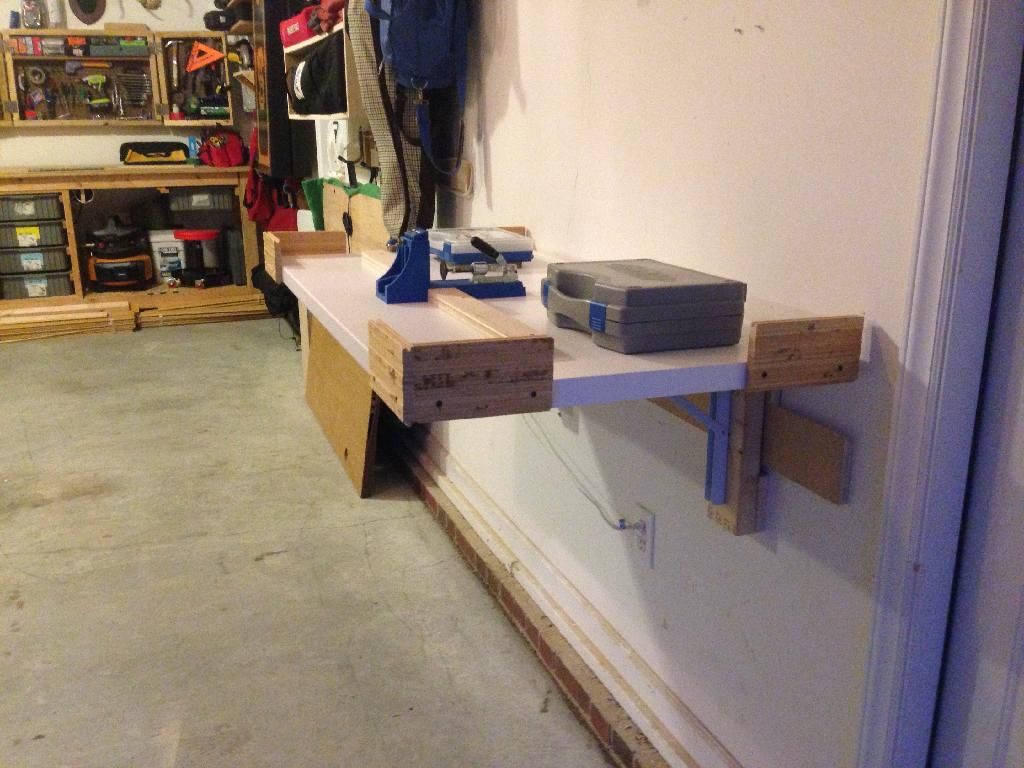
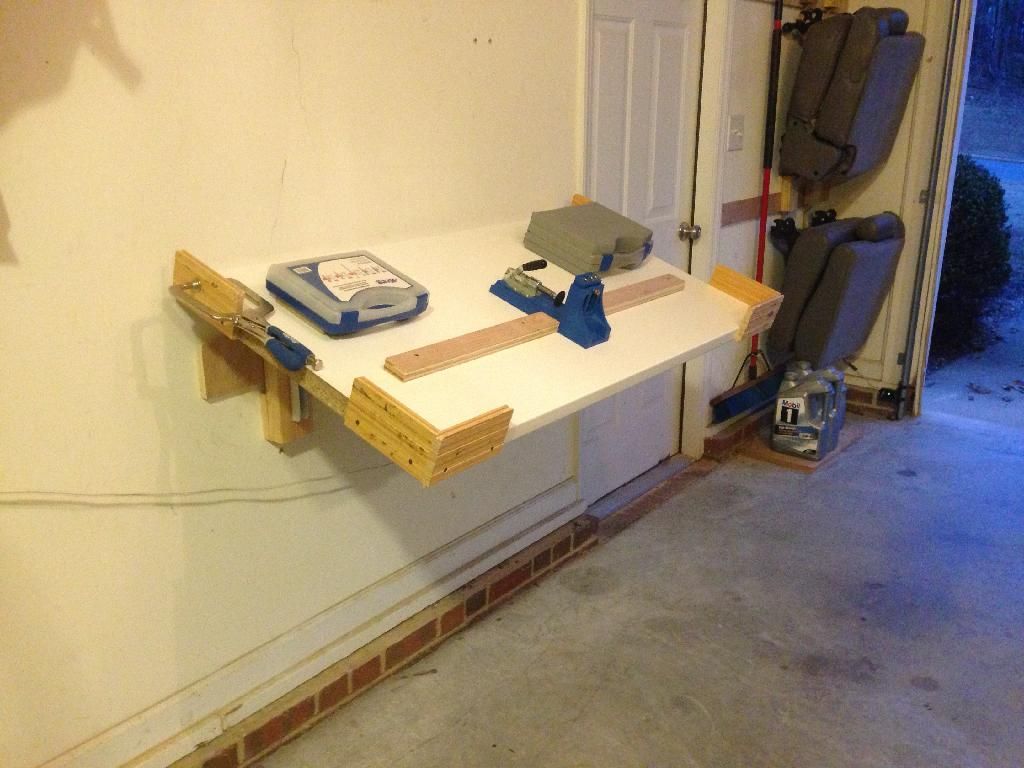
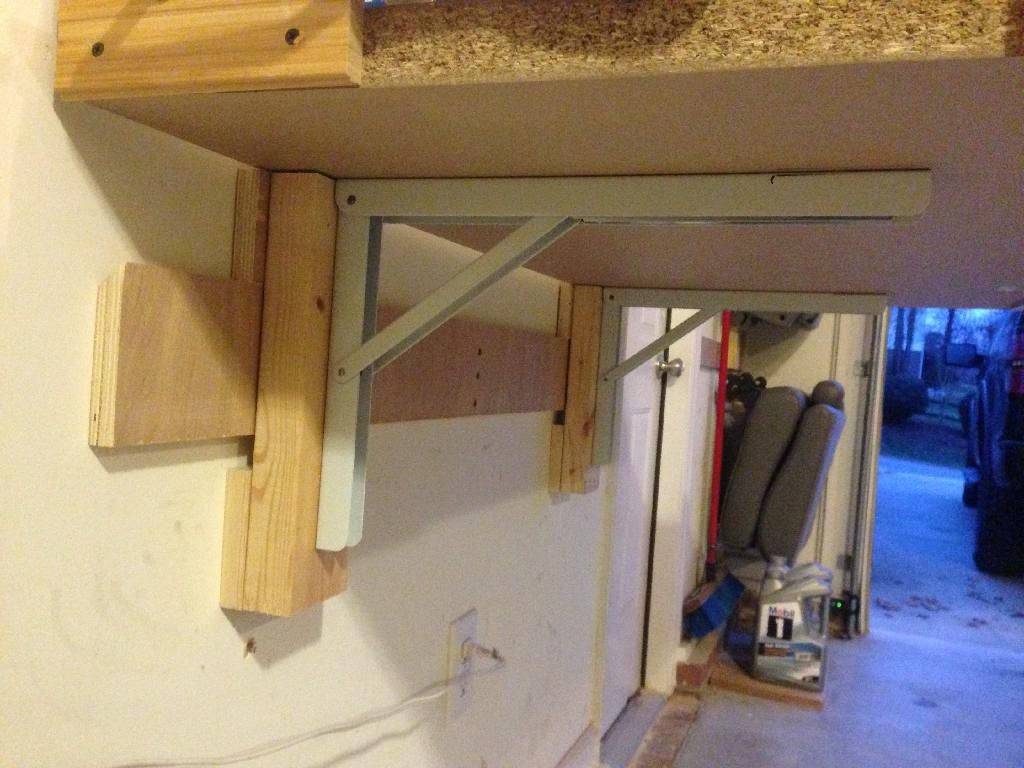
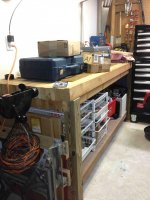
My bench is just some gorilla rack, some 2x4's for support and some decent sized pieces for MDF painted.
 
To avoid these ads, REGISTER NOW!

Mr.3-5-7

Well-known member
Joined
Jul 5, 2013
Messages
125
Location
Mesa, AZ
Well, when i built mine i was looking for just sheer strength. I think i accomplished that. The top is made out of two sheet of plywood. One OSB and the other is subfloor. Both have great spanning. I used a super strong subflooring adhesive and glued the two together.

Here they are sitting overnight with weight on them.

Untitled by gjktaylor, on Flickr

For the structure i used 2x6 and 4x4. The 2x6 was used as the ledger and skirt, 4x4 are the vertical supports. Used rabbit joints to fit it all together. And GRK screws to secure it all. I then mounted the vertical support legs into the concrete. This thing is a beast and nothing with make it come apart.

Before picture

DSC_0022 by gjktaylor, on Flickr

After

DSC_0031 by gjktaylor, on Flickr

Top close up

DSC_0028 by gjktaylor, on Flickr

Finished

DSC_0042 by gjktaylor, on Flickr
 

dave67fd

Well-known member
Joined
Apr 25, 2011
Messages
872
Location
Southern NH
Here's a few of mine. Will be replacing the blue top with hardwood at some point.
 

Attachments

  • DSC01216.jpg
    DSC01216.jpg
    126.7 KB · Views: 411
  • DSC01785.jpg
    DSC01785.jpg
    128.7 KB · Views: 633
  • DSC01964.jpg
    DSC01964.jpg
    135.3 KB · Views: 427
  • DSC02324.jpg
    DSC02324.jpg
    139.8 KB · Views: 479
  • DSC01212.jpg
    DSC01212.jpg
    131.4 KB · Views: 382
  • DSC01961.jpg
    DSC01961.jpg
    132.6 KB · Views: 452
Last edited:

jsharpphoto

Well-known member
Joined
Jan 1, 2014
Messages
450
Location
Dallas, TX
Combined four Craftsman cabinets that I got on sale in the fall with some bowling alley that I have been hoarding for a couple of years. Relatively light duty as the bench top "floats" on the the cabinets. Cut 3/4 inch plywood to fit the tops of the cabinets and then screwed it to the bottom of the bowling alley. Close fit of the plywood keeps the cabinets in the desired locations.

Retained the metal braces that were originally under the lanes to stiffen them but had to relocate a couple of them. Added 1" x 3" to the edges and gave everything five coats of polyurethane. Top weighs approximately 175 lbs. and the cabinets are about 100 lbs. each. Drawers are rated at 50 lbs each so once I get them filled, the bench total could approach 1400 lbs. That said, I'm still going to add a turnbuckle on an angle between the top and the back wall to keep everything from moving around.

you need to replace the fixed casters with fully rotating casters, or your bench will only roll straight.

I built a very similar bench out of a pair of 32 inch craftsman cabinets. I replaced all 8 casters with ones from Harbor Freight so they'd all match. Just take one of your existing casters with you so the hole pattern will match up.
 

wedge40

Well-known member
Joined
Oct 31, 2009
Messages
335
Location
Bloomington, IN
Well, when i built mine i was looking for just sheer strength. I think i accomplished that. The top is made out of two sheet of plywood. One OSB and the other is subfloor. Both have great spanning. I used a super strong subflooring adhesive and glued the two together.

Here they are sitting overnight with weight on them.

Untitled by gjktaylor, on Flickr

For the structure i used 2x6 and 4x4. The 2x6 was used as the ledger and skirt, 4x4 are the vertical supports. Used rabbit joints to fit it all together. And GRK screws to secure it all. I then mounted the vertical support legs into the concrete. This thing is a beast and nothing with make it come apart.

Before picture

DSC_0022 by gjktaylor, on Flickr

After

DSC_0031 by gjktaylor, on Flickr

Top close up

DSC_0028 by gjktaylor, on Flickr

Finished

DSC_0042 by gjktaylor, on Flickr

You're an elephant surgeon?
:bounce:
 

GCncsuHD

Well-known member
Joined
Aug 19, 2013
Messages
968
Location
Salisbury, NC
Great ideas guys, I'll be building two more soon so I'll be scanning this thread for ideas for a metal welding table and a heavier built wooden one for beating on.

Here is the one I just finished, this is my light duty/catchall/small project bench, just Home Depot unfinished cabinets that were on sale, a 10' laminate countertop from Lowes, on top of 3/4" OSB. I cut the toe-kicks off the cabinets and set the backs of them on the foundation wall, then used stainless steel legs on the front from Ikea for supports. Still some work to do, I'll be putting pegboard on the wall above the countertop, lights under the upper cabinets, and mounting a stereo in it. I'll probably just do an oil rubbed finish on the cabinets vs staining or painting them to keep the natural wood finish.

Concept

50 by wrfalcon75, on Flickr
Realization

Untitled by wrfalcon75, on Flickr

Untitled by wrfalcon75, on Flickr

Untitled by wrfalcon75, on Flickr
 
Last edited:

BrianL

Member
Joined
Oct 1, 2012
Messages
13
Location
Massachusetts (Central)
I built my bench prior to finding this site. But I have some great ideas for my garage bench build in the spring. Bench is 8' and attached to wall/studs as well as 2x4 legs on each end. I applied a toung oil finish, about 4 coats, after a light sand. Nothing too fancy.

This is just another work surface I have out there. A repurposed cabinet and counter top.
 

Attachments

  • workbench.jpg
    workbench.jpg
    140.5 KB · Views: 711
  • workbench1.jpg
    workbench1.jpg
    139.1 KB · Views: 620
  • worksurface.jpg
    worksurface.jpg
    150.2 KB · Views: 570
Last edited:

SpydyrWyr

Member
Joined
May 11, 2012
Messages
11
Built a pretty cool little flip-down workbench. It's a little larger than 24" x 48". I've got it set up as a pocket-hole drilling station and also for assembling ******** boards (hence the corner stops). It flips down nice and flat against the wall so it's completely out of the way when not in use. Corner stops are recycled bamboo flooring.

FBC0ED6A-4A68-4186-B445-7D98A68B852F_zpsdl8br5zc.jpg


8242A3A5-0B94-49DB-936D-3EF4D32446D5_zpsvldwbflc.jpg


The hinges even have intermediate locking locations so I an set it on an angle and use gravity to square everything up before clamping/assembling....

75E8B724-1265-4067-9462-D7113499B409_zpshk98fqfy.jpg


I put it on my french-cleat system so I can move it around really easily if my situation dictates a change in shop layout...

08B57FA5-D1EA-4E8B-9375-9B68A9D11603_zpshi8pavge.jpg
 

GCncsuHD

Well-known member
Joined
Aug 19, 2013
Messages
968
Location
Salisbury, NC
GCncsuHD

Too nice to work on! Very well done.

Thanks! But it's definitely not too nice to work on, it's nice having 10' of workspace for multiple small projects, coming from my old shop at my parent's house with only a 2'x4' rolling cart or a truck tailgate as a workbench is a welcome change. As I mentioned I'll be building a heavy wooden workbench to beat on, and a small welding table soon.
 

aosty

Well-known member
Joined
Jan 5, 2008
Messages
157
Location
west coast
The hinges even have intermediate locking locations so I an set it on an angle and use gravity to square everything up before clamping/assembling....

I put it on my french-cleat system so I can move it around really easily if my situation dictates a change in shop layout...

08B57FA5-D1EA-4E8B-9375-9B68A9D11603_zpshi8pavge.jpg

Cool idea using a French cleat.

Are those the K&V brackets? What are the intermediate position angles?
 

SpydyrWyr

Member
Joined
May 11, 2012
Messages
11
I got them from HomeDepot.com and they're listed as John Sterling Co. brand. I'm pretty sure they're identical to the K&V brand though (I saw those on Amazon). In addition to the fully folded 0 deg. and the upright 90 deg., they can lock in at 80 and 70.
 

Mr.3-5-7

Well-known member
Joined
Jul 5, 2013
Messages
125
Location
Mesa, AZ
You're an elephant surgeon?
:bounce:

No, but i have seen enough benches get flimsy over time. I wanted something that i could feel confident throwing an engine block on. Something that wont give when im really cranking on something in the vise.
 

Boatz22

Member
Joined
May 23, 2013
Messages
11
Location
Atlanta
My first post so I'm showing my old and my new workbench. The original is 30 years old made from construction lumber. The base on the new is 4" x 4" and 2"x4" steel tubing that I had powder coated. The top is 1 3/4" maple butcher block. It is sturdy and rock steady.
 

Attachments

  • Original.jpg
    Original.jpg
    140 KB · Views: 598
  • New_1.jpg
    New_1.jpg
    144.7 KB · Views: 718
  • New_2.jpg
    New_2.jpg
    133.1 KB · Views: 699

TheClaw

Well-known member
Joined
Dec 25, 2012
Messages
529
Location
Chicagoland
My first post so I'm showing my old and my new workbench. The original is 30 years old made from construction lumber. The base on the new is 4" x 4" and 2"x4" steel tubing that I had powder coated. The top is 1 3/4" maple butcher block. It is sturdy and rock steady.

Very nice! Welcome to the board.
 

Hpozzuoli

Well-known member
Joined
Dec 11, 2013
Messages
3,428
Location
Rhode Island
Here's my 2 work benches. One on either side. Hard to see with all the ****. The main one behind the box and cart is about 8ft and the smaller is 6ft. Sometimes the main one is clear and sometimes it's not. I use the tops of my boxes as benches as well.

The benches are all homemade. The top of the big bench is 3 inch thick butcher block salvaged from the high school where my dad taught auto repair.
 

Attachments

  • image.jpg
    image.jpg
    142.9 KB · Views: 673

G20-Budo

Well-known member
Joined
May 31, 2013
Messages
987
Location
Chandler, AZ
My first post so I'm showing my old and my new workbench. The original is 30 years old made from construction lumber. The base on the new is 4" x 4" and 2"x4" steel tubing that I had powder coated. The top is 1 3/4" maple butcher block. It is sturdy and rock steady.

Sweet bench!! :thumbup:
 
To avoid these ads, REGISTER NOW!

rallynova

Member
Joined
Apr 19, 2011
Messages
20
Location
washington st
<a href="http://s25.photobucket.com/user/bseghers/media/2713c_zps1effe9c1.jpg.html" target="_blank"><img src="http://i25.photobucket.com/albums/c51/bseghers/2713c_zps1effe9c1.jpg" border="0" alt=" photo 2713c_zps1effe9c1.jpg"/></a>
 

Djoz

Member
Joined
Jan 5, 2014
Messages
6
Location
Redmond
Here's a 6ft Craftsman workbench I scored on CL. After a saw how much the optional pegboard I decide to make on with scraps and painted it black.
 

Attachments

  • photo.jpg
    photo.jpg
    130.8 KB · Views: 496

OldracerJones

Well-known member
Joined
Jan 20, 2012
Messages
334
Location
Chico, Texas
Here's mine, heavily in use.


Sent from my iPad using Tapatalk HD
 

Attachments

  • ImageUploadedByTapatalkHD1391479831.344950.jpg
    ImageUploadedByTapatalkHD1391479831.344950.jpg
    90.3 KB · Views: 672

ShaneMSnyder

Well-known member
Joined
Dec 3, 2012
Messages
224
Location
Marysville, Washington
Here's a 6ft Craftsman workbench I scored on CL. After a saw how much the optional pegboard I decide to make on with scraps and painted it black.

I have the same CMan bench with the drawer module (which is really flimsy and ***** by the way) but the frame is nice and sturdy. The add ons are pretty spendy too but I like your DIY pegboard. :thumbup:
 

toolin' around

Well-known member
Joined
Feb 3, 2014
Messages
337
Location
Los Angeles, CA
Just finished my mobile welding bench. I had one similar in Australia, and I miss it.
3/8 plate top with vise and grinder, and 1/4 plate on the bottom for the welder, bottle, cut off saw and asst stuff.
Next job is a hinged frame on the vise end for the cut off saw that puts it level with the bench top, and folds down when not in use.
pe4e6ezu.jpg
putary4u.jpg
4uremady.jpg
 

coyotejake

Well-known member
Joined
Dec 18, 2013
Messages
93
Location
Washington state
Nice! I want to make a 'grind cart' for my cut-off saw, grinder, and scotchbrite deburr wheel that I can wheel out into the driveway (keeping all that grit out of my garage and off my other tools). Your simple design is inspiring!
 

Toofast28

Well-known member
Joined
Feb 6, 2014
Messages
207
I'm in the middle of building this bench for my garage, it'll get finished this weekend. 8ft L x 30" D x 38" H. 10 ga steel top, .125 steel everywhere else. Removable vise, electrical outlet, lighting overhead (needs to be added still), gets doors in each of the three openings and is on wheels. ImageUploadedByTapatalk1391706382.848659.jpgImageUploadedByTapatalk1391706401.064853.jpgImageUploadedByTapatalk1391706410.797433.jpgImageUploadedByTapatalk1391706421.348101.jpgImageUploadedByTapatalk1391706434.730965.jpg
 

Chicago_one

Member
Joined
Feb 6, 2014
Messages
11
Location
Chicago
Hey guys, new member here. First home, first garage, first bench.
I was planning to build one specific to the space but I found this one for $40 and couldnt pass it up. Ill be replacing the peg board, which is why its sitting on the top.

I'll be building my garage this spring / summer. I'll be sure to share pics of that...


TheClaw

Well-known member
Joined
Dec 25, 2012
Messages
529
Location
Chicagoland
Hey guys, new member here. First home, first garage, first bench.
I was planning to build one specific to the space but I found this one for $40 and couldnt pass it up. Ill be replacing the peg board, which is why its sitting on the top.

I'll be building my garage this spring / summer. I'll be sure to share pics of that...


Welcome aboard. You'll love the home ownership gig.

I'm out in the western 'burbs.

Jeff
 

weedsnager

Well-known member
Joined
Aug 12, 2013
Messages
46
Location
St John, In
Hey guys, new member here. First home, first garage, first bench.
I was planning to build one specific to the space but I found this one for $40 and couldnt pass it up. Ill be replacing the peg board, which is why its sitting on the top.

I'll be building my garage this spring / summer. I'll be sure to share pics of that...


At the rate were going in Chicago right now it'll be June before spring gets here in chi town !
 

SockeyeSummer

Well-known member
Joined
Nov 9, 2012
Messages
103
Location
The 49th State
Here's mine I just finished in my new shop. 22 ft. Total length. All framed with 2x6's with 3/4" plywood top (for now, I'll see how it holds up). The four foot leg where the vice is has 3/16" steel plate surface.
Sorry about the dark pic.
 

Attachments

  • image.jpg
    image.jpg
    64.1 KB · Views: 390

spazzer

Well-known member
Joined
Apr 18, 2006
Messages
270
Location
Central Valley, California
Picked this up on Thanksgiving off CL. $75.

The vise will go on a different bench, I don't want to drill holes in this one.
 

Attachments

  • IMG_20131224_162128_596.jpg
    IMG_20131224_162128_596.jpg
    56.4 KB · Views: 309
  • IMG_20131224_162214_677.jpg
    IMG_20131224_162214_677.jpg
    54.4 KB · Views: 254

jeepsrbetter

Active member
Joined
Aug 6, 2010
Messages
37
Location
Lafayette, CA
Here is my recently completed "Stevo" workbench. It is 3 Harbor Freight 44" cabinets set inside a steel frame with leveling feet. It has a butcher block top across 2/3 of it and a 1" steel plate over the last 1/3. I wanted the frame to look like it could have come out of an old shop (hence the FOMOCO tool chip riveted to it) and could have been offered by Craftsman in the 1950's (hence the riveted Craftsman Badge). I have 4 1950's era steel kitchen upper cabinets to refinish and hang above the bench still. I apologize for the clarity/distortion of the pictures, my cell phone is pretty beat up.

-Jacob


bhays

Well-known member
Joined
May 15, 2006
Messages
293
Location
Southern Indiana
Very nice work on that, Jeeps... love the detail with the craftsman and ford plates. Here's my current setup, couple of the Home Depot cabinets and two layers of 3/4 plywood with a galvanized metal cover for a top. I may go back and build it out with a frame SteveO style this summer, but for now the top just sits on a cleat on the wall on the back and on the cabinets in the front. It serves the purpose.
ImageUploadedByTapatalk1391983140.969924.jpg
 

Sims5

Well-known member
Joined
Dec 20, 2013
Messages
423
Location
Mount Vernon, OH
bhays. Did you fasten the two boxes to each other? I was thinking about two HF 44" together and changing the casters to 2 fixed and 6 swivel type.
 

fullthrottle24

Well-known member
Joined
Oct 22, 2010
Messages
367
Location
Ohio
Here is my recently completed "Stevo" workbench. It is 3 Harbor Freight 44" cabinets set inside a steel frame with leveling feet. It has a butcher block top across 2/3 of it and a 1" steel plate over the last 1/3. I wanted the frame to look like it could have come out of an old shop (hence the FOMOCO tool chip riveted to it) and could have been offered by Craftsman in the 1950's (hence the riveted Craftsman Badge). I have 4 1950's era steel kitchen upper cabinets to refinish and hang above the bench still. I apologize for the clarity/distortion of the pictures, my cell phone is pretty beat up.

-Jacob

Nice work, great color and attention to detail.
 
To avoid these ads, REGISTER NOW!
Top Bottom