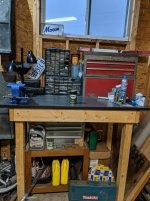
I took this image a while back to show how I use a strap from the ceiling to work on bikes in my basement shop, but it gives an overall look at its layout at the same time.
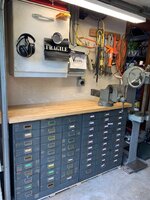
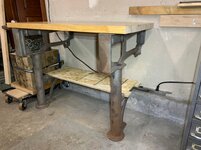
These cabinets are 1940s-era laboratory cabinets, bought for $5 each in the 1980s when the research institute where I started my career was remodeling. I have five of them, and would happily have more. I've reinforced the drawers on most of them to hold a good amount.
Those cabinets, by the way, were an early Steevo application. The institute had home-built uprights made from flat and angle iron. They supported the lab bench. These cabinets slipped in underneath. I had a few of the uprights, too -- left them in my garage in central Ohio thirty years ago as part of the workbench I built. (I need to see if they're still there and get some dimensions and photos.)
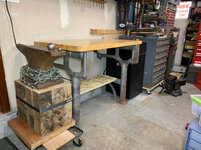
I'm a big fan of a central island. I have one in my basement, in my garage (another one of these cabinets) and I've designed it into the several industrial laboratories I've had over the years.


")