tulenutn2o
Active member
- Joined
- Dec 21, 2010
- Messages
- 42
I would, but that would involve cleaning it first!


Thanks. How do you like the dragon fire unit? Worth the 3K?

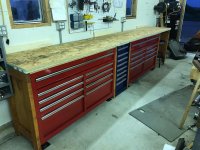
The ones in the above pictures are all Newage. On the other side is a Bendpak 2 post lift and a DragonFire bench.
Not yet. It's been on my to-do list for a few months now. Depending on my free time I may do a build thread and put together a video of all the short build clips I took during the process and a final reveal.
Pft, get back to me when you have doubles and even triples and still can't find it. LOL

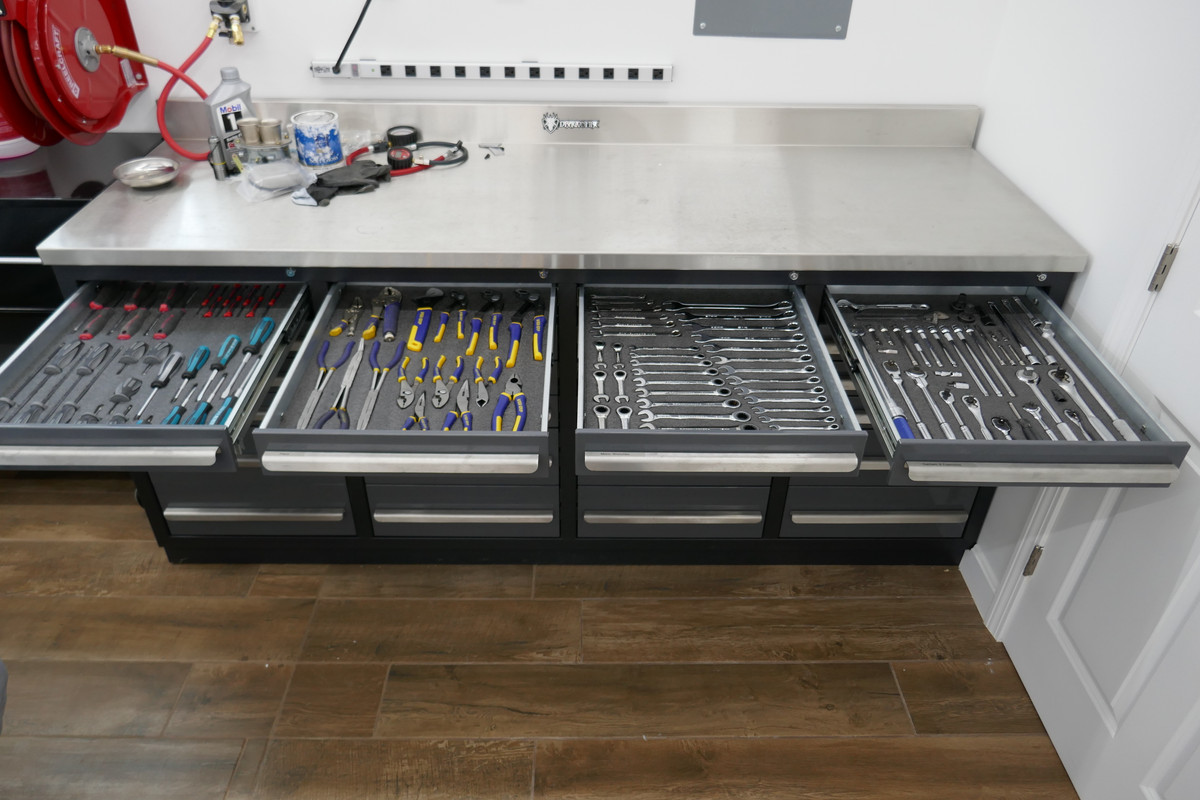
Really nice tool organizing there... Could you share what kind of foam you've used for this ? It does look really good and I'm looking at different options.
Thanks,
Hey all,
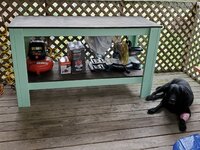
Love seeing all the great work benches and thought I would share one I just built from almost all scrap wood.
The top is an old counter top a friend gave me and the drawer handles are some old wrenches I had laying around along with some old bolts from my yard art 48 Ford truck.
Enjoy
Love it, worth the $ in my opinion. The wheels I bought with it make it a little too high so I had to remove those.
Off topic: Your avatar looks like my cobra.


Schurtjl
Coupla questions on your bench, please:
How much do the items weigh that you are gonna work on the bench?
I don't have any set weight, but it will literally hold anything I want to put on there.
What drove you to build an 11' bench? -- looks like you have plenty of room for an even longer one.
Unless I wanted to use two pieces for my metal top, I was limited by the length of material the metal brake at the fab shop could handle. I prefer to have several benches around the shop, instead of just one big one.
With the strength of the wood you used, why did you choose to place a pair of legs in the middle of your bench? -- what is the rule of thumb for determining when/where to include intermediate legs?
Probably wouldn't have needed the middle legs. I tend to overbuild things.
If you had built a longer bench than 11', when and where would you have added another set of legs? (I guess this kinda rephrases the previous question.)
Did you consider putting the bench on castors?
No, I wanted it to sit solidly on the ground. I have a forklift to move it around if needed.
How did you determine the 37" height?
That was the height of the workbench at my previous house, and I liked it. It's high enough that I don't need to lean over to work on things. I'm able to comfortably sit on a stool with my legs underneath it. I don't think I would want it any higher though.
TIA -- Craig
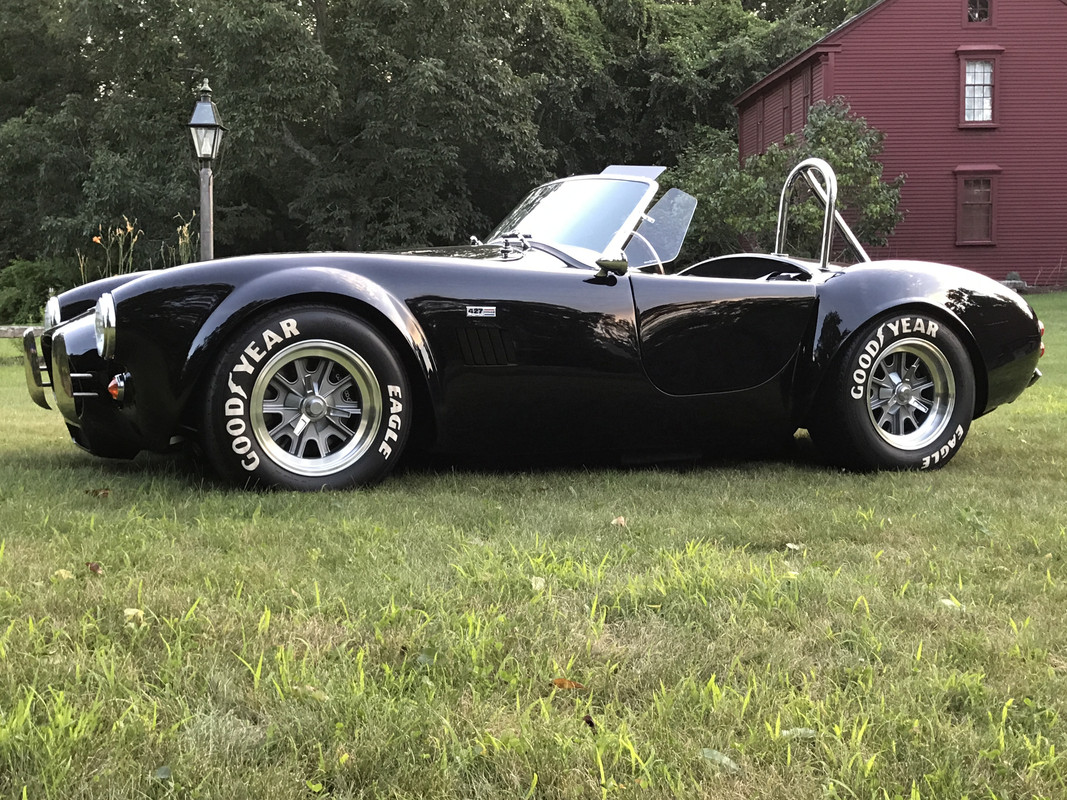
Nice ... FFR? Mine is a BDR Saphire Black with Blk Stripes. 427 with IR Injection.
IR injection? More info please? Is that what that huge belt drive is for?
Nice ... FFR? Mine is a BDR Saphire Black with Blk Stripes. 427 with IR Injection.
 Thunder, do you use an air cleaner on that setup? Or just make it a point to not drive through dust storms?
Pro 3.0 - I have both in my garage. I couldn't fit the Pro 3.0 lockers in a specific spot (36" wide) so bought the Bold (30" wide) and they cosmetically match my Pro 3.0 uppers well but the thinner gauge of steel metal is immediately obvious and they feel far less nice to open and close the doors.Newage Pro 3.0 or Bold?
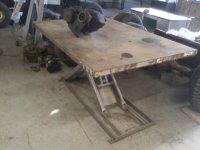
Still need to get a top bent up for it. Then it’s just a matter of time until it’s covered in ****!! Lol
Damn, both you & StRacerDuke...both beautiful machines!
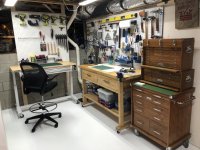
You'll see in the upper right hand corner of the bench the base of a cheap drill press, with just the table. Best thing ever: ideal for soldering/manipulating small things, for holding something upright, ...
Still need to get a top bent up for it. Then it’s just a matter of time until it’s covered in ****!! Lol
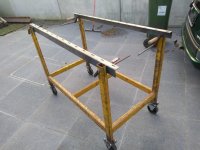
KING NERO: did you make the top of your rolling cart/workbench? is that 4x4's glued together and did you plane the wood or sand it?
nice looking and guess you might need a second one.
You won't regret it! Just for your info, here's another shotGreat use of that DP base and table. Makes me wanna take the drill head off the column of mine right now. [emoji106]
")
KING: I hear you on how some projects take a while to get to the finish line.

I finished up this bench last week, except for paint. The frame is made from leftover jack posts and angle iron that was in the garage when we moved in, the top is a 2-1/2" thick piece of bowling alley. I'm undecided on what color to paint the legs, but I'll just leave them oiled steel for now.


My OCD is killing me- those pictures need shifted about 8" to the left
Haha ironically the left picture is right in line with the edge of the work bench, it's just the perspective of the shot. Note the left edge of the picture in line with the shelf end above it:My OCD is killing me- those pictures need shifted about 8" to the left

My OCD is killing me- those pictures need shifted about 8" to the left