jeffmoss26
Well-known member
bonus doggo!!


Sent from my SM-N960U using Tapatalk
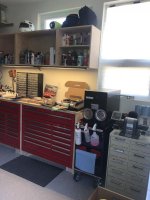
My OCD is killing me- those pictures need shifted about 8" to the left")

My OCD is killing me- those pictures need shifted about 8" to the left

But you can see the hangers. And they are spaced differently on each picture.Guys, I promise, it's straight in line!!! I even went out to the garage to double check...
That's because I put those hangers on the studs... and since the pictures were not centered on studs, I had to custom measure each one and do the math to correctly locate the pictures left/right. I can OCD with the best of us!!But you can see the hangers. And they are spaced differently on each picture.

Guys, I promise, it's straight in line!!! I even went out to the garage to double check...
Men, on a garage forum, debating picture placement
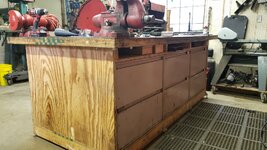
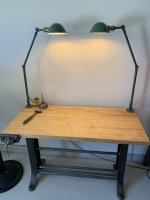
King Nero: thanks for posting the extra picture showing me (us) your frame as you were beefing it up to put on that thick wood top. great bench!!
Men, on a garage forum, debating picture placement
I am so going to make all my stuff crooked when I post pics! And I will be sure to clock all of my hex head bolts differently too.

I am so going to make all my stuff crooked when I post pics! And I will be sure to clock all of my hex head bolts differently too.
Also rotate all the screws on the electric trim plates at random jaunty angles!
I am so going to make all my stuff crooked when I post pics! And I will be sure to clock all of my hex head bolts differently too.
Maybe mix phillips, straight, and hex bolts in the same bolt pattern for good measure?
The level that hangs above my workbench is intentionally askew. If anyone asks, I tell them that is how you are supposed to store levels. I then explain that, just like you wouldn't store a torque wrench under tension, you don't store a level in a perfectly level position otherwise it'll lose its calibration. I'm getting better at saying it with a straight face, so much so that I'm probably around 50-50 with getting people to believe me when I tell them that.
Starting to come together
Sent from my iPhone using Tapatalk

Latest phase of mine.
Soon to come will be to elevate the parts washer to bench height and aim for as close as I can to get it to perfection through plywood. Wood top will be painted black there too. It’s almost too much for me to get this all cluttered up so it’s an easy battle to clean up nightly and plan for the next day I be out there.
Right now I am doing up my air manifold system along two walls, bench will see 4 quick disconnects the length of it.

Is that a toolbox-drawer cling-on on the front of your fridge? If so, that's awesome
Bdbecker, it is also important to re-set your digital torque wrenches to zero so they don't lose their calibration.The level that hangs above my workbench is intentionally askew. If anyone asks, I tell them that is how you are supposed to store levels. I then explain that, just like you wouldn't store a torque wrench under tension, you don't store a level in a perfectly level position otherwise it'll lose its calibration. I'm getting better at saying it with a straight face, so much so that I'm probably around 50-50 with getting people to believe me when I tell them that.
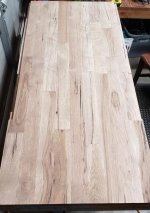
Finished up my 4ft workbench build this weekend(single car garage space).

Finished up my 4ft workbench build this weekend(single car garage space).