smalltown
Well-known member
Looks like my garage cleaned up !


It's here somewhere... I promise...

I appreciate WordMan’s honest workbench pic. Many of our benches look like that. Projects accumulate, time gets tight, other distractions occur, and we have to put down that tool or box or bag or part somewhere. Next thing you know, your work surface is buried! My workbench looks covered like that much more often than clean and tidy.
PS: That pick of the green wastebasket stacked on that 5 gallon buck to hold your socket tray is classic. I find myself doing that sort of thing frequently.
Thank you for posting up!
Love this quote!It's not a workbench if there's no room to do any work...Otherwise it's just a big shelf.

I am so going to steal that idea for the router mount. I've been lusting for a good idea on my 10" Cman saw:


 This looks like a great solution to a common problem...
Ho Lee Chit! Awesome!I have completed my main workbench in my dream shop, The ASYLUM, and I think it is finally worth sharing. The full story of the planning, evolution, and final building of it can be found here: Asylum Workbench Story
It was a long time in the making (15 years to be exact), but this area of the shop is finally finished.

This 3-photo series shows how the rolling island workbench “docks” underneath the stationary pedestal bench.


With the matching bikes…


Shopnut - that's pretty insane but appropriate for the Asylum.
Shopnut: THAT’S NUTS!! In a very impressive way!
Ho Lee Chit! Awesome!
Sent from my SM-G975U using Tapatalk
Shopnut,
Good to see you are still around. Your place looks great. A little too clean but great. Lol.
I agree, does it ever get dirty from actual use?
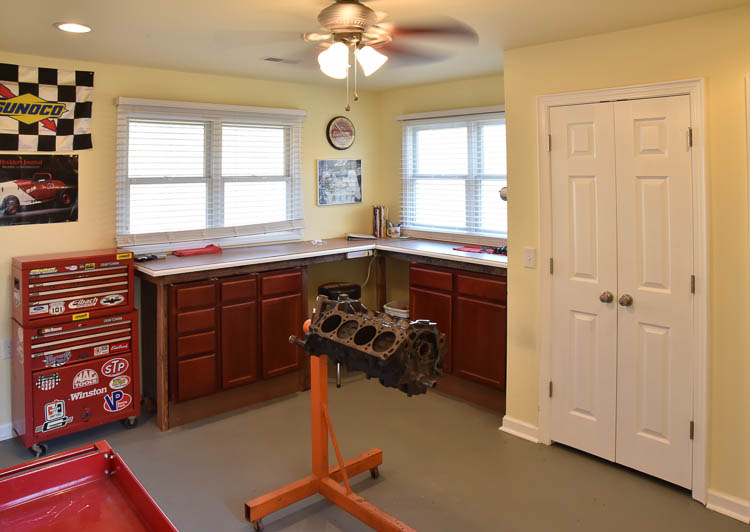
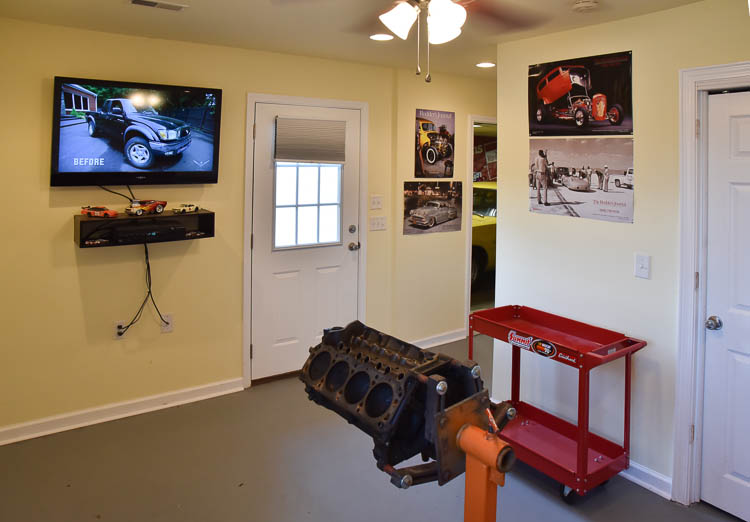
Work in progress here.
We moved in just over a month ago and I have about 16hrs into this humble bench build so far. If anyones interested, I have alot of progress / build photos. Next steps are upper cabs, electrical and pegboard tool storage.
Before / Current
PS: how do you post photos within the actual post here? The thumbnail images attached are quite frustrating to click on and view imo. Thanks,
Paul
^

That fix couldn't be simpler to make right...But it will take a little more time now to take the TV back down.
Or to go real fancy...But the $3 method above works just as well.

That’s an interesting bench set up. Kinda cool but what’s on the other side of the wall?
Sent from my iPhone using Garage Journal
Work in progress here.
We moved in just over a month ago and I have about 16hrs into this humble bench build so far. If anyones interested, I have alot of progress / build photos. Next steps are upper cabs, electrical and pegboard tool storage.
Before / Current
PS: how do you post photos within the actual post here? The thumbnail images attached are quite frustrating to click on and view imo. Thanks,
Paul

Thanks guys! Glad you like it.
Yep, still around. I took a couple years off from the Journal to get married and along with that came three wonderful step-daughters. So needless to say, I didn't have too much shop time available. But lately, time is more readily available and projects are getting finished again.
You need to come down and visit again... a lot has probably changed since you last visited!
I'll be the first to admit, I've probably spent more time working ON the shop than working on projects IN it during the early years of the Asylum build. But its ALL fun to me and it keeps me out of trouble. The shop was built with a goal in mind... to be equipped the way I need/want it for my projects and to be a joy to be in while working on said projects. Its nearly there!!
The shop is finally transitioning over to being a working garage lately as i want to have all my bikes running again. The Yamaha RZ350 (the black and yellow bike in the pictures above) needed a full teardown after leaking gas internally and totally pitting engine bearings during a 8 year storage period (bad on me for not draining the gas!!)
We hope to be down there in the summer after our sons graduation. If so I will contact you. Thanks.
Preface: This is not intended to be an attack on any individual, it is just a general comment for the group to consider.
I propose that comments related to cleanliness of someone's workbench/workspace and how much work they actually get done no longer be entertained in this thread. I'm not saying we should make a rule or delete posts, but can we all agree to just ignore them when they are posted? Passing judgement on someone for having a tidy workspace is pointless and doesn't add any value to this thread.
Different strokes for different folks - some like a tidy workplace, some don't care. Neither is right or wrong, its all a matter of what works for you.
I have completed my main workbench in my dream shop, The ASYLUM, and I think it is finally worth sharing. The full story of the planning, evolution, and final building of it can be found here: Asylum Workbench Story
It was a long time in the making (15 years to be exact), but this area of the shop is finally finished.
This 3-photo series shows how the rolling island workbench “docks” underneath the stationary pedestal bench.
With the matching bikes…
We hope to be down there in the summer after our sons graduation. If so I will contact you. Thanks.
Its hard to not take offense to this statement since the comment in question was a simple poke at Shopnut and his very well put together creation. I will not post demeaning comments to someone with out making it well known I am joking, like an LOL.
I only wish I had a clean shop.
Thanks for the kind words! Occasionally I do step back and reflect on how far this place has come over the years. And all the sweat, tears, and beers that went into it! LOL.Wow that’s amazing, just take a step back and be proud of that.
Tool Junkie!!!
Its hard to not take offense to this statement since the comment in question was a simple poke at Shopnut and his very well put together creation. I will not post demeaning comments to someone with out making it well known I am joking, like an LOL. I only wish I had a clean shop.
...It's likely the reply following yours that prompted bdbecker's request. The one that seeming suggested I never use my shop...
It was not a response to your post AK. I'll add that it wasn't just the other post either, its a culmination of similar, previous posts.
 20201013_174050 by Jon S, on Flickr
 20201013_173935 by Jon S, on Flickr
Added 4x8' of workbench w/ zero impact on floor space.
Ho Lee Chit! Awesome!
Sent from my SM-G975U using Tapatalk
LOL that is my screen name on video games. but i spell it Chet.
Shopnut, is your crane swing arm attached to a steel support beam or ??? and does it whack your clock when swung out.
my money is that it triggers a switch (most likely yellow and black) that ***** the clock into a hidden compartment out of the way.
looks great! really like how it lines up to your existing bench alsoAdded 4x8' of workbench w/ zero impact on floor space.
That's really nice. I am actually looking at doing something similar. What connections did you use for the swivel legs?
looks great! really like how it lines up to your existing bench also
![20201003_120342[1].jpg](/forum/data/attachments/887/887903-43f98f23feb1d73481addd5d16df17bb.jpg)
![20201003_120418[1].jpg](/forum/data/attachments/887/887938-18715118deebf38a9088ebea1ca0c082.jpg)