To avoid these ads, REGISTER NOW!

Lift modifications Thread- Lets see them!

TerryH

Well-known member
Joined
Dec 8, 2012
Messages
2,248
Location
Springdale, AR
1764816558462.png

Whats going on with the steering rack mounted so far back?

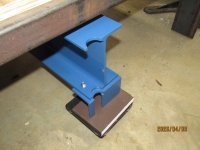
It's a center steer rack from RRS (Revelation Racing Supply) out of Australia. 2.5 turns lock to lock. The rack bolts in the same locations as the original steering box and pitman arm and uses the stock Maverick inner and outer tie rods. The front and rear suspension is all from them. Strut front with reinforced control arms, C5 Corvette brakes. Rear is a 3 link/torque arm with QA1's, Wilwood brakes. The 9" is located with Mumford links instead of a panard bar or watts link. 3 extra crossmembers that stiffen the car significatly. And it all bolts into the car. The crossmembers all have big doubler plates inside the floor. You can see the added front torque arm crossmember in the pic in the original post. The other 2 reinforce the floor for the coilovers in the rear and mount the Mumford links. It's a pretty wild setup.

Link to the RRS website

54629469862_47d2f0844f_b.jpg

54962920045_d3a86d8099_b.jpg
 
To avoid these ads, REGISTER NOW!

racecougar

Well-known member
Joined
Jan 26, 2021
Messages
4,971
Location
Missouri
Ah frame cars, we call those trucks here ;)

Not sure the DMV would agree with that statement. I know MO doesn't offer 18k plates for my Skylark.

IMG_1834.JPG


I have a piece of thick c channel I use across the tops of the jackstands if needed.
That certainly can work if you have suitable locations where the frame rails are the lowest component.

I'm all about finding ways to get by, but I'll say that after a year of sketchy lifting using the jack tray, I went to bridge jacks, and my only regret is that I didn't do it sooner.
 

Paul_VR6

Well-known member
Joined
Dec 27, 2012
Messages
300
Location
Oxford, Pa USA
Bit tongue in cheek as the only things out here that have frames that aren't rusted out are trucks!

Agree on the bridge jack, definitely worth having!
 

TerryH

Well-known member
Joined
Dec 8, 2012
Messages
2,248
Location
Springdale, AR
Reminds me of a old GM N-body center take-off R&P.
Might be for clearance issues with the front sump oil pan.

Not sure of his train of thought but it does work to clear the rather large Champ T pan. And it uses the OE maverick inner and outer tie rods.
 

Diesel Dan

Well-known member
Joined
Jul 21, 2013
Messages
2,457
Location
TN
Not sure of his train of thought but it does work to clear the rather large Champ T pan. And it uses the OE maverick inner and outer tie rods.
It'd take some out of the box thinking to get a power R&P on my Monza too.
 

Restomod68

Well-known member
Joined
Nov 12, 2017
Messages
64
There's some really interesting and clever ideas here! I especially like some of the adapted lifting hoists on the 4-posters. That gives me some ideas.

Something I didn't see here (unless I missed it) was alternative uses for a 4-post for work space. Anyone with a small shop/garage repurpose a 4-post lift for a liftable work and/or storage space with a work bench? I have been thinking about something like this until I get a new shop built. Would be a little clunky to step UP to, but if you're desperate for space, it could serve as a great flexible option.
I know for my lift, Advantage sells a solid Deck mod for multiple options, boats, ATV, Mowers, storage space.


Skellyii

ALLIANCE MEMBER
Joined
Nov 13, 2021
Messages
1,698
Location
KC Area
I know for my lift, Advantage sells a solid Deck mod for multiple options, boats, ATV, Mowers, storage space.

Jeez!

At that price, I would think I could either make my own, or have a local shop create one for less.
 

marquess

Member
Joined
Apr 4, 2016
Messages
16
I'll do a second post for the gantry beam, as I can't figure out how to load a second photo in the desired order.
Make that a third post while I revisit that first post that didn't survive posting. My text commentary was that I made some swivel adapters for when you can't quite get the lift arms past an obstruction like a tire. One pair is shown in that photo.
 

marquess

Member
Joined
Apr 4, 2016
Messages
16
Third post for second lift mod. I made a gantry beam for over 10' of lift clearance. It sits on the top of the lift carriages. I store it on two little rolling dollys and for installation use the lift arms and slings to pick the beam up high enough to sit on a pair of stepladders (the 4' orange ones in the photo). I then drop the lift arms and pivot the beam ends over the top of the carriage weldments one at a time:

beam.jpg
 

gregs

Well-known member
Joined
Mar 16, 2007
Messages
1,577
Third post for second lift mod. I made a gantry beam for over 10' of lift clearance. It sits on the top of the lift carriages. I store it on two little rolling dollys and for installation use the lift arms and slings to pick the beam up high enough to sit on a pair of stepladders (the 4' orange ones in the photo). I then drop the lift arms and pivot the beam ends over the top of the carriage weldments one at a time:

beam.jpg
How do you have it attached at each end?
 
To avoid these ads, REGISTER NOW!

FTG-05

Well-known member
Joined
Oct 11, 2012
Messages
1,515
Location
TN
Third post for second lift mod. I made a gantry beam for over 10' of lift clearance. It sits on the top of the lift carriages. I store it on two little rolling dollys and for installation use the lift arms and slings to pick the beam up high enough to sit on a pair of stepladders (the 4' orange ones in the photo). I then drop the lift arms and pivot the beam ends over the top of the carriage weldments one at a time:

beam.jpg
Pics of the i-beam connection to the lift carriages?

Thanks for posting!
 

sjvicker

Well-known member
Joined
Aug 9, 2014
Messages
600
Location
SW Washington
If anyone has this style of lift with the detent in the sides, here is how I mounted unistrut on mine to hang utilities.

on the top the unistrut is bolted through the bottom bolt of the upper post assembly.

On the bottom its secured with a 1/4-20 bolt that is below the carriage when its all the way down.

IMG_0167.jpeg

IMG_0168.jpeg
 

cpakalolo

Active member
Joined
Mar 30, 2026
Messages
43
AS the person that started this thread....I ask that we please keep this on topic.

I am not trying to argue if mods are safe or are not. I am just trying to document the mods that people have done. The direction of this thread is starting to turn in toward that ugly place that many internet forums tend to go and I want to prevent that.

So if you have mods, whatever they are, please post pics here. If folks want to debate those mods, please open your own thread.

Now let's get back on track folks with some photos. :thumbup::thumbup:


Now I have used quite a few 2 post lifts in my days. I used to build custom cars and trucks for a living to include custom suspensions (static and air) as well as complete custom paint. I am not a stranger to the 2 post lift at all. I also used them at the auto shops on base during my service to the USA while fixing my own vehicles.
I make no claim that 2 posts are not safe in general. I just want to see all the things folks are doing to theirs and hopefully have a one stop thread for all things lift modification.
I signed up to this forum specifically to look at other people's mods. We can learn from both good and bad advice if we know the difference. Thanks for your starting of this thread.
 

cpakalolo

Active member
Joined
Mar 30, 2026
Messages
43
Great idea.
I feel that the extra bracing up high is very valuable. The top rail stabilizes the need for the two towers to lean toward each other. If you braced the top, it could be braced in the fore-aft direction too. A little bracing up high can make one a little more confident in their lift.
 

dante2

Well-known member
Joined
Dec 27, 2011
Messages
478
Location
Central OK
Third post for second lift mod. I made a gantry beam for over 10' of lift clearance. It sits on the top of the lift carriages. I store it on two little rolling dollys and for installation use the lift arms and slings to pick the beam up high enough to sit on a pair of stepladders (the 4' orange ones in the photo). I then drop the lift arms and pivot the beam ends over the top of the carriage weldments one at a time:

beam.jpg
How good does everyone think this would work with a pallet rack beam and at most 200lbs? A little bracing on the ends to keep it from tipping to one side or the other and it already have the overhang to drop into the carriages.
 

marquess

Member
Joined
Apr 4, 2016
Messages
16
How do you have it attached at each end?
Pics of the i-beam connection to the lift carriages?

Thanks for posting!

Sorry, I only now noticed these questions. Oops. I see there is a "receive email notifications" option that I have just now enabled.

The beam is held in place by gravity only. There are two flanges bolted on to positively retain the beam ends on top of the carriage weldments, as shown in the two photos below (taken with the beam in its usual resting place on dollys under my welding table). The semicircular cutouts are clearance for the hydraulic hose fittings on the hydraulic rams.

The separation between the two carriages varies about 3/16" from fully down to fully up, so I had to plan the distance between the two flanges very carefully (which is why they are bolted instead of welded). As it happens I got it exactly right on the first try.
 

Attachments

  • beam-1.jpg
    beam-1.jpg
    272.8 KB · Views: 32
  • beam-2.jpg
    beam-2.jpg
    277.3 KB · Views: 33

marquess

Member
Joined
Apr 4, 2016
Messages
16
How good does everyone think this would work with a pallet rack beam and at most 200lbs? A little bracing on the ends to keep it from tipping to one side or the other and it already have the overhang to drop into the carriages.

I would do a beam calculation; there are online calculators for standard size I, box, and channel beams. Just plug in your beam type, the span, the load location (point load at center of beam). I don't remember which one(s) I used, but there are many to choose from.

A commercial pallet rack beam for a comparable span can probably handle quite a large point load in the center, several thousand pounds, but it's easy enough to check.

Make sure the parts that hang into the carriage weldments don't hang up on anything anywhere during the carriage travel. After my first test fitting I had to enlarge the semi-circular cutouts to avoid any risk of contacting the hydraulic fittings. With a heavy load the beam could easily have broken a fitting off, which would have been fun as well as making a big mess.

Also keep in mind the total weight of the beam, as with my design I have to muscle it around a little getting it on and off. The lift won't care but you might. I had to pass up some prospective beams as too heavy.
 

zaius

Member
Joined
Aug 19, 2024
Messages
18
Stupid question: For those screwing on outlets onto their lift posts, what did you use to drill out the hole through that thick metal plating?

Any special bit or will a standard carbide work without much slipping? Did you guys use self tapping screws afterwards or nut/bolts?

Thanks
 

TurnipTruck

Well-known member
Joined
Aug 28, 2005
Messages
1,550
Location
Southcentral Alaska
I used ordinary hss drill bits and drilled and tapped for 1/4-20 bolts so there wouldn’t be any protrusion inside, and I took additional care to stay out of the path of the carriage bushings. The post steel isn’t anything special.
I suppose that fine thread self tappers designed for thick metal would work, IF you took care to snap off the excess length.
 

grabeb

Well-known member
Joined
May 28, 2021
Messages
197
I have a 4 post, so I used sticky double sided tape and put it up under the ramp. Then zip tied the cords up neat.
 

dante2

Well-known member
Joined
Dec 27, 2011
Messages
478
Location
Central OK
got a 3.5 inch on my hemi right now and its dialed. way better than the 2 inch i had before. makes a huge difference for clearance and the ride feels way better too. hellcat one is sitting on something ridiculous but thats just for show lol. what lift you running?
1775771059122.jpeg
 
To avoid these ads, REGISTER NOW!
Top Bottom