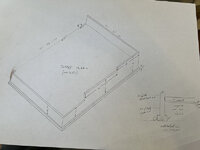
drivesitfar
Well-known member
i just found this thread and want to follow along or read what you did if it's already raised and re built.


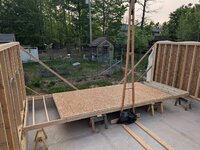
Haha. They could also be called old boy courtesy jacks!In the film industry, we call those ”Fat Boy Courtesy Jacks”, all of our walls are built on them. There’s no reason to work on the floor when 24 inches is so much more comfortable!
Well, you aren’t wrong. I have worked around a familiar group for 40 years. Over the years our coolers have shifted through beer-gator aide-vitamin water- pedialite and we’re in the ensure range now!Haha. They could also be called old boy courtesy jacks!
It'll be a while. My slab won't be poured before the first week of May... hopefully no later.i just found this thread and want to follow along or read what you did if it's already raised and re built.
This is exactly how I just built a 28 ft addition on the back of my shop. Sheathed the 10 ft 2x6 walls after. Too old for heavy lifting.I know this is 180 degrees outside of methods being discussed here. I have built many buildings, solo, over the years. I toenail the 4 corner posts to the bottom plate, brace them. Same with a stud 16' from each corner. Install the top plate and fill each stud in place vertically. Work around all 4 walls. Sounds cumbersome but it goes pretty quick- nail all tops on one wall first, than get down and toe in the bottoms, next wall , etc.
No time spent building lifts or temp platforms to equal hgt of stem wall. No extra equip to buy. Yes I have to sheath after, but that's only 1 pc at a time too. If there are any framing errors you can correct before sheathing.
In the end working solo you may spend no more time on it.
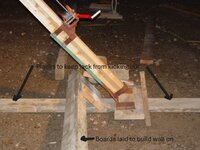
So you stabilized the ground connection with wood back to the other stem wall?Here's how I did mine:
Close up of jack base. Normally it would be nailed to a wood floor.So you stabilized the ground connection with wood back to the other stem wall?
That is very interesting. I am impressed with the pivot/hinge on the base of the jack timber. And mounting the winch "sideways" eliminates my concern that cranking the winch as the top plate passes would cause an interruption.Close up of jack base. Normally it would be nailed to a wood floor.
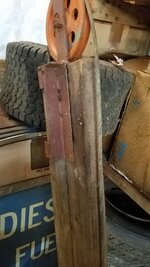
Thanks. Can you tell me about the top of the jack timber? Is there a pulley? what did you use to make sure the cable worked around 180 degrees?Not laminated,just standard 2x4's.
That was my thinking. I just wondered since they are pretty cheap. I'll search for something more suitable.My experience with garage door pulleys... computer says no.
I'll get some pictures of it for you later today.Thanks. Can you tell me about the top of the jack timber? Is there a pulley? what did you use to make sure the cable worked around 180 degrees?
I'm thinking about old garage door cable pulleys. Though they are not rated very highly I think I could easily add two or three additional bolts to hold it together. Not a good idea?
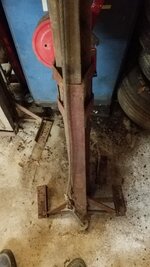
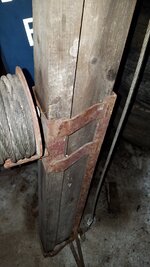
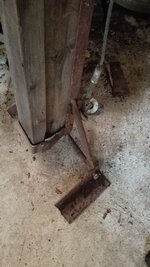


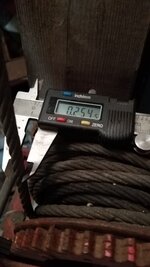
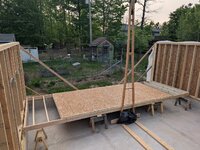

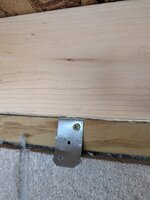
I ended up using three blocks. That plus regular old 8’ 2”x6” studs in a 30’ section of my garage and ten foot 2”x6’ studs in a 24’ wide portion gave me a ten foot ceiling i a 30’ wide part of the garage and a 12’ ceiling in a 24’ wide portion of the 32’ x 54’ garage so a lift would work. (We actually used full length members instead of stud length. That coupled with the sill and top plate gave me a few mor inches of height.)I guess a follow-up to my question might be...
I won't have a slab or block stem wall built until May. Should I go with one block high instead of two? What purpose does the block serve? I expect my ceiling will be higher inside the garage and the blocks will protect the sole plates from moisture. Otherwise is there really a need? I can still redesign that part. Actually the whole garage!
Thanks, Tim
Thanks. Not really an original idea of mine but I did tweak it a bit. I've found the 18"ish tall saw ponies to be very useful in many ways.Very interesting method. Very creative.