dmcintosh
Well-known member
I've learned a ton already to help me with my garage build. So let me just say thanks to everyone for their insight and willingness to share.
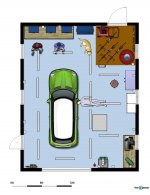
A quick recap of my project. Built a 24' x 30' pole building with a 10' ceiling to replace a 12' x 18' shed. Planning to use this to work on/restore my 1966 Chevelle Wagon. The concrete will be 'painted' with Rust Bullet in the next day or so I can start my electric. Planning to install a 60 amp subpanel.
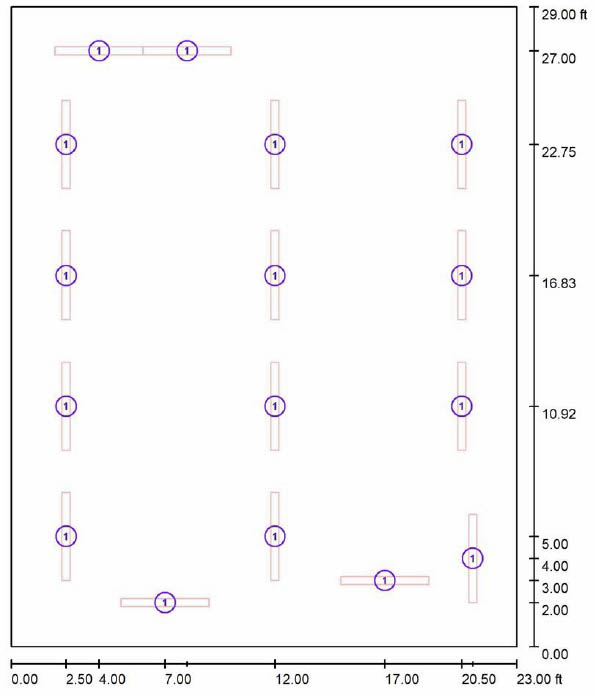
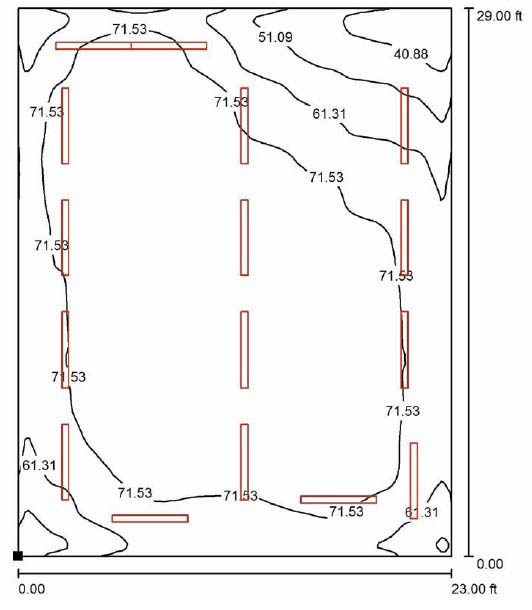
Been working on lighting ideas and would like some input. From what I've already learned, I am planning to use fluorescent strip lights (T8) probably Lithonia from HD since they are easy to get and the price is not bad. Any ideas on the layout? In addition to the main lighting I may also add lights directly over the work benches and equipment if it is too dark.
A quick recap of my project. Built a 24' x 30' pole building with a 10' ceiling to replace a 12' x 18' shed. Planning to use this to work on/restore my 1966 Chevelle Wagon. The concrete will be 'painted' with Rust Bullet in the next day or so I can start my electric. Planning to install a 60 amp subpanel.
Been working on lighting ideas and would like some input. From what I've already learned, I am planning to use fluorescent strip lights (T8) probably Lithonia from HD since they are easy to get and the price is not bad. Any ideas on the layout? In addition to the main lighting I may also add lights directly over the work benches and equipment if it is too dark.