OP

You are using an out of date browser. It may not display this or other websites correctly.
You should upgrade or use an alternative browser.
You should upgrade or use an alternative browser.
Logan 922 ca.1951 Restoration
- Thread starter OldeTimeEtc
- Start date
OP
OldeTimeEtc
Well-known member
OP
OldeTimeEtc
Well-known member
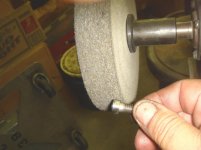
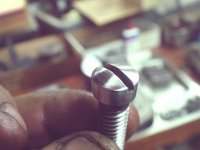
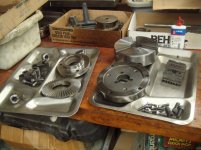
I then set about cleaning up all the screws. The allen head ones just need some light cleaning up with my stainless wire wheel. The slotted screws I cleaned up and then polished the heads to give it a nice finished look. It should be noted there is a benefit to polished metals....the polished surfaces not only look more professional and cosmetically pleasing but also tend to help resist rusting.
Attachments

OP
OldeTimeEtc
Well-known member
OP
OldeTimeEtc
Well-known member
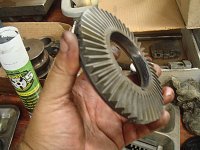
Now assembly begins. First I took the scroll and applied a small amount of chuck grease only to the center and outer edge where it turns against metal. I then applied some oil in the scroll channels and gear teeth. Same with the pinion gears.....just some light grease where they turn against metal and oil on the gears. Then I installed all the parts keeping in mind the marks I made for the pinion gears so as to return them to their original place.
Attachments

Last edited:
OP
OldeTimeEtc
Well-known member
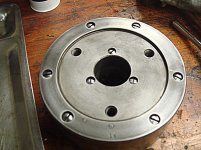
Now the housing goes together with all internal parts installed. The housing fit snug so I had to tap them together using a rubber mallet. Once together I installed all the screws. Then on went the spindle mounting plate.
Attachments


OP
OldeTimeEtc
Well-known member
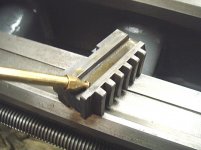
I then took the chuck and mounted it on the lathe....mainly so I could install the master jaws and top jaws. The lathe made a handy holder for this purpose. The master jaws I gave a squirt of oil in the necessary areas then installed them by 1-3.....turning the scroll as I installed one after the other in number order. Once done next came the top jaws returning them to their assigned numbers. A little squirt of oil on the top jaws where they mount then tapped them onto the chuck and tightened on the allen screws. then checked the whole assembly to make sure everything turned nice and no binding. I gave the chuck several open and closed turns to also make sure the oil and grease got worked in.
Attachments


Last edited:
OP
OldeTimeEtc
Well-known member
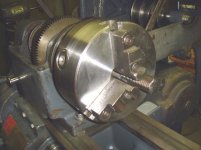
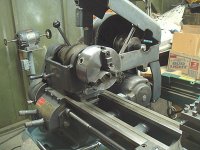
OP
OldeTimeEtc
Well-known member
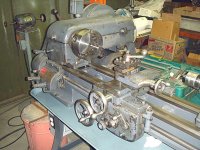
The finished Lathe....nearly complete. All that's left to do is wait for my new flat belt and then make a few adjustments and finish cleaning the front cone pulley and spindle hole. Then I can check/test if everything cuts straight.
Attachments

Last edited:
OP
OldeTimeEtc
Well-known member
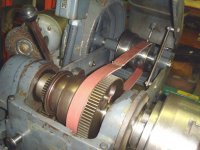
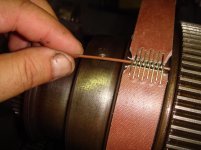
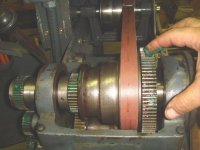
New flat belt came in the mail today so tonight i set about installing it. Pretty easy installation....just wrap it around the pulleys and while holding the 2 ends together, insert the pin that comes with it, take about 1/4" on each end and bend the ends up then cut off the excess.
Attachments



OP
OldeTimeEtc
Well-known member
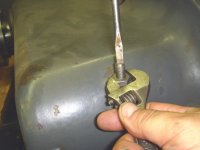
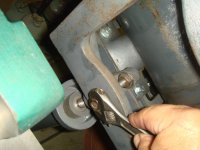
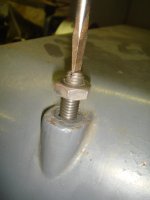
On the back end of the drive housing under the cover is Logan's "auto tensioner" (added a drop of oil to the top of the lower pin and a touch of grease to bottom of the lower pin where it pushes down on the counterbracket) which pivots the back counterbracket and pulley back when the heavy housing cover is lowered closed.....tightening the drive belts. Its a pretty simple design. You just need to remember to leave the cover open when not using the lathe so to save stretching the belts when unnecessary which also loosens them for changing belt pulley speeds. The adjustments screws are located on the top back of the cover (flat belt) and just straight below that is the adjustment screw for the v belt. Just tighten the jam nuts to lock your adjustments.
Attachments

Last edited:
OP
OldeTimeEtc
Well-known member

OP
OldeTimeEtc
Well-known member

OP
OldeTimeEtc
Well-known member
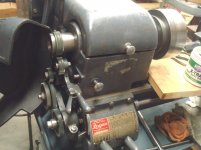
I then double checked to make sure everything worked on the head stock including the back gear, quick change gear assembly and the carriage.....both forward and reverse. Everything worked fine.......once I do a little cleaning on the head stock pulley I'll do a test run to see how straight it cuts then make adjustments accordingly.
As an added note: I hear some guys don't like the "clicking noise" the clip makes on the flat belt......maybe its the belt material but this runs nice and smooth and this "clicking " noise is almost non existent.....in fact I have to really listen to hear it. Pretty quiet in my opinion.
As an added note: I hear some guys don't like the "clicking noise" the clip makes on the flat belt......maybe its the belt material but this runs nice and smooth and this "clicking " noise is almost non existent.....in fact I have to really listen to hear it. Pretty quiet in my opinion.
Attachments

Last edited:
OP
OldeTimeEtc
Well-known member
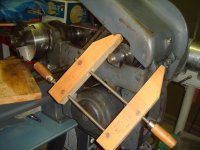
Now that the Lathe is running I can finish the last task I need to do. Clean up the front cone pulley and spindle. I first had to find a way to keep tension on the belt while the cover is open so I could use the lathe itself to spin the pulley for cleaning up. So I came up with this temporary set-up to keep tension on the belt.
Attachments
OP
OldeTimeEtc
Well-known member
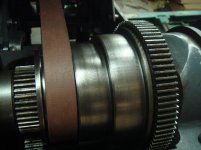
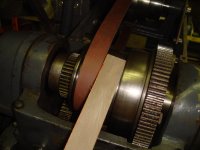
I then set the spindle on a minimal speed in reverse and turned the machine on. Although Ive used some methods I wouldn't recommend especially to amateurs the risks are my own but to keep others from mimicking me I choose to show only safer methods whenever possible. To clean the front pulley using the machine's power I would use a sanding stick with fine sandpaper attached to keep my hands away from the running parts and running it in reverse keeps anything from flying back at me. Then I would tape, glue or staple some scotchbrite wrapped around another stick to finish it. Now I have a nice clean brighter satin finished pulley. This was a very minimal job...anything a lot worse and one would have to remove the spindle and pulley for cleaning.
Attachments


Last edited:
OP
OldeTimeEtc
Well-known member
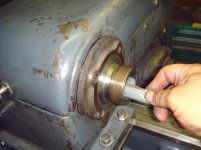
Once the pulley was cleaned up then I removed the clamp and closed the lid returning the Lathe auto tension to normal. Once I removed the chuck, I then took a piece of doweling and wrapped some very fine sandpaper around it and used that to clean up the surface rust inside the spindle while it spun under the machine's power.
Attachments



harleybuilder
Well-known member
I love it when someone takes the time and care to bring old tools/machinery back to life and usability. ..... you have done a wonderful job. ...