To avoid these ads, REGISTER NOW!

Long needed change...

Conn'swhiterose

Well-known member
Joined
Jun 11, 2011
Messages
75
Location
Calgary AB Canada, 3rd rock from the sun
Well I guess it's my turn to post a thread of my new garage build. I've been working overseas for the last 7 years and during that time I have not really had the need to have a larger work/storage area for my stuff. As a result my old 14X20 was crammed as well as a 20X22 that I have been renting just down the back alley from our house, not to mention the things I have stored in my brother's garage...:bounce:
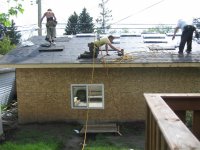
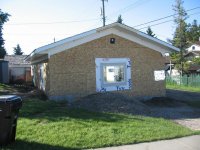
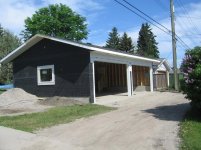
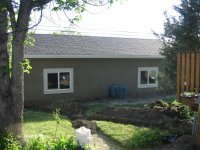
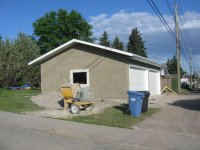
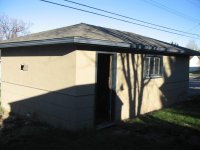
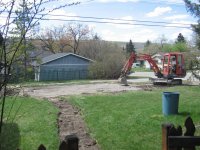
So I've returned home now and decided that enough is enough. I demo'd the old garage ( surprisingly heartbreaking- many many hours spent in there) and broke ground to put up a 36X22 in hopes of regaining my sanity. That's the max size that I can put up according to city regs.
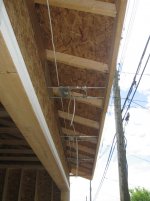
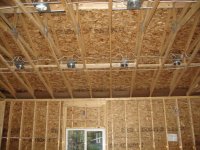
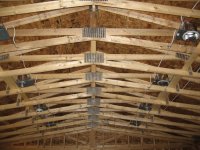
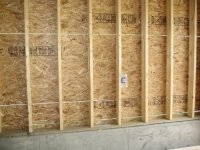
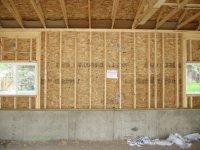
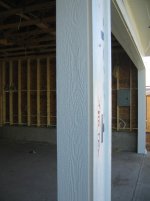
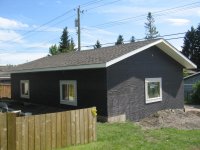
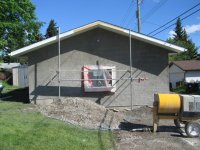
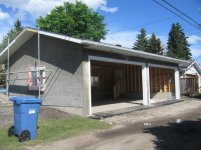
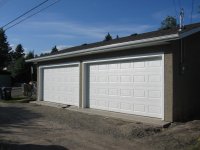
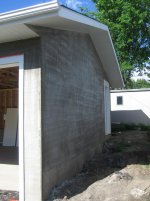
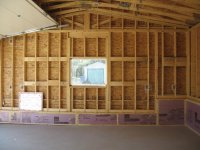
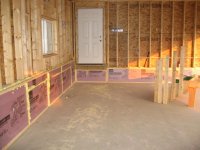
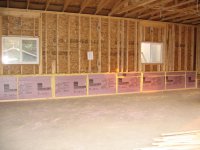
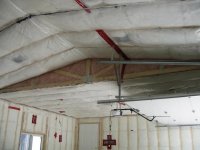
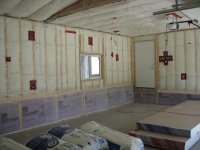
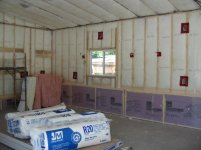
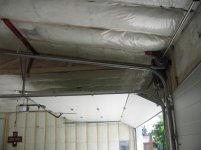
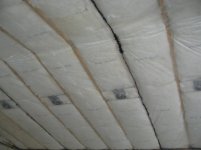
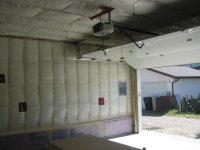
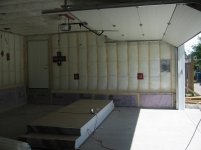
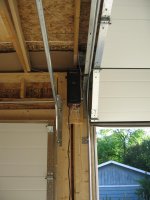
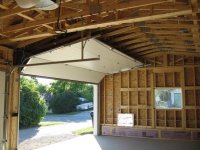
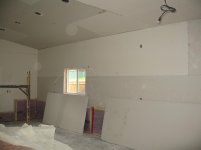
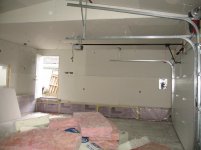
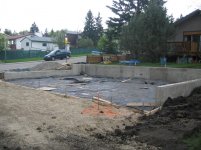
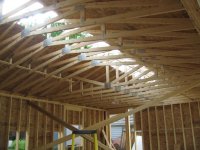
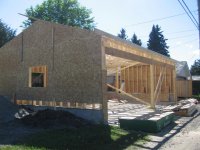
I'm an avid MOPAR and HD nut, so this is going to be home for the toys as well as a workshop. The building is a reverse gable (36 foot wall is the entrance) with 2 16'X8' doors. Construction is 2X6 walls supported by a 3 foot retaining wall in the rear and 2 foot retaining walls on each side, with 10 foot walls (another city max). I'm splitting the bays equally, one side with standard trusses and the other with scissor trusses to accommodate my new 2 post rotary lift...
So that's about it for now, I'll start posting pics of the demo and build....

Cheers everyone....have a great long weekend..

Happy Canada and Independence Day!!!

:beer:
 

Attachments

  • Old garage and maple tree removal.jpg
    Old garage and maple tree removal.jpg
    146.1 KB · Views: 125
  • Another shot of the old girl.jpg
    Another shot of the old girl.jpg
    137.1 KB · Views: 107
  • It's demo time !.jpg
    It's demo time !.jpg
    142.4 KB · Views: 117
  • Garage, meet excavator...jpg
    Garage, meet excavator...jpg
    142.7 KB · Views: 112
  • OUUUCH!.jpg
    OUUUCH!.jpg
    146.6 KB · Views: 131
To avoid these ads, REGISTER NOW!

mudhog

Well-known member
Joined
May 20, 2011
Messages
357
Location
south Bygod Texas
I bet that was fun knocking down that old garage but it's going to be even better to be under control on how the new one goes up, and how everything is going to lay out. "mopar and HD" it don't get much better then that. thats like an instant man card.
 
OP
C

Conn'swhiterose

Well-known member
Joined
Jun 11, 2011
Messages
75
Location
Calgary AB Canada, 3rd rock from the sun
I bet that was fun knocking down that old garage but it's going to be even better to be under control on how the new one goes up, and how everything is going to lay out. "mopar and HD" it don't get much better then that. thats like an instant man card.

Thanks mudhog.......spent lots of time in Houston, Dallas/Ft worth (work AND play)...you guys know how to live....

It was fun to take down the old one knowing what the future holds!!

Glad to hear you like Mopar and HD...here`s a couple of pics for `ya...:rocker:
 

Attachments

  • IMG_4635.jpg
    IMG_4635.jpg
    144.7 KB · Views: 55
  • IMG_3337.jpg
    IMG_3337.jpg
    152.3 KB · Views: 76
  • IMG_3414.jpg
    IMG_3414.jpg
    152 KB · Views: 61
  • IMG_3520.jpg
    IMG_3520.jpg
    147 KB · Views: 54
OP
C

Conn'swhiterose

Well-known member
Joined
Jun 11, 2011
Messages
75
Location
Calgary AB Canada, 3rd rock from the sun
Well I've finally got some time today to update this thread with some more pics.

While trying to get the dirt work and concrete in place we had about a month of rain, so we got really good at tarping! The benefit of course, was it helped with the curing process after we finally got the floor poured.
 

Attachments

  • Breaking ground 3.jpg
    Breaking ground 3.jpg
    151.1 KB · Views: 60
  • Breaking ground 2.jpg
    Breaking ground 2.jpg
    151.5 KB · Views: 59
  • Breaking ground 1.jpg
    Breaking ground 1.jpg
    148.8 KB · Views: 61
  • Rough grade complete 1.jpg
    Rough grade complete 1.jpg
    144.9 KB · Views: 63
  • Rough grade complete 2.jpg
    Rough grade complete 2.jpg
    148.7 KB · Views: 56
OP
C

Conn'swhiterose

Well-known member
Joined
Jun 11, 2011
Messages
75
Location
Calgary AB Canada, 3rd rock from the sun
Here's some pics of the cement work....

I didn't take pics of the footings being poured..not sure why :headscrat
The footings were poured first and then the retaining wall on top as a second pour...the floor and apron went in about a week later in a single pour...3/8" rebar, 16" on center.
 

Attachments

  • Footings and retaining wall3.jpg
    Footings and retaining wall3.jpg
    145.5 KB · Views: 81
  • Footings and retaining wall2.jpg
    Footings and retaining wall2.jpg
    150.3 KB · Views: 78
  • Footings and retaining wall 1.jpg
    Footings and retaining wall 1.jpg
    145.6 KB · Views: 76
  • Pouring floor 1.jpg
    Pouring floor 1.jpg
    150.2 KB · Views: 1,291
  • Pouring floor 2.jpg
    Pouring floor 2.jpg
    150.5 KB · Views: 91
  • Floor and Apron complete.jpg
    Floor and Apron complete.jpg
    147.1 KB · Views: 93
OP
C

Conn'swhiterose

Well-known member
Joined
Jun 11, 2011
Messages
75
Location
Calgary AB Canada, 3rd rock from the sun
Next was framing and sheathing, and we finally got a break in the weather so it went up quick...nice change with the slow start.
 

Attachments

  • Framing 3.jpg
    Framing 3.jpg
    147.6 KB · Views: 65
  • Framing 2.jpg
    Framing 2.jpg
    147.6 KB · Views: 78
  • Framing 1.jpg
    Framing 1.jpg
    151.7 KB · Views: 66
  • Framing 4.jpg
    Framing 4.jpg
    146.8 KB · Views: 65
  • Framing 5.jpg
    Framing 5.jpg
    148.4 KB · Views: 69
OP
C

Conn'swhiterose

Well-known member
Joined
Jun 11, 2011
Messages
75
Location
Calgary AB Canada, 3rd rock from the sun
More framing and sheathing....note that half of the trusses are standard and the other half are scissor, for the new lift!!!:thumbup:
 

Attachments

  • Sheathing completion 2.jpg
    Sheathing completion 2.jpg
    141.6 KB · Views: 83
  • Sheathing completion 1.jpg
    Sheathing completion 1.jpg
    145.4 KB · Views: 64
  • Sheathing and trusses 2.jpg
    Sheathing and trusses 2.jpg
    148.2 KB · Views: 67
  • Sheathing and trusses 1.jpg
    Sheathing and trusses 1.jpg
    145.1 KB · Views: 71
  • Standard and Scissor trusses 1.jpg
    Standard and Scissor trusses 1.jpg
    145.8 KB · Views: 67
  • Standard and Scissor trusses 2.jpg
    Standard and Scissor trusses 2.jpg
    138.8 KB · Views: 63

Kevin54

MEMBER EMERITUS
Joined
Jan 12, 2005
Messages
29,341
Location
Urbana, Ohio
attachment.php


Garage looks good, but one question....did they pull the rebar up into the concrete or just leave it on the ground?
 
OP
C

Conn'swhiterose

Well-known member
Joined
Jun 11, 2011
Messages
75
Location
Calgary AB Canada, 3rd rock from the sun
Next was the electrical rough in...

Our house was built in 1952, so it has a 100 amp service which was not nearly enough for our garage plans...so we opted to run a 100 amp service in the garage and "sub" the house off of the garage. Somewhat costly but without it the garage project was dead in the water. So we ran the new service in the garage and trenched a new feed to the house including the cable tv and telephone services (to eliminate all overhead connections to the house).

The exterior rough in consists of 8 exterior pot lights mounted in the soffitt, two GFI exterior 100 receptacles and two motion sensor security lights.

The interior consists of:
11 110V receptacles
4 220V receptacles
8 interior pot lights for the vaulted ceiling side
10 4ft flourecent light fixtures. 6 overhead for the standard ceiling side and 4 wall mounted on the vaulted side ( extra lighting while there is a vehicle on the hoist- blocking the pot lights)
1 cat5 comms connection

here's some pics to add to this.....
 

Attachments

  • main to house.jpg
    main to house.jpg
    149.2 KB · Views: 78
  • Main feed to house.jpg
    Main feed to house.jpg
    143.6 KB · Views: 72
  • Lighting panel.jpg
    Lighting panel.jpg
    146.3 KB · Views: 96
  • Exterior pot lights 1.jpg
    Exterior pot lights 1.jpg
    147.9 KB · Views: 77
  • Exterior pot lights 2.jpg
    Exterior pot lights 2.jpg
    134.3 KB · Views: 90
  • Exterior pot lights 3.jpg
    Exterior pot lights 3.jpg
    135.6 KB · Views: 70
To avoid these ads, REGISTER NOW!
OP
C

Conn'swhiterose

Well-known member
Joined
Jun 11, 2011
Messages
75
Location
Calgary AB Canada, 3rd rock from the sun
cant say ive ever seen a window header framed like that...interesting.

Good eye!!!

Me either actually, just trying something different this time around. There's still 2 2x6 plates above the window, just sandwiched together instead of the second running flush with the wall studs.

The thought is for better/easier insulating above the window(s) -trying to avoid any sweating issues, as the garage will be heated.

I'm really not sure that it'll make a big difference either way??:dunno:
 

twostory

Well-known member
Joined
Dec 23, 2005
Messages
554
Location
Duluth, Georgia
The thought is for better/easier insulating above the window(s) -trying to avoid any sweating issues, as the garage will be heated.

I'm really not sure that it'll make a big difference either way??:dunno:

I put a 1/2 inch foam board between my 2x6 headers. This provides a thermal break, and makes attaching the sheet rock easier.

Looks good so far...
 
OP
C

Conn'swhiterose

Well-known member
Joined
Jun 11, 2011
Messages
75
Location
Calgary AB Canada, 3rd rock from the sun
Back with more updates for you guys..

Next was shingles, soffit, facia and trim out the doors and windows. We used a product that was new to us, maybe not to you guys? "Smart board or Smart trim" which is a super solid MDF product with raised wood grain-like pattern on it. You can literally pound this stuff with a hammer and not put a dent in it. We liked the finished look of it around the windows so we carried on with it around the roll up doors...we ended up facing the door jambs with too, then put on 3 coats of paint prior to stucco. One pic attached shows some decent detail of the trim...

For your viewing pleasure....:)
 

Attachments

  • Shingling 1.jpg
    Shingling 1.jpg
    146.7 KB · Views: 51
  • Shingling 2.jpg
    Shingling 2.jpg
    144.3 KB · Views: 48
  • Shingling 3.jpg
    Shingling 3.jpg
    147.8 KB · Views: 49
  • Shingling 4.jpg
    Shingling 4.jpg
    143.2 KB · Views: 58
OP
C

Conn'swhiterose

Well-known member
Joined
Jun 11, 2011
Messages
75
Location
Calgary AB Canada, 3rd rock from the sun
looks like it's going to be great once done :)

It looks great man. I bet you can't wait to occupy it.

Thanks guys, it's coming along, but it sometimes seems that it'll never be finished! Oh well, still plowing ahead.

You're right I can't wait to occupy it....nothing like you accomplished NUTTSGT, the makeover on your house and garage is incredible, that takes a lot of effort and determination, not to mention vision. Well done. :thumbup:
 
OP
C

Conn'swhiterose

Well-known member
Joined
Jun 11, 2011
Messages
75
Location
Calgary AB Canada, 3rd rock from the sun
Next- the stucco finish. Tar paper, wire, scratch coat and finish coat. We chose a color named "mountain moss" which looked a lot like just plain old wet cement for 2 days, so we were really surprised when it darkened to the right shade over a 5 day period....first for me, usually colors get lighter? First time I've had anything to do with stucco so now I know, I guess?

Anybody ever had that happen??:headscrat

Anyhoo, here's some more pics....
 

Attachments

  • Tar paper & wire 4.jpg
    Tar paper & wire 4.jpg
    149.2 KB · Views: 49
  • Tar paper & wire 3.jpg
    Tar paper & wire 3.jpg
    146.7 KB · Views: 45
  • Tar paper & wire 2.jpg
    Tar paper & wire 2.jpg
    146.7 KB · Views: 36
  • Tar paper & wire 1.jpg
    Tar paper & wire 1.jpg
    145 KB · Views: 42
  • Scratch coat 1.jpg
    Scratch coat 1.jpg
    146.9 KB · Views: 45
  • Scratch coat 2.jpg
    Scratch coat 2.jpg
    148.3 KB · Views: 47
  • Scratch coat 3.jpg
    Scratch coat 3.jpg
    146.6 KB · Views: 45
OP
C

Conn'swhiterose

Well-known member
Joined
Jun 11, 2011
Messages
75
Location
Calgary AB Canada, 3rd rock from the sun
Next, we had to figure a way to insulate the retaining wall with minimal loss to square footage , so 2X2 frame and the Pink Panther it was...no to mention a few cans of spray foam to help seal any remaining gaps...take a look ...
 

Attachments

  • Retaining wall 5.jpg
    Retaining wall 5.jpg
    135.2 KB · Views: 50
  • Retaining wall 4.jpg
    Retaining wall 4.jpg
    142.2 KB · Views: 46
  • Retaining wall 3.jpg
    Retaining wall 3.jpg
    140.1 KB · Views: 43
  • Retaining wall 2.jpg
    Retaining wall 2.jpg
    142.3 KB · Views: 50
  • Retaining wall 1.jpg
    Retaining wall 1.jpg
    139.5 KB · Views: 46
OP
C

Conn'swhiterose

Well-known member
Joined
Jun 11, 2011
Messages
75
Location
Calgary AB Canada, 3rd rock from the sun
Then it was the R40 ceiling treatment and R20 for the walls...
 

Attachments

  • Insulation 5.jpg
    Insulation 5.jpg
    130.9 KB · Views: 40
  • Insulation 4.jpg
    Insulation 4.jpg
    130.8 KB · Views: 42
  • Insulation 3.jpg
    Insulation 3.jpg
    132.9 KB · Views: 44
  • Insulation 2.jpg
    Insulation 2.jpg
    133.7 KB · Views: 46
  • Insulation 1.jpg
    Insulation 1.jpg
    132.5 KB · Views: 52
  • Insulation 6.jpg
    Insulation 6.jpg
    132.5 KB · Views: 36
  • Insulation 7.jpg
    Insulation 7.jpg
    105.7 KB · Views: 37
OP
C

Conn'swhiterose

Well-known member
Joined
Jun 11, 2011
Messages
75
Location
Calgary AB Canada, 3rd rock from the sun
Then 2 16'X8' doors, one with a liftmaster jackshaft opener and rising rails (2/12 interior pitch) for the vaulted side and a standard 8' install with a whisper drive for the other side....

That's all for tonight guys....


:beer:
 

Attachments

  • Whisper drive2.jpg
    Whisper drive2.jpg
    127.7 KB · Views: 33
  • Whisper drive 1.jpg
    Whisper drive 1.jpg
    129.7 KB · Views: 34
  • Jackshaft opener.jpg
    Jackshaft opener.jpg
    139.9 KB · Views: 33
  • Vaulted door 2.jpg
    Vaulted door 2.jpg
    139.8 KB · Views: 33
  • Vaulted door 1.jpg
    Vaulted door 1.jpg
    145.3 KB · Views: 39

John in OH

Well-known member
Joined
Jun 2, 2007
Messages
2,444
Location
SE Ohio & Eastern Virginia
This looks like a nice job!

I was wondering if there is a specific purpose for the two levels of horizontal blocking between the 2x6 studs on the end walls on each side of the windows?

Also, in the earlier pics showing the rough wiring, there appear to be translucent covers/material around each of the outlets and switch boxes. This is unfamiliar to me ... can you provide more description and purpose?
 
OP
C

Conn'swhiterose

Well-known member
Joined
Jun 11, 2011
Messages
75
Location
Calgary AB Canada, 3rd rock from the sun
Thanks John in OH, but we can't take credit for the batting, that was done by our contractor(s). My wife and I framed and insulated the retaining wall.

This has been an interesting build as we have been hands on throughout the whole process with the contractors, leading the way as to our wants and expectations. We've been fortunate that none of the guys have had their nose out of joint over this, and in the end we're all happy. It's not our first time through this either so we do have a good idea how things work and don't, thus I don't think we've been unreasonable.....

Anyway....to answer your questions..

I put scrap 2X6 and 2X10 material into the walls to act help with hanging cabinets, hose and electrical reels etc, just prior to insulating...the plan is for sheet rock/gyprock so this will help down the road...some are set in a little higher than others to jog around electrical boxes..

The translucent boxes you see are to help seal out draft. You install them during rough in and later they tie in with the vapour barrier. You simply barrier over them and later cut out the barrier around the flange of the vapour barrier box and either tuck tape them or use a silicone sealant..

Hope that helps....sorry for the wall of text!!:lol_hitti
 

John in OH

Well-known member
Joined
Jun 2, 2007
Messages
2,444
Location
SE Ohio & Eastern Virginia
I put scrap 2X6 and 2X10 material into the walls to act help with hanging cabinets, hose and electrical reels etc, just prior to insulating...the plan is for sheet rock/gyprock so this will help down the road...some are set in a little higher than others to jog around electrical boxes..

That blocking for future attachments is a good idea! I'm going to steal it and incorporate it in my build which still has the studs open.
 

64dragnwagon

Well-known member
Joined
Sep 3, 2006
Messages
461
Location
Northeastern Tennessee
Wow, that is well insulated! It even looks warm like a baby's blanket. I guess that is critical in the part of the world you are in. Nice build and thanks for sharing.
 
OP
C

Conn'swhiterose

Well-known member
Joined
Jun 11, 2011
Messages
75
Location
Calgary AB Canada, 3rd rock from the sun
Next was the dreaded drywall...can you tell I don't like it:confused:

I've tried my hand at it several times and to be honest I'm not that bad at it, but for this build we hired the job out....100% of it, the only time I touched the board was to help unload the truck! We really wanted a pro job on this...after all it's the thing you see the most!!

Here's some pics....first hanging the board...
 

Attachments

  • Hang board 1.jpg
    Hang board 1.jpg
    148.8 KB · Views: 20
  • Hang board 2.jpg
    Hang board 2.jpg
    107.7 KB · Views: 17
  • Hang board 3.jpg
    Hang board 3.jpg
    81.1 KB · Views: 16
  • Hang board 4.jpg
    Hang board 4.jpg
    140.7 KB · Views: 17
  • Hang board 5.jpg
    Hang board 5.jpg
    73.7 KB · Views: 19
  • Hang board 6.jpg
    Hang board 6.jpg
    77.8 KB · Views: 19
  • Hang board 7.jpg
    Hang board 7.jpg
    105.9 KB · Views: 19
To avoid these ads, REGISTER NOW!
Top Bottom