regguy1
Well-known member
Yes, I did


Yes, I did
FYI.. I have had my Maxjax for about a month now. I did the clutch on the 99 Cobra and a few other things...worked great. I also put my 2007 Saturn Outlook full size AWD SUV up in the air and left it overnight. Base vehicle weight is right at 5000 lbs and there was atleast a few hundred lbs of stuff inside. Probably 5250 lbs or so. Held like a champ even with me shaking the **** out of the SU like I was having a wild seizure. I wanted to put it to the test and not be all gingerly around it. Its either gonna hold...or its not. Held just fine. Next up is front brakes on the Saturn followed by headers and cam on the 04 Z06.
Sounds great! Did you use epoxy in your anchor installation?
I've finally got my lift installed. Everything went relatively smooth with one exception for the three back holes in one of the columns where I hit rebar. Had to run out and get a rebar cutter to get through it. Concrete turned out to be roughly 5" in all 10 holes, drilling was very easy. After I drilled the first hole per instructions, I didn't like the way the bigger bit drills out the pilot hole to the final diameter and I opted to drill with the larger 7/8" bit all the way without using the pilot and it worked great. I positioned the columns the way I wanted them and then used them for both starting the holes exactly where I wanted them and also to ensure the drill is stable and square to the floor. This way, once the columns are positioned, they don't need to be moved until all holes are finished.
All anchors seem to hold fine, none of them pulled all the way to the surface, none of them allowed me to do more then 4 turns to set and all hold 90 lb.ft. of torque.
The concern I have is that some of you who already installed their lifts said that they were "rock solid" while lifting. Mine is not. The base does seem to be rock solid, but the columns seem to flex and at the top they move roughly a quarter of an inch. Is this normal? What do you guys think? I'm attaching pictures of the base and the top before and after the vehicle is lifted.
I'm lifting a BMW E39 540i, which reportedly should be about 3800LB.
Can someone tell me the size of the floor pads? I have looked at the Dannmar site and cannot find the size.
Thanks,
It sounds like the anchors are set correctly and secure, you may have to retighten the bolts the first couple of lifts as the anchor will come up slightly. The main concern is to keep the columns level when lifting to prevent friction between the lift arms, if the 1/4" movement continues all you need to do is shim the column out 1/4" to assure both columns are level with a load.


 ).
).
No problem. I only posted here because I was frankly amazed - and scared crapless - when I discovered just how badly the anchors were set (or really, not set). When I installed the first lift post exactly as per the Dannmar instructions, it seemed completely solid. I had obvious issues with installing the second post. This is what started the whole thing and me doing more investigation and calling Wej-It directly. Had the really "obvious" failures not happened, I'd have finished the install and there would be a car on the lift right now. I'd have had absolutely no idea that the lift was really unsafe. But, because of the discrepencies in information, I decided to unbolt the first post and test it.
The point of the story is that I'd be willing to bet two things with some very serious money.
1) That there are people who have installed (in this case, Dannmar specifically) lifts and who think they are to spec - and who have unsafe anchors. If you notice, parts of the instruction manual are kind of "generic". So it may be related to more than just the MaxJax. I don't know. But I do know that the MaxJax instruction manual gives a clearly inadequate and untested process that is not recommended or supported by the actual anchor manufacturer.
2) That some people who have had anchors fail or twist, resulting in them having to cut out and repour concrete, may have experienced this because of the incorrect method of setting the anchors listed in the MaxJax installation manual.
These are my opinions, and may not be fact. What is most certainly fact is the discrepencies in the installation process. And when you consider the differences in the process, consider this. The only advantage to doing it the Dannmar way is - that Dannmar doesn't have to provide a single washer and a single 5/8" coarse nut. I don't think it was deliberate. I just think it was a sloppy mistake. I posted this because I don't want to read about somebody getting crushed under their car because the anchors pulled out and they didn't know - and I didn't speak up.
I have 10 Wej-It Power Sert anchors waiting to be installed this weekend. I'm going to order the AWF epoxy and then all should be well. Hopefully that'll end the issues.
. But for the others, should I keep cranking on them like I did this one, or should I stop at 4 complete turns?Quick question on the anchor install. I've got the holes drilled and anchors recessed 5/8" below the top... but the first one I tried to set wouldn't pull up flush to the surface like the MaxJax instructions say. I grabbed a breaker bar to allow me to crank harder, but the washer ended up just bending and going down in the hole... the concrete chipped a little bit around the hole, but the anchor is still about 1/4" from the lip of the concrete. The anchor itself didn't turn (I was holding the bolt to prevent it even if it tried).
Then I read the instructions that came with the anchors, which said for the 5/8" anchors to do no more than 4 turns to set the anchor.
Any suggestions on what I should do for the other 9? I assume the first one is fine, even though it's still 1/4" from the concrete lip? It must be REALLY tight since the washer is basically a funnel now
I don't think it matters, but the concrete is very deep... I tried to go all the way through, but the 8" long bit only barely made it through one of the holes.
Thanks,
Pat
After that I used the thick steel plate which was a part of the temporary lift hoist....do the hoses that plug in from the "power unit" have to be equal length for this to operate properly?
I have a similar lifting problem, the symptom is the same as yours, one side starts first and the other a second or two after and the side that starts first also lowers faster finishing first. It is the same under load. The difference from yours is that switching hoses at the columns does not change the behavior of the columns, which in my case points to difference in cylinders.
.--------------------------------------------------------------------------------
do the hoses that plug in from the "power unit" have to be equal length for this to operate properly?
I would like to mount the power unit on the wall close to the stationary column and run a hose up and along the ceiling to the other one. Primarily to avoid tripping over them and to have a more "professional" looking shop. When not in use I would figure out a way to secure it to the ceiling out of the way.


Do you bring those in every night when your working on your car or leave them outside?
... I am not sure about what type of hose that comes with the lift...it is probably stamped on the hose. Any sugesttions? I have not experianced any leakage issues as of yet with my lift.
I saw your other photos...Do you have any of what you did with the hoses?


I was looking for a hydraulics store in my neighborhood and found this one: http://www.hoseandfittingsetc.com/. By the look of their front page they might have something that will fit.
Does anyone have an online source for compatable fittings that will work with the quick connect hardware that came with the unit?
I don't remember anything like this included with my set. I just put the pegs in and that's it. Can you attach a picture of them?
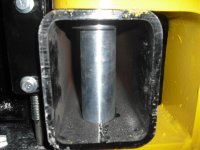
Attached is a pic of 3 of the E clips, and the fourth one, which I installed. Before I install the rest, i just want to make sure I should, since installing/removing those E clips is sorta a pain.
Attached is a pic of 3 of the E clips, and the fourth one, which I installed. Before I install the rest, i just want to make sure I should, since installing/removing those E clips is sorta a pain.
Thanks,
Pat
Just went through my MaxJax stuff and found four of these laying on the shelf... I checked the manual and apart from them mentioned in the parts list, didn't see anything about installing them. I would imagine they could be used if you plan on keeping the lift assembled for extended periods of time as a precautionary measure (in case someone tries to remove them??).
I was referring to this post by DogP, sorry about the confusion.