Bikemeister
Member
Group buy - I'm in. 


Yeah, sorry, I didn't do a very good job with the photos. The pics with the car in the air were before I rigged the power pack onto the column, just to make sure everything was working.
The power pack stays on the column all the time now, although to remove it is simply a matter of disconnecting the hoses and lifting it off (the brackets I made just slide over the top of the column and bolt to the cart). It doesn't interfere with the cylinder or anything, and it puts the controls and spacers up at a comfortable working height, and provides a couple of handy hooks to hang trouble lights on.
I'll try to get a better picture of the setup now.
One question for the experts: with the finished depth of my anchors 3/8" below the surface, and with a half inch of steel plate and another 3/16" of washers and shims, there is now less than one inch of bolt threads going into the anchor -- probably 5/8 to 3/4 inches. My guess is that is plenty but would it be prudent to go out and buy longer bolts to assure greater mating?
I'm also going to look for threaded plugs in plastic or steel to keep the anchors cleanly plugged when not in use.
Cheers
You can get longer bolts but as long as you have as much as the diameter of the bolt you should be good. I am getting longer bolts.
Interesting -- so that's the rule of thumb -- depth to equal or greater than stud diameter. Then I'm good to go.
Thanks!


For what it's worth, I drilled my pilot holes around 1" deep with a 3/4" bit instead of a 5/8" bit - the 5/8" was way too loose in the base plate holes, but the 3/4" fit quite nicely. Drill the centre pilot hole first, move the post, drill out to full size, install that anchor, bolt the baseplate down with that one anchor, and then drill the other four pilot holes.
This is how I did it and all my holes are bang on.
So, you drilled all the holes about an inch deep with the 3/4 and then drilled them all out with the 7/8"?
Anybody know good mail order place or local places to get these bits?
So, you drilled all the holes about an inch deep with the 3/4 and then drilled them all out with the 7/8"?
Anybody know good mail order place or local places to get these bits?
Not mail order but my Lowes has both the 5/8 and 7/8" sizes in stock. They are the Bosch SDS ones. They are like $16 and $25 respectively.
Steve


Just ordered all of my fittings from here: www.discounthydraulichose.com
Website made it easy to find what I was looking for. They had 90 deg swivels, etc.
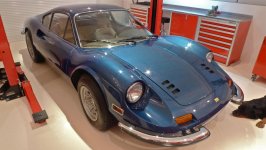
Getting close with my install. Here is a picture of the pump mounted on a column:
And here is the hose going up. Yes, I had room for a full-size lift but went with the MaxJax as a temp lift until I start my detached building in a few years. Extra credit if you can identify the bike.
Can you use regular HD type pipe fittings with this much pressure? Looks like you have a 90 degree fitting from a box store?
Yes don't use those!!! Dry-fit only! High-pressure fittings on the way (see my post above)
Ok, that's what I was worried about.
You may want to add that to your post if it's not there, I didn't see it. Wouldn't want anybody to get hurt.
I just paid $40 each for 2 90 degree swivels that made me Flinch a little. It would be tempting to go to the "depot" and grab some pipe fittings of one didn't know better.
Note: These fittings are for dry-fit only, use high pressure fittings!
Getting close with my install. Here is a picture of the pump mounted on a column:
And here is the hose going up. Yes, I had room for a full-size lift but went with the MaxJax as a temp lift until I start my detached building in a few years. Extra credit if you can identify the bike.


Nogglefish, Thats a GT Bycycle, Circa ??? 1988ish.. Can you say Mike Diminguez ?
You got it, even got the correct year! 1988 GT Pro Freestyle Tour. Wasn't my original bike, I sadly gave mine away to a neighborhood kid =(
I think the drill might hit the post and you could end up with a hole drilled ot an angle.
I used a small drill for the pilot (about 1/4")
The 7/8" will be too large. Go with a smaller bit for a shallow pilot hole.
Thanx! Guess I'll get the 5/8"

I think if you look at the directions for the anchors, they say do not use a pilot bit.If you egg out the hole you could end up with a very dangerous situation.Why don't you make up a steel template with 6" pcs. of 7/8"ID steel tubing welded to a pc of 1/8" plate.Pin it down with a couple of 1/4" pins and the tubes will hold your bit nice and straight.Sort of along the lines of this JR Smith setting gauge we used to use in wall hung toilet rough-ins.If I get 1 of these lifts I will make up a template for drilling.If you don't have to think or worry about placing the holes you can be much more accurate in your work!
 When I make one up I plan to do several...maybe rent with deposit and small fee!?