FoMoCo_Mofo
Active member
Being one of the few people lucky enough to test the first production MaxJax lifts, I have much to talk about regarding this lift. I work on both motorcycles and cars, which are both old and new, so there are a myriad of different size and weight vehicles to test. I, like most of you also have a pretty limited space in which to do work. This is why I believe Jeff thought I would be a good beta tester, not to mention I am pretty local to Dannmar and have done some things with Bendpak and Ranger in the past.
When the lift was delivered it didn’t take long to install. I would say less than an hour to get it up and running. We decided to first mount in under the carport right in front of the garage entrance in my driveway. Once we figured out exactly where we wanted it to go, we made our measurements, checked them twice and drilled the concrete to check the true thickness. Once the concrete was determined to be up to snuff it was as simple as marking the other holes and drilling the rest of them. From there we tapped in the drop-in anchors and tightened them all up with a 12v impact. We then broke out our level and got everything straight with the shims that came with the lift.
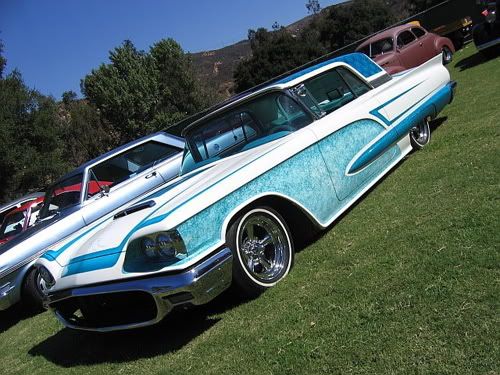
From there we slid on the lift arms and attached the hydraulic lines from the power unit to the lift and plugged the unit into the garage’s 110 wall socket. The lift fired right up, and went up and down with easy. so we gave each other and two of the neighborhood rides on it until we drove my `59 T-Bird on to lift it.
It lifted that pig of a car right off the ground with no issues except that the Panther Creek carport above it is a bit short, so we didn’t get to test the full extension of the lift with a car. Don’t worry, a new tall custom constructed carport is on it’s way soon, so we’ll be able to have even the tallest cars at the lift’s height limit without hitting the roof.
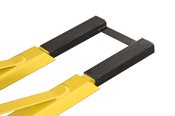
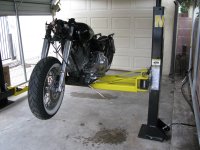
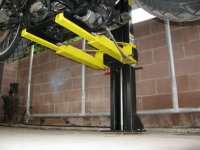
We then put my `89 Harley-Davidson FLHS on it. The bike is pretty low, so we though this was going to be a bit of a chore. We pulled the bike up to the lift and slid the arms underneath the bike from the left side of the bike, then slid the motorcycle mount onto them underneath the bike from the right side without issue. We then pushed the up button and the bike was raised to a comfortable height to work on.
I have been using this lift with various cars and bikes for a few weeks now and have given Jeff and the staff at Dannmar a few things to think about. Nothing that has to do with the design or operation of the lift itself, but more facts regarding the various mounts that are being made or that could be made.
Things I like:
• The ease of use
• The size
• The portability
• The option to use it with either a car or motorcycle
Things that I feel could be improved:
• I personally would like a little more length in the hydro line. I work on some early and mid- sixties cars. They are LONG and almost come in contact with the power unit when pulling the car up to the lift.
• I would like to see a bit more length on the motorcycle mount so one does not have to maneuver the bike as close to the lift as you do now. 2.5” more length would do perfectly.
• For saftey’s sake, I would also like to see some tie strap “D” rings on the sides of motorcycle mount as well.
I will be getting more of the floor mounts in the coming weeks and will install it inside the garage, so stay tuned for that…
Here's a few Pics of the my H-D currently residing on it.


When the lift was delivered it didn’t take long to install. I would say less than an hour to get it up and running. We decided to first mount in under the carport right in front of the garage entrance in my driveway. Once we figured out exactly where we wanted it to go, we made our measurements, checked them twice and drilled the concrete to check the true thickness. Once the concrete was determined to be up to snuff it was as simple as marking the other holes and drilling the rest of them. From there we tapped in the drop-in anchors and tightened them all up with a 12v impact. We then broke out our level and got everything straight with the shims that came with the lift.
From there we slid on the lift arms and attached the hydraulic lines from the power unit to the lift and plugged the unit into the garage’s 110 wall socket. The lift fired right up, and went up and down with easy. so we gave each other and two of the neighborhood rides on it until we drove my `59 T-Bird on to lift it.
It lifted that pig of a car right off the ground with no issues except that the Panther Creek carport above it is a bit short, so we didn’t get to test the full extension of the lift with a car. Don’t worry, a new tall custom constructed carport is on it’s way soon, so we’ll be able to have even the tallest cars at the lift’s height limit without hitting the roof.
We then put my `89 Harley-Davidson FLHS on it. The bike is pretty low, so we though this was going to be a bit of a chore. We pulled the bike up to the lift and slid the arms underneath the bike from the left side of the bike, then slid the motorcycle mount onto them underneath the bike from the right side without issue. We then pushed the up button and the bike was raised to a comfortable height to work on.
I have been using this lift with various cars and bikes for a few weeks now and have given Jeff and the staff at Dannmar a few things to think about. Nothing that has to do with the design or operation of the lift itself, but more facts regarding the various mounts that are being made or that could be made.
Things I like:
• The ease of use
• The size
• The portability
• The option to use it with either a car or motorcycle
Things that I feel could be improved:
• I personally would like a little more length in the hydro line. I work on some early and mid- sixties cars. They are LONG and almost come in contact with the power unit when pulling the car up to the lift.
• I would like to see a bit more length on the motorcycle mount so one does not have to maneuver the bike as close to the lift as you do now. 2.5” more length would do perfectly.
• For saftey’s sake, I would also like to see some tie strap “D” rings on the sides of motorcycle mount as well.
I will be getting more of the floor mounts in the coming weeks and will install it inside the garage, so stay tuned for that…
Here's a few Pics of the my H-D currently residing on it.