You should check out Dannmar's new MX-6. It's ALI certified with 7 automatic safety locks. And you don't have to paint anythingwww.maxjaxusa.com
Awesome lift!
Sent from my Moto G (5) Plus using Tapatalk
Last edited:


You should check out Dannmar's new MX-6. It's ALI certified with 7 automatic safety locks. And you don't have to paint anything
The epoxy is really thick. Check out this thread.Thanks guys, Normally I don't get too crazy about this sort of thing, but I dont want to be nervous every time I get under it
As far as I can tell the manual doesn't have instructions for the epoxy anchors just the wedge type. Ill look closer tonight. The epoxy anchors come with basic instructions from wedge it which of course say you need a non through hole.
Is anybody feeling generous enough to elaborate more on the coffee filter method? Is it just stuff a full size filter all the way into the hole
It still seams like the anchor would push the epoxy right by the filter.
MaxJax possesses the patent on this portable lift. Anything else is a rip-off and will hear from our legal department. Do your homework on the reviews of these types of knock-offs.
Is the coffee filter recommendation from GES patented too? Selling epoxy anchors as an alternative to wedge anchors when they are almost 2" longer than the min concrete depth recommendation??
Excellent work!I want to follow up in case anybody finds my question in search. Danmar called me and recommended the coffee filter method. I think that would work fine but It still didnt feelright to me.
Thankfully the Radar estimate of my slab thickness was a bit conservative and only 2 of the 10 holes poked through when drilled to 6". For the 2 holes, I packed the earth below with a dowel and squirted in a bit of the inject tite epoxy. After it cured I redrilled to 6" and I had the proper blind hole. I have no worriesabout compatibility and I am confident that the holes were sealed well enough to ensure epoxy is in the annulus between the anchors and the slab.
It took me quite some time to drill the holes. The reconditioned bosch hammer drill I bought worked fantastically (if not quietly!). However, the instructions want you to use the posts as a drilling guide. Many of the holes in my posts were just undersized enough that I couldent get the 7/8 bit to rotate without getting hung up on steel.I had to keep repositioninng the posts so that one of the "big" holes was over where I wanted to drill. Even with wheels it is time consuming to get the posts aligned to say +/- .05". I think I could have just drilled the holes where I marked them with a sharpie, but I was in full caution mode. They aligned perfectly when everything was done.
I really think the lift should come with a flexible pigtail line for the quick disconnects. The "zigzag" 45 degree fittings into the cylinders are a bit problematic for a few reasons. I had to take one post apart a few times to get the fittings just right so they dont hang up on the post cut-out and so I have enough clearance to put in the center bolt.
My last problem is since I did the first set of holes in 2 steps, I need another mixing thing-a-ma-bob for the injet-tite. I suspect I will need a hair more than 2 cartiridges as well since i used some to fill the bottom of 2 of the holes. Inject-tite is not super common to find on the interwebs. I ordered some more from stanley fasteners, but there was a 2 cartridge minimum and 16$ shipping. I think I am in for 50$ or so for what probably amounts to only needing 5 ml of epoxy.
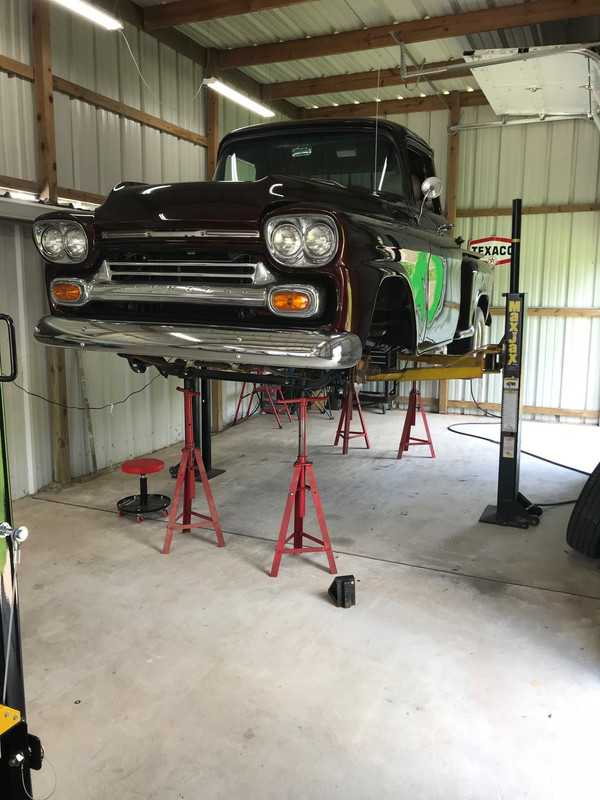
I live in houston suburbia, and being locked at home with all the awful flooding I got to spend some time in the garage to take my mind off the depressing local news.
I center my cars with an inch or two. Don't take chances with it off balanceHow centered, left to right, does the vehicle need to be between posts? If it's offset 12" or even more, is that going to be an issue? Imagine posts are where I want them to be, but ceiling obstruction requires vehicle to be pushed to one direction to clear obstruction. I'm thinking MX6 here, with mechanical lock every 3.5" or so. So, if it started to lift unevenly, hopefully it'd be level once I released the pressure. Thoughts?
can some one with this maxjax email me i have some questions my email is [email protected]
still loving my maxjax
best purchase ever made for my garage

I just got a replacement cylinder for my lift, as the original one was leaking, and after installation it leans out a good bit, so much so that with a car on it the top of the cylinder hits the tie bar . What did I do wrong in assembling It?
Wow, it's been a long time since I've been on the GJ! But I do get occasional emails from threads I've been on!
I feel I've done just about everything, encountered weird things on the MJ's, but the one you're describing is rather unique and I'd say just requires some close inspection during its travel up n down.
I must say the newer models don't go up and down as quickly, but still work Ok. I need to order a spare hydraulic cylinder which I consider is a weakness of the MJs. I think they're about 80 bucks or so.
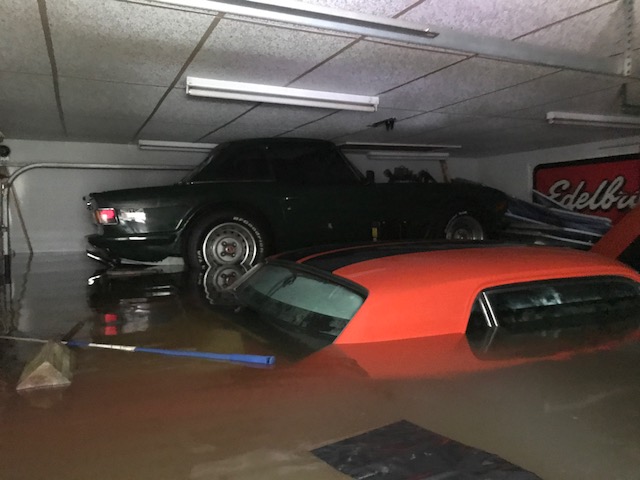
At our flooded home, both my Maxjax's and everything we own was under flood water for two weeks. The maxjax columns are ok, needed extensive cleaning, but the electric pumps both died. At 450 per electric motor/pump assembly, kind of hurt
At our new location in Cypress, Tx, I got to have the fun of drilling new anchors in 3 locations! lucky me!
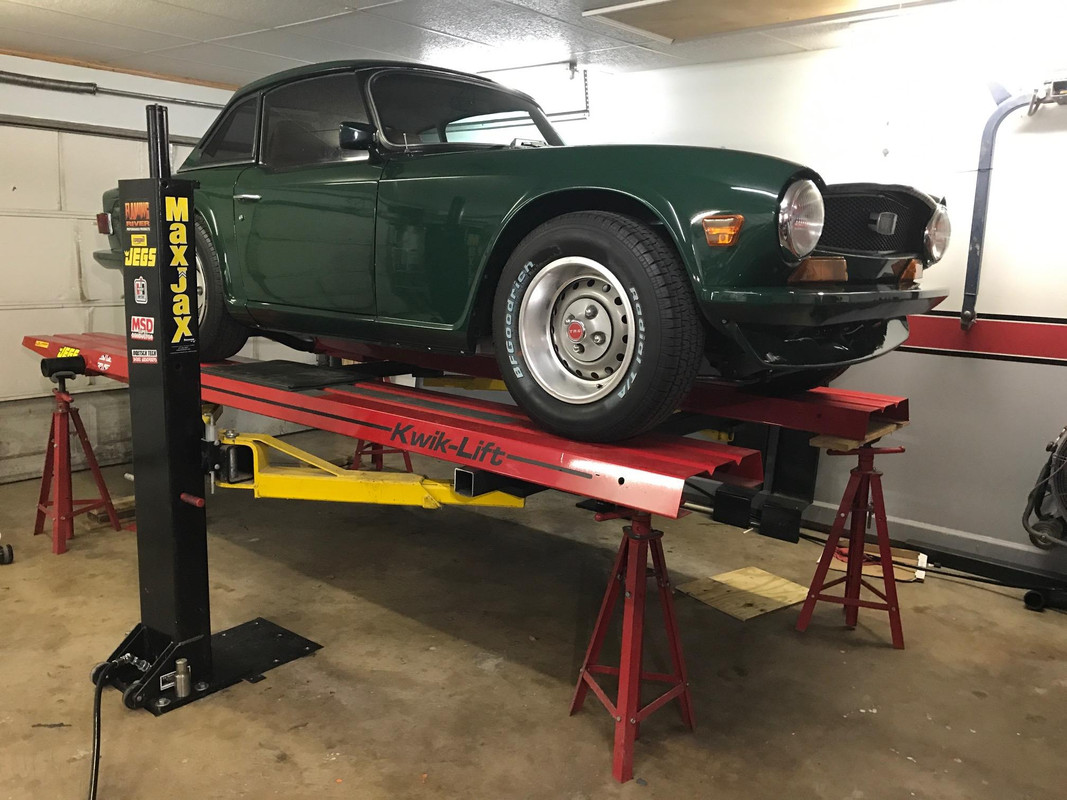
This pic was at our home which flooded, I had the TR6 up as high as it would go, but still got half way up on it. I was using the Kwik-lift as a means of making a "4 post" lift.
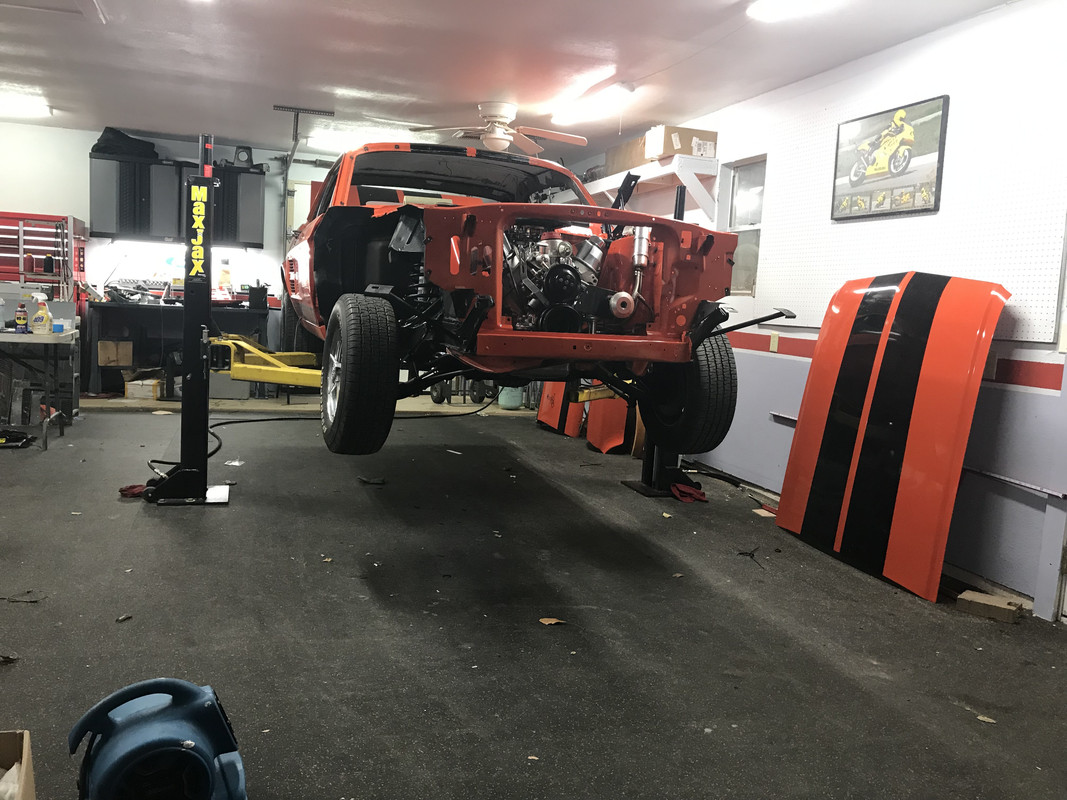
At our newer home in Cypress, here I'm hard at work re-restoring my 67 Mustang.
A maxjax saved my Triumph Tr6, well, the flood water from Harvey did get to the middle of my triumph, but wasn't near as much work as my 67 Mustang which was under 6' of nasty flood water for 2 weeks! I'm still working on it today; got a ways to go yet.
I meant to say outside to outside of the base plates, not the columns themselves! that make sense?
Very sorry for your hardship..... I wish they were $80. I just got a quote from them....$325 plus freightI must say the newer models don't go up and down as quickly, but still work Ok. I need to order a spare hydraulic cylinder which I consider is a weakness of the MJs. I think they're about 80 bucks or so.


And FWIW, Dannmar is selling direct now at a really great price.
I gave up on mechanical anchors a long time ago. When they work, they're fine, but when the loosen, or go above the concrete, I too would have concern about being underneath my MJ.