To avoid these ads, REGISTER NOW!

Mc1337sauce's 2 Car Renovation

OP
M

Mc1337sauce

Active member
Joined
Dec 24, 2014
Messages
40
Location
Arizona
On the HF tool cart... the drawer with the pliers... DO they come like that now with those slots? That's kinda cool. I like my HF 5 drawer cart. I put a folding tray on it and the paper towel holder and glove box holder. I could use some more room so I might get one of their side drawer units.... anyway, nice looking garage.. too nice, needs to be dirtier. :)

Oh and BTW, I'm lusting over a set of quick jacks. That would make working on the my 4runner sooooo much easier.

No, that plier rack isn’t from HF, it’s from Ernst...I’ve bought quite a few of them through Amazon. I use them for organizing pliers, saws, and any other long and thin utinsel.

I was going to put the shelf on my cart too, but didn’t end up with enough room where I was putting the cart, so it’s sitting in my shop on a shelf (pun intended).

The QuickJacks definitely make everything a lot easier working on most vehicles. I don’t actually use them on my 4Runner because my frame is 20” off the ground, so it’s a bit too high to get the wheels off the ground, but for one a little less lifted it would be fine (and the SUV extensions they sell may let me get it high enough).

Thanks for tuning in bud!
 
To avoid these ads, REGISTER NOW!
OP
M

Mc1337sauce

Active member
Joined
Dec 24, 2014
Messages
40
Location
Arizona
Been a while since I did anything to the garage, but I've had a lot of projects I've knocked out in it lately. Finally, this weekend, I've started getting around to rectifying the less-than-perfect lighting situation - lots of shadowing, and no lights in the back of the garage so very dark when working on a rear end, detailing, etc.

I put some Barrina LED lights (4ft) in my kitchen a while back and have been very impressed, so I went with their product to add to the garage as well, this time some 8 footers. After wrapping up a couple automotive maintenance projects today, I installed the first two (of 6, per pack) lights, and WOW are these things bright! The two lights alone make a massive difference in lighting up the garage, and once I get the other four up (hopefully tomorrow) this place is going to look like an OR.

Here's a pic with the first two up - one of my 4 lamp fluorescent fixtures is even unplugged since I haven't configured the wiring for the expansion yet.


I'm shooting to have this knocked out tomorrow, so stay tuned for an update soon!
 

sinister94

Active member
Joined
May 11, 2017
Messages
32
Finally had time to work on the garage this past week. I forgot to take pics (again...grrrrrrr), but I promise I will have some for the next update, which will be rather large.

Here's my video covering the last few weeks of work:

I finished up all of the paint, including the ceiling, and got some metal pegboard that matches my Craftsman boxes and equipment mounted on the fresh wall. I also prepped the floor for epoxy, which will be the primary topic of next week's update, so stay tuned! I should have this project wrapped up very shortly!

Where did you get the metal pegboard?

I've been looking for pegboard to help organize my garage, but I'm leaning towards the metal style.

I'm also in AZ but I'm hesitant to get racedeck, how's the warping in this heat? Unfortubately my garage faces east and gets hit pretty hard by the sun
 
OP
M

Mc1337sauce

Active member
Joined
Dec 24, 2014
Messages
40
Location
Arizona
Where did you get the metal pegboard?

I've been looking for pegboard to help organize my garage, but I'm leaning towards the metal style.

I'm also in AZ but I'm hesitant to get racedeck, how's the warping in this heat? Unfortubately my garage faces east and gets hit pretty hard by the sun

I got the pegboard from Amazon if I remember correctly, I believe this is the product I used (red, obviously, but also available in many other colors): https://amzn.to/2FRkAz0

The RaceDeck has been absolutely fantastic! I don't leave my door open (and my garage door faces north anyway) so it doesn't get directly sunlight, but even on 120+ days, I have seen no warping...even after cranking on the AC in there on the weekends down to 75-80 and heat cycling it back up to 100+ during the week. I'm putting together some progress pics of the light install which should help you get a good idea of how it looks currently - other than some tire tracks and a couple scrapes from working on cars (jack, jackstand, etc), it's held up great! Combined with the QuickJacks, it's a wonderful solution to work on cars in comfort. I will say, since these aren't freeflow tiles, whatever you traipse in from your tires stays on top of the tiles - just something to consider. If I were to do it again, I would more seriously consider the freeflow option (or the new wood-look tiles).

One thing to mention about my install is that I didn't **** the floor up to any of the walls - instead, I finished all of the edges with the edge trim (tapers from zero height to tile thickness) with about an inch gap on the sides, and an exposed epoxy-coated area towards the front. Again, the photos that are incoming may help show that a bit better.

Just let me know if you have any other questions and I'm happy to answer any I can!
 
OP
M

Mc1337sauce

Active member
Joined
Dec 24, 2014
Messages
40
Location
Arizona
Got all 6 lights up, and DANG is it bright now! Didn't get any pics with the vehicles in because I haven't finished up all of the wiring yet, but it's coming along swimmingly.


Also knocked out a quick tire rotation on my mom's VW - the QuickJacks make that operation a breeze! Too bad I didn't get to utilize the new lights for that!

Anyway, I have what I think I need on order, so I'm hoping to get this install finalized soon. May be next weekend, may not be - I'm planning on replacing the entire cooling system in my W140 as soon as all of the necessary parts arrive, so if they come in this week that's going to get prioritized for sure.
 
OP
M

Mc1337sauce

Active member
Joined
Dec 24, 2014
Messages
40
Location
Arizona
Didn't have a whole lot of time this weekend with the Super Bowl and all (long time Patriots fan here, so it was a good weekend to say the least), but I did work on the wiring for the new lights.

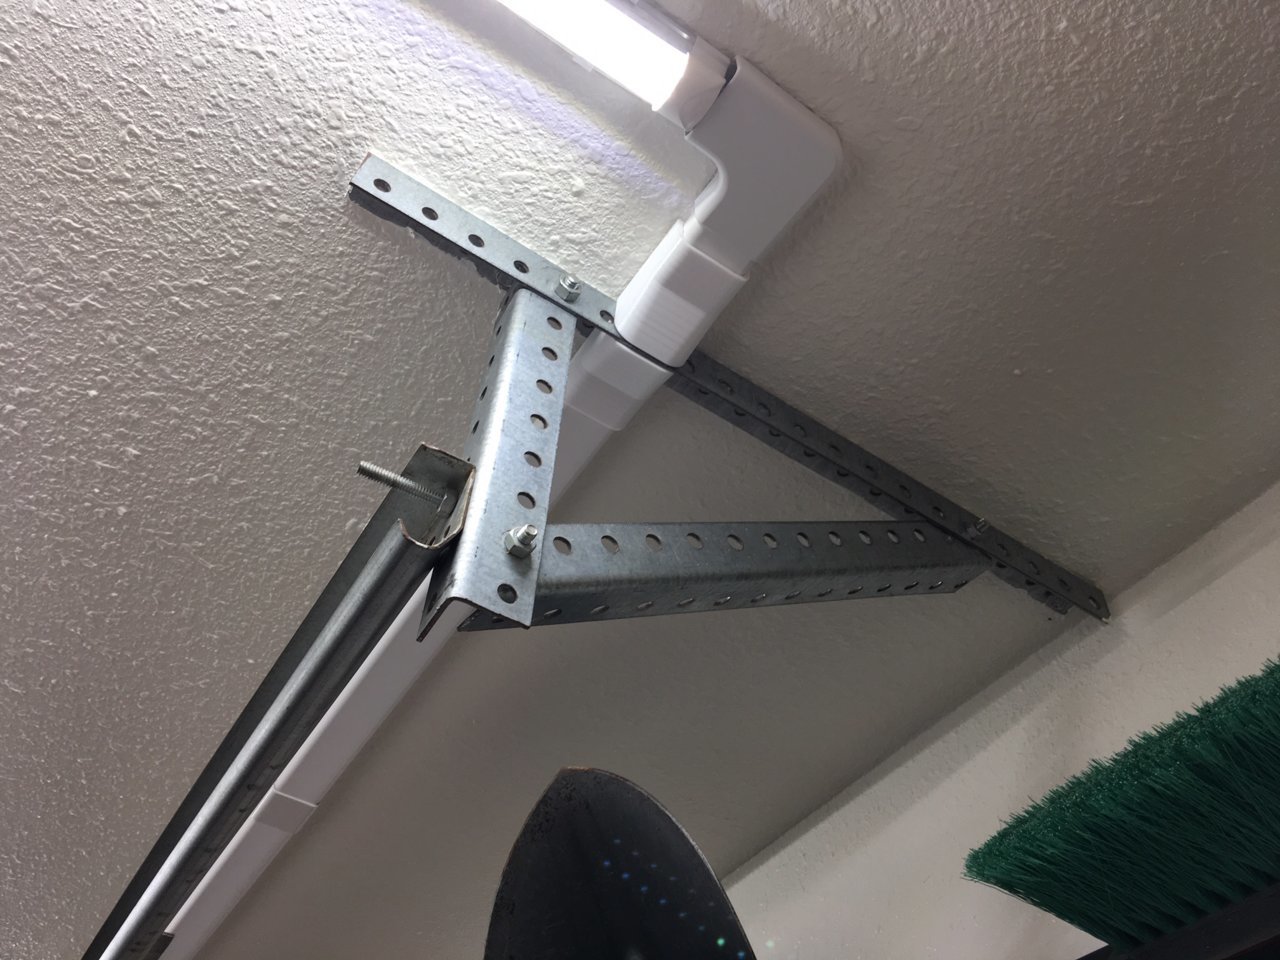
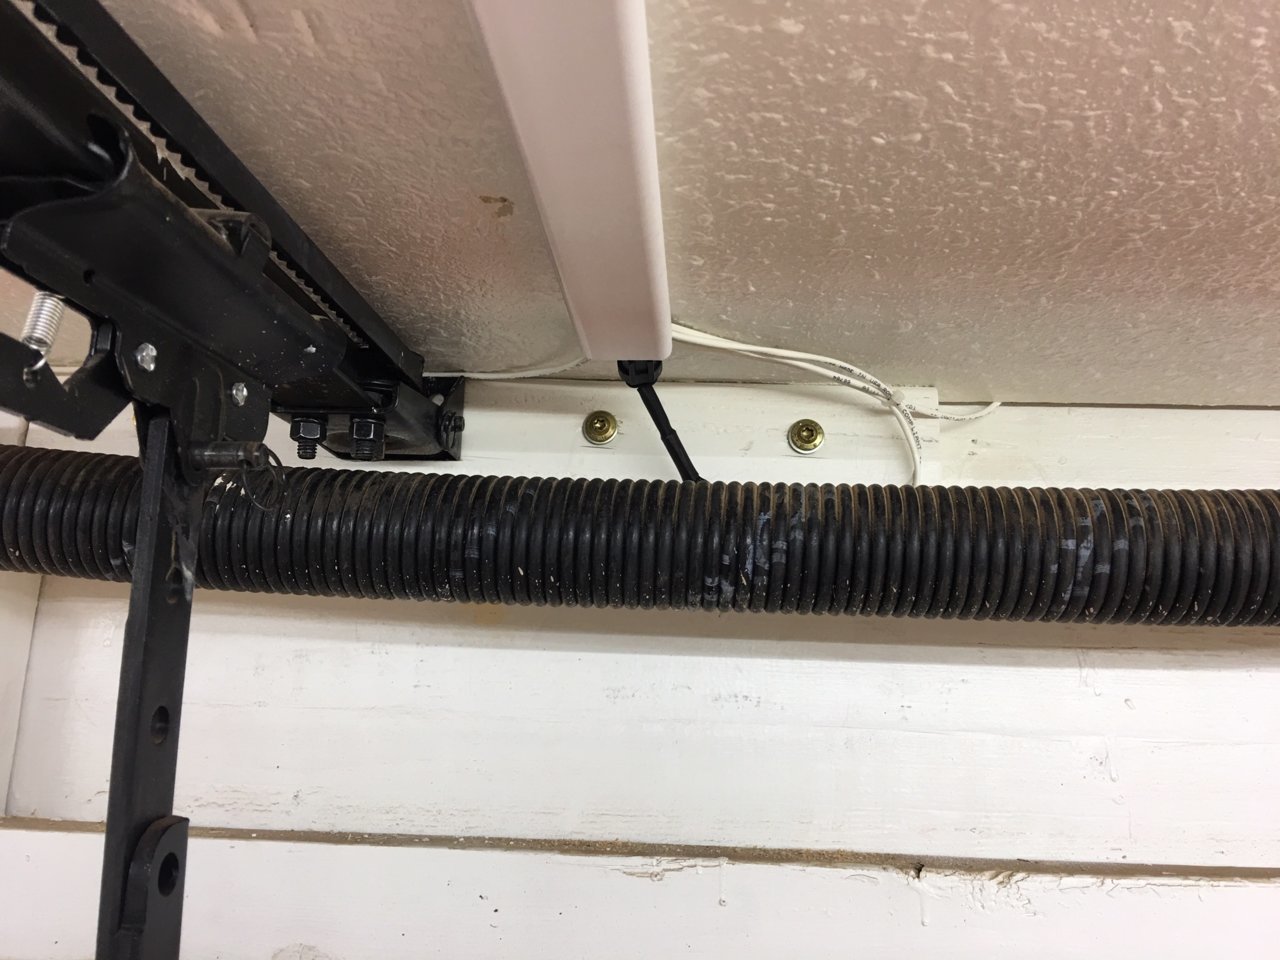
I finished planning the routing and ordered all of the necessary cables early last week, got everything connected on Saturday, and started putting up conduit (wire duct) Sunday morning. I didn't get a whole ton done, but was able to complete the three bridges that run across the garage centerline from left side lamp to right side lamp.

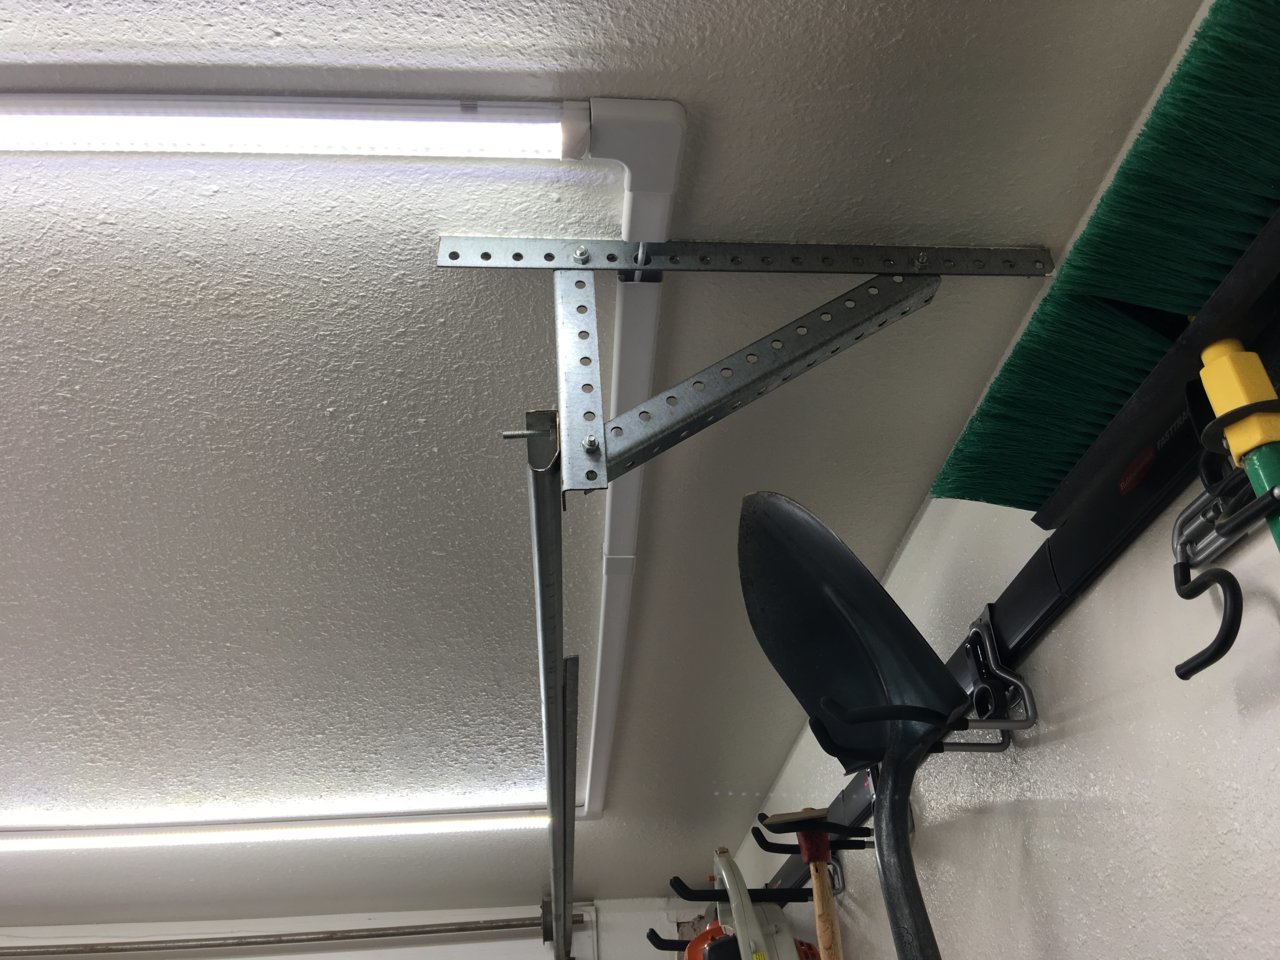
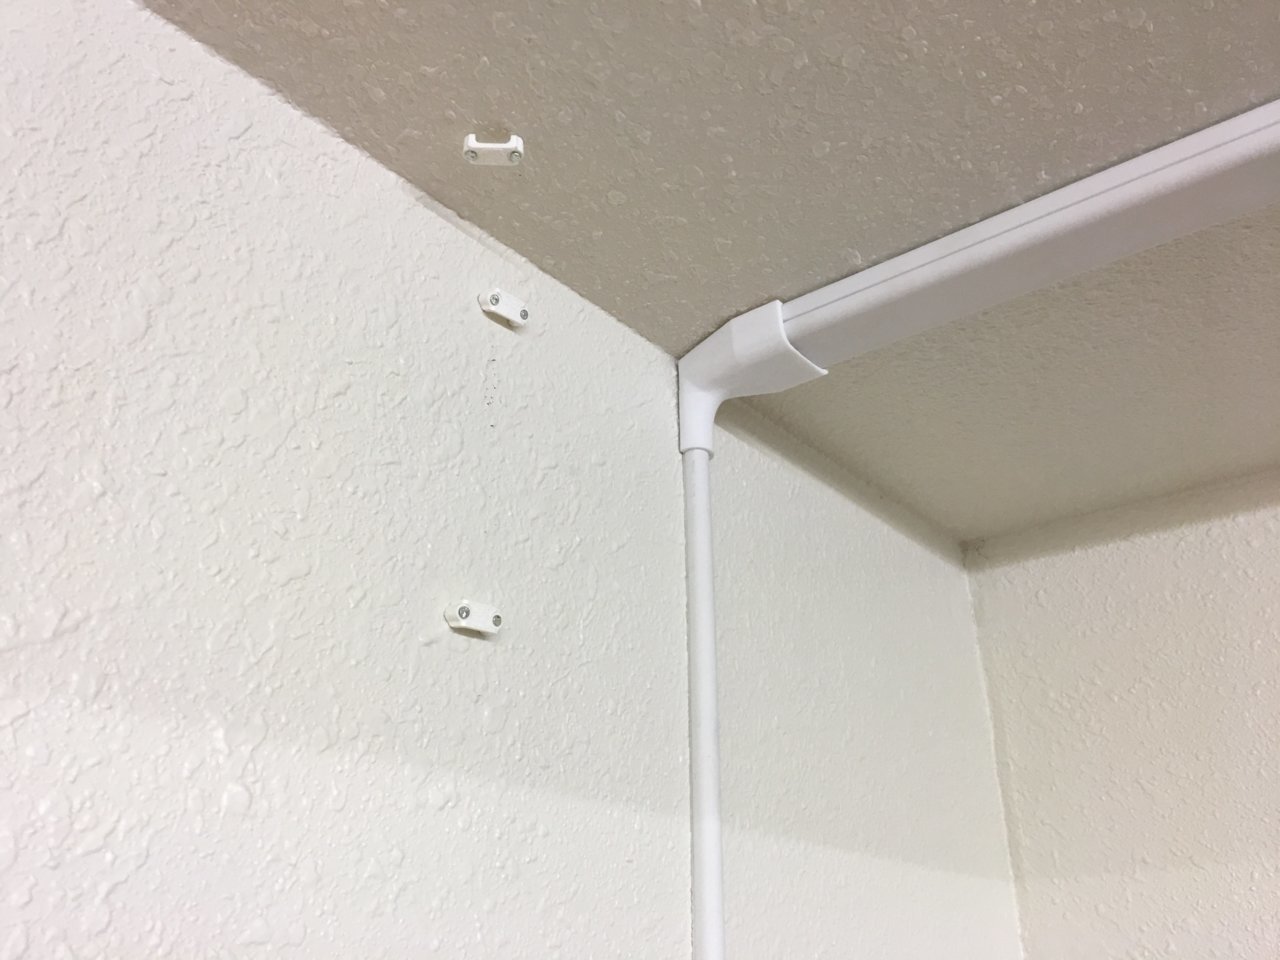
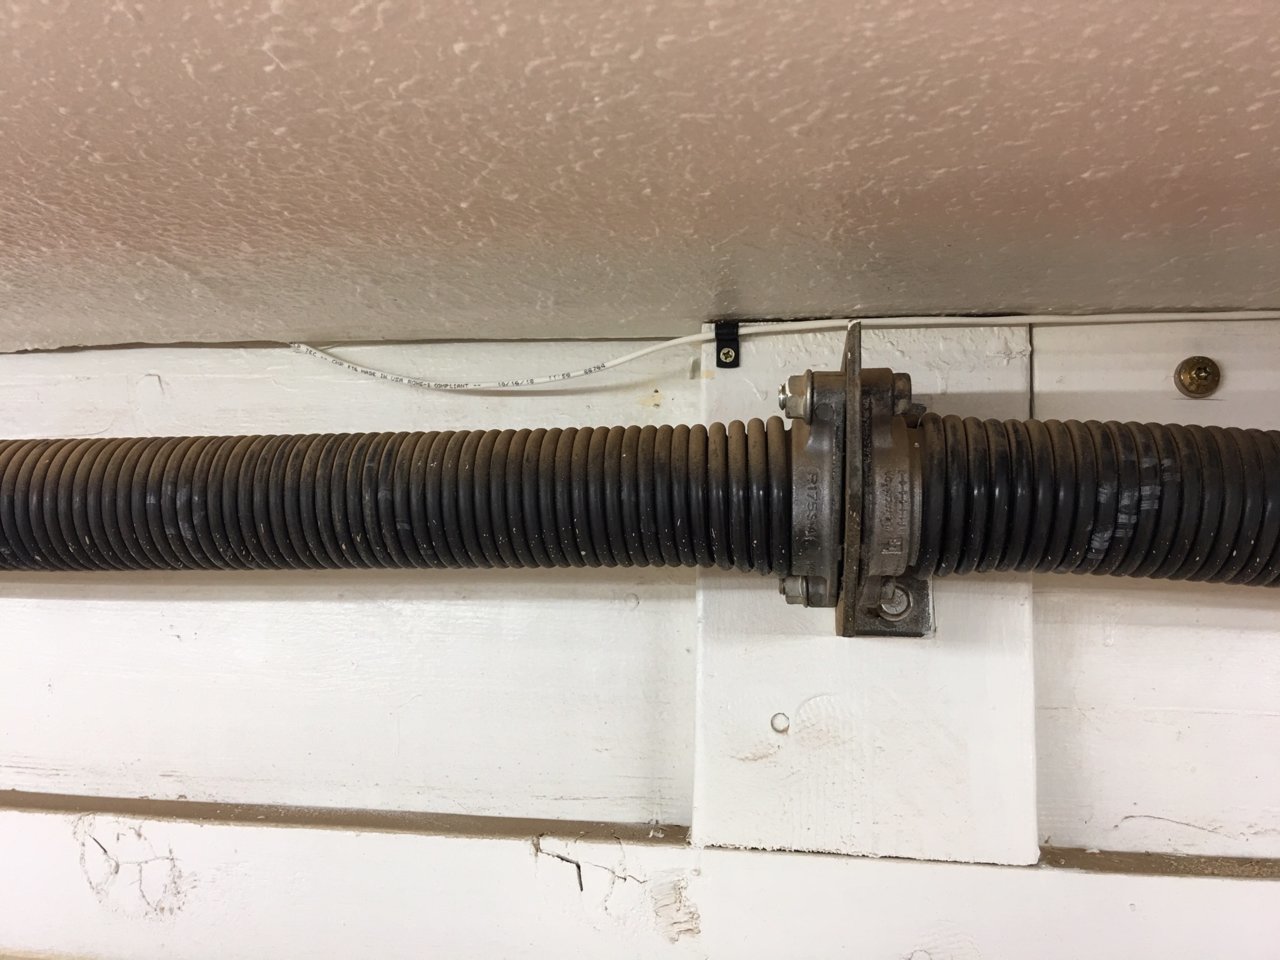
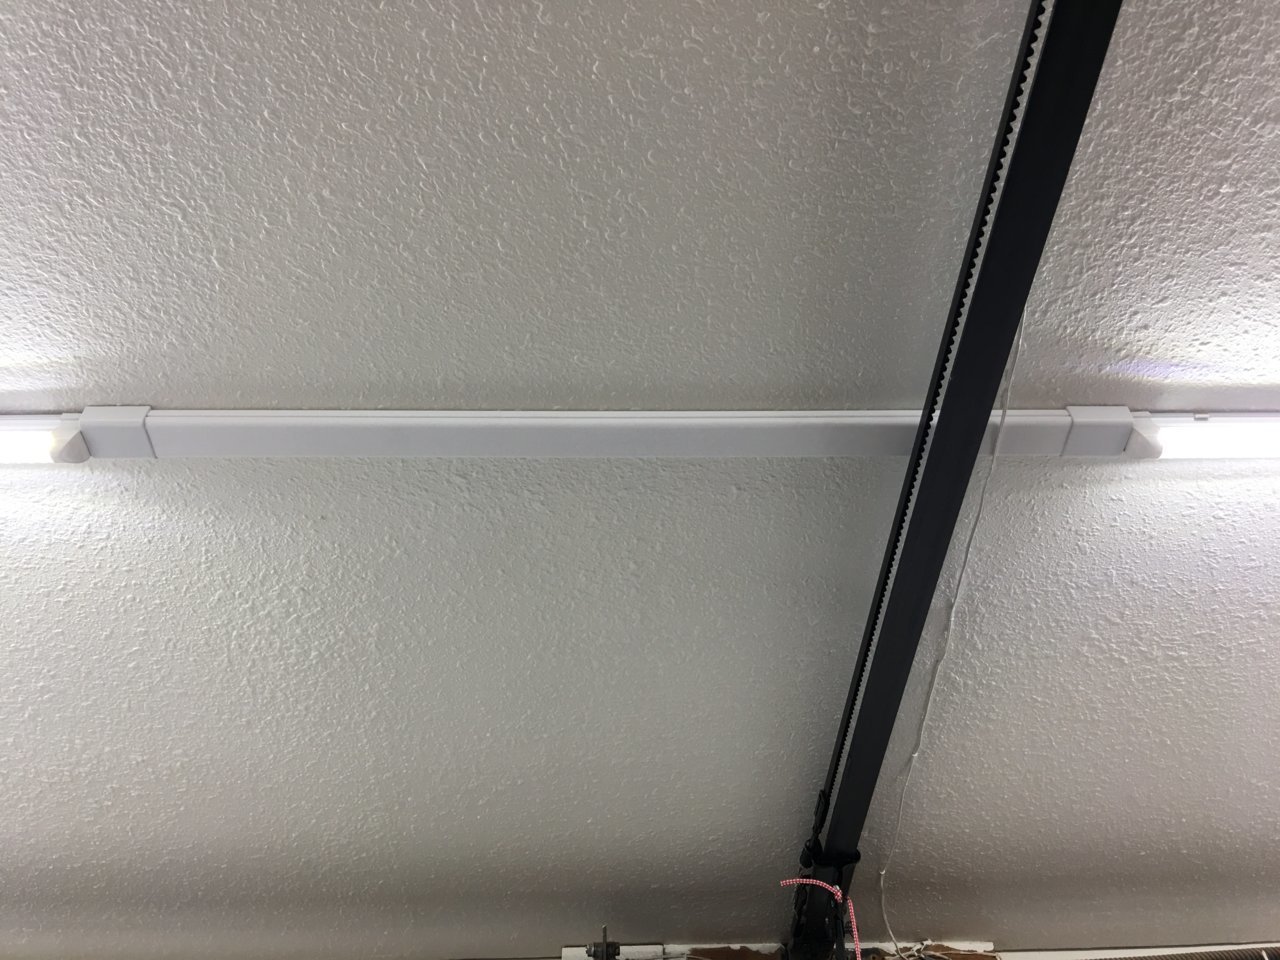
Here's what the straight connection looks like with the duct in place (tucking nicely over the garage door track):


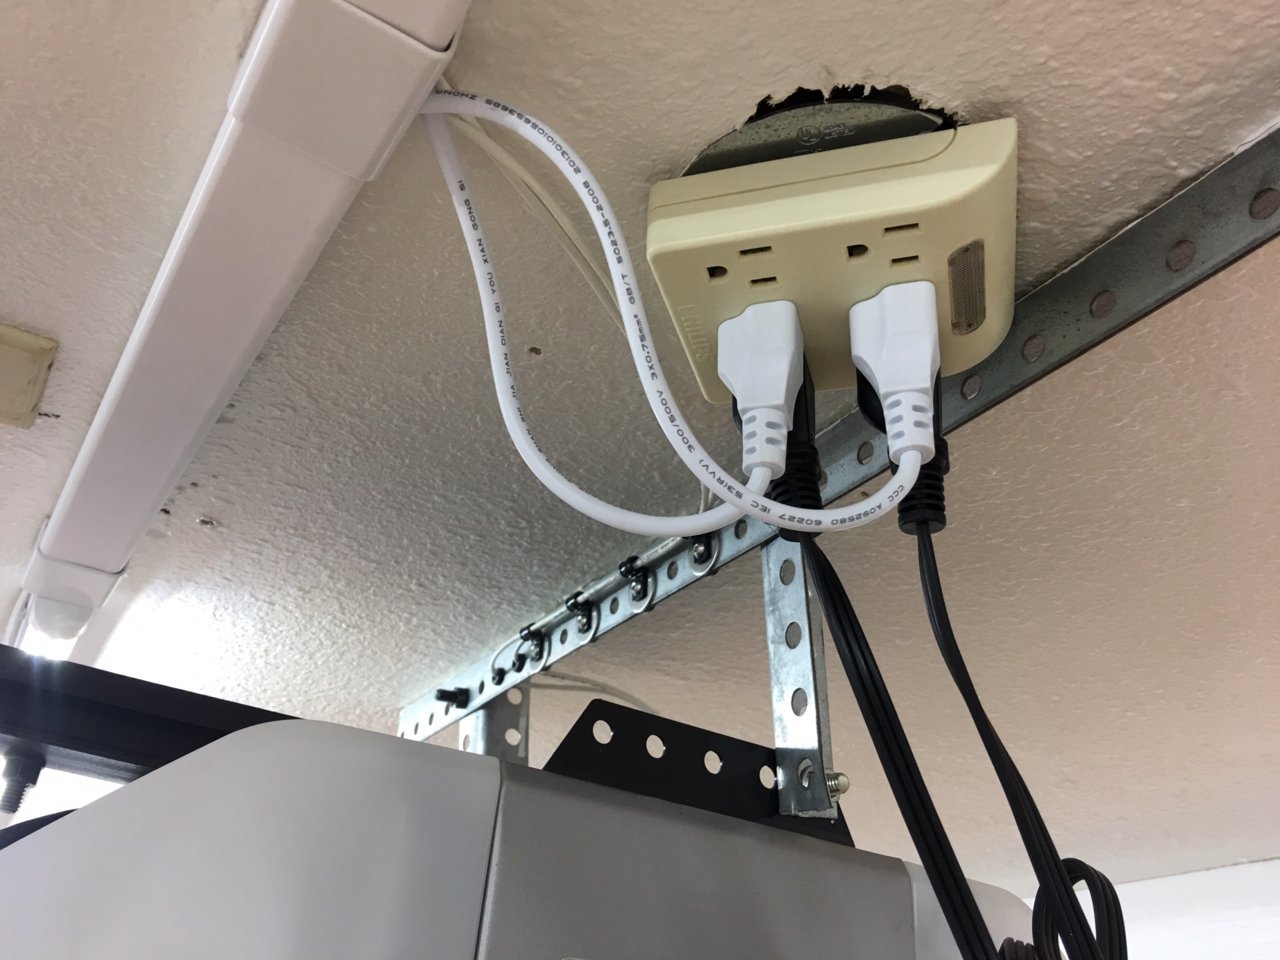
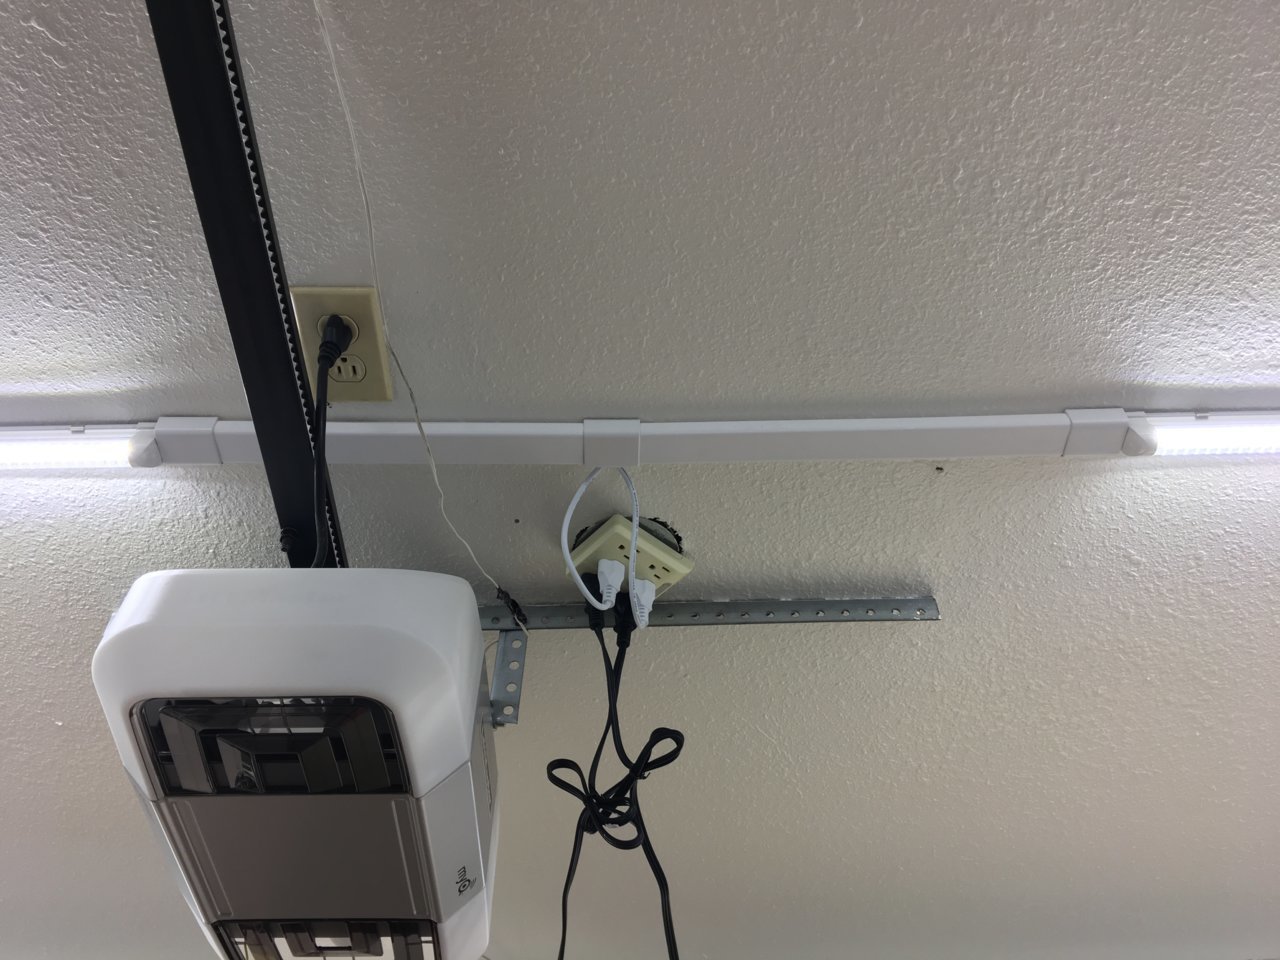
Here's where the two light runs connect to power (somehow, this is the one place in the entire house I didn't remember to replace the outlets with new white ones, so that is coming later):


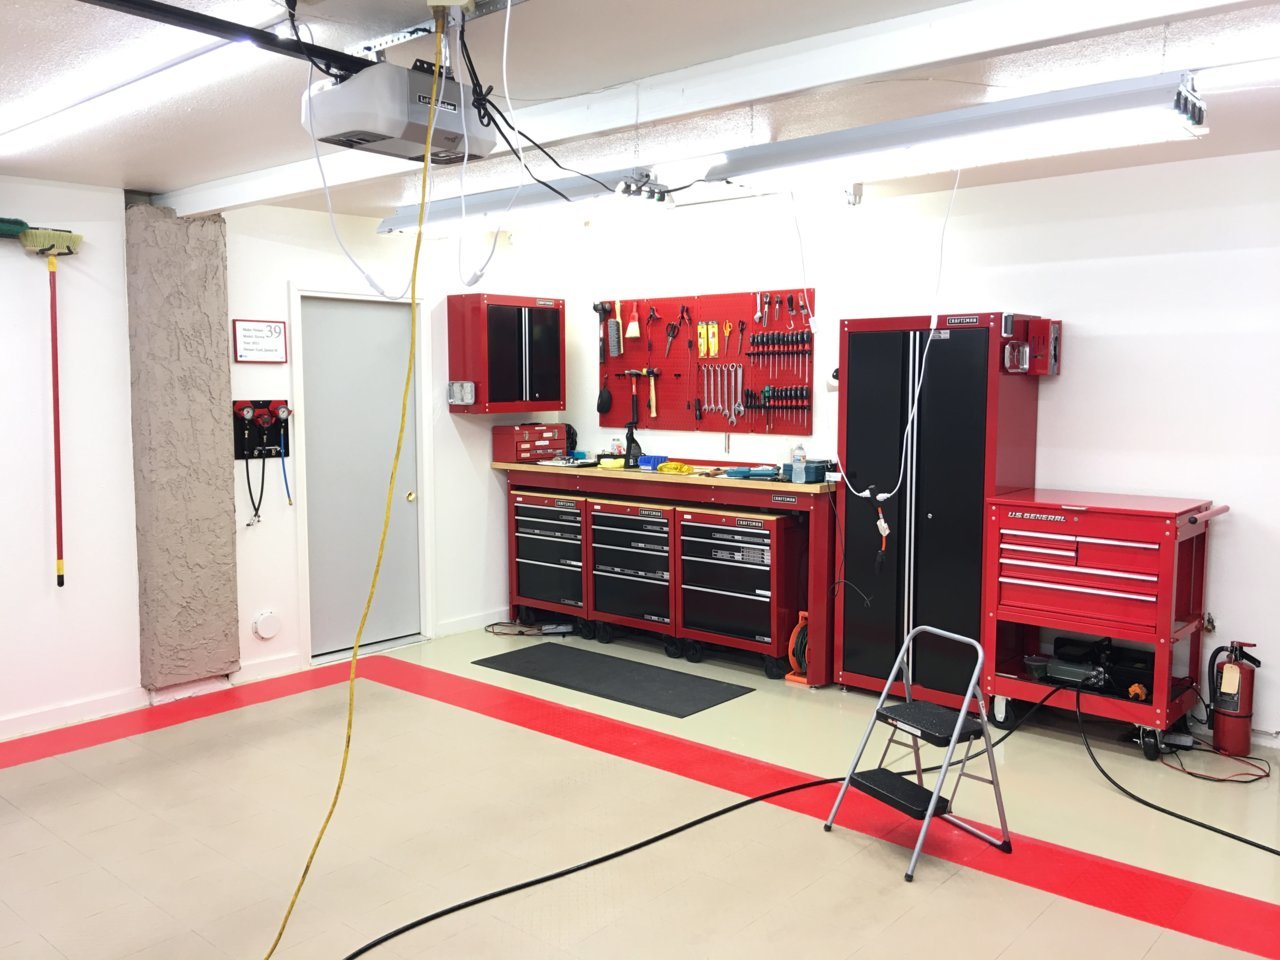
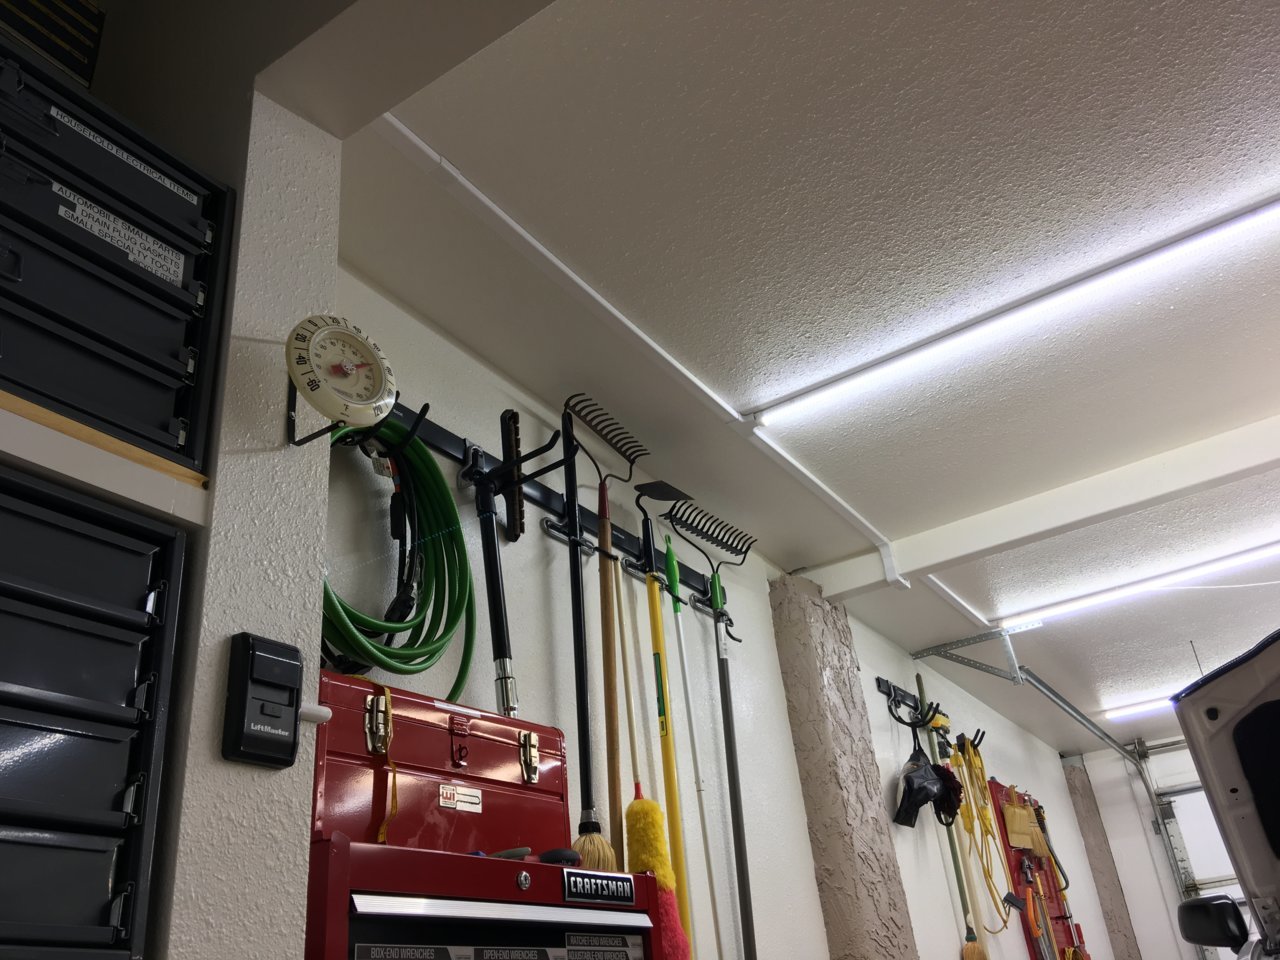
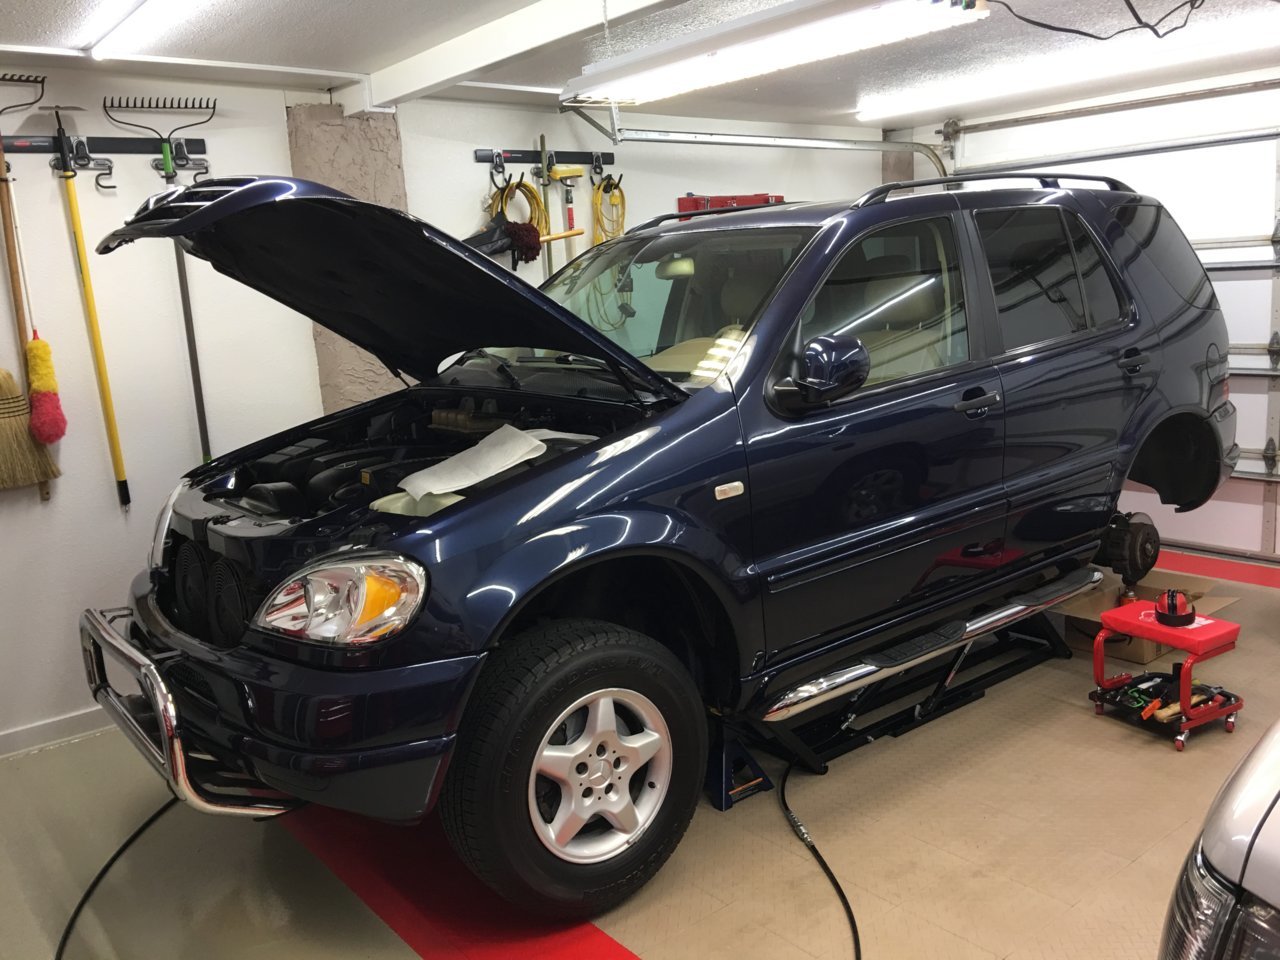
And of course, a shot of the garage with a couple vehicles inside for reference (BRIGHT!):


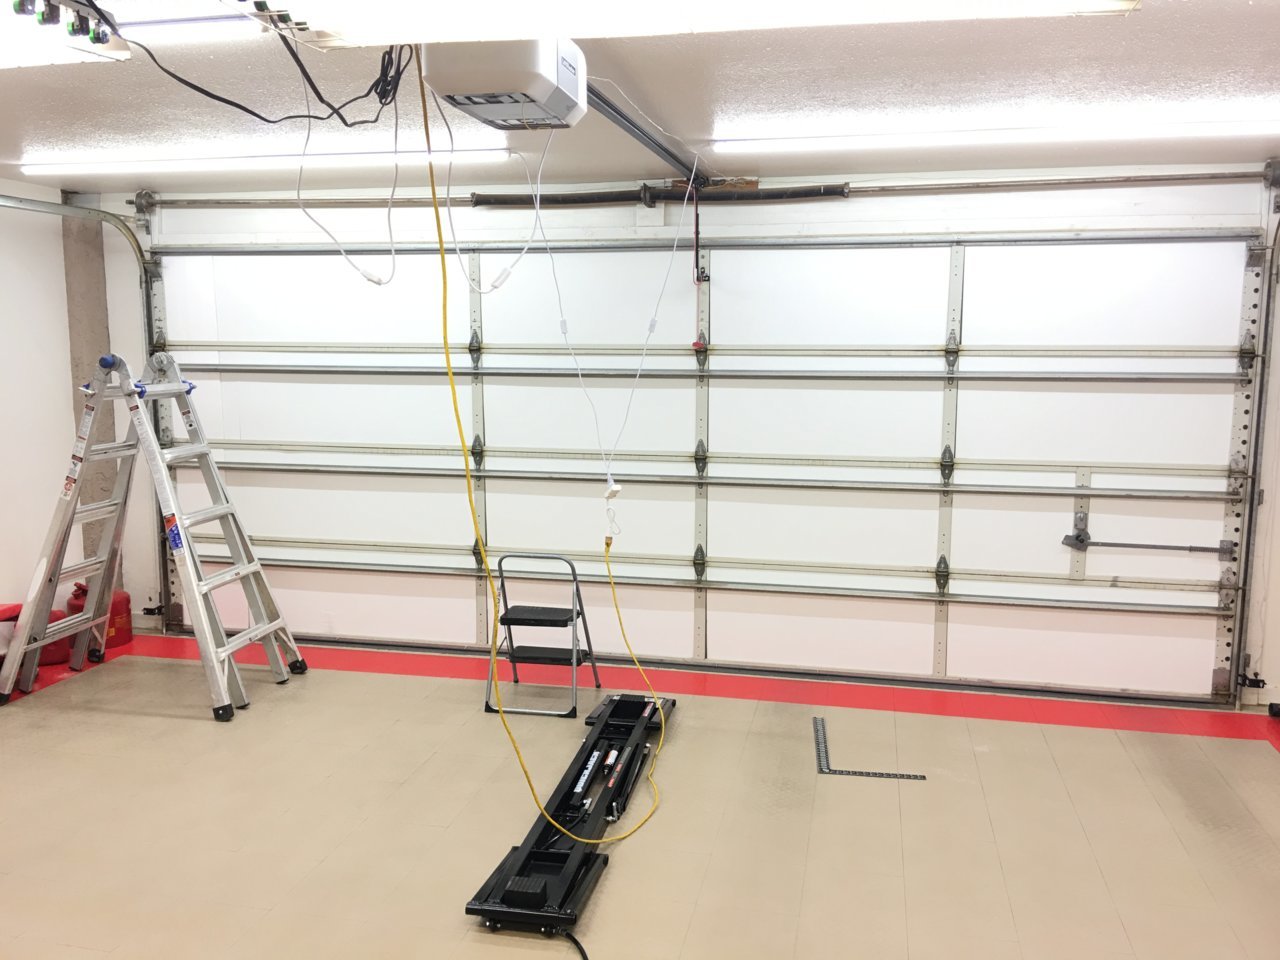
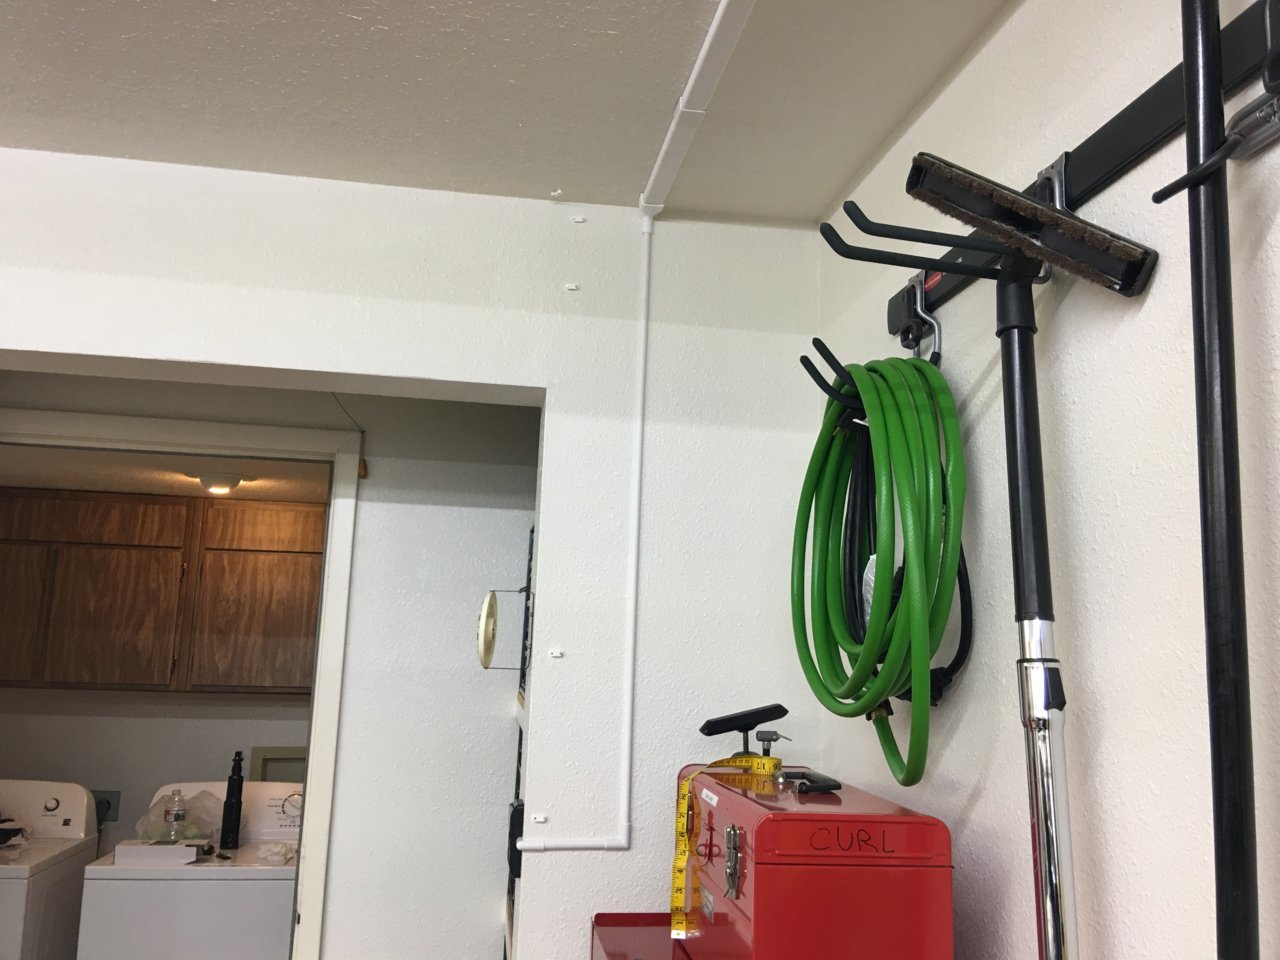
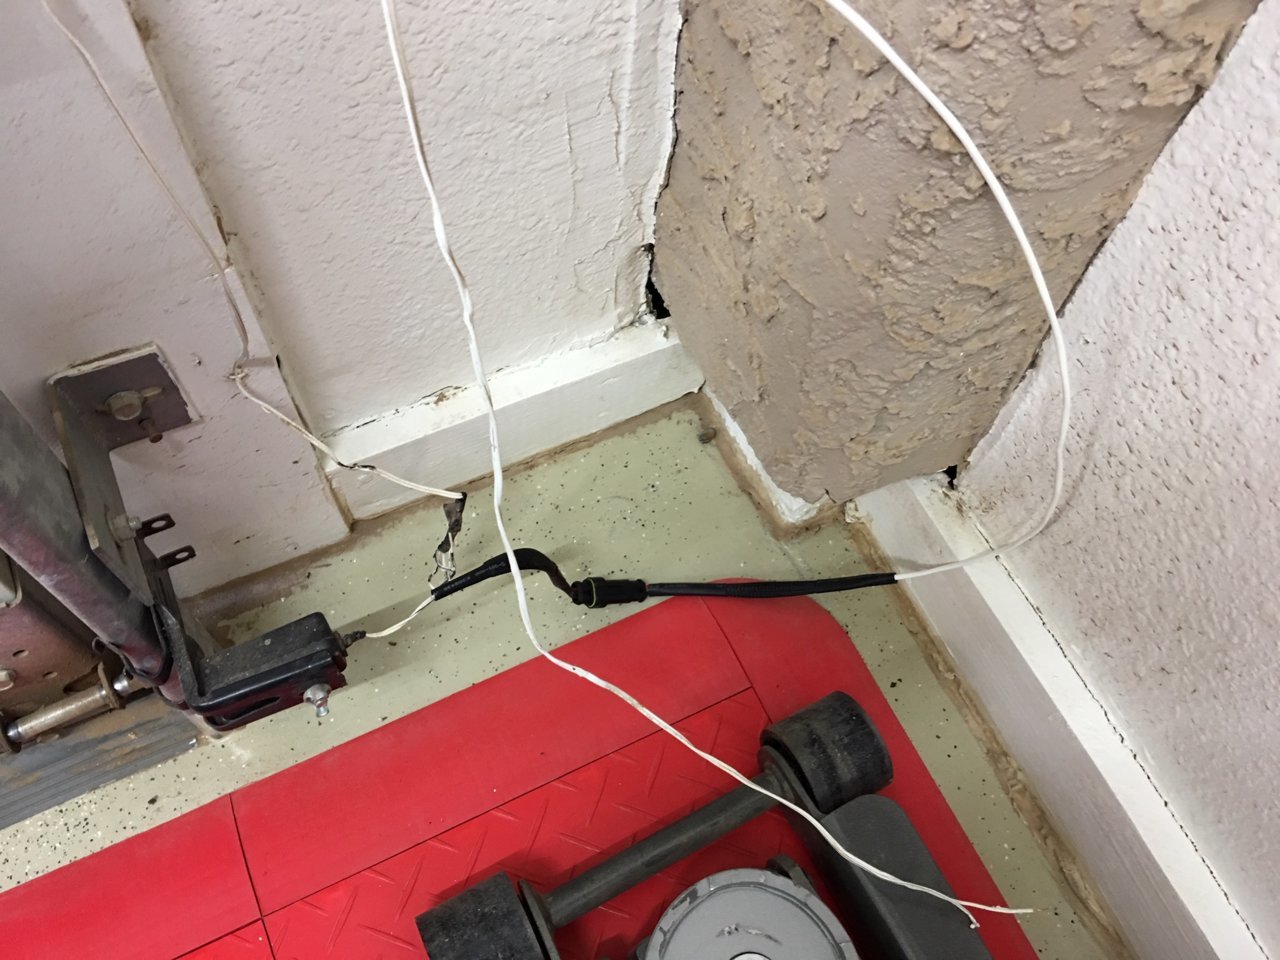
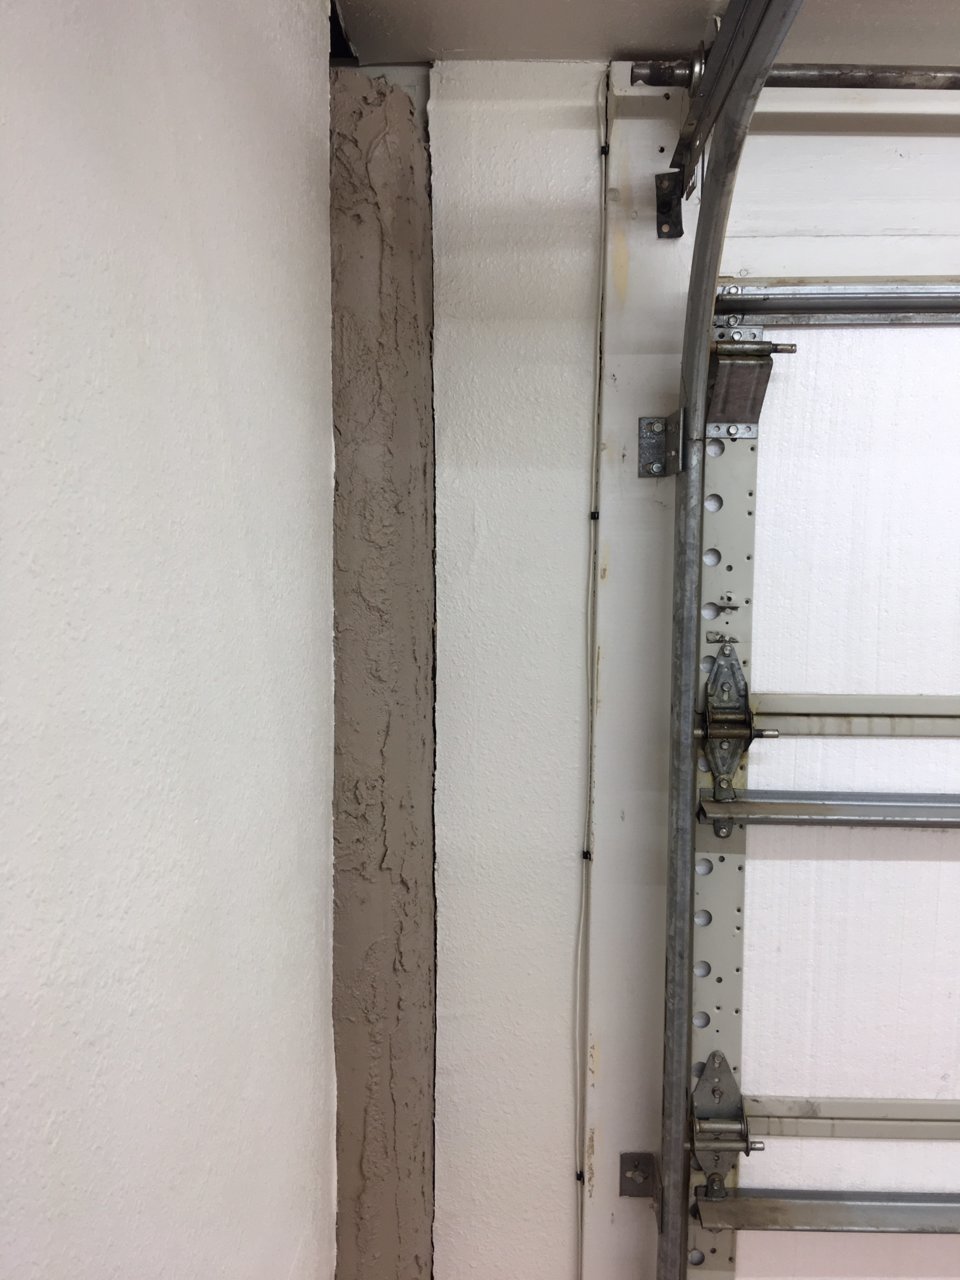
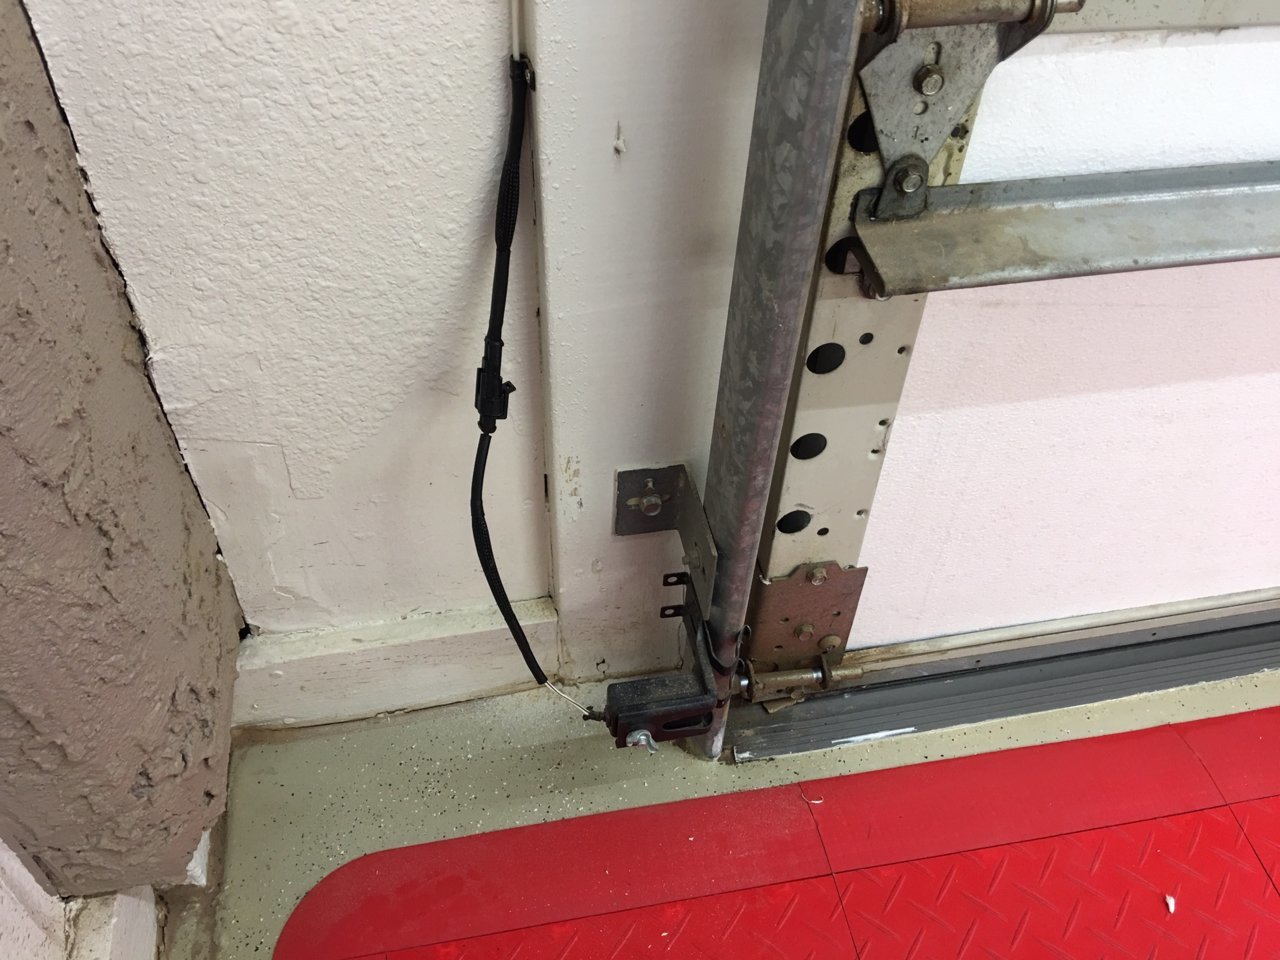
In the pics you may notice the garage door sensor and control wires running haphazardly across the ceiling and under the conduit - I will be replacing that with shielded, 2 conductor cable and running inside the conduit that is supplying power to the lamps, so it should be entirely unnoticeable once I get that done and make for a sweet setup.

I'm torn as to whether I should keep the two, 4-lamp fluorescent fixtures in the garage - the color temperature of the lamps does not match the new lights, but they do provide a decent amount of light output, especially for interior work or anything underhood (though I do have a M12 underhood lamp for that purpose, too). The alternative would be to move them to my shop out back...not sure what I'll do at this point, but any opinions/input on that would be appreciated to help sway my decision.

During the weeks lately, I've been working on organizing my parts stock more to my satisfaction, as well as cleaning up my parents' garage since I do a decent amount of work in there (minor maintenance on family vehicles). I might start a thread on that garage makeover if it turns into a full-blown build - won't be to the extent that mine is, but may end up being a substantial transformation.

Once I get this lighting install finished, I have some more auto projects planned, and also would like to come up with an A/C solution for the shop out back (I have something in mind with a dual-hose portable unit) as well as patch up the ceiling in there after a roof leak surfaced during the last monsoon season. Always something to do!
 
OP
M

Mc1337sauce

Active member
Joined
Dec 24, 2014
Messages
40
Location
Arizona
I never seem to get as much as I want to get done over the weekends these days. I wrapped up all of the conduit for the light install on Saturday, and was planning on installing the additional pieces of conduit necessary to re-run the garage door wiring, but didn't have the time to finish up all of the custom adapter pieces I need for that portion of the project. I am running the garage door wiring for the sensors and opener button through the same conduit used for the lights on the ceiling (all new 2 conductor, shielded cable), but I'm adapting down from CordMate III (the big stuff) to CordMate I on the wall to minimize size and "intrusiveness". I CAD modelled some custom adapters to make the size change, but didn't have time to 3D print them in matching white plastic in time, so I will need to finish up the project next weekend (hopefully).

In the meantime, here are some more progress pics:


Under the beam to the front of the garage (long run number 1) - you can see the tee at the end where I will run some more CordMate III to the wall where it will then neck down to CordMate I at the 90 degree inside corner. Should look very clean, and 1000X better than the wire nailed to the wall and running diagonally across the ceiling.


This is long run number 2 - instead of running under the garage door track bracketry, I decided to enlarge one of the holes to run the wire directly through. I have some custom end pieces that I designed and am waiting to 3D print that will hide all of the exposed wire as well as the enlarged hole. Should look very slick when completed.


We finally had a nice, non-rainy weekend here in AZ, so I did take advantage of that and was able to drive all of my vehicles to get all of their juices flowing. I have some work coming up on my Mercedes (shocks, new tail lights) as well as on my sister's ML (full brake job), so I'm stoked to finally get the garage buttoned up and make use of the more functional lighting setup.
 
To avoid these ads, REGISTER NOW!
OP
M

Mc1337sauce

Active member
Joined
Dec 24, 2014
Messages
40
Location
Arizona
It seems like the lighting/garage door opener rewiring project will never end. The lights are finally completely finished, but the garage door opener rewiring project took an interesting turn. Saturday, I got everything buttoned up from the remote to the opener, but then Sunday, when I went to open the garage door, the 2x4 on the wall where the track mounts split in half with a loud "kaboom," so I spent most of the day replacing that. No pics at the moment since it was a bit of an emergency repair, but I'll post how I mounted that when I have a chance. It should be bulletproof from here on out. Anywho, here's what I got done this past weekend:

CordMate (standard size) mounted on the wall, adapted to CordMate III on the ceiling using a custom adapter I designed and 3D printed. The amount of tries it took for me to get the snap fit *perfect* is...too many...but I'm extremely picky about OEM look and feel, and that's what I achieved. You can see the tacks on the wall and ceiling that were holding the old wire.


Closeup on the adapter:


Another custom 3D printed piece - outside corner into the opener. The original outside corner that came with the kit was a bit too short to reach the opener, and that corner is not exactly 90 degrees either (85, to be exact).


The whole shebang - no more wire tacked up to the ceiling running diagonally.


Hoping to finish rewiring the opener sensors next weekend and then get cracking on some projects (finally)!
 

joey1320

Well-known member
Joined
Jun 14, 2015
Messages
1,813
Location
NE Ohio
Love the Lexus.
Your garage is really nice. I may grab one or two of those ac units for mine.
 
OP
M

Mc1337sauce

Active member
Joined
Dec 24, 2014
Messages
40
Location
Arizona
Love the Lexus.
Your garage is really nice. I may grab one or two of those ac units for mine.

Thanks man, it's a great daily driver and the garage is definitely a nice place to work with all of the work I've put into it.

I highly recommend a mini split if you can fit it into your structure/situation - much more efficient and effective than portables. The portables are much better than nothing, but don't work as quickly nor as effectively.
 
OP
M

Mc1337sauce

Active member
Joined
Dec 24, 2014
Messages
40
Location
Arizona
Finally got all of the re-wiring completed this weekend - the only thing left to do on the garage is patching all of the old holes where the garage door wire was run, and touching up the paint in those areas. Here's what's been completed over the past week:

The other 3D printed trim pieces for the CordMate III that I did.


Old sensor wire next to new sensor wire - added plugs so I can easily disconnect and remove/replace if ever necessary in the future.


The runs up above the opener itself - LED and fluorescent lights plugged in, with the small wires being the control and sensors for the opener.


Cable management much cleaner than previous. I wish I had more pics of how it was before, but there was just wire everywhere.


Breakout from wire duct out to each sensor. This portion has a plug as well for quick disconnect if ever needed. Excess wire loops back into the wire duct for cleaner look.


Close up of the sensor wiring from above, and also a view of the new garage door opener track support piece I installed last weekend after the original crumbled. Lag bolts for the win.


I love my P-clips. Keeping the runs as clean as possible without cutting into walls, ceiling, etc.


P-clips down each side of the garage door, almost impossible to see unless standing within the last foot or two on either side of the garage, and keeps everything clean.


Shot of finalized sensor harness after being tacked to the wall with P-clips.


So, next weekend the plan is to patch and paint the spots here and there, and to then get to work on the huge backlog that has been forming since this one-weekend project spiraled out control with my OCD and tendency to re-do everything that doesn't meet my spec.

More to come as always!
 
OP
M

Mc1337sauce

Active member
Joined
Dec 24, 2014
Messages
40
Location
Arizona
Long time no update - I've had a ton of projects/business opportunities crop up the past couple months, and I've not catalogued much of what I've done, being so busy.

Finally got a full brake job knocked out on my sister's Mercedes ML - huge pain in the rear, as the front rotors were formidably seized onto the hubs, requiring the purchase of a brake drum/rotor puller and the use of a sizable impact on that. Just wrapped that it today, along with some general maintenance tasks including a full clean of the floor (necessary after that dirty job) and some outdoor items (spraying for weeds, cleaning the driveway, etc).

I don't have much in the way of pictorial representation of recent events, but below is the ML on the lift this morning halfway completed.


I might have a new car coming into the garage sometime soon - in the market for a couple different German vehicles to add to the collection. Stay tuned!
 

Unruh

Well-known member
Joined
Aug 12, 2017
Messages
1,431
Location
Silverdale, Washington
You have a great garage! Those small details really make a place stand out. When it gets too hot for you this summer, come up to Washington State and help me with my place!
 
OP
M

Mc1337sauce

Active member
Joined
Dec 24, 2014
Messages
40
Location
Arizona
You have a great garage! Those small details really make a place stand out. When it gets too hot for you this summer, come up to Washington State and help me with my place!

Thanks man, I appreciate it! If I didn’t have other obligations I’d take you up on that - it’s already getting up into the 90s, I’ll need to break out the air conditioners here soon.
 
To avoid these ads, REGISTER NOW!
Top Bottom