To avoid these ads, REGISTER NOW!

metal gauge for welding cart?

MJ_

Well-known member
Joined
Oct 3, 2018
Messages
54
Location
_
Hello,

For father's day, I purchased a Hobart 140 welder. Unfortunately, I made my purchase a couple days outside of the "free cart" window and I am considering making my own. (I did approach Hobart about this, explained that I had just bought the welder, fab table and a helmet... they said 'tough cookies')

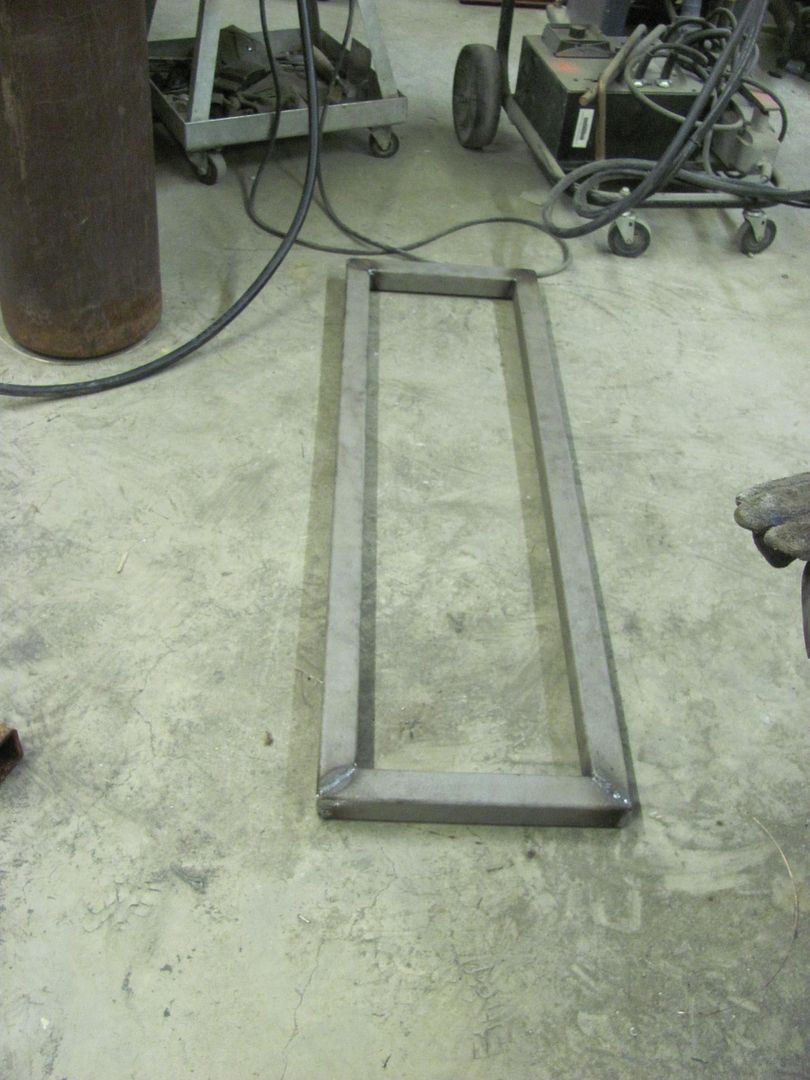
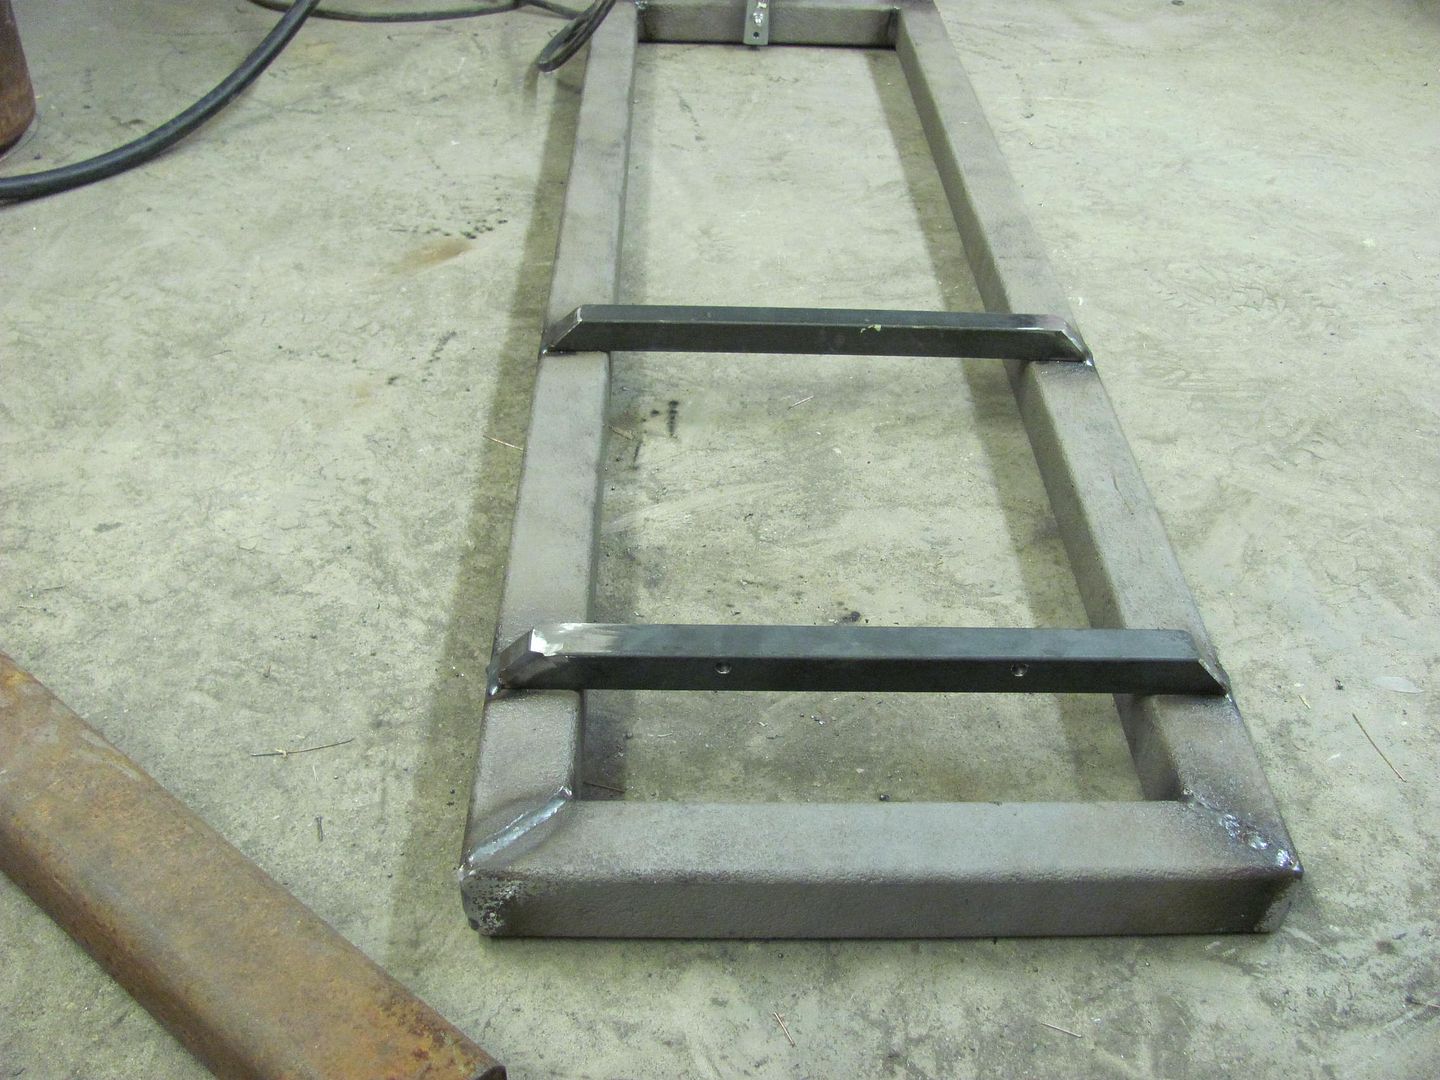
After looking at a lot of previous posts for ideas, I think I may opt to fabricate mine out of square tubing. I am wondering if anyone has an opinion on what metal gauge would be sufficient for the cart's frame. My local metal supplier has square tubing in many thicknesses, but I have been considering a 1.5 inch square tubing in 11ga/0.120 but perhaps 0.180 would be better?

If you've made one of these, I would appreciate your input.
thanks,
MJ_
 
To avoid these ads, REGISTER NOW!

lilredex

Well-known member
Joined
Apr 29, 2006
Messages
5,944
Location
Toronto
Mine was made from one inch square tubing and bed rails, etc, and other junk that was on hand. Most any material will work, not much stress on that type of construction.
 

Attachments

  • Miller135 - 1.jpg
    Miller135 - 1.jpg
    104.4 KB · Views: 149
  • Miller135 - 2009-2.jpg
    Miller135 - 2009-2.jpg
    47.5 KB · Views: 119

Jazz1

Well-known member
Joined
Jan 3, 2016
Messages
4,184
Location
Thunder Bay On.
Shopping cart gauge, it can easily support 500 lbs
 

Attachments

  • E44AC35B-9995-4ED7-A3D1-F7553C3770B6.jpg
    E44AC35B-9995-4ED7-A3D1-F7553C3770B6.jpg
    109.1 KB · Views: 176

LeeG

Well-known member
Joined
Nov 29, 2012
Messages
1,525
Location
Phoenix, AZ
I built mine using 1" 16ga square steel tubing, and skinned it with 20ga steel. Holds my Miller 211 just fine.
 

bdbecker

ALLIANCE MEMBER
Joined
Nov 18, 2015
Messages
5,542
Location
Iowa
I suspect that if you use 11ga tube, it will be thicker than what is used on the factory made cart.

EDIT:
I just looked it up. If it's this cart, it's exactly the same as the one I got with my Millermatic 135. Don't feel bad about missing out on the deal, it's not really that great of a cart. I plan on building something to replace it soon.

https://www.hobartwelders.com/acces...obart-small-running-gear-cylinder-rack-194776
 
Last edited:

kazlx

Well-known member
Joined
Oct 30, 2012
Messages
2,851
Location
Tustin, CA
Build whatever you want. It would be hard to make something that won't hold up your welder.
 
OP
M

MJ_

Well-known member
Joined
Oct 3, 2018
Messages
54
Location
_
I suspect that if you use 11ga tube, it will be thicker than what is used on the factory made cart.

EDIT:
I just looked it up. If it's this cart, it's exactly the same as the one I got with my Millermatic 135. Don't feel bad about missing out on the deal, it's not really that great of a cart. I plan on building something to replace it soon.

https://www.hobartwelders.com/acces...obart-small-running-gear-cylinder-rack-194776

Yes, that is the one. Hard to imagine paying the MSRP for it. I thought for that money, I could build something better.
 
OP
M

MJ_

Well-known member
Joined
Oct 3, 2018
Messages
54
Location
_
Mine was made from one inch square tubing and bed rails, etc, and other junk that was on hand. Most any material will work, not much stress on that type of construction.

Always like to see materials get recycled. Very cool cart.
 
OP
M

MJ_

Well-known member
Joined
Oct 3, 2018
Messages
54
Location
_
Thanks everyone for the advice. This gives me a good start.
 

MP&C

Well-known member
Joined
Oct 21, 2009
Messages
4,396
Location
Leonardtown, MD
With limited floor space in my shop, I went multi-story welder cart. This one holds MIG, TIG, Spot welder and timer control, and Dent puller... :


I recently sold my Dinosaur Mig, after owning since '91 I thought it was time for a new one..

Picture179.jpg


Sold it on CL, time now to consolidate. My shop space is limited, and I need to incorporate the new Miller 211, the Hypertherm Tig, and the Snap On dent puller, and two bottles:

Picture1499.jpg


Picture1500.jpg


Picture1501.jpg


Starting with the base, some 1-1/2 square tubing makes up the frame. This stuff was free, and as with most free stuff, it isn't, as Kyle spent quite a bit of time media blasting rusty square tubing that has been sitting outdoors for a number of years.

Picture1502.jpg


The Tig will go on the bottom, and it has some mounting holes on the bottom side...

Picture1503.jpg


So some 3/4 square stock was used to make some rails for the Tig, along with some holes to tie in the front end..

Picture1504.jpg


adding the front casters.....

Picture1509.jpg


A cross brace was added under the center line of the 2 bottles...

Picture1512.jpg


12 gauge will be used to form a tray under the bottles...

Picture1513.jpg


Support bracket added for Mig welder:

Picture1510.jpg


Picture1511.jpg


the rear axle was made from a piece of angle and two 3/4-10 bolts..

Picture1521.jpg


Picture1523.jpg


Rear bottle tray made from some 12 gauge, and welded on using about 3/8 diameter plug welds..

Picture1528.jpg


Picture1530.jpg


Top shelf added along with some gussets made of 12 gauge..

Picture1533.jpg


Bottle relief and pull handle added....

Picture1532.jpg


Picture1534.jpg


Picture1536.jpg


these studs are added to make use of the bottle bracket that came off the old welder. My brother in law had borrowed it at one time, and it came back with the fancy bracket. He retired the ratchet strap I had around the two bottles. This worked pretty well, so rather than reinvent the wheel.... Reminds me, I have some other things needing finishing I should lend him...

Picture1537.jpg


Picture1539.jpg


Picture1540.jpg


Then a bracket for the clip is added to hold the Mig torch..

Picture1542.jpg


Picture1543.jpg


Picture1544.jpg


Holders for the various cables....

Picture1548.jpg


Picture1549.jpg


Picture1545.jpg


Picture1546.jpg


Picture1551.jpg


.....and a test fit before we throw some paint on it...

Picture1554.jpg


Picture1552.jpg


Looks like I have some room left, may have to add one more....

Picture1555.jpg


Picture1556.jpg


Picture1558.jpg


Picture1559.jpg


Picture1560.jpg


Picture1561.jpg


Now to disassemble and paint it... It was a toss up between some bright red (HD color) which was acrylic lacquer, or a bright yellow (H/K Lemon Yellow basecoat). As I didn't have any lacquer thinner in stock for the red, yellow it is...followed by clearcoat. Note ring holders for Tig filler rod tubes..

Picture1567.jpg


Picture1569.jpg


This should help to brighten up the shop!
 

Bodj Built

Well-known member
Joined
Feb 3, 2016
Messages
1,165
Location
Moorpark, CA
13G or lighter is plenty. I built both of mine. One holds my TIG and plasma cutter and one 300 argon bottle. The other holds my 220v and 110v MIG welders and one argon/co2 bottle. Locking casters are welded right on all 4 corners. Makes it easy to maneuver around and make sure it doesn't roll away if you're on a bit of a slope.

https://scontent-lax3-1.**.fbcdn.net/v/t1.0-0/p206x206/48368176_10156493982651501_6694676639374114816_n.jpg?_nc_cat=107&_nc_oc=AQkW1bMZXkX07V_J6Wb1I8Vd3YsC1fQ8aIwZ3lyeCdCvN5OqGUS8BVhdyLIA2jfsBwM&_nc_ht=scontent-lax3-1.**&oh=a4730ea46be3edf047ef5af377b551f9&oe=5DB0EACB
 

dr_clyde

Well-known member
Joined
Jan 7, 2009
Messages
6,421
Location
Holland, MI
I've made many carts. I am currently making a new batch, as I recently sold my old cart with one of my welders, and have aquired a few new tools that need carts.

I have a basic design that I modify for whatever I am needing to cart around. It is very simple in Solidworks to add or subtract height or width to accommodate different machines.

attachment.php


The entire thing is made from 14ga sheet metal and square tubing.

You can use thinner, but I like 14ga from an ease of working standpoint. It forms up nice and stiff, and welds easily with the MIG. The 14ga tubing is a standard stock size, and is cheap.

I do a basic frame from tubing to hold up the shelves and act as a handle. The shelves are all laser cut and formed on a press brake.

Here you can see how the shelves are notched and formed to capture the tubing and stay rigid.

attachment.php


Here is the basic design tacked up for a test fit. I still need to cut the new filler rod holder, this is my old one and I need to make some changes to it.

attachment.php


My lead holders are modular and adjustable, you can easily move them side to side or back and forth to accomodate different size leads or locations.

attachment.php


Cylinder retention is accomplished with this cool clamp bolted to the back shelf.

attachment.php


Now I need to weld it out and get it powder coated. I have 3 more carts to make, I need one for my MM255, my plasma cutters, and my Walter Surfox, which will be all stainless with a tray on the the top to keep the acid contained when I passivate small parts.

My old cart was the "all in one" style. It housed the Dynasty 200DX, Coolmate 3 water cooler, Lincoln Invertec V300 PRO, LN-7 Feeder, Hypertherm Powermax 900 plasma, filler metals, consumables, leads, and a lot of misc. junk.

41667750584_d17a6dc485_b.jpg


It was a real space saver, and it was really dense with storage. I had a lot of stuff on it. However, it was impossible to move around the shop easily, and I discovered I much preferred to have the machines separate from each other. It allows two guys to use them on other ends of the shop, makes them far more portable, and allows me to tailor each cart to the needs of each machine. When I sold the Lincoln, I gave the guy the cart with it.

That forced me to design and make some new carts.
 

Attachments

  • Dynasty 200 DX Cart.JPG
    Dynasty 200 DX Cart.JPG
    78.6 KB · Views: 607
  • IMG_6736.jpg
    IMG_6736.jpg
    99.4 KB · Views: 593
  • IMG_6735.jpg
    IMG_6735.jpg
    71.2 KB · Views: 594
  • IMG_6734.jpg
    IMG_6734.jpg
    101.8 KB · Views: 593
  • IMG_6726.jpg
    IMG_6726.jpg
    97.3 KB · Views: 596

brewchief

Well-known member
Joined
Sep 20, 2008
Messages
2,370
Location
Michigan
Just a FWI the basic Harbor freight cart is around 40$, it's far from super fancy but it works and is pretty cheap. If it will meet your needs it may be cheaper than building one.

Sent from my SM-G965U using Tapatalk
 

sberry

Banned
Joined
Jun 18, 2005
Messages
35,747
Location
Brethren, Michigan
I an not sure what ga the chair is. BBQ grills are also a great source of tube just right for this. You don't need to run to the steel yard for every piece. Its expensive, its slow, requires a lot of finish.
I use a lot of appliance steel, sheet. Its pre finished, scuff and paint.
 

Attachments

  • Hobart cart.JPG
    Hobart cart.JPG
    52.6 KB · Views: 70
  • tool cart b.jpg
    tool cart b.jpg
    151 KB · Views: 60
  • refrig cart.jpg
    refrig cart.jpg
    79.5 KB · Views: 59

jimgood

Well-known member
Joined
Aug 4, 2014
Messages
2,394
Location
Marshall, VA
MJ, is this your first welder? If you use thin tubing, make sure you practice. It's easier to blow through thinner tubing. The .120 wall stuff will be more forgiving, albeit heavier and more expensive.
 
OP
M

MJ_

Well-known member
Joined
Oct 3, 2018
Messages
54
Location
_
This is my first welder and any cart that I make will be my first project with a welder.
I was leaning toward using a 16ga square tubing due to the number of people who chimed in to advise this thickness. But, I've been thinking that a thicker material would afford me the luxury of a few mistakes. As you said, it would cost more, but I could call this the cost of learning.
 
To avoid these ads, REGISTER NOW!

sberry

Banned
Joined
Jun 18, 2005
Messages
35,747
Location
Brethren, Michigan
5 minutes fab. I eventually moved the plasma and the Hobart to the top of the Synchro and eliminated 2 carts. I put the SP on the old plas cart. It was the shopping welder for a long time. One thing about this type if fab is that you don't get "invested" in it,,, both time/money and emotion and not scared to change when the time comes.
Some of the guys been in the same shops a long time and are well rooted, making custom makes some more sense but when starting go for simple and easy,,, free or cheap is even better. I would have a hard time not looing at HF engine stand or tool box as a start if I was doing this again and needed to buy materials.
When I wanted to change or it became more obvious it was a 5 minute deal and didn't need to toss something I worked hard on. I did that a lot earlier in my career, I got a lot of stuff is beautifully fabricated but now obsolete.
 

Attachments

  • SP cart.JPG
    SP cart.JPG
    71.3 KB · Views: 34
  • Plaz Hob Synch.jpg
    Plaz Hob Synch.jpg
    122.3 KB · Views: 35
  • plas cart.JPG
    plas cart.JPG
    43.4 KB · Views: 39
  • plaz lead holders.JPG
    plaz lead holders.JPG
    36.5 KB · Views: 31
Last edited:

Bodj Built

Well-known member
Joined
Feb 3, 2016
Messages
1,165
Location
Moorpark, CA
My TIG welding cart was my first TIG project. Trial by fire. You'll be thankful you went thinner than going thicker. Yes, thicker is more forgiving, but if you ever need to put the cart in the bed of a truck to help a buddy weld somewhere off site, you're going to hate life.
 
OP
M

MJ_

Well-known member
Joined
Oct 3, 2018
Messages
54
Location
_
I do understand your point.
I help a metal fabricator on the weekends and I get to unload an older Lincoln LN25 flux-cored welder that is fastened to a cart made from liberal amounts of solid square rod. I could never lift that thing by myself and certainly have a hard time doing it with help.
 
OP
M

MJ_

Well-known member
Joined
Oct 3, 2018
Messages
54
Location
_
Very nice... I like the use of the tool cabinet and the cable hangers too.
 

ez-duzit

Well-known member
Joined
Jun 24, 2013
Messages
5,094
Location
Marina del Rey
M--thanks.

The tool chest is a Kennedy with ball bearing slides. Cable hangars I made from a piece of aluminum pipe, 3/8" rod and 1/4"x1-1/4" flat bar I had on hand; installed using the threaded inserts provided by Kennedy for attaching the handle, which I used on the front of the cart.
 
Last edited:

BukitCase

Well-known member
Joined
Apr 11, 2017
Messages
1,075
Location
Oregon
ez-duzit, Hypertherm recommends a LOT more "breathing room" than that, so I scrapped a "multi-unit" cart idea; I'm guessing they're a bit overprotective, you've had no overheat problems? ... Steve
 

tarbellb

Well-known member
Joined
Apr 17, 2011
Messages
5,725
Location
Oregon
Doc has lots of good info.

I wouldnt go any thicker than 16g (.060), and lean towards 18 or even 20 depending on design and availability.
 
OP
M

MJ_

Well-known member
Joined
Oct 3, 2018
Messages
54
Location
_
dr_clyde's cart build is very nice. I can appreciate the use of sheet metal and this makes me wish I had access to a break. Nice and simple solution overall. I'm pretty sure my own cart is going to look apologetic compared to the other photos shared in this thread. :)
 

dr_clyde

Well-known member
Joined
Jan 7, 2009
Messages
6,421
Location
Holland, MI
For some reason, guys like to over complicate things that they are designing.

I work with some industrial designers and I’ve learned that less is often more. What can you remove from a design and have it still be functional?

Form needs to follow function, and a good design tends to look plain and simple, while being devilish in the details.

A good example of this is stiffening and gussets. Formed sheet metal can be just as strong or stronger than a tube with a sheet shelf welded on.
 

lis2323

Well-known member
Joined
Dec 25, 2016
Messages
3,234
10 or 11 gauge would be fine. This one I built for a Syncrowave


8c41686bd4e58b067672b035eb9bd1de.jpg

c90734ae4f55a05cea71afe727744b6b.jpg

eb5335e3ddce6115edc19b9f9db2b339.jpg

And this one for an XMT

d675e5592e3237326616a8447726e50f.jpg


Sent from my iPad using Tapatalk
 

Attachments

  • d675e5592e3237326616a8447726e50f.jpg
    d675e5592e3237326616a8447726e50f.jpg
    491 KB · Views: 5
  • eb5335e3ddce6115edc19b9f9db2b339.jpg
    eb5335e3ddce6115edc19b9f9db2b339.jpg
    745 KB · Views: 4
  • c90734ae4f55a05cea71afe727744b6b.jpg
    c90734ae4f55a05cea71afe727744b6b.jpg
    401.3 KB · Views: 4
  • 8c41686bd4e58b067672b035eb9bd1de.jpg
    8c41686bd4e58b067672b035eb9bd1de.jpg
    500.5 KB · Views: 11
Last edited:

sberry

Banned
Joined
Jun 18, 2005
Messages
35,747
Location
Brethren, Michigan
A good example of this is stiffening and gussets. Formed sheet metal can be just as strong or stronger than a tube with a sheet shelf welded on.
Along that same thought and not to be contradictory. A Bud stopped over for something a while back, he happened to show me a hitch add on he had to a new PU. He was rightfully proud of it. The guy that did it knew exactly, it wasn't his first time and he chose a structural piece a size thicker than a lot of us would have used. In doing so he eliminated a whole bunch of additional pieces, didn't need to add the gussets and bracing, saved a lot of work, did the whole job as I recall with 4 pieces.
I saw a work bench here, it was nice enough but I count about 30 pieces that didn't do anything, 16 gussets on the top frame alone. The workmanship was great but the design had a lot of stuff added took days.
 

ez-duzit

Well-known member
Joined
Jun 24, 2013
Messages
5,094
Location
Marina del Rey
ez-duzit, Hypertherm recommends a LOT more "breathing room" than that...you've had no overheat problems? ... Steve

Just finished the cart this past week and still have to plumb the air compressor before I can run the plasma cutter. But I expect no problems. You can fit your hand between the machines.
 

BukitCase

Well-known member
Joined
Apr 11, 2017
Messages
1,075
Location
Oregon
Here's what the manual for my PM45 says -

"Locate the Powermax45 near an appropriate 200–240 volt power receptacle for CSA or CE 1-phase power supplies,
a 400 volt receptacle for 3-phase CE power supplies, or a 480 volt receptacle for 3-phase CSA power supplies. The
Powermax45 has a 3 m (10-foot) power cord. Allow at least 0.25 m (10 inches) of space around the power supply for
proper ventilation."


(emphasis added by me)

IF your model's the same type case as mine (and you care) there are louvers on only one side, plus front/rear grills - so there's always the option of placing the plaz so that side's louver's are toward the outside... Steve
 

dr_clyde

Well-known member
Joined
Jan 7, 2009
Messages
6,421
Location
Holland, MI
I can’t imagine overheating that little plasma cutter. It’s not going to be running for hours at a time.
 

slodat

ALLIANCE MEMBER
Joined
Feb 6, 2010
Messages
3,679
Location
Central-ish, WA
I made this out of 14ga tubing several years ago. First project with my then new to me TIG welder. I did it to start the process of learning. It went well.

IMG_1889.jpg


IMG_1885.jpg
 
To avoid these ads, REGISTER NOW!
Top Bottom