To avoid these ads, REGISTER NOW!

Between 485 & 705 SQ/FT Mid-Century Moto Mecca Makeover

Workspaces between 485 and 705 squarefeet.

Trapps

ALLIANCE MEMBER
Joined
Feb 10, 2017
Messages
2,003
Location
The Detroit Zoo
Gregor, this is awesome!

I ran US gear in the UK on a transformer about the size of a gallon milk jug. I never thought to bring 240 gear home and convert although I knew it could be done.

No question Linn and Naim are of a high build quality and I am not the least bit surprised at what you found inside the Naim.

I think the love/hate relationship with Linn, Naim, and many other products, has as much (more?) to do with the sound as anything else. Some, myself included, felt they, Linn in particular, are too bright. Subjective description, I know. But that's audio; what works for one may not work for another and vice versa. Therein lies the beauty, all that really matters is how it sounds to you. I spent a lot of time doing A/B comparisons between sources, amps and speakers. I believe speakers color sound more than any other component, but sources, processors and amps can also have an audible impact.

With your fab skills, you could no doubt create something out of metal that's hidden but supports the load in the credenza. Assumes it can be returned to square...
 
To avoid these ads, REGISTER NOW!

Bakafish

Well-known member
Joined
Feb 7, 2017
Messages
477
Location
Tokyo
I ran US gear in the UK on a transformer about the size of a gallon milk jug. I never thought to bring 240 gear home and convert although I knew it could be done.
It's only possible if the transformer is multiple wound on the supply side for the voltages in question. It is fairly common to do this for expensive equipment that may be sold in multiple regions, often better exposed to the end user to change it, but certainly not something you can assume to be there. Critical to change the fuse (as he did) as the current drawn will change considerably.


One of my first jobs was selling electronics and mid-end HiFi gear, mostly Japanese and American stuff, did it for more than a decade eventually becoming a factory rep. I later spent a few years at a mastering lab, converting multitracks to digital for CD manufacturing (although we did send some stuff out for vinyl cutting.) I'm agnostic on the whole 'record player' revival, although it's not a new thing, they seem to hang on while so many other formats have come and gone. They may be even more popular here in Japan than over there, there's certainly a lot of record shops around my place. I can understand the ritualistic nature of playing a record and the big album art, but get a bit squinty when audiophiles start waxing on about analogue superiority. Being old and having lost most of my high frequency hearing I am in no position anymore to argue one way or another, and I do love to see old gear loved and nurtured, so thumbs up I guess.
 

Zippercat

Well-known member
Joined
Jul 13, 2013
Messages
828
Location
TN
OCD aside, does the credenza top HAVE to be made flat? Or do you simply want to insure that it does not warp more and will be able to support your hifi gear in the future?

We know you love challenges and watching a metal worker trying to unwarp (is that even a word?) plywood sounds like it would be entertaining, but it will not be easy….if it is even possible.

Center support, whether wood, metal or other, carrying the load through to the floor is most likely the best visual and least costly solution. Another choice would be to replace or supplement the top. IF you can cleanly remove the top, then maybe you can likely add a layer, say about 5/8” thick, below and replace the old top over it.

Maybe you can show us the cabinet interior so folks can offer other ideas?
 
OP
S

sakurama

Well-known member
Joined
Oct 10, 2010
Messages
1,458
Location
Portland - the cool one.
i-kt69DL2-X2.jpg

I mentioned we needed to get a tree for the kids. I've always wanted to get a tree from the National Forest but we'd had a tradition of going to this one tree farm since the kids were tiny. But it's time for new traditions and the kids aren't interested in sitting on Santa's lap anymore.

For $7.50 you can go to the Mt Hood National Forest (anywhere from 30-60 minutes) and, if you follow a few simple rules, harvest a tree up to 15' (about 5m). The restrictions are pretty limited - be at least 100' off the road and be sure to leave another tree at least 8' away.

i-84Jmzsp-X2.jpg

Don't "top" a tree - take the whole thing and scatter the branches if you cut them off. The nice and simultaneously scary part was that it snowed Sunday and the forest road we took was like a sheet of ice. But I grew up in snow so I wasn't out of my element but there were a couple of turns that gave pause.

i-dzspJWH-X2.jpg

From 2012 (ten years ago!) - we hadn't bought the house yet - that was still a month away.

i-tcSkzSR-X2.jpg

Wow, has it been a crazy journey. But we are still laughing so that's good.

I am glad we've started this new tradition.

Turntable stand is done and I'll wrap that up in the next post.

Gregor
 
OP
S

sakurama

Well-known member
Joined
Oct 10, 2010
Messages
1,458
Location
Portland - the cool one.
OCD aside, does the credenza top HAVE to be made flat?

Nope.

And I'm learning to live with things like that. I do believe that it is a "flat pack" design because I recall it being shipped flat when I bought it - ebay I think. So I could probably take it apart and do the weight thing with the long parts but the doors slide smoothly so for now I'm going to back burner that and put the energy into building something specific for the hifi.

Gregor
 

shirk

Well-known member
Joined
Sep 2, 2011
Messages
90
Location
North Vancouver, BC
For $7.50 you can go to the Mt Hood National Forest (anywhere from 30-60 minutes) and, if you follow a few simple rules, harvest a tree up to 15' (about 5m). The restrictions are pretty limited - be at least 100' off the road and be sure to leave another tree at least 8' away.
This is similar to how we can get a tree here in BC. BC Hydro allows cutting of trees under their tower lines. No charge, just need to print off an online permit. Can't cut them too close to Vancouver here, need to drive 20-30 minutes north but not too bad.
 
OP
S

sakurama

Well-known member
Joined
Oct 10, 2010
Messages
1,458
Location
Portland - the cool one.
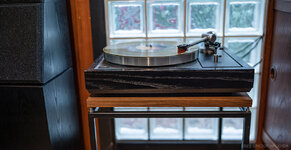
The turntable stand - we left off with the broken tap.

i-3GZZSDJ-X2.jpg

I used some cardboard and plastic tarp to create a makeshift spray booth by the garage door. It's way too cold to spray outside so desperate times call for desperate measures.

i-FLqLht7-X2.jpg

I tossed some old black M8's into the threaded holes to keep it off the ground. It's surprising how many sides this thing has - each time I moved it I'd find another bare tube. Three light coats of this paint/primer which has been holding up well on other things. I wanted to see if it would look good in semi-gloss but the paint has no filling ability so I'd had to either go back and keep sanding the stand down or use a high build primer. Or the textured paint which works so well and doesn't require any additional work.

Since I come from the audio era of spikes I am going that route. The thinking was that the spikes serve to level and connect to the larger substrate (the floor) and create a more solid connection. Since music on a record is the microscopic topography of the groove the reasoning is that a more solid structure creates more accurate reading of the groove and therefore better sound.

i-LMMnwm9-X2.jpg

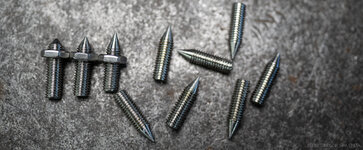
I think spikes are cool so I want to go that route. I know that the table I used to own was great so mine is a copy but better made and perfectly to the size of the Linn. I bought stainless set screws and they came with the 45 degree point on the left. I cut a 30 degree point in the lathe and didn't like the look so I tried 20 degree and that looked good. The nuts are low profile M8 jam nuts.

i-d7xq7JD-X2.jpg

Since the socket of the set screw will be inside the stand I turned back the first few threads and drilled the screw so that it could be adjusted or removed if it gets stuck.

i-6cGfXjF-X2.jpg

This allows you adjust the spike to get it level.

i-K2x9LrH-X2.jpg

That is the table - done and dusted.

i-pdPwd2K-X2.jpg

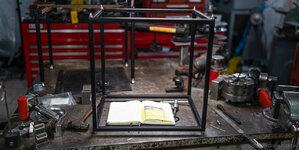
Sometimes I ink a drawing before I build it and then, inevitably, I change the design. The small box is the power supply for the turntable. It's not the same box as the Naim boxes so I thought I'd make a shelf on the stand for it but then decided that the power supply could change and the stand wouldn't work and also, it just wouldn't be as pretty. Slave to fashion and all.

i-BJqjS43-X2.jpg

So I moved the mini framer off the lift and lowered the Festool table down for the first time in months. It was a bit dusty.

i-8r5S6Qp-X2.jpg

One of the benefits of being a hoarder, er, someone who keeps a vast catalog of quality materials, is that I still had the cut out of the MDF from the kitchen sink. It was too big to throw away and you never know if you'll need it. It took 9 years but I just saved myself buying a sheet of MDF!

i-SPc8T9N-X2.jpg

With the MDF cut to the exact dimensions of the stand and the turntable base I set the stand next to the credenza and carefully leveled it in both directions - first the stand itself, then the MDF on top of the spikes. I think the part of setting up a hifi that I like is the tweaky attention to detail. It probably started with working in a darkroom and having to be accurate with time and temperature.

i-4Shxwkd-X2.jpg

So I set the turntable onto the bare MDF and put on a record I know, Arlo Parks, and listened. I played the song before with the table on the credenza and then again on the stand - same volume, etc. The only difference is the stand and I was very surprised - much more detail and clarity.

i-jzDnv8c-X2.jpg

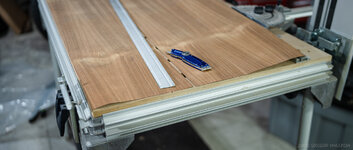
My plan was to cover the MDF in black formica but I looked at the photos of the turntable, the speaker and the credenza and I liked the grain. Plus I didn't want to buy a 4x8 sheet of formica that I'll need to hoard for 9 years. I remembered I had a bunch veneer that I bought for a Garrett Wade shoot as backgrounds.

i-c6rFZsN-X2.jpg

I don't even recall what the wood is - teak? I don't think it's walnut. Doesn't matter, I'm going to stain it black and just use the grain.

i-wNtgssw-X2.jpg

I buy full size rollers and cut them in half to use the half size rollers which I like for trim and glue.

i-DTwq5hw-X2.jpg

I have plenty of contact cement and watched a video on veneer to see if there was anything different about gluing it than gluing formica. There is - an expensive hammer.

i-jKxpfLK-X2.jpg

This is a veneer hammer which is basically an $80 metal squeegee. I have had laminate delaminate on me - the trailer table I made and in a couple spots on the kitchen. There can be many reasons but one is certainly not enough pressure so the hammer seemed like something worth trying as it concentrates the pressure to a much smaller area then the rubber roller. I polished the edge to a mirror finish so it would be smoother.

i-tzMD4wD-X2.jpg

I tried using a blade to trim the top surface and then remembered I owned a router just for this. Unlike Ben I will always opt for a power tool given the chance.

i-whf338W-X2.jpg

It even had the flush trimming bit mounted and my hose and power cord are hanging over the table so this was refreshingly easy. I was quite happy about that whole setup right now.

i-v97zBMV-X2.jpg

I cut some strips from the left over sheet of veneer and got cocky/fancy thinking I'd cut them the other way for the "end grain".

i-mxfpfmp-X2.jpg

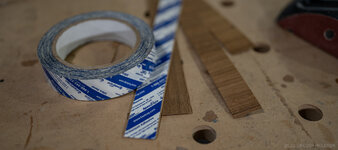
Continuing the theme of using what's in the cabinets I found some Fastcap double sided tape for just this purpose.

i-7Q2FNLx-X2.jpg

i-3XVF82t-X2.jpg

i-xB7tkkD-X2.jpg

i-dQRvk2F-X2.jpg

I took the completed veneered board to the table and looked at it and thought, "Maybe the wood color would be nice with some tung oil? It does match the teak of the credenza..."

i-ChwSKzT-X2.jpg

...and so it does.

I'm going to guess the veneer is teak which is certainly one of my favorite woods and it's a dead match to the rest of the furniture so I'm going see how that sits even though it wasn't the plan.

i-grvR6Z2-X2.jpg

I used 1-2-3 blocks to perfectly align the top to the table base. Once it's perfect I gently press down and then tap each corner so the spike penetrates the veneer. This is a good practice to get the two connected as a "unit" and provided you're careful to replace the top in the same orientation it will always line up and lock in place.

i-vJxn7Jt-X2.jpg

I think it would look great in black - and that's certainly an option down the road but I love the teak as it visually connects the turntable to the room. Nadia has continued to surprise me with her ear noticing the difference the table made. How much is the table and how much is the turntable being perfectly level is hard to say but it certainly works great and looks great.

I'm now designing a stand for the rest of the gear so the credenza can retire comfortably while it's doors still slide.

Next up I take a break from hifi to go back to motorcycles: prepping the mini framer for the weekend.

Gregor
 

GeddyT

Well-known member
Joined
Jun 17, 2015
Messages
1,243
Location
Bellingham, WA
Nice job on the table! As for the credenza, here's the plan: Sand and finish all of the bottom surfaces. Then, every six months to a year or so, you flip it over upside-down. Like rotating the tires on your car. And when visitors ask you why your credenza is upside-down, you say, "Because it's July. Duh."
 

Choirboy

Well-known member
Joined
Apr 18, 2013
Messages
178
Location
SE Iowa
Nice job on the table! As for the credenza, here's the plan: Sand and finish all of the bottom surfaces. Then, every six months to a year or so, you flip it over upside-down. Like rotating the tires on your car. And when visitors ask you why your credenza is upside-down, you say, "Because it's July. Duh."
This will only work if you also make your clocks run backwards while it is upside down. Then when people comment on the clock, you can answer "because the credenza is upside down, duh."
 

legenddc

Well-known member
Joined
Aug 19, 2012
Messages
1,075
On the credenza is the bottom also sagging? If it is you could put some metal on the top and bottom and clamp it for a little and see if that straightens it out. Maybe spray some water but that seems pretty risky.

If the bottom isn't sagging and only the top is then you could cut out the divider, spread the case out some and replace the divider. I know the Bessey parallel clamp jaws can be flipped around to use it to spread things instead of clamp.

Hard to tell from the pictures but I wonder if you couldn't take the cabinet part out of the legs and flip it around. Putting the bottom on the top and eventually letting the bow return to flat.
 

nicholam77

Well-known member
Joined
Dec 18, 2016
Messages
2,675
Location
Minneapolis, MN
Love seeing all these projects, Gregor! Awesome stuff!

The chair was a gift from Judiaann (and Ben) and it's special because I couldn't afford one either! It's the perfect chair for listening to music and spun the other way it's perfect for reading the paper in front of a fire. I consider myself very lucky.

Wow, that fits in your living room perfectly. I like how your furniture palette echos the colors and materials of the house.

The record player stand turned out great, and I like how you kept the wood tone for the veneered shelf. I guess you already have the veneer hammer, but I recently did a veneer project and used a veneer scraper, which is considerably cheaper. I was using paper-backed veneer, maybe it makes a difference what kind it is, but I've even heard of people just using a rounded over block of hardwood to apply pressure.

If you do more veneering in the future, I had a good experience with this water-based contact cement.

You know with your Festools, woodworking skills, and veneering abilities, you could just build a new credenza! Just sayin'!
 
OP
S

sakurama

Well-known member
Joined
Oct 10, 2010
Messages
1,458
Location
Portland - the cool one.
Remember this bike?

20200204-xr10012066-X2.jpg

I built it right at the beginning of lockdown - just before actually. I need to do a proper build thread on it but I'm not sure what the right place would be. My friend Scott Kolb built the frame probably 15+ years ago. All of us who were road racing owned Honda XR100's which is something Kenny Roberts Sr., the first American to win the MotoGP, started at his ranch.

He reasoned that the physics of riding a motorcycle was the same for 8hp XR100's as it was for his 100+ hp Yamaha YZR500 2 stroke GP bike. He was not wrong. Kenny Roberts introduced the idea of sliding a GP motorcycle to the world and it was a skill he developed through dirt track racing and honed on minibikes. Because of this every road racer worth his salt bought an XR100 to practice with.

Racers being racers bikes were modified to bump the hp from 8 - 10 and soon, because of this minibike arms race Colin Edwards (another American GP star) came up with a set of rules for these bikes that became known as "mad dogs" as in an angry chihuahua. Scott wanted to address the failing that no one else did - the frame. He built a copy of the famous Ron Wood chassis but scaled it down for the XR100 motor. He built 10.

At the time I had a nice XR100 but knew I wanted one of the frames so I bought it and then hung it on the ceiling of the shop in NJ. Then in the garage in Oregon. Finally I started racing the indoor flat track series in Salem and decided it was time. The 1 Show of 2020 provided the deadline that I always need.

20200210-xr10012340-X2.jpg

My intention was to race it at the show and then in the 2020 Salem series - learn to slide, have fun, get back into racing. The trouble was two fold: 1. the bike never ran right. We could not get the thing to rev out and no amount of timing or jetting was helping. 2. right after the show Covid hit and the Salem series was canceled for the next two years.

Fast forward two years...

This summer I decided to hand it off to someone to figure it out. Joe at Vicious Cycle took it and discovered that the keyway on the rotor was cut wrong and so the timing was hopelessly off - beyond what adjustments allowed. With that fixed it runs - like a scalded cat making 15 rwhp. Initially he thought it might be the big Lectron carb so he swapped it for a known carb and I've left it since it's running great.

20221125-clock22855-X2.jpg

The indoor series started up again so I took this and my other mini down. I was too nervous to race this bike as it has double the hp of the other mini but I did get a bunch of practice laps in and put together a punch list of issues.

1. Fix exhaust routing.
2. Handling is too twitchy and nervous - lower the forks in the triples.
3. Brake is too high, too strong and wasn't returning.
4. Gearing is way too short - bike was running in 4th instead of 3rd.
5. Gas tank leaks.

That burned exhaust you see? Poor routing of the pipe due to the fact that I couldn't find a tighter mandrel bend in 1" tube. The new rear brake was way too strong and touchy, the gearing was too short and the handling was really twitchy. Oh, and the tank leaked.

20221206-hifi23539-X2.jpg

I removed and cut up the old pipe but also ordered up some new tubing with a tighter radius.

20221206-hifi23542-X2.jpg

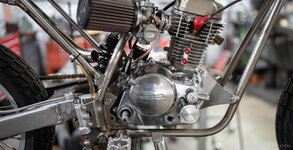
The old pipe went from a diameter of 1" (25mm) to 1.5" (38mm) and did it in two steps based on what was suggested by Baisley High Performance to ported the head. For this new exhaust I wanted to use tapers like the exhaust I built for the other mini I have as that exhaust turned out really nice.

20221207-framer23559-X2.jpg

20221207-framer23561-X2.jpg

The large radius tube from the old exhaust combined with the tight radius from the new pipe and gave a decent routing. I'm using painters tape to hold the tubes in approximate location.

20221207-framer23562-X2.jpg

Little by little you cut, trim, test and fit. The goal is something that looks better but also tucks into the motor hard so that my boot can't touch it. Again.

20221208-framer23572-X2.jpg

Most flat track bikes use a lower exhaust tucked in on the right side. And it's not that interesting or ****. Harley used a high exhaust and it was pretty awesome and I liked the idea of the exhaust snaking along the motor and exiting up high by the seat.

20221207-framer23566-X2.jpg

It's got a good amount of space for my boot and meets up with the old routing by the subframe. Tacked up and ready to weld.

The tank is getting sealed up now and the next thing is the brakes.

Gregor
 
Last edited:

rlmartinson

Well-known member
Joined
Aug 22, 2012
Messages
99
Location
Lee, NH
Looks great!
It sure would be easier if the exhaust exited off the back of the head! That's something I have wondered about for a long time, why not design the motor with the carb in front and exhaust in back? I get that its too late now to spin the head 180 degrees because of the valvetrain, but I wonder if there is another reason? Maybe to shield the air filter from most of the flying dirt?
 

Choirboy

Well-known member
Joined
Apr 18, 2013
Messages
178
Location
SE Iowa
Looks great!
It sure would be easier if the exhaust exited off the back of the head! That's something I have wondered about for a long time, why not design the motor with the carb in front and exhaust in back? I get that its too late now to spin the head 180 degrees because of the valvetrain, but I wonder if there is another reason? Maybe to shield the air filter from most of the flying dirt?
I ain't no engineer, but I've always assumed it is because on air cooled motors the exhaust valve and surrounding area are the hottest, so it is advantageous to get it into the most direct air stream for better cooling. But, that is just an assumption.
 

Uofime

Well-known member
Joined
Jan 11, 2021
Messages
174
Location
Charleston SC
Looks great!
It sure would be easier if the exhaust exited off the back of the head! That's something I have wondered about for a long time, why not design the motor with the carb in front and exhaust in back? I get that it’s too late now to spin the head 180 degrees because of the valvetrain, but I wonder if there is another reason? Maybe to shield the air filter from most of the flying dirt?
You want to avoid turns as much as possible on the intake side, it’s more sensitive to restriction. Between the carb and air box or filter the intake side ends up sticking out pretty far so you end up with this “normal” solution with it over the transmission on singles/ inline engines.
 
To avoid these ads, REGISTER NOW!
OP
S

sakurama

Well-known member
Joined
Oct 10, 2010
Messages
1,458
Location
Portland - the cool one.
I do use Columbia River Mandrel Bending when they have the tube size that I need. For this project it's hard to find mandrel bends in such a small diameter so I shopped around.

20221208-framer23585-X2.jpg

Here's the pipe all tacked up and plugged with an argon purge for the backside.

20221208-framer23587-X2.jpg

My fitups are much better then when I started welding stainless which was 10 - 12 years ago. A tight fit makes for an easier job of welding as your second hand can just rotate the tube instead of feeding rod.

20221208-framer23590-X2.jpg

And all welded up. I want to switch back to the other carb at some point and I probably should have test fit it to make sure the pipe will clear but I'll probably just make a new one if this doesn't work out.

20221208-framer23578-X2.jpg

Dropped the forks in the triple clamps which will slacken the steering angle and also give the bike a bit more trail which should all quiet the steering down and make the bike more stable.

20221208-framer23570-X2.jpg

I went with my middle gear which was a solid drop in teeth and required taking out a link in the chain. I have room to drop to the next size down if I need to.

20221208-framer23579-X2.jpg

The point of the larger rear disk is to help with heat and feel. I don't use the rear brake much when coming into a turn but I do use it on the way out to help control the slide or step out. The brake was way too strong and didn't have much feel - it just instantly locked - and what you want is very soft brake that allows you to scrub power gently. I beveled the pads to reduce surface area...

20221208-framer23582-X2.jpg

And doubled the return springs (which are the springs I use for exhausts - that makes life simpler) along with lowering the pedal. Hopefully this will keep me from accidentally riding the brake and cooking it which happened in the first shakedown practice.

20221209-framer23598-X2.jpg

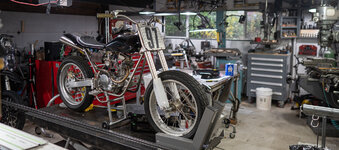
Dropping the forks raised the bike so I had to put larger wheels on the stand. All ready for practice tonight and then the race tomorrow. Hopefully all the changes make the bike comfortable and predictable. It's already fast so next is smooth.

Gregor
 
OP
S

sakurama

Well-known member
Joined
Oct 10, 2010
Messages
1,458
Location
Portland - the cool one.
Looks great!
It sure would be easier if the exhaust exited off the back of the head! That's something I have wondered about for a long time, why not design the motor with the carb in front and exhaust in back? I get that its too late now to spin the head 180 degrees because of the valvetrain, but I wonder if there is another reason? Maybe to shield the air filter from most of the flying dirt?

It's certainly been done - check out this link: https://motocrossactionmag.com/mxas-history-of-reverse-cylinder-engine-designs/

And Yamaha have an MX bike that does it. You trade compromises but as was mentioned mostly it's been that way to keep the exhaust side of air-cooled motors in the wind.

Gregor
 

GeddyT

Well-known member
Joined
Jun 17, 2015
Messages
1,243
Location
Bellingham, WA
All modern Yamaha 4-stroke dirt bikes (since 2015) have reversed heads (exhaust in the back, intake in the front). Thing is, they don't just shoot the exhaust out the back, choosing instead to wrap in all the way around the engine once before heading for the tail. This leads me to believe that at least part of the reason for the traditional layout is to achieve sufficient exhaust length.
 
OP
S

sakurama

Well-known member
Joined
Oct 10, 2010
Messages
1,458
Location
Portland - the cool one.
So practice and the race went well. I took the kids with me on Saturday night hoping to get them interested in their bikes again. I've learned a lot about patience this past year. Trying to make them do things never works but bringing them to the race, handing them $20 to buy whatever they want from the concession and then telling them they can do whatever they want as long as they watch my race and cheer - it makes for a fun night for them. At the end of the evening Lucas said, "I want to ride my motorcycle again - can we do that next week?" Yeah, of course.

Long game. Oh, and I won my first race on the new bike that night. It was the heat race but a win is a win especially if you're pressured all race by Scott Rounds. So yeah, a good night.

There was a guy taking photos that night but I've not gotten any from him yet - hopefully I will and I can post those but...

This week, with the kids at moms, I had time to start work on the turntable. I reached out to Rick, my old boss at the hifi shop, and he sent me a kit that would update the turntable. The Linn LP-12 has been around in its basic form for 50 years and over that time it's been continuously refined and updated. That fact makes it either loved or hated in the goofy world of hifi. Loved because you can keep updating your turntable to get the benefits of new technology or hated because you think it's a scam to fleece you - why didn't they just make right the first time?
i-pbmmzPH-X2.jpg

First step: level the jig.

In my mind the LP-12 is the Porsche 911 of the audio world. A good idea that has been continually refined as research/development and technology evolves. The reason the 911 didn't have fuel injection when it was first produced is because it didn't exist. Material sciences and computer technology have come a long way in the last 50 years.

i-pBfQMRM-X2.jpg

Festool light coming in clutch.

i-ZJLqQB3-X2.jpg

I try to start with as much organization as I can: Festool screwdriver, Snap on wrenches etc.

i-SKHttdB-X2.jpg

Despite having done this before I read all 90+ pages of set up manual found online. It's been a while after all. It was some nice light reading...
i-7RnSfPS-X2.jpg

It didn't take long to strip the whole thing down to the base.

i-PtRjc58-X2.jpg

With the chassis stripped I went over the small scratches with a sharpie to fill them in and gave it a quick wipe down with some Pledge - you know, because that's what I do.

i-SK4STLc-X2.jpg

The new sub-chassis is CNC'd from aluminum (aerospace aluminum! - it's just a 7000 series) that's bonded to a steel frame - it's not rocket science but it's a stronger part but I had to drill out the armboard for the tonearm rest.

i-NVVRH8w-X2.jpg

The whole upgrade is this simple bearing. Still a single point bearing but with changes in material science, hardness and friction technologies this is supposedly a big improvement. Plus a few bags of fasteners, grommets and springs.

i-6zP5gmp-X2.jpg

The three springs that support the whole chassis/subchassis arrangement.

The Linn philosophy is that you start at the source. If you lose music in the beginning - the turntable, your speakers aren't going to magically find that again. They can only play what they get fed or as they say in computers: garbage in garbage out. It makes sense but hasn't always been a popular philosophy.

The bearing has incredibly tight tolerances and so does the rest of the sub chassis. It's hard to imagine that this will make a big difference and yet small differences add up to big ones.

i-H9jztps-X2.jpg

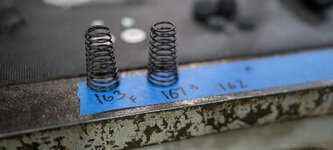
While the springs are supposed to be the same they never are so I measured how much force each applied to the scale for a 2mm press with the Mitutoyo height gauge. Is this overkill? Yes. Is it fun to use tools to solve a problem? Yes.
i-crMk6WF-X2.jpg

Depending on their strength they go different places in the chassis. This facilitates the ease of setup.

i-nf8825p-X2.jpg

When I worked in the hifi shop I had zero mechanical ability and so this was my introduction to the concept of "tuning." Tuning, in this definition, is the mechanical refinement of parts to achieve a balance or an optimum result. At the time this seemed like a black art to me and much of the hifi world treated the idea of "tuning" a Linn to be a black art. Rick was one of the best at it.

It isn't a black art. It's a simple mechanical device with a pretty basic set up that needs some delicate attention but it isn't, much like everything in the world, rocket science.

The goal of tuning this turntable is to get the suspension to evenly bounce. That's it. An even bounce with a slow decay means that you've got it setup without any binding or external forces acting on it and thus it's pretty well isolated in the chassis. A simple design that has been perfectly refined. Just like the 911.

i-PbX9hGb-X2.jpg

i-CNGsGJL-X2.jpg

With the turntable parts installed it was time to put the tonearm back in but first the new cartridge is installed. Tiny wires required the binocular magnifying glasses.

i-dsXJPhJ-X2.jpg

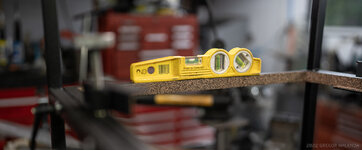
I pulled out my Starrett Machinist Level as a joke but when I set it on the table I realized how incredibly sensitive it is and how much easier it is to use and so I actually ended up using it to fine tune the table to level - and you're leveling it because that's how the suspension is designed to be optimal. Which just makes sense - the springs are vertical and so you want a repeatable and consistent base. Level is universal.

i-PgpcfJP-X2.jpg

It takes 24 drops of "special" Linn oil to lubricate the new bearing. Not sure what it is but obviously oil technology has come a long way in 50 years too.

i-h52rtrL-X2.jpg

So this is the whole thing - a single point bearing on the platter. Super low resistance but also zero runout. That's a hard thing to achieve and when you're trying to pick up micro vibrations you need as little slop in the system as possible. I still have my doubts about this because the bearing looks pretty much the same on the spindle.
i-b4XWjsM-X2.jpg

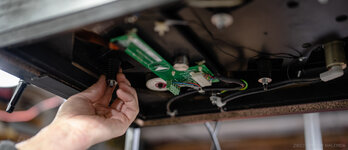
Here's the "black art" part of it - you spin the springs and their bushings until you get a perfect vertical bounce. It's not a black art though - it's just getting three springs to all be bind free and centered which, like jetting a carb or setting a motorcycle suspension, takes some patience because each twist effects the other springs. Twist, bounce, adjust, repeat.

It was surprisingly easy.

The turntable came to me pretty well set up but now I can see the difference in it being perfectly set up. There's zero binding, zero drift or resonance and the decay lasts for a long time because there's zero forces interfering. I guess all those years of working on motorcycles had a side effect of making me more mechanically sensitive.

i-TQKT9HG-X2.jpg

This is the very fancy alignment/protractor jig to make sure the tonearm and cartridge are aligned and square. I do not understand 70% of it and I suspect that 70% of it is to take up the space left after you use the two grid boxes.

i-kbPBvQm-X2.jpg

I had to pull out the binocular magnifiers again to see the alignment perfectly but, again, it didn't take much but some careful finesse.

All done but the listening!
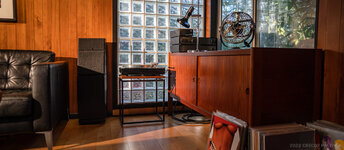
i-ckfXZRK-X2.jpg

Ween is another one of those bands that I love but missed on vinyl and it does not disappoint.

The sound now is tighter, cleaner and, and this is really a strange phenomenon that I can't explain but it's, much, much quieter in the background. Just overall better. I'm also super happy with the choice of the veneer for the turntable stand - it just helps tie things together. I'm going to do the same again when I build the stand for the gear.

The lamp came from ebay via Portugal and all I needed to do was rewire the plug. The bulb is a 240v 60w bulb but ends up being perfect on 120v as it's very, very dim making only the softest glow.

Let's take a quick moment to reflect on the larger journey here.

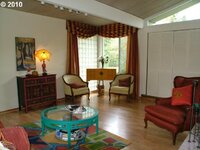
Here's a photo from the real estate listing of the house - in 2010:
i-st9Z4nr.jpg

When I look at this photo I'm pretty speechless...

i-WPC2KB7-X2.jpg

...and when I look at this photo I'm pretty speechless too - but for different reasons. When we bought this house I saw this under all that. Did I have any idea how much work it was going to be? Not in the slightest.

When we moved in the living room was the room that no one ever sat in. It felt disconnected and lacked warmth - it wasn't cozy. Now it feels warm, inviting and comfortable. It feels like what this house was or should have been. It's filled with amazing music and light. Thank you for following along on this journey.

It makes me happy.

Gregor
 
Last edited:

Seagoon

Well-known member
Joined
Jan 23, 2014
Messages
859
Location
Scunthorpe. UK.
It always amazes me that people happily use furniture from a different era to that of the house. I can happily sit in a Victorian house with Victorian furniture or a MCM house with MCM furniture, but swap the furniture over and I just can't settle.
I wouldn't even want to visit the house in it's 2010 guise, but now you would have to prise me out with a crowbar! It's just perfect!
I first found GJ via your thread when I was looking for a chuck key for an old Bosch drill that I had been gifted, and found a UK woodworking site. One of the inmates highlighted your thread, and I just hope he has followed along like me and is still just as impressed.
 

MadeByMiller

Well-known member
Joined
Dec 29, 2018
Messages
1,230
Location
Rapid City, SD
That last picture is just dreamy...

I am about the furthest thing from an audiophile, with that being said I can 100% appreciate the effort you've gone through to fine tune and maximize the quality of your device. I'd also love to hear it to see if I can even distinguish what I'm missing out on.

Congratulations on your journey.
 

nicholam77

Well-known member
Joined
Dec 18, 2016
Messages
2,675
Location
Minneapolis, MN
...and when I look at this photo I'm pretty speechless too - but for different reasons. When we bought this house I saw this under all that. Did I have any idea how much work it was going to be? Not in the slightest.

That before and after is just awesome! I've been following along here since pretty much the beginning and I forgot how different the house was when it came to you! Sorry if I missed it somewhere in this long thread, but did you have any photos or anything to go off of what the original house looked like before it was painted white and "updated"? A quick Google search of Saul Zaik shows a pretty consistent palette for the interiors, which it seems you've been very faithful to. But the ones on Google images also look lovingly restored and fresh like yours, I can't tell how original they are. I guess what I'm trying to ask is do you know if your vision of the place is pretty similar to the architect's original look? Either way it's absolutely lovely.

I don't know anything about HiFi but the turntable was an interesting read.
 

wasfast

Well-known member
Joined
Apr 10, 2014
Messages
874
Location
San Diego CA
There is something very satisfying to do something to approach perfection. That concept is so core to Japanese craftsmanship. You can see OCD from there but high craftsmanship is a step back from the edge:).
The before/after shots are so nice. What it took to get there, well it was a lot based on all your posts earlier.
 

Choirboy

Well-known member
Joined
Apr 18, 2013
Messages
178
Location
SE Iowa
That before and after is just awesome! I've been following along here since pretty much the beginning and I forgot how different the house was when it came to you! Sorry if I missed it somewhere in this long thread, but did you have any photos or anything to go off of what the original house looked like before it was painted white and "updated"? A quick Google search of Saul Zaik shows a pretty consistent palette for the interiors, which it seems you've been very faithful to. But the ones on Google images also look lovingly restored and fresh like yours, I can't tell how original they are. I guess what I'm trying to ask is do you know if your vision of the place is pretty similar to the architect's original look? Either way it's absolutely lovely.

I don't know anything about HiFi but the turntable was an interesting read.
If I remember right from years ago Gregor contacted the original architect and he wanted 4 or 5 figures to get Gregor copies of the original blueprints? Personally I'd be flattered that anyone wanted to lovingly restore my design instead of seeing nothing but a dollar sign, but then again that is maybe why I don't run my own business...
The house looks lovely. While my own heart beats for English and American Arts and Crafts (and my 1912 house will reflect that) I do love MCM when done with an artistic vision (read: I don't generally like generic 60s ranch houses...)
 
OP
S

sakurama

Well-known member
Joined
Oct 10, 2010
Messages
1,458
Location
Portland - the cool one.
That before and after is just awesome! I've been following along here since pretty much the beginning and I forgot how different the house was when it came to you! Sorry if I missed it somewhere in this long thread, but did you have any photos or anything to go off of what the original house looked like before it was painted white and "updated"?

If I remember right from years ago Gregor contacted the original architect

Supposedly the house was featured in Sunset Magazine in the 50's after it was built. I went to the library and searched for it from 1956 to 1958 or so and never found anything. I did contact Saul, the architect and asked if he had any photos of the house from when it was built and he wasn't interested in helping me unless I was going to hire him to do further work.

The other Saul Zaik house that you can find photos of belongs to another photographer who I've contacted over the years but never met. His house was mostly restored when he bought it and he's done a great job with continuing the process. I drew on details that I saw on his house as it's the one that most closely resembles this one.

Also, when I was searching I accidentally stopped by Saul's house not realizing it was his actual house and not just one he'd designed. His wife was home but didn't invite me in. She remembered the couple that commissioned the house, Arthur M. Stanley and his wife, and recalled that he was a friend of Saul's and this was, I think, the first house he built and Stanley was a friend. Stanley's wife was not a fan of midcentury design and did not appreciate it. I have tried many times to find information about Stanley; did they have kids, are the kids alive, did they have photos of the house? I've never had any luck.

From friends who have lived in the neighborhood I know the house changed owners in the 80's and from what I can find that is when Arthur Stanley died - in 1981 at age 55. From the stories I hear the house was owned and remodeled by a drug dealer whose Mercedes 280SL was set free by a rival and rolled across the street and down 50' into the ravine. The 80's was when the loft, skylights and jacuzzi were added. And that all sort of tracks for the 80's.

It might be time to reach out to Saul and his son again. I would guess Saul is in his mid to late 80's now but supposedly continues to go to the office. I'd just love to find family photos or construction photos from during its life. I do have the original blueprints and should probably get them framed before something happens to them. Maybe I need to look through the old Sunsets again too.

Gregor
 

kap384

Well-known member
Joined
Jan 10, 2013
Messages
48
Location
Calgary
Incredible transformation. Absolutely beautiful. Love MCM and respect you so much for bringing this one back to its glory. The Hi-Fi wormhole was incredible, as usual. I'm a Sunfire/Carver guy myself. Thank you for sharing another window into your awesomeness!
 
Last edited:

Novadave

Member
Joined
Mar 6, 2014
Messages
15
Location
Bristol, England
Gregor, I'm a long time follower, first time commenter on your post. You have inspired me in many ways from woodworking, tools, knives and sharpeners and also hifi! Thanks to you I found Naim amplifiers recently, on my return to vinyl, wow definatly worth the spend! We even seem to have similar tastes in music too! So thank you for all the inspiration along the way.

I'm interested in the new cartridge for the Linn? Unless I missed it you didn't say what it was? Loving the setup pictures by the way!
 
OP
S

sakurama

Well-known member
Joined
Oct 10, 2010
Messages
1,458
Location
Portland - the cool one.
Gregor, I'm a long time follower, first time commenter on your post. You have inspired me in many ways from woodworking, tools, knives and sharpeners and also hifi! Thanks to you I found Naim amplifiers recently, on my return to vinyl, wow definatly worth the spend! We even seem to have similar tastes in music too! So thank you for all the inspiration along the way.

I'm interested in the new cartridge for the Linn? Unless I missed it you didn't say what it was? Loving the setup pictures by the way!

When I worked at Audio Alternative we would always do A/B demos on gear and that was a great way to make your decisions - listen to a song, change the component, listen again. There's no one here in Oregon that sells Naim and I trust Rick implicitly so I just asked him what he'd recommend in the $500-700 range and he suggested the MoFi MasterTracker or the UltraTracker - I went with the Mastertracker. Since I changed more than one thing I can't tell you what changes are attributed to the bearing, sub-chassis, cartridge or general tune up.

In the end I think you have two options: trust someone you know or go and listen. Because Rick has never steered me wrong I went with that option and I'm very pleased.

I've been listening to The Smile lately, an offshoot of Radiohead, and I'm looking forward to seeing them live. Everyone who's seen them says it's one of the best sounding shows they've ever heard. It's interesting to see a band live after listening to a recording - very different things.

G
 

Nolift911

Well-known member
Joined
May 16, 2011
Messages
1,017
Location
Lansdowne, VA
This is fantastic - as always. Such attention to detail. This thread never disappoints heading down rabbit holes.
So in layman's terms what is the most important upgrade with regard that to setup - again for the layman?

Not sure I fully grasp a "perfect" set up and terms such as binding, zero drift, resonance decay etc. when it comes to the turntables - or the affect.

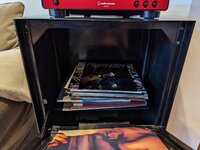
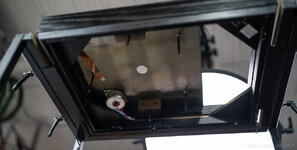
And when I say layman, I mean it - here is my setup, an old recycled NY City newspaper vending machine - turntable on top, records inside and the feature playing record in the window - low tech.

(I do recognize the simplicity in an air-cooled 911 though :cool: )

fleetwood setup (new).jpg

fleetwood inside new.jpg
 

Zippercat

Well-known member
Joined
Jul 13, 2013
Messages
828
Location
TN
It might be time to reach out to Saul and his son again. I would guess Saul is in his mid to late 80's now but supposedly continues to go to the office. I'd just love to find family photos or construction photos from during its life. I do have the original blueprints and should probably get them framed before something happens to them. Maybe I need to look through the old Sunsets again too.

Gregor
Looks like Mr. Zaik died in 2020.


nicholam77

Well-known member
Joined
Dec 18, 2016
Messages
2,675
Location
Minneapolis, MN
Thanks for the info, Gregor. I see according to @Zippercat it sounds like the architect has died, which is unfortunate. Not that you need his recognition or anything, but especially based on the condition the house was in when you got it, I feel like he'd be proud of how you brought his work back to life again.
 
OP
S

sakurama

Well-known member
Joined
Oct 10, 2010
Messages
1,458
Location
Portland - the cool one.
This is fantastic - as always. Such attention to detail. This thread never disappoints heading down rabbit holes.
So in layman's terms what is the most important upgrade with regard that to setup - again for the layman?

Hmm, for a layman and not a hifi geek.

First I suppose we can agree that music is reproduced and the goal is an accurate reproduction. Ideally you want to hear something as close to what you'd hear live. Although most live shows don't sound as good as the recordings because they're not performed in an ideal setting. The recording studio is the "ideal setting" for capturing as much detail as possible. So in a basic sense you want all that information.

To me this is where it gets interesting. Something Rick taught me was that listening to a system you can judge how good it is not really by how deep the bass is or how clear the treble is but by how engaging it is. This might seem strange but our minds have a phenomenal ability to hear and see patterns - it's what makes us special. You don't have to be a musician to know when someone plays the wrong note - you hear it because it's not in the expected pattern and that rub the mind the wrong way.

This is something that I use all the time in photography but in the opposite way...

i-FNhJLCn-X2.jpg

This shot looks like late afternoon light flooding into the living room right?

i-psM83nz-X2.jpg

There was light coming in but it didn't reach that far and I recently bought a 1k Mole Richardson Fresnel that was just sitting there so I plugged it in and the tungsten light was very warm, about the right brightness and so I set it at an angle that your mind associates with a late afternoon time. Second shot is without that light.

I hope you don't feel cheated here! I use light a lot - it's what I do.

Now with the system I have, a pretty high end one, you're dealing with extremely small resolution. The bearing is quiet so no background noise muddies the sound. The motor is extremely accurate so the pitch doesn't change and the tonearm and platter are very rigidly locked so that the smallest details of the groove get accurately reproduced. All this combines to create a pretty lifelike and extremely engaging sound.

Rick was fond of saying that if a system didn't make you tap your foot to the song it wasn't any good.

Like anything you can chase finer and finer resolution and the more you pay attention the better you are at it. This is why musicians buy better instruments, photographers buy better lenses, machinists buy bigger mills.

For my turntables setup there's a lot of tiny details that help it work exactly as it's supposed to - the cartridge is aligned, the weight of the cartridge in the groove is set correctly, the suspension isn't binding so the springs are isolating the platter and tonearm from any vibrations that might cloud the reproduction.

The problem with hifi is that measuring it doesn't equate to something being better. Think of food. A recipe is a collection of ingredients but the more careful a chef is the more he's able to transform those ingredients into something otherworldly. My ability with a camera and light is all about refinement. The better job I do the more you forget about the camera and light and you just say wow, that's beautiful.

So the same goes for the hifi. The better job it does the more you go wow.

And just like resolution charts for camera lenses tell you absolutely **** all about if a lens is going to be beautiful hifi sort of trades in the same ether. This makes for a rich playground for snake oil salesmen.

So I'm not sure if I muddied the water or added clarity.

Gregor
 

VMX42

Well-known member
Joined
Jun 27, 2011
Messages
50
Location
Sydney, Australia
"Level is universal"... don't say that in the presence of a cosmologist... :cool:


Gregor, one more thing you might try with your turntable stand...is to add more mass to the bottom of the stand. It worked wonders for mine. My turntable stand isn't that different to yours, so for the test I just used some scrap timber to span the frame and added a couple of concrete blocks...


My son is a physicist [who studied cosmology - hence my comment above] and he tried to explain why it changes the resonance and therefore the sound, but I just tried it, experimented with differing amounts of mass and tuned it to suit my ear. Of course then I had to make it look pretty...
 
To avoid these ads, REGISTER NOW!
Top Bottom