
I bought a new Miller Multimatic 220 to replace my venerable, 50 year old "MigaSPOT" MIG welder. The MigaSPOT served me well for a long time.
I decided to get a new MIG welder and was thinking of Harbor freight or Everlast. However, my cousin, a professional welder, strongly recommended the Multimatic 220. It was triple my imagined budget but he argued it would replace both my ancient MIG and TIG machines.
Here's the build 10 years ago for my MIG cart. It has worked great:
https://www.garagejournal.com/forum/showthread.php?t=67950
Here's the build 7 years ago for my Lincoln TIG cart. It has also worked well but I don't use it much:
https://www.garagejournal.com/forum/showthread.php?t=131902
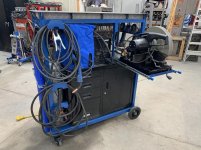
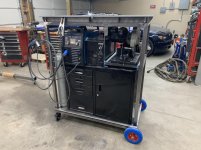
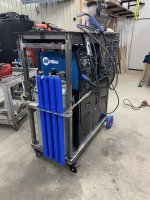
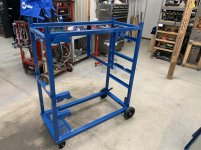
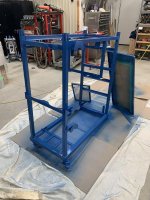
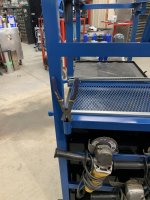
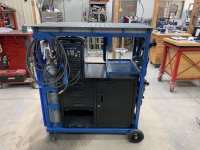
I was going to use my existing MIG cart but decided to make a new station that would hold everything. The most useful thing is the "slide out" 14" cold saw, much more convenient than dragging out the old saw when I want to use it. I used heavy duty drawer slides.
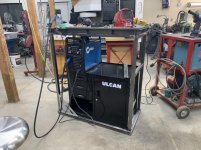
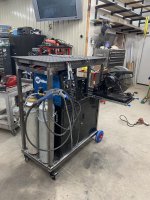
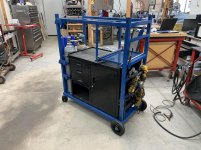
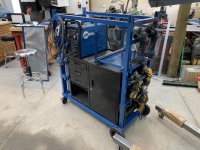
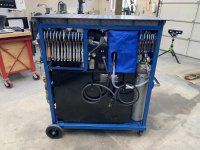
I fit the Multimatic, a plasma cutter, a cold saw and two bottles in the main area. I also used the large Harbor Freight welding cart cabinet and it's immediately full of stuff.
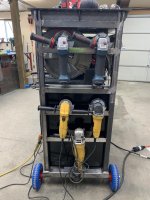
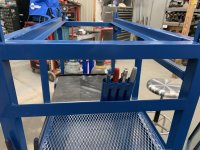
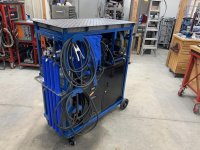
For bits and bobs on the outside (those take all the time), I have an area for large vice grip clamps and an area for small vice grip clamps. An area for four TIG wire tubes, a place to put pens, a place for a MIG pliers and a place for a "setup" jigs 90 and 45 degrees for the cold saw. I made cable hangars out of 2" angle and had just enough room left over to stick my magnetic torch and grinder holders and other magnets near the bottles.
I bought two new Bosch cordless angle grinders for the project. They are super convenient but don't have the power of the corded units. The also blow through batteries. I find I use them well for the fine grit flap disk and for a grinding wheel with I don't have a bunch to do. For heavy duty grinding, I grab one of the corded units.
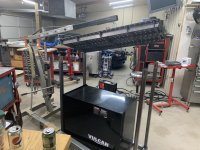
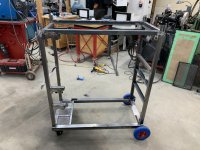
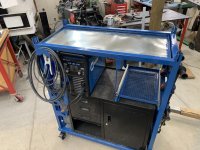
The top is a 2'x4' "Certiflat" top. That's really my only failure, the top is a bit too high to be useful. I'm pretty tall but it's still too high to be convenient. Overall I'm happy with the project. To do it over again, I would use a 1/4" plate for the top and make it a tad larger. It was tight fitting everything into the space.
I decided to get a new MIG welder and was thinking of Harbor freight or Everlast. However, my cousin, a professional welder, strongly recommended the Multimatic 220. It was triple my imagined budget but he argued it would replace both my ancient MIG and TIG machines.
Here's the build 10 years ago for my MIG cart. It has worked great:
https://www.garagejournal.com/forum/showthread.php?t=67950
Here's the build 7 years ago for my Lincoln TIG cart. It has also worked well but I don't use it much:
https://www.garagejournal.com/forum/showthread.php?t=131902
I was going to use my existing MIG cart but decided to make a new station that would hold everything. The most useful thing is the "slide out" 14" cold saw, much more convenient than dragging out the old saw when I want to use it. I used heavy duty drawer slides.
I fit the Multimatic, a plasma cutter, a cold saw and two bottles in the main area. I also used the large Harbor Freight welding cart cabinet and it's immediately full of stuff.
For bits and bobs on the outside (those take all the time), I have an area for large vice grip clamps and an area for small vice grip clamps. An area for four TIG wire tubes, a place to put pens, a place for a MIG pliers and a place for a "setup" jigs 90 and 45 degrees for the cold saw. I made cable hangars out of 2" angle and had just enough room left over to stick my magnetic torch and grinder holders and other magnets near the bottles.
I bought two new Bosch cordless angle grinders for the project. They are super convenient but don't have the power of the corded units. The also blow through batteries. I find I use them well for the fine grit flap disk and for a grinding wheel with I don't have a bunch to do. For heavy duty grinding, I grab one of the corded units.
The top is a 2'x4' "Certiflat" top. That's really my only failure, the top is a bit too high to be useful. I'm pretty tall but it's still too high to be convenient. Overall I'm happy with the project. To do it over again, I would use a 1/4" plate for the top and make it a tad larger. It was tight fitting everything into the space.


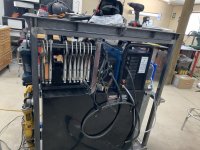
 ), gas cylinder(s), filler rods and wire spools, place to loop/store the welder leads, those sorts of things.
 ), saw, grinders, etc, those sorts of things go on the fab/work cart/table/station.