stonesfan68
Well-known member
I picked up a rough Milwaukee Model 20 jack from Craigslist a few months back and have been slowly getting around to bringing it back to life.


The guy I bought it from said it wouldn't stay raised anymore, and that the jack had belonged to his grandfather. I don't know anything about rebuilding jacks or hydraulics in general, but for $40 I decided to learn.
I contacted Milwaukee and spoke with Caroline in customer service. She was very helpful in getting me parts pricing and in answering a couple of technical questions. She told me that that jack was built sometime in the 1980s.
I bought a rebuild kit and several other miscellaneous parts. I decided to tear the jack down, paint it, rebuild the hydraulics and then reassemble the jack.
You don't need much in the way of tools to do the job, but metric tools need not apply. This thing is SAE all the way! There are no instructions to rebuild the jack. I basically printed out the instruction/parts manual (available on the Milwaukee Jack website) and used the parts drawing as a guide. I worked on one part of the jack at a time which helped me keep all of the o-rings and gaskets in the right order. I also bought four spray cans of Krylon Farm & Implement #1822 Massey Ferguson Red, a can of flat white paint for the saddle, and some heavy-duty rust handler primer. (I paid more for the paint then I did for the jack!)
You also need a clean place to work, and put something under the jack to collect fluids and old seals and o-rings.
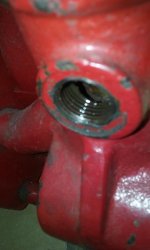
First I removed the reservoir and drained the fluid. It takes a 1/4" hex tool.

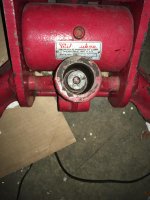
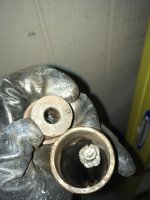
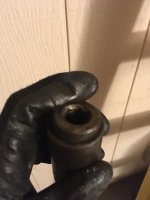
The next thing that I did was to remove the front wheels. You do that by removing the cotter key and sliding the wheel off of the axle. The wheels are heavy for their size- and they include a grease fitting.

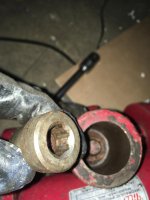
The rear wheel assemblies are held on to the housing using a set screw. I strongly suggest soaking these fittings with Aerokroil or your other favorite penetrant prior to removal. These little fittings were tight and I ended up having to drill them out after I stripped the heads.
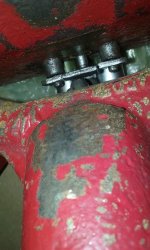
The instruction manual does give directions for removing the hydraulic pump. You drive out a roll pin from the top of the lifting arm. (You can see the hole where the roll pin was installed in the second photo, just behind the saddle.) Flip the jack over, and the remove the four screws holding the pump to the frame. Then remove the two springs.
Did I mention that this jack is heavy?
Since I planned on painting the jack I removed the level bars as well. You do this by removing four snap-rings.

I couldn't find a way to get the saddle off of the lifting arm without grinding and then welding the pieces back together, so I moved on the the tear down of the hydraulic assembly.
The guy I bought it from said it wouldn't stay raised anymore, and that the jack had belonged to his grandfather. I don't know anything about rebuilding jacks or hydraulics in general, but for $40 I decided to learn.
I contacted Milwaukee and spoke with Caroline in customer service. She was very helpful in getting me parts pricing and in answering a couple of technical questions. She told me that that jack was built sometime in the 1980s.
I bought a rebuild kit and several other miscellaneous parts. I decided to tear the jack down, paint it, rebuild the hydraulics and then reassemble the jack.
You don't need much in the way of tools to do the job, but metric tools need not apply. This thing is SAE all the way! There are no instructions to rebuild the jack. I basically printed out the instruction/parts manual (available on the Milwaukee Jack website) and used the parts drawing as a guide. I worked on one part of the jack at a time which helped me keep all of the o-rings and gaskets in the right order. I also bought four spray cans of Krylon Farm & Implement #1822 Massey Ferguson Red, a can of flat white paint for the saddle, and some heavy-duty rust handler primer. (I paid more for the paint then I did for the jack!)
You also need a clean place to work, and put something under the jack to collect fluids and old seals and o-rings.
First I removed the reservoir and drained the fluid. It takes a 1/4" hex tool.
The next thing that I did was to remove the front wheels. You do that by removing the cotter key and sliding the wheel off of the axle. The wheels are heavy for their size- and they include a grease fitting.
The rear wheel assemblies are held on to the housing using a set screw. I strongly suggest soaking these fittings with Aerokroil or your other favorite penetrant prior to removal. These little fittings were tight and I ended up having to drill them out after I stripped the heads.
The instruction manual does give directions for removing the hydraulic pump. You drive out a roll pin from the top of the lifting arm. (You can see the hole where the roll pin was installed in the second photo, just behind the saddle.) Flip the jack over, and the remove the four screws holding the pump to the frame. Then remove the two springs.
Did I mention that this jack is heavy?
Since I planned on painting the jack I removed the level bars as well. You do this by removing four snap-rings.
I couldn't find a way to get the saddle off of the lifting arm without grinding and then welding the pieces back together, so I moved on the the tear down of the hydraulic assembly.
Last edited: