To avoid these ads, REGISTER NOW!

Model A Ford garage

1/2 Cup

Member Emeritus
Joined
Apr 28, 2012
Messages
19,283
Location
Shepparton. Victoria. Australia
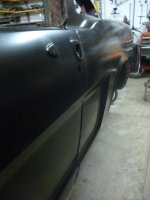
What would you like to see?? Model a engines are all the same on the outside. They can be dressed out differently but most are set up stock. I can take a picture or two of a B engine not set up for racing but stock. Don't know if I can give you exactly what you would like to see but I will try. Currently have company from out of town so it may be a week or so.

Many thanks for the offer and all in your own good time.
Its always great to see other perspectives and thoughts in relation to the model A.
Here is a few ideas for starters;

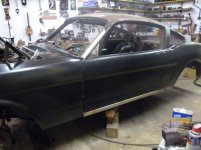
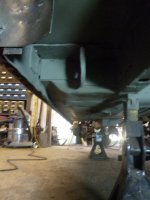
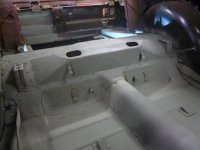
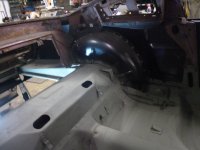
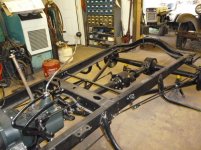
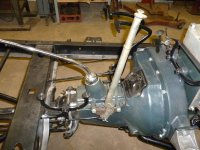
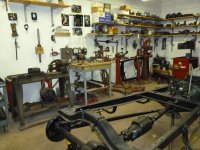
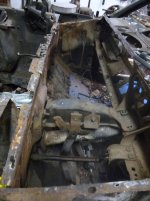
1. Any projects you are working on articulated from start to finish.
2. Tips and tricks you have picked up over the years.
3. Your "ultimate" Model A touring engine.
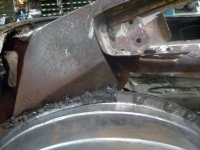
4. What not to do when restoring a model A. and lessons learned.
5. All the above could apply to transmissions, diff rebuilds.
6. Past projects.

Regards
 
To avoid these ads, REGISTER NOW!
OP
B

bolensboneyard

Well-known member
Joined
Nov 22, 2013
Messages
3,074
Location
South East
I believe the best way to tour in a Model A is to keep as close to stock as possible while still taking advantage of some of the comforts of advancements in technology. Let me be more specific. A high compression head and high lift cam are nice to get that little extra horse power but as soon as you get to far away from what Henry built you no longer have a Model A. No one likes to be the last in the pack but the fun is in the trip not the destination. I would not spend money on air conditioning, down draft carburetors or expensive overdrives just to get more speed for touring. A boost and some extra dependability can come from adding an model B intake and carburetor, with the added bonus of an acceleration jet. A water pump that is leakless, greaseless is also nice to cut down on maintainence during long trips. An alternator is also a good idea. As far as electronic ign. is concerned I feel it is not worth the extra expense. Adding an oil pressure gauge and temp. is also a worth while idea. Hyd. brakes are not necessary if you have yours adjusted right.
 

1/2 Cup

Member Emeritus
Joined
Apr 28, 2012
Messages
19,283
Location
Shepparton. Victoria. Australia
I believe the best way to tour in a Model A is to keep as close to stock as possible while still taking advantage of some of the comforts of advancements in technology. Let me be more specific. A high compression head and high lift cam are nice to get that little extra horse power but as soon as you get to far away from what Henry built you no longer have a Model A. No one likes to be the last in the pack but the fun is in the trip not the destination. I would not spend money on air conditioning, down draft carburetors or expensive overdrives just to get more speed for touring. A boost and some extra dependability can come from adding an model B intake and carburetor, with the added bonus of an acceleration jet. A water pump that is leakless, greaseless is also nice to cut down on maintainence during long trips. An alternator is also a good idea. As far as electronic ign. is concerned I feel it is not worth the extra expense. Adding an oil pressure gauge and temp. is also a worth while idea. Hyd. brakes are not necessary if you have yours adjusted right.

I am in 100% agreement, great advise.:thumbup:

With the 30 roadster restoration I have been very mind full of keeping the car true to its heritage whilst I have taken advantage of some modern technologies, to look at the vehicle many would not see nor be aware that they what they were looking at was anything other than standard.
I have paid particular attention to the mechanical braking system, steering and suspension.

"trip not the destination". well said. also good info. thx.
jim

Well said.:thumbup:

Regards
 
OP
B

bolensboneyard

Well-known member
Joined
Nov 22, 2013
Messages
3,074
Location
South East
been working long hours on a 1966 GT Mustang fastback in the Model A Garage so I have not had the time to post sorry. This is a complete "frame up" and it is mine so I have been pre-occupied. Hope to get some more info out soon. Bobby
 
OP
B

bolensboneyard

Well-known member
Joined
Nov 22, 2013
Messages
3,074
Location
South East
By request I am uploading more pictures of the AA overdrive reversed as installed in my Rat Rod
 

Attachments

  • 087.jpg
    087.jpg
    147 KB · Views: 229
  • 089.jpg
    089.jpg
    143.1 KB · Views: 229
  • 092.jpg
    092.jpg
    143 KB · Views: 246

48fordnut

Well-known member
Joined
Apr 4, 2006
Messages
307
Location
mid ga
Bob, That had to be at a different time from when I was there. Too little ,all your walls were filled with model A special equipment. Good pics of the installation.
 
OP
B

bolensboneyard

Well-known member
Joined
Nov 22, 2013
Messages
3,074
Location
South East
I was on a mission at that time to tool up. Thought everyone might want to see the current project. Even though it is not a model A it is the other great Ford landmark a 1966 GT fastback 2+2 and here are some of the things I have done to it so far. Let me know if you want more of this project. thanks Bobby
 

Attachments

  • 001.jpg
    001.jpg
    134.1 KB · Views: 231
  • 006.jpg
    006.jpg
    133.5 KB · Views: 226
  • 011.jpg
    011.jpg
    132.6 KB · Views: 216
  • 013.jpg
    013.jpg
    133.4 KB · Views: 211
OP
B

bolensboneyard

Well-known member
Joined
Nov 22, 2013
Messages
3,074
Location
South East
Thanks The next series of pictures are of the right rear full quarter panel. This is the first one I have ever done (and probably the last as my tired old *** feels it every day). I have a new respect for uni-body construction after this. The seams have been fully welded but that is not shown.
 

Attachments

  • 011.jpg
    011.jpg
    133.4 KB · Views: 376
  • 010.jpg
    010.jpg
    138.8 KB · Views: 394
  • 009.jpg
    009.jpg
    137.9 KB · Views: 448
  • 006.jpg
    006.jpg
    135.2 KB · Views: 361
OP
B

bolensboneyard

Well-known member
Joined
Nov 22, 2013
Messages
3,074
Location
South East
More pictures of the rear quarter panel progress. Do not pay attention to the man under the welding hood. Oops! he is in the next set of pictures sorry.
 

Attachments

  • 051.jpg
    051.jpg
    133.1 KB · Views: 256
  • 053.jpg
    053.jpg
    136.8 KB · Views: 260
  • 054.jpg
    054.jpg
    139.8 KB · Views: 249
  • 056.jpg
    056.jpg
    131.9 KB · Views: 259
Last edited:
OP
B

bolensboneyard

Well-known member
Joined
Nov 22, 2013
Messages
3,074
Location
South East
rear quarter panel update
 

Attachments

  • 004.jpg
    004.jpg
    134.9 KB · Views: 217
  • 001.jpg
    001.jpg
    135.2 KB · Views: 226
  • 005.jpg
    005.jpg
    132 KB · Views: 231
  • 003.jpg
    003.jpg
    133.5 KB · Views: 271
OP
B

bolensboneyard

Well-known member
Joined
Nov 22, 2013
Messages
3,074
Location
South East
Left quarter is now installed except for some spot welds along the bottom. I will post some pictures after the holiday of the rear valance once it is fit up and quarter trimming is done. Bobby
 

Attachments

  • 006.jpg
    006.jpg
    131.3 KB · Views: 197
  • 004.jpg
    004.jpg
    135.6 KB · Views: 189
  • 003.jpg
    003.jpg
    133.6 KB · Views: 195
  • 002.jpg
    002.jpg
    138.5 KB · Views: 219

Jvvmusme

Well-known member
Joined
Sep 25, 2011
Messages
566
Location
Bogota, Colombia
I was on a mission at that time to tool up. Thought everyone might want to see the current project. Even though it is not a model A it is the other great Ford landmark a 1966 GT fastback 2+2 and here are some of the things I have done to it so far. Let me know if you want more of this project. thanks Bobby

I am looking for a model A roadster pick up in a less than decent condition and more than a restoration project. Besides ebay and hemmings ( not found any) where can I look ?

Any Model A gurus in the USA ?

My first lesson learned about Model A is the carb and manifold you posted.... Good advice
 
OP
B

bolensboneyard

Well-known member
Joined
Nov 22, 2013
Messages
3,074
Location
South East
I have a pickup in a basket for sale but it is a closed cab. Unfortunately the roadster usually get trashed by the weather. Most of them you see today are built from fiberglass tubs on an old chassis. Can get pricey that way. Try putting an ad on the Ford Barn wanted.
 
To avoid these ads, REGISTER NOW!
OP
B

bolensboneyard

Well-known member
Joined
Nov 22, 2013
Messages
3,074
Location
South East
Thanks. I just got the driver's door aligned. Took me a while. Kept having to walk away then another day look at what I knew I still wasn't happy with the first time. When I hoped to have the patience. Working with repop can be a challenge. Finally satisfied with the result now I have to change the lower hinge for a new one without changing anything else. Hope the new one is on the money. I will have pictures when the fender is on. Just started removing the heater assy. as I have to replace the cowl upper and maybe lower. This should be a challenge but the last big one. Bobby
 
OP
B

bolensboneyard

Well-known member
Joined
Nov 22, 2013
Messages
3,074
Location
South East
Update on Mustang progress. I have hung the drivers door. What a treat to make it look this good. It is a lot harder than you would think as the number of options to adjust is equal to the number of overcorrections you can make. Then I still had to modify a few things. After taking off the front fenders and taking a look before I hung the other door I determined that the lower cowl pan where the air ducts are was way too far gone to save. This facilitated ripping out the entire upper and lower cowl, a big job. Also had to take out the windshield. This will be a long project as I am going to wire and repair the dash panel while it is open and paint inside the cowl tank and behind the dash. The radio was chopped out much more than necessary so I will have to cut out the dash and weld in a new panel grind and polish to match. He also cut and spliced enough garbage into the wiring harness to make it impossible to save and not look like a hack job. I will be rebuilding parts of the firewall top and a few other areas in order to have a solid perimeter to weld to. I also want to wire while the cowl is open. Structure will be slowed considerable. Getting the switches out that were brutalized and straightening the dash panel around the ignition switch as whoever the "mechanic" was that tried to take it out with a crowbar beat it to death; that was another treat. Last picture is looking behind the dash into the hole that was the cowl Bobby
 

Attachments

  • 010.jpg
    010.jpg
    133.5 KB · Views: 202
  • 009.jpg
    009.jpg
    134.1 KB · Views: 206
  • 002.jpg
    002.jpg
    136 KB · Views: 278
OP
B

bolensboneyard

Well-known member
Joined
Nov 22, 2013
Messages
3,074
Location
South East
The tow truck is gone! I was at the Model A Ford day with the local gang to celebrate the Model A as we do every year at the largest local Ford dealership. This dealership has a plan to build a new showroom and display some of Ford's landmarks such as vintage Cobras that are in the dealers collection. To make a long story short, he wanted my tow truck for his new showroom and offered me a new Ford Focus hatchback for it. My wife could not refuse so she has a new car and I have a new space in the barn. She deserved it. Her old car has over 261,000 miles on it. Quite a complement!
 
OP
B

bolensboneyard

Well-known member
Joined
Nov 22, 2013
Messages
3,074
Location
South East
Sad for sure but the complement and the look on my wife's smiling face for almost a week now are worth the empty spot in my barn. Besides I am working on something to fill it.:)
 

patent pending

Well-known member
Joined
Feb 7, 2012
Messages
271
Location
Charleston, SC
I saw your tow truck in the Sunday paper the other day...they had an article about the show at the dealership. I appreciate your willingness to give up something you enjoy for something you know will make your wife happy. I don't know you, but that tells me a lot about you already! :thumbup:
 
OP
B

bolensboneyard

Well-known member
Joined
Nov 22, 2013
Messages
3,074
Location
South East
Y'all don't know what it means to us that obviously special people would take the time to recognize the thought, but then, who else but those that are as thoughtful could. thanks Bobby and Ginny
 
OP
B

bolensboneyard

Well-known member
Joined
Nov 22, 2013
Messages
3,074
Location
South East
Here are some preliminary pictures of the temporary fit up of the cowl and left front fender. I also am in the process of installing the radio panel in the dash that had been chopped for an aftermkt. radio. More of a pain than a rear quarter for an old man trying to straddle a tunnel with a grinding wheel and welding torch.
 

Attachments

  • 016.jpg
    016.jpg
    137.8 KB · Views: 238
  • 017.jpg
    017.jpg
    133.4 KB · Views: 230
  • 015.jpg
    015.jpg
    132.4 KB · Views: 253
OP
B

bolensboneyard

Well-known member
Joined
Nov 22, 2013
Messages
3,074
Location
South East
Sorry I have not had time to post as I have been pushing to get ready for winter. The Alternator that I am having made for the Rat Rod is finally ready. Because the compression is so high 6V will not start it when the engine is warm but I did not want to spoil the originality of having a hot rod that was built to be vintage or original stock. It took a while to find someone who builds a quality alternator inside of a model A Ford generator but I have one on the way. It will put out 75 dependable amps. at 12 volts. I will post pictures when I get it and let you know how it turns out.
 
OP
B

bolensboneyard

Well-known member
Joined
Nov 22, 2013
Messages
3,074
Location
South East
More pictures of GT All welding is complete for structure. Picts are of bottom and floors, trunk etching primer.
 

Attachments

  • 001.jpg
    001.jpg
    134.5 KB · Views: 206
  • 004.jpg
    004.jpg
    136 KB · Views: 199
  • 009.jpg
    009.jpg
    132.9 KB · Views: 210
  • 010.jpg
    010.jpg
    135.8 KB · Views: 196
OP
B

bolensboneyard

Well-known member
Joined
Nov 22, 2013
Messages
3,074
Location
South East
Finish primer will be applied inside and out once door jams are prepped then sprayed with exterior color. Once this is done all work behind the dash will be completed and the dash sprayed. Bobby
 

Attachments

  • 011.jpg
    011.jpg
    133.3 KB · Views: 152
  • 012.jpg
    012.jpg
    135.6 KB · Views: 145
  • 013.jpg
    013.jpg
    133 KB · Views: 136
To avoid these ads, REGISTER NOW!
Top Bottom