To avoid these ads, REGISTER NOW!

Model A Ford garage

OP
B

bolensboneyard

Well-known member
Joined
Nov 22, 2013
Messages
3,074
Location
South East
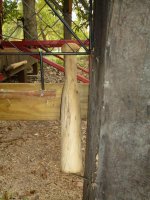
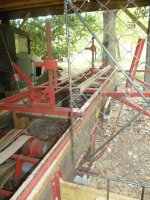
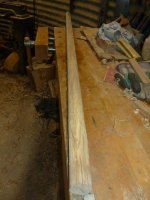
BB: good to know the CANT hook is helping with the log turning. speaking of that any boards cut yet?

so are you writing a book and have you noted that earlier in your thread? I'm still trying to catch up on the cool Mustang frame up build you did, but interested to hear what's in the book.

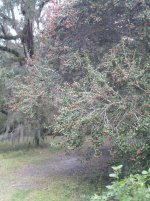
isn't it good to smell the roses (or flowers) especially in Decemeber? unfortunately my red poinsettas in this picture are silk, but I bought them for my bride 31 years ago and they still brighten up our place this time of year.

cheers

drives pictures already up cutting boards. Book is now registered copyright. Have to start looking for publisher after the holidays. It will be between covers and not virtual if I have to publish it myself.
 
To avoid these ads, REGISTER NOW!

drivesitfar

Well-known member
Joined
Oct 23, 2013
Messages
35,999
Location
Pacific Northwest
BB: what's the book about or did you mention that already in this thread or have a thread about it?

I saw you trim a log and not sure I've seen any pictures of any actual boards coming off the saw. maybe you are waiting until you build or put in some sort of table or rack to catch the boards?

carry on cause you do seem to get a lot done!!
 

1/2 Cup

Member Emeritus
Joined
Apr 28, 2012
Messages
19,283
Location
Shepparton. Victoria. Australia
BB: what's the book about or did you mention that already in this thread or have a thread about it?

I saw you trim a log and not sure I've seen any pictures of any actual boards coming off the saw. maybe you are waiting until you build or put in some sort of table or rack to catch the boards?

carry on cause you do seem to get a lot done!!

Bobby a book:headscrat
 
OP
B

bolensboneyard

Well-known member
Joined
Nov 22, 2013
Messages
3,074
Location
South East
BB: what's the book about or did you mention that already in this thread or have a thread about it?

I saw you trim a log and not sure I've seen any pictures of any actual boards coming off the saw. maybe you are waiting until you build or put in some sort of table or rack to catch the boards?

carry on cause you do seem to get a lot done!!

drives I only made three boards 3/4 inch and three of 1/2 and 3/8 inch. All were planed down and ready for use. Some of the log was used for fire wood as it took time to get the mill adjusted to cut without the saw laboring. The rest of the small logs were made into handle stock. I am not good at remembering to take a lot of pictures; too focused on the work; especially with a spinning blade a few feet away.
 
OP
B

bolensboneyard

Well-known member
Joined
Nov 22, 2013
Messages
3,074
Location
South East
Bobby a book:headscrat

Steve and drives

The attached synopsis is a very small part of the book. It does not include the emotional pitfalls of the man's journey. I believe it is a story that will ring true for many, to one degree or another. It is a true story!
 

Attachments

  • CC manuscript synopsis.txt
    740 bytes · Views: 39

drivesitfar

Well-known member
Joined
Oct 23, 2013
Messages
35,999
Location
Pacific Northwest
BB: sounds like an interesting book/story. did the kid end up restoring an old Mustang to better than new condition from the frame up and also bring a mill home and set it in his yard? or is someone you know?

hope you have a relaxing day today!!
 
OP
B

bolensboneyard

Well-known member
Joined
Nov 22, 2013
Messages
3,074
Location
South East
BB: sounds like an interesting book/story. did the kid end up restoring an old Mustang to better than new condition from the frame up and also bring a mill home and set it in his yard? or is someone you know?

hope you have a relaxing day today!!

drives let's just say I would like to know the man even more than I already do!
 
OP
B

bolensboneyard

Well-known member
Joined
Nov 22, 2013
Messages
3,074
Location
South East
Photos of the Holly tree outside my kitchen/dining room/living room. Even the close up does not do justice to the intense color of the red and green. Sure nice to see at this time of year.

I picked up some new/old tools to work in the wood right shop. I will post them in the coming days.
 

Attachments

  • P1030387.jpg
    P1030387.jpg
    136 KB · Views: 12
  • P1030385.jpg
    P1030385.jpg
    152.4 KB · Views: 14
OP
B

bolensboneyard

Well-known member
Joined
Nov 22, 2013
Messages
3,074
Location
South East
More of the Southern Magnolia cut on the mill. The piece on the bench is a roughed out rake or fork handle. It is five feet long 1 3/8 dia. planed and roughed with my spoke shave. The piece behind/through the screen is a club I made on the lathe from a persimmon log to knock the log dogs loose on the mill.
 

Attachments

  • P1030391.jpg
    P1030391.jpg
    126.6 KB · Views: 38
  • P1030390.jpg
    P1030390.jpg
    145.9 KB · Views: 37
  • P1030394.jpg
    P1030394.jpg
    82.1 KB · Views: 38

drivesitfar

Well-known member
Joined
Oct 23, 2013
Messages
35,999
Location
Pacific Northwest
BB: good to see the mill is getting some use. love all the handmade tools you make too.

just curious how big is your lathe or did you make that long persimmon piece round with a different tool?

it's good to stop and smell the roses so to speak and you seem to take as many pics of the flowers as you do of your cool mill so guessing you like them maybe as much.

cheers
 
OP
B

bolensboneyard

Well-known member
Joined
Nov 22, 2013
Messages
3,074
Location
South East
BB: good to see the mill is getting some use. love all the handmade tools you make too.

just curious how big is your lathe or did you make that long persimmon piece round with a different tool?

it's good to stop and smell the roses so to speak and you seem to take as many pics of the flowers as you do of your cool mill so guessing you like them maybe as much.

cheers

drives I did not make the handle for the rake on a lathe. It was made with hand tools referenced in the post after cutting it down with a draw knife. Love flowers.
 
OP
B

bolensboneyard

Well-known member
Joined
Nov 22, 2013
Messages
3,074
Location
South East
Tools used to make handles by hand. Latest tool is the scraper plane which is used mostly on a flat surface. Spoke shave gets me closer to the target. I have a curved spoke shave on its way here that was supposed to arrive yesterday but so far no dice. I am anxious to see how much advantage it will give me over the spoke shave on the round axis.


Thanks all for stopping by. Doing the work is an adventure but taking pictures of things that are not living is not something I normally do. Seeing them on film keeps me from experiencing the full glory of the romantic connection I have with a creation. It helps to know the annoyance of documenting my work, allows others to experience the same emotional connection.
 

Attachments

  • P1030393.jpg
    P1030393.jpg
    78.5 KB · Views: 27
  • P1030392.jpg
    P1030392.jpg
    85.5 KB · Views: 29

oldironfarmer

Well-known member
Joined
Jun 25, 2016
Messages
6,664
Location
Terlton, Oklahoma
I love your persimmon mallet. It will wear gracefully with age.

I think you'll find the curved spokeshave is great for putting on a finish but slower from the rough, that's where a flat base shines. At least for me. They were, after all, named for shaving spokes for wooden wheels of which many millions were made within the last 200 years.

Great work and unusual philosophy, as usual.
 

Bob Heine

ALLIANCE MEMBER
Joined
Oct 24, 2009
Messages
10,703
Location
Boca Raton, Florida
Bobby, the mill a great addition but the wooden handles are just as amazing. I don't own any fullers and didn't know what they were before joining the GJ. The lathe-turned handle on the fuller is cool but the hand shaved/shaped handles on the cant and tongs are classics. I've been buying shovels and rakes with fiberglass handles but you shape your own from Southern Magnolia wood -- I'm beyond impressed. I think the piece-duh-resistence is the Persimmon club. Do you have one for under the seat in the pickup? You never know when you'll need to gently straighten up something/someone when you're out on the road.

It doesn't seem right to comment on each of your hand crafted things when you have to stop crafting to respond with a keyboard attached to a soul crushing machine.
 
OP
B

bolensboneyard

Well-known member
Joined
Nov 22, 2013
Messages
3,074
Location
South East
I love your persimmon mallet. It will wear gracefully with age.

I think you'll find the curved spokeshave is great for putting on a finish but slower from the rough, that's where a flat base shines. At least for me. They were, after all, named for shaving spokes for wooden wheels of which many millions were made within the last 200 years.

Great work and unusual philosophy, as usual.

Thanks Andy. I'm still waiting for the curved shave but it is Christmas. I am also currently learning how to hammer a large round saw blade. Mine does not need it yet but I want to be prepared. Should be an interesting experience. I need to find some inexpensive old blades to practice on that someone has not painted up or made a toilet seat out of. :lol_hitti
 
To avoid these ads, REGISTER NOW!
OP
B

bolensboneyard

Well-known member
Joined
Nov 22, 2013
Messages
3,074
Location
South East
Bobby, the mill a great addition but the wooden handles are just as amazing. I don't own any fullers and didn't know what they were before joining the GJ. The lathe-turned handle on the fuller is cool but the hand shaved/shaped handles on the cant and tongs are classics. I've been buying shovels and rakes with fiberglass handles but you shape your own from Southern Magnolia wood -- I'm beyond impressed. I think the piece-duh-resistence is the Persimmon club. Do you have one for under the seat in the pickup? You never know when you'll need to gently straighten up something/someone when you're out on the road.

It doesn't seem right to comment on each of your hand crafted things when you have to stop crafting to respond with a keyboard attached to a soul crushing machine.

Thanks Bob. I do not have one under the seat but the thought has crossed my mind. As for my soul, the only thing I enjoy more than working with my hands is people. It's a good thing we don't all live close together, I would not get anything built/made; but, on the other hand, each day would be like a historical reunion comprised of a "Band of Brothers!"
 
OP
B

bolensboneyard

Well-known member
Joined
Nov 22, 2013
Messages
3,074
Location
South East
Ahh--persimmon--the American ebony. Dense wood that smells bad but turns well. Good job on the stick.

Ahh Jim. Thanks! Working with Persimmon, I have learned many things about the wood for sure. The latest thing is that once it is allowed to punk out outside, it is hard to gouge out. It comes out in small chunks so it has to be pared down once you get close to size then sanded. It still retains most of its hardness though. Turning it wet and green is a dream!
 
OP
B

bolensboneyard

Well-known member
Joined
Nov 22, 2013
Messages
3,074
Location
South East
looking for a sawyer's anvil if anyone knows of one sitting idle. Or maybe a piece of steel large enough to make one out of but close enough for me to ****.
 

drivesitfar

Well-known member
Joined
Oct 23, 2013
Messages
35,999
Location
Pacific Northwest
BB: when I was really on the ANVIL SEARCH a few years ago there were so many in barns in your area that I was tempted to drive back with my trailer to pick up a few.

look at ads where guys are selling their old tools and ask them if they might have an old anvil laying under a bench they forgot about. it doesn't hurt to ask and I bet you'll find several so just make sure they haven't been in a barn fire so take a steel ball to drop onto the anvil to see if rebound is 90% or close to that. (drop steel ball on top of anvil from maybe 10 inches to keep #'s easy and if it bounces up 9 inches you've got 90% rebound is a rough estimate instead of just pinging with a hammer).

also a ton of anvil users hit cold steel on them and chipped off the edges so while you can use an anvil for cold steel I always tell members to use a chunk of RR track or even an I beam like I posted a few pictures of some big ones. (the RR track with the long cut out is mine waiting to find a bench or stand to put it on)

heck I was cleaning up a rental house 30+ years ago and the tenant left me a bunch of stuff in my detached garage and I can't recall who I gave the anvil to, but it was too heavy for me and my big 6'5 foot son to lift and I needed it gone.

i've been gathering RR track and a few have been shaped into anvils and if you go to this SHOW YOUR ANVIL thread you'll see LIS2323 has posted his huge I beam anvil he made.

https://www.garagejournal.com/forum/showthread.php?t=33788&highlight=anvil
 

Attachments

  • 00b0b_aBNjyGxCdNi_1200x900.jpg
    00b0b_aBNjyGxCdNi_1200x900.jpg
    105.7 KB · Views: 44
  • Lis' I beam anvil and stand.jpg
    Lis' I beam anvil and stand.jpg
    151.2 KB · Views: 43
  • RR track with anvil type cut out 1 (2).jpg
    RR track with anvil type cut out 1 (2).jpg
    156.9 KB · Views: 42
Last edited:
OP
B

bolensboneyard

Well-known member
Joined
Nov 22, 2013
Messages
3,074
Location
South East
BB: when I was really on the ANVIL SEARCH a few years ago there were so many in barns in your area that I was tempted to drive back with my trailer to pick up a few.

look at ads where guys are selling their old tools and ask them if they might have an old anvil laying under a bench they forgot about. it doesn't hurt to ask and I bet you'll find several so just make sure they haven't been in a barn fire so take a steel ball to drop onto the anvil to see if rebound is 90% or close to that. (drop steel ball on top of anvil from maybe 10 inches to keep #'s easy and if it bounces up 9 inches you've got 90% rebound is a rough estimate instead of just pinging with a hammer).

also a ton of anvil users hit cold steel on them and chipped off the edges so while you can use an anvil for cold steel I always tell members to use a chunk of RR track or even an I beam like I posted a few pictures of some big ones. (the RR track with the long cut out is mine waiting to find a bench or stand to put it on)

heck I was cleaning up a rental house 30+ years ago and the tenant left me a bunch of stuff in my detached garage and I can't recall who I gave the anvil to, but it was too heavy for me and my big 6'5 foot son to lift and I needed it gone.

i've been gathering RR track and a few have been shaped into anvils and if you go to this SHOW YOUR ANVIL thread you'll see LIS2323 has posted his huge I beam anvil he made.

https://www.garagejournal.com/forum/showthread.php?t=33788&highlight=anvil

Thanks drives, I will check it out. I have two nice anvils for conventional blacksmithing but want a sawyer's anvil. It is basically a square block without any horn. Not of much use for anything else.
 
OP
B

bolensboneyard

Well-known member
Joined
Nov 22, 2013
Messages
3,074
Location
South East
Well with a list a mile long of things pending and too much mud, rain, cold etc. I was staring down at a chunk of the Persimmon I made Ginny's bowl and bread board out of that I had intended to make another large bowl out of but it had too many cracks in it; after seasoning for over a year. I had noticed a ceramic bowl in an ad on the TV (a two second flash) that I thought was an appealing design. It was stuck in my head. I looked this block of wood over in order to determine if I could make the bowl and skirt the cracks. It needed to have a function and Ginny needed a biscuit or cookie bowl. I managed to do both. The top is Magnolia and used to cover the screw holes from the backing plate used in the failed attempt previously. The knob is store bought. The bowl was mounted between centers as it had to be opposite the original try and the screws holes would now be in the top.
 

Attachments

  • P1030396.jpg
    P1030396.jpg
    68.7 KB · Views: 38
  • P1030397.jpg
    P1030397.jpg
    76.1 KB · Views: 35
  • P1030400.jpg
    P1030400.jpg
    86.4 KB · Views: 38

drivesitfar

Well-known member
Joined
Oct 23, 2013
Messages
35,999
Location
Pacific Northwest
BB: the bowl looks great. WELL DONE!!

i'm guessing the inside is smooth as a baby's behind?

cheers

hope you and your bride have a VERY MERRY CHRISTMAS and a very good year in 2019.

best of luck on your square anvil search which i'm guessing is sitting under a bench not far from you.
 

Bob Heine

ALLIANCE MEMBER
Joined
Oct 24, 2009
Messages
10,703
Location
Boca Raton, Florida
Bobby, how did you cut the notches in the edge of the lid? They are spaced so evenly and are so uniform in size I want to be surprised by the hand crafting trick you used.
 

drivesitfar

Well-known member
Joined
Oct 23, 2013
Messages
35,999
Location
Pacific Northwest
BB: I saw that design on the lid too when I posted that I like your new bowl and while the other guys are asking. I too would like to know how you cut the notches and how you made the lid? i know you said you bought the handle.

did you manage to avoid or get rid of all the cracks?

I used to play golf with persimmon headed woods and only the pros could get or afford the really good ones. now everything is made of metal and those expensive old vintage wood clubs sell for pennies. good to see there are other uses for such a nice looking wood.

hope you had a great day!!
 
OP
B

bolensboneyard

Well-known member
Joined
Nov 22, 2013
Messages
3,074
Location
South East
BB: the bowl looks great. WELL DONE!!

i'm guessing the inside is smooth as a baby's behind?

cheers

hope you and your bride have a VERY MERRY CHRISTMAS and a very good year in 2019.

best of luck on your square anvil search which i'm guessing is sitting under a bench not far from you.

drives Merry Christmas to you and yours also. Rest!
 
OP
B

bolensboneyard

Well-known member
Joined
Nov 22, 2013
Messages
3,074
Location
South East
Bobby, how did you cut the notches in the edge of the lid? They are spaced so evenly and are so uniform in size I want to be surprised by the hand crafting trick you used.

Bob I actually spaced them with the chisel width I used for the cut. If they had come out way off I would have used dividers. I scalloped them between two points and skipped every other space. Use the chisel from both directions and work toward the center rolling the cut as you go. Always with two hands on the chisel for better control and to keep the non cutting hand out of the way.
 
OP
B

bolensboneyard

Well-known member
Joined
Nov 22, 2013
Messages
3,074
Location
South East
BB: I saw that design on the lid too when I posted that I like your new bowl and while the other guys are asking. I too would like to know how you cut the notches and how you made the lid? i know you said you bought the handle.

did you manage to avoid or get rid of all the cracks?

I used to play golf with persimmon headed woods and only the pros could get or afford the really good ones. now everything is made of metal and those expensive old vintage wood clubs sell for pennies. good to see there are other uses for such a nice looking wood.

hope you had a great day!!

drives I did get rid of the cracks. A small one exists in the cover. I glued the top piece on to reinforce the crack but it did warp it slightly. See my answer to Bob on the technique. I made the lid as I was cutting the bowl then once the outside was complete sawed through between the two with a rip hand saw. I planed the bottom of it with a low angle plane; as the grain on persimmon is cross directional.
 
OP
B

bolensboneyard

Well-known member
Joined
Nov 22, 2013
Messages
3,074
Location
South East
Onward and sideways. Started yesterday working on a holder for the large blades on my Sawmill thickness planer. They are 16 inches long and half an inch thick. I had to use an impact wrench to get one off in order to cobble together from scrap the idea I had in my head to make one that would work on my tool grinder (it is one inch short of being able to do it all in one pass.) Would have been easier if I had Andy's scrap pile. I am going to try and see if swiveling the table on the grinder on an angle will be enough to pick up the other inch. I can always loosen the T nuts and slide it I suppose. It is all tacked up and I have had a protractor on it. Level both ways on the bevel and the angle is exact at 35 degrees. Now I have to keep it from moving with the welding. Pictures when it is done. It is made from two pieces of 3/16 support for a tractor seat **** together a heavy 2x2x1/4 angle iron in the center (9) inches long and another 3/16 plate from a different tractor. These pieces, except for the angle iron, are left over pieces from the brackets I made for the braces on the mill shed. I will use two 5/8 pieces of drill rod under the support for the blade so all five bolts can be snugged down. I'm not too concerned about the blade flexing at 1/2 inch thick but I know what bolts can do if I get over zealous.
 
To avoid these ads, REGISTER NOW!
Top Bottom