To avoid these ads, REGISTER NOW!

Modest 25x35 Fabrication Shop Build

OP
T

Trm303

Well-known member
Joined
Aug 4, 2020
Messages
162
Location
Cape May
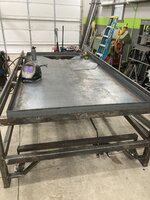
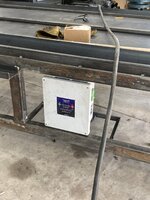
Finally getting back in the shop to work on my own projects (momentarily). I started mocking up a built in electronics cabinet for the motor controller and wiring, and I also got majority of the water bed completed. I initially wanted to tig the entire water bed but after steaming my makeshift water cooler and overheating my syncrowave, I decided to mig the rest which went much quicker.

I went with a large drain at the far end of the table which will connect to the water bladder beneath. I will have a valve at the drain in addition to a valve at the highest point in bladder to vent. I plan to pressurize the vent to fill the table. I also designed the wheel system to lift each end up independently so I will be able to tilt the table toward the drain to fully drain it after every use.

I ended up with a bow in the middle of the bed despite my best effort to avoid that. With the heigh controller, it shouldn’t matter how uneven the table is but my goal has been to make it as level and square as possible. I have three 1x2 stringers that run the length of the bed to hold the slats so I brought the center support up to height so all the slats should sit level. Due to reading many complaints about water splashing from the table, I will also be making 3” removable walls to combat this.
F25AB5B4-29BF-4863-843C-EF9C7AA0571E.jpeg
3368AED4-F9ED-4A18-BDED-DF1E12C3A035.jpeg
ACEA2643-B204-409A-9592-D307343C1FE5.jpeg
On a side note, I placed an order for 20mm rails through automation overstock. The order did not charge my card and had no updates for about two weeks, I was getting ready to call them and ask for updates when my card got charged and the following day my rails and carriages were on my front porch. The rails were packaged very well and the quality exceeds my expectations thus far, I will update further when I get my gantry built but I am very pleased with their product and would recommend them if you don’t mind the wait.
 
Last edited:
To avoid these ads, REGISTER NOW!
OP
T

Trm303

Well-known member
Joined
Aug 4, 2020
Messages
162
Location
Cape May
Aside from welding in the drain bung, the water bed is DONE. For some reason my table turned out shallower than the plans so my 2” flatbar slats are not going to work and I will have to go pick up some 1 1/2” flat bar on my next trip to the steel yard.

1446DA9F-C21C-4EAE-B1D1-427AA021A2D5.jpeg

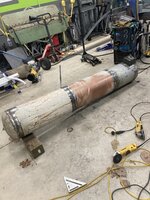
I calculated the water table to hold about 65 gallons, and since 100lb propane tanks hold roughly 25 gallons, I grabbed an extra scrap tank from my local propane supplier. I cut them all up and welded 2 1/2 together to form the water bladder where I will keep my water/coolant mixture when the table is not in use. The bladder tank will sit on a decline with a sump at the bottom which will be plumbed to the water bed drain. I will weld together the sump then pressure test the bladder at around 5psi for leaks prior to paint

FE0E1927-4558-4AB6-A102-A89F6F1939E1.jpeg
1C27F7E7-94B8-4CAA-87B2-00DEE8FCCD24.jpeg

I just want to give a little shout out to Benchmark Abrasives. They are my exclusive supplier for abrasives and I am very satisfied with their products. I just recently tried their purple paint remover pad on the propane tanks for the 4.5” grinder and it does an excellent job with a surprisingly long lifespan. Their standard cutoff wheels are also the best I’ve encountered so far.
 
Last edited:
OP
T

Trm303

Well-known member
Joined
Aug 4, 2020
Messages
162
Location
Cape May
I have slowly been sneaking in some time on the table. Plenty of work coming in which means little to no time for my own projects. I installed a sump at the bottom of the tank and then pressure tested the tank at 10psi for leaks, welded up a couple leaks I had then drilled out the drain/fill hole and welded in a 1 1/2” bung. Got the tank in under the table and made two crossmembers to support the tank. I am going to try to get all the fab work on the table portion complete so I can paint it and move it to its final resting place because not having the room to pull a car in the bay is beginning to get old.

66428801-2575-4208-AF61-B3A45ECC1198.jpeg
450621AE-9010-4ACF-B16F-22E1599FCA72.jpeg
 
OP
T

Trm303

Well-known member
Joined
Aug 4, 2020
Messages
162
Location
Cape May
My intentions with the plasma cutter is to have it on a stand alone cart so it is not always tied to the table and can be mobile when I need to use it for other projects. I will have it on a quick detach air hose and 50amp plug so I can move it around. A Motorguard M30 filter and regulator will also be mounted on the cart.

I have yet to put much thought into it but somehow it will have quick connect mounts so it will lift and move as one with the table.

C184C52B-F023-4EAC-B3D4-86DDFFC731D2.jpeg
47718C61-B89A-4366-A5E5-B725DE2E9962.jpeg
 
Last edited:
OP
T

Trm303

Well-known member
Joined
Aug 4, 2020
Messages
162
Location
Cape May
I like the plasma cart. Is there going to be a place to wrap the hand torch on the cart?
There will be a drawer at the bottom of the cart for all consumables and the hand torch.


I am getting very close to getting the table portion completed and painted. Of course I designed a fairly complicated (and ever evolving) computer terminal station that folds under the table. The terminal is to conserve as much floor space as possible and keep terminal out of the way when loading full sheets. I believe I have worked out all the kinks and I am fairly happy with the results. The computer, monitor, keyboard and mouse are all one unit that swivels out from underneath the table, then the monitor/computer unfold and the keyboard and mouse have a separate platform that is adjustable for using the terminal seated or standing. Both mechanisms are spring loaded to make everything easy to move around.

5A8218BA-DCBF-48A2-B2FD-35097671B3EA.jpeg
4CE3FDA9-6FB5-4531-AE69-EE9E5E925E32.jpeg
A18A5ACE-9634-4BC2-9829-8C2BCB4E8494.jpeg
 
OP
T

Trm303

Well-known member
Joined
Aug 4, 2020
Messages
162
Location
Cape May
Couple exciting things in the works and let me precursor this by saying I am currently all over the map! Haha

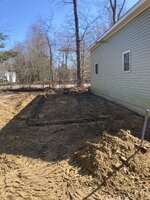
Just got all my permits approved for a “carport” off the back side of the shop which will be 15’ off the side and full length of the shop. This will be a place to keep and start my oldest project, a 69’ El Camino, which will be a daily drivable hopped up street car. I will be putting in the concrete reinforcements for a Jib Crane for engine pulls/material handling. This will eventually become enclosed and part of the shop as time goes on.

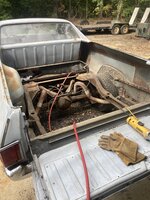
Since the El Camino has been on my mind recently, I have been seeking a motor for it which I stumbled upon while talking to one of my frequent customers. I ended up buying his old 03’ Chevy 2500 with a 6.0 LS For $900. The truck was then listed as a parts truck on Marketplace and I had a buyer willing to pay me the $900 I had invested for the truck without a motor. So now I have a motor sitting in the shop until I get the carport built.
D84E6587-932D-4171-810C-2258C79EB744.jpeg
8628C6F8-DE0B-4034-AC85-1C4D67BDB5F4.jpeg

FE906AFB-4ED3-43D5-A173-9898ADDA4FED.jpeg

I also got the CNC table fully painted. The Plasma Cart is finished and painted and attaches to the table so it will move as one but is also stand alone unit when I need to use the hand torch for other jobs. I opted not to put a drawer in the bottom due to the hand torch being a tight fit so I will probably end up wrapping it in diamond plate.
472A2701-9F27-44B7-8DB7-DE65B2DD66D3.jpeg
93B68AC5-3140-44C4-AA77-A01E55E82FB5.jpeg3FB00BBC-DD16-4448-A356-B266C59A9755.jpeg

And if all that wasn’t enough going on, a buddy of mine, who alluded to the fact that his father had an older Case skid steer he may be interested in letting go, let me go and check out the machine before I made an offer on it. To my surprise, it is a beautiful mid 90’s 1845C with a whopping 600 hour on the thing that has been kept in a barn. Needless to say I am going to do anything I can to try to score this thing to replace my current machine. I’ll post some pictures if I am able to make a deal.
 
OP
T

Trm303

Well-known member
Joined
Aug 4, 2020
Messages
162
Location
Cape May
I decided to sell the Skat Trak prior to replacing it so I wasn’t strapped for cash and it ended up working out very well. I put it up on market place and had it sold in under a week with $6k in my pocket. I made an offer on the 1845C and ended up taking it home a week later. It’s not the prettiest machine but it is very clean with 602 hours and no play in the pins or chains. It also has a factory high flow which in my opinion, the low flow rate auxiliary was one of the only drawbacks to this machine. I’m waiting on the parts for a full service before I actually work the machine because I imagine most of the filters/fluids are all original. Also picked up a cheap pair of forks off of CL.

F60F4CCD-79E8-4F72-8FE3-84CAEBFAC5D3.jpeg


I had an upcoming job for bending some thick steel so I picked up a swag off-road finger press brake and also got the gooseneck dies for future versatility and I am very pleased with the kit, took about an hour to weld up and I can already tell it is definitely going to get put to good use.

A5681181-0439-44FA-878D-3D0BE151623A.jpeg

CNC table base is done, I have the gantry mocked up and am in the process of aligning the ground rails until I broke my only 5mm tap and of course you can’t get them locally.

5E47C911-B139-4A6D-B5BC-09CAD1A9998C.jpeg
 
OP
T

Trm303

Well-known member
Joined
Aug 4, 2020
Messages
162
Location
Cape May
Not much progress to write back on. I have been doing more side work than anything else. For every job I get done, it feels as though I have two more people trying to squeeze themselves into my tight schedule and I have a serious problem saying no! One of those projects being what was supposed to be a fairly straightforward bed replacement on a 71 El Camino that quickly turned into wheel wells, body supports, etc.
2E946AFF-8BDD-4225-9E91-AFE2E9AFE46E.jpeg
Unfortunately I don’t foresee much more progress until the new year. My girls family has a farm stand that sells Christmas trees/decor so every year from thanksgiving to Christmas, it’s all hands on deck pushing about 700 Christmas trees in addition to making and selling hundreds of wreaths/grave blankets/woodworks. In the meantime I will be attempting to clear out my job list.

I did however down all the trees needed for my carport. Before Christmas officially kicks off, I hope to have my buddy swing by with his backhoe and dig all the stumps so I will be ready for concrete following the new year.
9A5680A3-EBC7-40D9-9C17-C3D7428E541D.jpeg
It’s rather old news I never posted but I did get the gantry painted and mounted. All the linear motion appears to be smooth and ready for motion control. If I can find some down time, I will start wiring everything up.
AD8F272F-FBF9-4293-8B58-087FA184EC08.jpeg
And as of yesterday, I stumbled upon a market place deal on vidmars. I picked up this lot locally for $500. One is going to my father but I will hold on to the other two until my addition is built.
93D7164E-80D9-4ABD-829C-ED3C5D67038C.jpeg
 
OP
T

Trm303

Well-known member
Joined
Aug 4, 2020
Messages
162
Location
Cape May
Starting to get back into working on the shop now that my Christmas season is all wrapped up. Stumps have been dug and the ground has been filled and leveled in preparations for the carport. I hope to be ready for pouring the foundation in the next month or so.
7C7D120E-A73D-45F6-B4F7-511AB6907FF6.jpeg
I’ve already taken on and finished quite a few fabrication jobs since the new year but I’ve also found the time to make some progress on the CNC table. I was able to mount and wire all my motion control components and everything appears to be rolling smoothly.

So far I am very pleased with the AVID CNC linear motion and motion control. For the money, it was definitely worth the time saving. I have a few more odds and ends to finish before I can push the table into place and start testing all the controls.
CA789A9A-3544-451A-B94A-B903B72099F8.jpeg
25D161CD-B76E-4179-AC6A-4103A735ED9F.jpeg
280835BF-E7A9-44CF-B4D6-E661D17E7FCE.jpeg
 

Attachments

  • C416E35D-DDC6-4F73-99AD-39E097E6E4A5.jpeg
    C416E35D-DDC6-4F73-99AD-39E097E6E4A5.jpeg
    1.4 MB · Views: 19

crunchwallet

Member
Joined
Jan 16, 2023
Messages
10
Location
Tucker
6 grand! I wish I could find a skid steer in my area for that. Prices out here are insane. Nice looking shop.
well it is a Case. lol kidding. Reminds me of my first project as a Super. We had taken delivery of a new Cat 420 backhoe and it broke within hours on the jobsite. No Cat rentals available but they had the Case equivalent so I told them to "bring it". The owner calls from the home office a couple states away and we are discussing the job, I tell him about the issues with the new machine and the Case. "you got a what?" A Case backhoe "A what?" A, C A S E, case backhoe "what the beep beep beep, was it free?" I later learned he had extensive experience with Case products from the 70's and 80's which were supposedly not up to the standards of Cat, Hitachi. I didn't notice much difference but maybe down on power compared to the Cat420
 
OP
T

Trm303

Well-known member
Joined
Aug 4, 2020
Messages
162
Location
Cape May
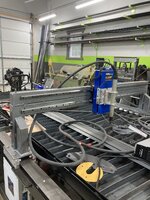
The CNC is done and pushed in place! I ran all the controls dry without an issue. The CNC where it is right now definitely makes the shop feel a lot smaller but it’s nice to be able to pull vehicles in again. The plan is to finish the carport and slowly enclose it after summertime making it part of the shop. The CNC will get moved out there along with some storage and the El Camino will also move in.
82021779-9006-4F5E-940C-94D815031B49.jpeg
I am starting to get more proficient in Inkscape/freeCad in preparation for making some money with the machine. I have a few ideas in the works that I hope to start working on in my free time.

Since I was shuffling things around, I ended up getting a little more organized and getting some stuff off the floor. I bought 2 homak wall cabinets for added storage and built a stand to hold my Kennedy machinist box and some tool holders for the lathe. I have to say I’m very happy with the Homaks, at about $60 cheaper then the gladiators, quality seems to be about par.
19AD4EE1-554E-4E6D-AACC-278BB8A460F5.jpeg
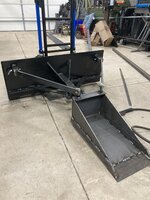
I wanted to build a versatile quick attach plate for the skid steer to use around the yard and I ended up making my own rendition of rmack13’s skid steer hitch plate. This has a standard hitch mount to make an assortment of specialty tools and also move trailers around the yard.
19F7E4D0-CFD6-4029-B348-BBAD2F52B43E.jpeg
Speaking of specialty tools… I need to dig the footer for my addition and my ground ***** to hand dig. I could borrow a excavator but I could also go without owing anymore favors so I opted to throw together a 12x24 trench bucket with some material I had laying around. Not sure how well it will work out but if it holds up enough to dig my footer I will be happy. 3 hours of work in the shop and another 2 in the machine will definitely beat 5 hours with a shovel!
0864042E-782B-40C6-9DBD-087D1800D1D9.jpeg
I’ve decided to incorporate a jib crane into the addition for engine pulls and loading material onto the CNC. I found some specs for a floor mount 1/2 ton jib that I intend to overbuild. So far I have a 4x4 1/2” base plate, 1x24” anchor bolts, and a 8” I beam. I just recently discovered a huge length of 11” 3/8 wall pipe at my local scrap yard. They let me cut a 8’6” piece off for the mast and told me I was welcome back anytime to comb through their yard for anything I might want at $.50 a pound.
C8AD0B5E-2AD8-486D-BD84-4F67D17BE2DA.jpeg
 
OP
T

Trm303

Well-known member
Joined
Aug 4, 2020
Messages
162
Location
Cape May
I am very impressed with trench bucket and it held up great! I dug the whole footer in an hour and some change. There were a lot of roots that would have taken me hours to cut through by hand and the skid steer did it with ease. I have a mason coming to borrow the bucket and see how he likes it. Sounds like he is interested in ordering a 20” dedicated trench bucket which will definitely do a better job than this bucket I threw together.
2F53CBAF-8D73-4B10-B753-698ABF55922B.jpeg
CC443EAC-74E3-477C-B0EE-23BA5C9AD611.jpeg
I just picked up the lumber for my forms and I have a buddy who knows concrete coming in to help out with the pour. Hoping to pour in the next two weeks if the weather is on my side.

I have a fairly large job in the works but I’ve been waiting for the delivery on a mag drill for over a week so in the mean time, I’ve been knocking out some small projects on my list I normally don’t have the time for like this material rack. This rack is to organize all of my intermediate length material that is too small to stand vertically and too big for the bottom storage dividers. Recently I’ve been finding myself pulling full lengths for something I overlooked in my cutoffs section.
4AF333A7-B736-402B-B792-2C8E168FFF35.jpeg
 
To avoid these ads, REGISTER NOW!
OP
T

Trm303

Well-known member
Joined
Aug 4, 2020
Messages
162
Location
Cape May
Captain14: I do not have any names in mind but I am open to ideas

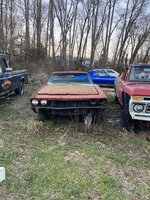
68400BIRD: I had no intention to disappoint! I snapped some pictures in its run down state sitting in what my girl’s parents call “death row” where all of their projects go to die. I brought it over when I was in between places and it never made it to my house after I moved in. Original 350 car that will eventually be a Turbo 6.0 T56 combo
DD4B14B7-4CAA-464C-9DAE-9215F782E18A.jpeg
7A9AA731-55E4-4769-9769-1C3C7B1A2E54.jpeg
 

AndyS64

Member
Joined
Jan 14, 2018
Messages
13
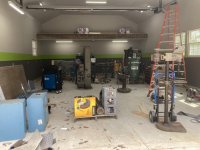
While I had the scaffolding up, I hung the Reverberray tube heater and got that out of the way. I was also finally able to start moving some of the lighter machines and tools in and figuring out the layout. I have a pretty good idea where most of this stuff will go but as I start pulling more stuff in from storage, I’m starting realize I forgot about a lot of stuff I need to find homes for.

I also bought a lot of this equipment in untested or in unknown condition and immediately put them into storage so It’s safe to assume that at least some of the stuff is going to need repair. My current plan is to get it all up and running in order of importance and then slowly take each one out of commission to repaint/rebuild. I have a few days coming off next week and I hope to pull a favor and borrow a big enough forklift to get my lathe and large drill press in the shop.

IMG_5534.jpg
IMG_5543.jpg
IMG_5544.jpg
IMG_5545.jpg


Sent from my iPhone using The Garage Journal mobile app
I have a shop very similar in size to yours. 30x40. Can I ask what size tube heater you went with? Love the shop!
 

Attachments

  • 8640AC7A-1E3C-4E9F-8557-722942C6FB87.jpeg
    8640AC7A-1E3C-4E9F-8557-722942C6FB87.jpeg
    892.3 KB · Views: 51
  • 586BB3D4-C63F-43BF-81E0-DF103FB5D27C.jpeg
    586BB3D4-C63F-43BF-81E0-DF103FB5D27C.jpeg
    709.8 KB · Views: 59
  • AED7E3C1-F922-4CB0-B7A5-29855222006E.jpeg
    AED7E3C1-F922-4CB0-B7A5-29855222006E.jpeg
    344.8 KB · Views: 57
  • 6A28C14B-AB85-4965-85EE-935485390DA3.jpeg
    6A28C14B-AB85-4965-85EE-935485390DA3.jpeg
    277.3 KB · Views: 55
OP
T

Trm303

Well-known member
Joined
Aug 4, 2020
Messages
162
Location
Cape May
I have a shop very similar in size to yours. 30x40. Can I ask what size tube heater you went with? Love the shop!
Model Number is DET3-20-75N. It’s a 75k btu burner. The tubes come in 10’ sections and I believe that burner can be extended to 30’ (or more). They are available on Zoro and can be had for a very nice price if you come across a 20% off coupon. Love the heater, rarely kicks on when I keep the shop around 55* and very quick recovery when I open the door to bring something in.

I like your shop! Are those doors 10x10 or 12x12? The color scheme turned out great!
 
OP
T

Trm303

Well-known member
Joined
Aug 4, 2020
Messages
162
Location
Cape May
I Currently have two jobs going on but they are both outside and the weather has been ****. Due to the weather mentioned above, my concrete pad is also on hold till next Tuesday at the earliest. With no money to be made currently, I’ve actually had a bit of time to work on some things I’ve had on the back burner since I started doing work out of the shop.

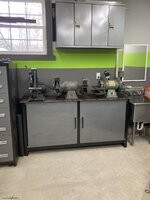
The welding bench had originally been made enough to work on it and I never got around to finishing it. I threw a couple extra hangers under the table for c-clamps and then finished all the welding and gave it paint job. The grinder bench with swing out milk crate drawers was also another half finished project I was able to knock off my list. I made some framed doors out of angle iron and sheet steel and linked them both up to their corresponding lower swing outs so the lower milk crates swing out as you open the door. Everything then got a paint job and got put back together.
BA1953CE-62AC-4837-B469-95573ABDA249.jpeg
CA72A890-54EA-4A47-BB8D-F9AF4B42A5D7.jpeg
80AC653C-EDD6-4C74-BFE2-F0753494BC6E.jpeg
Since the concrete is getting the anchor bolts for the jib crane during the pour, I made the base plate out of 1/2” to get the bolt pattern down. I then drilled out a piece of plywood to the pattern and welded all the anchor bolts together to maintain the pattern during the pour.
7F1E34FF-5A51-40A3-B7A0-40C0DA960F61.jpeg
8AFE7852-70C1-4AFA-BA9A-DEB2FD468B4F.jpeg
 
Last edited:
OP
T

Trm303

Well-known member
Joined
Aug 4, 2020
Messages
162
Location
Cape May
Had a few reschedules due to weather, but 13 yards later and my pad is finally poured! Since my in-laws are in construction, I am waiting for them to place their next lumber order for a house they are building to get some bulk discounts.

I also happened upon a few loads of free asphalt millings which will turn most of the area behind the shop into a parking lot for my trailers and the jobs Waiting to be worked on.
47ECA591-62FA-4FF3-950B-7A7CE99327B7.jpeg
I did a big no-no and lent my machine out. It came back like this…
ABF19AF5-77A5-4314-83FD-B06549A354BB.jpeg
Thicker plates, more bolts, a much heavier duty center section, a day I’ll never get back and hopefully this will never happen again.
0EDFB953-6E59-4B77-A8C0-E53CD0BF69E8.jpeg
0F8C59E1-4C8C-48BF-9E8C-822A45D08CCC.jpeg

If I didn’t already have enough going on… if anyone remembers my engagement present for my fiancé, we have also slowly been working on that in hopes to be camping in it this summer. Nothing inside was salvageable and the subfloor was rotten so we gutted it to find a decent amount of rear frame rot. Every other Sunday we put time in on it. We hope to have the shell off the next Sunday we work so I can get the frame fabbed up and ready to go back together.
8CAD74E5-23CC-4FE1-B8C1-6285E18E589F.jpeg
 

DeeDubz

Well-known member
Joined
Nov 20, 2019
Messages
1,454
Location
Socal
How did that happen? Ive had a few ppl wanted to barrow my machine... on the house *aka free* and ive politely declined. Its pissed a few ppl off but i would come unglued if one of my friends/family did that to my machine. I would be mad at myself if I did that but at least Im the one with skin in the game.
 
OP
T

Trm303

Well-known member
Joined
Aug 4, 2020
Messages
162
Location
Cape May
How did that happen? Ive had a few ppl wanted to barrow my machine... on the house *aka free* and ive politely declined. Its pissed a few ppl off but i would come unglued if one of my friends/family did that to my machine. I would be mad at myself if I did that but at least Im the one with skin in the game.
They don’t know how it happened, the only conclusion I came up with was one of the levers that lock the bucket popped up and they continued using it until they curled the bucket on something heavy and the bucket popped out of the quicktach plate on the one side tweaking the side still locked in. No other theories I can come up with for that result and it’s honestly just better forgotten now that it’s done with. It’s very frustrating considering one of the landscape companies I do work for has the same machine with over 9k hours on the clock that everyone beats the piss out with the stock quick tach center section..

It’s a tricky situation because anything of theirs is always up for grabs when I need it so it I’ll just be frustrated for a while and get over it. Needless to say I will try to run my machine when it gets lent out to them but no one else will borrow the machine
 
OP
T

Trm303

Well-known member
Joined
Aug 4, 2020
Messages
162
Location
Cape May
Not much action lately, lumber was dropped for the carport but still waiting on the help to put it up. In the mean time, I’ve been scratching off some more of my back burner projects, one of which being my tig cooler.

I started out with a eBay procon beverage pump and a 5 gallon bucket when money and time was tight, but I’m tired of the look, the noise of the motor rattling on the bucket, and the bucket being in the way.

I ended up using a small keg for the reservoir, a random hydraulic cooler, and a Amazon AC muffin fan for air movement. I was able to compress the entire package together enough to squeeze it in the pre-existing cooler space in the cart (with some minor modifications). I am very happy with the final product and it is so much more quieter than any other coolers I’ve seen run. I have yet to weld any AC with it yet but I did tig a small exhaust with it and the tank was still cool to the touch.
151B55AD-61CD-4271-867C-CA0B1CD5961D.jpeg
3E6B3BAC-4364-4989-9435-083193F65B28.jpeg
B09CA7FD-2084-4CC4-BDAA-051C58C0D788.jpeg
808340AC-A158-40CE-8BB5-51A1C79875B0.jpeg

In other news, we successfully pulled the shell off the airstream. The frame is in pretty poor shape in the back end where the bathroom was. Since airstream specific holding tanks cost significantly more than standard tanks, we ended up buying off the shelf fresh and black tanks that will fit inside the frame and I’m just going to fab up new mounts while I’m rebuilding the rear of the frame.
7320611C-29EB-405D-A501-7615986D8A6F.jpeg
360E7644-CB64-4D19-BDB0-091AE7005D5E.jpeg
 
OP
T

Trm303

Well-known member
Joined
Aug 4, 2020
Messages
162
Location
Cape May
It’s been quite some time without updates and I’d like to be reporting more progress but unfortunately I’ve just been WORKING. Between the actual job and sidework, I’ve been putting in around 70-80 hours a week. Although it is not exactly how I’d like to spend the summer, it’s definitely helping to expand the shop.

I’ve made a huge step by getting the CNC up and running. On my night shifts I’ve become fairly proficient at Inkscape and FreeCad as my primary drafting programs and I’ve already put the machine to good use. One of the first things I made with it was this Tig rod holder for the side of my syncrowave. This uses 1-1/2 pvc tubes with caps which works out to about half the price of the ones you can buy.
792D09ED-F5C0-471B-93C1-7E16A1F96726.jpeg
6FBDDFC6-628C-4485-B573-7D7FC5ECA223.jpeg
I’ve also got hooked up with my local gun range who also prints signs and I designed and cut them some signs they print their own designs on and sell, here’s one of the latest signs I cut and they printed
0D84AD52-9C4E-445A-A41E-BA3CCF4984BA.jpeg
While doing a lot of welding on our airstream frame, I designed and cut a lot of the frame components on the CNC and it turns out there is a market for them. So far I have fulfilled 2 orders through Facebook for a bunch of different parts in addition to making quite a few for myself.
B2827134-6512-4629-8B8E-CAF2674AAA90.jpeg
847B80CA-0BD4-453F-9530-B73C808BE746.jpeg
And the most exciting update being getting the carport roof up. Me and the in-laws were able to get the roof up in a few hours, I hope to find some time in the near future to get the gable ends in and get my inspection before I throw up some walls. Now that I have a known ceiling height, I can also start working on the jib crane.
A7BBAC8F-E6C4-45F3-829F-AB944AB6F8CC.jpeg
 

LopezBart

Well-known member
Joined
Oct 13, 2023
Messages
2,564
Location
Lopez Island, WA
Not much action lately, lumber was dropped for the carport but still waiting on the help to put it up. In the mean time, I’ve been scratching off some more of my back burner projects, one of which being my tig cooler.

I started out with a eBay procon beverage pump and a 5 gallon bucket when money and time was tight, but I’m tired of the look, the noise of the motor rattling on the bucket, and the bucket being in the way.

I ended up using a small keg for the reservoir, a random hydraulic cooler, and a Amazon AC muffin fan for air movement. I was able to compress the entire package together enough to squeeze it in the pre-existing cooler space in the cart (with some minor modifications). I am very happy with the final product and it is so much more quieter than any other coolers I’ve seen run. I have yet to weld any AC with it yet but I did tig a small exhaust with it and the tank was still cool to the touch.
151B55AD-61CD-4271-867C-CA0B1CD5961D.jpeg
3E6B3BAC-4364-4989-9435-083193F65B28.jpeg
B09CA7FD-2084-4CC4-BDAA-051C58C0D788.jpeg
808340AC-A158-40CE-8BB5-51A1C79875B0.jpeg

In other news, we successfully pulled the shell off the airstream. The frame is in pretty poor shape in the back end where the bathroom was. Since airstream specific holding tanks cost significantly more than standard tanks, we ended up buying off the shelf fresh and black tanks that will fit inside the frame and I’m just going to fab up new mounts while I’m rebuilding the rear of the frame.
7320611C-29EB-405D-A501-7615986D8A6F.jpeg
360E7644-CB64-4D19-BDB0-091AE7005D5E.jpeg
In those years the frames were quite undersize for the loads they were expected to handle. Later on they figured out that relying on the shell of the Airstream to contribute to the stiffness of the assembled trailer was a bad idea. Many people caused all sorts of trouble by attaching a receiver hitch to the back of their trailers for bicycle carriers and the like.

When I finally do our 1971 I'll likely make the frame deeper in section.
 

PhantomEB

Well-known member
Joined
Feb 6, 2006
Messages
6,853
Location
Medicine Hat, AB, Canuckistan
Read this from post 1 to now…..love this shop!

Once my bronco is back to driven out on its own power, one of the first things I will be doing is removing everything and painting the walls. I may go fully above and beyond and use one hell of a stripe like your green. I know the lower half will be a dark grey like yours.
 
OP
T

Trm303

Well-known member
Joined
Aug 4, 2020
Messages
162
Location
Cape May
In those years the frames were quite undersize for the loads they were expected to handle. Later on they figured out that relying on the shell of the Airstream to contribute to the stiffness of the assembled trailer was a bad idea. Many people caused all sorts of trouble by attaching a receiver hitch to the back of their trailers for bicycle carriers and the like.

When I finally do our 1971 I'll likely make the frame deeper in section.
This is only a 23’ so the 1/8 wall 5” channel frame seems appropriate, but any longer and I would have redone the frame in either actual channel or 5x2 tube. I can’t imagine the same frame underneath a 31 footer!
 
OP
T

Trm303

Well-known member
Joined
Aug 4, 2020
Messages
162
Location
Cape May
Read this from post 1 to now…..love this shop!

Once my bronco is back to driven out on its own power, one of the first things I will be doing is removing everything and painting the walls. I may go fully above and beyond and use one hell of a stripe like your green. I know the lower half will be a dark grey like yours.
Thanks! The dark grey definitely helps keep the shop looking cleaner for longer! Especially with all the metal dust everywhere. I’ll be sure to keep an eye out for your thread if you post about it
 
OP
T

Trm303

Well-known member
Joined
Aug 4, 2020
Messages
162
Location
Cape May
Unfortunately, I cannot provide as much updates as I would like to because I haven’t had much time to myself.

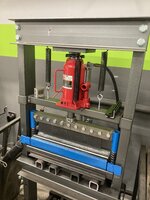
The airstream parts have gotten a little out of hand and I have been cutting out 4X8 SHEETS worth of parts for orders through eBay and Etsy. I upgraded my 20 ton Harbor Freight press with an Air over Hydro unit that makes my life a little easier but it leaves me wanting more. One of the parts I make is a Crossmember that I have to cut long perforations in to bend on my brake, then I have to weld the seams which is becoming tiresome with all these orders going out so I have already started shopping around for a 6-8’ long press brake capable of bending 1/8” parts! Haha
07E7B073-0038-42AD-9AFD-BA6FFC61D9B0.jpeg
3AA749CC-016F-411F-A0AA-E101C53EF6EC.jpeg
I did manage to get the airstream frame finished up and painted. I’m excited to get it decked and the parts for it off my benches and out of my garage!
A111A849-864B-4BC2-8CF7-4FE892DE1589.jpeg
One of the bigger jobs that ate up most of my time was a railing job for a home renovation. Although I didn’t get any creative freedom with it and had to follow the designs provided, it did give me some time to play with my bender on the clock and buy me a set of dies!
A317D652-68A6-424A-B7F2-6E72CB8F53B6.jpeg
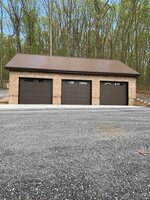
I did get my “carport” approved by the construction office so I’ve already started picking up the materials to start closing it in. Hopefully I will be posting some progress pictures here shortly.
 
Last edited:
To avoid these ads, REGISTER NOW!
Top Bottom