To avoid these ads, REGISTER NOW!

Mopar / Wood Shop Cave

moparfreak

Well-known member
Joined
Jan 24, 2005
Messages
853
Location
Milwaukee, WI
Hello Folks,

So, I have been in the midst of a significant house / garage project since December, and wanted to start a build thread, since I've always been a lurker and written down so many great ideas from this forum, now's my chance to finally implement them.

In any case, the build is a house and garage addition and remodel. The kitchen is being enlarged and remodeled and a bathroom being added as well. As you can imagine, most of my attention recently has been on getting the kitchen squared away & finished off. We have been without basic kitchen utilities for quite some time and, well, y'know. That can be a drag!

According to plans, the house originally went from this:
Before.png

To looking like this:
After.png

So as you can see, the garage will go from about 400 sqft to just under 1350 sqft. The intention here is to serve as a place for my woodworking shop, as well as a mechanical/auto restoration shop for my mopar collection. At the moment it's a collection of one, a 1973 Dodge Charger. In a year or two I hope to add a 2009-2014 Dodge Challenger as well, to round out the Mopar muscle of today + yesteryear combo. The Charger is fun but in rough shape, so needs a lot of work.

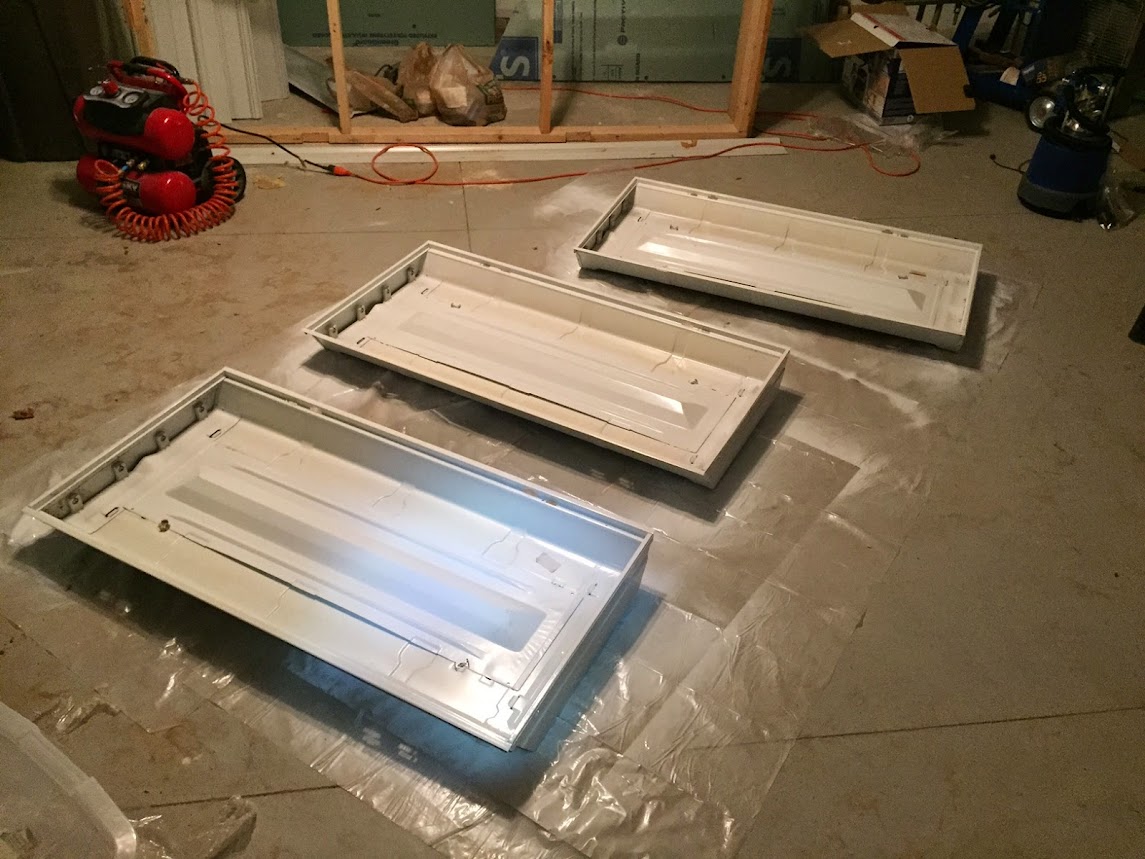
I have big plans for the shop. It's insulated with a 80k BTU Mr. Heater furnace to take the chill out in winter, and plenty of windows+ceiling fan in the summer. Walls are drywalled, ceiling will be the corrugated white roof panels (Dura-Panel from Menards) for ease of finishing (i.e. none) and its brightness and look. There will be a lot of creative built-ins and storage nooks and crannies, dedicated custom workstations and french cleat system throughout for customizing ability. Power and lighting will be abundant and I'm going for the grey+red industrial / retro type look (but won't be nearly as show-quality as some of the other garages I've seen on this forum). For now the floor is going to be bare concrete, haven't decided what to do yet for the long term on that.

As far as equipment, it'll have my big IR vertical A/C with installed lines, 50A line for buzzbox Lincoln as well as my more convenient smaller Lincoln wire feed. I'll make a little area on the side of the auto bay for welding & metalworking. Plan is also to build in a dust collection system for all the WW tools, cause sawdust in the air really bothers my lungs and allergies. I'm also seriously contemplating putting in one of the HF hoist systems for lifting some of this heavy stuff. In the car bay, I plan to put a MaxxJaxx lift, perfect for my scenario and usage, and it's gotten great reviews on this forum.

Hope to start posting progress pics shortly. The structure is up and there but the finishing work has yet to start!

Thanks,
Adam
 
Last edited:
To avoid these ads, REGISTER NOW!
OP
M

moparfreak

Well-known member
Joined
Jan 24, 2005
Messages
853
Location
Milwaukee, WI
A few pics of the excavation. Those guys were seriously a hassle. I'm thankful that part is over. Frost walls were level so a lot of extra time by the carpenter to get everything leveled out.

Foundation+1.jpg

Foundation+3.jpg

Foundation+4.jpg

Thanks,
Adam
 
OP
M

moparfreak

Well-known member
Joined
Jan 24, 2005
Messages
853
Location
Milwaukee, WI
Then a ****-ton of wood was delivered and things really got serious. The rough carpenter was an old-school guy, just he and his son. Used to have a bigger crew and did full houses, but lately dialed it back and does "smaller" jobs like this. Couldn't believe it as they went through that process. Quite a sprightly guy for pushing 60 years old.

In any case, framing turned out great. A couple areas where adjustments were needed due to the existing construction of the house, floor levels, ceiling joist directions, etc. Needed to add a few headers where I didn't anticipate so I'll have to work around those but all-in-all very pleased with how the structure went up.

Framing+2.jpg

IMG_2335.jpg

IMG_2339.jpg

Thanks,
Adam
 
OP
M

moparfreak

Well-known member
Joined
Jan 24, 2005
Messages
853
Location
Milwaukee, WI
Once the framing was done, I started the plumbing and HVAC, took awhile, got that done and inspected, then insulated. Picture are kind of crummy cause of my phone. I also finally got all my equipment out of the storage trailer and into the shop, which is nice to finally get access to all those stored tools. Still don't know where anything is...

IMG_2548.JPG


IMG_2545.JPG


IMG_2544.JPG


IMG_2543.JPG


Thanks,
Adam
 
OP
M

moparfreak

Well-known member
Joined
Jan 24, 2005
Messages
853
Location
Milwaukee, WI
Well, got a few more things knocked off the list here. The drywall was installed and finished off, it's amazing how that makes things come together, but makes a huge mess too that I need to clean up. While that was going on, I was able to get the exterior fascia and soffits installed so the roofer can come back and put the gutters on, finally get that water away from the foundation.

Here's the backside looking at it from my rather deep backyard. Right hand side is garage, left hand side is the dinette we added to the kitchen w/ vaulted ceiling. It was a bit tricky trying to get an addition of this size look right with a 60's style BLAH looking rectangular suburban ranch but I think the architect did a really fine job of blending it in just right.
IMG_2601.JPG


Here are the garage drywall pics. Next step is to clean it up, prime and paint the walls.
IMG_2606.JPG


IMG_2607.JPG


IMG_2604.JPG


For the next little while I'm going to be focusing on installing kitchen cabinets so we can inch closer to getting back all our utilities and appliances back online in there. Once that's done I can focus back on the shop again.

Thanks,
Adam
 
OP
M

moparfreak

Well-known member
Joined
Jan 24, 2005
Messages
853
Location
Milwaukee, WI
A quick update:

- For the last month and a half I've been solely focused on the kitchen, but finally a week ago got most of our cabinets in, countertops and appliances and plumbing and electrical all live and functional. So, now that we have running water and drains, a bit of the stress and pressure is off.

- Next week my better half is going to start priming the garage walls

- My Dura-Panel metal sheet ceiling arrived from Menards. It was quite a challenge getting that into the garage, took two pallet jacks, but now it's in and also ready with the roll insulation going in over the top of it. Pretty excited to see how that turns out. It will be a challenge getting those 16' sections up on the ceiling, planning on using two drywall lifts to lift them up...we'll see how that goes.

- I have decided to go all in on dust collection, will build a system into it from the get go. My main regret right now is not wiring in a 220V for a DC. Put one in for my IR air compressor but now I need to put another one in the corner. I need to decide if I ask the electrician to do it (and pay $$$) or do it myself after all the final inspections. Although the cost is killing me I will probably just go to the best system from the get go and not mess around, use the ClearVue CV1800 system w/ 5 HP motor. This is the shop I plan to use for the rest of my life, and I do a lot of WW, and whenever I cut more than a couple pieces of wood on any of my equipment, my nose starts going crazy. (not to mention what I don't know might be happening to my lungs). When you catch a view of the air in the sun from the windows it's crazy how much is floating in the air...

Hopefully I'll be back soon-ish to post some progress pics. Gotta finish up the siding this weekend and next, then can start turning back to the inside.

Thanks,
Adam
 
OP
M

moparfreak

Well-known member
Joined
Jan 24, 2005
Messages
853
Location
Milwaukee, WI
So another brief update. Been taking care of small details inside the living space, it's so nice to have a working kitchen....

Got some double 4.5" dutchlap vinyl and got most of it up, working weekends and evenings for the last couple weeks. Anyone who says vinyl siding job should take a couple days has clearly never done it. As a 1-man or even 2-man job, it's just very tedious, but it looks great. Almost like I knew what I was doing!

Next is kitchen insulation then metal ceiling in the garage!

photo%2B1.jpg

photo%2B2.jpg

Thanks,
Adam
 
OP
M

moparfreak

Well-known member
Joined
Jan 24, 2005
Messages
853
Location
Milwaukee, WI
Final piece of siding went on this weekend. Took me all of 6 weeks (mostly by myself but occasionally w/ some helpers) to do. Some of that was waiting time for more material to come in from Menards. Bought WAY too much siding and way too little trim. Oh well, the weather really held up in my favor (70+ degrees and it's just about October!). That's my step-father in law putting in the last piece at the top of the bigger gable. This project wouldn't happen w/o him, he's been out just about every weekend helping. I'll pay him back when he builds his 3000+ sqft outbuilding next year.

photo%2B%282%29.JPG


What a relief!

Next up, I'm back in the shop, priming, painting and preparing for the metal ceiling to install. Gotta find the best way to work with those 3' x 16' Dura-Panel sheets, and making the cuts and adjustments, and also cutting for junction boxes. B/c of the corrugations it makes it a bit complicated. Zip saw / grinder will work for cross cuts, and for junction boxes I'm thinking of using the HVAC hole saw cutter to get a clean cut w/o buggering up the corrugations...Any ideas? I know the air nibbler definitely won't work well. Planning to use two drywall lifts side by side to lift the panels up and give enough support to prevent bending / kinking.

Thanks,
Adam
 
OP
M

moparfreak

Well-known member
Joined
Jan 24, 2005
Messages
853
Location
Milwaukee, WI
Been making some good progress on the shop....

Installed an attic ladder. Werner unit, gas assist, went in real easy. Makes life so much easier now to get up there. It has a nice folding feature and is a sealed opening with weatherstrip. I think it ran me about $200 at HD, well worth it for me. Sorry the pics aren't great, still no lighting in the garage.

Also installed a 1ton HF chain hoist from the rafters above where the ladder is, to enable pulling up heavy items that I want to store up there. Over the next week or so, I plan to build a small lifting platform so I don't need to haul all the heavy materials up and down (i.e. cinder blocks, bags of mortar, concrete, drywall compound, boxes of tile, etc.). No pics of that yet but I'll get to it.

IMG_2748.JPG


IMG_2749.JPG


Thanks,
Adam
 
OP
M

moparfreak

Well-known member
Joined
Jan 24, 2005
Messages
853
Location
Milwaukee, WI
Also, finally started getting the metal ceiling installed. I used Dura-Panel from Menards and had them cut to my specified lengths. There's basically 3 bays that need to be done, and got 2-1/3 of them done yesterday. Also got R25 rolls installed above the metal and already seeing 10 deg improvement in heat losses from before and it's not even all done.

You need a crew and a good drywall lift but overall this went real nice. It looks amazingly good and the pictures do not do it justice. Have maybe a dozen or so panels left to install, will do that next weekend and also hang the NG shop heater and plumb the exhaust vent through the wall.

For making the cuts, used the HVAC circle cutting tool and it worked very nicely for the circular junction boxes. Needed to adjust the height of the drill bit so it would extend down to reach the corrugations. Angle grinder worked for rectangular boxes.

http://www.homedepot.com/p/Malco-Adjustable-Hole-Cutter-HC1S/100520674

IMG_2757.jpg

IMG_2758.jpg

IMG_2760.jpg

IMG_2761.jpg

Thanks,
Adam
 
OP
M

moparfreak

Well-known member
Joined
Jan 24, 2005
Messages
853
Location
Milwaukee, WI
My mopar stable:

- '98 Durango 5.9L - Tows / hauls / workhorse
- '09 Caravan - Handles the 3 kiddies, a rare "Swivel-n-Go" version which is awesome BTW
- '73 Charger SE - Bought in college (12 yrs ago....) and have been working on it since, albeit slowly as life has gotten in the way. But as you can see, building a proper home for it now. It showed up in Toolmonger's Flickr pool a few years back:

http://toolmonger.com/2009/01/16/flickr-pool-73-dodge-charger-resto/

I'll see if I can get a few more pics up, have to dig them out of the archives...

And finally I also have a '05 Mazda3 hatch that I am driving for a couple more years and it will be replaced with a Dodge Challenger (new style), preferrably of the SRT variety. But, I need the kids to all get into boosters at least for that, as a full size car seat just won't fly in a vehicle like that....

Thanks,
Adam
 
OP
M

moparfreak

Well-known member
Joined
Jan 24, 2005
Messages
853
Location
Milwaukee, WI
Here's a few pics:

1973 Dodge Charger SE
400 cid - rebuilt it stock when I bought it. Have plans for speed parts, stroker kit and EFI
Will be "resto-mod" type so all new suspension and steering so it doesn't drive as much like a boat
Lots of body work to do
Will put a lot of dollars into the mechanicals but the paint will be low buck. I want to drive it and not care or worry about dings / dents / scratches.

IMG_0726.jpg

IMG_0727.jpg

IMG_0728.jpg

Thanks,
Adam
 

GDPossehl

Well-known member
Joined
Sep 23, 2014
Messages
450
Location
Atlanta, GA
Awesome challenger. I'm surprised you haven't taken that nasty hitch off of it though! On the other hand, it needs a whip antenna and a CB.
 

CodeRedZ

Well-known member
Joined
Dec 29, 2009
Messages
446
Location
Huber Heights Ohio
the metal ceiling is an interesting touch.

My next door neighbor has a 71 Cuda and a 72 Duster, in his garage.
 
Last edited:
To avoid these ads, REGISTER NOW!
OP
M

moparfreak

Well-known member
Joined
Jan 24, 2005
Messages
853
Location
Milwaukee, WI
Awesome challenger. I'm surprised you haven't taken that nasty hitch off of it though! On the other hand, it needs a whip antenna and a CB.

Yeah, it's peculiar. Part laziness but also partly I think it adds some character. When I restore it, I might refinish the brackets and remount it, we'll see. I hae bashed my shin on it too many times when filling at the tank (fill spout is behind the license plate bracket). Gives me one extra vehicle to tow the utility trailer!
 
OP
M

moparfreak

Well-known member
Joined
Jan 24, 2005
Messages
853
Location
Milwaukee, WI
Made some progress on the Mopar cave this past week....

Finished up the metal ceiling. Man it looks great. It's very early in but I am more than pleased. Very glad I went this route. I've gotten a lot of compliments from everyone who's seen it. Took two total sundays to do it, really not bad at all.

Here it is just about finished, but the shop is still very cluttered...

IMG_2767.JPG


IMG_2768.JPG


Also hung and vented the 80k BTU Mr. Heater shop furnace. Not sure yet how well it will work but it looks great. Ran B-vent through a thimble in the wall, got that cutout done yesterday as well and it looks real nice and almost like I know what I'm doing here...

IMG_0110.JPG


IMG_0111.JPG


IMG_0112.JPG


Still need to add an extension to bring it up above the roof line and some caulking. Then, need to wire in the thermostat (already ran my LV wire, so just have to make the connections) and make the gas connection.

I have a bunch of 4xT8 flourescent fixtures and need to now figure out the best way to install them. They have screws poking out the top from the electronic ballasts, and combined with the irregular ceiling surface, makes me think flush mount is out of the question. But, on the other hand, I don't want to chain hang them cause the holes cut for the junction boxes would be uncovered then, so not quite sure what to do there, any suggestiosn?

Next up, getting back priming and painting of the walls. Also starting to turn my attention to some interior stuff again, AKA the bathroom and mudroom...

Thanks,
Adam
 
OP
M

moparfreak

Well-known member
Joined
Jan 24, 2005
Messages
853
Location
Milwaukee, WI
That metal ceiling does look nice. What length did you have the panels cut to? Just curious from a "handling" point of view.

When you start in on that '73, I hope you'll start a build thread at our 3rd Gen. Charger forum.

http://wichargerguy.proboards.com/

DynoDave,

I think I may have come across that forum years ago when I first got the Charger and did some work, but with family and house getting in the way the last few years I had forgotten all about it. I will definitely track it on the forum.

I laid out the room based on the architectural print, and then confirmed the numbers with measurements. There is also two big LVL header beams that essentially divides the ceiling into 3 main rooms that I had to set up the sheets for. Because I had flexibility with the overlap end to end, I basically just had to make sure I had enough, and could overestimate a bit and just have an inch or two more overlap. I had Menards cut the sheets into 16'ers, 12'ers and 10'4"ers based on where they were going. I also incorrectly estimated how much overlap there was long edge to long edge. I assumed there was 4-6" of overlap but really there was only 1.5" or so. This plus a bit extra padding resulted in ~400 sqft extra metal. My stepdad has helped me so much, I gave it all to him, as he'll use the stuff in the office of his outbuilding when he puts that up next summer.

16' pieces handled surprisingly well with a single drywall lift in the center. I probably wouldn't go beyond that unless you had a second lift. I had a second lift that I used for where stuff was in the way and I couldnt' get the lift into the middle of the panel, or where I notched the panel for clearance to the attic ladder, so it needed support on both sides. I also have a light duty scaffolding that I had picked up from Menards years ago on sale for ~$80 or so for painting projects and that proved to be a very great aid to the project. Running up and down ladders does get old...

Thanks,
Adam
 
OP
M

moparfreak

Well-known member
Joined
Jan 24, 2005
Messages
853
Location
Milwaukee, WI
This weekend I worked on a lot of cleaning. Got a lot of the left over materials and stock up into the attic. I "finished" off the attic by putting a bunch of OSB up there for floorboards and some racking for wood, and other materials. It's now incredibly useful as I don't need to fill up the basement or garage with stuff I don't want to look at.

Anyways, a big milestone last night, parked one of our cars in there for the first time! This represents the first time we have been able to do that since moving in June 2013. When we moved in, the old 2-car garage was filled wall to wall, floor to ceiling with my shop equipment. Parking the cars outside in the WI winter was harsh and not going to happen again! It doesn't look like much to you guys but I look at that and know how much work it took to get to this point.
IMG_0160.JPG


IMG_0161.JPG


Put finishing touches on the flourescent fixtures to be used. Nice and white now!

IMG_0131.JPG


My supportive wife dutifully priming. Next is a coat of gray base on the wall, and 3 red stripes of varying thickness.

IMG_0129.JPG


Thanks,
Adam
 
OP
M

moparfreak

Well-known member
Joined
Jan 24, 2005
Messages
853
Location
Milwaukee, WI
What did you decide on mounting your florescent fixtures?

Just got those in on Monday while the finish electrical went down. I've got to get the tubes into them (36 of them, so it's gonna take me a while!), then I'll snap a few pics. They actually flush mounted pretty nicely, just needed to use some extra long screws and not crank down too hard and compress the corrugations on the metal. They blend right in and look nice.

In the meantime, working on finishing off the bathroom next to the garage, I know it's not shop stuff but I think it came out looking pretty good. Beadboard wainscoting, custom framed mirror, it's a nice touch! toilet and sink come next.

IMG_0264.JPG


My 1.5 yr old daughter got into the mix. Has an affinity for finish nails. I can see a lot of potential here....

IMG_0231.JPG


IMG_0232.JPG


Thanks,
Adam
 

Billhae

Well-known member
Joined
Dec 18, 2009
Messages
95
Any of those lights flush mounted in a place where the door when up will cover them? I will have a few like that and I'm trying to decide if I should wire them on a separate circuit so they can be turned off if covered up

Bath looks great
 
OP
M

moparfreak

Well-known member
Joined
Jan 24, 2005
Messages
853
Location
Milwaukee, WI
Any of those lights flush mounted in a place where the door when up will cover them? I will have a few like that and I'm trying to decide if I should wire them on a separate circuit so they can be turned off if covered up

Bath looks great

My two most forward lights are about 8 feet from the front wall so even when the garage door is opened they aren't blocked. In my last garage I had a few that got covered but found that they still gave decent light even with the door open, so I didn't mind it. I do have the front bay of fluorescents on a different switch, because if it's during the day and I have the garage door open, there's no need to keep those lights on.

Thanks,
Adam
 
OP
M

moparfreak

Well-known member
Joined
Jan 24, 2005
Messages
853
Location
Milwaukee, WI
Another update:

Finished up the bathroom and moving onto bigger and better things: The shop! Actually, I'm about to start building up a whole wall of our mud-room, but even my wife agrees that in order to take on another big woodworking adventure, things need to get finished and organized in the shop in order to work efficiently.

With that being said, electrician came over last week and lit the place up. My flourescents are in and *mostly* working. I used reclaimed units from an old university building my stepdad in law pulled for me from the trash heap, and they cleaned up nicely but looks like I got about 6 ballasts that need replacing. Even with ~30% of my lights down the place is BRIGHT!! I've got a good mix of spot lights with the cans and pendants and general area lighting from the flourescents, so it's really nice to have some light in the place now. All my outlets are live now too, so the 500' of extension cord covering the floor got put away.

Put a bunch of stuff up and organized the attic. I'm developing a few different creative storage techniques up there, as I plan to put a lot of my wood stock so I'll show that as it unfolds.

Got the gray paint on the walls which is really starting to make things look nice and finished.

16195780358_971e1fe364_z_d.jpg


16357433326_0cca6a56f8_z_d.jpg


15763400323_1bd703faf7_z_d.jpg


15763400313_3985847c55_z_d.jpg


Today I'll start laying out the stripe. I'm doing red, and following the theme of the famous tail stripes they put on the R/T Chargers *cuz obviously Mopar!*. Probably set it up to start an inch or two higher than the outlets. Then I'll probably make up a R/T stencil and put it in select places throughout the shop.
ct303.jpg


This long holiday weekend I plan to wire up the thermostat and get the heat going from the furnace, and hopefully w/ the red paint dry, I can start setting things against the wall and start setting up shop!!

Thanks,
Adam
 
Last edited:

JohnnieMo

Well-known member
Joined
Nov 25, 2014
Messages
1,175
Location
Calgary, Alberta
Why did you go with the metal ceiling? Was it cost? Labour? I'm asking because I really hate drywall mudding and if this saves considerable effort it might be worth an increased cost.

Sent from my Passport
 

sublime68charger

Well-known member
Joined
Sep 9, 2014
Messages
5,415
Location
SW Wisconsin
I love the r/t stripe idea!
The 68 have a different bumble bee stripe you might want to check out

You could also stencil in all the cars if you due the 69 style stripe that would be cool to have charger challenger Cuba built into the stripe as it goes around the garage


Mopar or no car

Sublime out
 
Last edited:
OP
M

moparfreak

Well-known member
Joined
Jan 24, 2005
Messages
853
Location
Milwaukee, WI
Why did you go with the metal ceiling? Was it cost? Labour? I'm asking because I really hate drywall mudding and if this saves considerable effort it might be worth an increased cost.

Sent from my Passport

I think I may have covered this in other threads but I picked metal for a few reasons:

1) Cost - Drywall I was not going to do myself. Metal I was going to. Simply put the metal was 20-30% cheaper.

2) Time - Metal took 2 full sundays for me and several buddies to complete. That's it, done! Drywalling, taping and sanding that much area would have taken the pros a couple extra days (and inconvenience to us since they were just a mess), and then would have taken ME an extra 5-7 days / nights worth of priming and painting since I'm doing all of that. Metal had none of that.

3) Mess - It was bad enough w/ all the sanding residue from the walls. Ceiling would have left everything just covered and caked.

4) Appearance - I think it looks really sharp. Clean, industrial looking, very fitting for a working shop. Very reflective and bright too. Easy to clean. Drywall can obviously look clean and good as well but I think the metal just looks real good for what you're spending.

That being said, there's still some things I need to figure out on it. Cause of the corrugations stuff doesn't mount up nice and flush to the wall. I have to figure out how to get all my outlet and junction boxes trimmed out nicely.

I love the r/t stripe idea!
The 68 have a different bumble bee stripe you might want to check out

You could also stencil in all the cars if you due the 69 style stripe that would be cool to have charger challenger Cuba built into the stripe as it goes around the garage


Mopar or no car

Sublime out

What do you mean by built in? If I'm following you, do you mean stenciling in the Charger and Challenger emblems? If so that would be pretty badass. The middle bay will hold my '73 Charger SE and the front left by the garage door will hold a new model Challenger so that would be pretty sweet to mark the spots inside the stripe.

MP2841886[1].jpg


dodge-challenger-hemi-emblem-jill-reger.jpg
 
OP
M

moparfreak

Well-known member
Joined
Jan 24, 2005
Messages
853
Location
Milwaukee, WI
Do you know of any stencils available, or would I have to do it the old fashioned way? Print, then cut the stencil out by hand? Those emblems will be a challenge but I think definitely worth it! Thanks for the idea!

Adam
 
OP
M

moparfreak

Well-known member
Joined
Jan 24, 2005
Messages
853
Location
Milwaukee, WI
Made some more progress. Got the stripe done, and it looks great!

Taping it up, used a laser level for this, it worked out well.

16196000760_45f142c721_z_d.jpg

THat was Friday. By Saturday night, I got to finally start setting up shop...it's still a huge mess but I can see it coming together now. This is the fun part...

16382527472_d1f7a7d651_z_d.jpg

16382527372_8ef6cdc134_z_d.jpg

16197216999_395be6b9ac_z_d.jpg

16357463256_2ceab4df45_z_d.jpg

Had an old floor to ceiling pantry cabinet 24" wide that was in the old kitchen I tore out. It is in good shape so I saved it and painted, going to install it tomorrow to hold a lot of my paint and supplies:

16197539807_9b91d138c0_z_d.jpg

More to come today!

Thanks
Adam
 
Last edited:
To avoid these ads, REGISTER NOW!
Top Bottom