To avoid these ads, REGISTER NOW!

Motorcycle Roadracing Garage

OP
E

ekraft84

Well-known member
Joined
Dec 14, 2010
Messages
336
Location
Michigan
Harley XR 1000 above

More American Iron from the same family - Hollingsworth H.D. which was in business for 60 years in St. Augustine, Fl before they sold it.

Unless I'm mistaken, all five of the sons raced at Daytona. At least one of the 250cc still holds the track record. ...17:1 ... shift at 12K !

#12 is a side by side twin, water cooled , 6 speed Harley - not Italian

About Al Hollingsworth's V-Rod...it is very serious business. The kids on the crotch rockets have NO IDEA what they're next to at the red light. It is street legal. Aren't they all ?

This shop had 6 in ground lifts which was pretty unusual for the late 1950s. James "Limey" Hollinsworth and his wife Myrtle opened up in 1946. Limey raced in a couple of the beach road course 200s in the late 1930s. He taught me how to ride.

:thumbup:
 
To avoid these ads, REGISTER NOW!
OP
E

ekraft84

Well-known member
Joined
Dec 14, 2010
Messages
336
Location
Michigan
With drywall finally finished and primed, paint color was chosen and off we went. The ceiling would remain white to match the ceiling lights and I wanted something neutral for the walls, but not something cold. My previous garage was all grey/blue and it had a cold feeling to it, so I wanted something with a little warmth. I sorted through colors and picked one I thought would work. From the photos below, it came out nice without question, but it really isn't the color for the bike workshop/garage concept I had in mind. I wanted something more grey/industrial-looking. Oh well.

Another thing of note are the wall lights. This was another add-on that ended up being a good idea. The 10 overhead lights are great for overall light, but in the summer when the garage doors are open, a good portion of that light is blocked. The four wall lights (two on each end of the garage) provided added light. As an electrician's son, you can never have too much light. I'd like to find some nice, industrial-style fixtures at some point, but the ones I went with were inexpensive and would make due for the time being.

Overall this completed a major phase in the whole shop project. The garage was starting to take shape and come together. Of course, I didn't have any tool storage or cabinets yet, but those were next on the list ..

Paint complete:
wkr_north_garage_project_42.jpg


No more holes:
wkr_north_garage_project_43.jpg


Good lighting was the goal:
wkr_north_garage_project_44.jpg


Speakers ready to be installed:
wkr_north_garage_project_45.jpg


Cabinets would eventually wrap around these walls:
wkr_north_garage_project_46.jpg


Rear speakers ready to be installed. Subwoofer down low:
wkr_north_garage_project_47.jpg


A sink/wash station will eventually go along this wall I hope:
wkr_north_garage_project_48.jpg


That back door was flipped to open out rather than in, then painted white. Also added a dead bolt for added security:
wkr_north_garage_project_49.jpg


Fridge, then power for future under-cabinet lights, power down low for an air compressor, HDMI/ethernet for a computer hookup and sub-panel in far corner. Also note power coming from PVC in floor for lift table:
wkr_north_garage_project_50.jpg


Next up, cabinets.
 

G2G

Well-known member
Joined
Sep 24, 2012
Messages
106
Location
Chicago
Looking good Eddie. Oh BTW I still have that old metal motorcycle table I bought from you about 5 years ago. It's my secondary to my Handy lift. I will be watching ur build up as I am sure I will see some ideas I will want to use, and yes you can never "finish" a garage as you always want more. LOL Kinda like in racing.
 
OP
E

ekraft84

Well-known member
Joined
Dec 14, 2010
Messages
336
Location
Michigan
Looking good Eddie. Oh BTW I still have that old metal motorcycle table I bought from you about 5 years ago. It's my secondary to my Handy lift. I will be watching ur build up as I am sure I will see some ideas I will want to use, and yes you can never "finish" a garage as you always want more. LOL Kinda like in racing.

Nice Steve. I wouldn't mind getting one down the road when two bikes are being worked on.
 
OP
E

ekraft84

Well-known member
Joined
Dec 14, 2010
Messages
336
Location
Michigan
Your space is really coming together. What are you planning for cabinets/tool storage?

Thanks. For cabinets, I wanted something clean and simple looking, but enough of them that would keep everything out of sight when needed. For tool storage, I found a Craftsman toolbox on sale at Sears that would be a good starting point for me.
 
OP
E

ekraft84

Well-known member
Joined
Dec 14, 2010
Messages
336
Location
Michigan
Cabinets were next, but in the meantime it started getting cold out so the heater was bumped up in the priority list. I have a friend in the heating and cooling business, so he provided a really good price on a Reznor heater, 45k in size. Through measuring and checking specs on all the sizes, the 45k would be ample in size and the throw would reach all the way across the garage to circulate heat to the far side. The thermostat was run over by the A/V center so all controls were in one nice and tidy spot. We also installed a ceiling fan to help circulate air. Overall the heater is extremely quiet and barely noticeable when kicking on.

The insulation has proven its weight in gold thus far. In the cold Michigan winters here, the coldest the garage has gotten without heat has been 50 degrees. I was pretty surprised by this and borderline excited, which is a little weird. With the heater cranking, it will stay at 70 degrees easily, only having to then kick every once in awhile. No more draining the water out of the bikes in the winter to prevent them from freezing when the temperatures drop below freezing in January/February. Yeah to me, this was exciting.

Reznor heater in far corner:
wkr_north_garage_project_51.jpg


The fins were red originally - painted black to match the color of the future cabinets:
wkr_north_garage_project_52.jpg


Poor photo, but shows the wiring behind the heater:
wkr_north_garage_project_53.jpg


Vented outside:
wkr_north_garage_project_54.jpg


@ Barber Motorsports Park in Leeds, AL:
wkr_north_garage_project_64.jpg


Now the cabinets were ready to get going ..
 

G2G

Well-known member
Joined
Sep 24, 2012
Messages
106
Location
Chicago
A little but trust me it not something I would think about repainting.
 
OP
E

ekraft84

Well-known member
Joined
Dec 14, 2010
Messages
336
Location
Michigan
I was planning of using tiles for the floor in my garage, but after seeing the pics of your floor I'm not sure about that anymore :headscrat... so thanks for that !!
Just kidding, FANTASTIC floor man :thumbup::thumbup::thumbup:

Thanks. If you have any questions, feel free to PM me. I was glad I did some extra research throughout that part of the process.
 
OP
E

ekraft84

Well-known member
Joined
Dec 14, 2010
Messages
336
Location
Michigan
The cabinet install happened over the course of about a month. From measuring, to figuring out materials, to getting the guys out here to install them, etc. - it was a process. We kept the cabinets simple, as there were a lot of them. I wanted upper cabinets to wrap around the workshop area, with base cabinets to match - going fully to the ceiling, minimizing dust, bugs, etc. from collecting above. The cabinets are a black melamine, using hardwood rather than plywood to minimize expansion/contraction on changing weather/humidity conditions. My dad does work with a builder who did the cabinets here. He does many retail eye center offices in the area and did a great job IMO.

Again the slope of the floor provided a challenge, but everything was leveled with a toe-kick, ranging from about 2" on the short side, to nearly 5" on the far side, but it's not noticeable unless you're really looking for it.

For door hardware, I picked an industrial/welded handle. Clean and simple. We also tucked some Xenon under-cabinet lights in - again, scope creep from the original project plans.

I went back and forth on counter-top options and settled on butcher block. It looks good and cleans up well. I'd like to eventually sand and stain them a darker color, but for now it works quite well. We did our first bike preparations after this was done and used nearly all of the counter-top space, tearing the race bike down to the frame, going through it and putting it all back together. It was the first time not working in dad's garage. I was a little bummed.

Start of upper-cabinet install:
wkr_north_garage_project_55.jpg


Upper and base cabinets - notice toe-kick to account for floor slope:
wkr_north_garage_project_56.jpg


Doors mounted up:
wkr_north_garage_project_57.jpg


Note toolbox on right. Craftsman limited edition box that was surprisingly good quality:
wkr_north_garage_project_58.jpg


A/V cabinet wiring. Glass door to be installed so remote works with receiver:
wkr_north_garage_project_59.jpg


Original ceiling light measurements were accurate:
wkr_north_garage_project_60.jpg


Under-cabinet lights:
wkr_north_garage_project_63.jpg


Installed:
wkr_north_garage_project_61.jpg


Another angle. Computer monitor will eventually go in far corner with PC underneath:
wkr_north_garage_project_62.jpg


Cabinet door hardware:
wkr_north_garage_project_65.jpg


I'd like to do additional cabinets on the opposite wall (with the window) for non-shop stuff, like rakes, shovels, bicycles, parts bins, etc. but this amount of storage was plenty to get started with.
 

X1 Mike

Well-known member
Joined
Dec 4, 2008
Messages
8,389
Location
Flagler, Fl
Garage looks awesome, I'm glad to hear that Chris helped you out with the floor. It makes her brother proud. :rocker:
 
To avoid these ads, REGISTER NOW!
OP
E

ekraft84

Well-known member
Joined
Dec 14, 2010
Messages
336
Location
Michigan
Thanks chenthu and dubber.

Here are a few more showing the cabinets:

Butcher Block top on base cabinet:
wkr_north_garage_project_66.jpg


Pulls:
wkr_north_garage_project_67.jpg


Made the corner cabinets on a 45 for easy-travel when walking back and forth. Thinking about putting a vise on the bench there eventually - good location?
wkr_north_garage_project_69.jpg


A/V cabinet - ethernet switch to power three locations, including stereo receiver for Sirius/XM radio feed. Note sprinkler control box at bottom of photo - this was relocated from another wall to bring everything control-related into this cabinet.
wkr_north_garage_project_70.jpg


A/V cabinet complete:
wkr_north_garage_project_72.jpg


Monitor doesn't do anything - it's there temporarily to test the HDMI inputs:
wkr_north_garage_project_73.jpg


Note the clear work pads. Thick and durable when hammering out and installing wheel bearings:
wkr_north_garage_project_74.jpg


I had drawn out plans and measurements to build an 8' workbench for this area of the garage. Then Sears put this Gladiator workbench on clearance for a price I couldn't touch if I wanted to build one myself. It's 8' long with a powder coated frame, adjustable legs (to accommodate the floor slope) and a butcher block top that matches perfectly with what I already had.
wkr_north_garage_project_76.jpg


Garage doors, thermostat, wall lights, under-cabinet lights, shop lights and outdoor lights:
wkr_north_garage_project_77.jpg


Just about finished:
wkr_north_garage_project_78.jpg


My dad in action:
wkr_north_garage_project_75.jpg
 

andyhurz20

Well-known member
Joined
May 11, 2012
Messages
64
Location
Wethersfield, CT
Absolutely awesome garage and bikes! I love the colors that you chose! The floor came out really nice I love the darker gray. The hardware is a perfect fit too!
 

e30bradley

Well-known member
Joined
Aug 3, 2011
Messages
2,725
Location
Don’t have a garage in Arizona USA
The shop is coming along great! What do you do to a new bike to make it race ready? Specifically the engine.. My father raced in the 80's and I think into the early 90's but he died when I was to young to even remember him. How does someone with no racing experience get started?
 
Joined
Nov 3, 2011
Messages
13
The shop is coming along great! What do you do to a new bike to make it race ready? Specifically the engine.. My father raced in the 80's and I think into the early 90's but he died when I was to young to even remember him. How does someone with no racing experience get started?

Owning a bike would be a place to start.:lol_hitti
If you don't have a bike, there is a racing class for spec 250 Ninjas. Not too expensive and a great place to learn basic skills. Heck if your small to medium stature there are several "Mini" racing organizations that race 125cc down(YSR's NSR50's, RS50's)
If you already have a bike, track days are a very affordable starting point. Requiring very little be done to the bike, and a minimum of gear. 1 or 2 piece suits newer helmet gloves and about any leather boot that covers ankles. Suit rentals are also available. This is a great way to get your feet wet, without swimming with the sharks.
Sorry about the thread jack.
Back to the shop, the recessed bike lift is the greatest idea ever! I have seen this done with a car lift, but never a bike lift!
Not sure if you do your own tires. I do. I have a Harbor Freight tire changer that works great, but takes up a large footprint. My solution was simple I drilled four anchor bolt holes and used female threaded anchors. I can bolt the tire machine down do my tires then unbolt it and stow it under the bench out of the way freeing up the floor space.
Since we are talking bikes, do you know what this is?
58205a69.jpg
This is my current restoration. It and a regular GSXR are headed to the Vintage Racing class next year.

SRAD
 

Pumba

Active member
Joined
May 25, 2013
Messages
38
Location
Cambridge, New Zealand
My guess would be an 85 or 86 slabside GSXR750

Actually just looked a bit harder and it has the cv carbs so might even be a bit later 88 or 87. I see the front end has also been upgraded and judging by your user name I would guess from a lat 90's SARD (maybe RGV but they look a bit long).
 

2Big2Ride

Well-known member
Joined
Oct 24, 2010
Messages
258
Location
d/FW, Texas - more FW than D
Snip...
Since we are talking bikes, do you know what this is?
This is my current restoration. It and a regular GSXR are headed to the Vintage Racing class next year.

SRAD
Looks like an 86 or 87 by the chassis and exhaust (US version). The stock forks, wheels and brakes have been replaced with newer stuff. Almost thought it was the limited edition with the factory dry clutch, but guessing it started life as the regular model and was modified. I would like to find a decent 86 stocker for a weekend putter and project bike. The introduction of the GSXR really changed sportbikes in the marketplace. ...nothing like living in the past. ...or I should say, honoring the past.
 
OP
E

ekraft84

Well-known member
Joined
Dec 14, 2010
Messages
336
Location
Michigan
The shop is coming along great! What do you do to a new bike to make it race ready? Specifically the engine.. My father raced in the 80's and I think into the early 90's but he died when I was to young to even remember him. How does someone with no racing experience get started?

Like SRAD said, there are classes for all type of bike to race. To start, I'd check with a rulebook from an organization like WERA (wera.com). You don't have to do anything with the engine. Some leave them stock, many do Supersport builds to them, which are minor modifications to keep them in the most popular/competitive classes.

If you'd like to hit the track first before a race, companies like Sportbike Track Time (sportbiketracktime.com) offer track days at various venues which is a good way to get started also.
 
OP
E

ekraft84

Well-known member
Joined
Dec 14, 2010
Messages
336
Location
Michigan
Thanks guys for all the positive feedback. Here are some photos of the crew working over the winter to prep the bike for this season.

Long-time friends and racers, Doug and Aaron - along with my dad:
wkr_north_garage_project_79.jpg


Table of parts:
wkr_north_garage_project_80.jpg


Temp table - there's never enough counter space!
wkr_north_garage_project_81.jpg


Aaron prepping the swingarm:
wkr_north_garage_project_82.jpg


These were taken this past January - cold temps with the heater doing its job. We typically take everything apart, down to the frame. We do all the work ourselves minus the engine, as we have an engine guy who builds all our motors. It's something we'd rather leave to those more knowledgeable than us, in that regard.
 

mml665

Well-known member
Joined
Oct 1, 2011
Messages
313
Location
Grosse Pointe Michigan
The space looks good! What kind of cabinets did you go with? I recall reading your comment about Michigan winters, and I agree we have two seasons heat and AC sometimes we cycle back and forth a few times like we did in April and May.
 
Joined
Nov 3, 2011
Messages
13
Actually, it is a real '86 750 Limited! Ultra rare and in the process of having the late model stuff removed to return to era correct stuff. You have great looking shop, and the race bikes look great also.
SRAD.
 
OP
E

ekraft84

Well-known member
Joined
Dec 14, 2010
Messages
336
Location
Michigan
The space looks good! What kind of cabinets did you go with? I recall reading your comment about Michigan winters, and I agree we have two seasons heat and AC sometimes we cycle back and forth a few times like we did in April and May.

I had them built as I couldn't find any pre-made ones I liked that would fit the dimensions I was looking for. I ended up getting about 4-5 different quotes from various places during initial planning. Cabinets aren't cheap but this was the best deal as I'm exchanging trades on labor to build a website for the guy who put these together.
 
OP
E

ekraft84

Well-known member
Joined
Dec 14, 2010
Messages
336
Location
Michigan
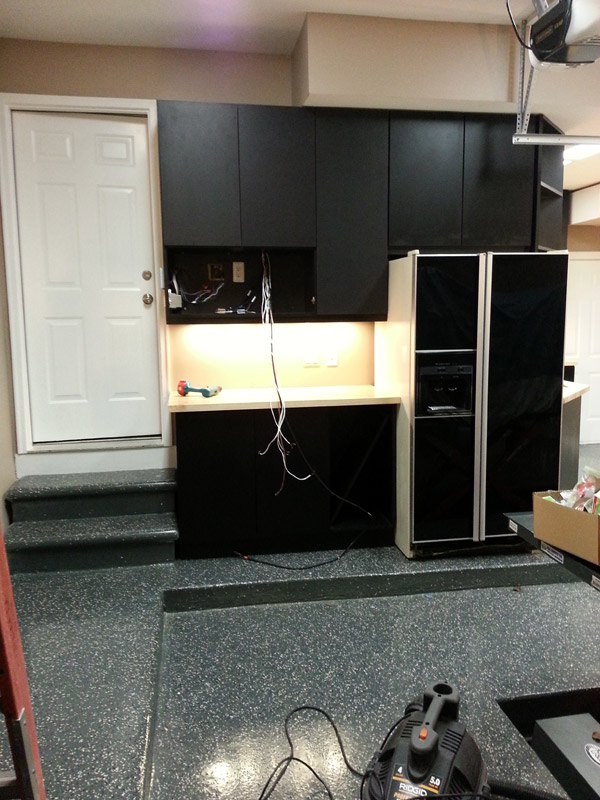
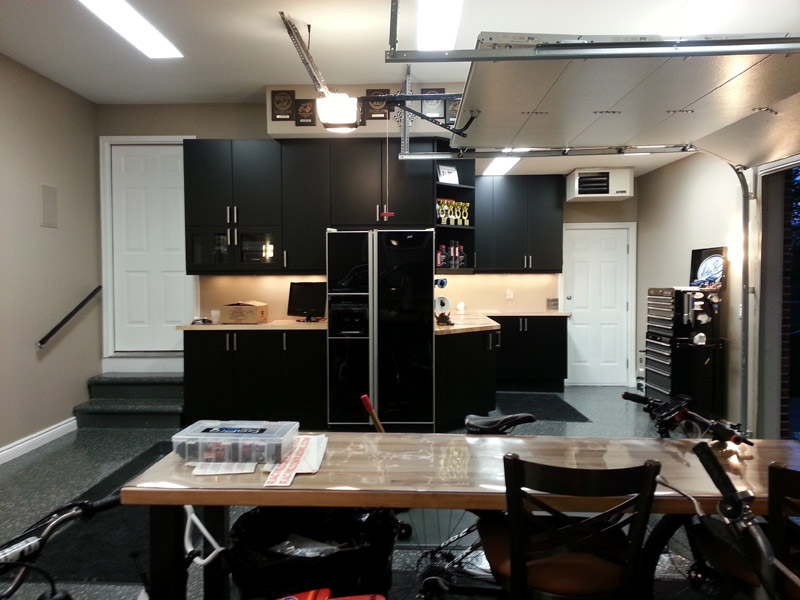
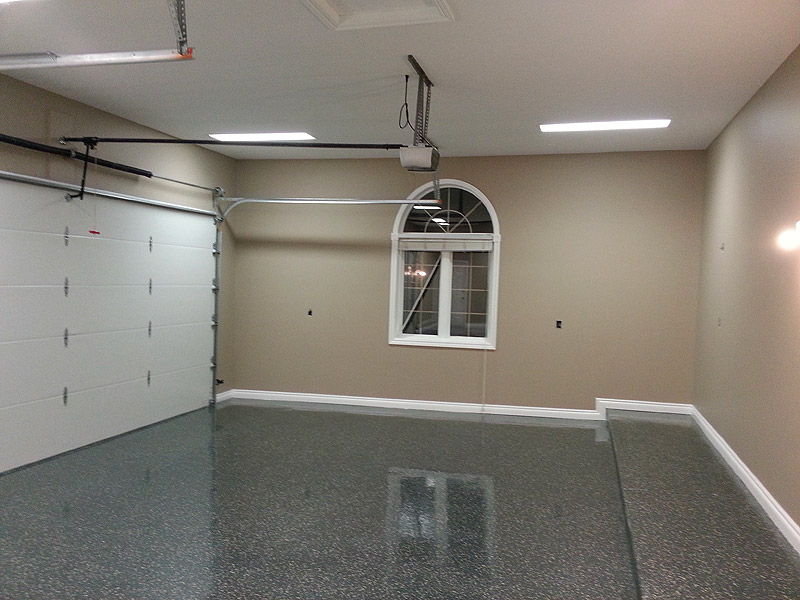
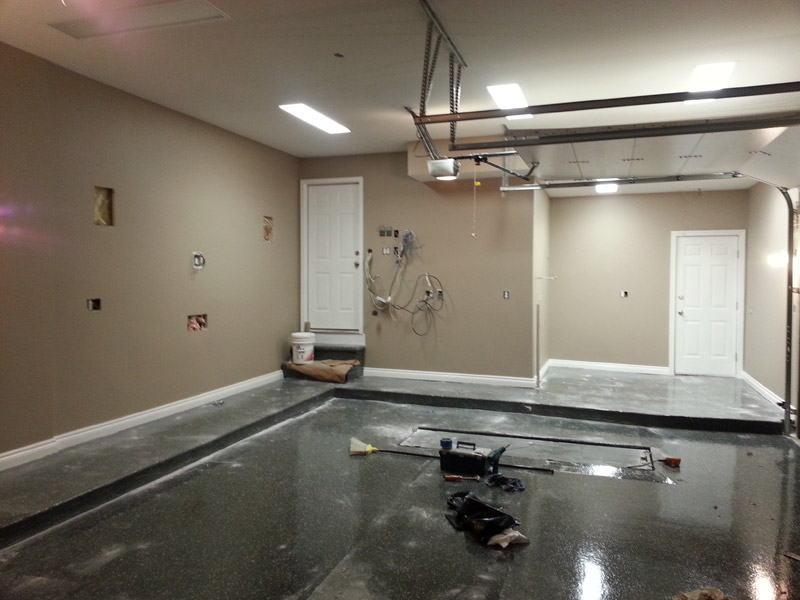
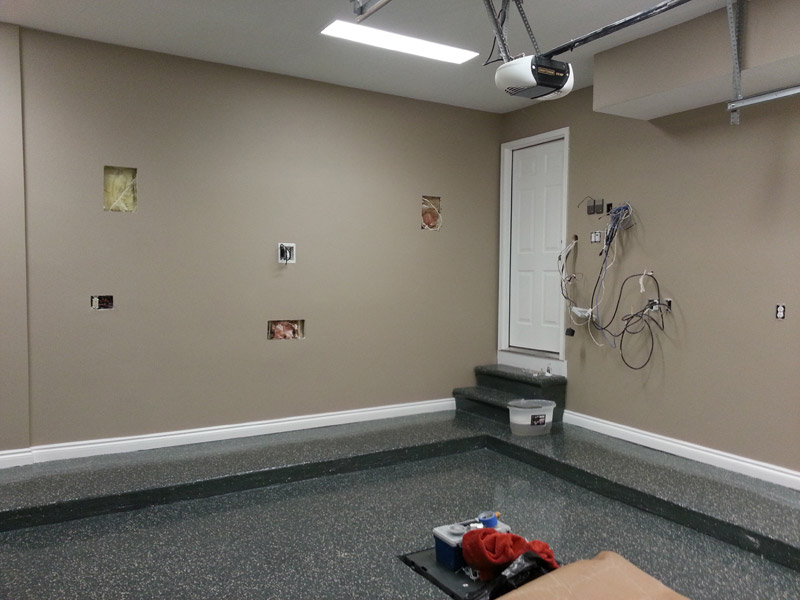
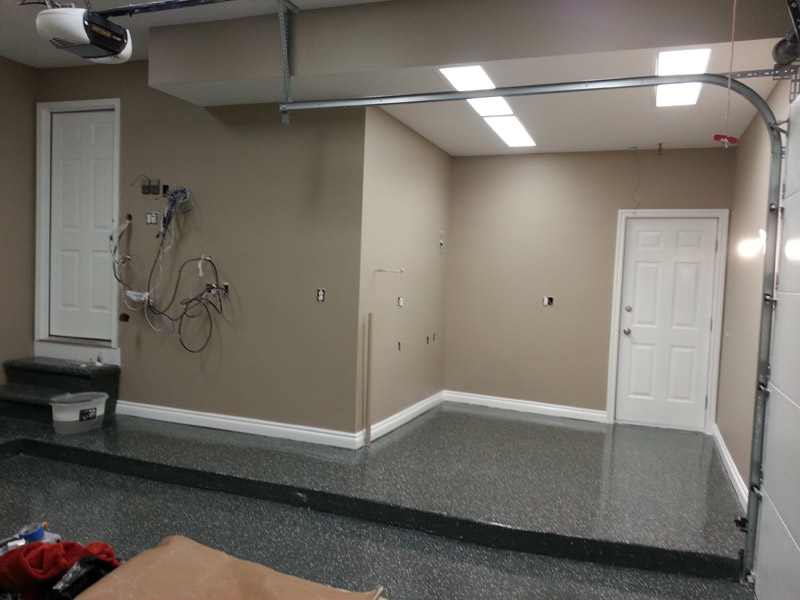
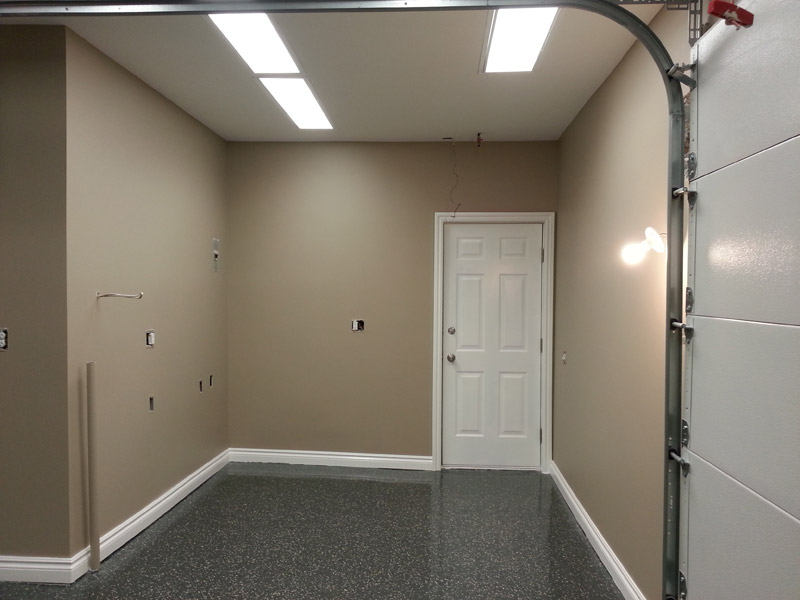
Wanted to see what you guys think .. looking for some input here on the far wall. What should be done on this wall for cabinets?

wkr_north_garage_project_83.jpg


This is what I've thought so far:

1. Full-height cabinets to the ceiling all the way across. Cabinets would likely be 6-8' tall with a 2' tall cabinet on top, divided into 4 big main cabinets total.

2. Cabinets would be big/wide - two on the left side of the window and two on the right side.

3. For sake of discussion here, cabinets are numbered #1, #2 (left side) and #3, #4 (right side). Here's what I'm thinking:

- #1 - Lawn stuff, rakes, shovels, ladder, etc. All non-workshop stuff in here. Upper cabinet would be pots and other stuff not frequently used.

- #2 - Hang mountain bike inside from peg hook. Bike stands, helmets, boots, MX gear, etc.

- #3 - Shelves to make room for all kind of bins that can be labeled, organized for parts and such. I like what Jack Olsen did in his garage with one of his bigger cabinets. Also have little parts trays on the door via slatwall.

- #4 - Air compressor, drill press, bench grinder, etc. Have a small shelf inside the cabinet that the drill press and bench grinder can sit on.

Any other thoughts/better ideas? I was thinking it'd be nice to have slatwall on the inside of the cabinets for hanging stuff and keeping things organized.

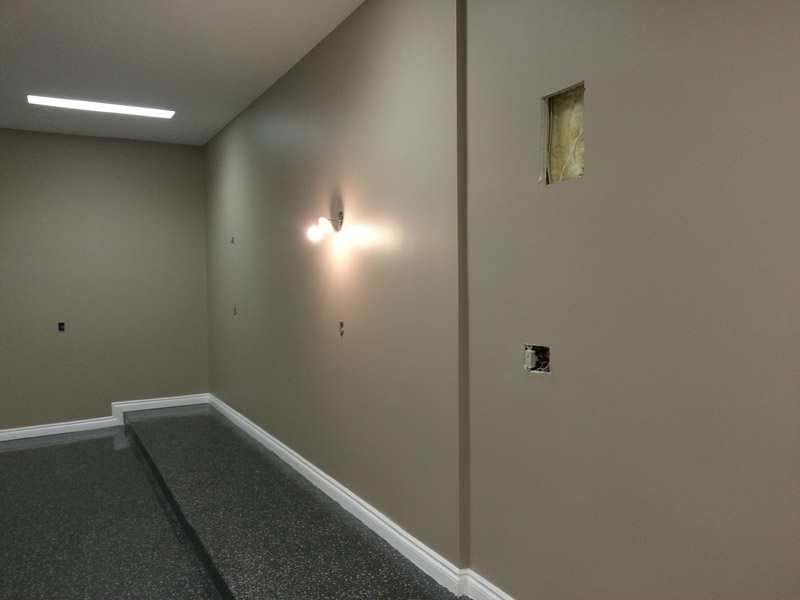
What I'm not sure of, is what to do by the window. Maybe have a little cabinet underneath the window that can open up to store stuff and something people can sit on otherwise?

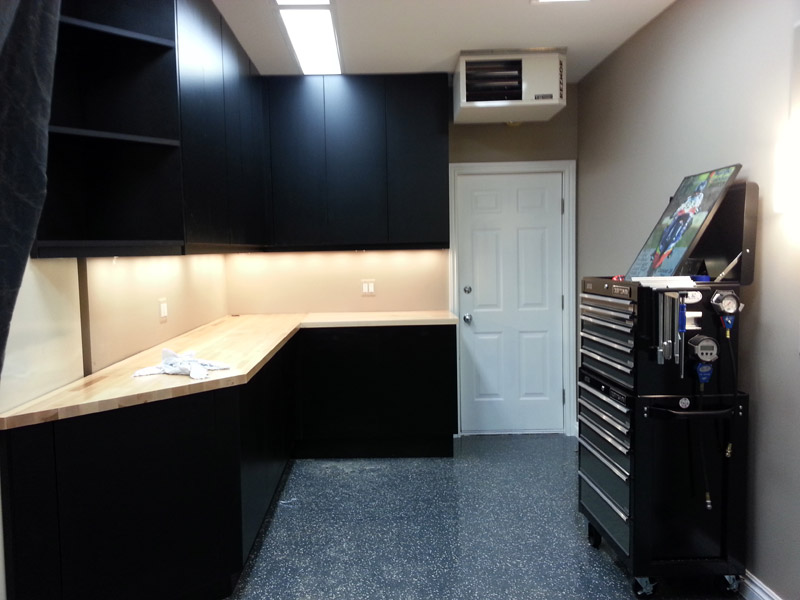
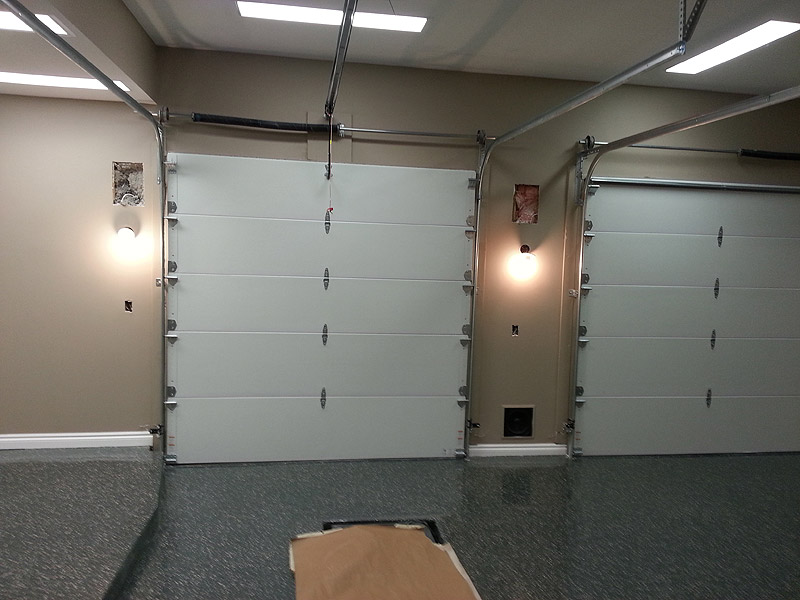
Also as you can see, the left of the window has the garage door frame to contend with. These cabinets would be limited in the max depth they could handle, which is about 15". I'd like to make the cabinets to the right of the window deeper, but not sure how that might look.

Any input would be appreciated.

Thanks.
 
To avoid these ads, REGISTER NOW!
Top Bottom