
You are using an out of date browser. It may not display this or other websites correctly.
You should upgrade or use an alternative browser.
You should upgrade or use an alternative browser.
MP&C Shop Projects
- Thread starter MP&C
- Start date


Kevin54
MEMBER EMERITUS
Robert.....not much to say as I am just checking in, other than that panel looks so damn fantastic. It's the details like that, that makes or breaks cars at a show, and your talents surely makes the cars. I've learned so much from reading your threads as I imagine many others have too. Just fantastic!!!


56Mark
Well-known member
Robert,
I saw your post at trifive. What a shame and that site has lost a lot of knowledge over subjective rules that were enforced to extremes in some cases. I have been following this thread occasionally. I'm glad you posted so everyone that wants can follow your work here and learn from it. Your posts there were always my favorite and very helpful.
Mark
larry4406
Well-known member
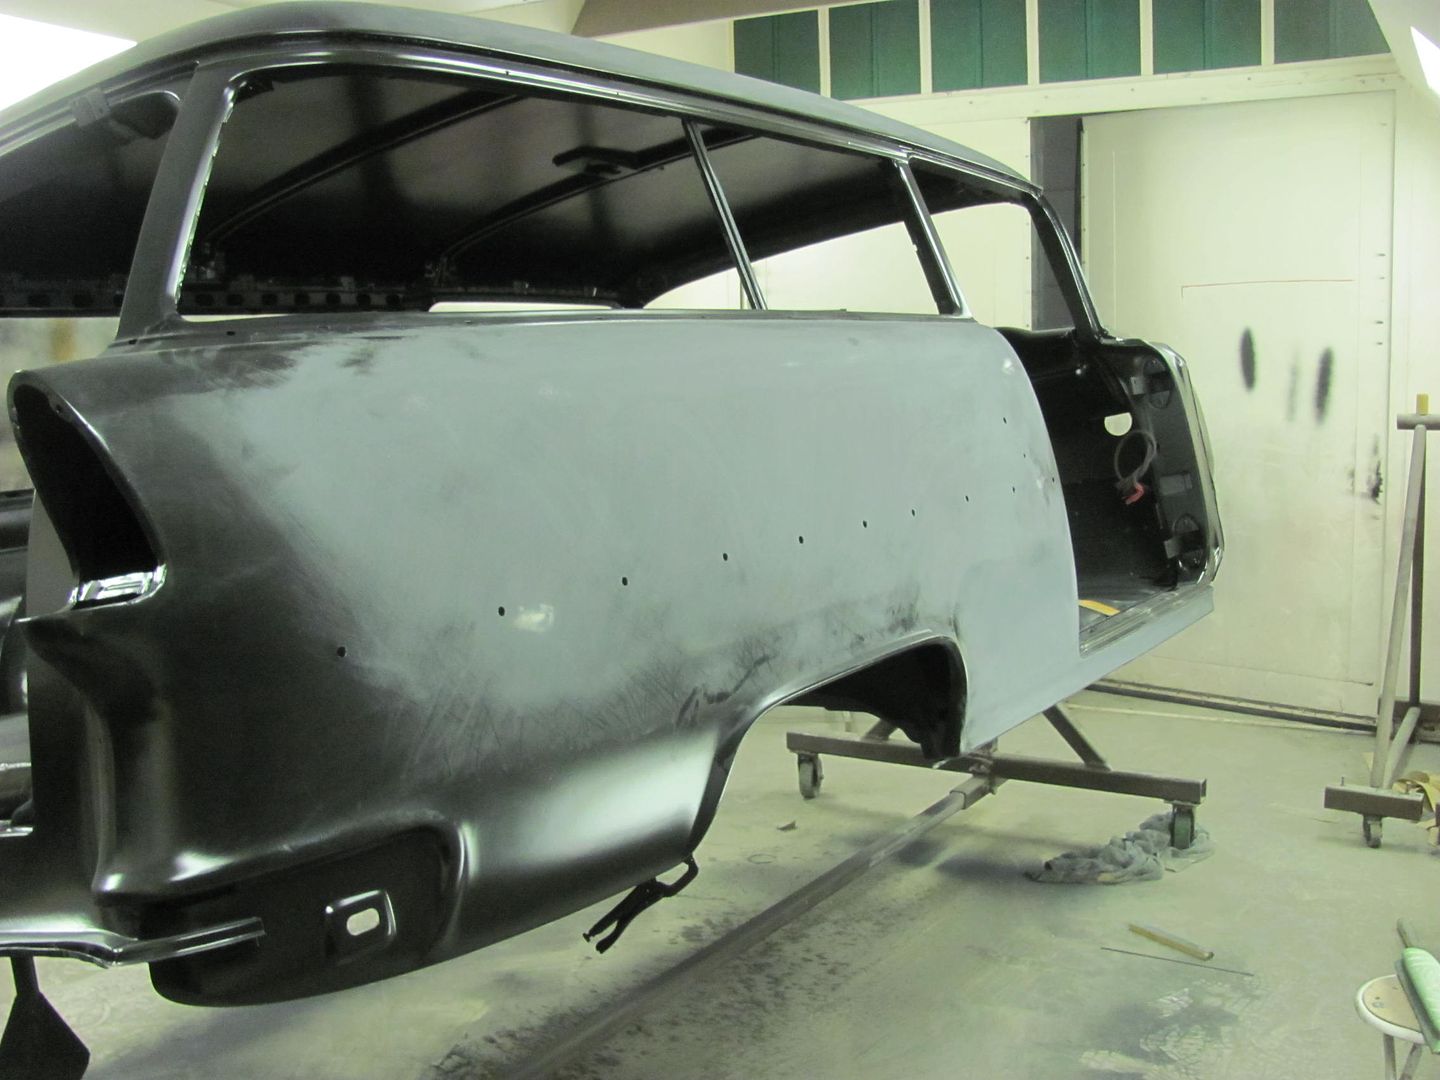
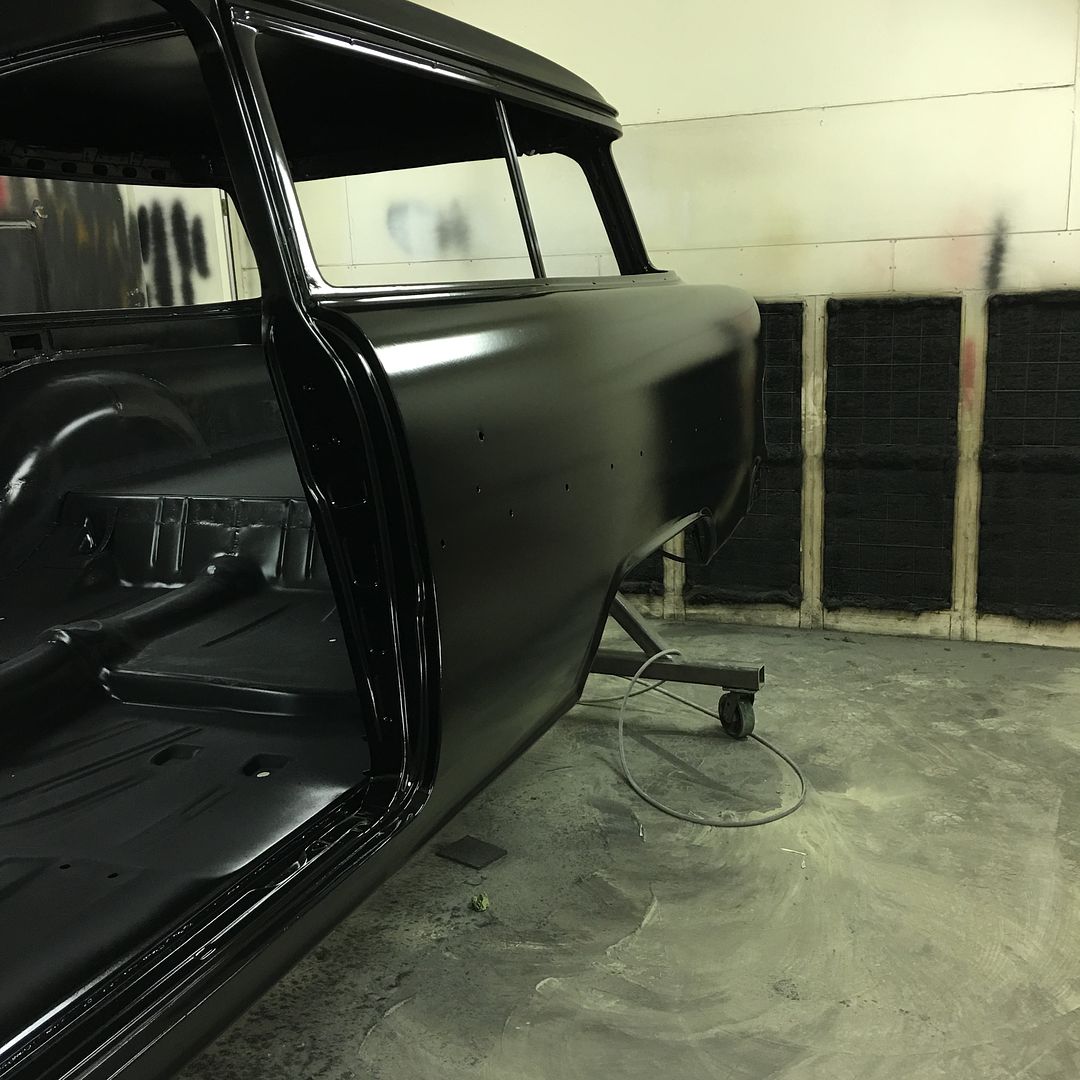
Say what you want, but I think the black SPI epoxy on the wagon looks bad ***! I want to see the wagon done (I'm sure you do to!).
aggierailroad
Well-known member
I'm just secretly smiling because it's not me blocking that out ")
Keep chugging along - it looks great!
Keep chugging along - it looks great!
Kirkski
Well-known member

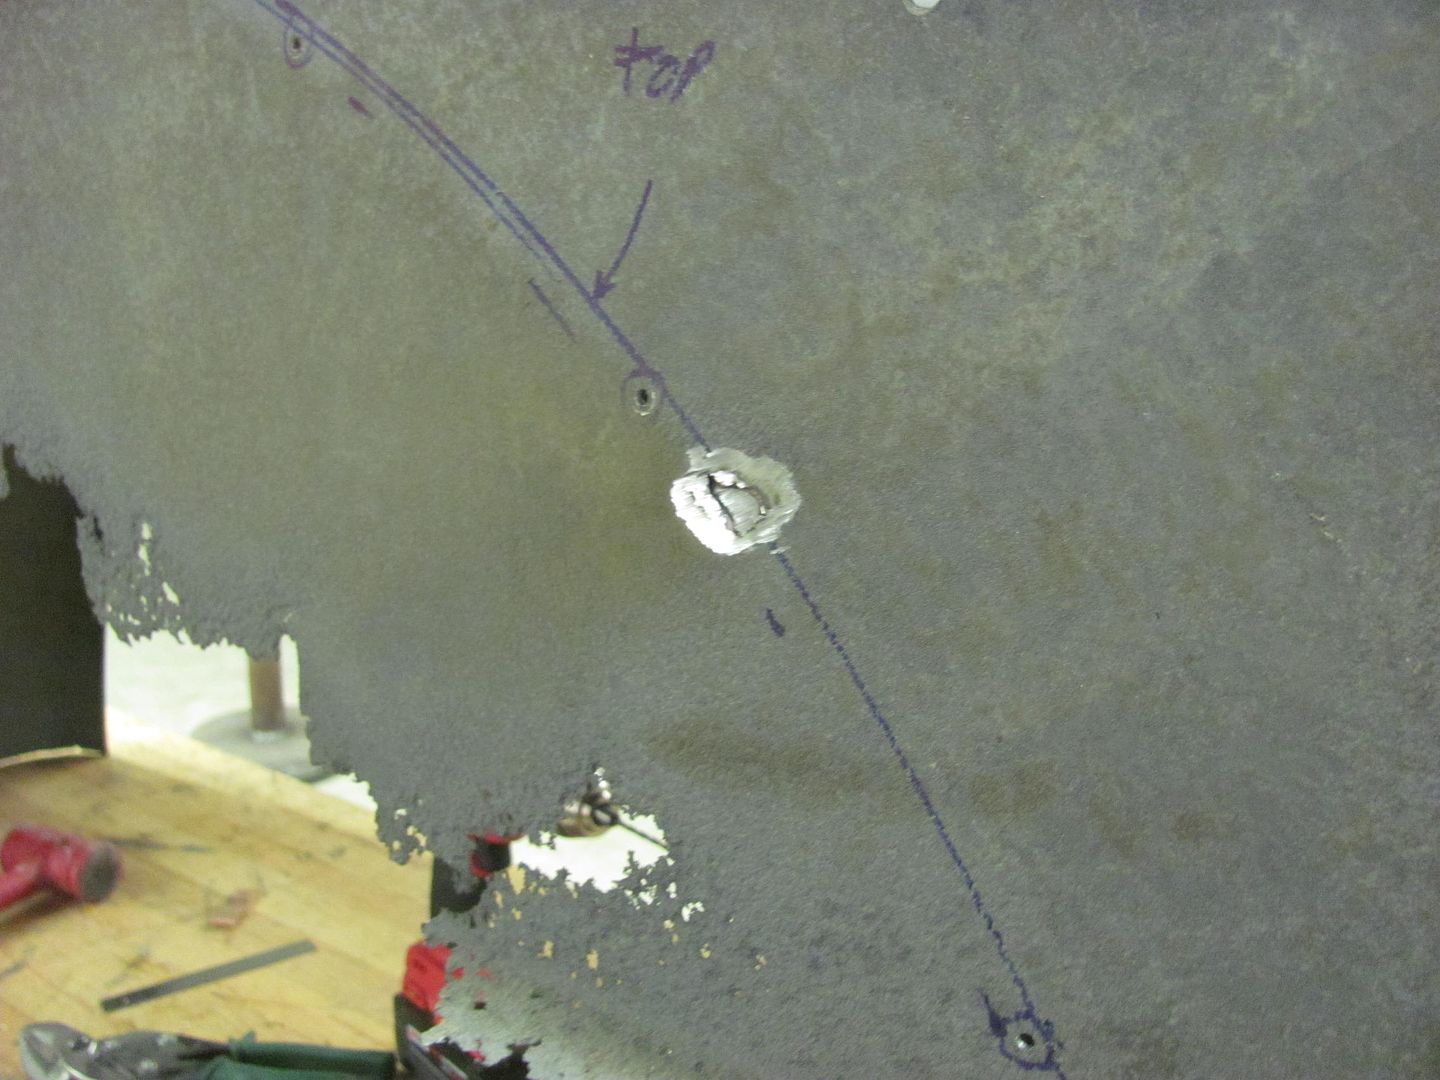
Contamination. Once there, you'll need to grind it back out and re-weld.. They seem to never go away trying to weld on top of it. Possibilities are contaminated metal (wasn't cleaned properly), possible outgassing of nearby paint or seam sealer burning or melting, possible shielding gas issue (not enough pressure or too much pressure) or dirty nozzle. For yours I would say it's the outgassing of paint or sealer from behind, based on the "funnel" appearance. This is indicative of gas forcibly escaping.
Kirkski
Well-known member
You're a genius that makes perfect sense... Duh.. Especially since I did not clean the area behind my welding.
Still not sure what my gas settings should be ... I have the regulator at 32 psi but that's how it was set up...
Thank you sir!
Still not sure what my gas settings should be ... I have the regulator at 32 psi but that's how it was set up...
Thank you sir!
Kirkski
Well-known member
Will do thank you!
Pressure too high also. With too high of pressure you'll get a venturi effect that actually pulls outside air into the weld. Try between 15-18..
You'll save money too, less gas used.
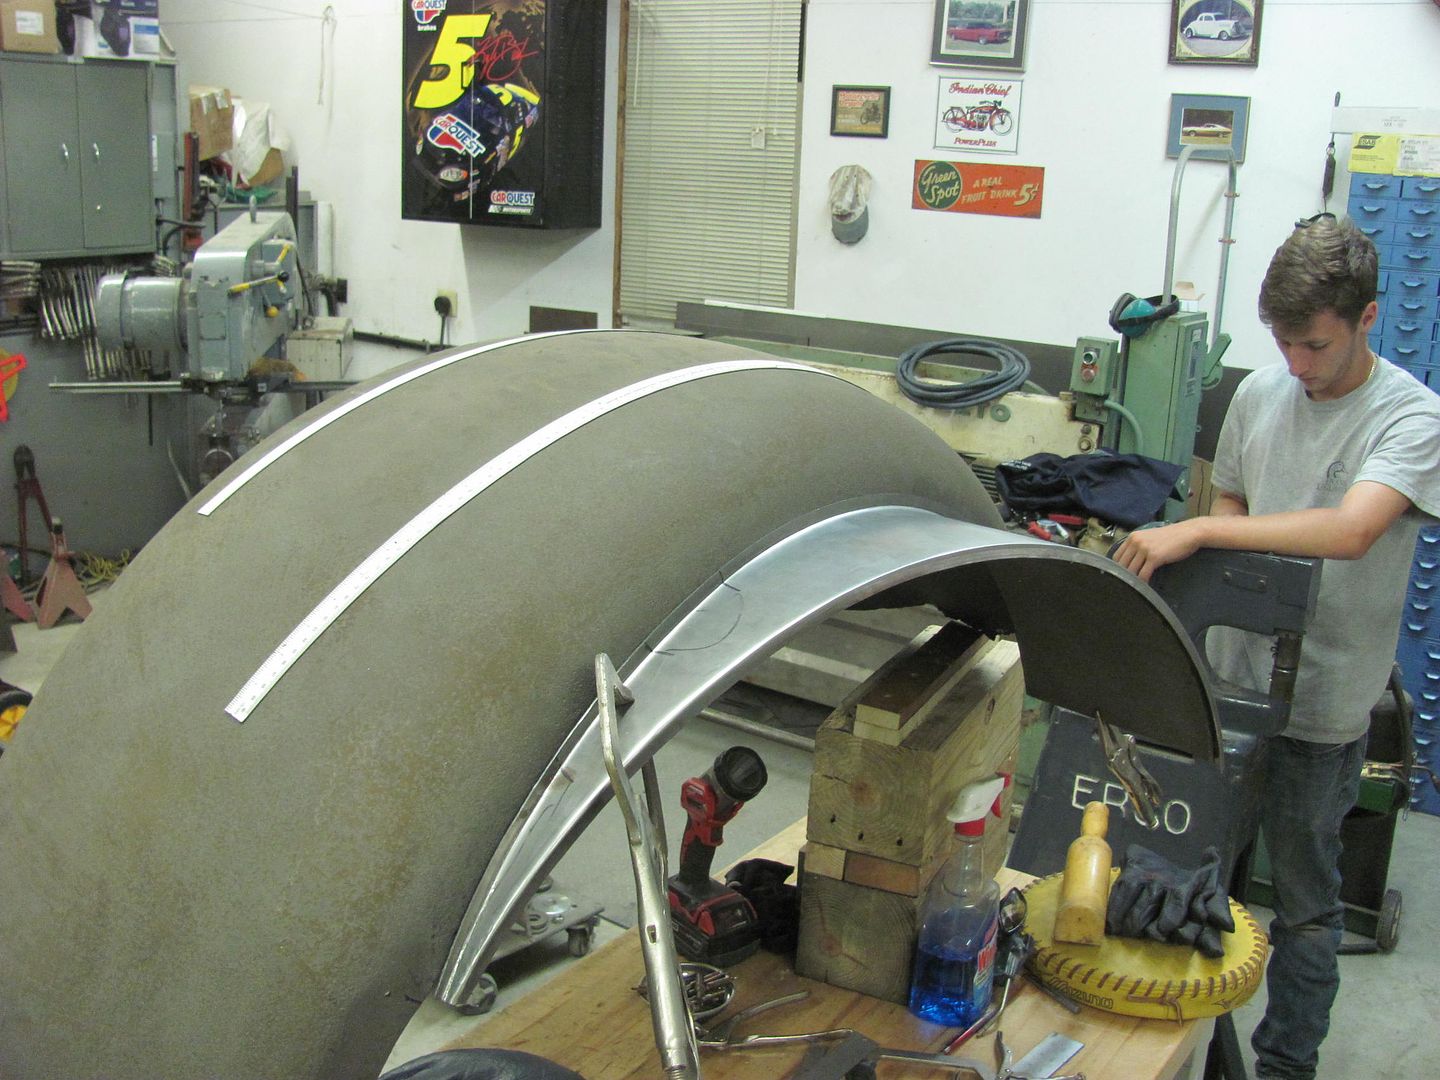
Need about one more day of curing on the epoxy primer, so today let's work on one of the Biederman fenders.. With Kyle on vacation I was shorthanded in the shop so John (the owner) came by and lent a hand.
First step was to remove the inner fender to see what we had to work with, added some 1/8 holes to use later for clecos in putting things back together..
The front of the fender bolts to the bumper filler panel, and the rear bolts to the running board. These have a difference in height of 13-3/4, so some blocks were screwed together to hold the fender in correct placement while we worked.
The inner is getting replaced so the spot welds were ground out for removal.
Once removed, we found more pitting and damage than we originally thought was there, so now lets make this new as well..

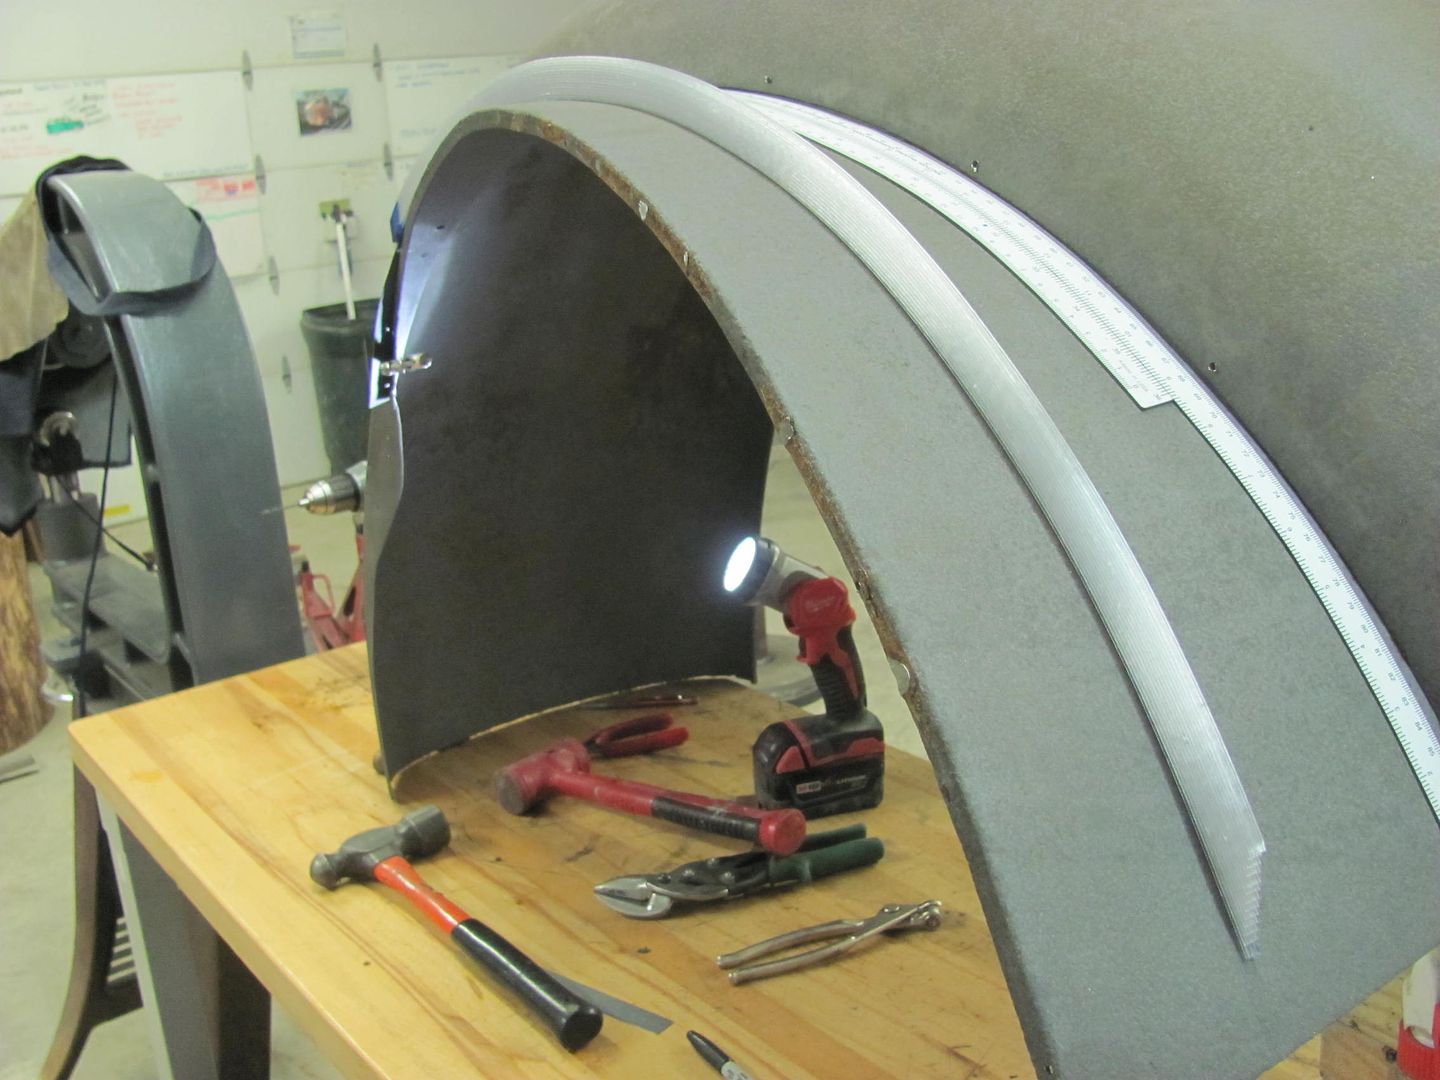
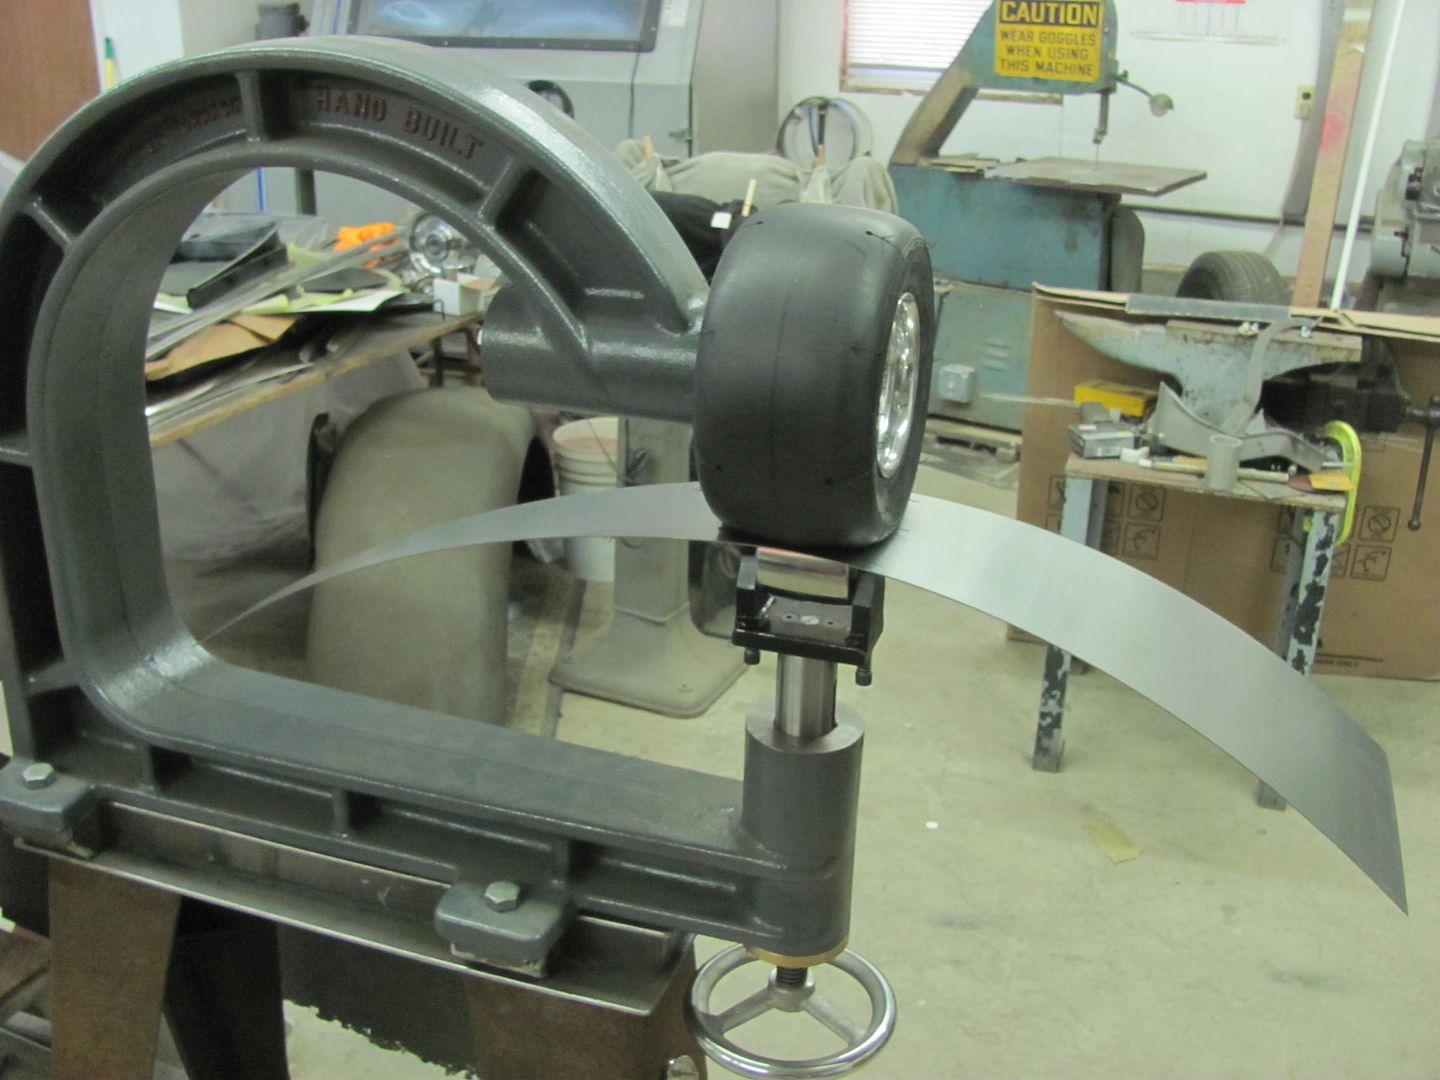
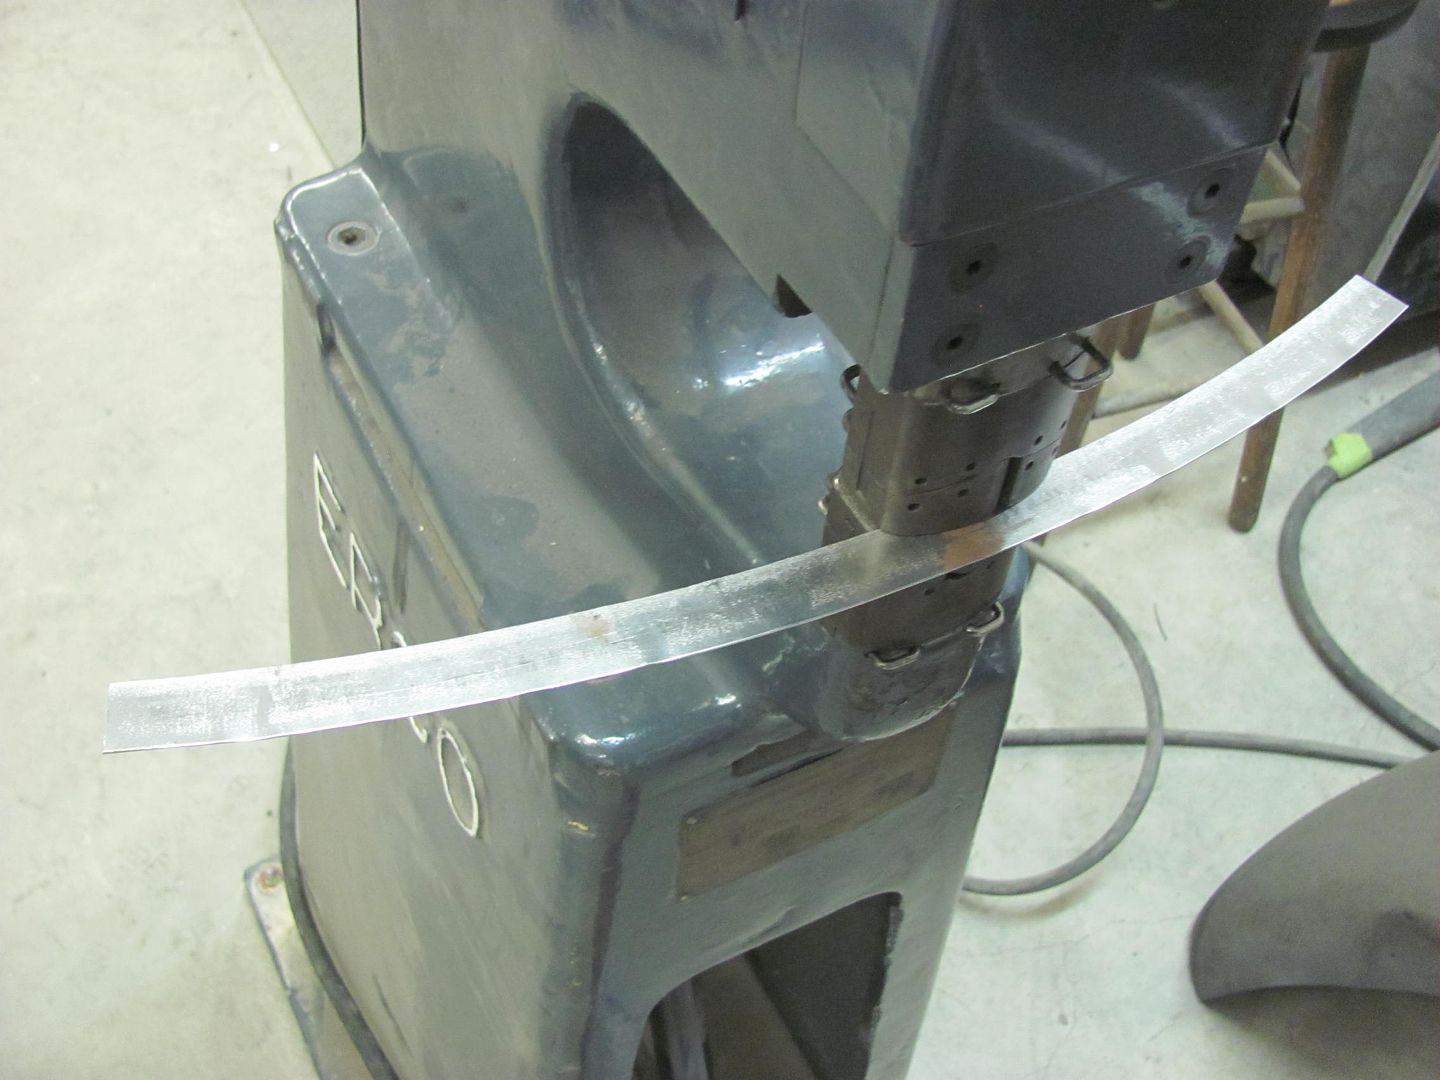
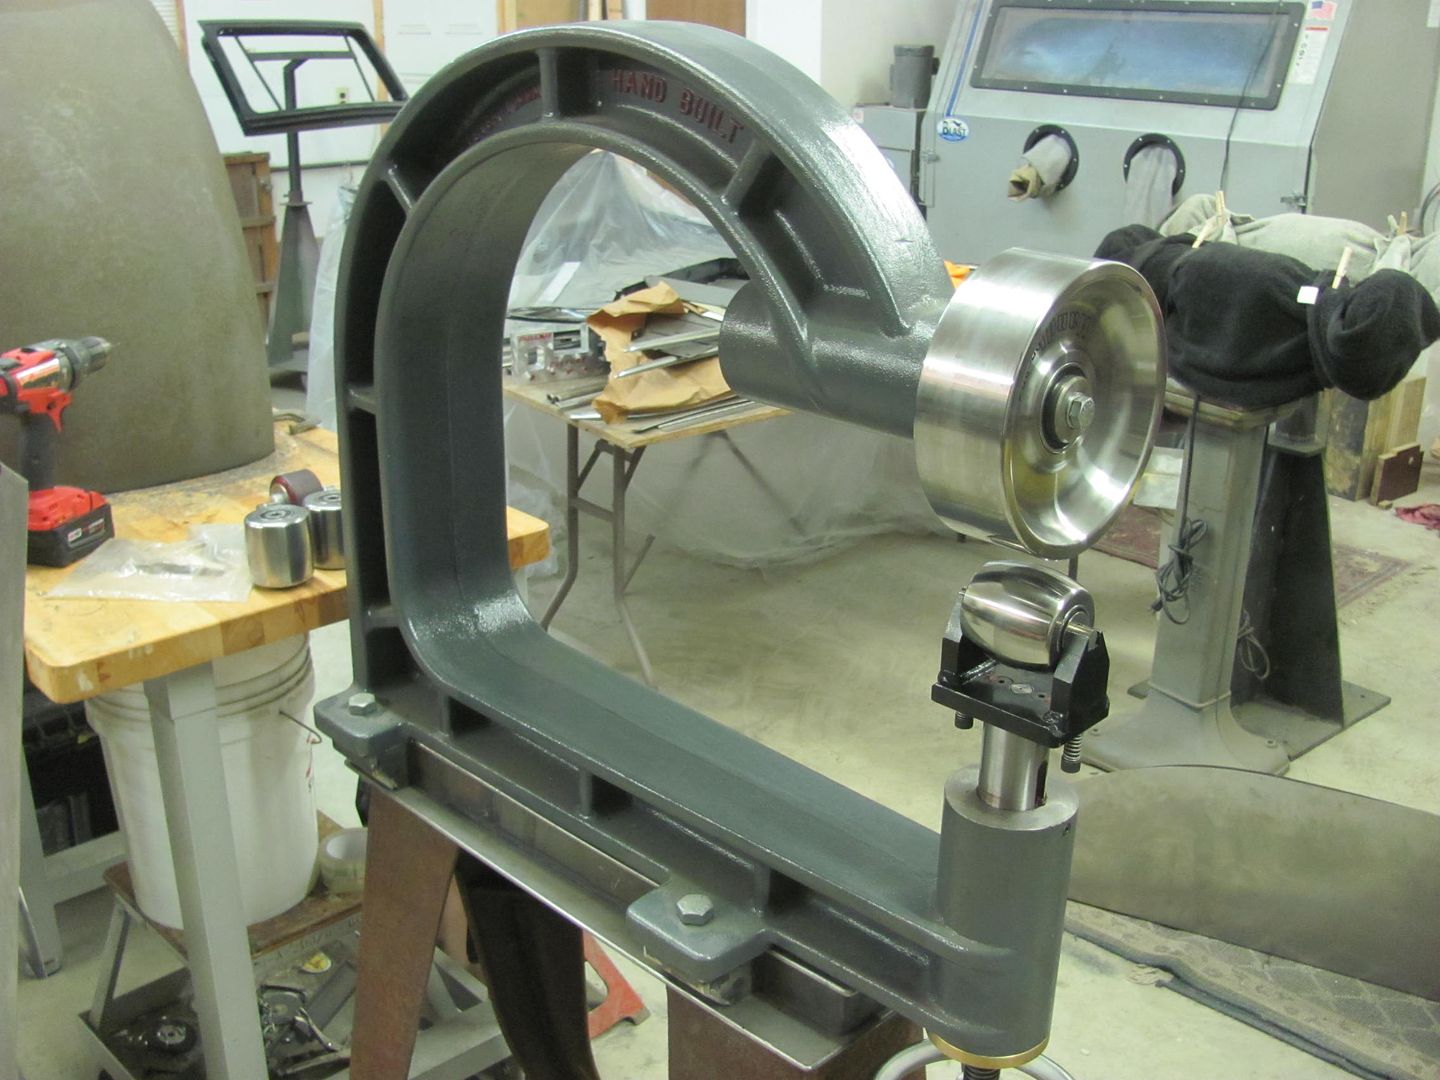
New piece is cut out and the Wheeling machine with the go kart slick is used to add the correct radius..
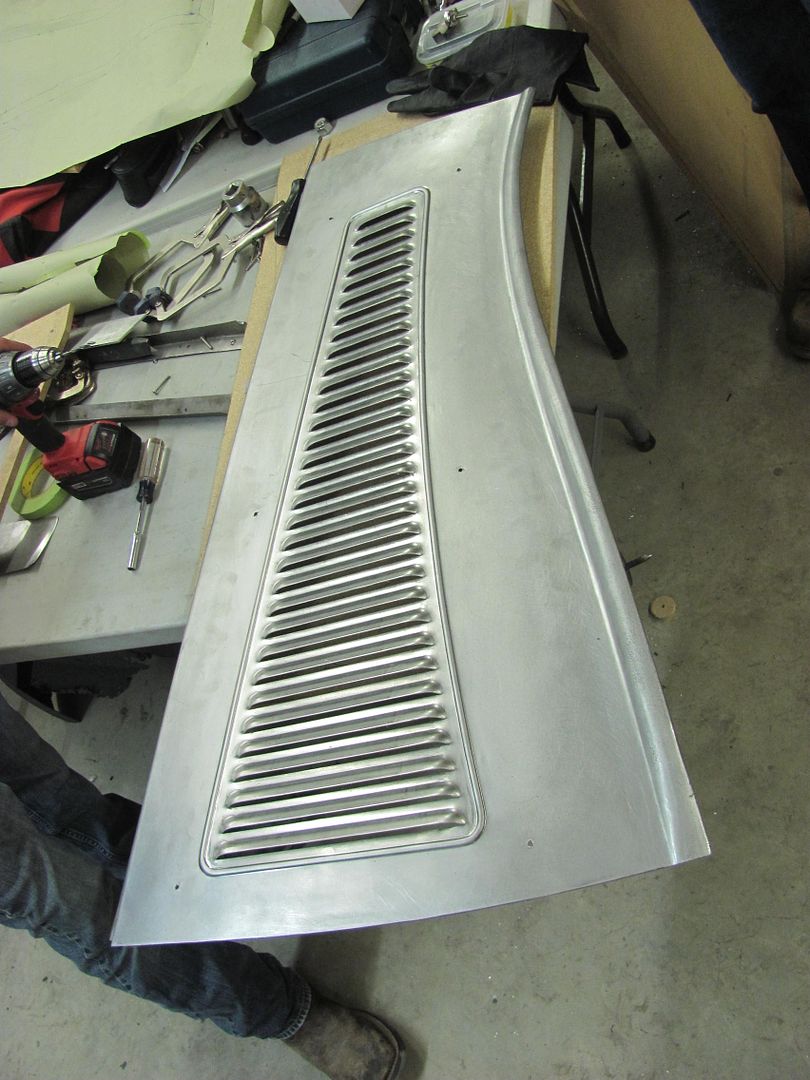
Then the flange bend line is marked/thinned using a tipping die in the Lennox like we did for the inner panels we made..
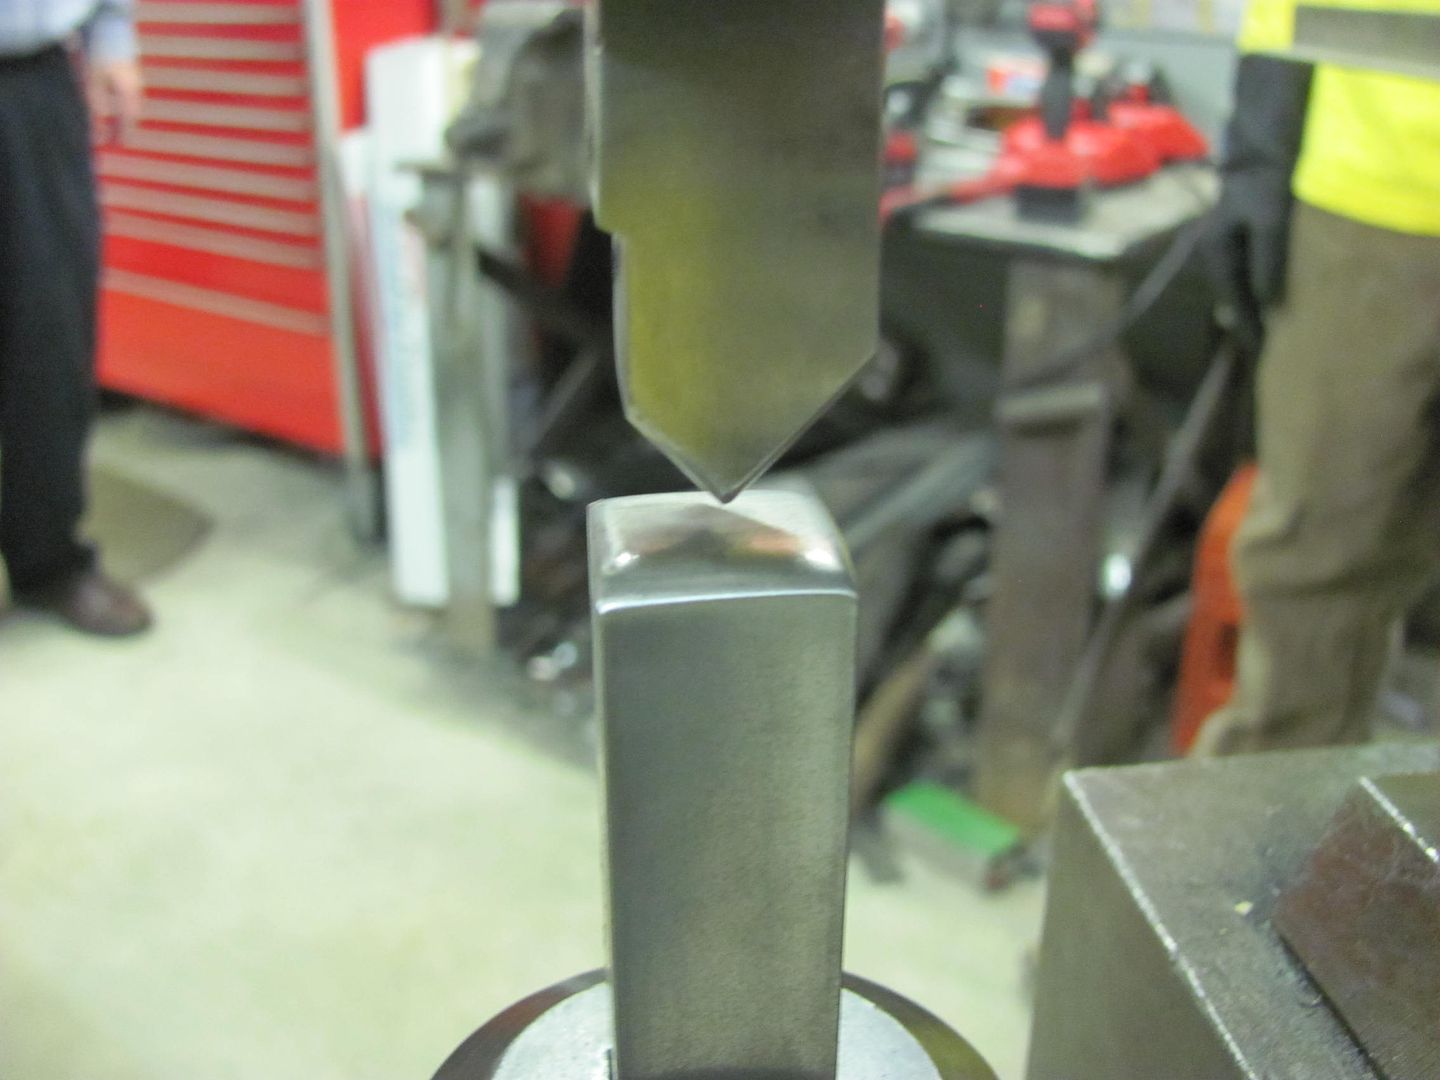
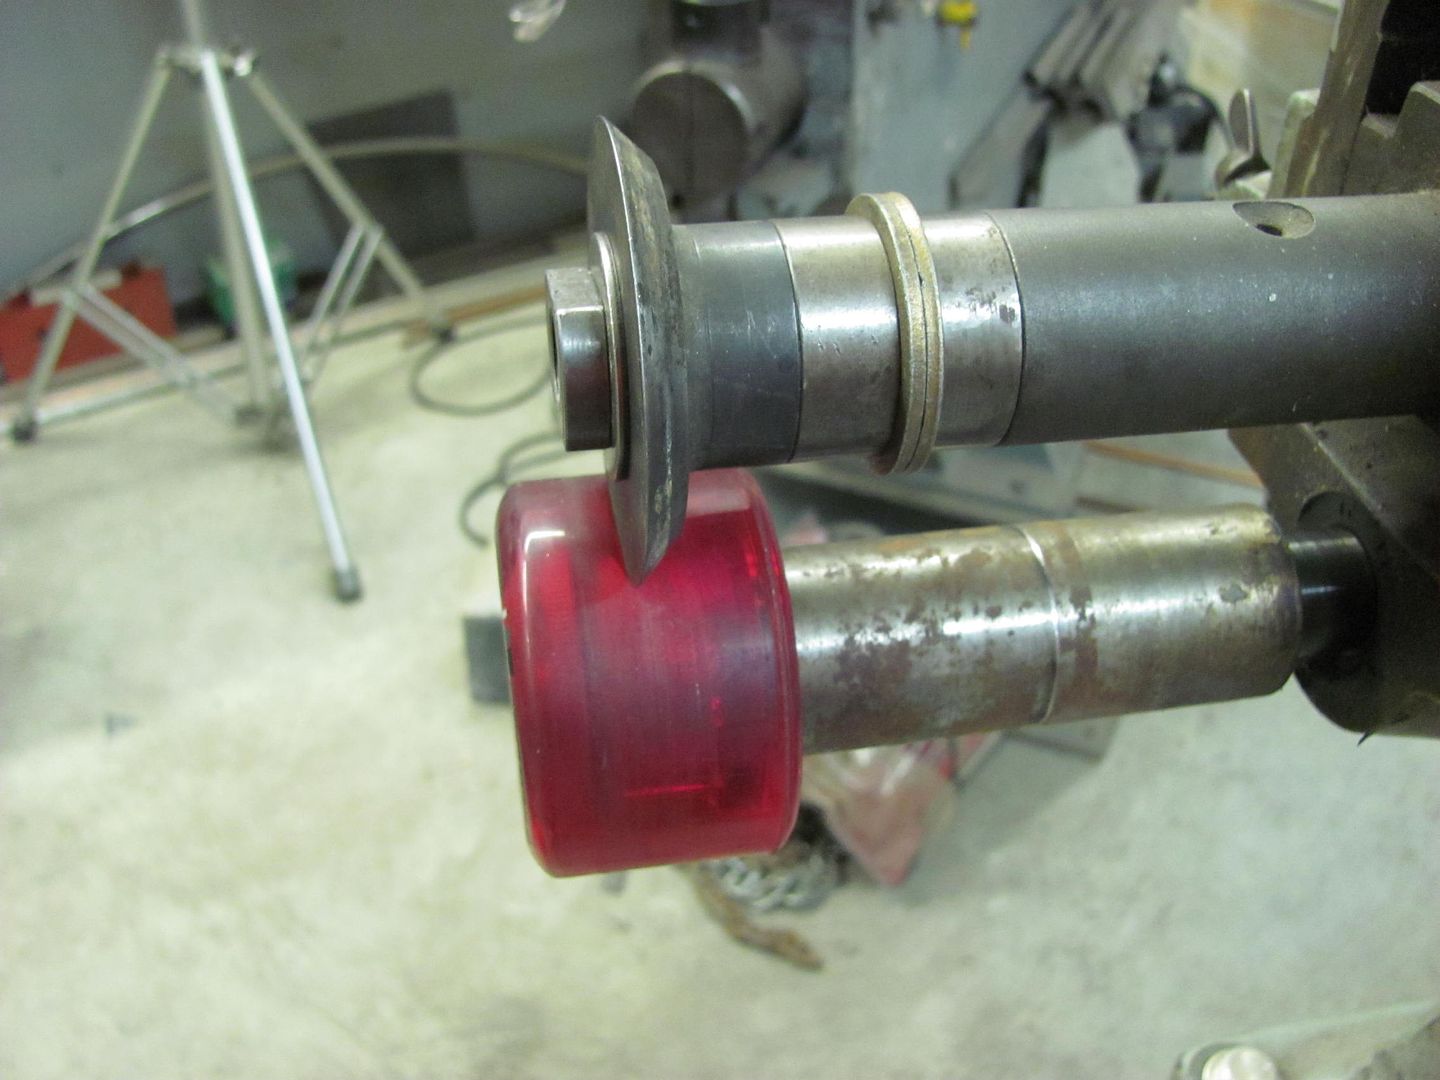
Then a tipping die and Skateboard wheel in the bead roller is used to make the initial fold on the marked line
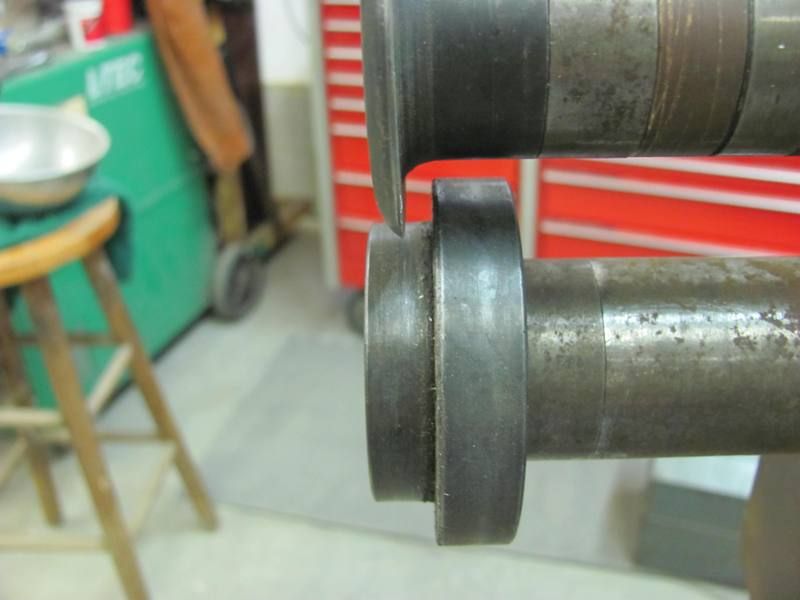
and finished up with a Step die so we could use it as a backstop
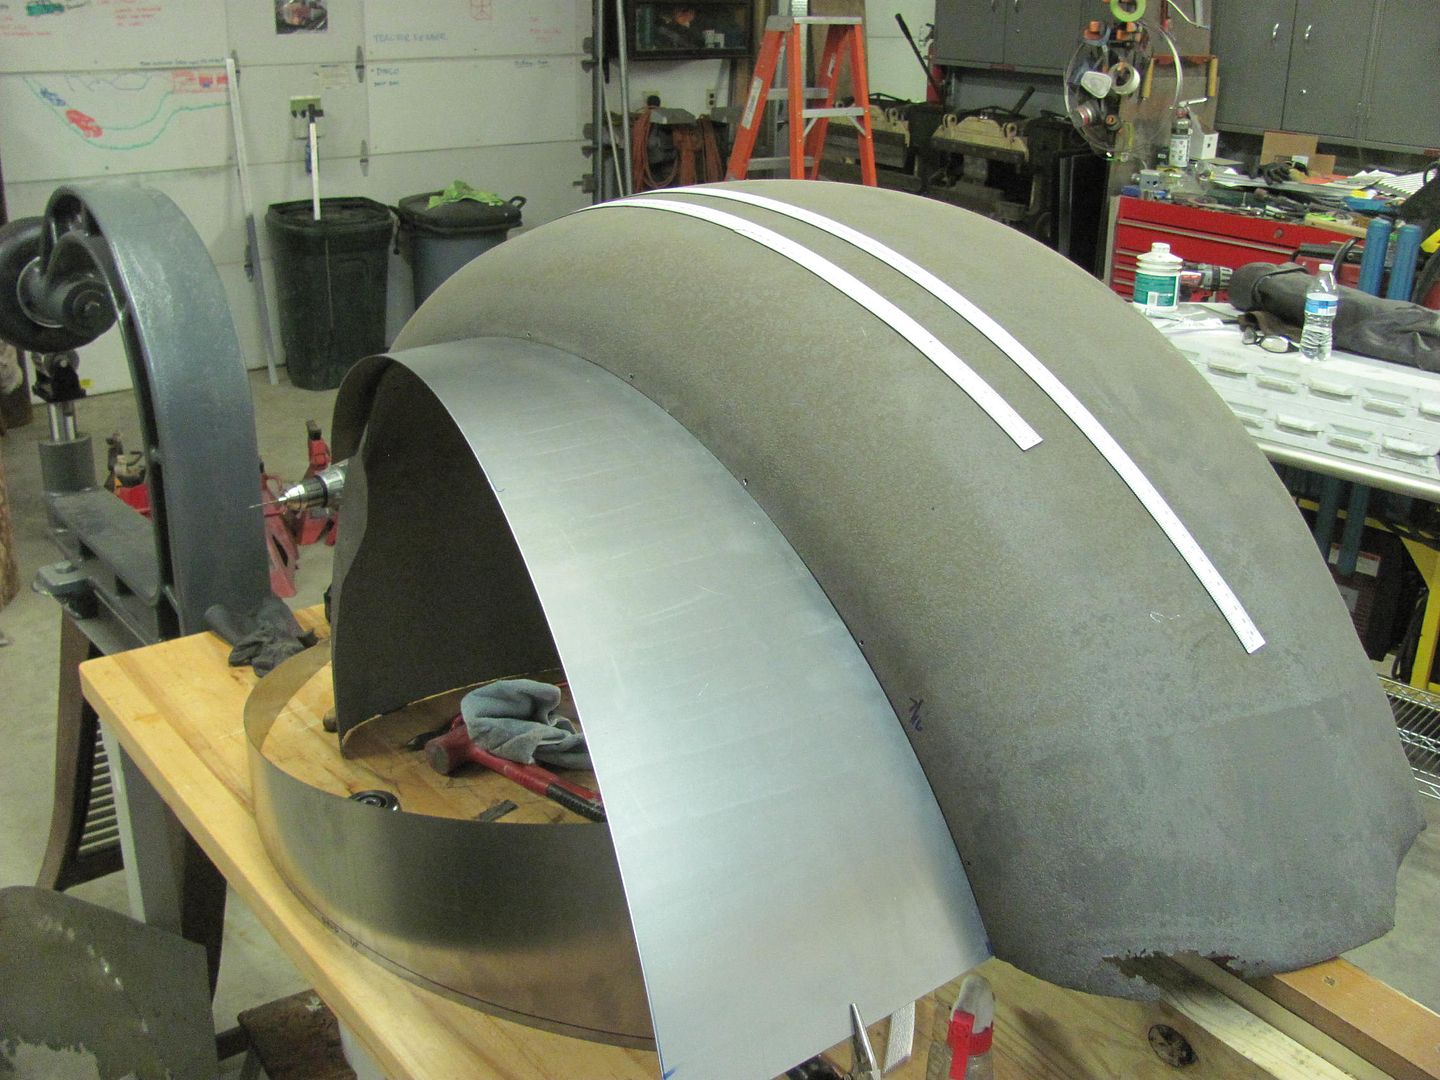
The Erco 1447 with stretcher dies was used to stretch the flange in between tipping sessions. All done, matches the fender contour, we'll get the other side folded down next time..

First step was to remove the inner fender to see what we had to work with, added some 1/8 holes to use later for clecos in putting things back together..
The front of the fender bolts to the bumper filler panel, and the rear bolts to the running board. These have a difference in height of 13-3/4, so some blocks were screwed together to hold the fender in correct placement while we worked.
The inner is getting replaced so the spot welds were ground out for removal.
Once removed, we found more pitting and damage than we originally thought was there, so now lets make this new as well..
New piece is cut out and the Wheeling machine with the go kart slick is used to add the correct radius..
Then the flange bend line is marked/thinned using a tipping die in the Lennox like we did for the inner panels we made..
Then a tipping die and Skateboard wheel in the bead roller is used to make the initial fold on the marked line
and finished up with a Step die so we could use it as a backstop
The Erco 1447 with stretcher dies was used to stretch the flange in between tipping sessions. All done, matches the fender contour, we'll get the other side folded down next time..
Last edited:
BORING HOP YARD
Well-known member
Sorry to bother you Robert, I was hoping you could expand on what grit sand paper and how long do you wait to sand the SPI primer?
Thank you!
Thank you!
BORING HOP YARD
Well-known member
Thank you Robert!
I really like the SPI primer and can see why you use it when your block sanding.
Greg
I really like the SPI primer and can see why you use it when your block sanding.
Greg
aggierailroad
Well-known member
Do you do this work on the side as a hobby or have something like a sole proprietorship? Just curious if anyone has given you hassle for the great work you crank out.
bulletpruf
Well-known member
Hey Robert -
Curious to hear what your day job is -- something similar to your after hours job or something completely different?
Scott
Curious to hear what your day job is -- something similar to your after hours job or something completely different?
Scott
Divcod
Well-known member
Not sure about who would hassle you but it seems as if you travel a fair amount so it is hard to keep family life in balance!I do this work on the side, with a couple of projects lined up when the wagon is complete. Who would you think I'd get hassle from?
I travel 6 - 9 months but when I'm It is easy lose track of time in the shop, no clocks or watches in the shop. Sometimes get home and realize it is very late. Just had my 39th wedding anniversary so have to say my wife is pretty understanding.
aggierailroad
Well-known member
I just recall a few instances of crazy environmental folks getting worked up over things like parts washers and confiscating them. This then led to everyone washing on the ground instead of recycling the cleaner.. but you know... big brother knows best.
Hey Robert -
Curious to hear what your day job is -- something similar to your after hours job or something completely different?
Scott
Scott, completely different. AV installs for various customers. I'm used primarily for my MacGyver skills.
I just recall a few instances of crazy environmental folks getting worked up over things like parts washers and confiscating them. This then led to everyone washing on the ground instead of recycling the cleaner.. but you know... big brother knows best.
I'm registered with the state as a hazardous waste generator. Which given the amount of rust repairs vs. painting that I do, amounts to about 1 gallon of paint waste per year. I dispose of it at the local landfill when they have their Hazmat disposal days...
bulletpruf
Well-known member
Scott, completely different. AV installs for various customers. I'm used primarily for my MacGyver skills.
I kind of figured it was something different. I can definitely see your MacGyver skills coming in handy with AV installs.
Scott
MScott
Well-known member
Robert, I noticed that you have a thread called "1947 Biederman Truck Fender..." on another site that I visit (Club Hot Rod) that includes some details you have not included here. Since I hate to miss any of your wonderful and instructive postings, I wonder if there are any more sites that you have posted on?
I do have a couple threads elsewhere, on the HAMB, metal shaping sites, etc, that more strictly apply to one job or vehicle. This thread is more of a mish-mash of all the shop projects to show and document methods used to help anyone that may have a similar repair needed on their own projects. So where most posts elsewhere should be here as well, they are added to this thread in a chronologic order instead of by project, and sometimes get lost in the mix. But it is possible I missed something as well.. 
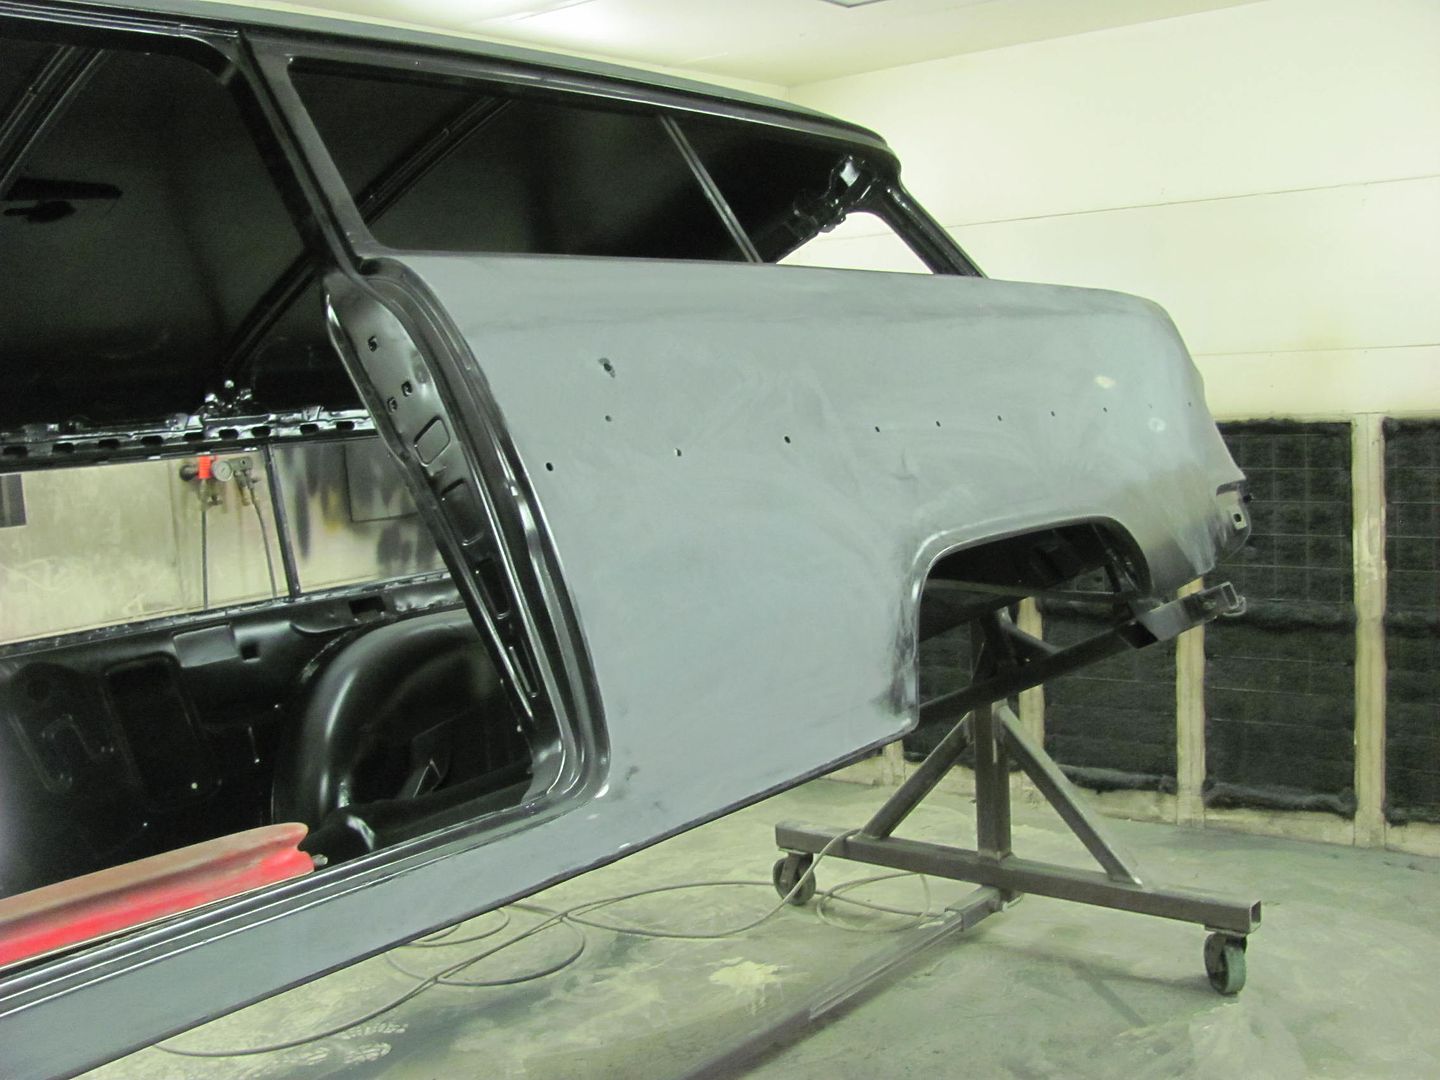
More block sanding on the wagon, we've got a few low areas to address and then get it ready for another dose of epoxy...

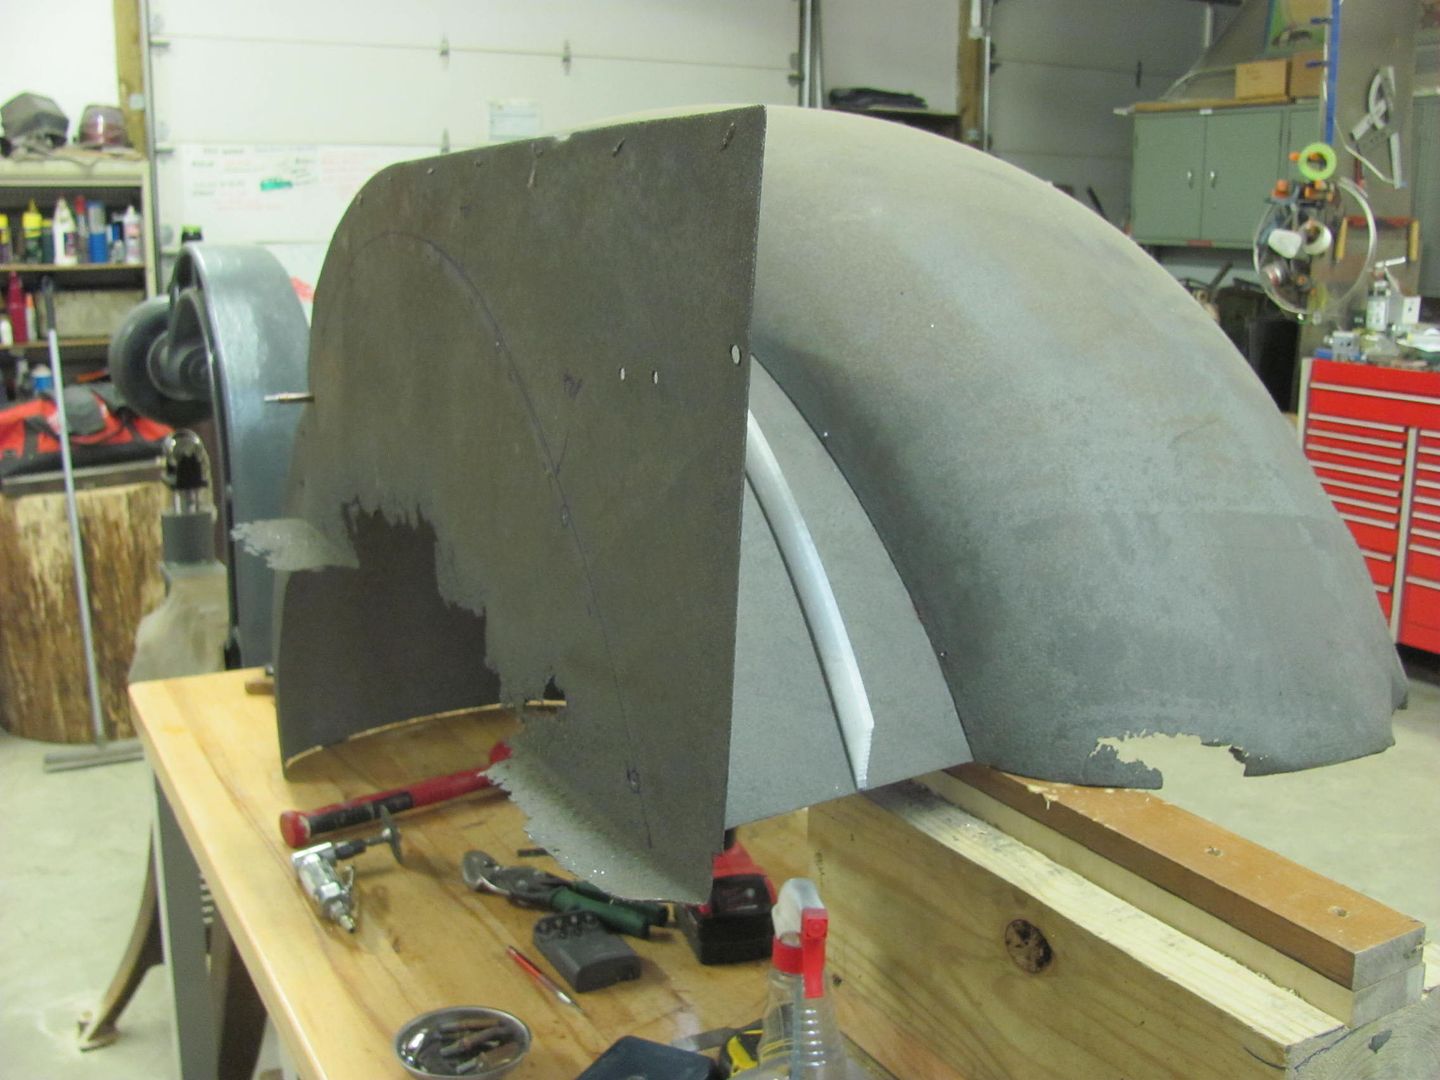
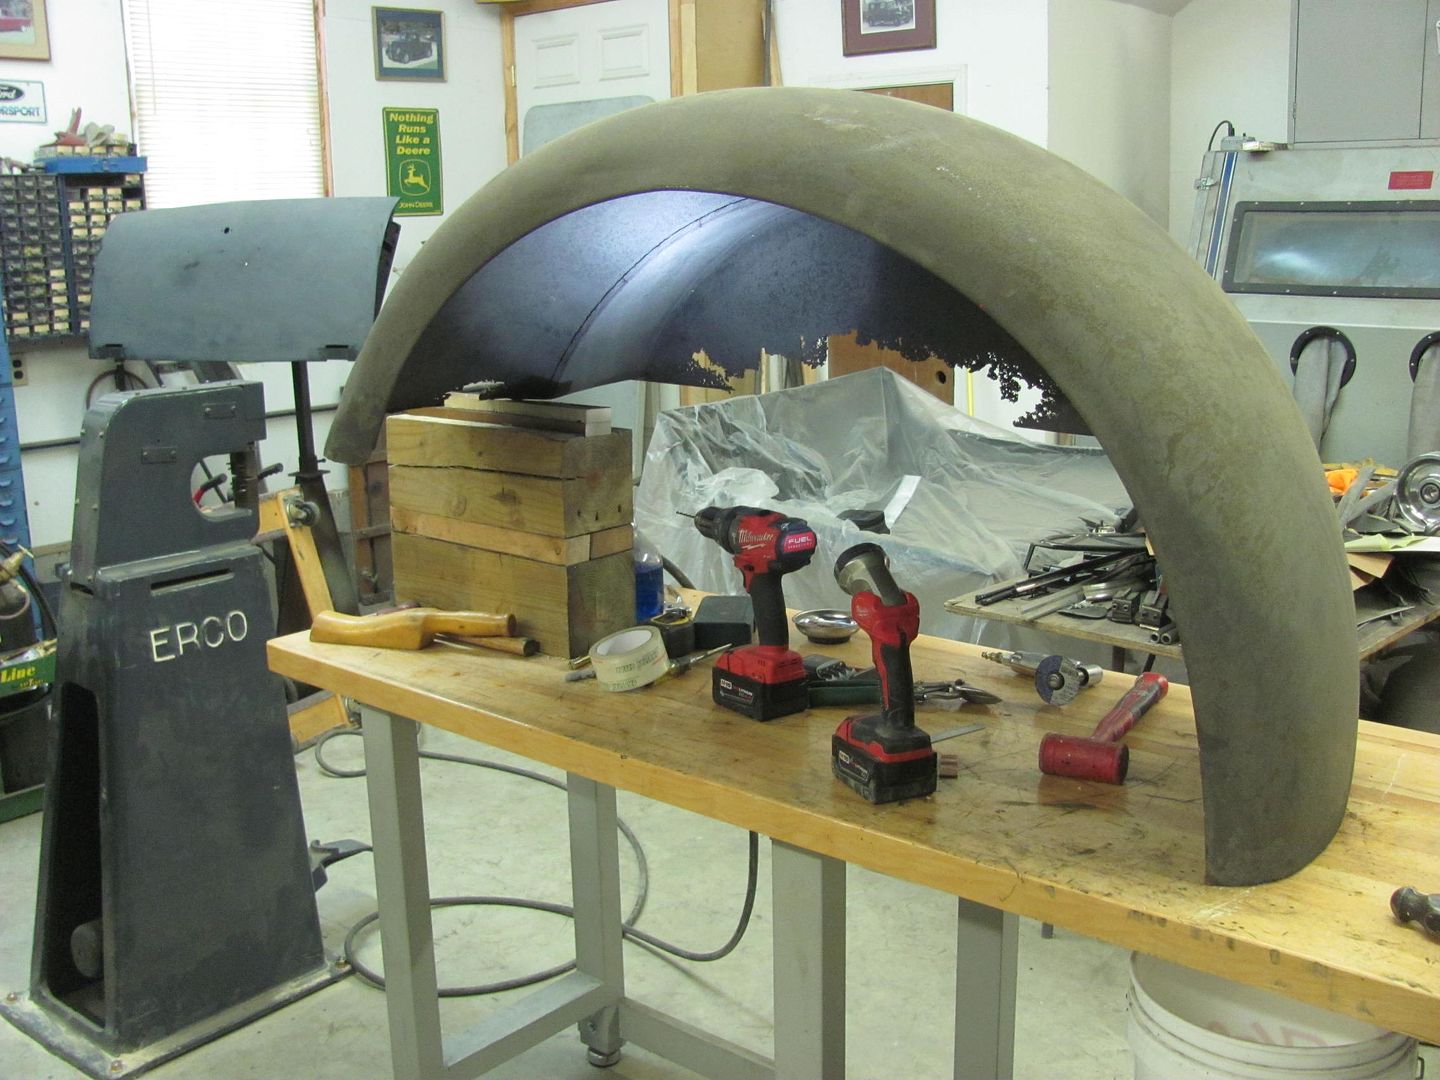
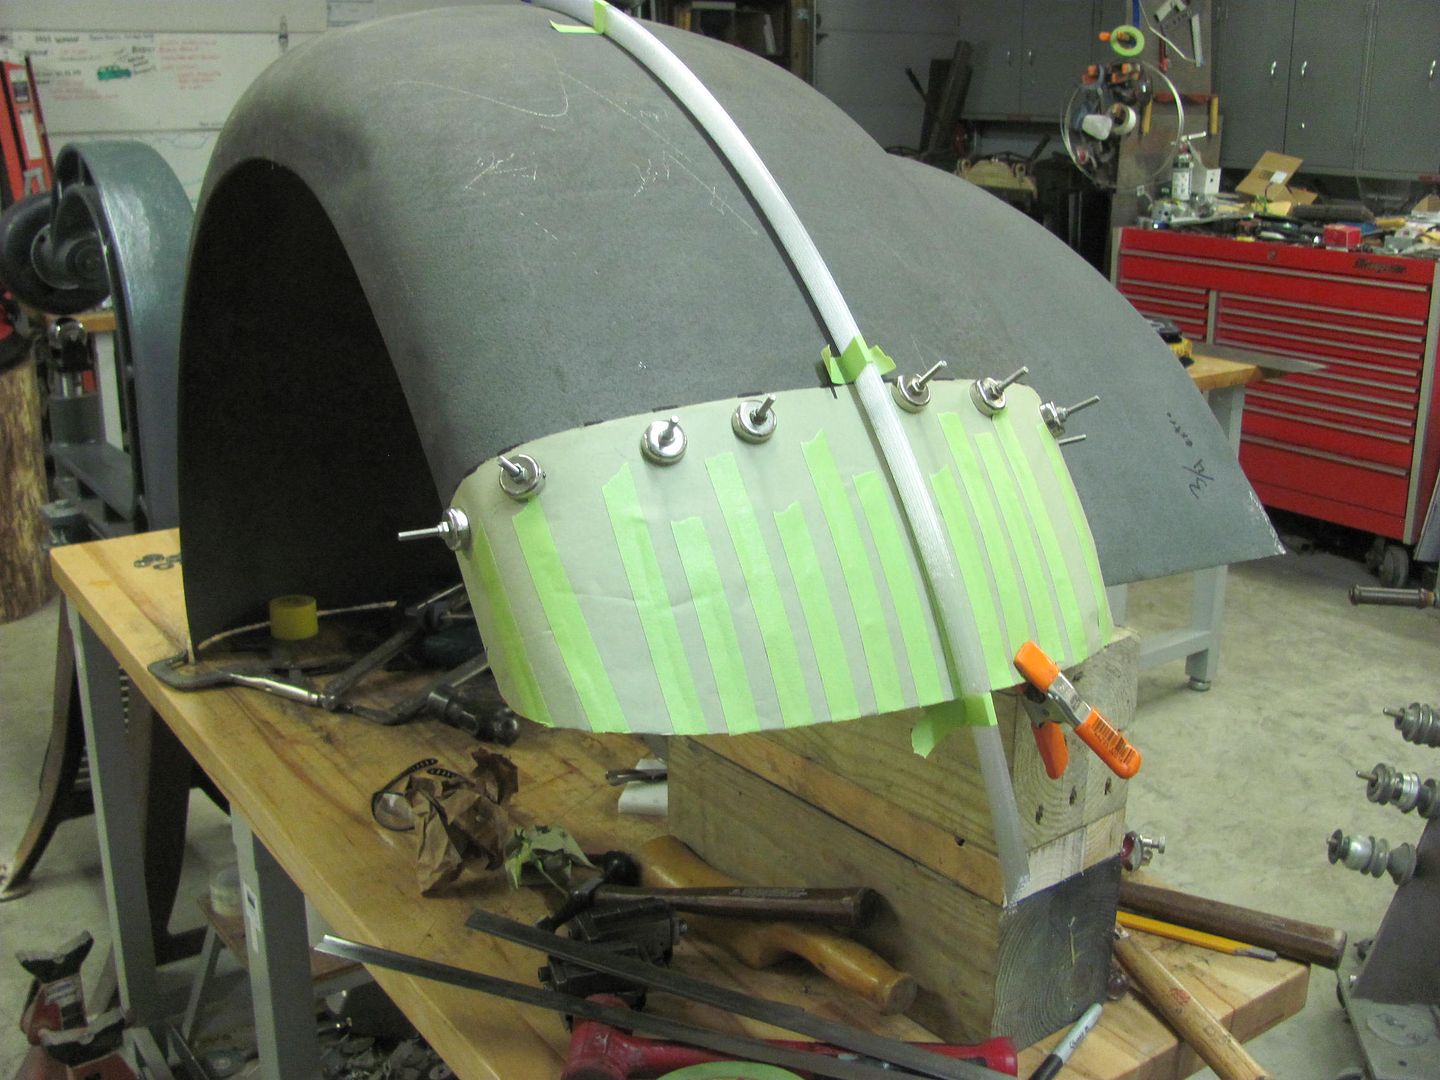
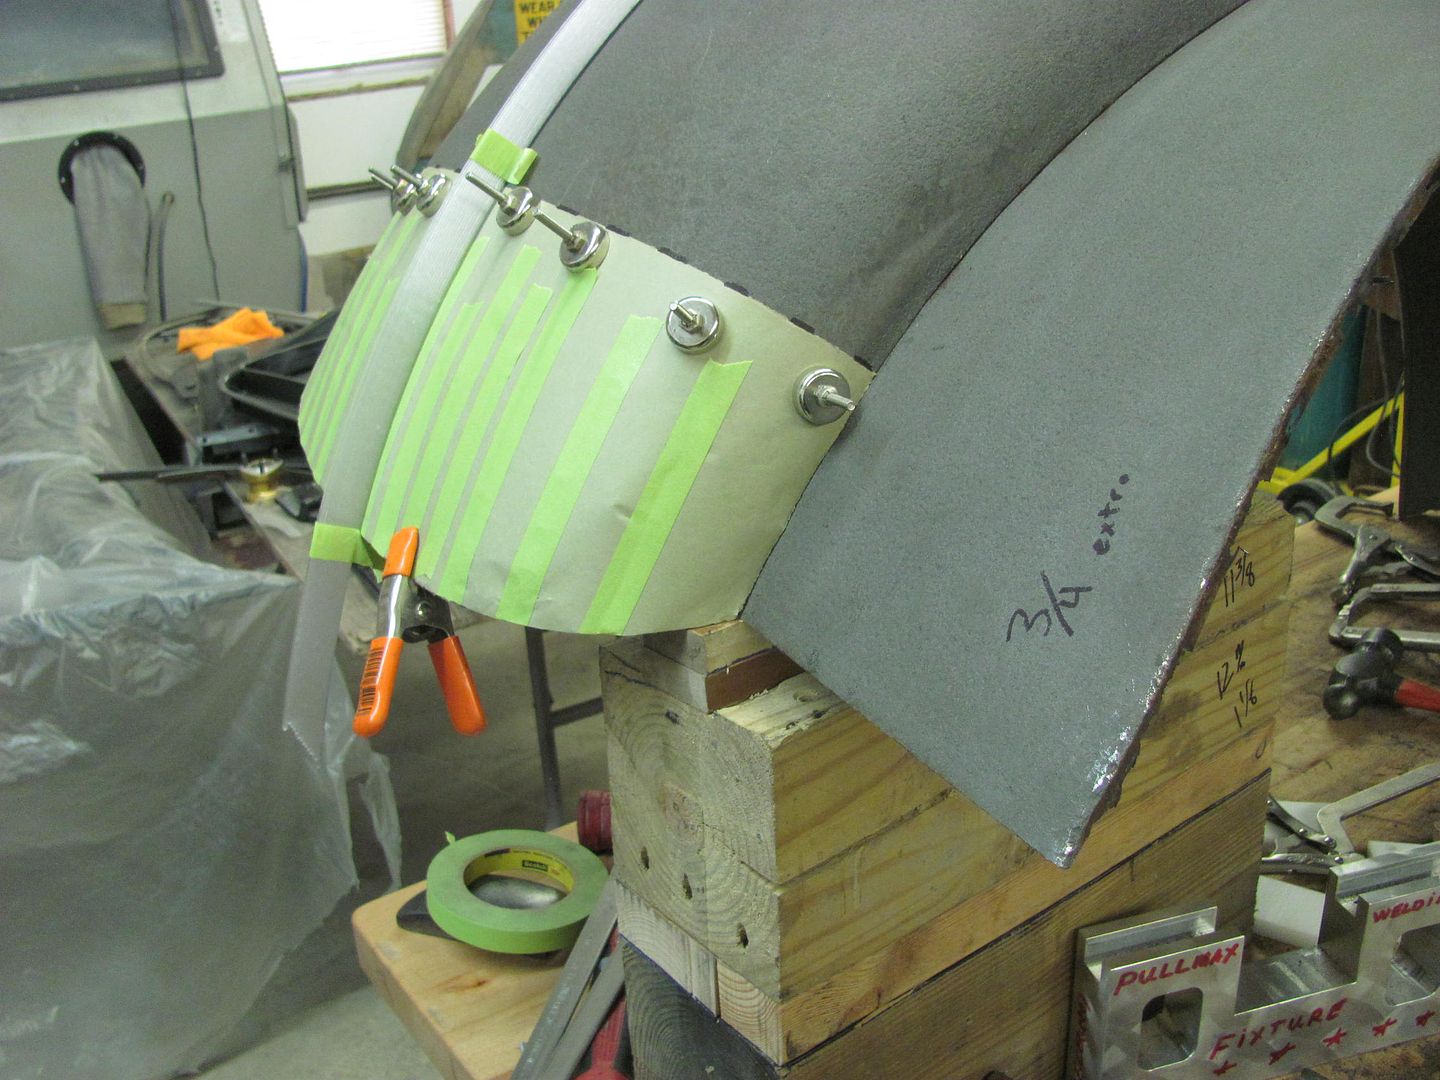
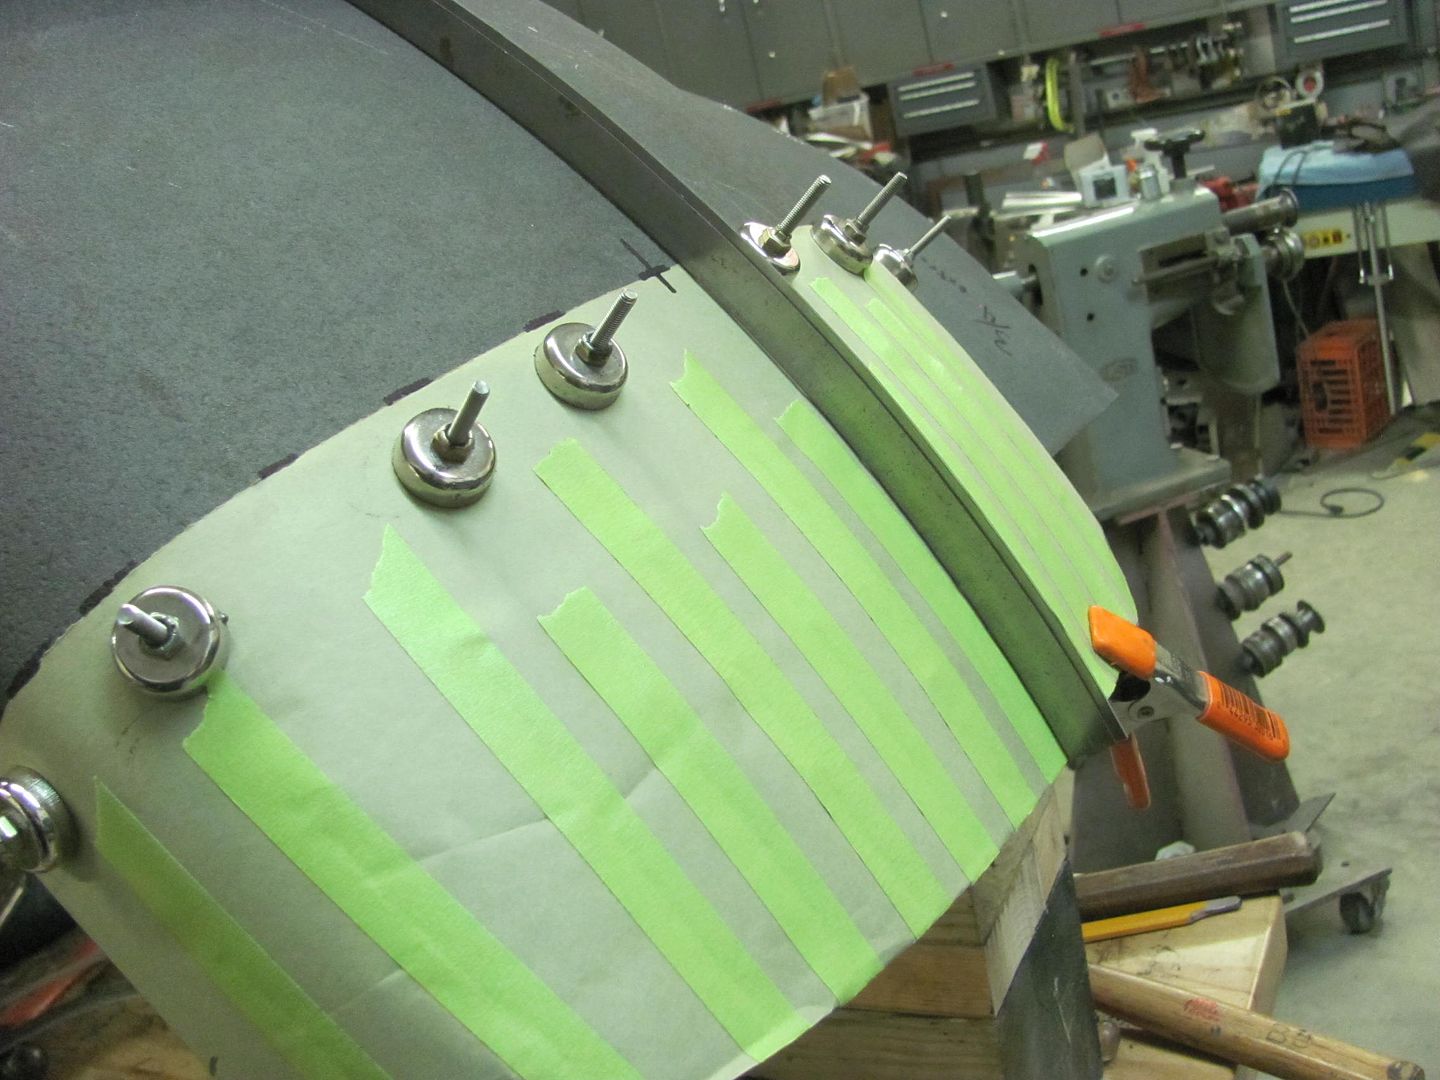
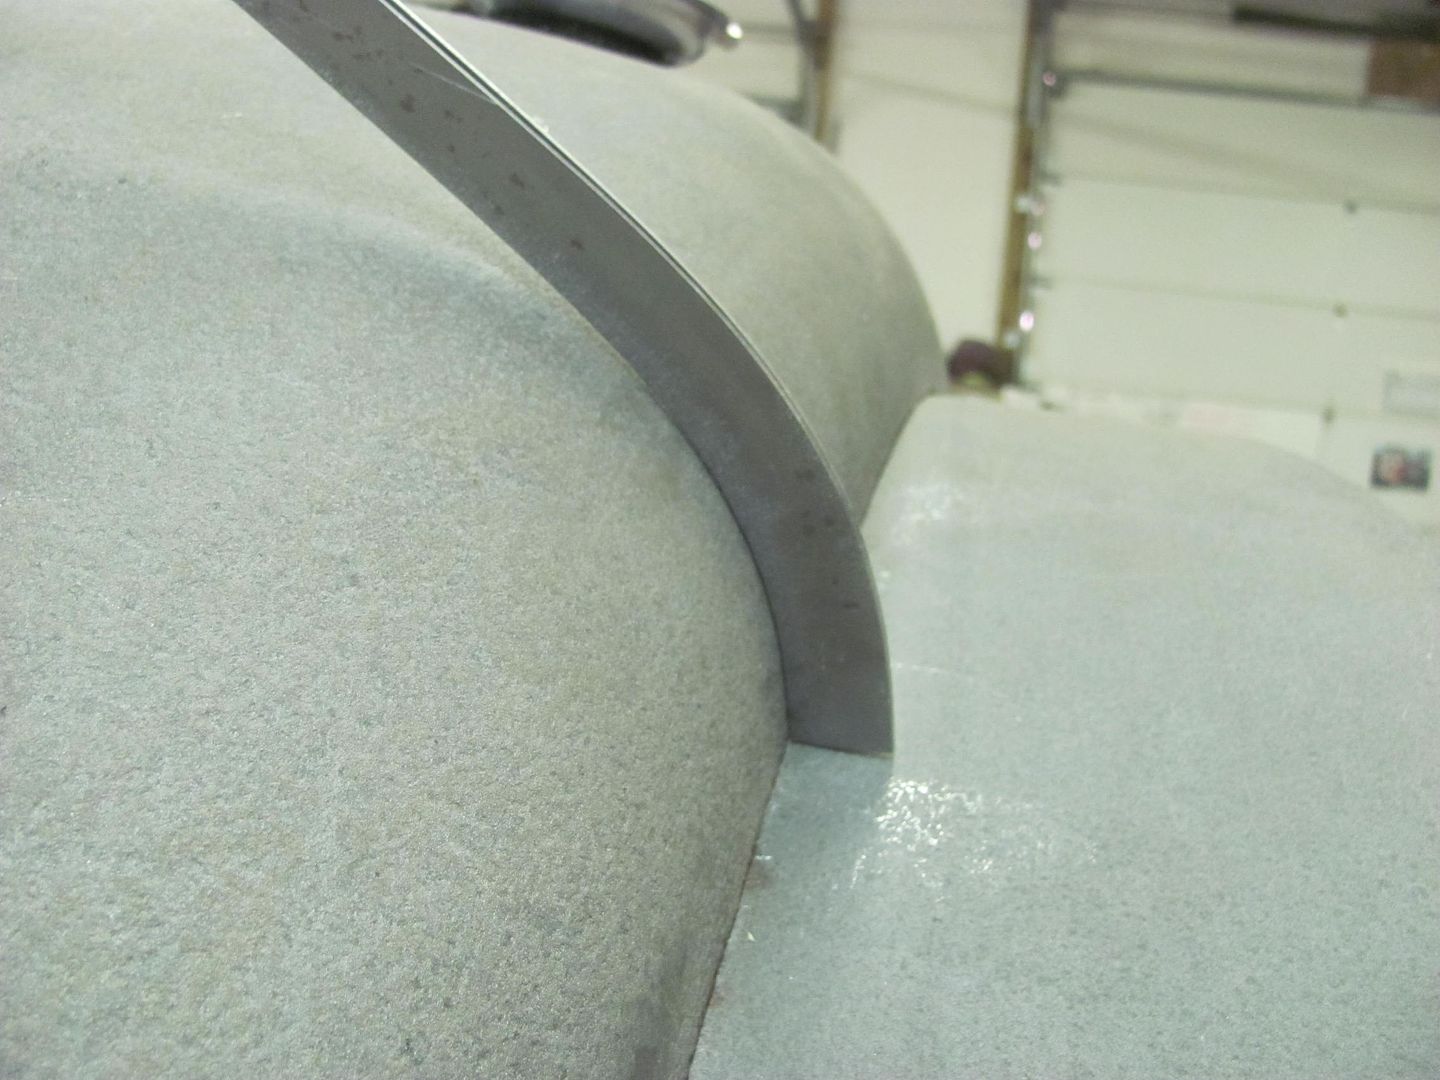
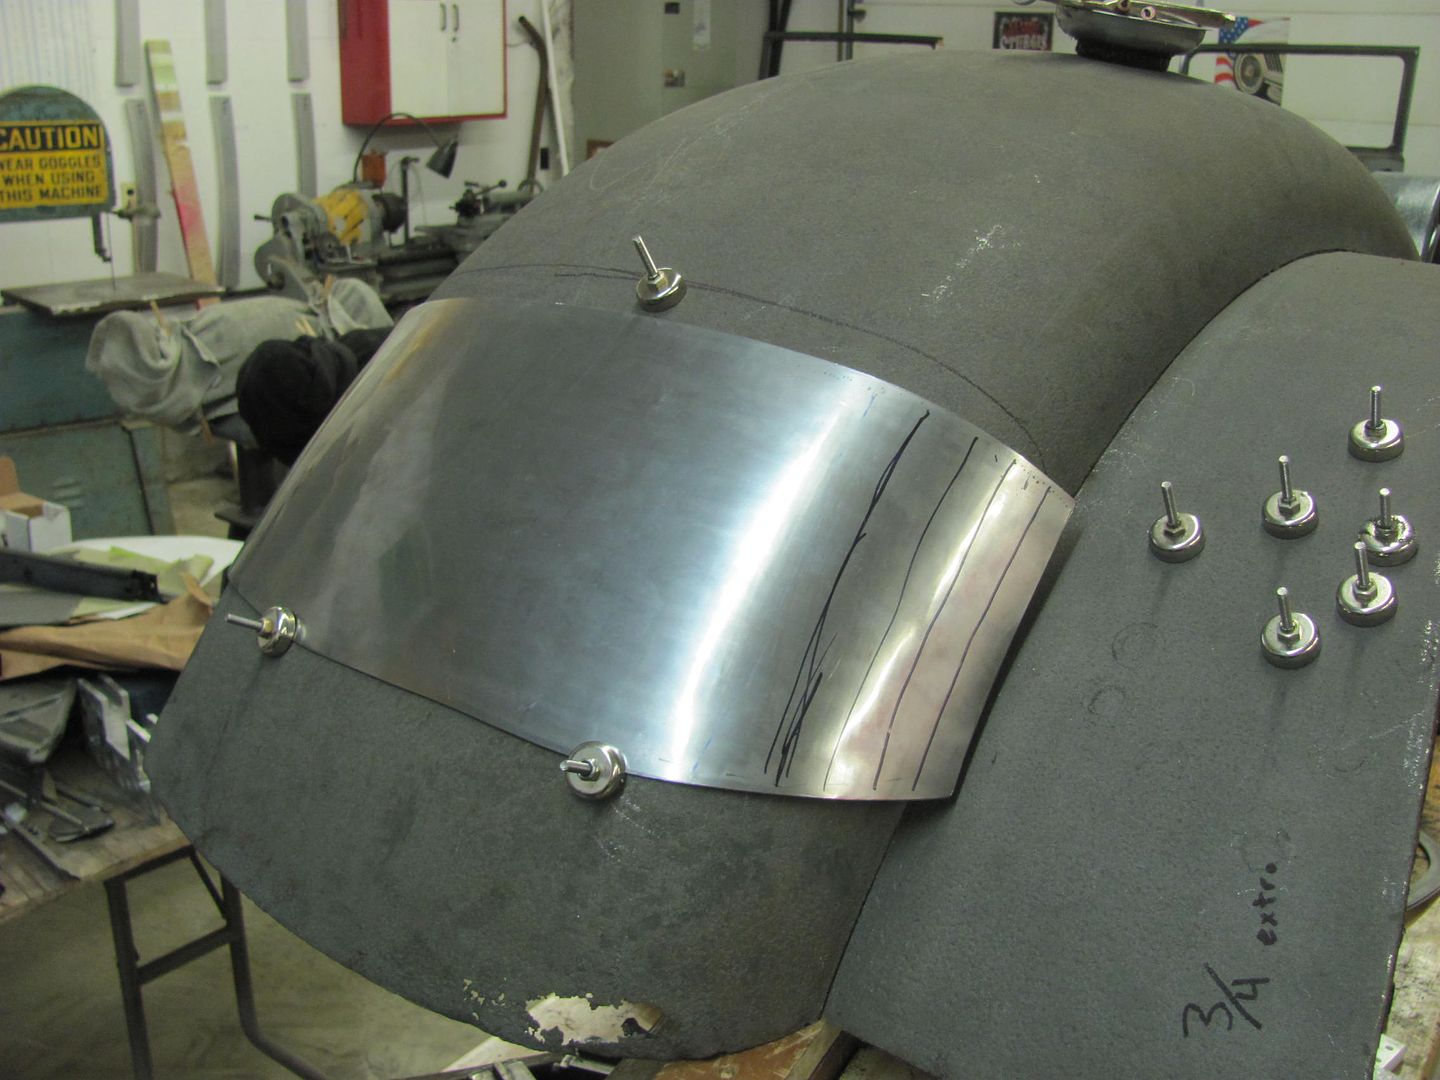
On to the Biederman fender repairs, here's a quick video to show how the radius for the filler panel was done..
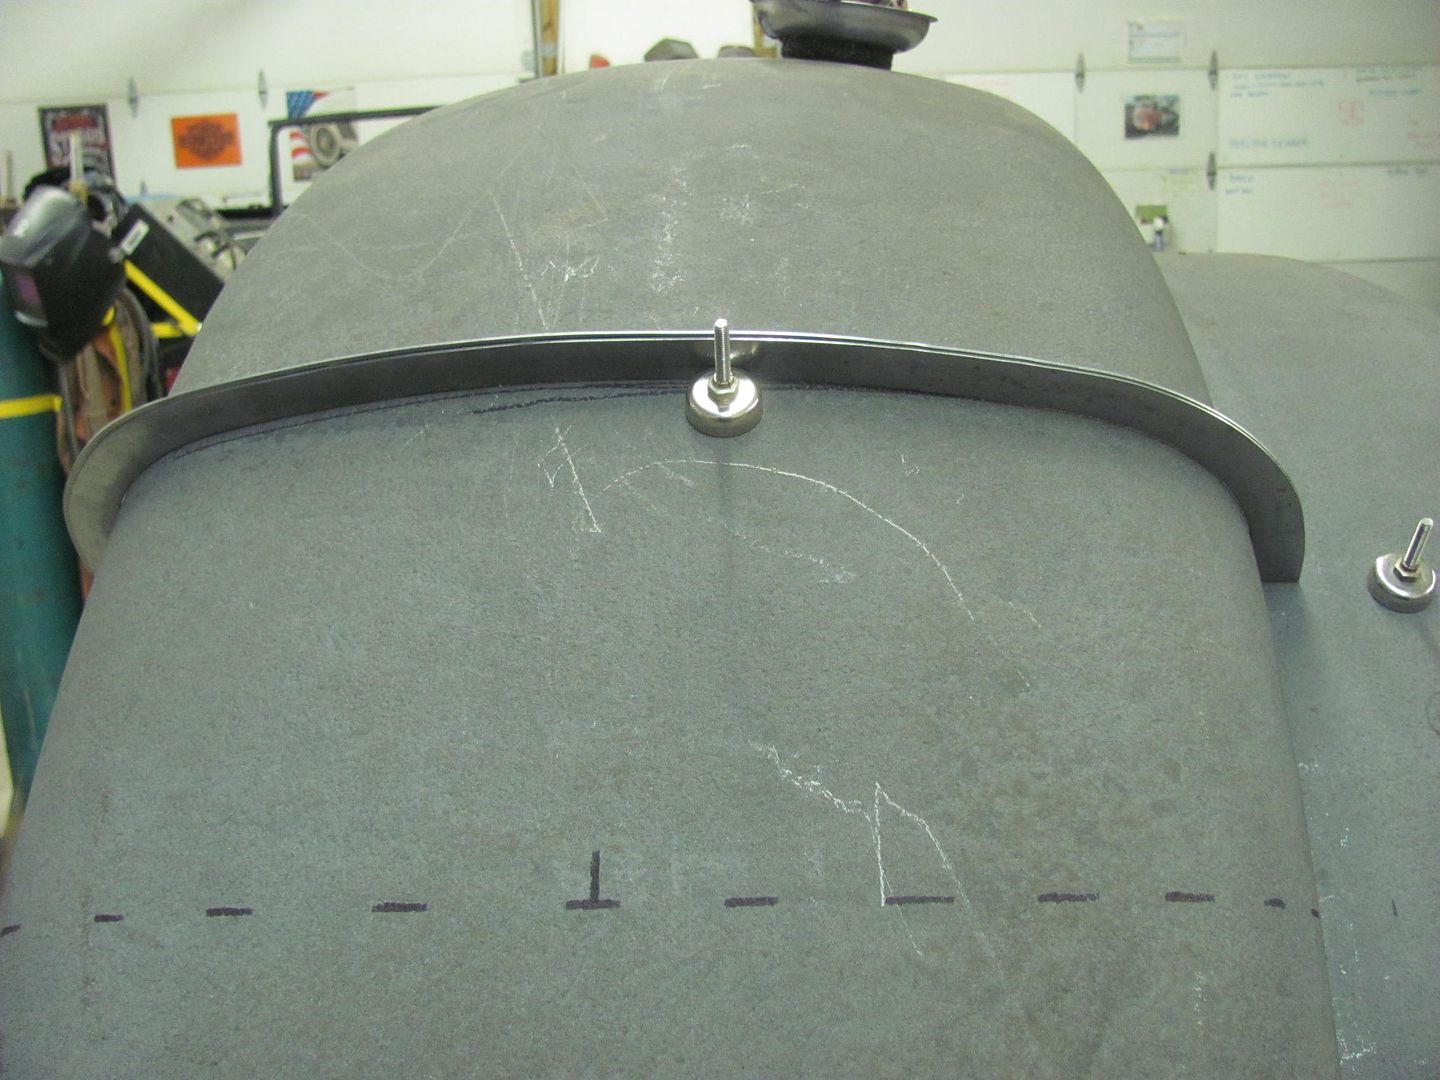
With the flanges turned both directions....

Looking at the rear of the fender that was adjacent to the cab, we found flat areas that seem to indicate some rubbing was occurring. So while we were fabricating the filler panel, we added about 1/8" to shove the fender outward away from the cab.
On to the Biederman fender repairs, here's a quick video to show how the radius for the filler panel was done..
With the flanges turned both directions....
Looking at the rear of the fender that was adjacent to the cab, we found flat areas that seem to indicate some rubbing was occurring. So while we were fabricating the filler panel, we added about 1/8" to shove the fender outward away from the cab.
Last edited:
Well after block sanding the latest coat of epoxy....
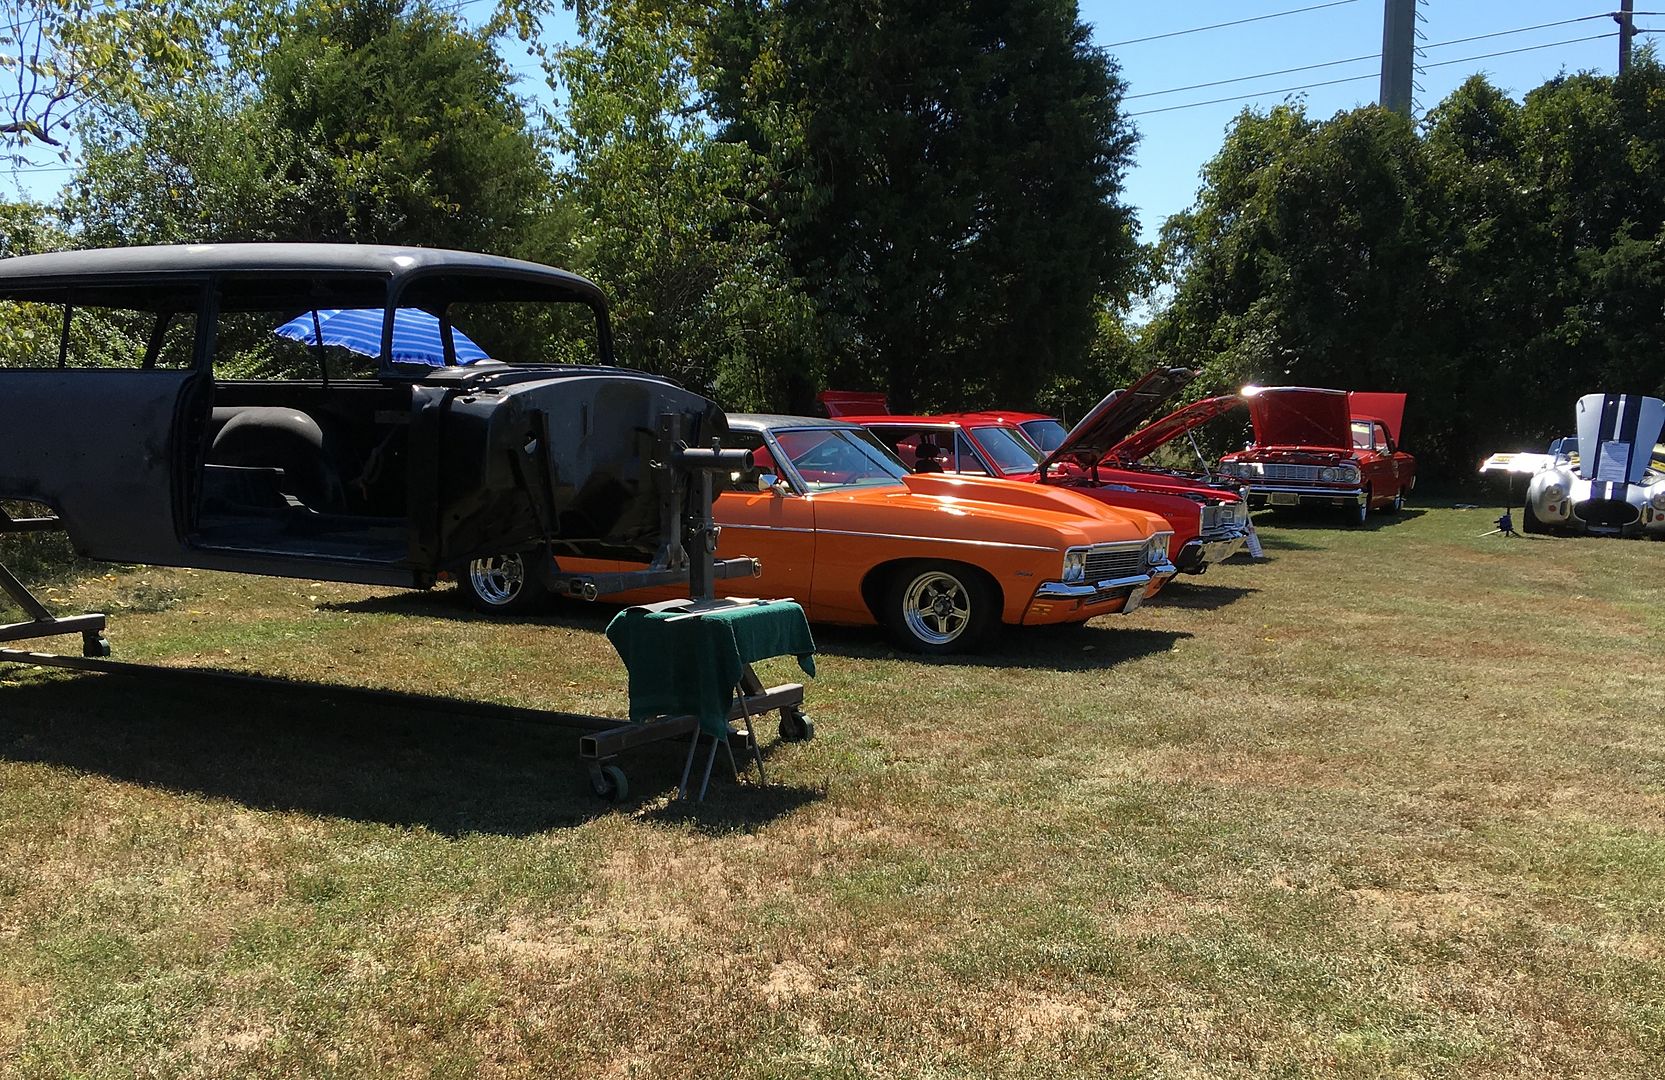
We had a local car show we could attend, but didn't know whether to take the body or the frame...
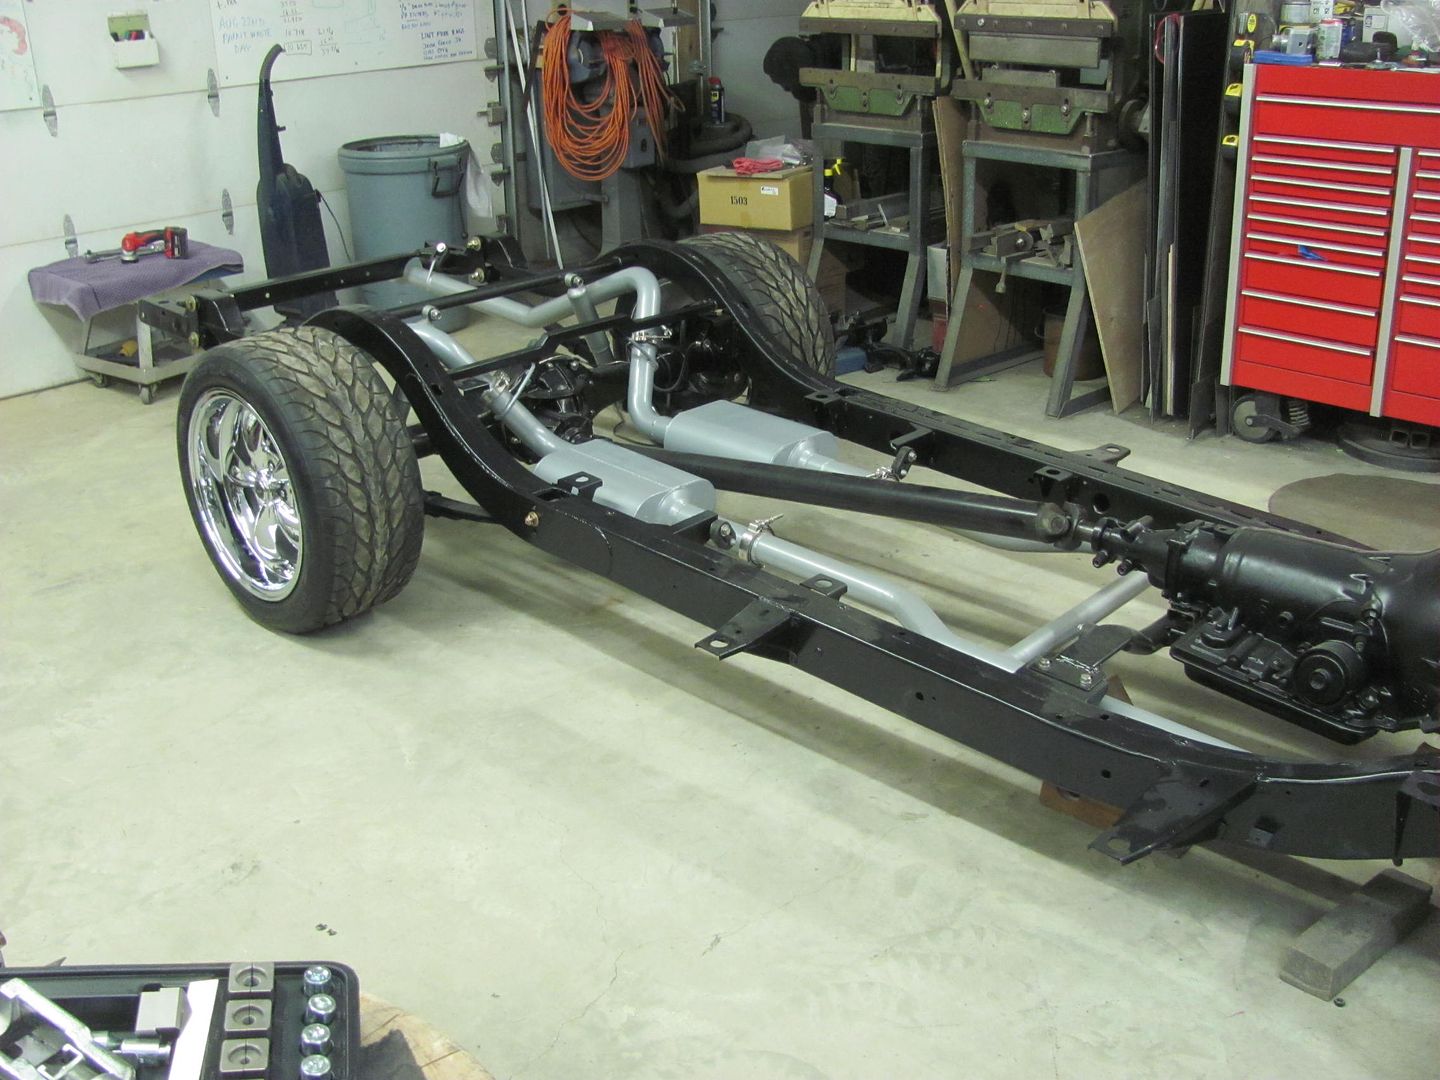
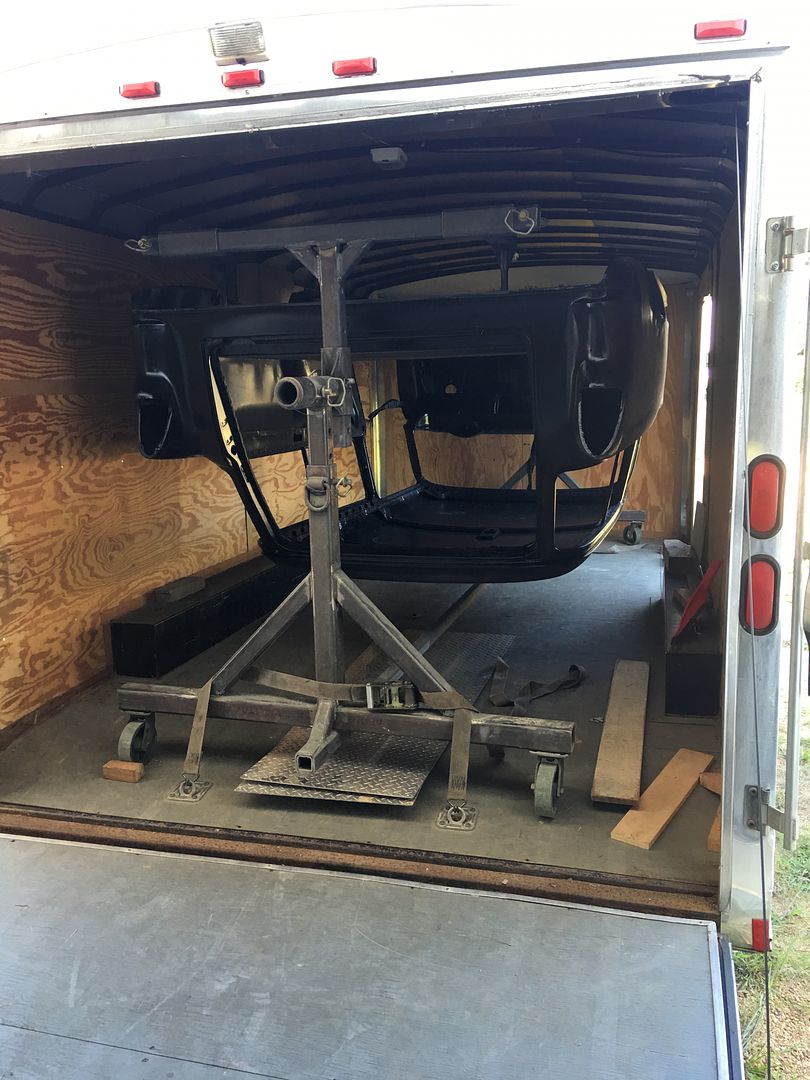
I didn't think the rotisserie would fit in my 16' trailer for some reason, but another measurement proved otherwise. Since it showed more of our metal fabrication, we opted for the body.. All loaded up, height limitations on the ceiling do require inverted travel...
At the show with the "trailer queen"
We had a local car show we could attend, but didn't know whether to take the body or the frame...
I didn't think the rotisserie would fit in my 16' trailer for some reason, but another measurement proved otherwise. Since it showed more of our metal fabrication, we opted for the body.. All loaded up, height limitations on the ceiling do require inverted travel...
At the show with the "trailer queen"
Kirkski
Well-known member
Robert that is awesome. I have never seen a display like that at a local car show
shortykorte
Well-known member
Too bad you didn't have some 44's to stand underneath the body. 
Divcod
Well-known member
Robert,Well after block sanding the latest coat of epoxy....
We had a local car show we could attend, but didn't know whether to take the body or the frame...
I didn't think the rotisserie would fit in my 16' trailer for some reason, but another measurement proved otherwise. Since it showed more of our metal fabrication, we opted for the body.. All loaded up, height limitations on the ceiling do require inverted travel...
At the show with the "trailer queen"
Did you take the fenders, glove box and a list of all the subtle changes made. Sure a lot of people will not recognize the changes.
Last edited:
WhiffySpark
Well-known member
- Joined
- Oct 22, 2009
- Messages
- 6,252

Dave, we took the new and old glove box doors as we had something to fit it to, and also took the cowl section we had recently replaced. The trailer was too cramped for much else, so that's all we took. Had quite a bit of people checking out the bare body AND its underside..
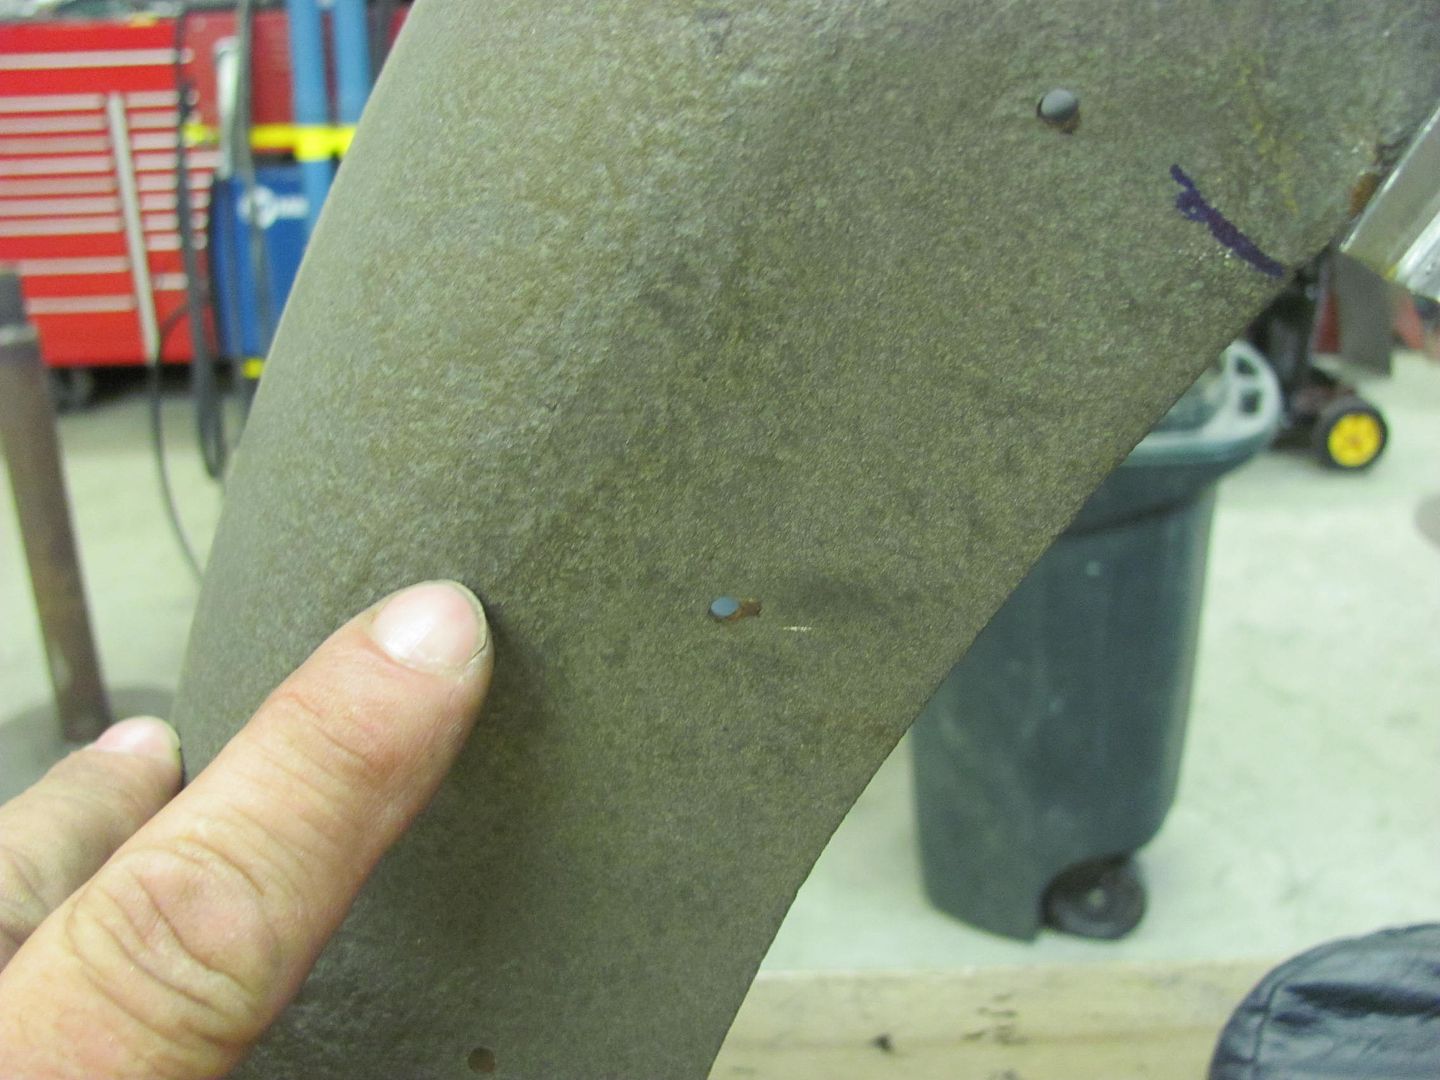
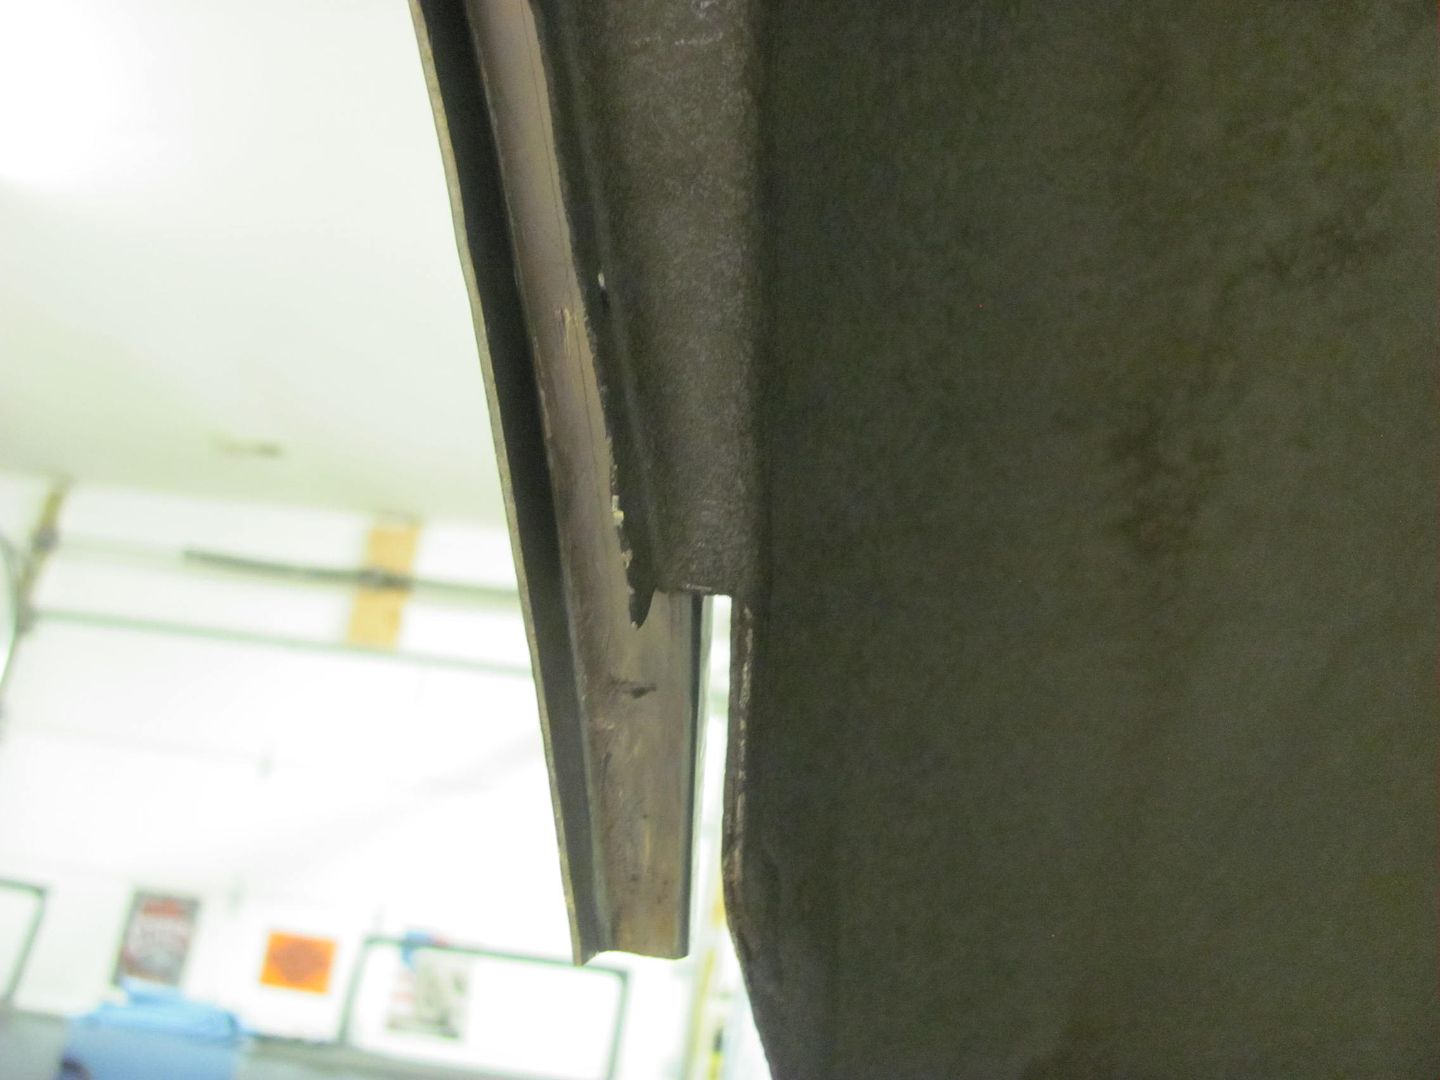
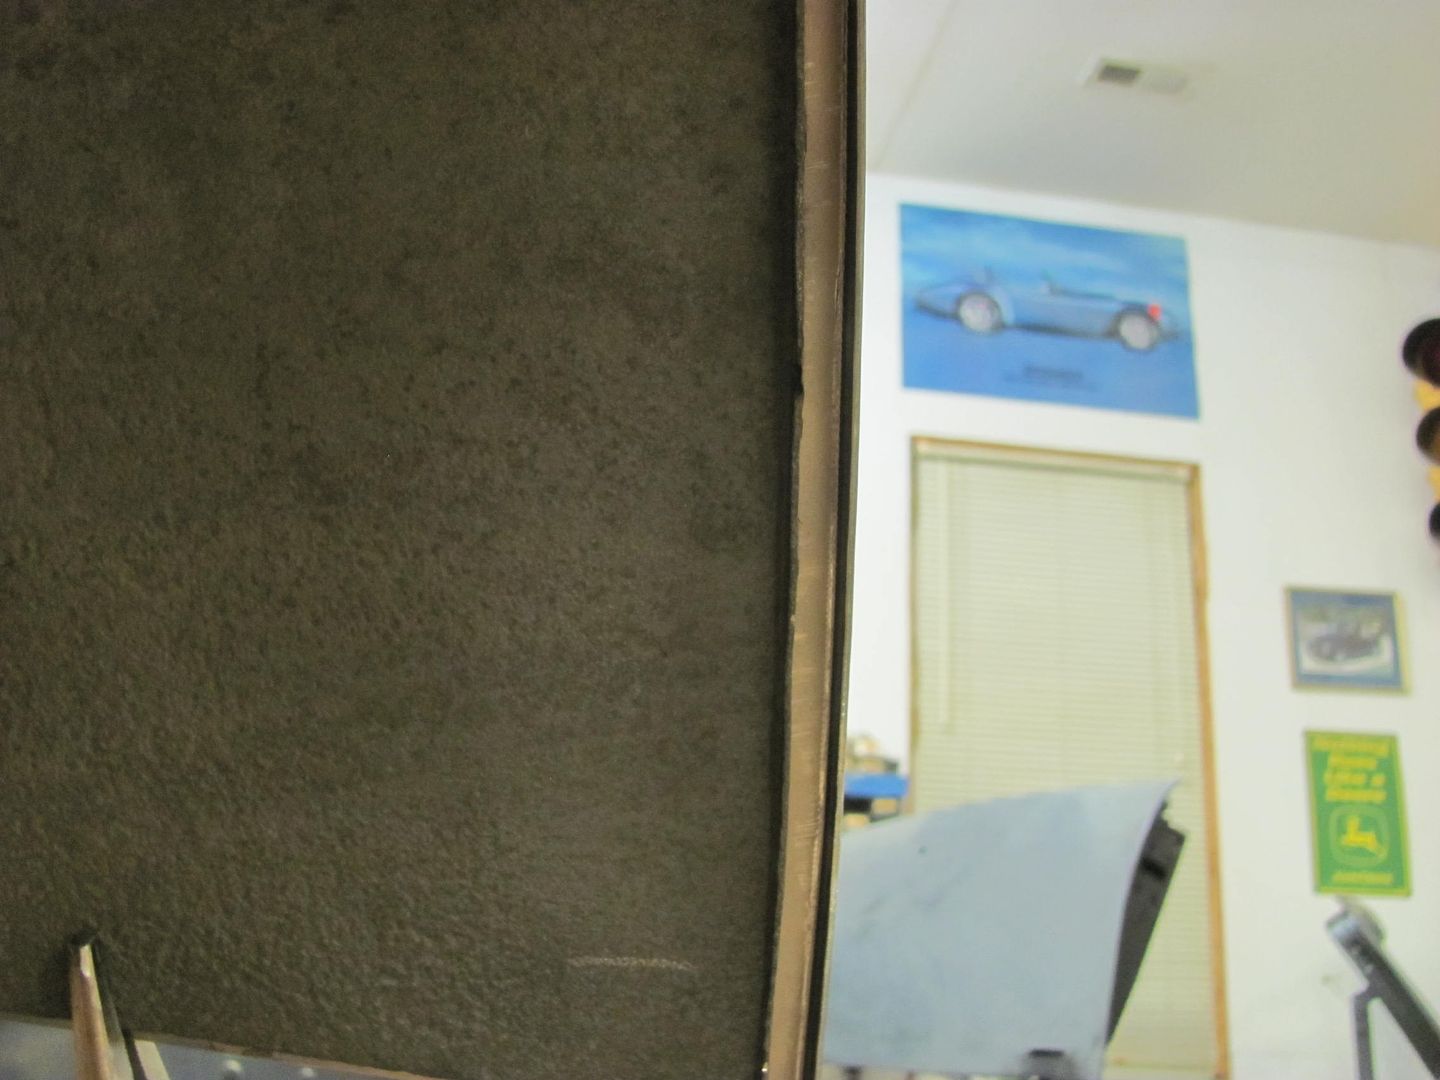
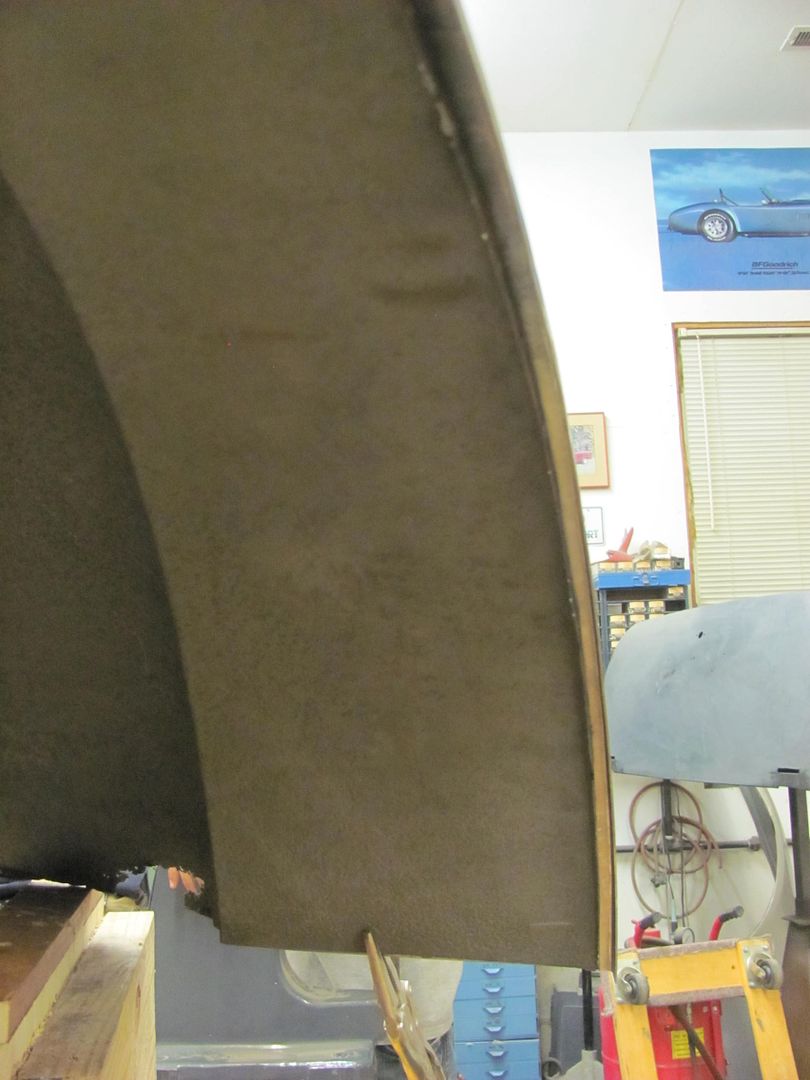
The rust shown on your wheel well opening is typically caused by moisture becoming trapped between the inner and outer. So regardless of the method used on the outer quarter, plan on an outer wheel well replacement / patch as well. All that aside, you will likely have better results by installing a full quarter, attaching as per factory methods. A patch will need to have welds accessible from the rear for planishing to fix the warping from shrinking, where a full quarter will eliminate that need. More than anything, all in what you're comfortable with. And there is always panel adhesive. I'm not as fluent in its use, but this should eliminate the weld shrinking issues. However, the adhesive does make use of a double thickness or overlap at the point of adhesive. This area will be prone to showing ghost lines in the finish, especially noticeable in a black finish.
Do you think I would be better off cutting this out or replacing the whole panel? It's a $400 car not looking to make it perfect just low loud and cool. She wants it painted black, I'm not sure Lol
The rust shown on your wheel well opening is typically caused by moisture becoming trapped between the inner and outer. So regardless of the method used on the outer quarter, plan on an outer wheel well replacement / patch as well. All that aside, you will likely have better results by installing a full quarter, attaching as per factory methods. A patch will need to have welds accessible from the rear for planishing to fix the warping from shrinking, where a full quarter will eliminate that need. More than anything, all in what you're comfortable with. And there is always panel adhesive. I'm not as fluent in its use, but this should eliminate the weld shrinking issues. However, the adhesive does make use of a double thickness or overlap at the point of adhesive. This area will be prone to showing ghost lines in the finish, especially noticeable in a black finish.
WhiffySpark
Well-known member
- Joined
- Oct 22, 2009
- Messages
- 6,252
Thank you. I'm a mechanic by trade I'm considering trying to fix it myself. It doesn't have to be perfect, but I do have ocd. You're some what local want to fix it for a case of beer? 
 .
.I worked on some more block sanding on the 55 today, and Kyle did some more work on the Biederman fenders..
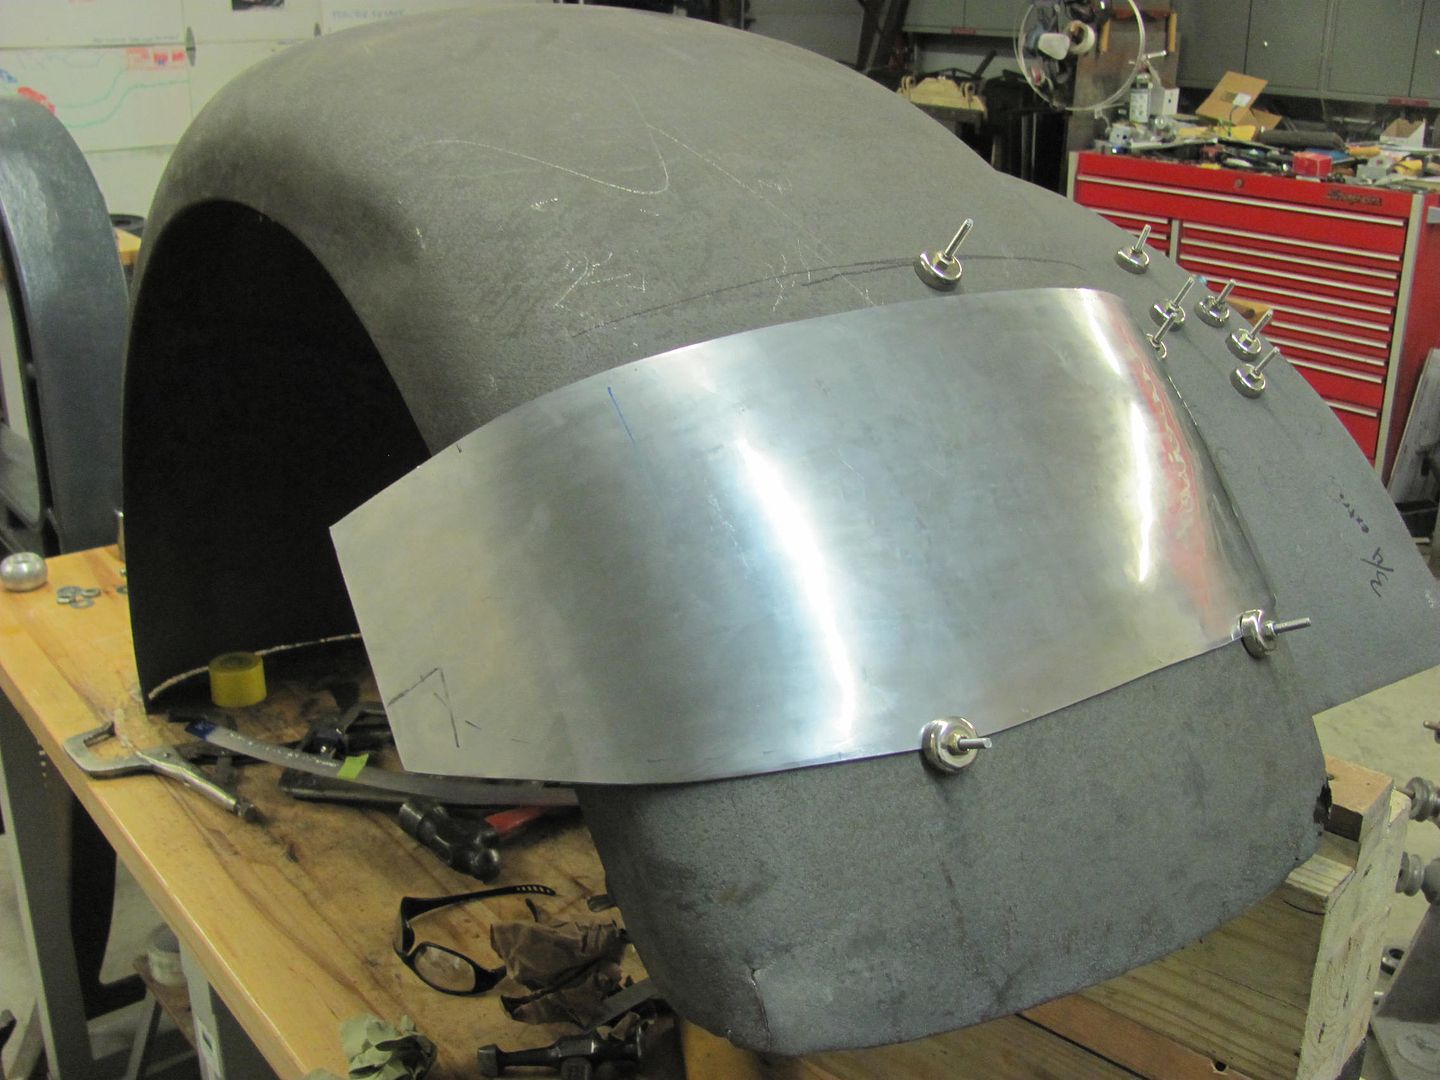
A paper pattern was taken from the front of the fender to use as a guide to cut out the new piece from 16 ga cold rolled steel.
Some 19 gauge was hemmed flat and the Erco kick shrinker used to make profile templates for the horizontal and vertical directions..
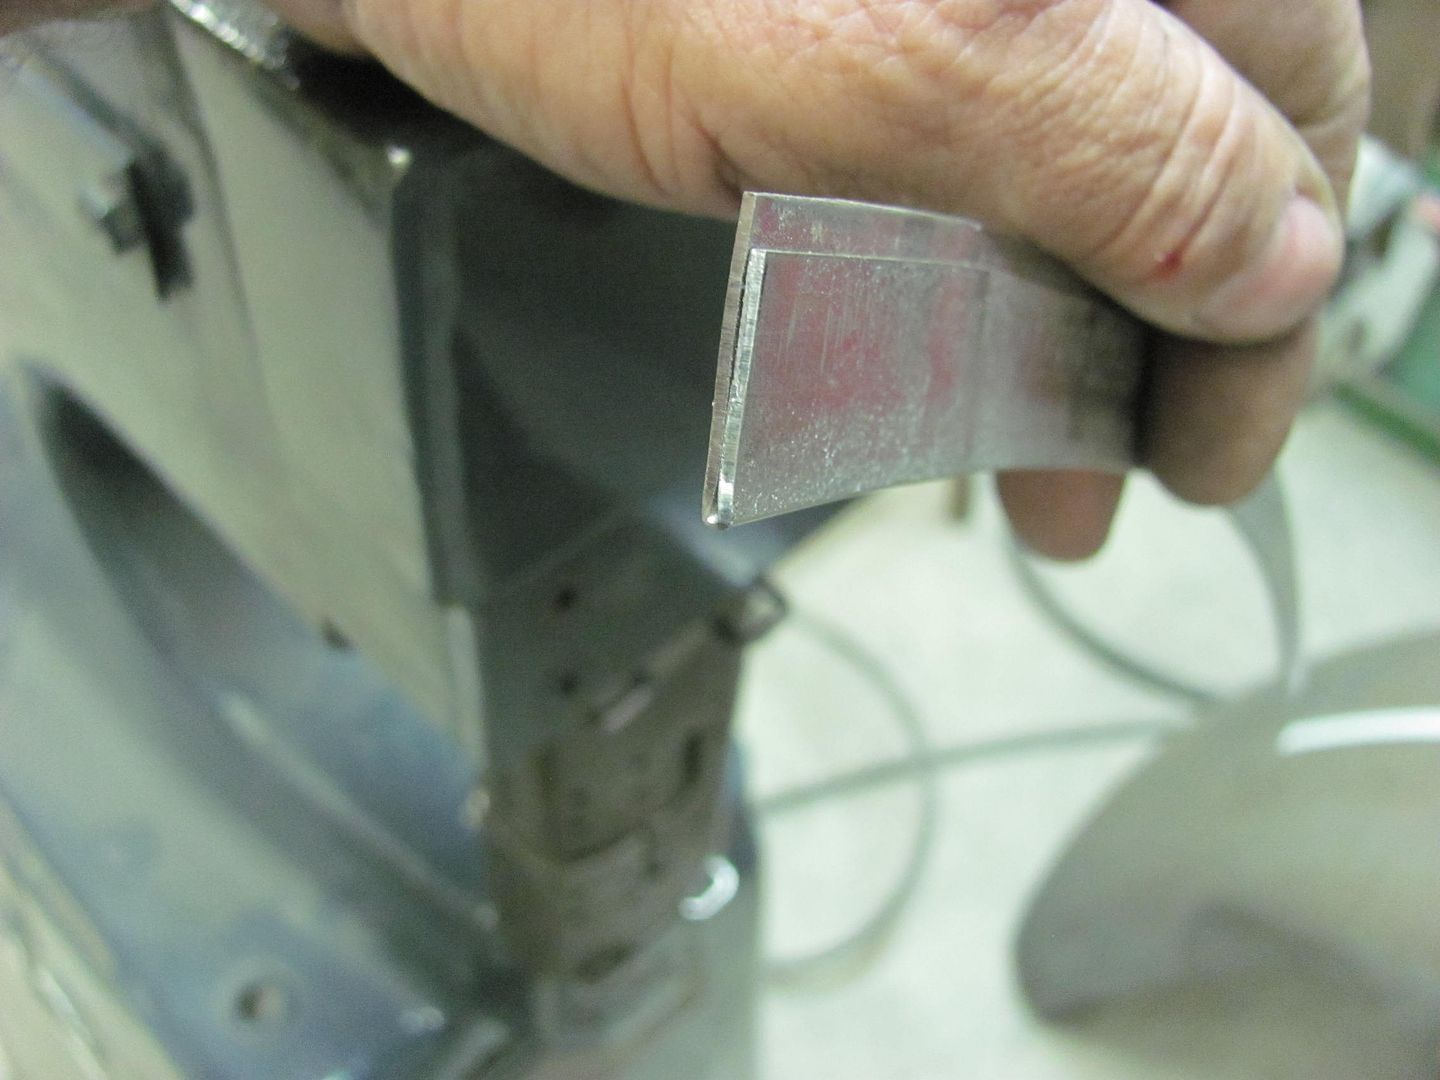
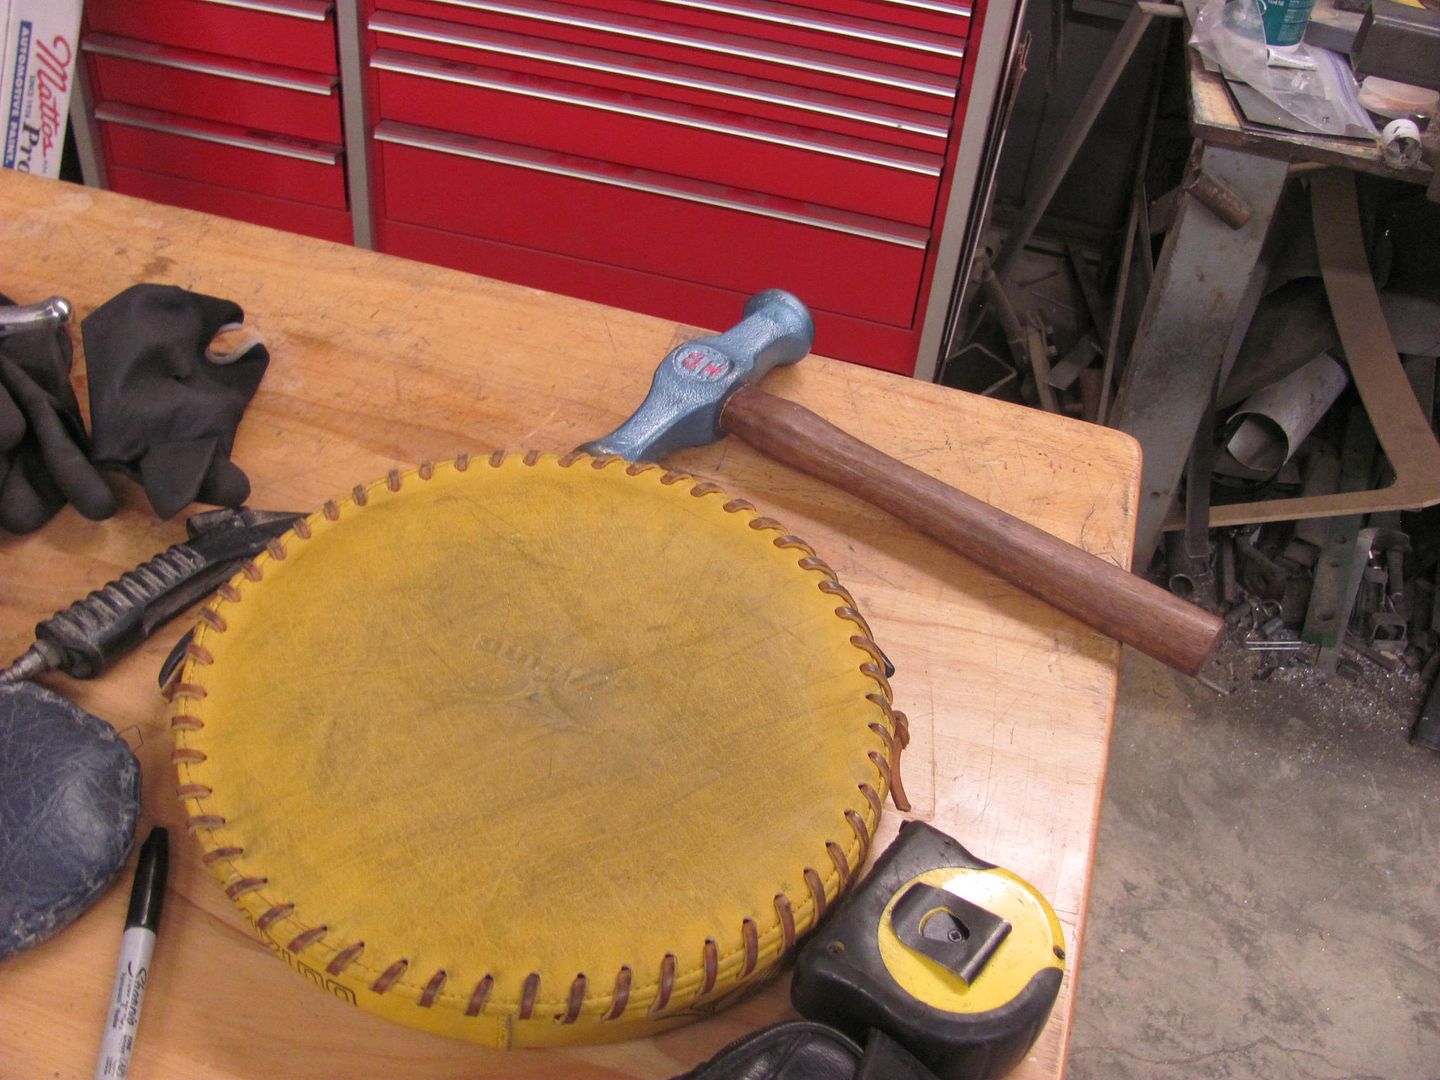
The initial shape was added with a blocking hammer and shot bag, and finished on the Wheeling Machine..
Getting close....
This video shows the progress so far, as well as the rust on the leading edge we're repairing..
A paper pattern was taken from the front of the fender to use as a guide to cut out the new piece from 16 ga cold rolled steel.
Some 19 gauge was hemmed flat and the Erco kick shrinker used to make profile templates for the horizontal and vertical directions..
The initial shape was added with a blocking hammer and shot bag, and finished on the Wheeling Machine..
Getting close....
This video shows the progress so far, as well as the rust on the leading edge we're repairing..
Duker
Well-known member
Fender filler panel no. 2 complete.. This 16 gauge sheet metal is a bit of a challenge!
Robert, fine work as always.....whenever I want to get a little inspiration to try and bend some metal I stop by your thread!
*