To avoid these ads, REGISTER NOW!

MP&C Shop Projects

To avoid these ads, REGISTER NOW!
OP
M

MP&C

Well-known member
Joined
Oct 21, 2009
Messages
4,409
Location
Leonardtown, MD
Had an insurance job in the shop, a collaboration with a local collision shop. One of those fancy, old-time looking hearse had a backing up run in with a yellow pole. The mirrors on this thing are on top of fender mounted spare tires, and let's just say they leave a lot to be desired. There is also a backup camera installed in the rear tag frame. So one end of the bumper wrapped slightly around the yellow pole and just barely hit the rear fender. My job was to straighten the rear bumper, which is made from flat polished stainless.


63364b38-181c-451b-a6ee-5b2180cae5be.jpg
(file photo)


f899311e-31d8-4202-b7f0-96158d6771f3.jpg


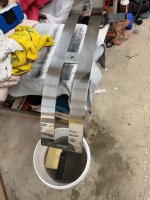
This close up shows how much the end moved.


819275e3-57bf-4502-a884-3a76a58733ed.jpg


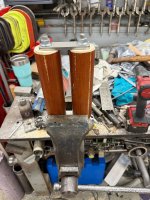
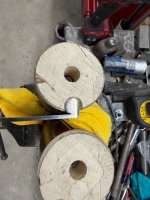
Not having a tree in the yard the right diameter, I opted for some 3" diameter wooden hand rail and some flat strap to make a leverage tool.


43a9b561-c4be-47a7-859f-a3404190c18f.jpg


9de70455-48d2-4cfd-8bdf-3baee136e6d1.jpg


a3aca564-2a5f-4ddf-8175-2c700ef8f854.jpg


This worked well to remove most of the damage, but the end where the vertical rod is welded still wanted to curl outwards. So our tool was modified to hold the rod end, the other hand rail moved over snug, and this held things sufficient to unwrap the end. The relief cut was added using a rounded router bit..


7908bbb9-0b95-4d55-9a7a-d5c8d7c60ac7.jpg


There was a slight crease by the outer mounting bolt, so a suitable punch was made from a scrap 2x4


a29196ad-5534-4030-a25e-5d41f32b753f.jpg


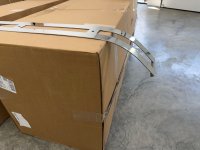
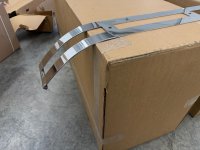
A profile template was cut out of an old shipping box and used to monitor our progress...


a0a0601d-f04b-4dd6-8763-d2a90c89513f.jpg


The damaged end was wet sanded up to 2500 grit and polished out on the buffing wheel to remove any trace of the yellow paint and subsequent scratches.


d6c1f40b-d48f-43d1-9846-9f106f57f09e.jpg


At the collision shop, waiting for the hearse to come out of the paint shop...


83c5756a-6513-4618-a628-54901afd8773.jpg


21865e6d-981b-49ce-9c1a-40661ada6afb.jpg


5c81eda0-3946-4188-b750-e37c0b4bb0e9.jpg
 
Last edited:

PugetDude

ALLIANCE MEMBER
Joined
Mar 13, 2013
Messages
22,593
Location
Superstition Mountains, AZ
How would you go about manually bending a 1x3/16” flat steel bar into a hoop with 22.5” inside diameter without a roller? Bbq project for a friend.
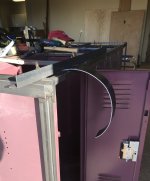
Larry, you can bump a curve that size pretty easy. That is how I did the fenders for the rolling tool bench- 1/8" x4" flat bar. I just clamped a piece of angle to the bench frame and bent it by hand. C4C2BF1D-6C92-477B-84D8-6BCBFB4B70CE.jpegTake your time, and use a radius template to ensure you don't overbend it. I would do it in two halves , calculate the diameter thru the neutral axis and trim each piece to half that length. Allow an extra 4" on each end for the flats that get trimmed off.
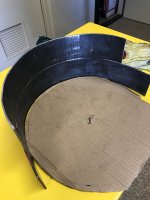
Good luck. Post your progress. 201F5F05-3024-42D8-951D-89B3C9C6B268.jpegSorry for the thread hijack, Robert. We now return to our regularly scheduled excellence.
 
OP
M

MP&C

Well-known member
Joined
Oct 21, 2009
Messages
4,409
Location
Leonardtown, MD
@larry4406 the “leverage” tool that I used to take out the incorrect bends was also used to add the correct ones back in. It’s nowhere near as consistent as a slip roll, but you’re welcome to try it out if you think it would do the trick

Sorry for the thread hijack, Robert….

More insight is a good thing
 
To avoid these ads, REGISTER NOW!

RifleA

New member
Joined
Sep 1, 2012
Messages
2
Location
Southern New Jersey
We went to the show about three years ago, very impressed. Even got in a tour of the plantation while we were there.
Robert, any update on the wagon? Is the milk truck still in the queue?
I‘ve been following this thread for a few years now and have reread it several times, learning something new with each pass, thank you for sharing your incredible skill set. I hope all is well with you and your family.
 
OP
M

MP&C

Well-known member
Joined
Oct 21, 2009
Messages
4,409
Location
Leonardtown, MD
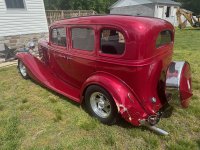
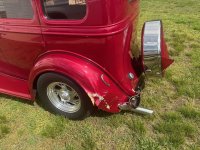
Just to share our collaboration with a local collision shop on the insurance repair job on a 33 Chevy Master sedan, here we see the pitfalls of driving a vintage vehicle amongst the crazies. This car has been owned by the same family for decades. Their family travels twice a year the 3-1/2 hour drive to Ocean City, MD and back. On their last trip they had stopped for a red light, as had the car behind them. The next car back did not. The car in between was totaled, and this one needs a bit of work. One of our local collision shops is on the hook for the paint job/repair and the shop owner reached out to me to do the metalwork.


dced8fc3-a3c0-4817-ab66-6164669e64db.jpg


19f7634a-eacb-494b-bd1c-7473ab984179.jpg


c1205df7-4bfb-4089-b2b0-d2e90efcbf50.jpg
 
OP
M

MP&C

Well-known member
Joined
Oct 21, 2009
Messages
4,409
Location
Leonardtown, MD
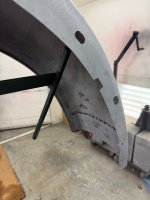
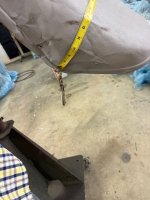
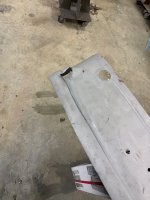
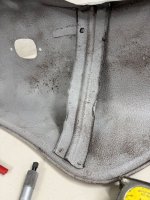
We had the tail pan and two fenders media blasted to get a better view of what we had to work with. Both fenders were bent up, although the drivers side took the brunt of it. There were some previous repairs to the running board attachment area that we'll address while we're here. These pics are after some hammer work to rough out the damage and get a better sense of where to proceed.


3109d90d-ffae-4434-9641-0c1b44bf1751.jpg


d4a41c26-97d2-4f4f-a8d1-7c8bcfcd3557.jpg


cc8f805d-f864-41c2-9509-1a1741d5395e.jpg


a6d0efbb-56a2-4b46-8bcd-45e800963563.jpg


ace637af-6642-4ea7-84a7-647c31fd49ca.jpg


c495a404-4efa-45b9-85ce-73c316ec8d1b.jpg


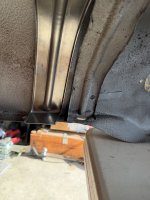
The fender brace for the passenger side had been hit with a tire chain or perhaps a retread that let go, and the driver's side was in pieces from the collision.


9e332369-b50b-472d-947b-c0195b7a5fc4.jpg


503c6d28-7bc8-4117-8d2d-eb1cab48f38c.jpg


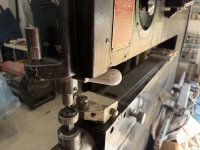
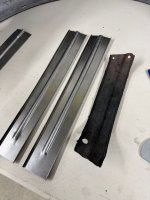
Time to make some parts. Beading dies in the Lennox...


31c8f902-e372-4a4c-8464-4b964630c7c0.jpg


We found it better to run the bead in the flat first and then add the side folds on the press brake, the next pic was a test run.


ab9ef95b-09af-49cd-9356-0787f0bca632.jpg


4bda1747-9691-49dd-a01a-0cb955e1c453.jpg


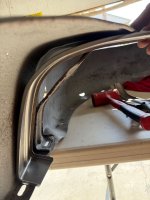
Where the originals have two bends, we thought a gradual curve that better matched the fender would give us more room for tires. This "roll" calls for a bead roller die in the wheeling machine, and some like sized spacers were used to support the brace across its width.


44de1f33-69c7-4304-ac7b-7aafe8957f96.jpg


ec93f6fb-c38c-4220-9985-6c653883f8e0.jpg


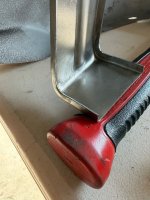
Then the right application of leeverage...


f2fb82d7-309a-43cc-9ced-f0cca42daf4c.jpg


test fit...


1297bc81-1224-42d7-8229-1a16182f4350.jpg


This design shows a bit more tire clearance....


fc95c1df-8629-4029-8dd6-43ebca832e59.jpg


17b29699-5b96-4ef1-80d0-b44843cf0be2.jpg
 
OP
M

MP&C

Well-known member
Joined
Oct 21, 2009
Messages
4,409
Location
Leonardtown, MD
Thanks for the comments!

And here's the benefit of posting pictures online of your work. Ted (tb33anda3rd on the HAMB) had seen pictures of the rear fenders and reached out to see if we needed any other parts. He put me in contact with someone who had an original tail pan. It has a couple of minor repairs, but for 93 years old was pretty straight and solid, much better than the ripped sample we had.


0a0b67f5-ceb1-4897-9727-c839d40fe7f5.jpg


63f53027-10bd-4370-bcc9-cd65e0475908.jpg


The smack in the rear end didn't bode well for the exhaust hangers either, the rubber isolators had ripped


0b41b1f0-20ab-4b43-a3f9-95bc648614ef.jpg


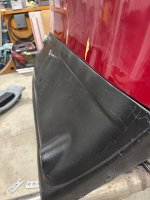
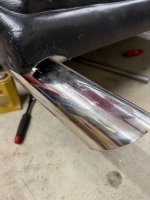
So the hangers were replaced and the tailpipes pulled upward a bit so we could add some relief openings for a more finished appearance.


77b4e2c0-a90e-4b6e-b66a-e1656501c41f.jpg


0ec8428e-93da-4b86-9bba-2f08d106e312.jpg


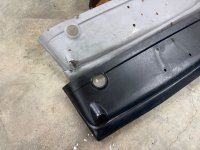
This "anvil" was fabricated to add the cutouts in the tail pan. The notch provides relief area for the side flanges while hammering the opening.


d480ce19-2b56-46b6-880e-16e5118df76f.jpg


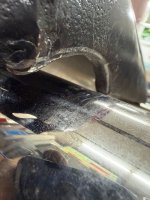
For the long chrome tips, I think this makes it look more finished and less an afterthought.


54b2a323-71b9-43fb-a9fb-6613e3fc0269.jpg


We turned in about 5/16 to add some strength across the opening. Still needs a bit of fine tuning.


a40ce18f-13c1-479a-bac9-00bf15c698b8.jpg
 
To avoid these ads, REGISTER NOW!
Top Bottom