To avoid these ads, REGISTER NOW!

MP&C Shop Projects

OP
M

MP&C

Well-known member
Joined
Oct 21, 2009
Messages
4,396
Location
Leonardtown, MD
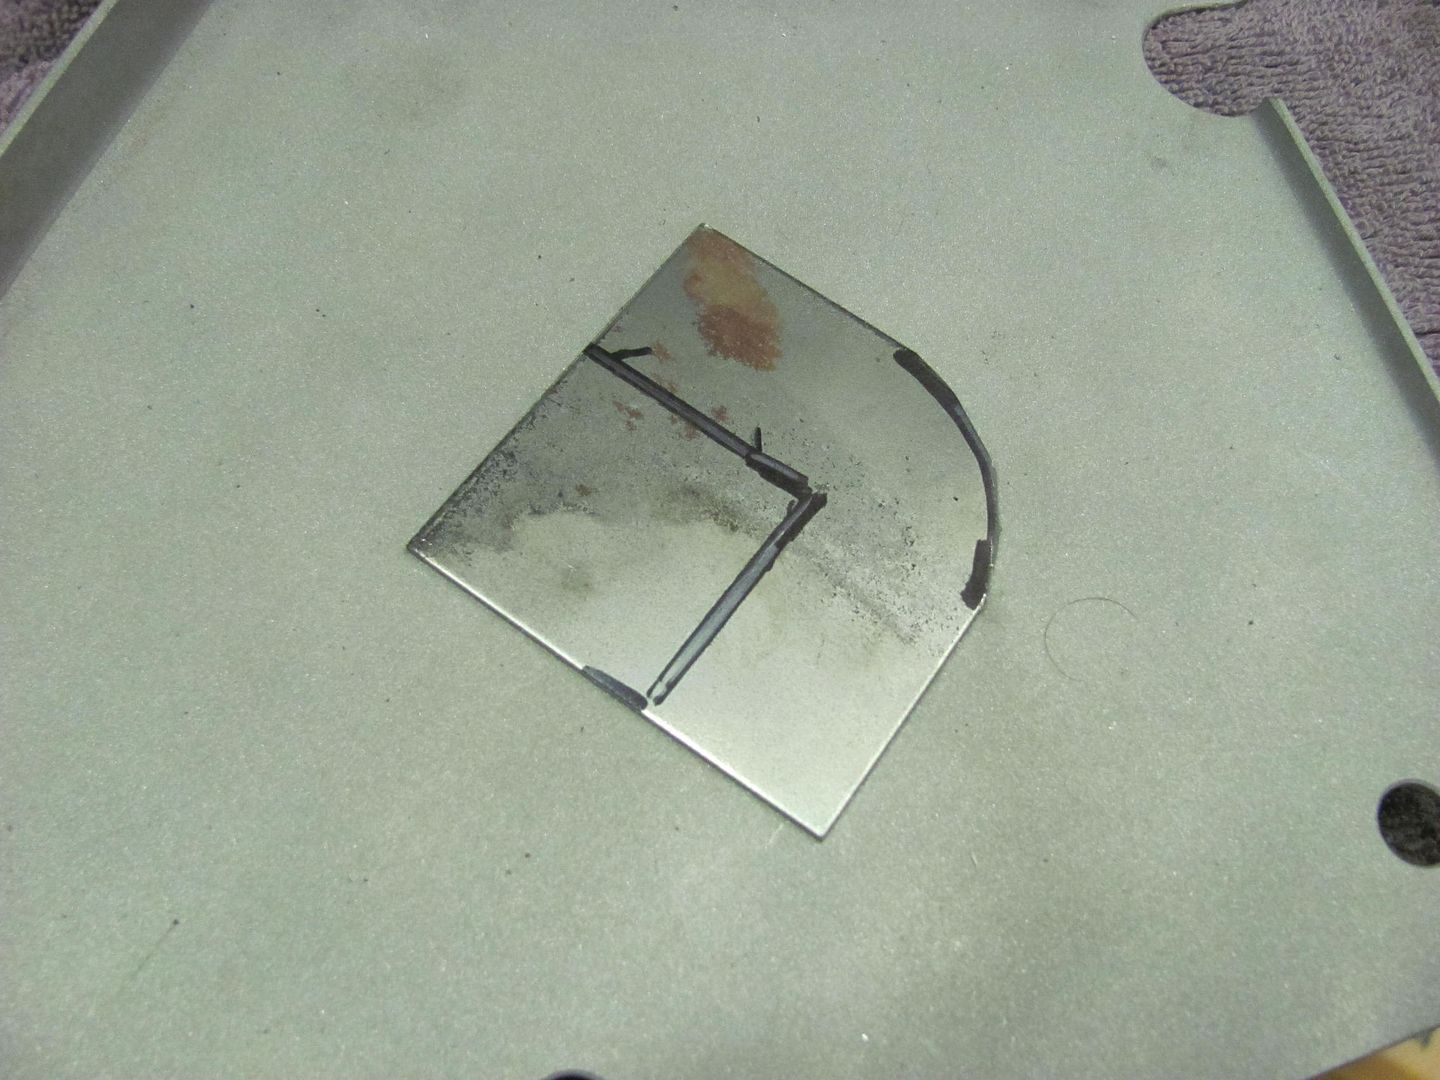
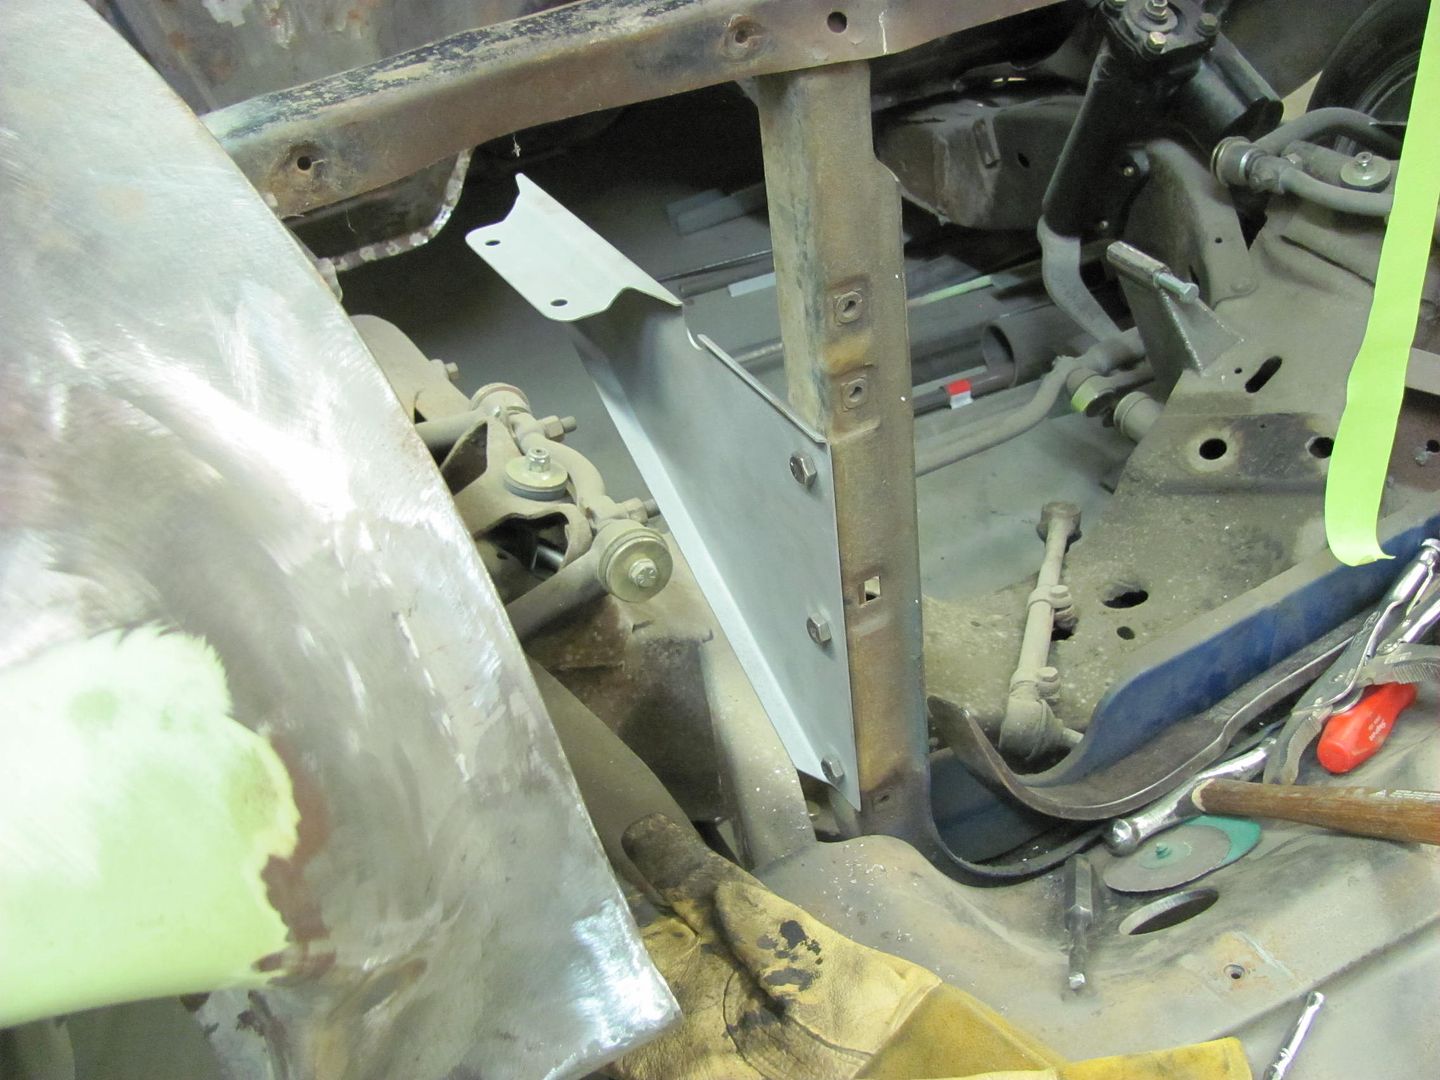
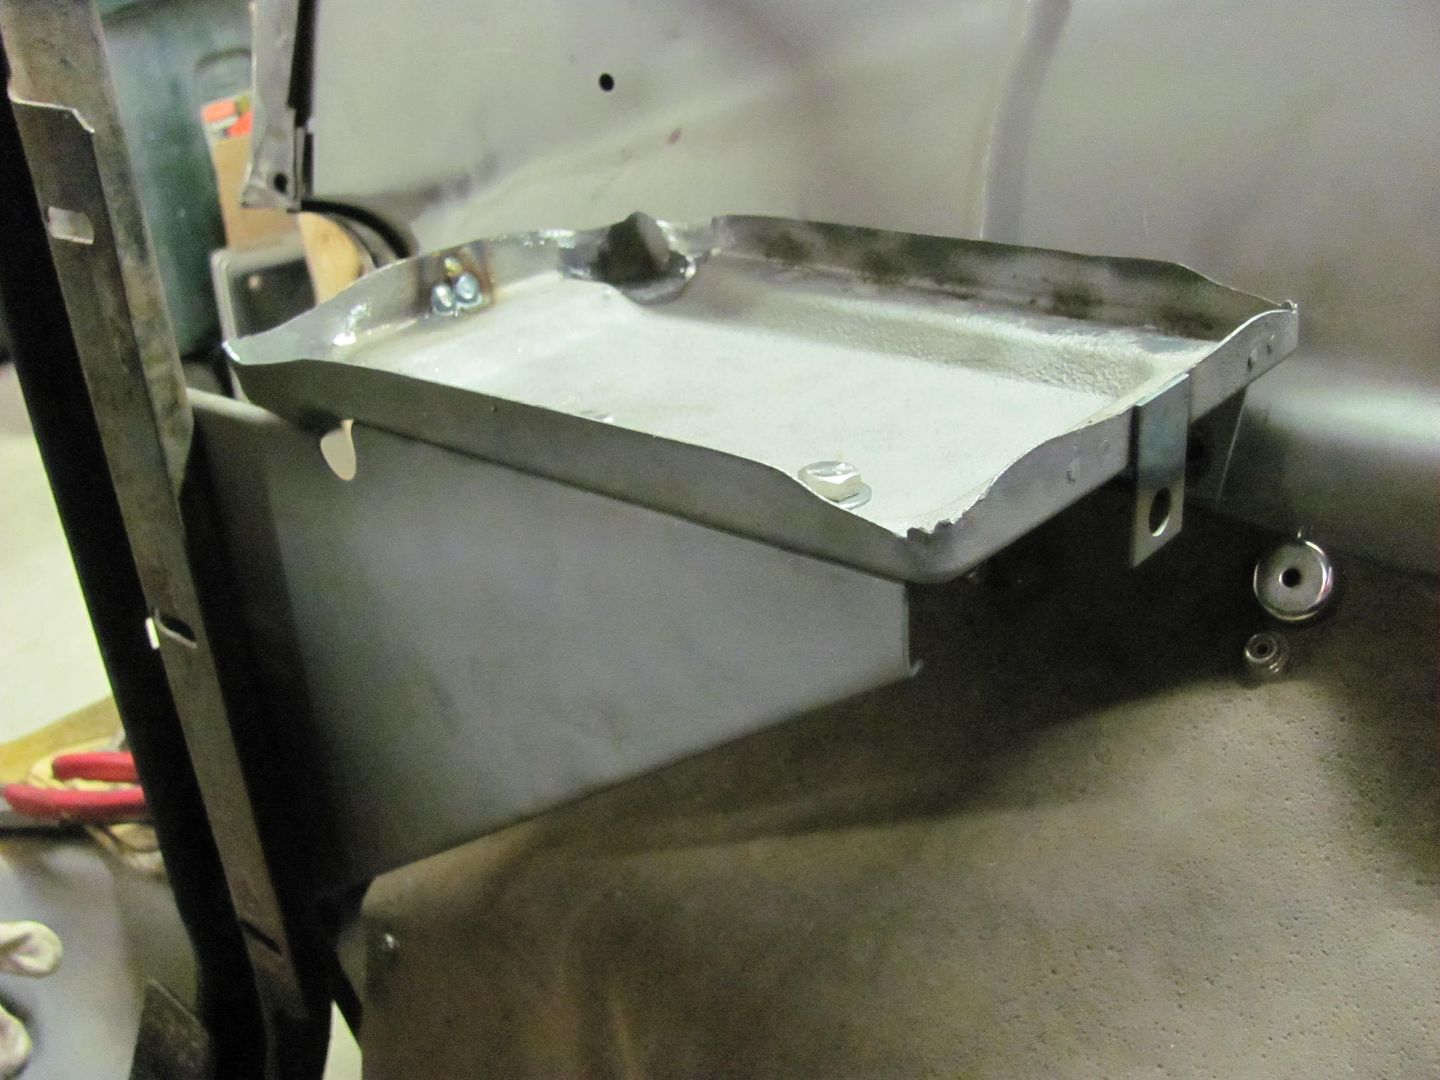
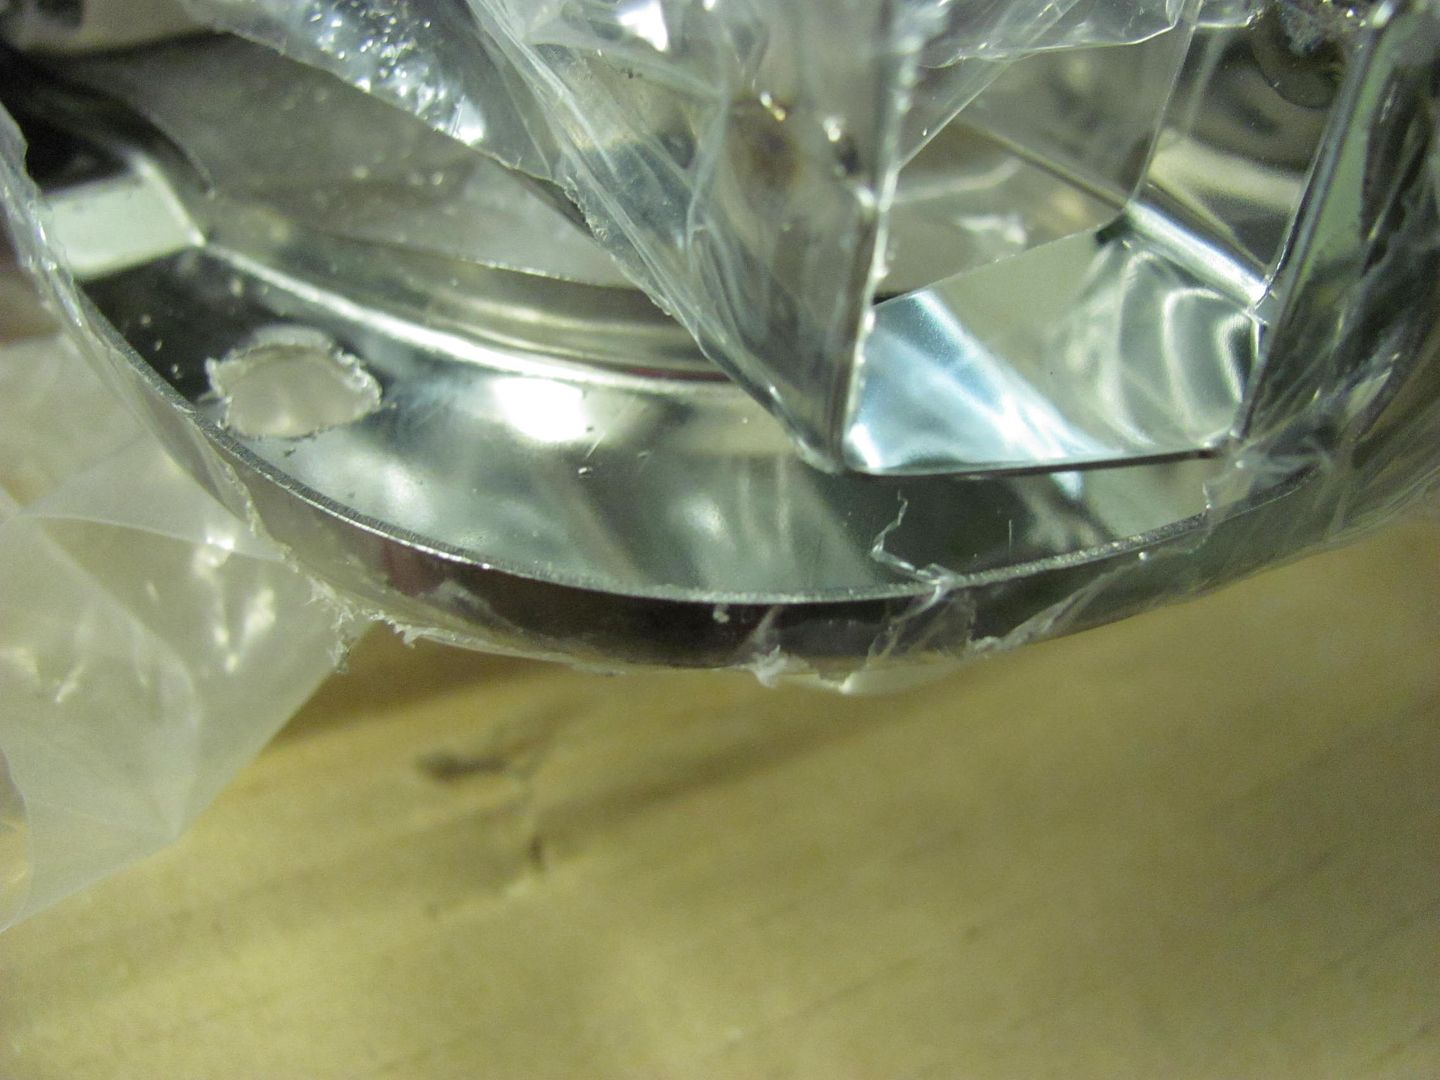
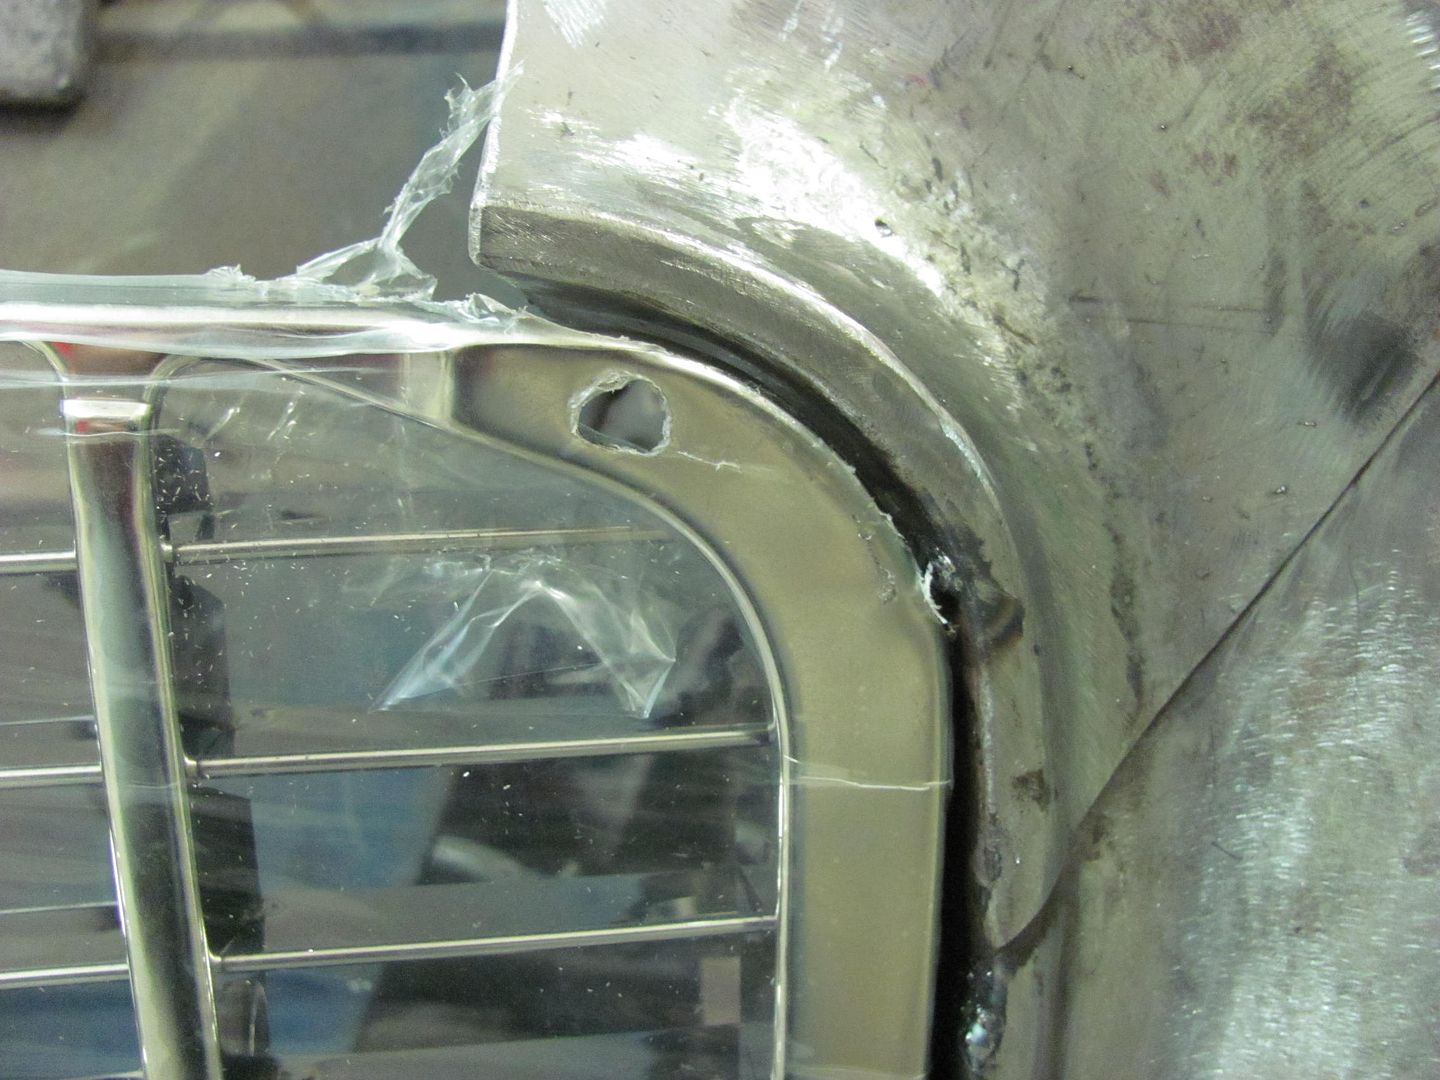
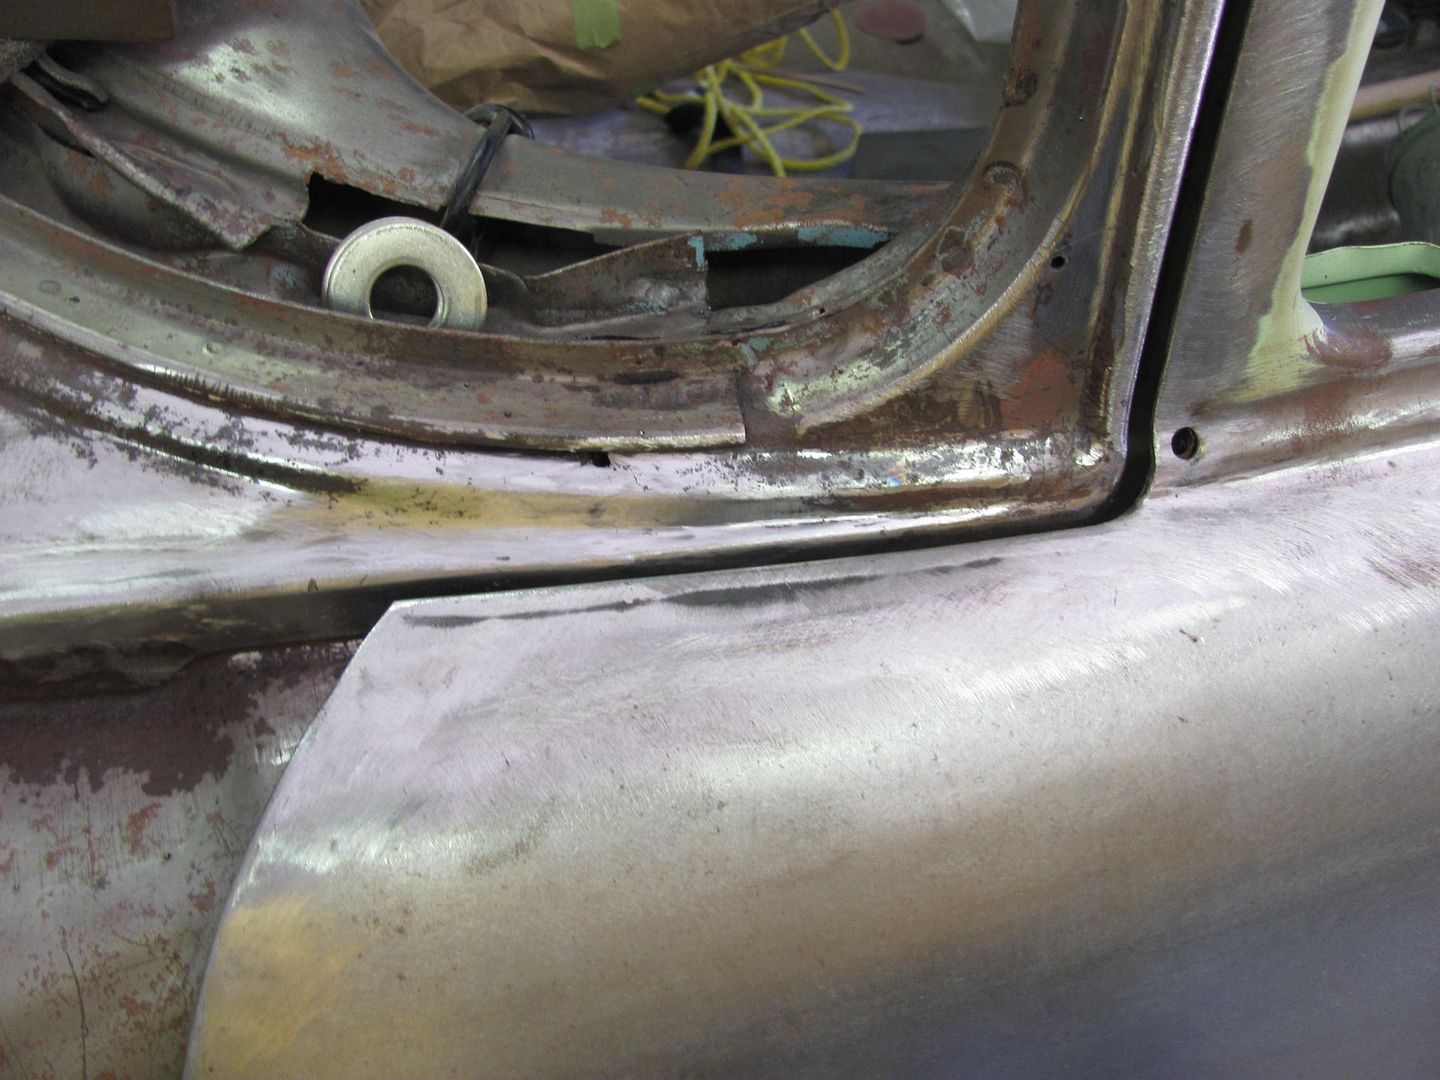
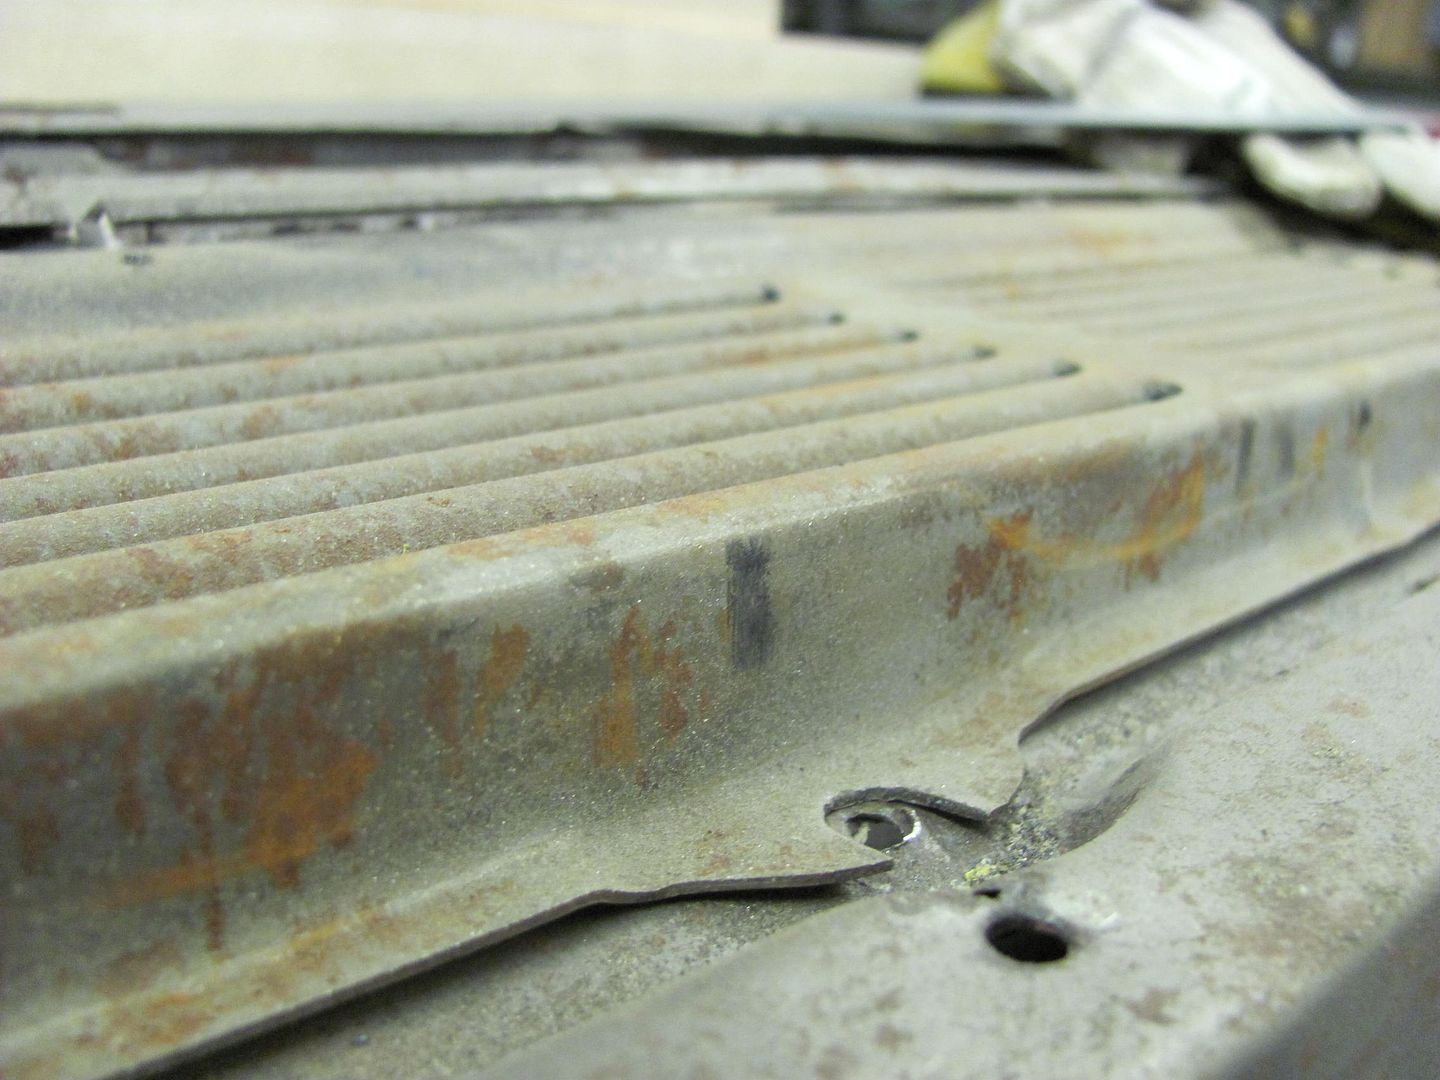
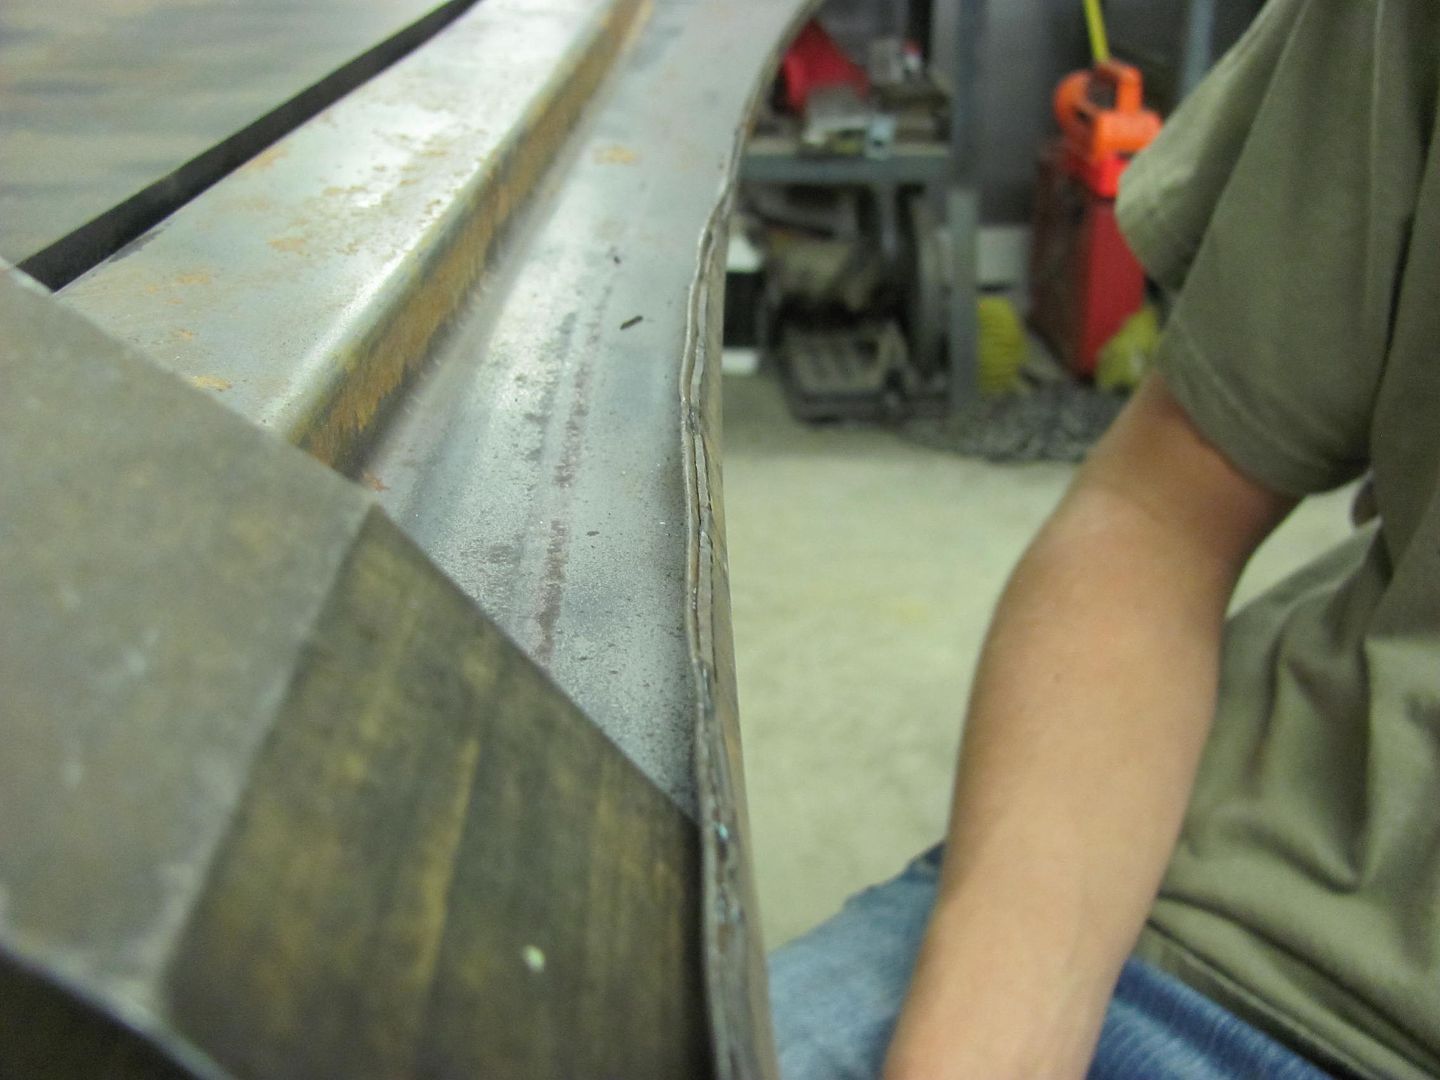
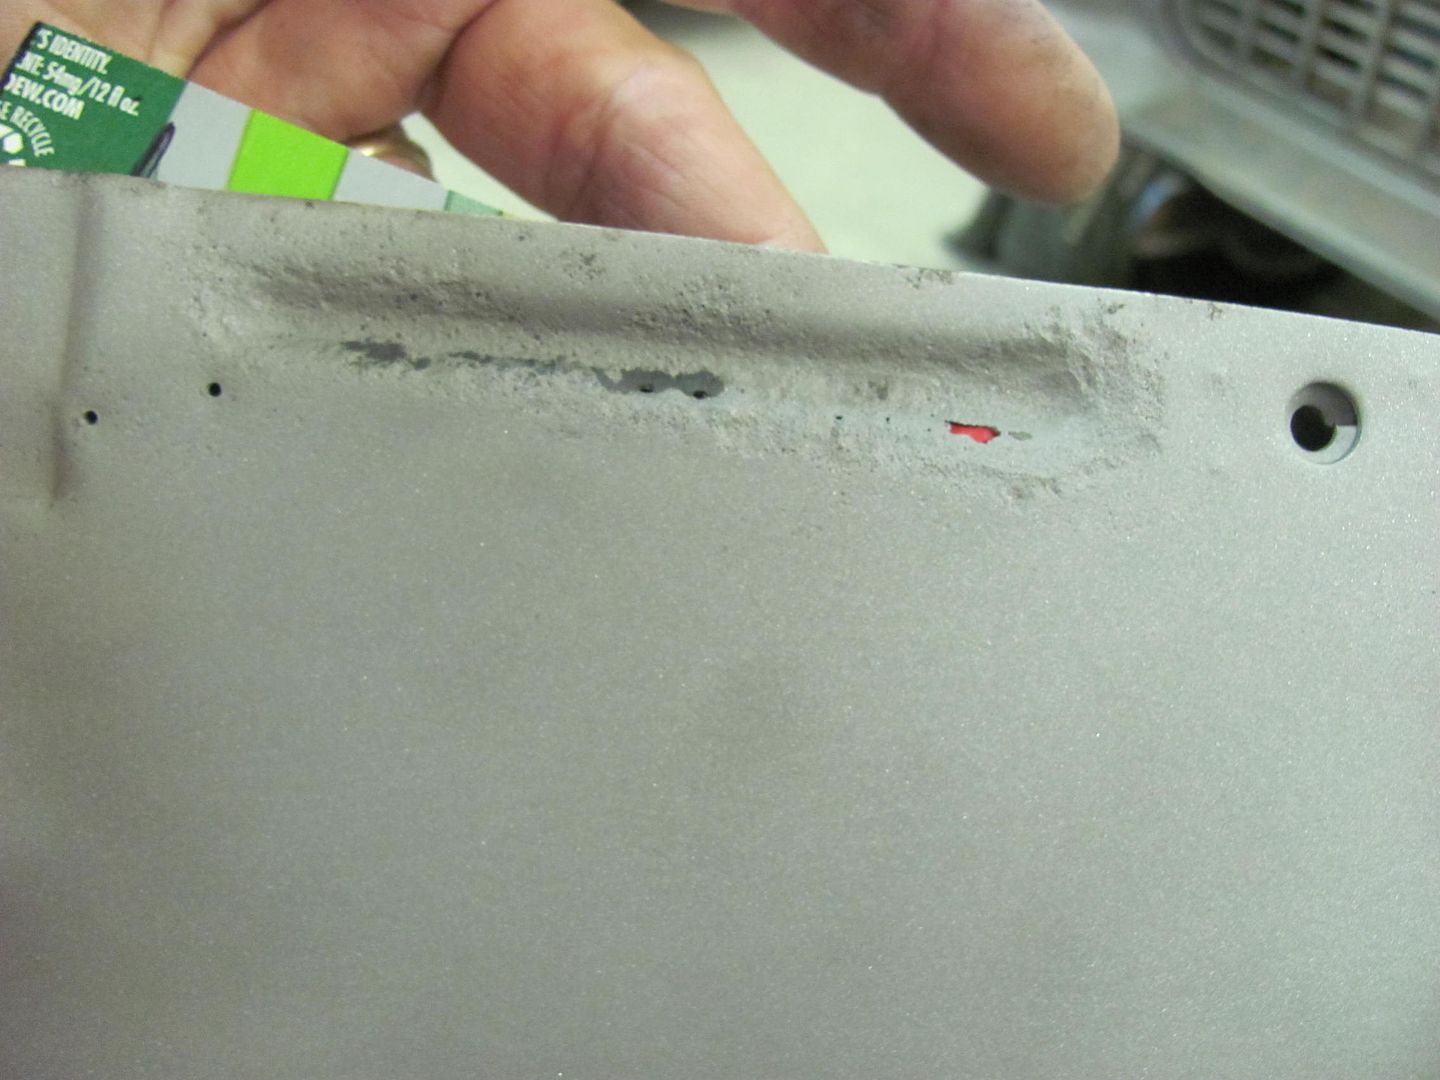
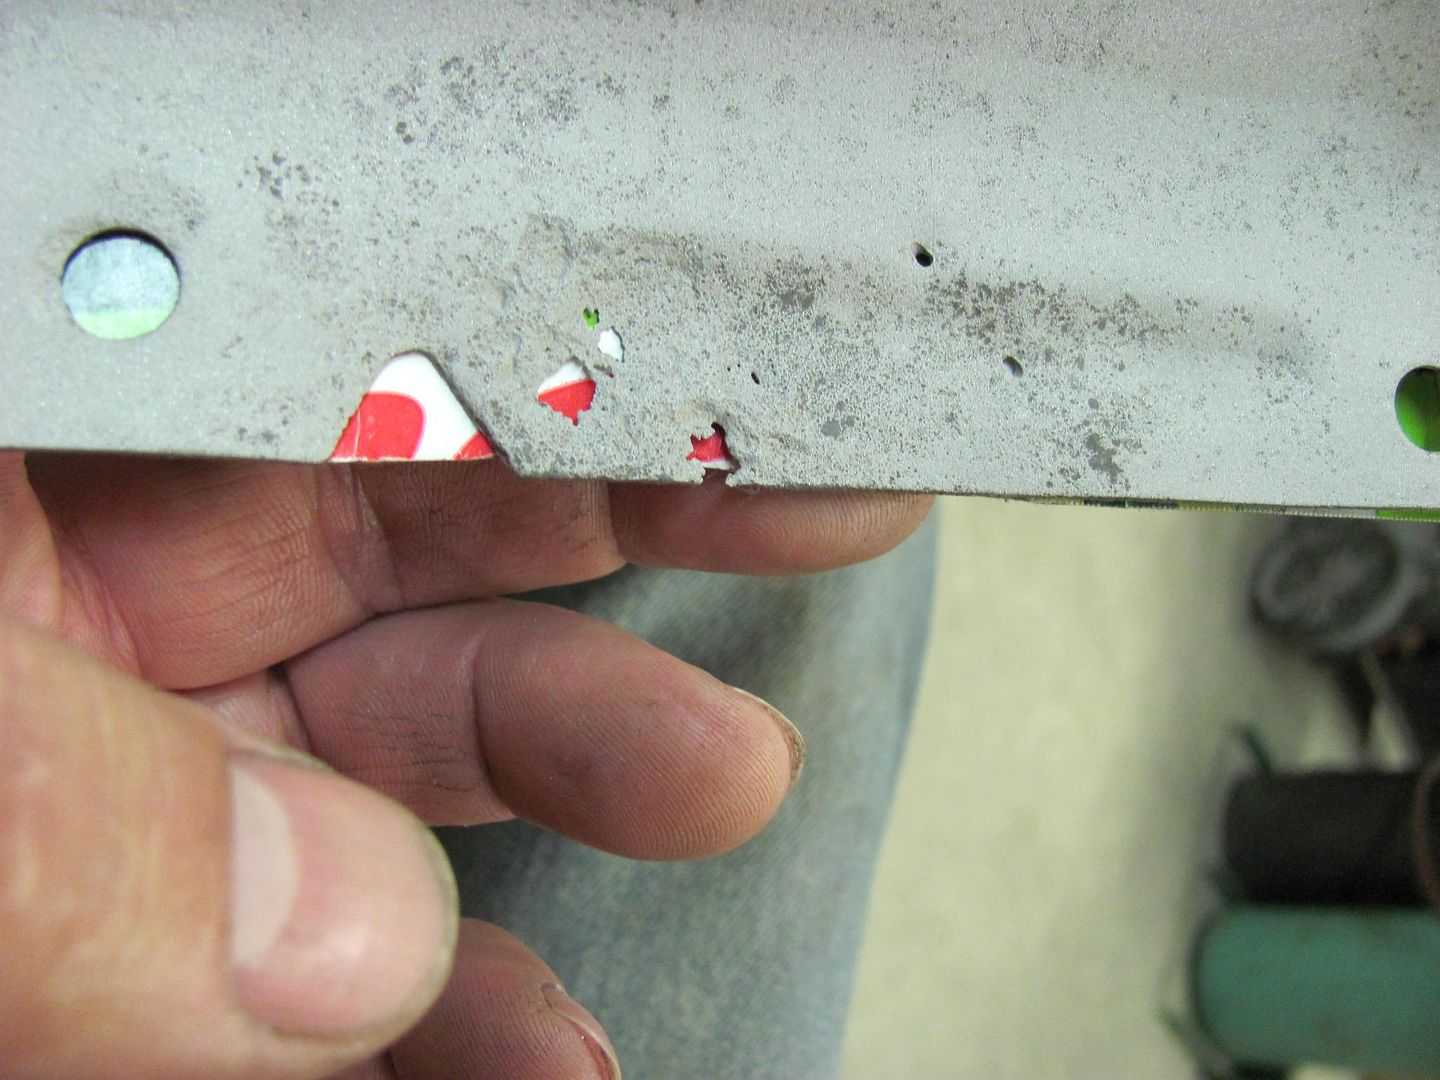
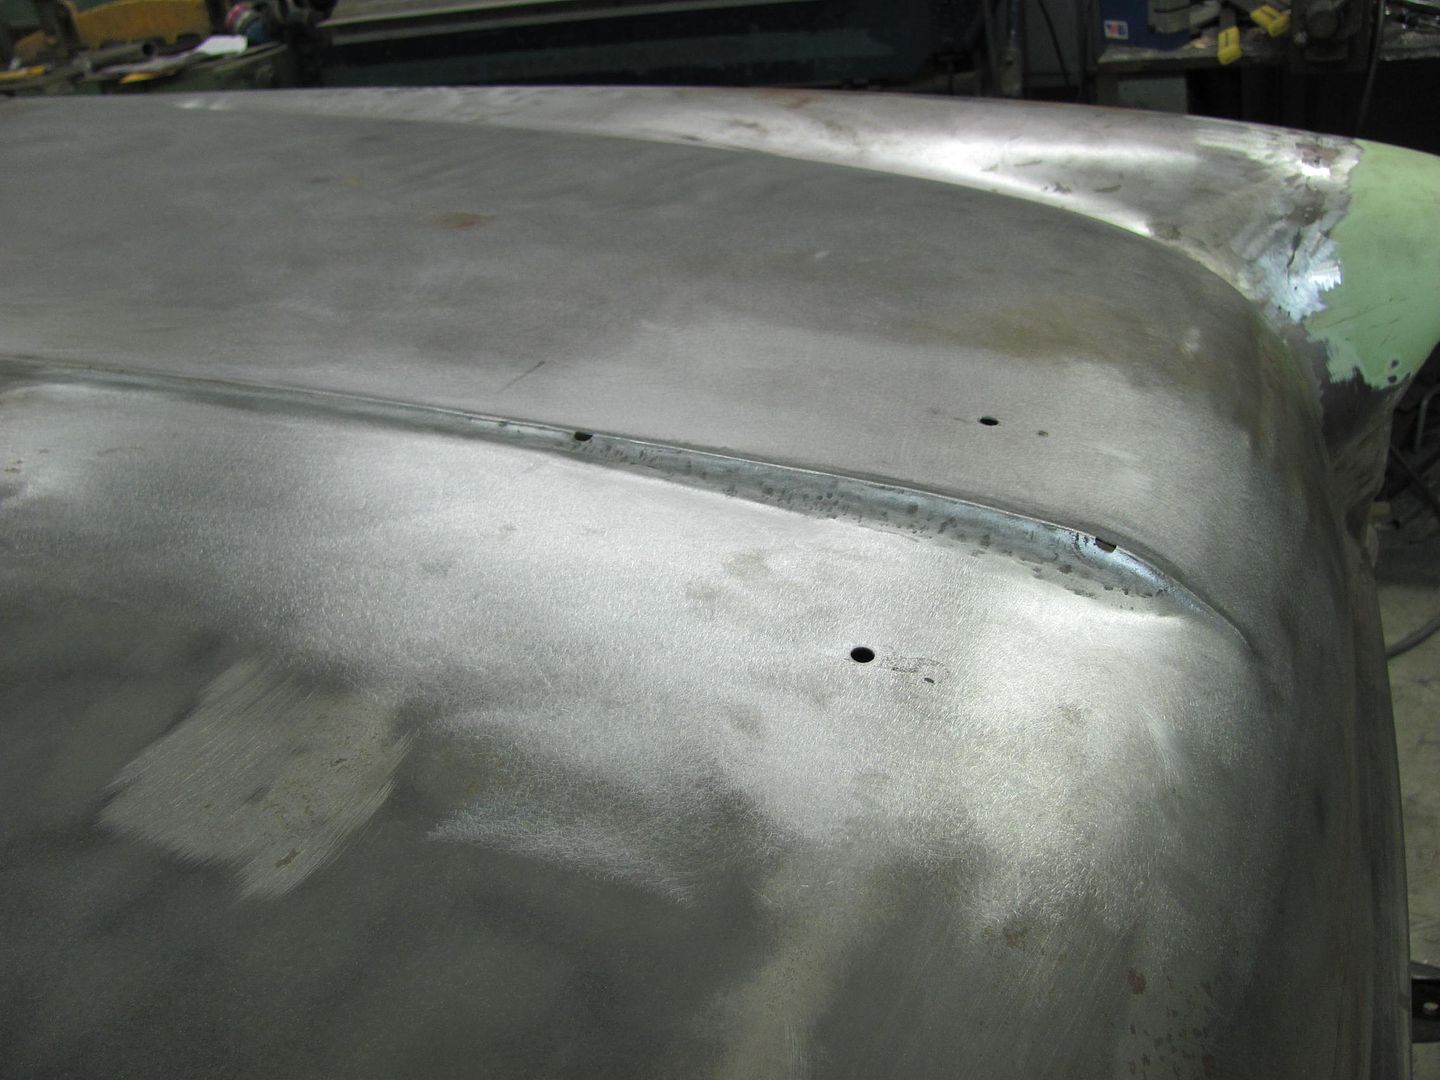
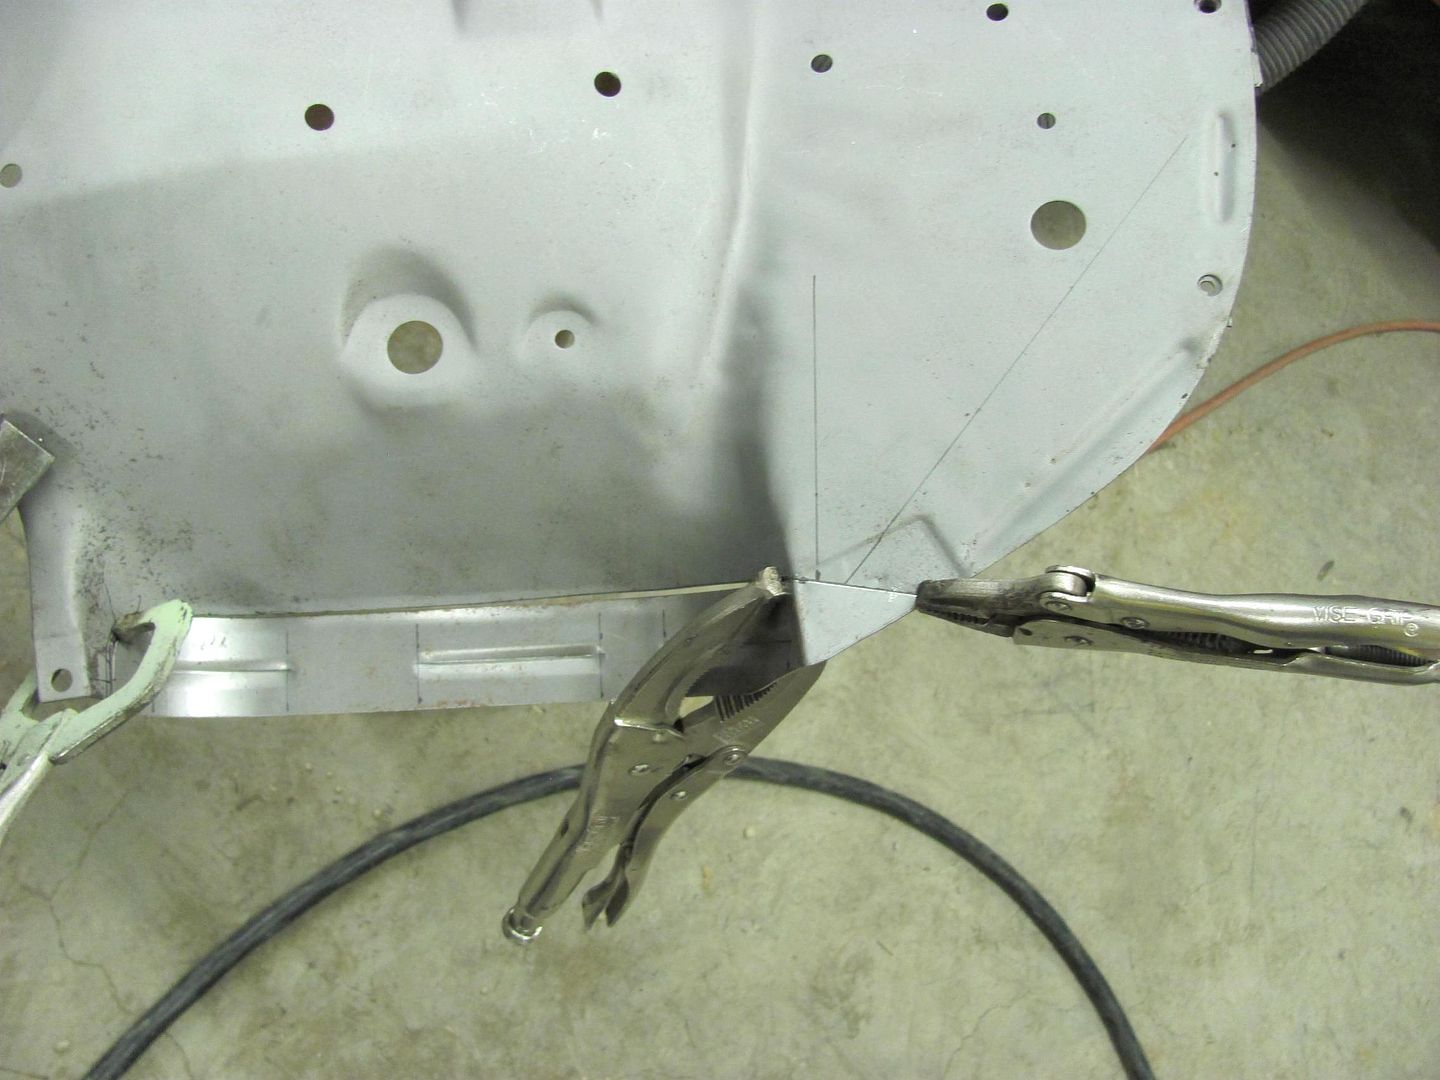
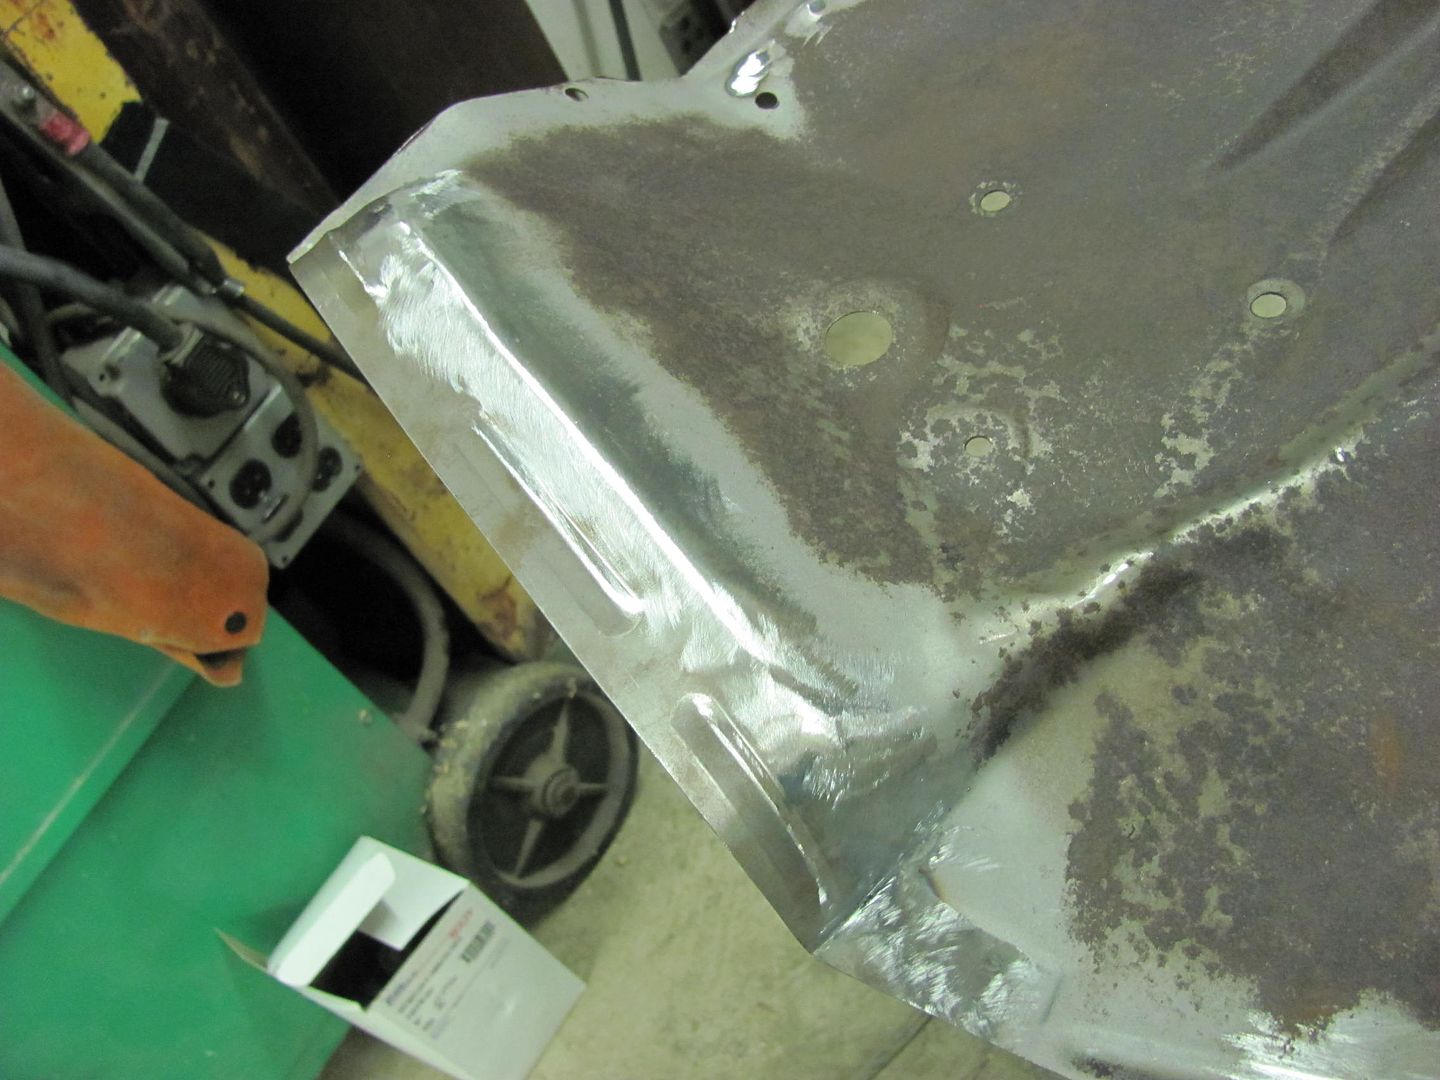
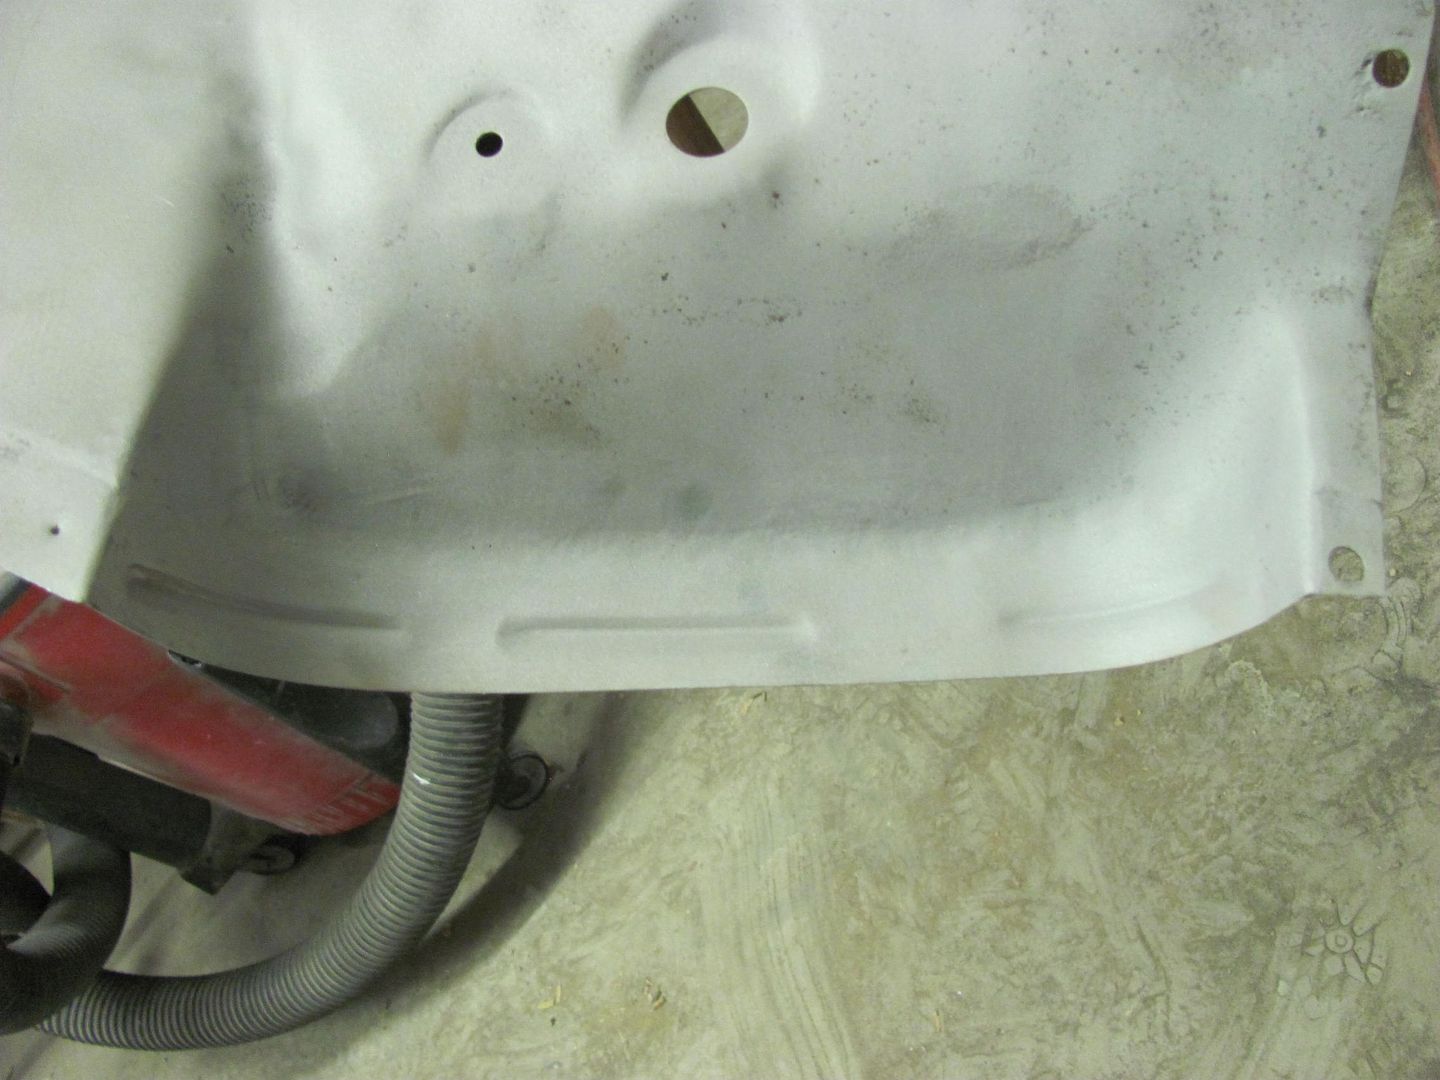
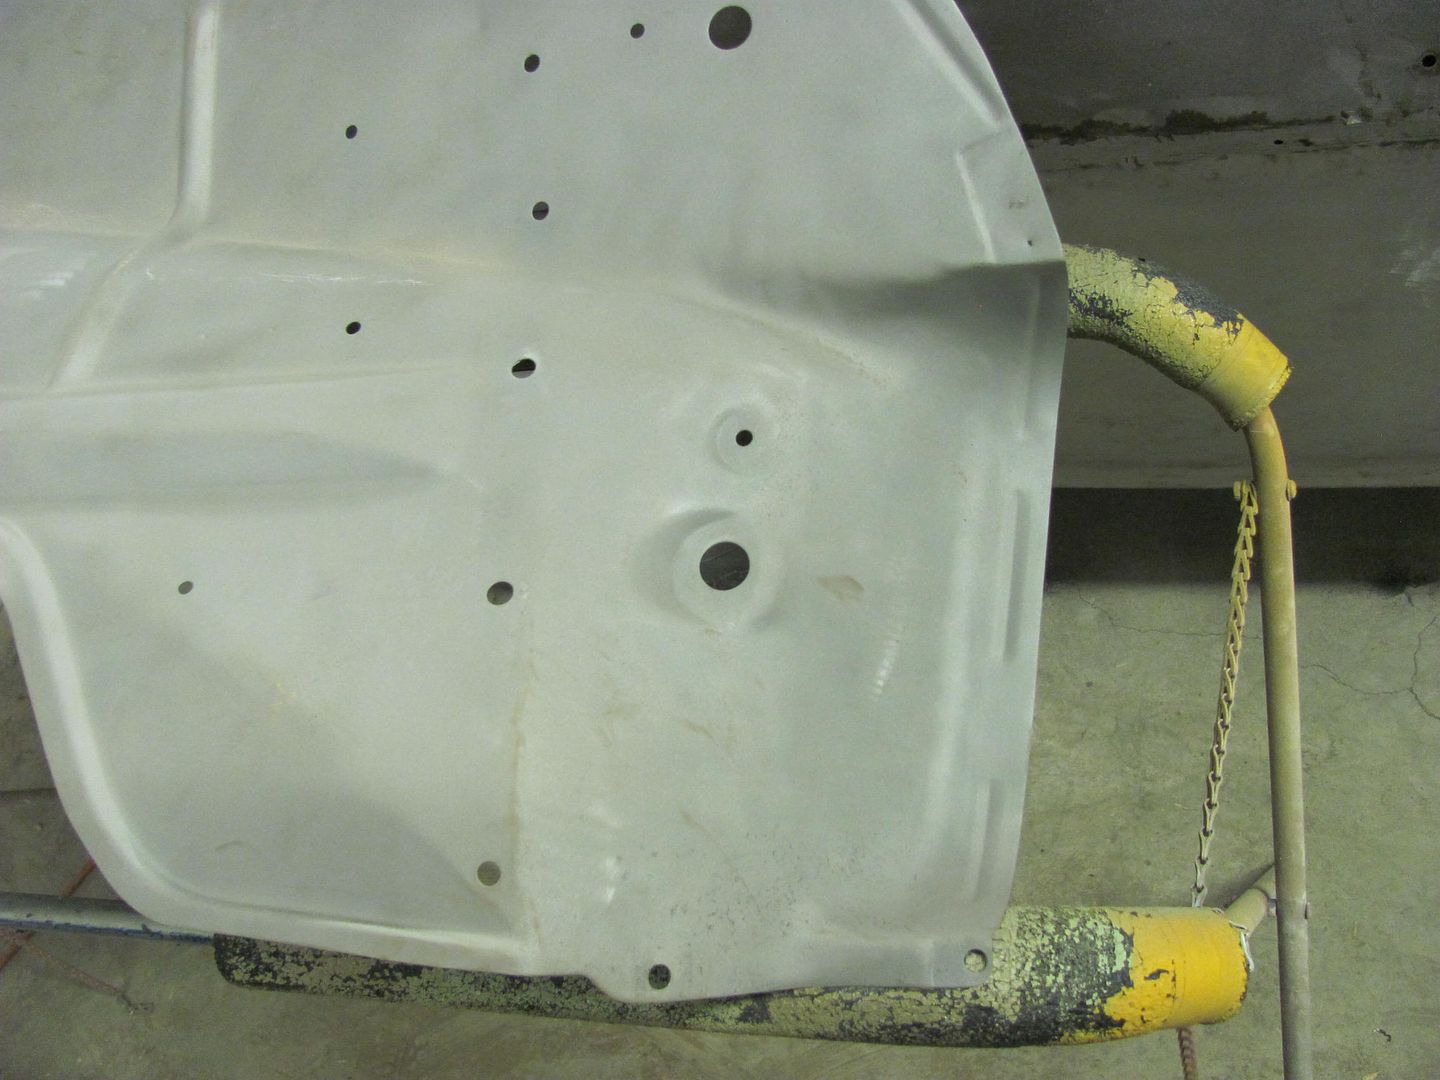
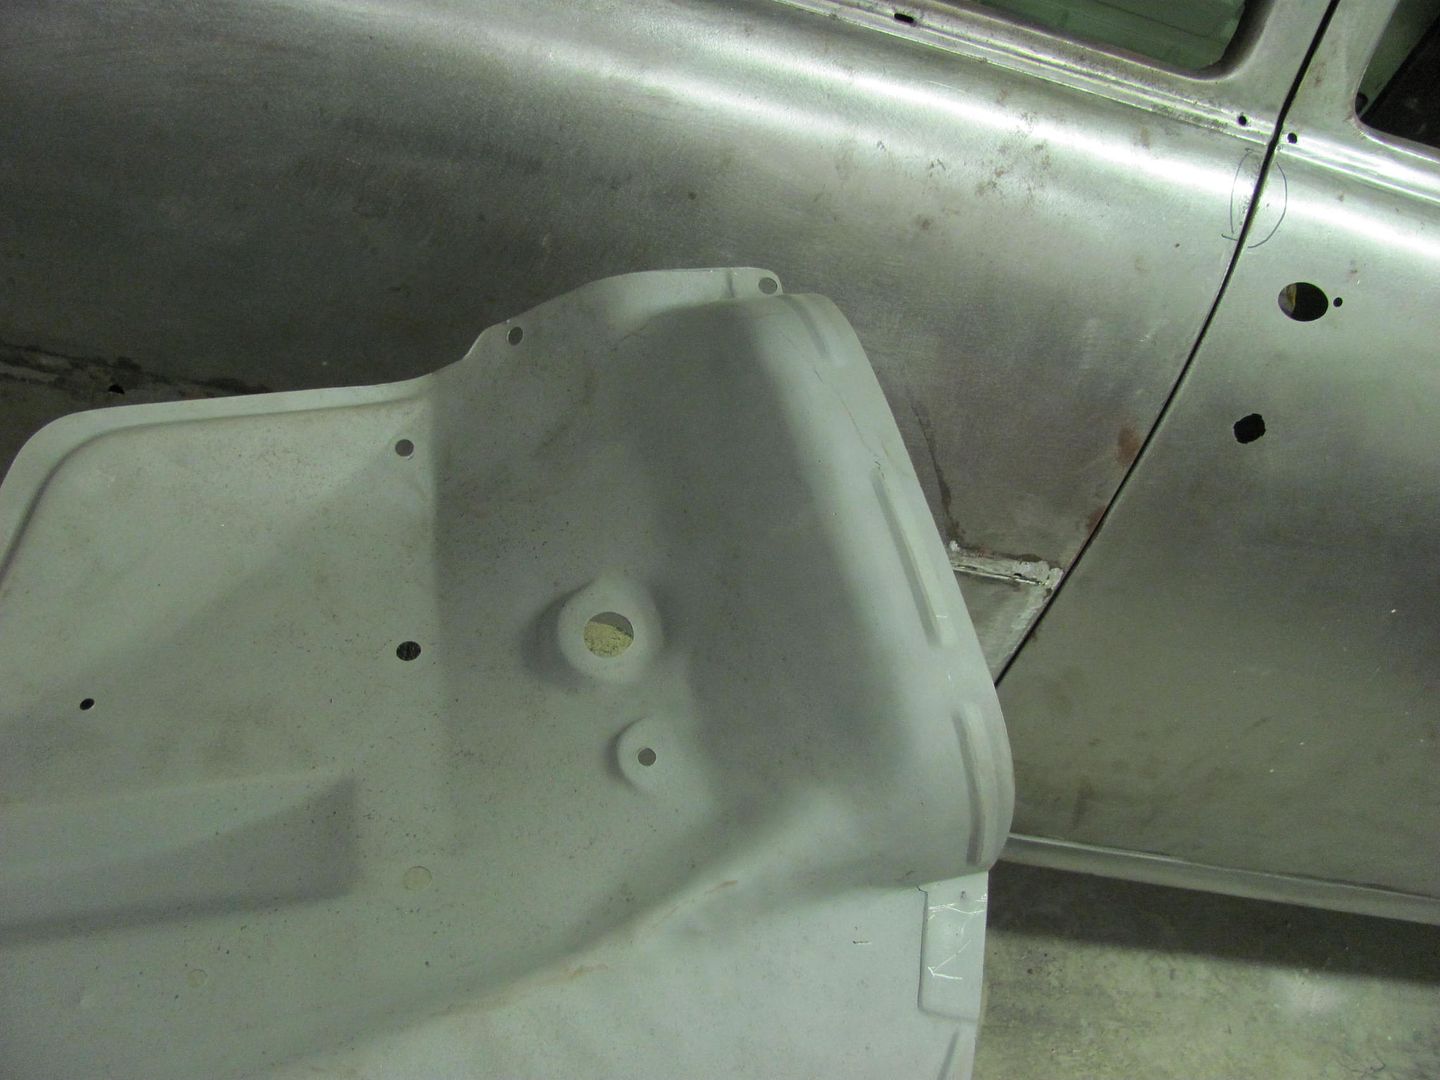
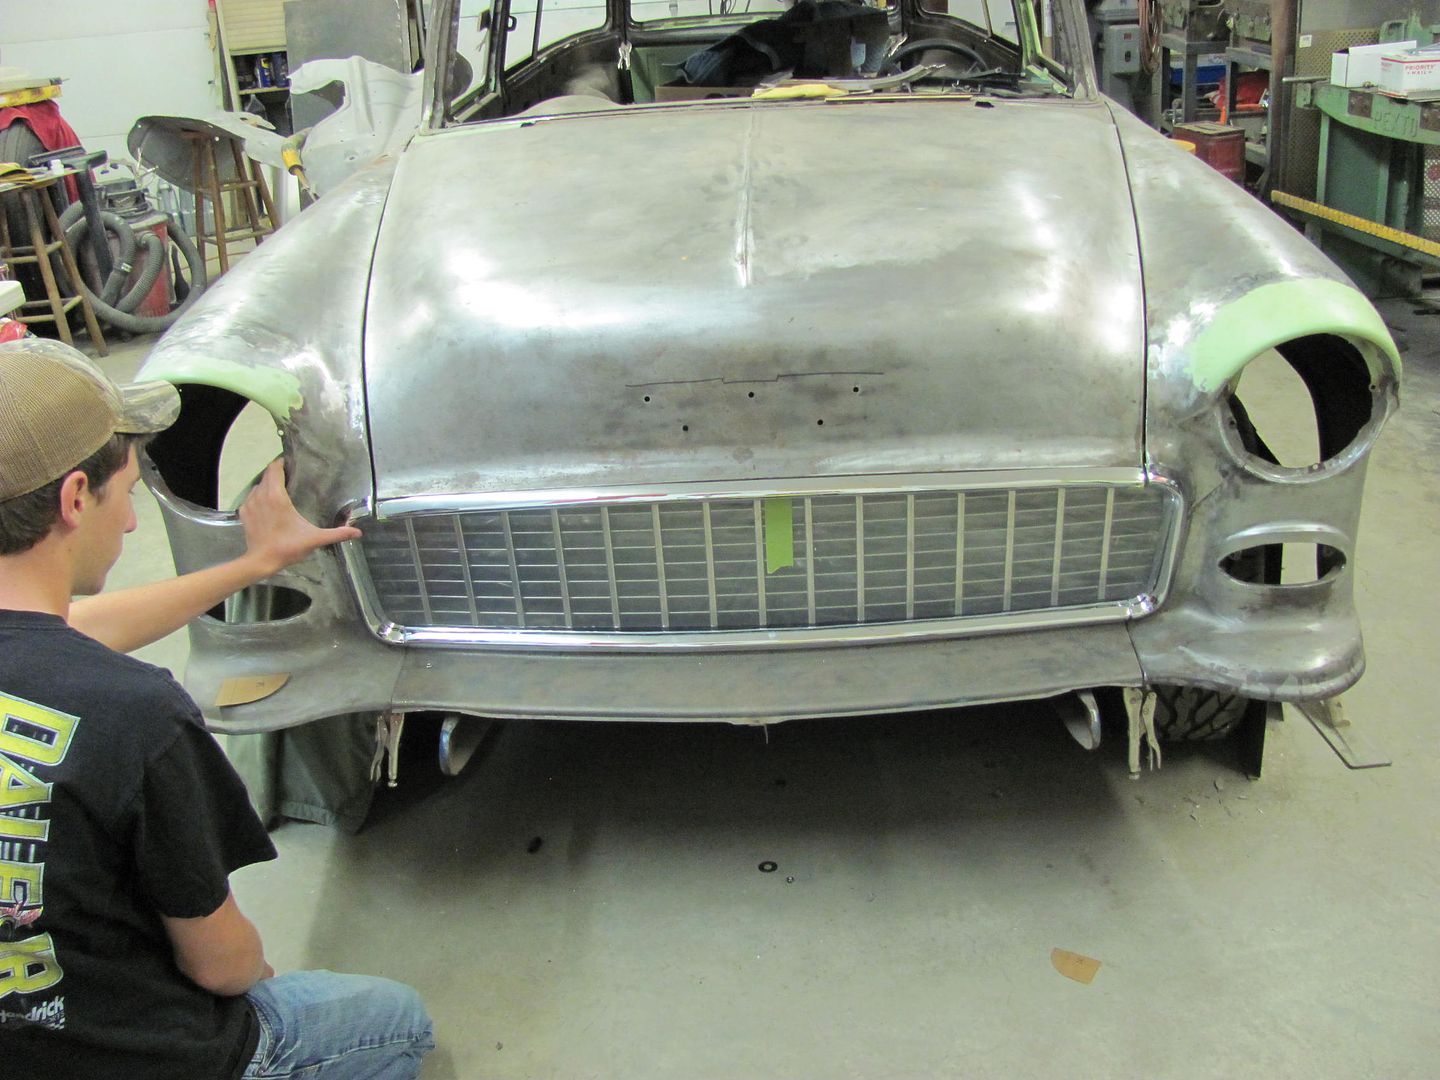
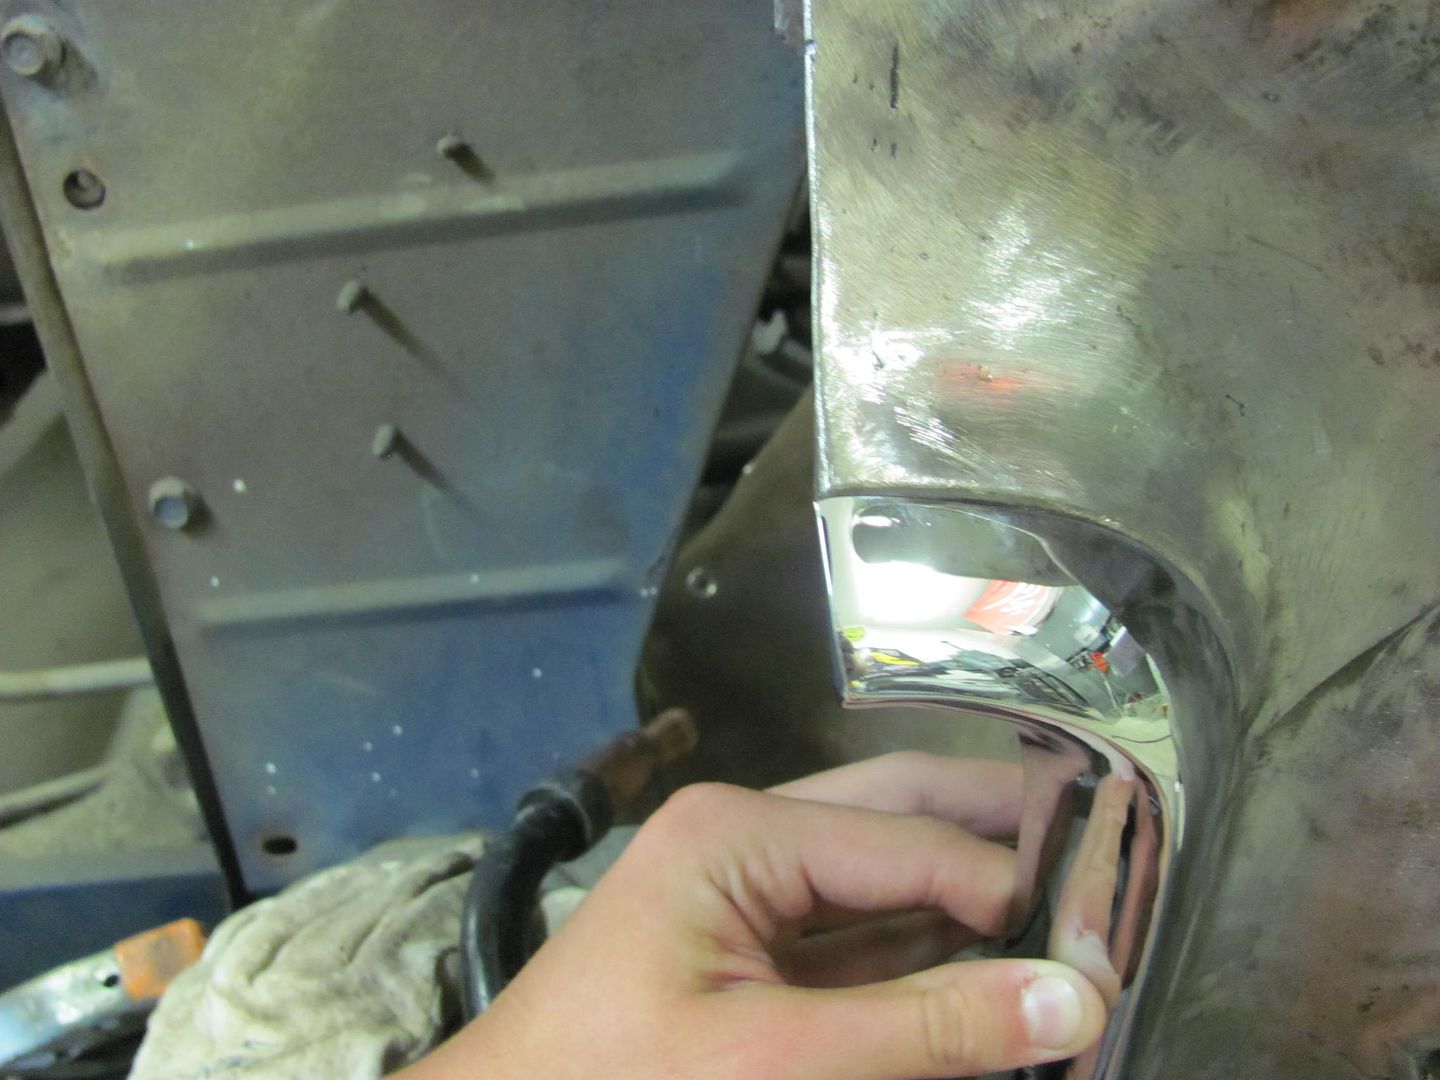
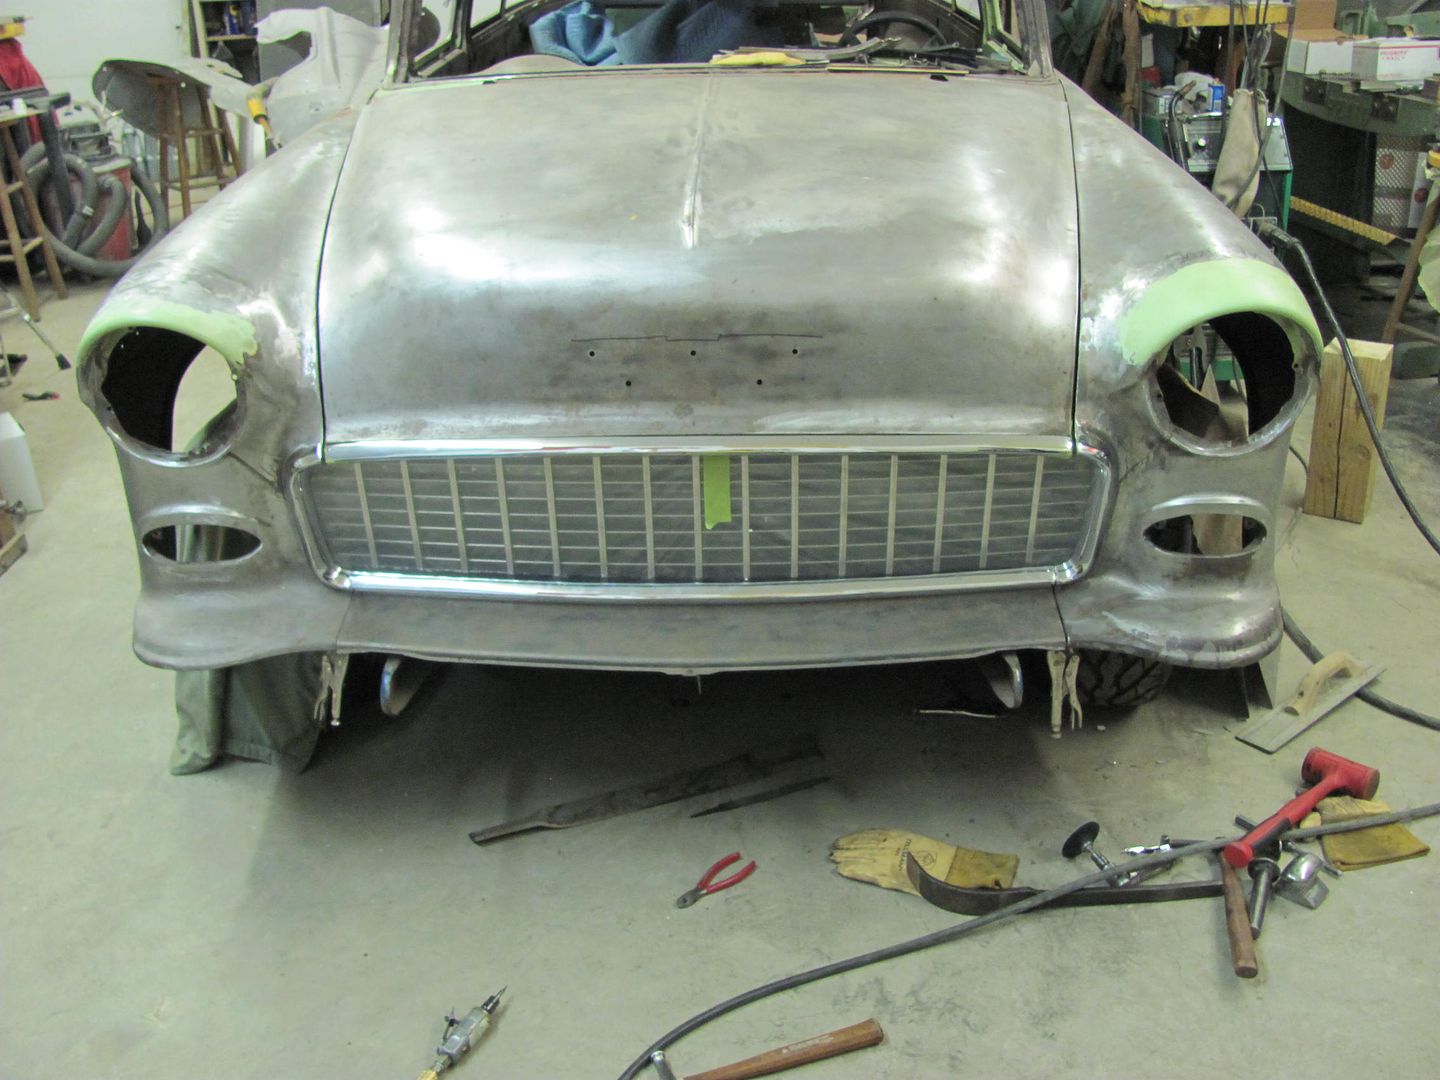
While I was finishing up the paint on the English Wheel, Kyle stripped the driver's inner fender. This one has the same issues in the front as well as a spot up top where the flange of the fender had some rust issues we previously repaired..

Picture1157.jpg


Picture1156.jpg


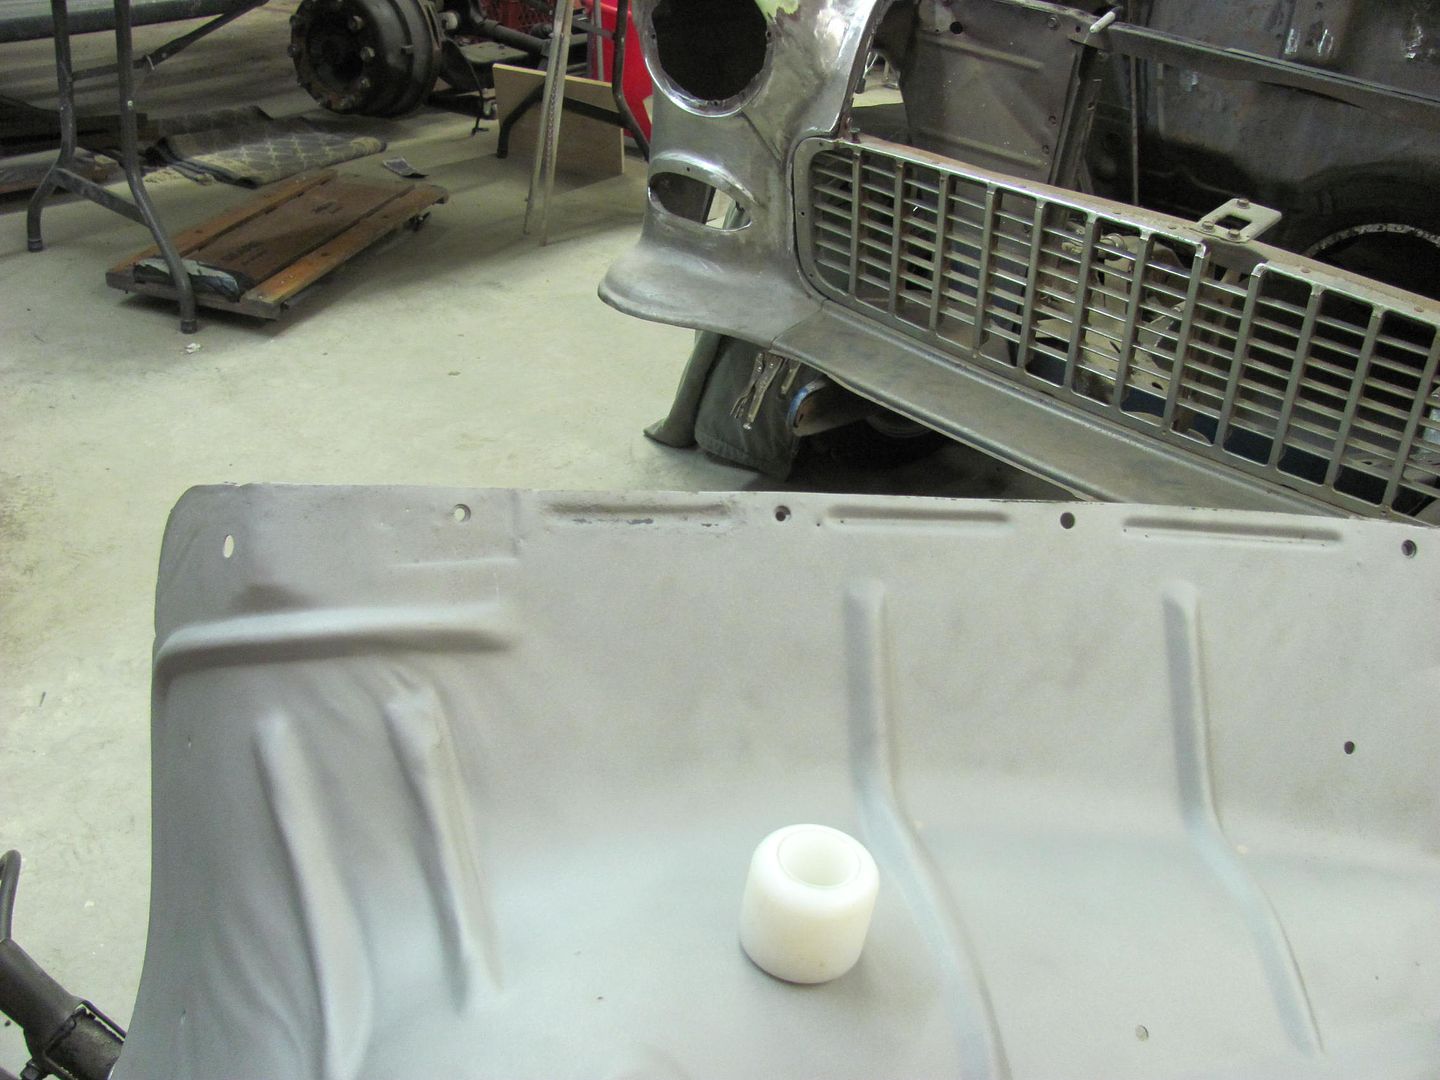
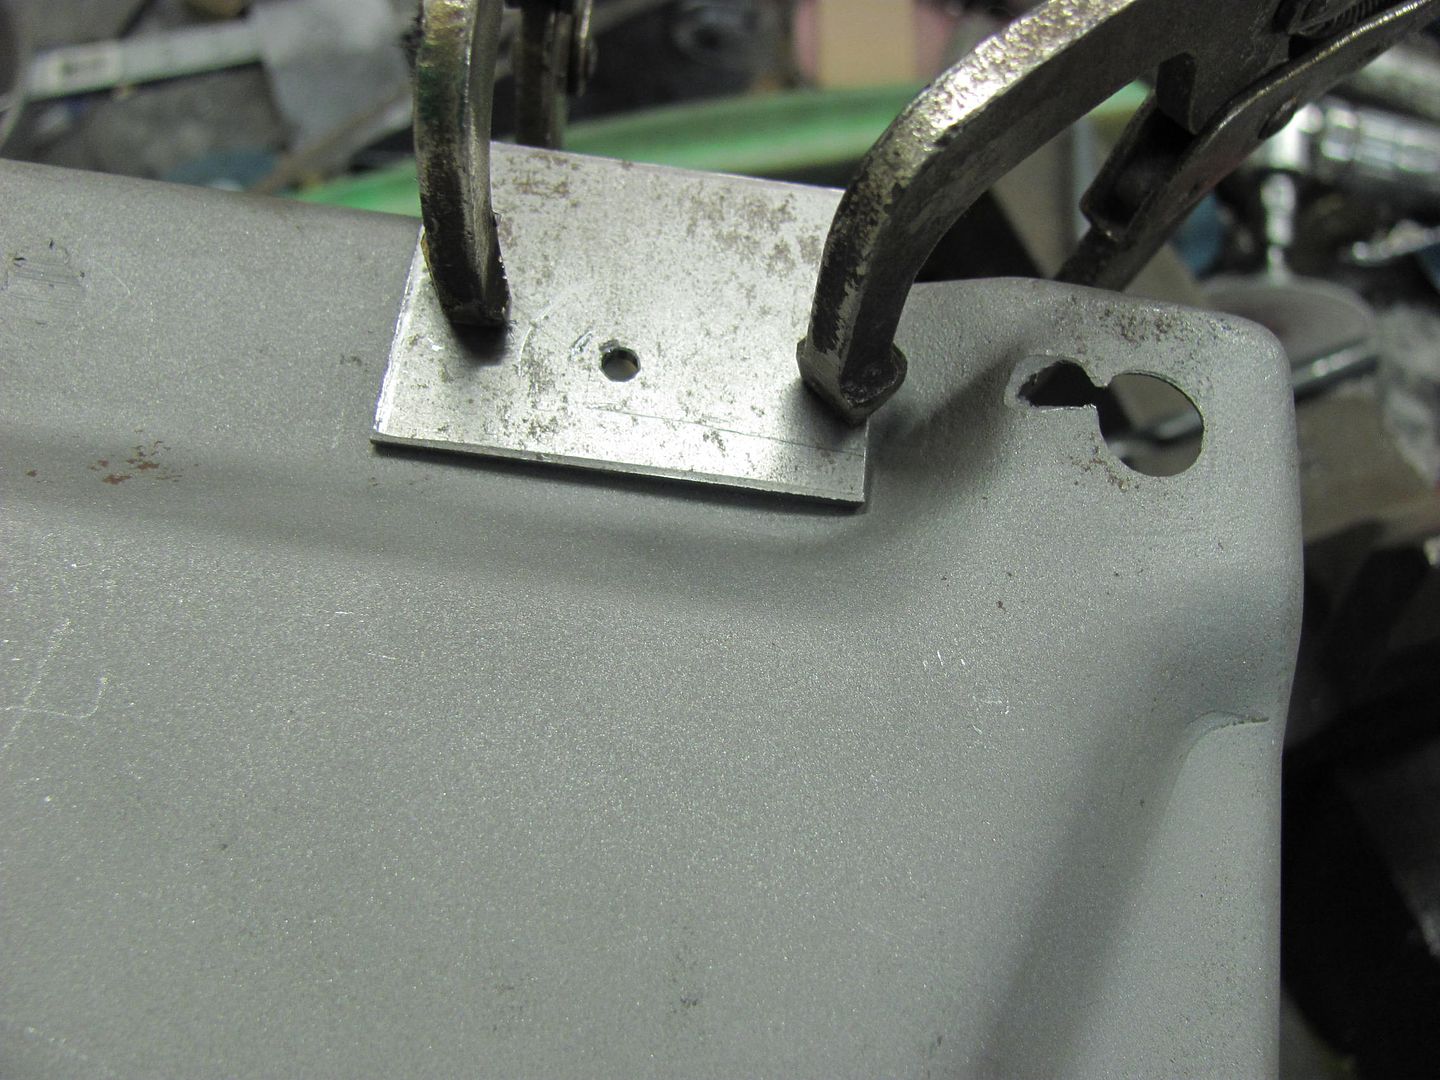
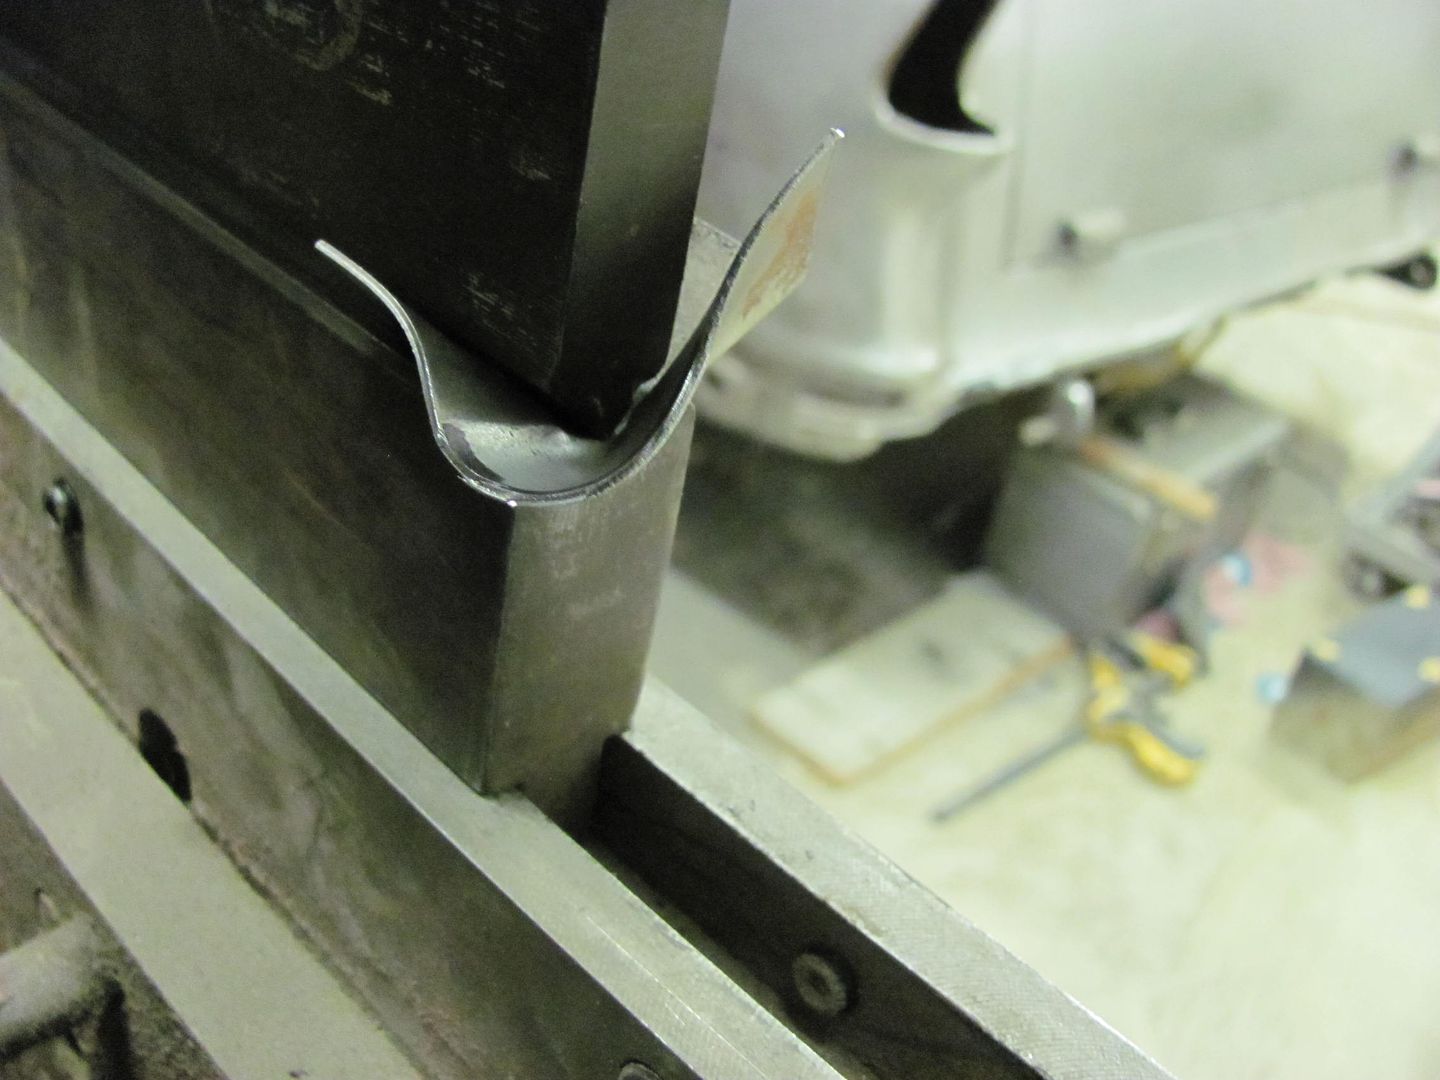
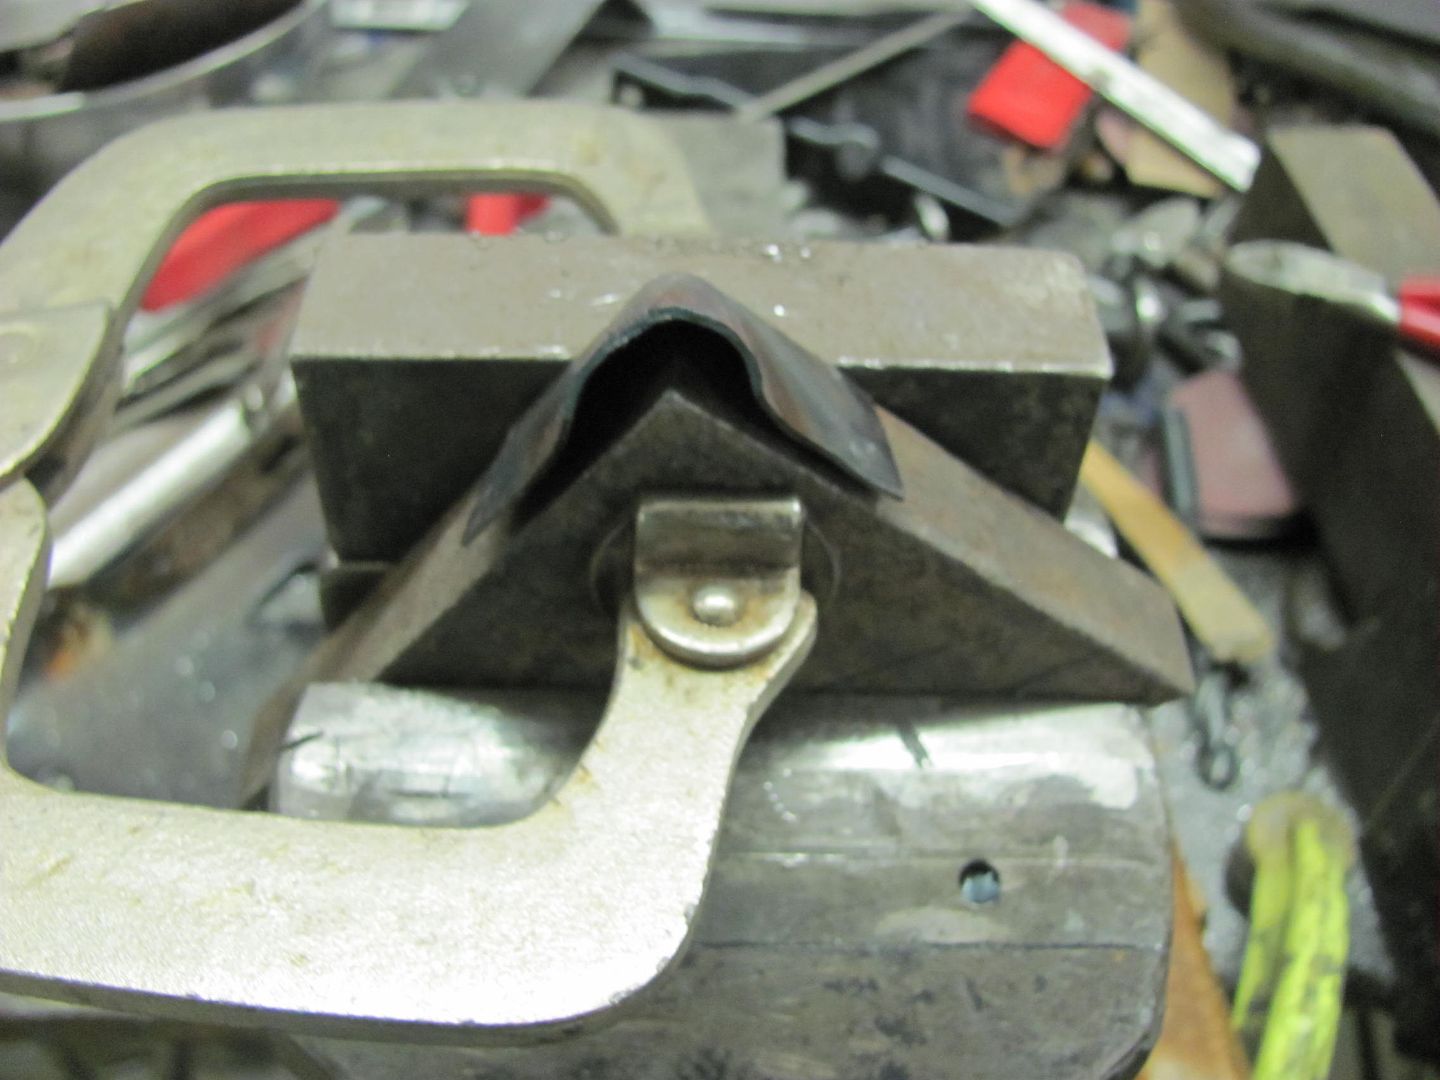
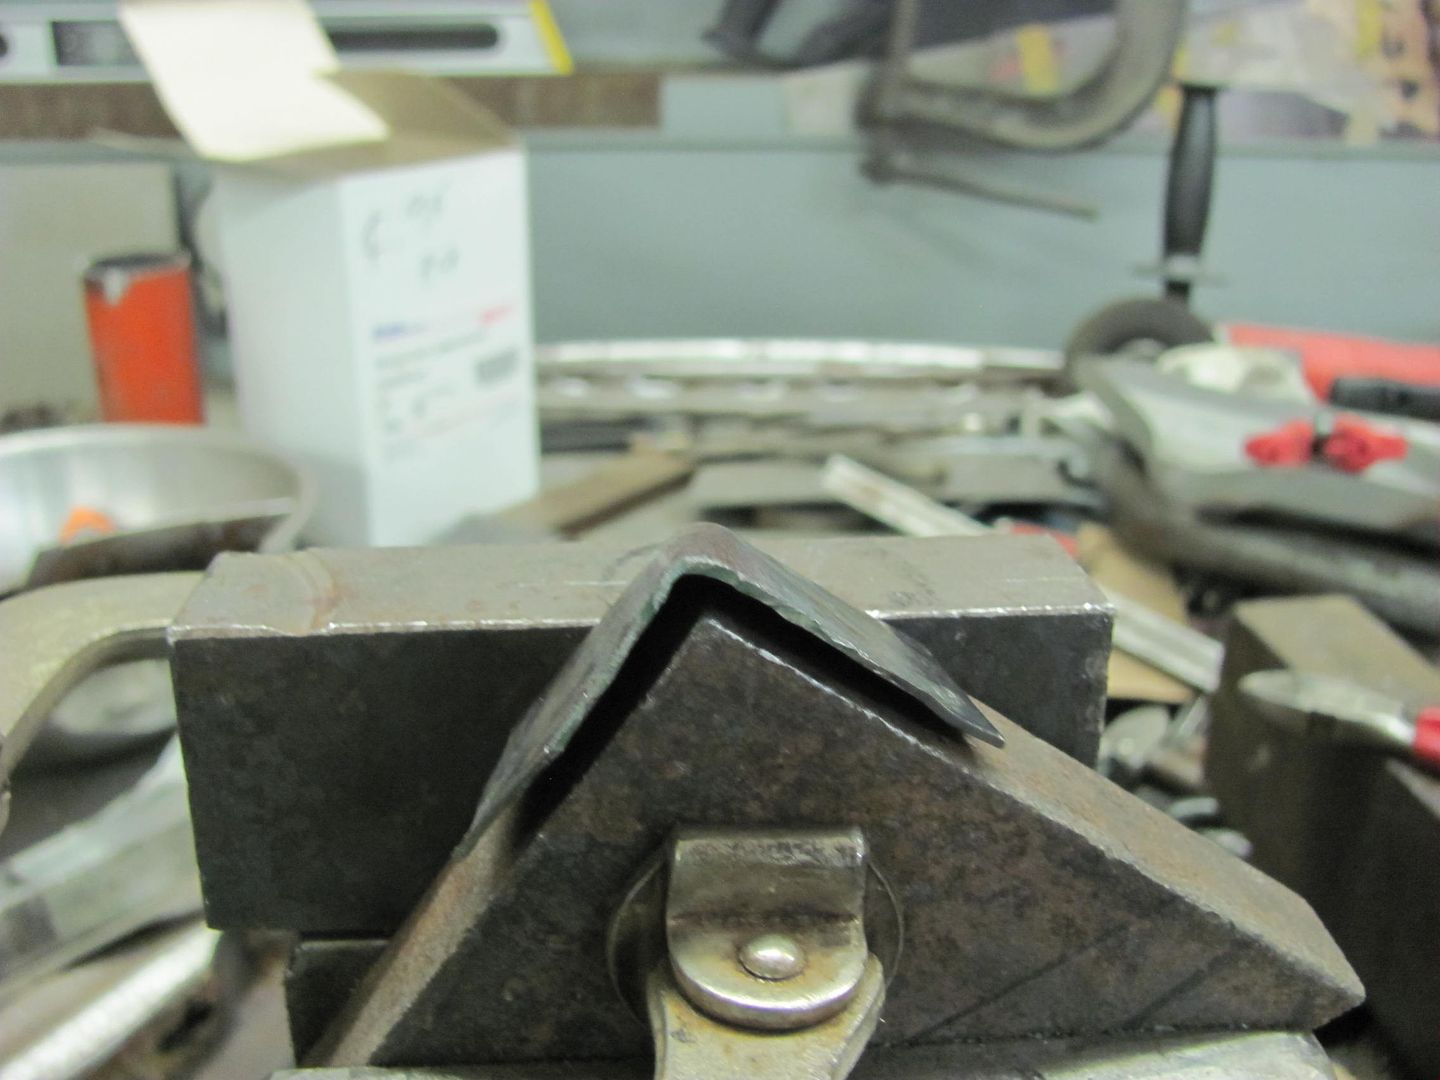
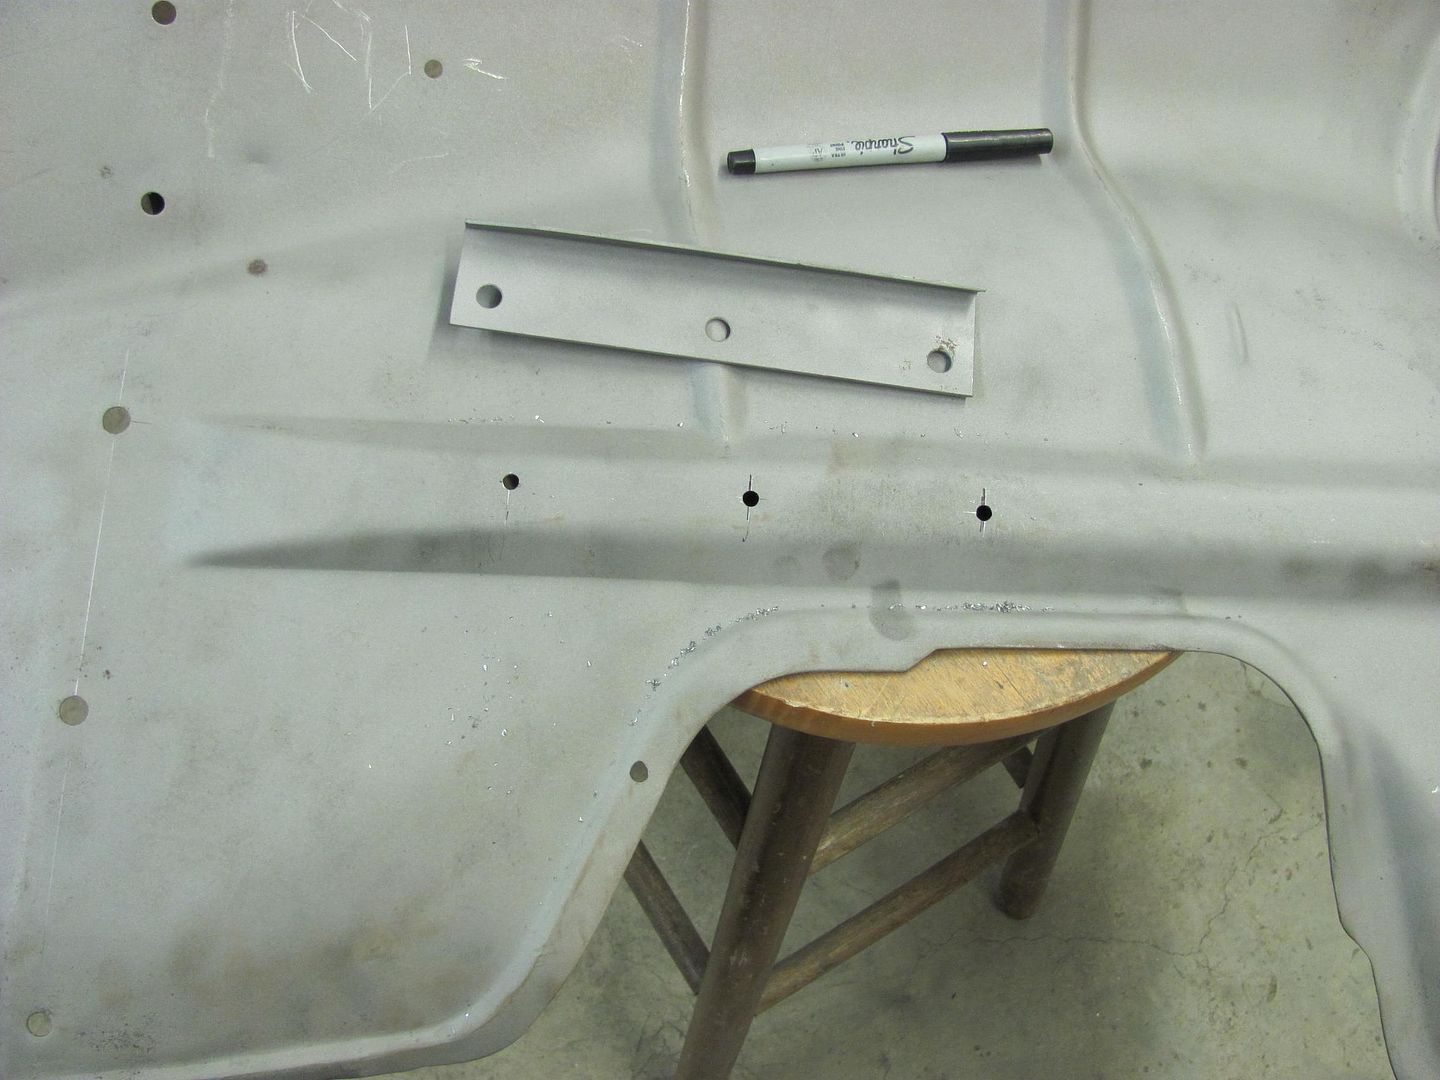
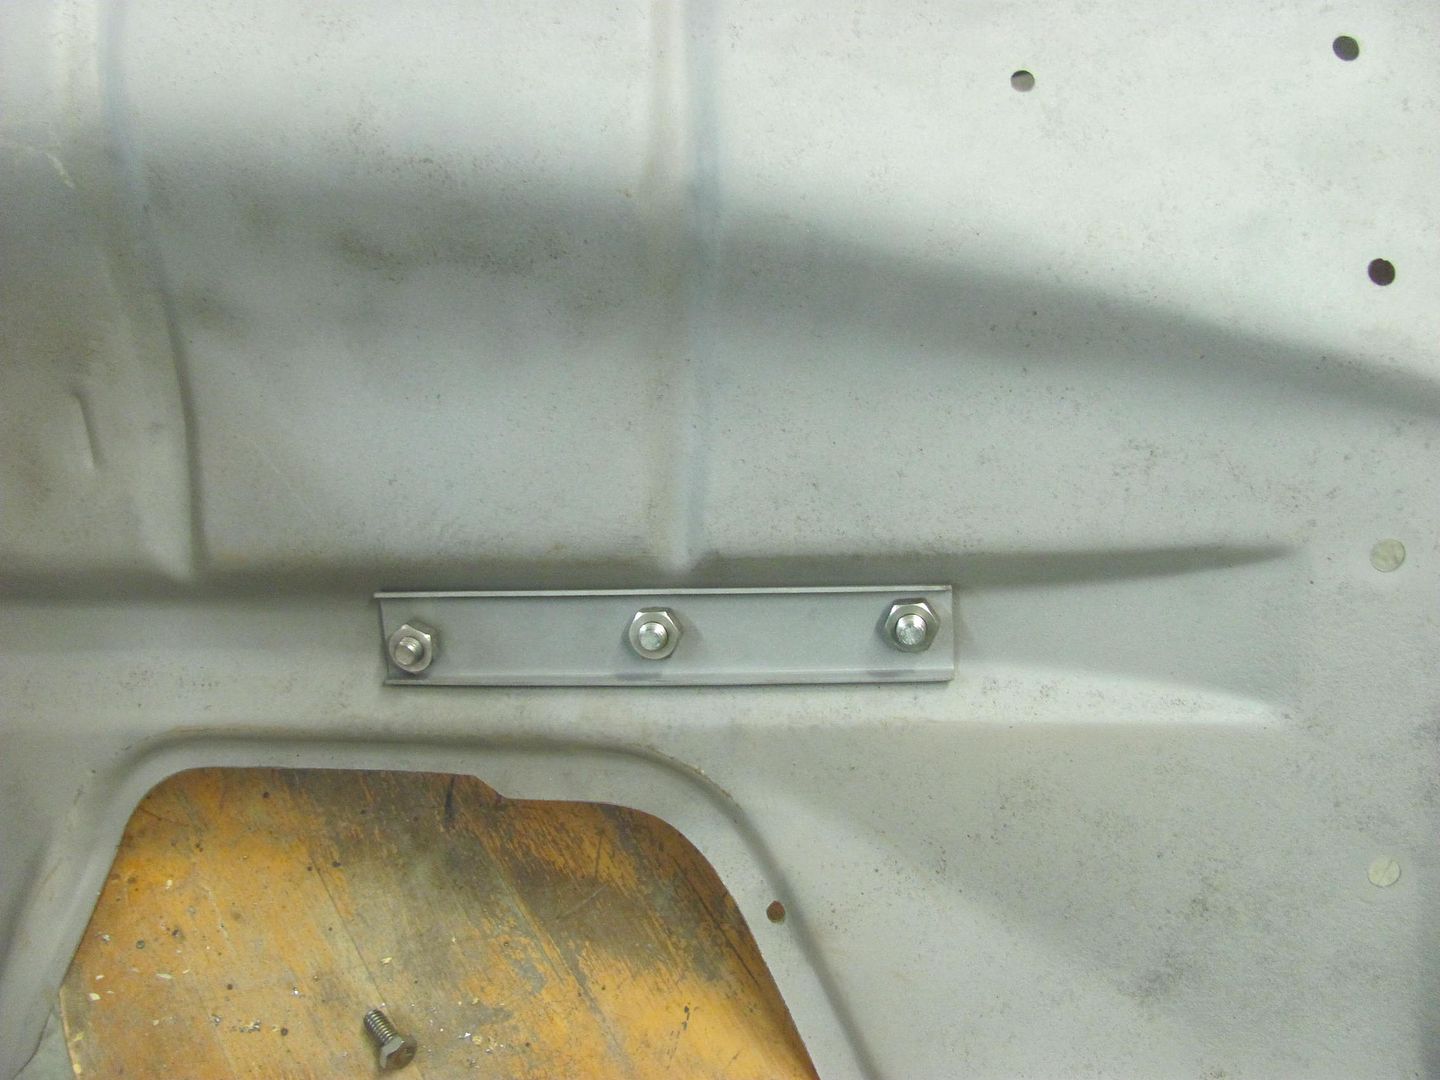
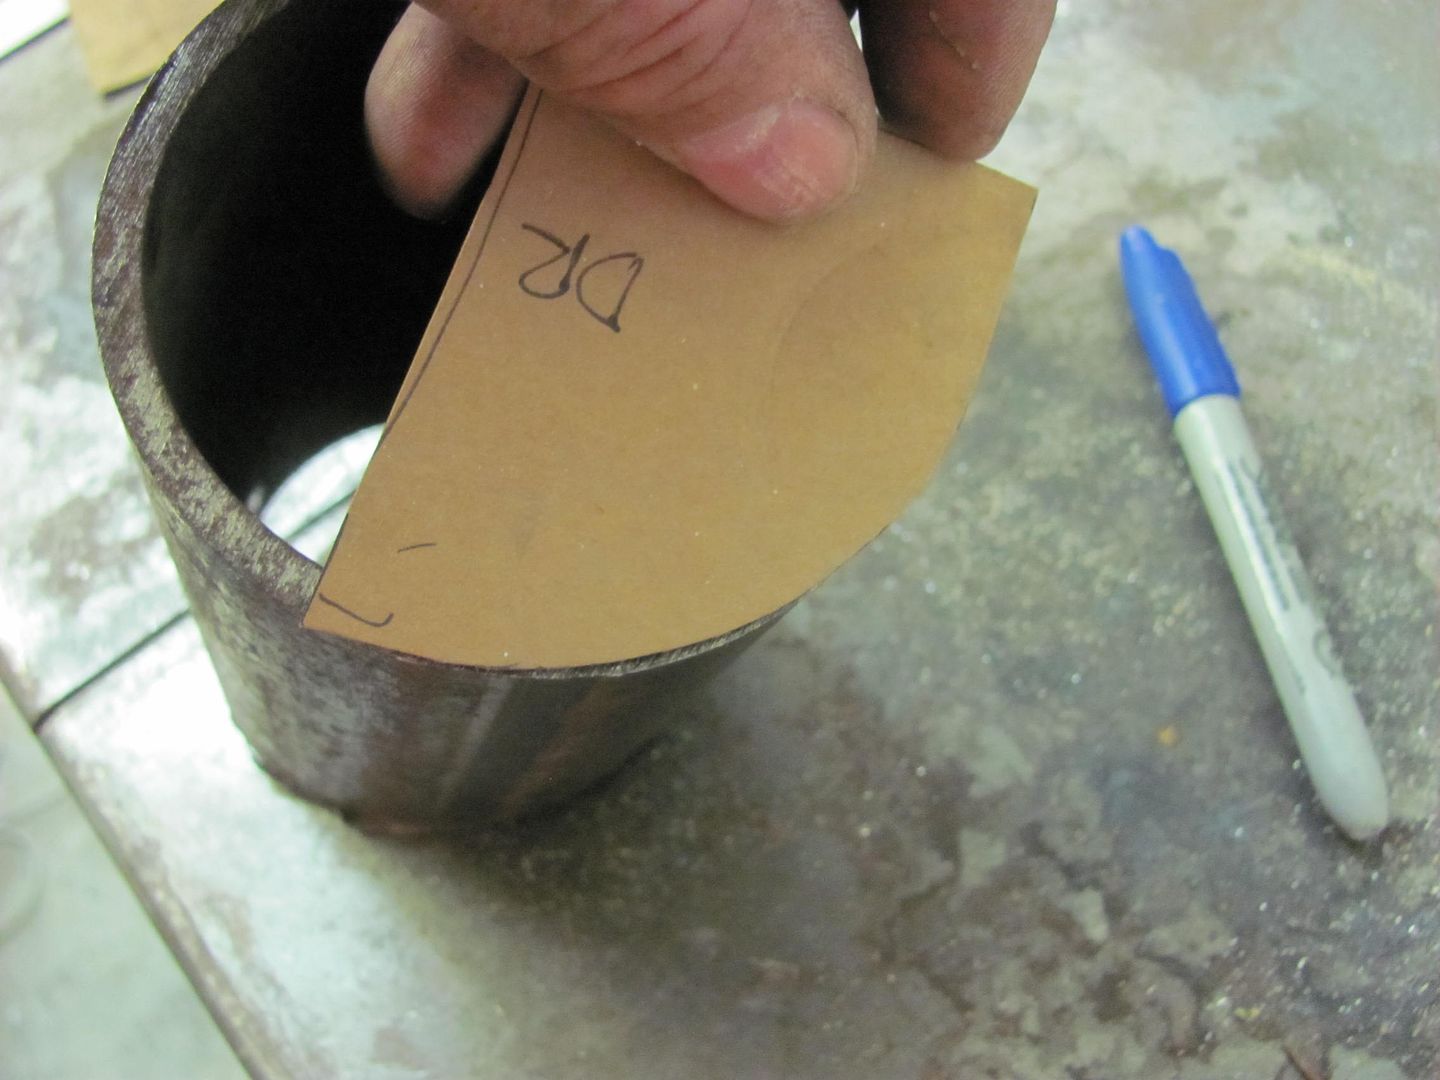
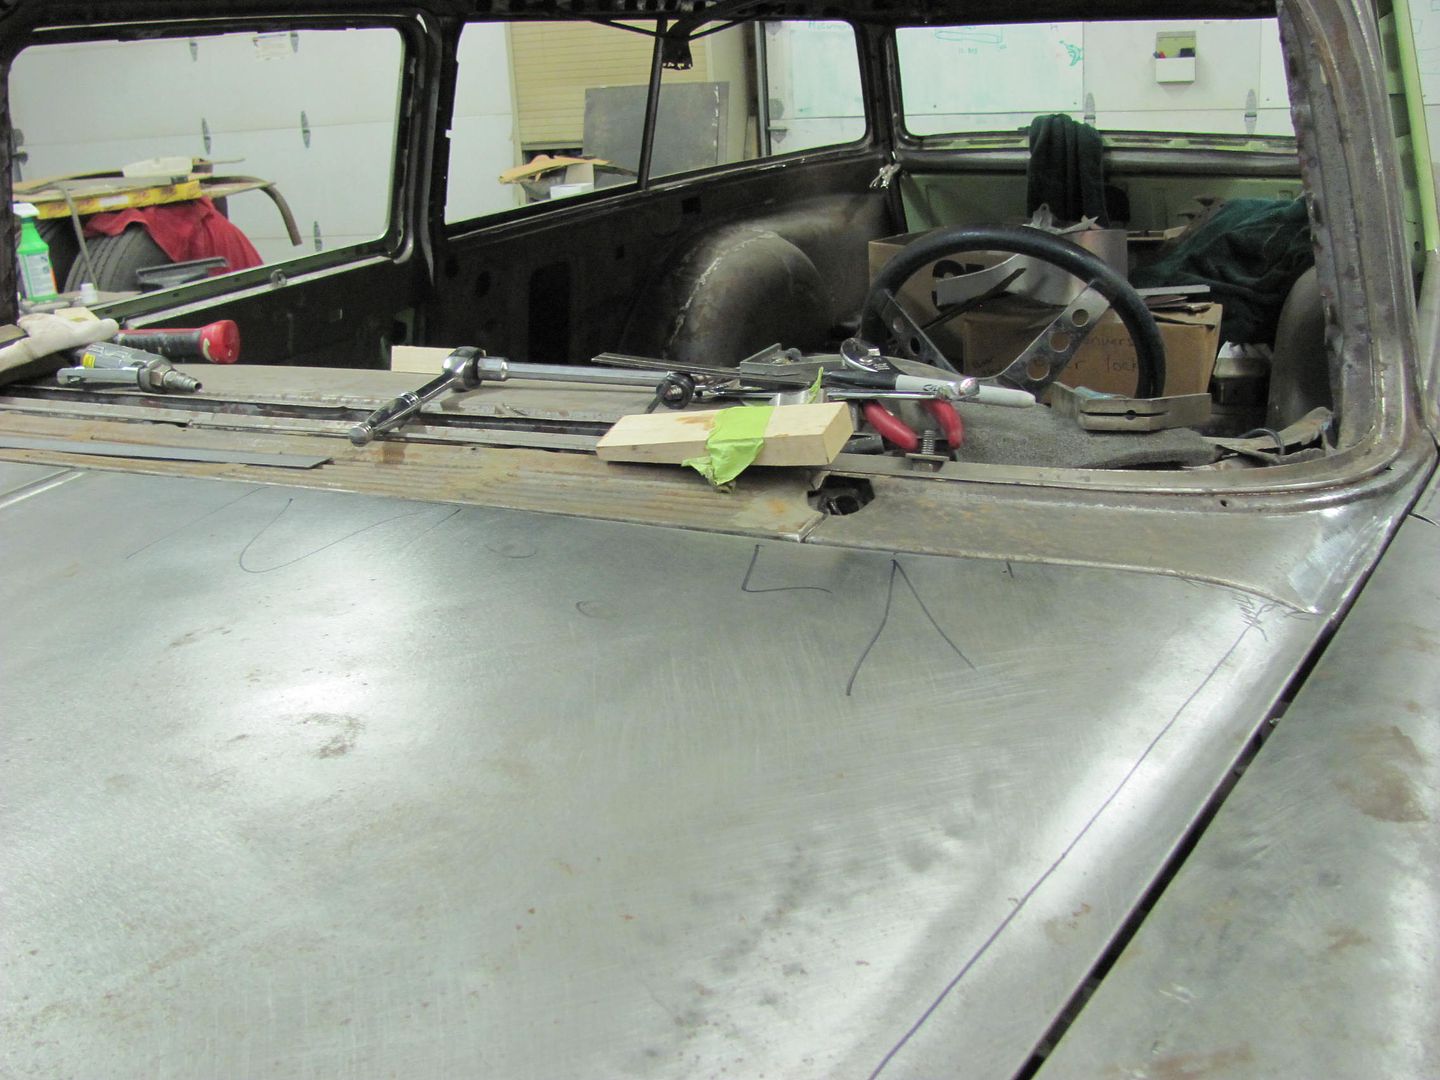
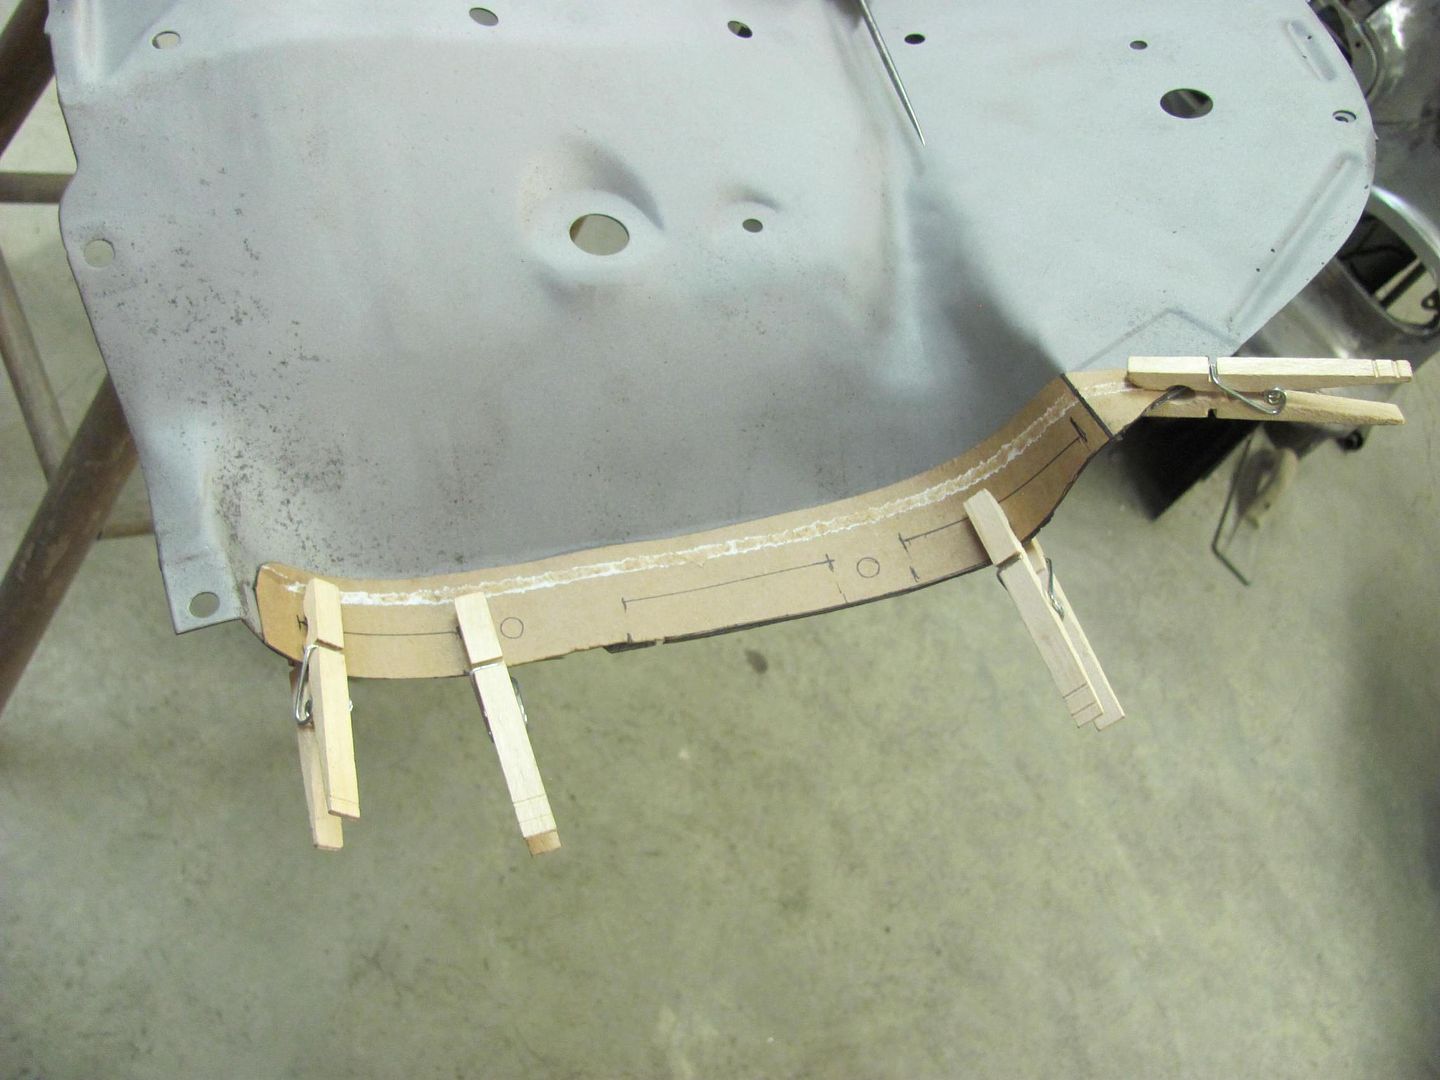
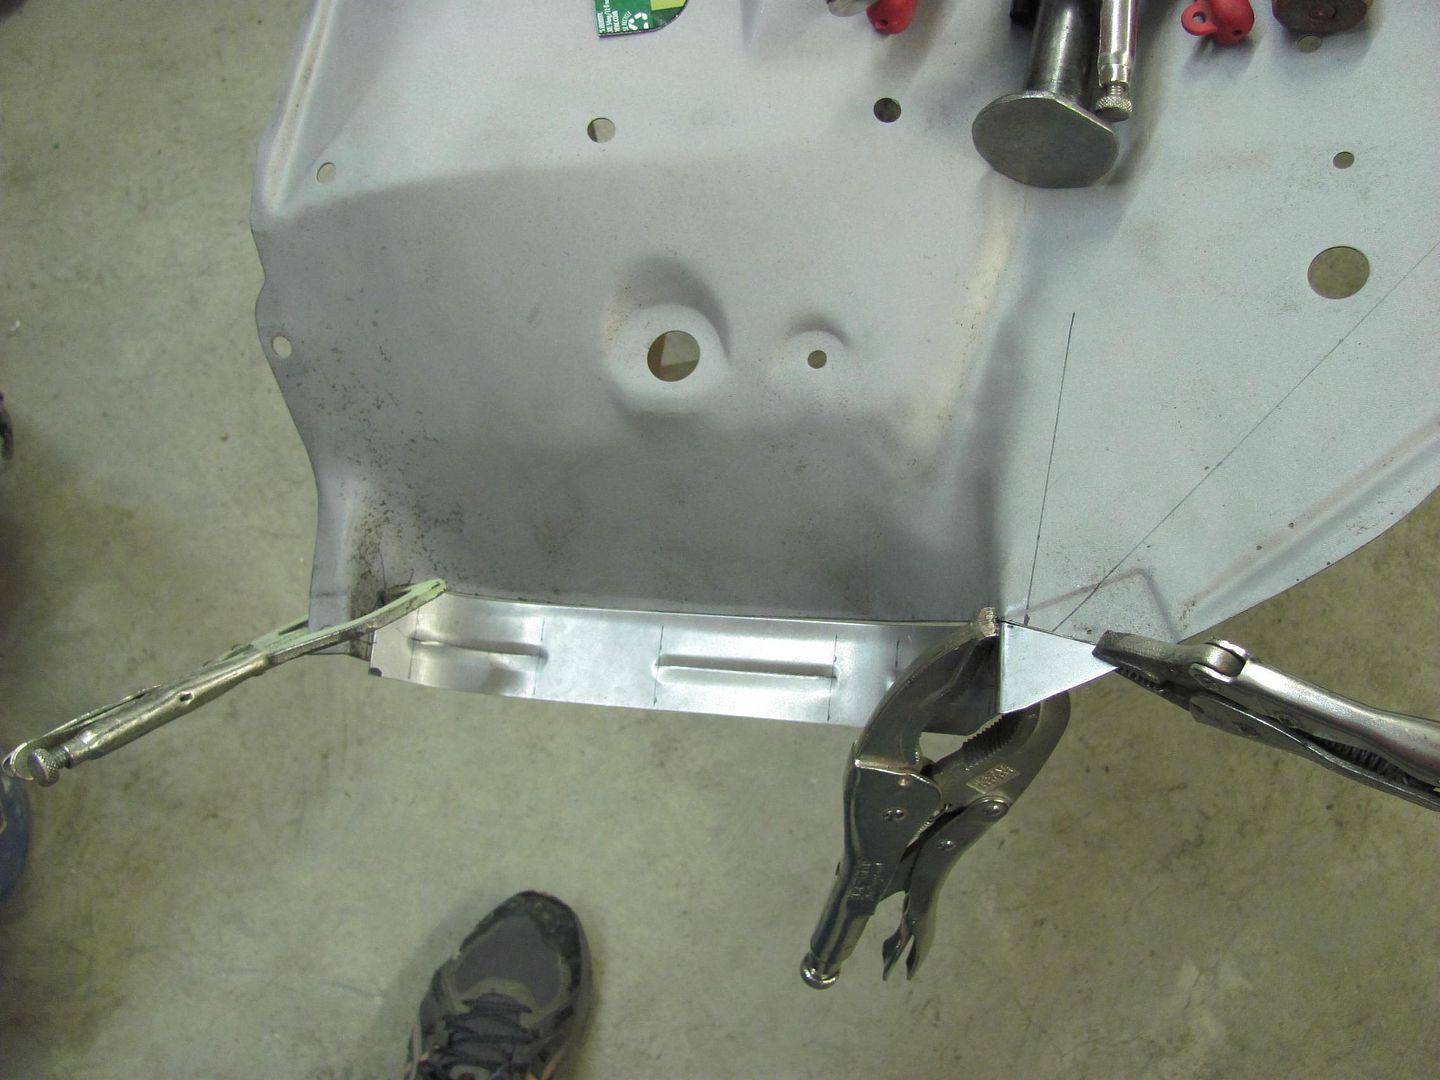
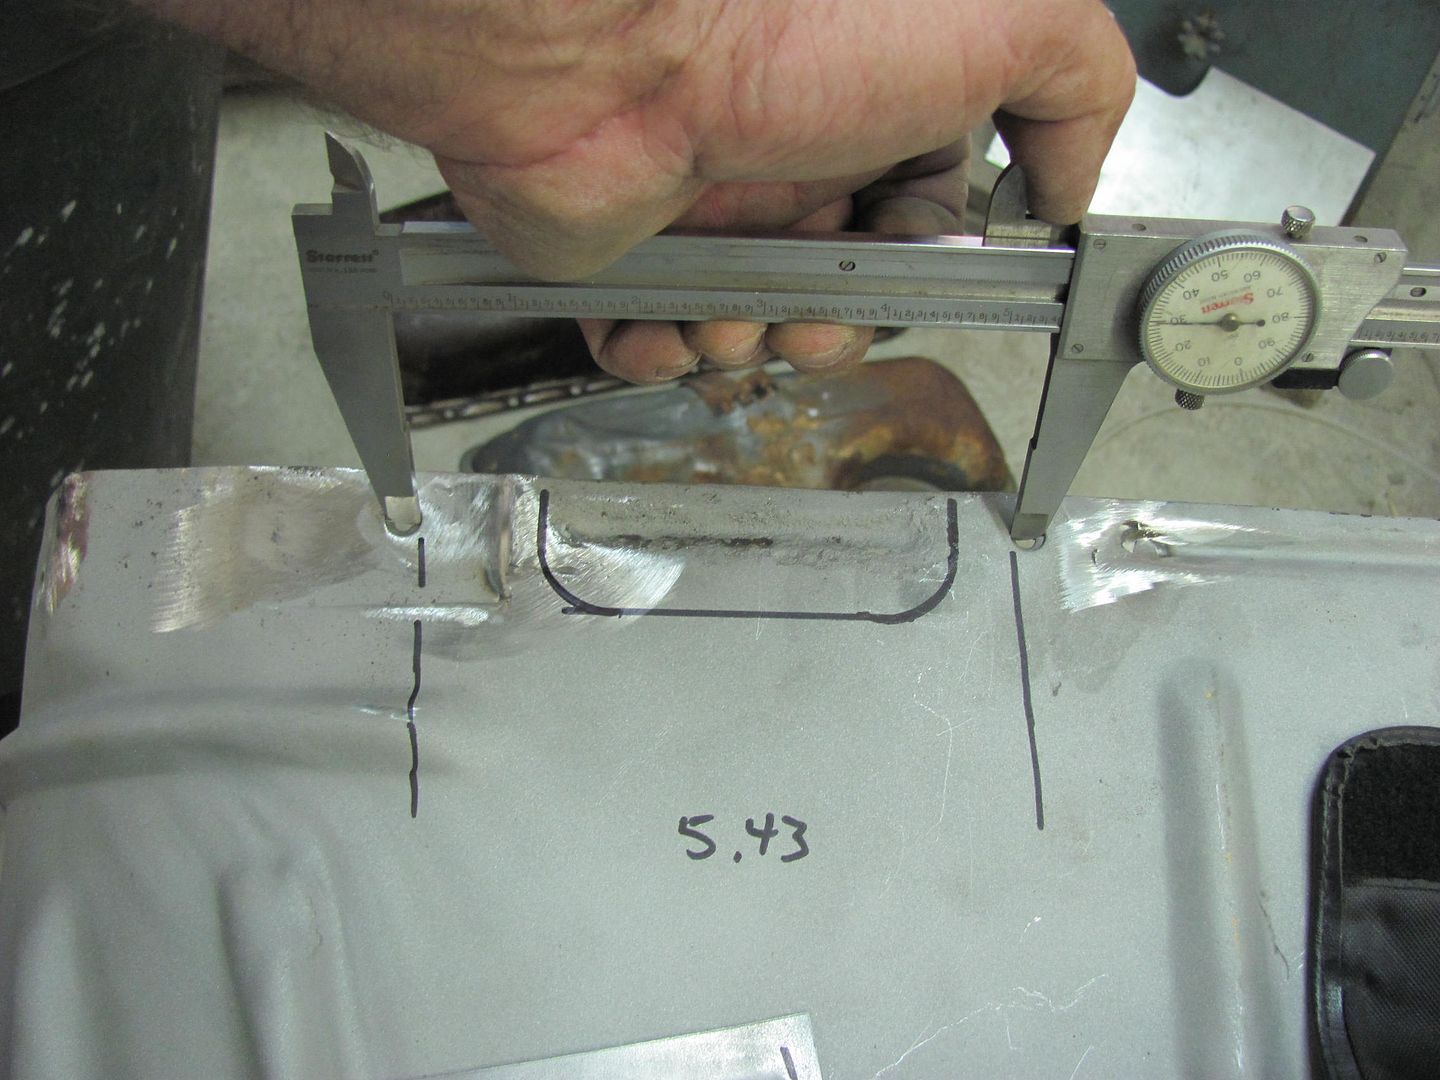
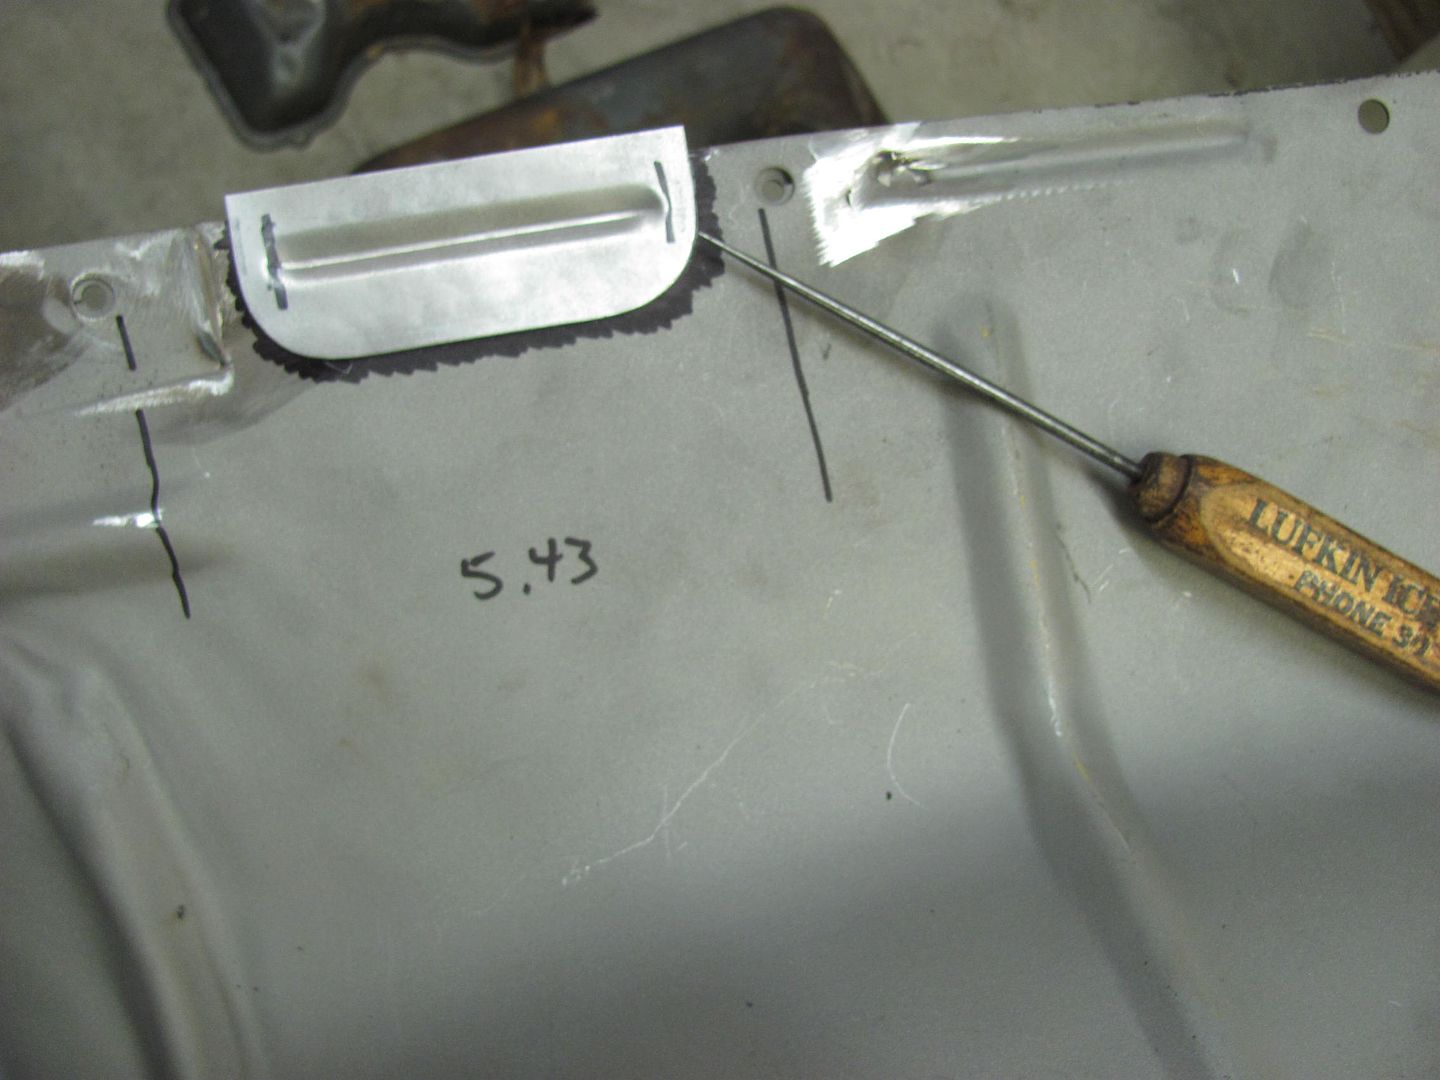
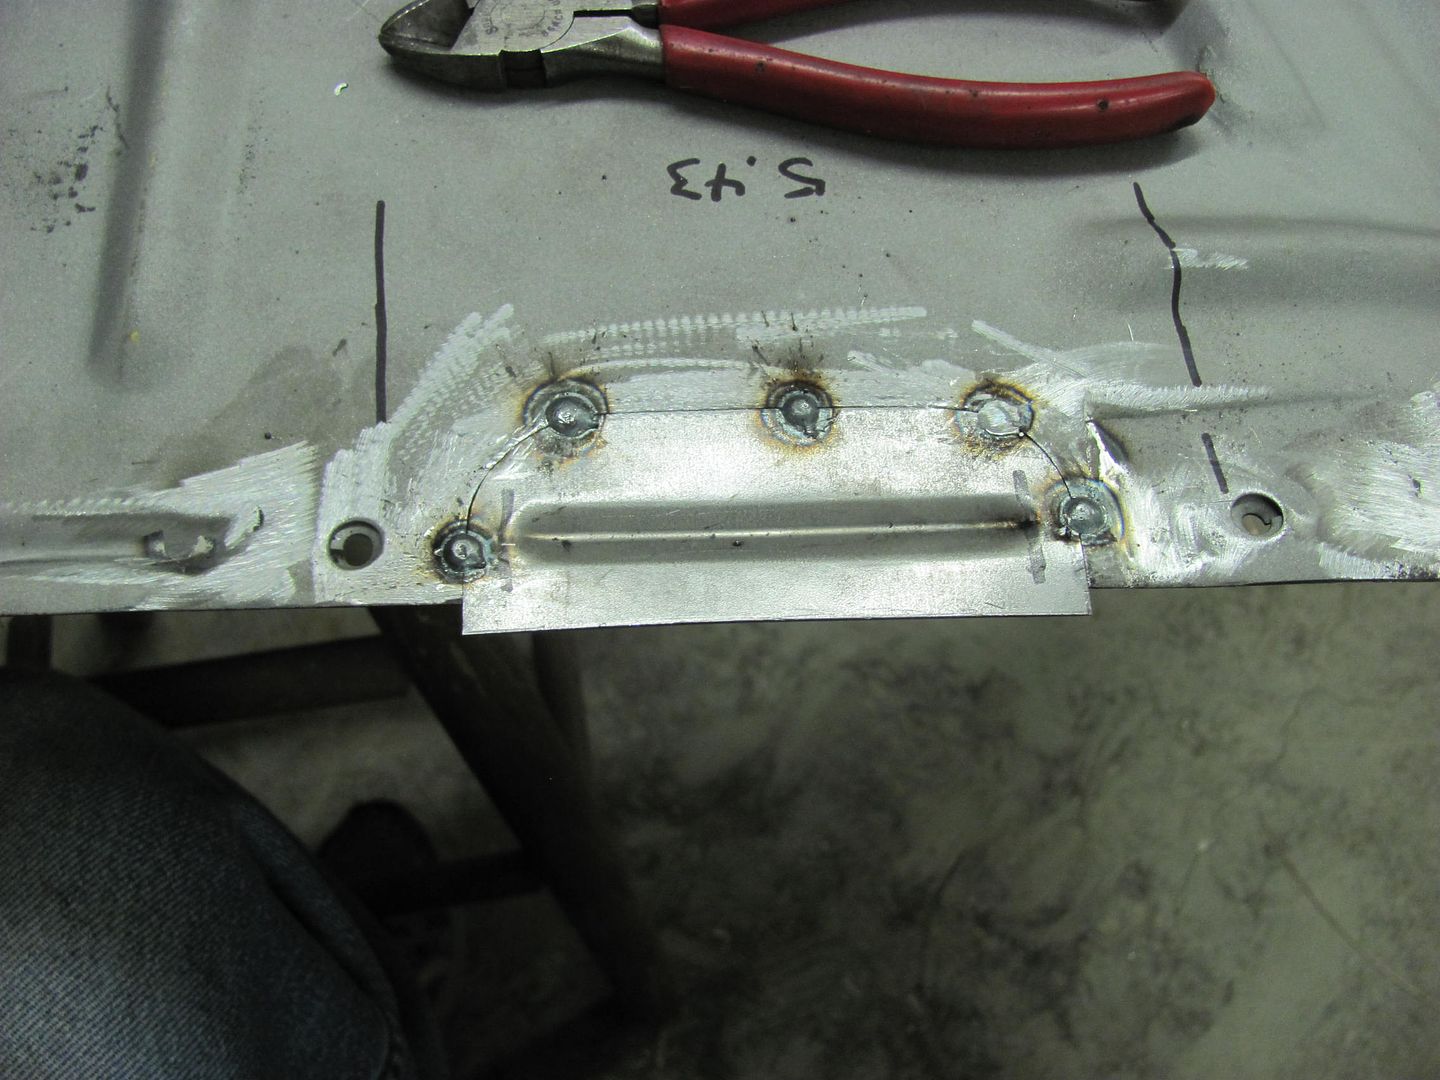
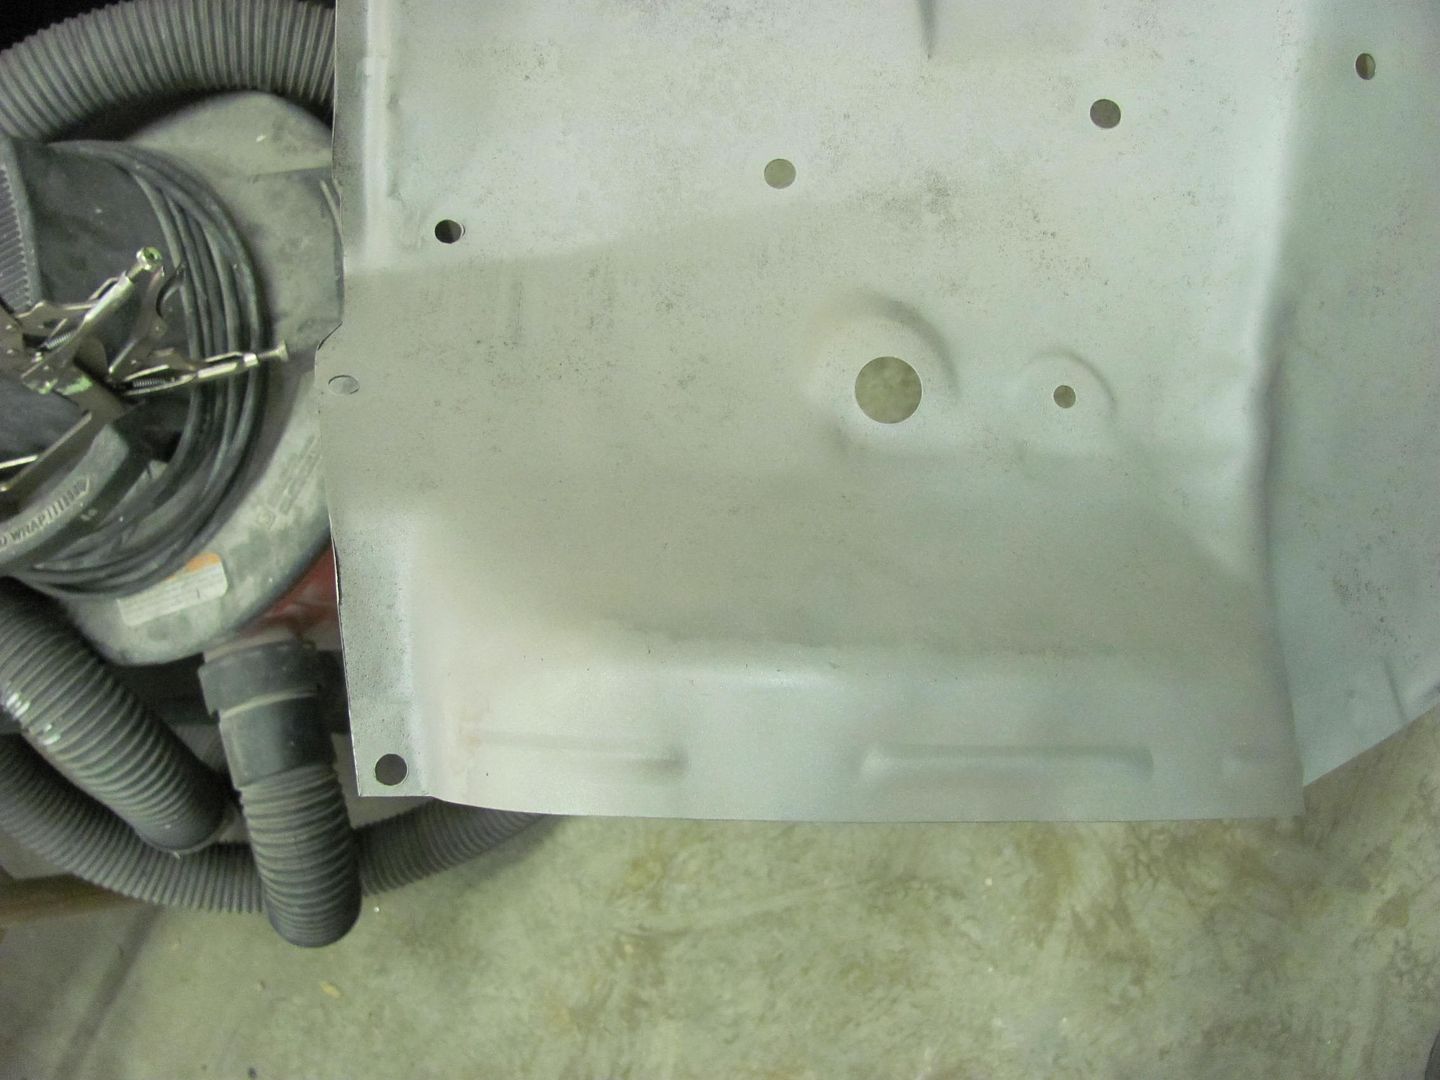
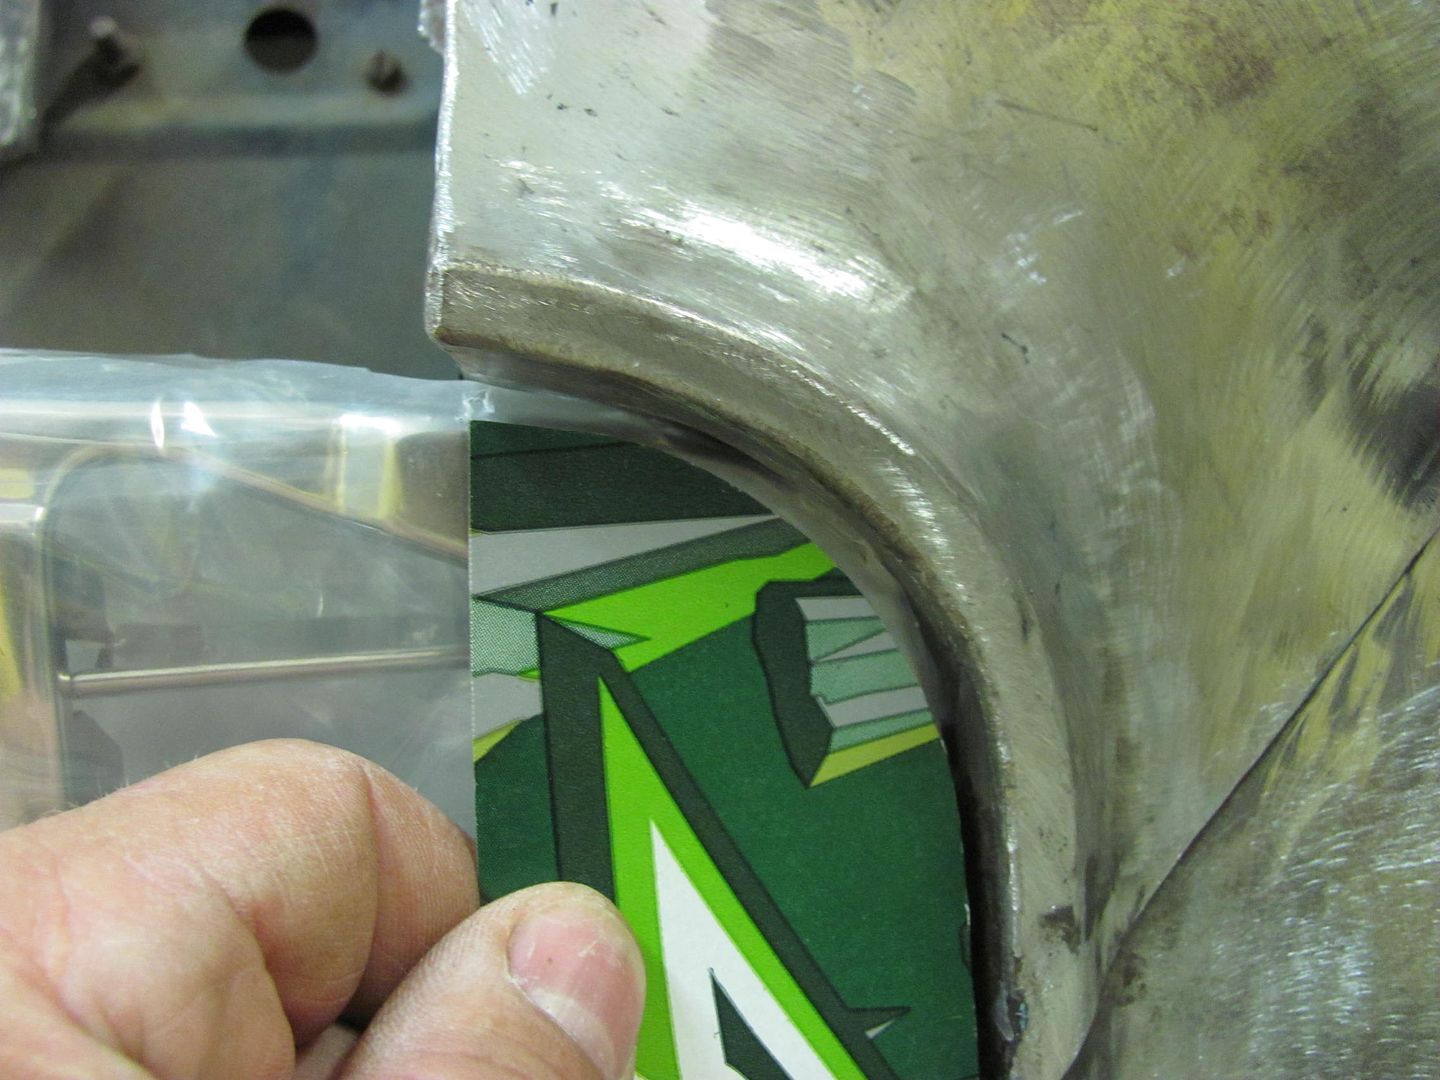
Looks like our same template will work here as well..

Picture1158.jpg


Picture1159.jpg


Picture1160.jpg


Picture1161.jpg


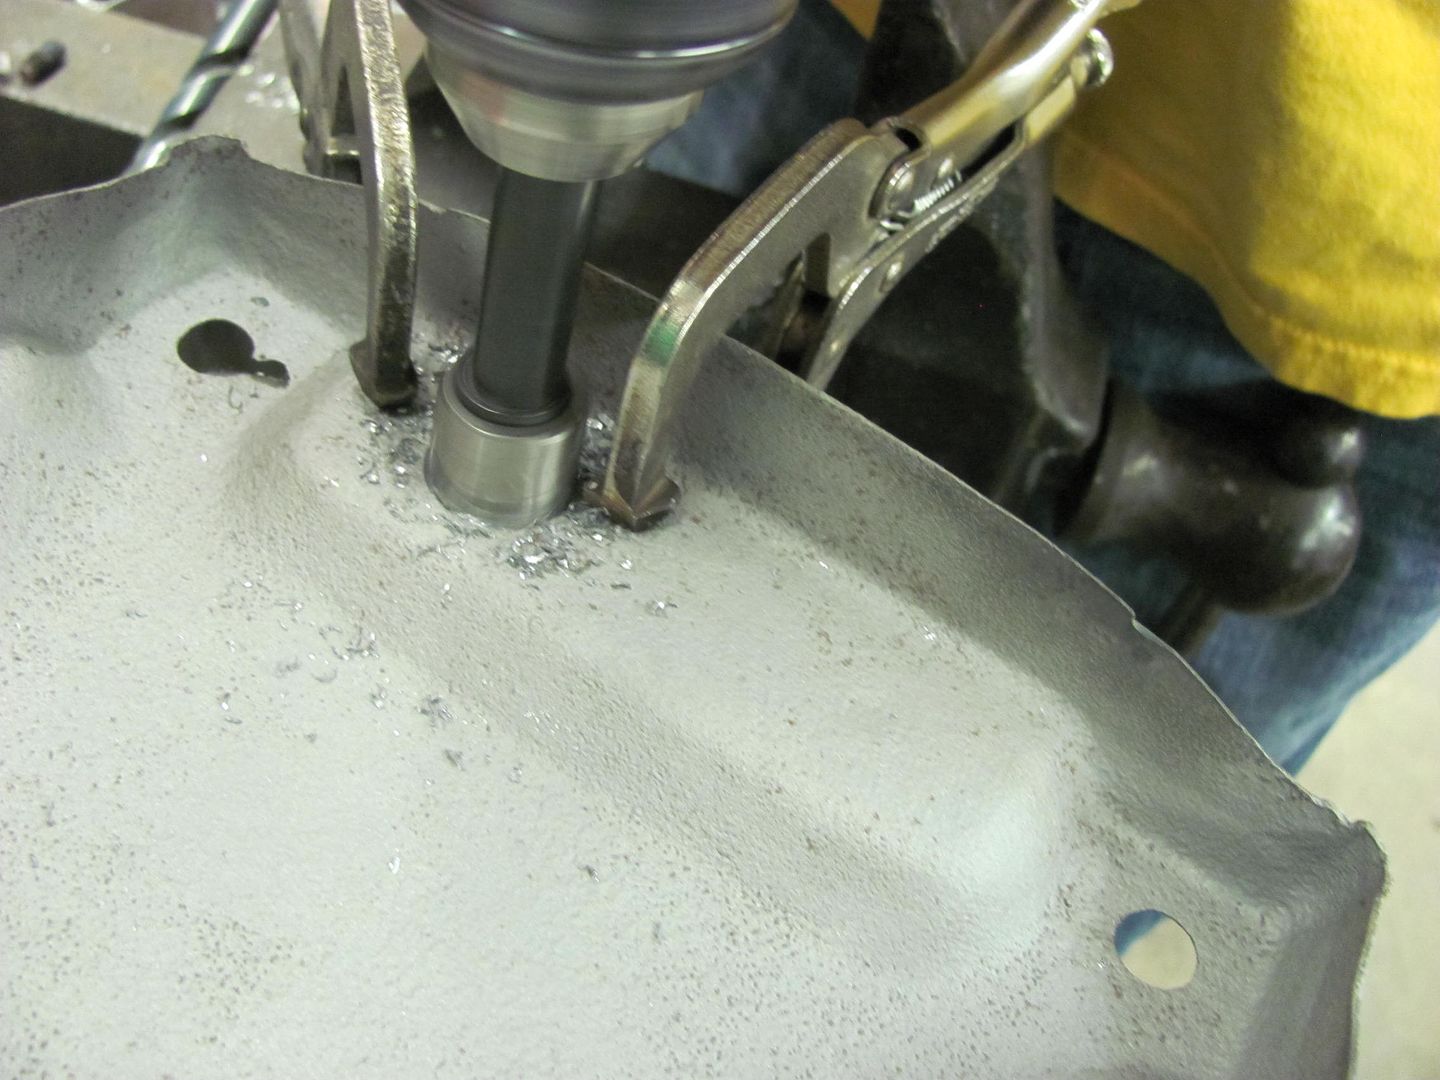
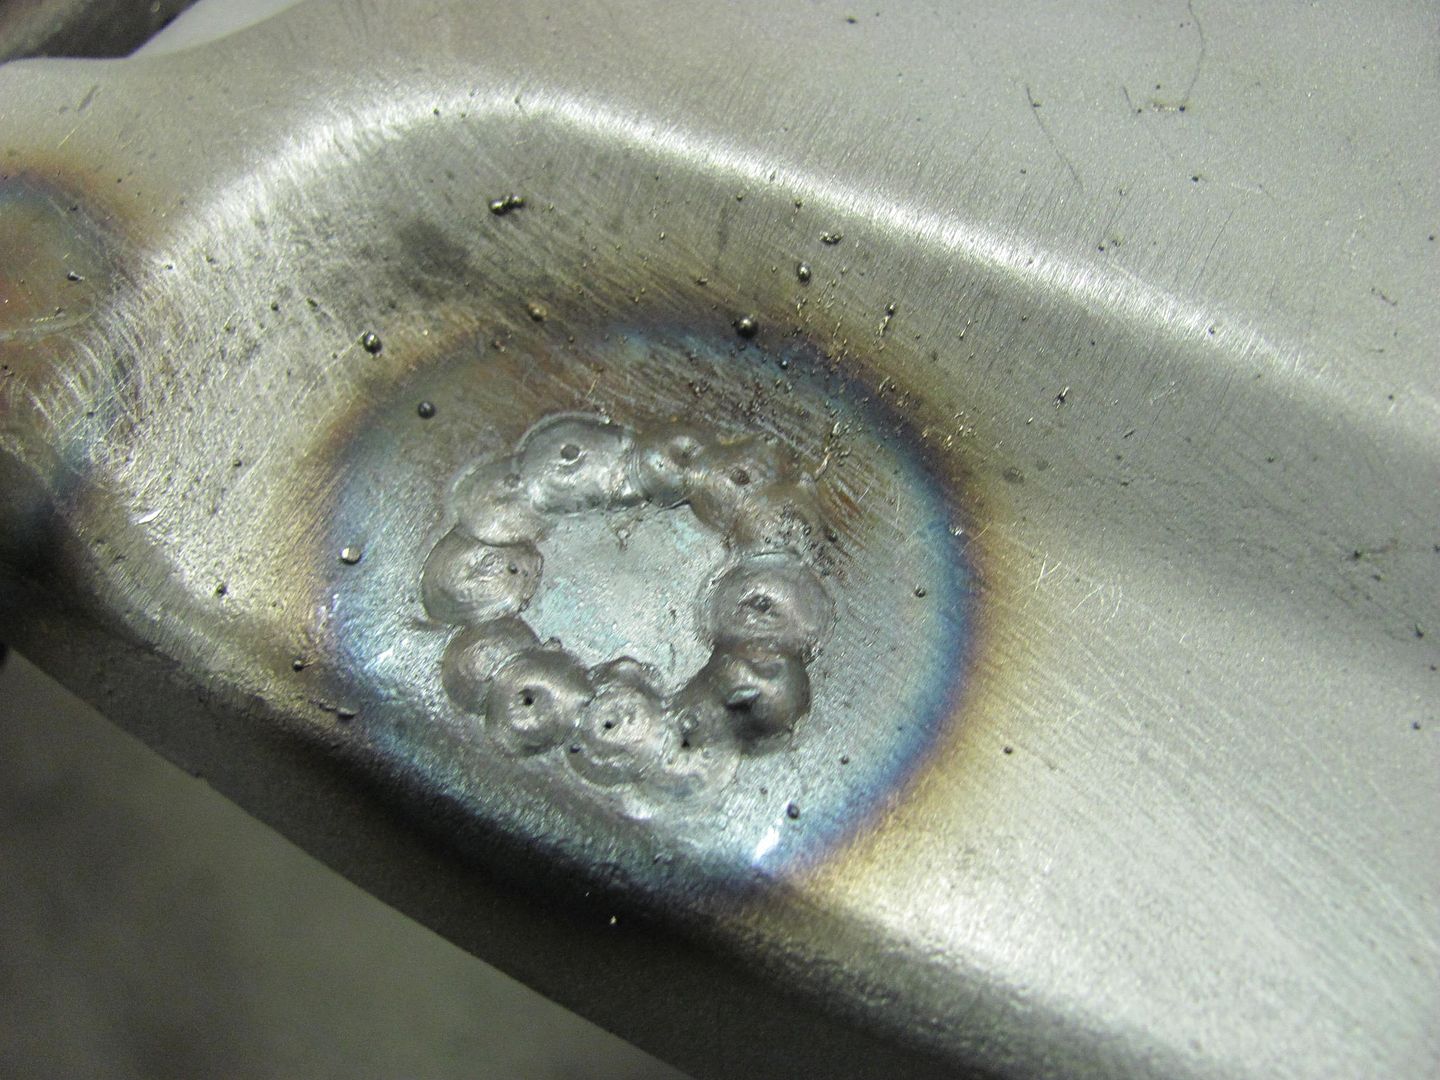
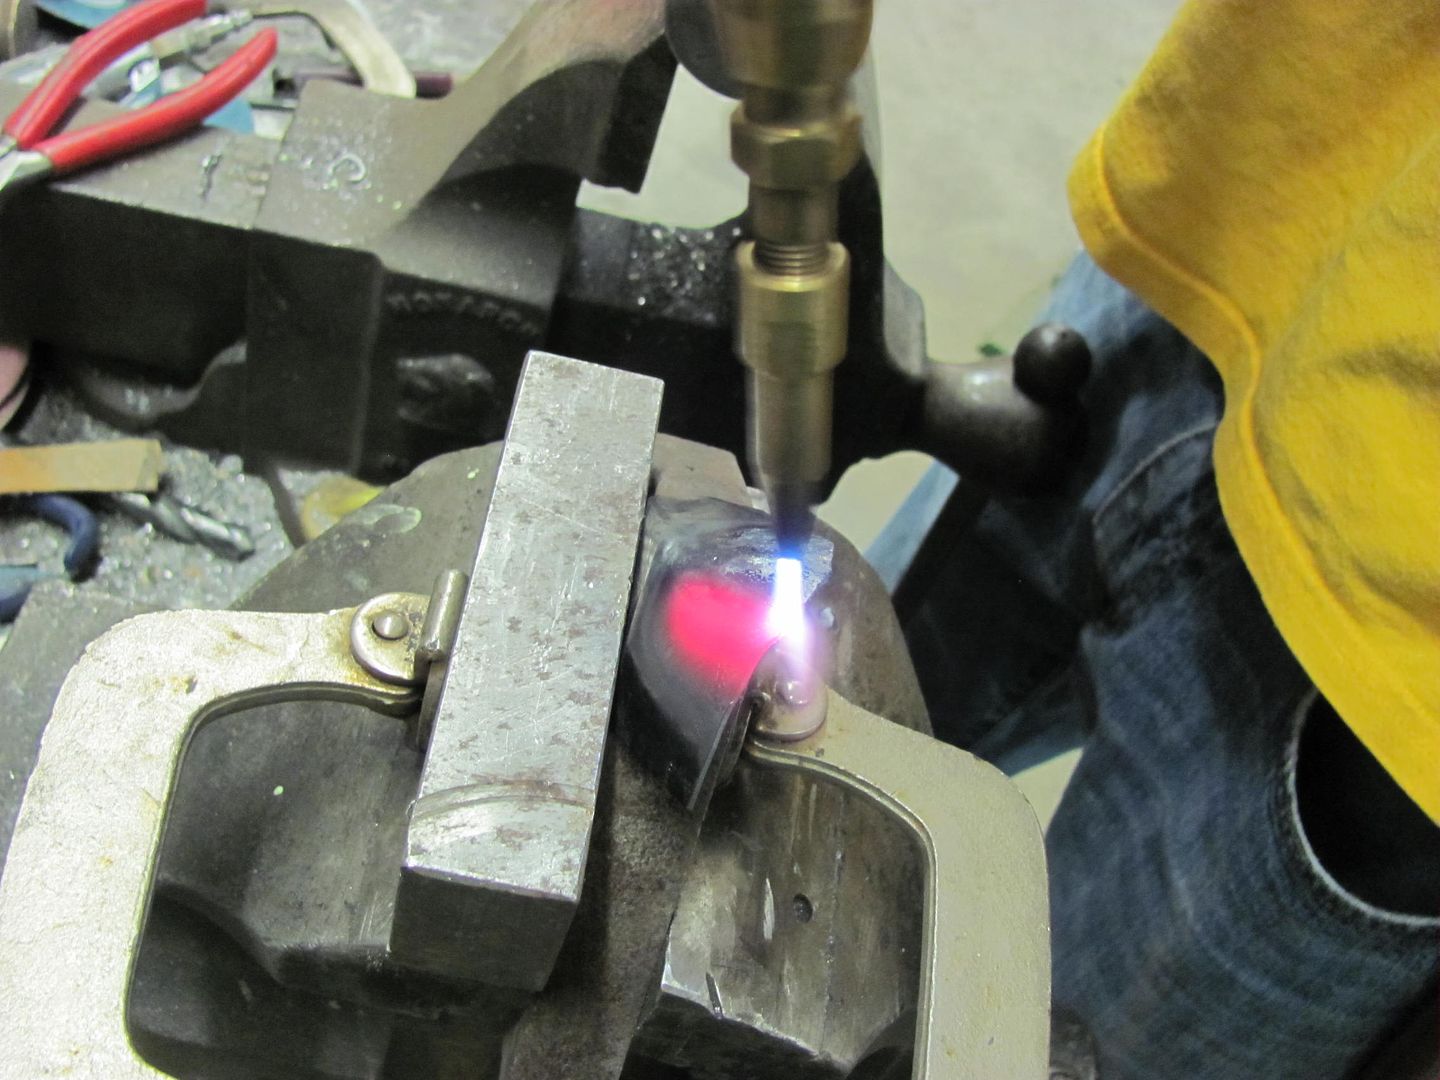
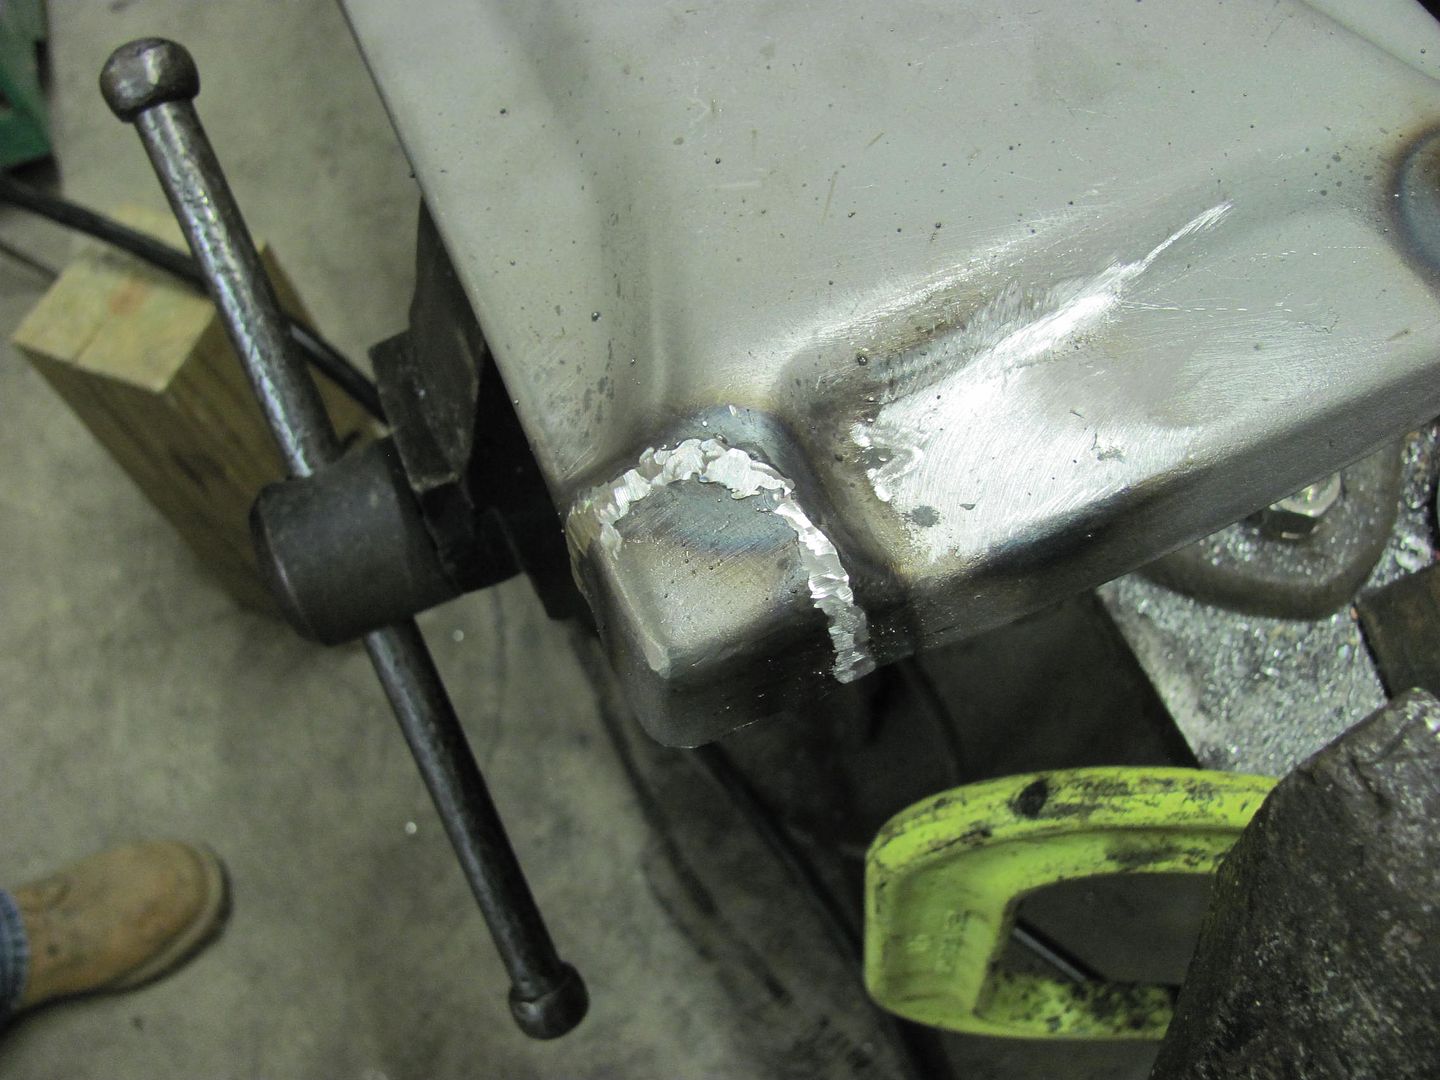
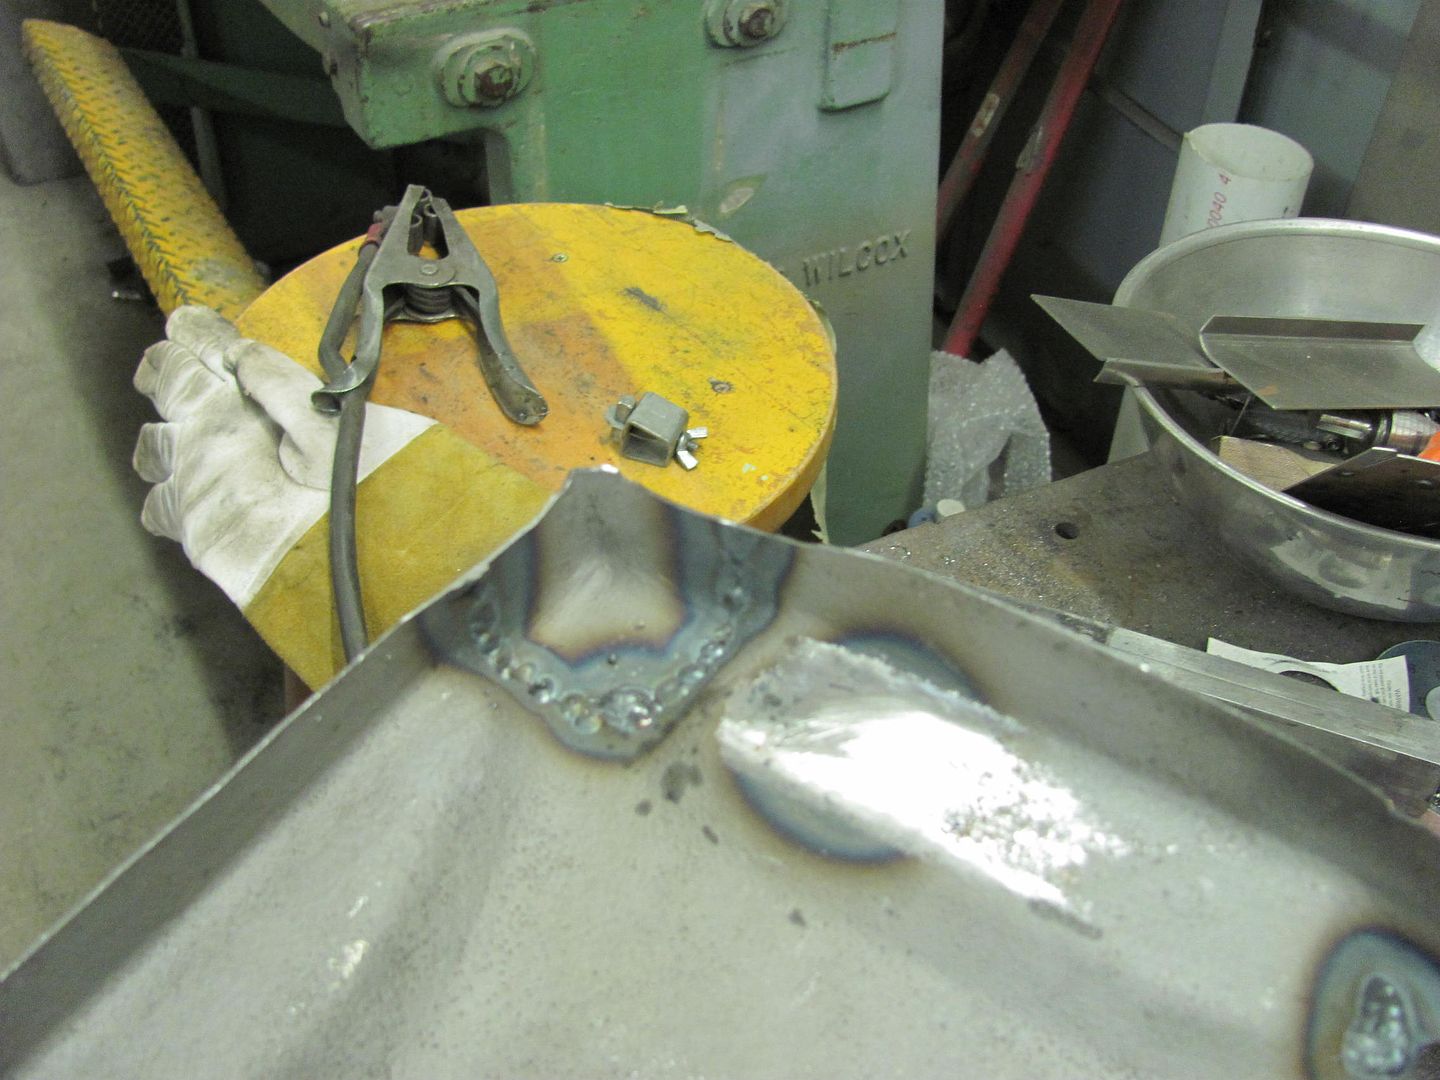
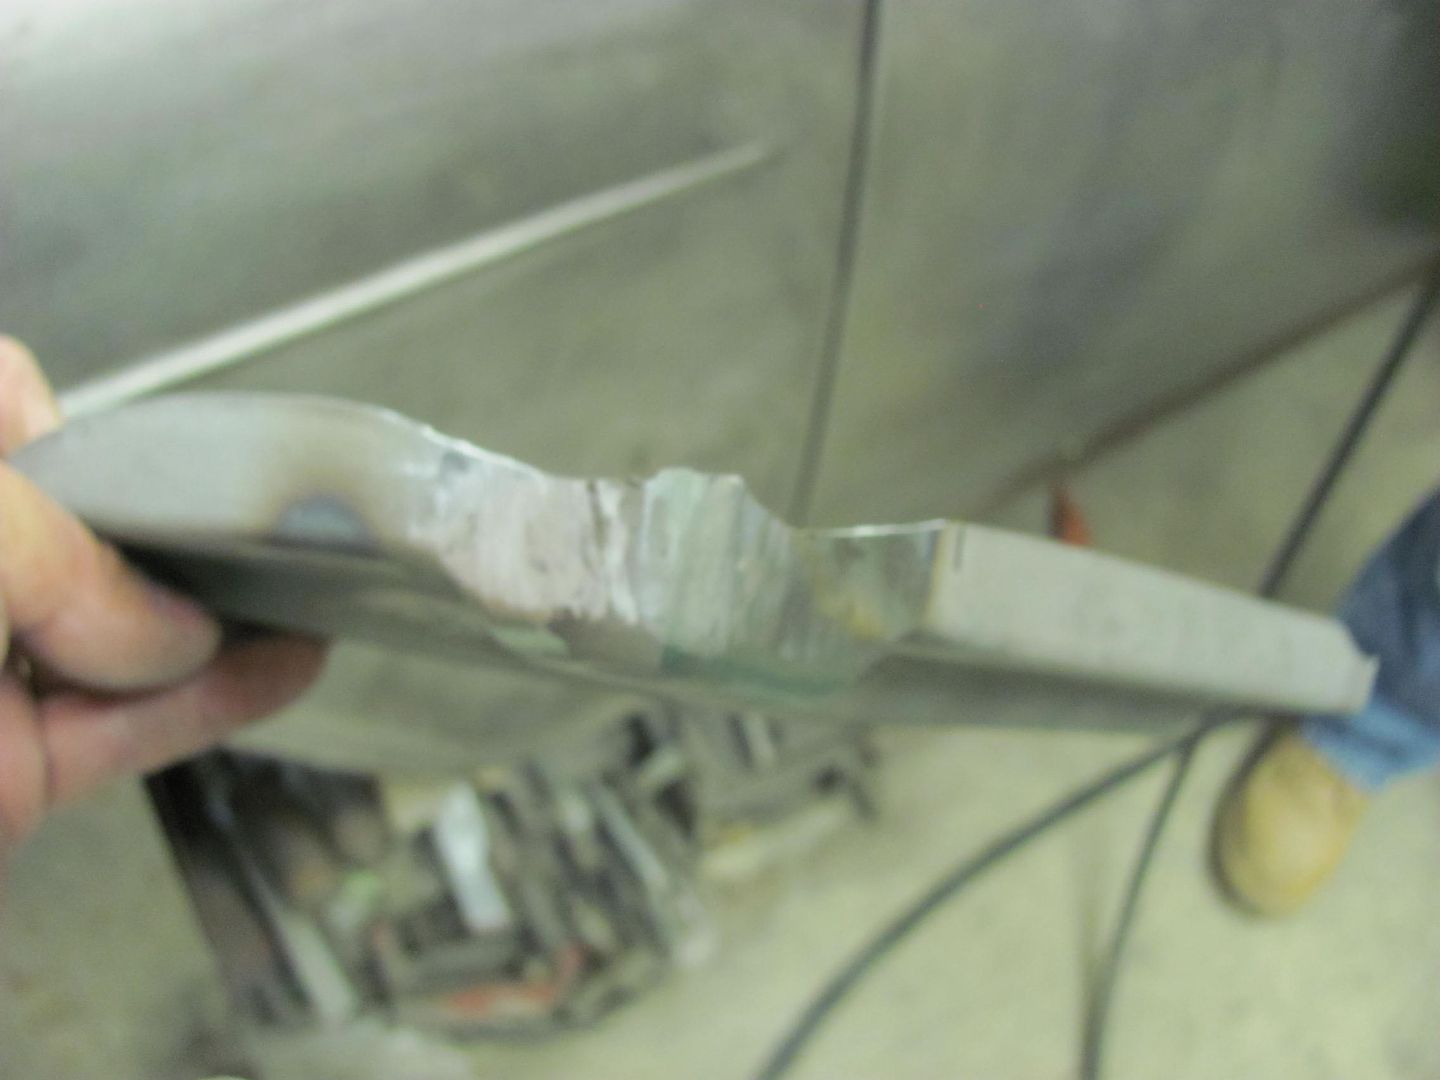
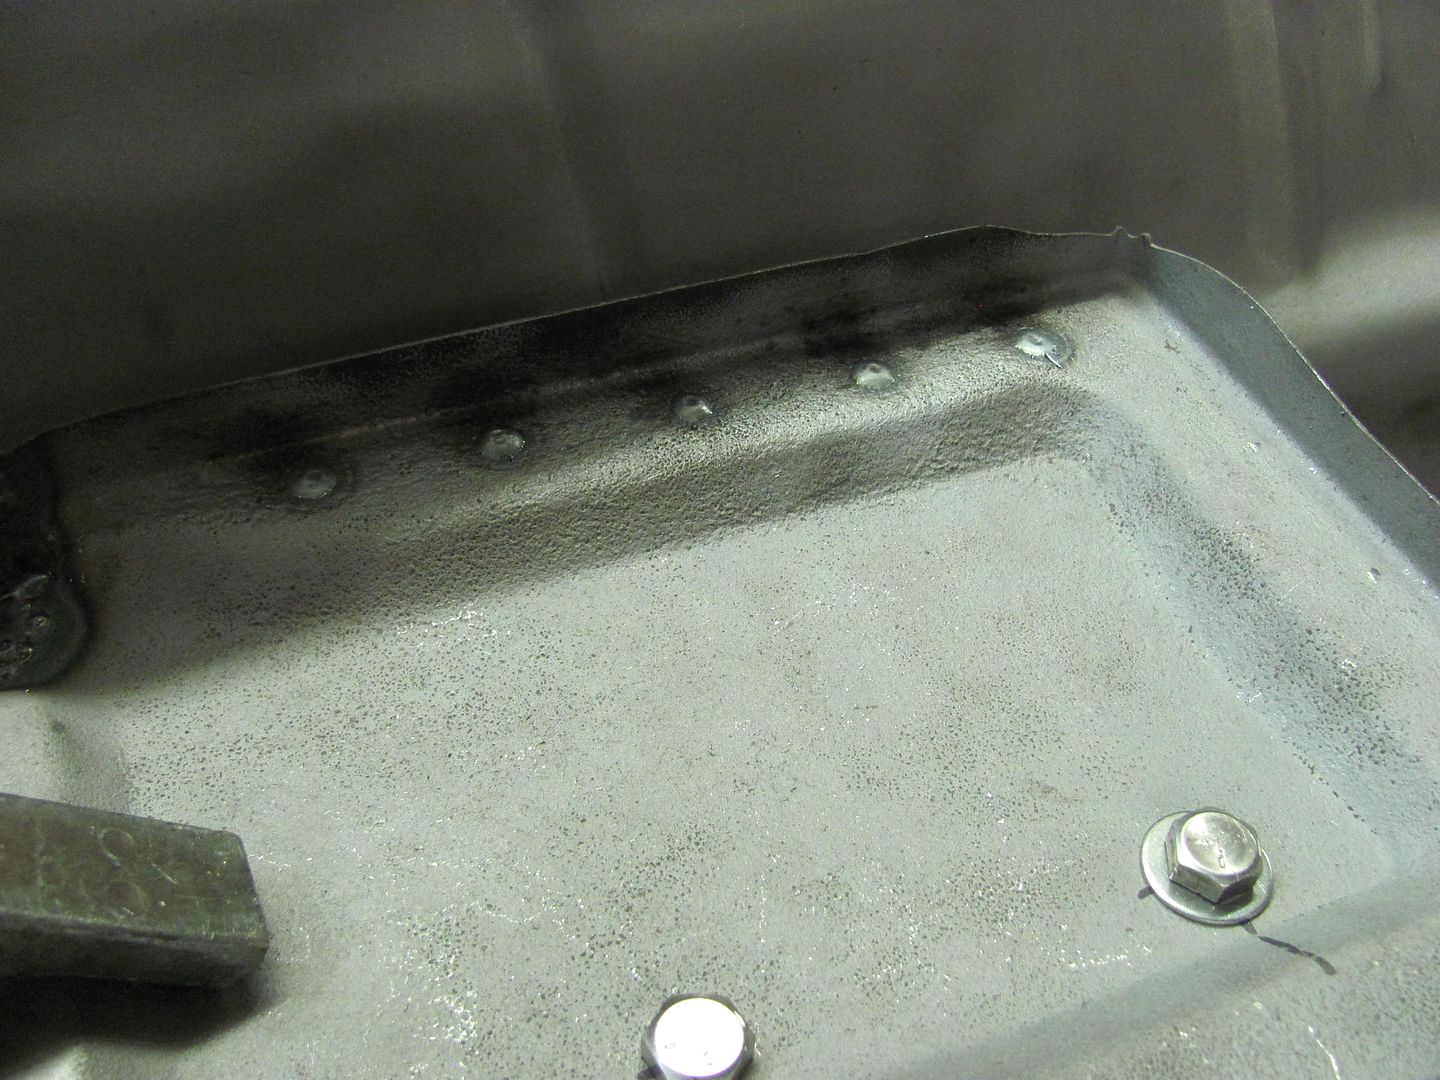
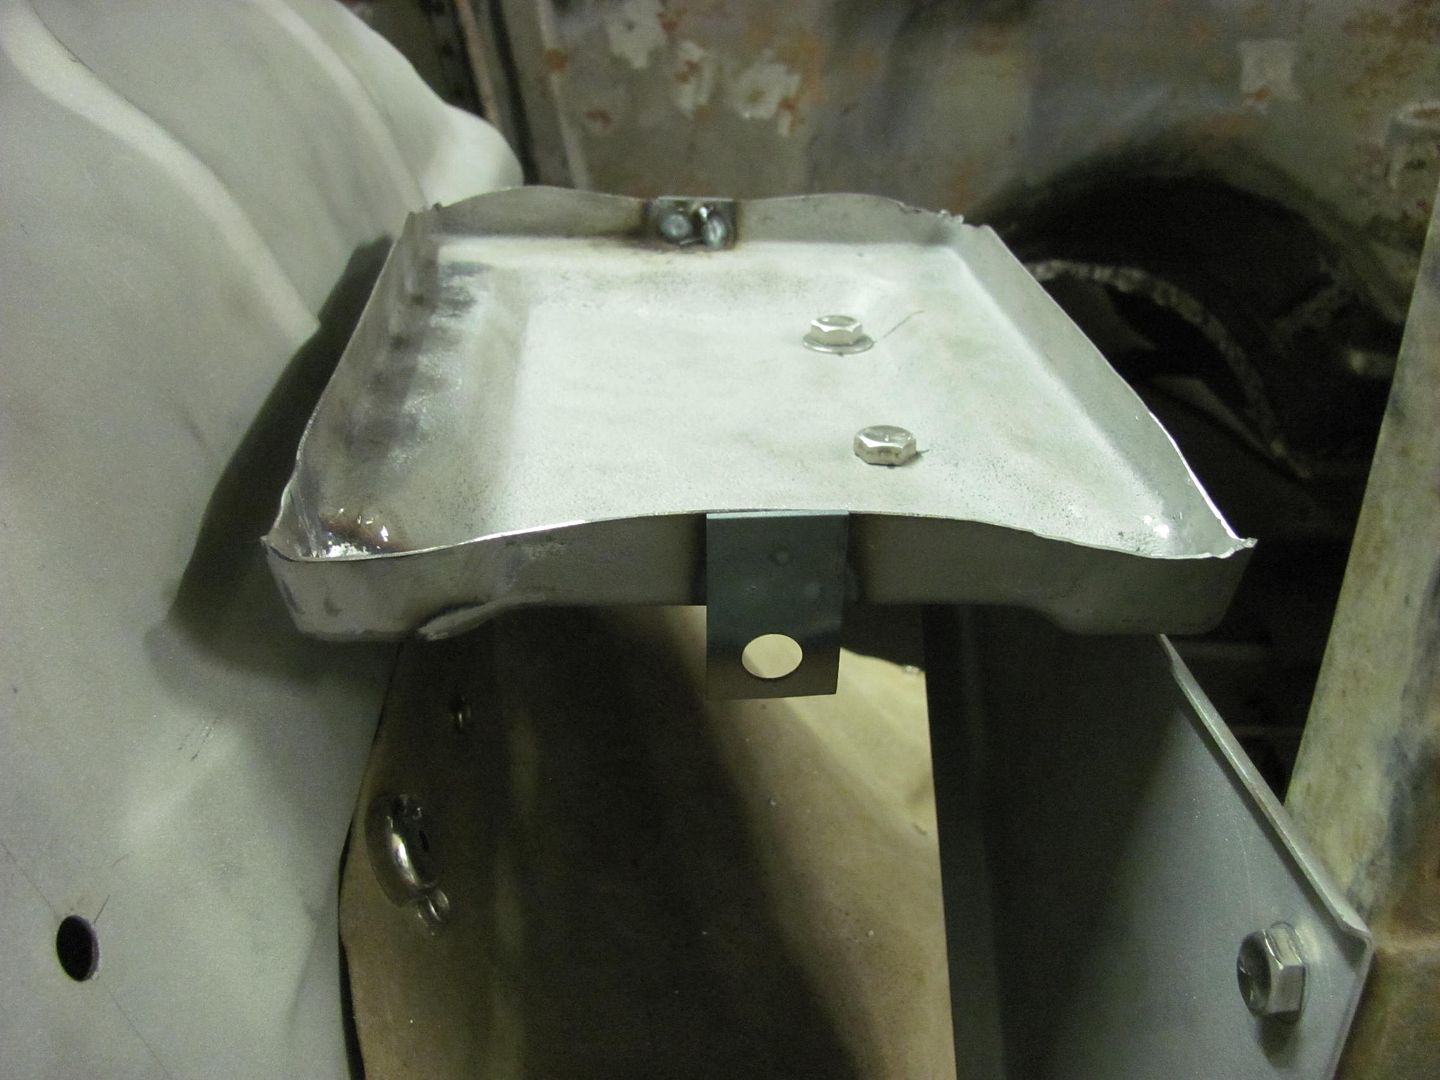
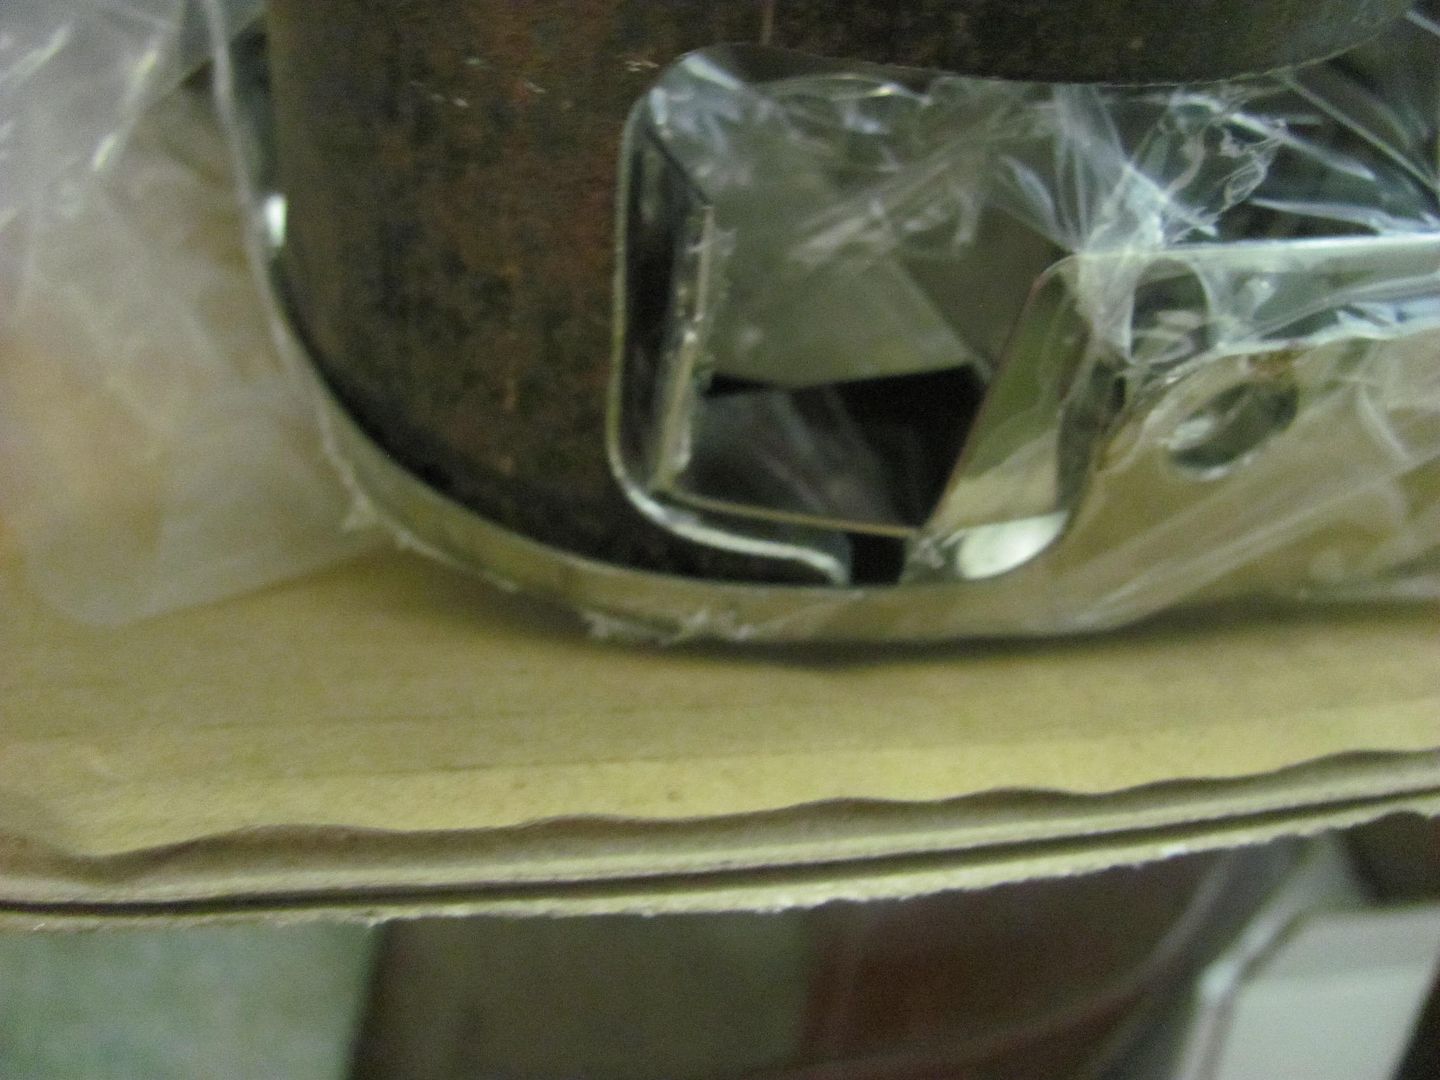
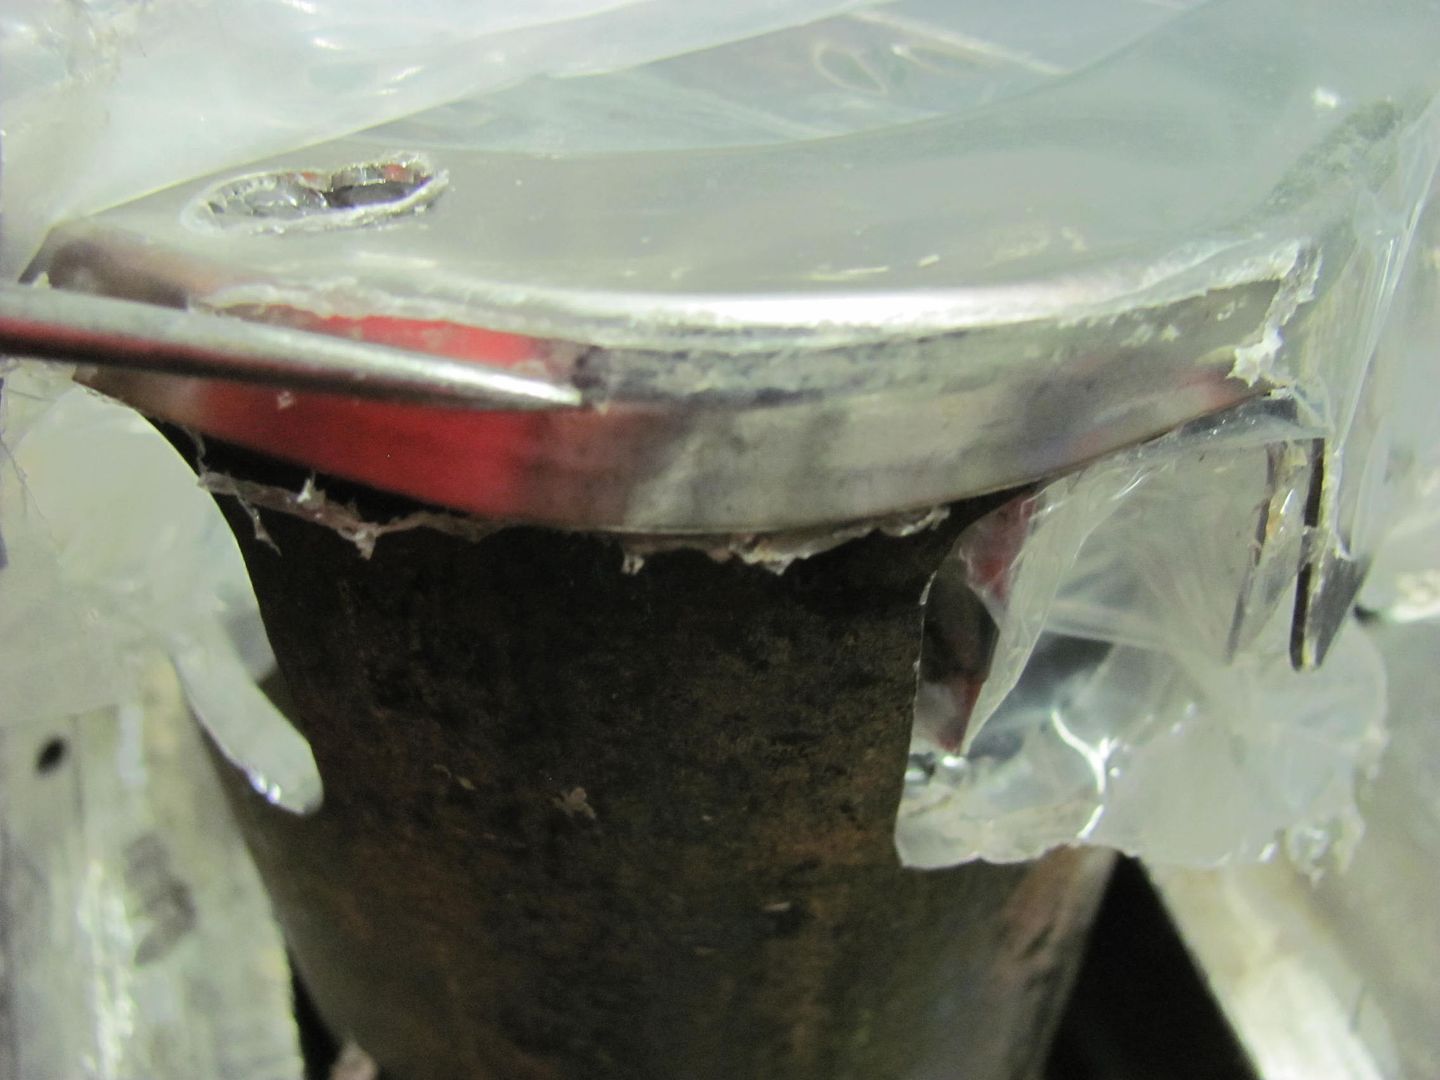
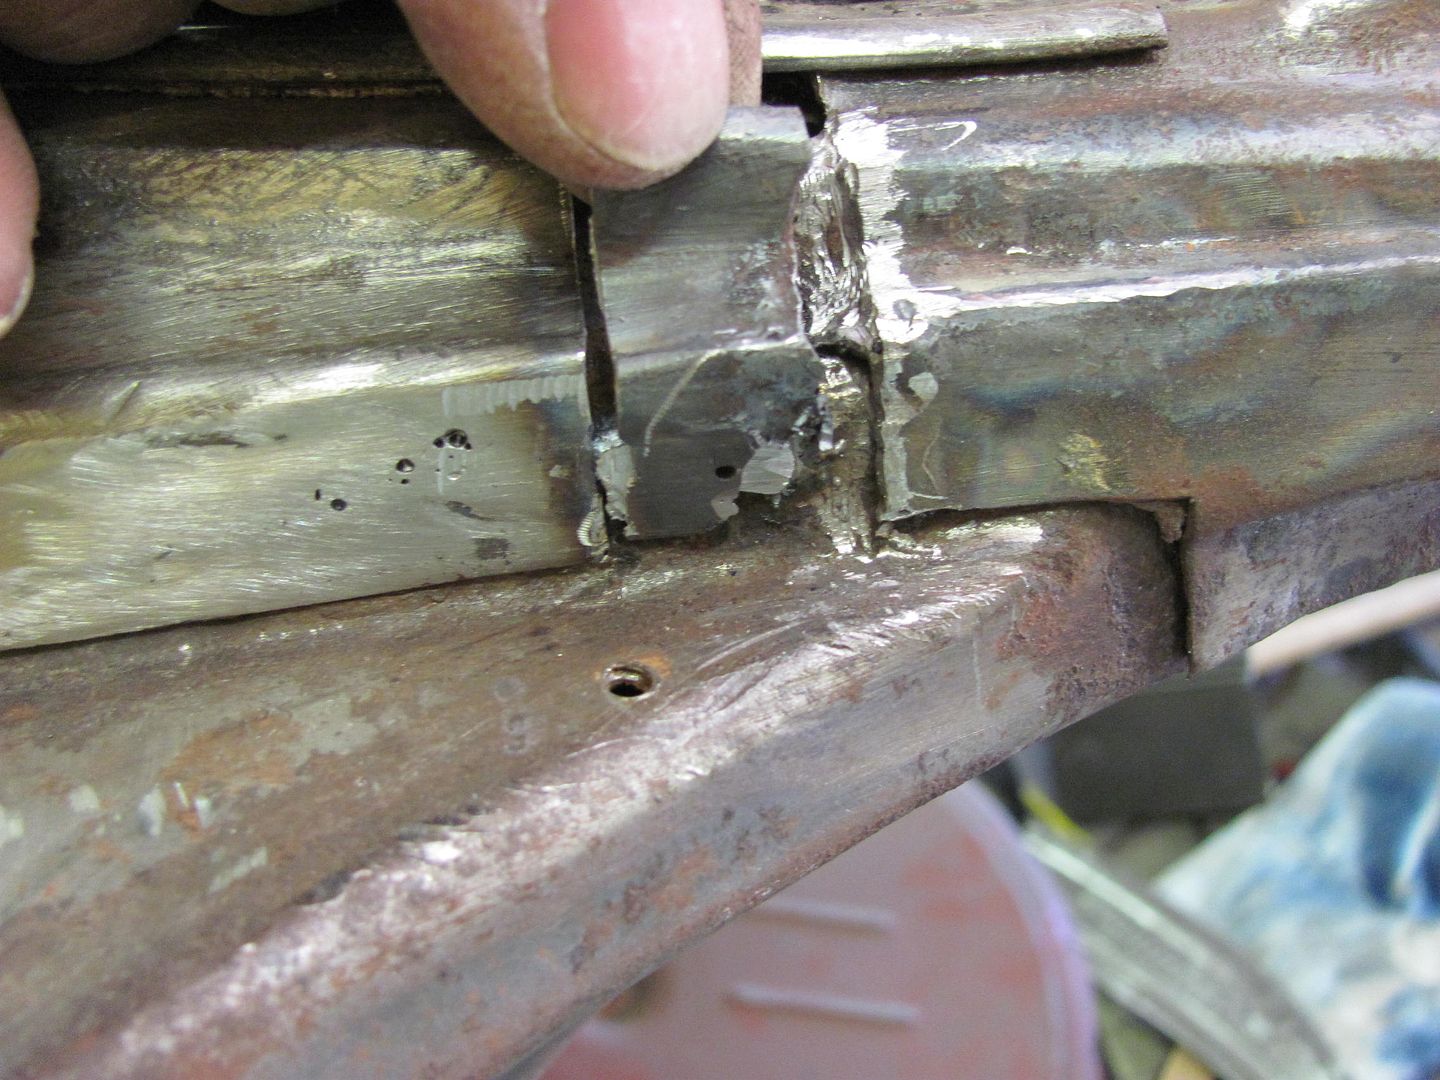
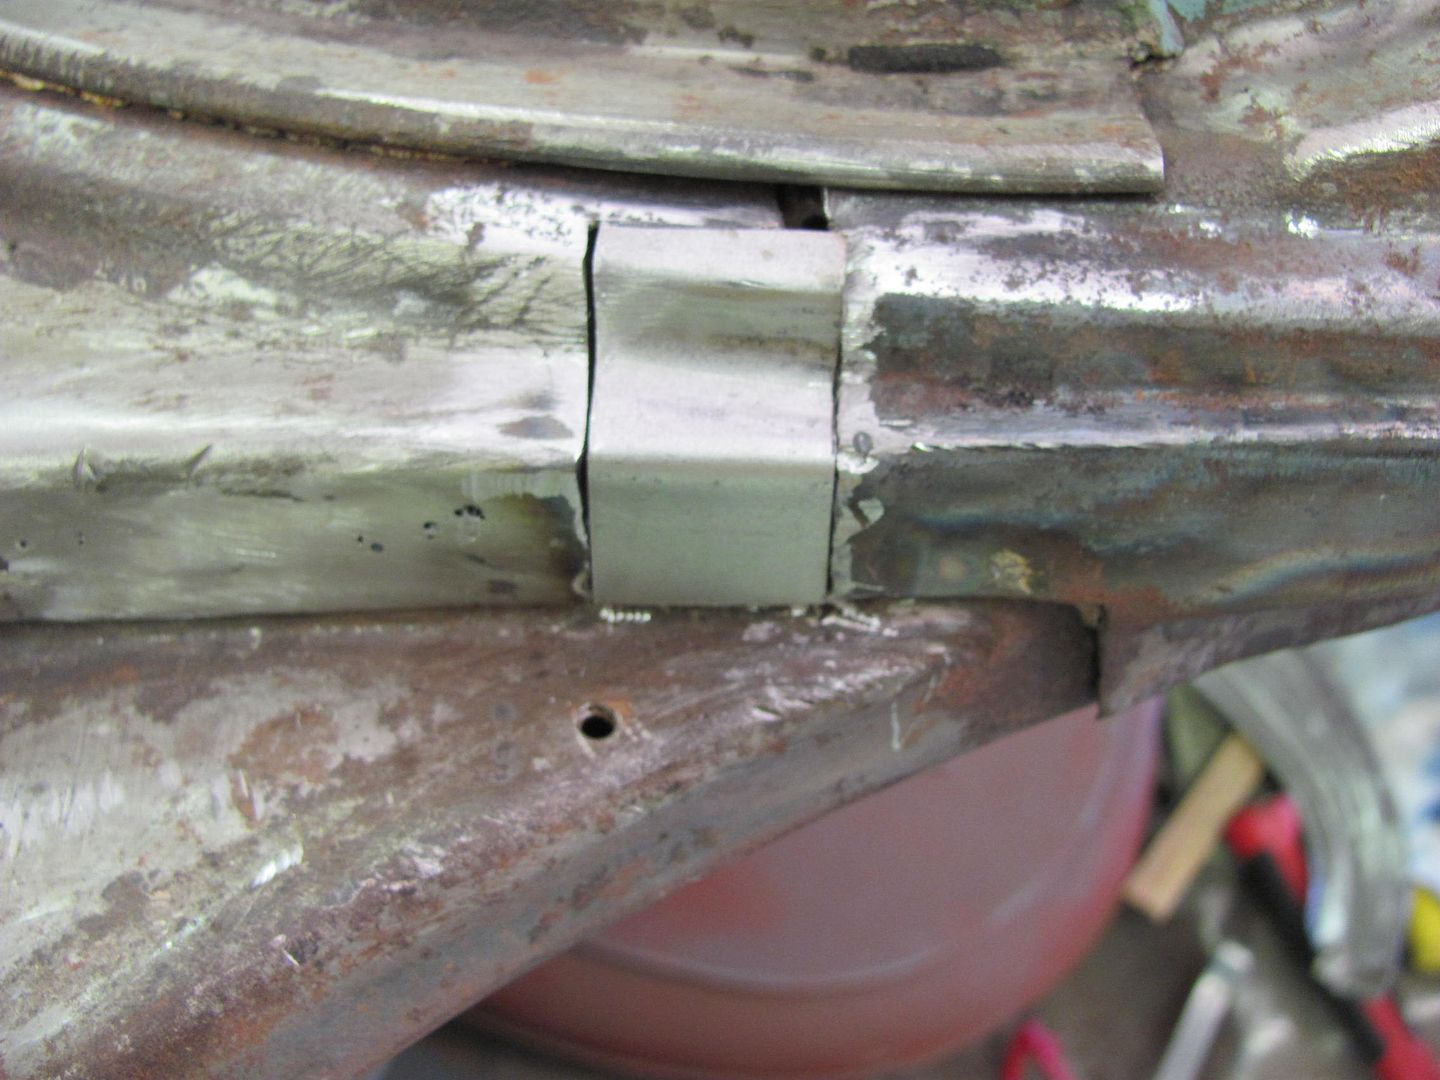
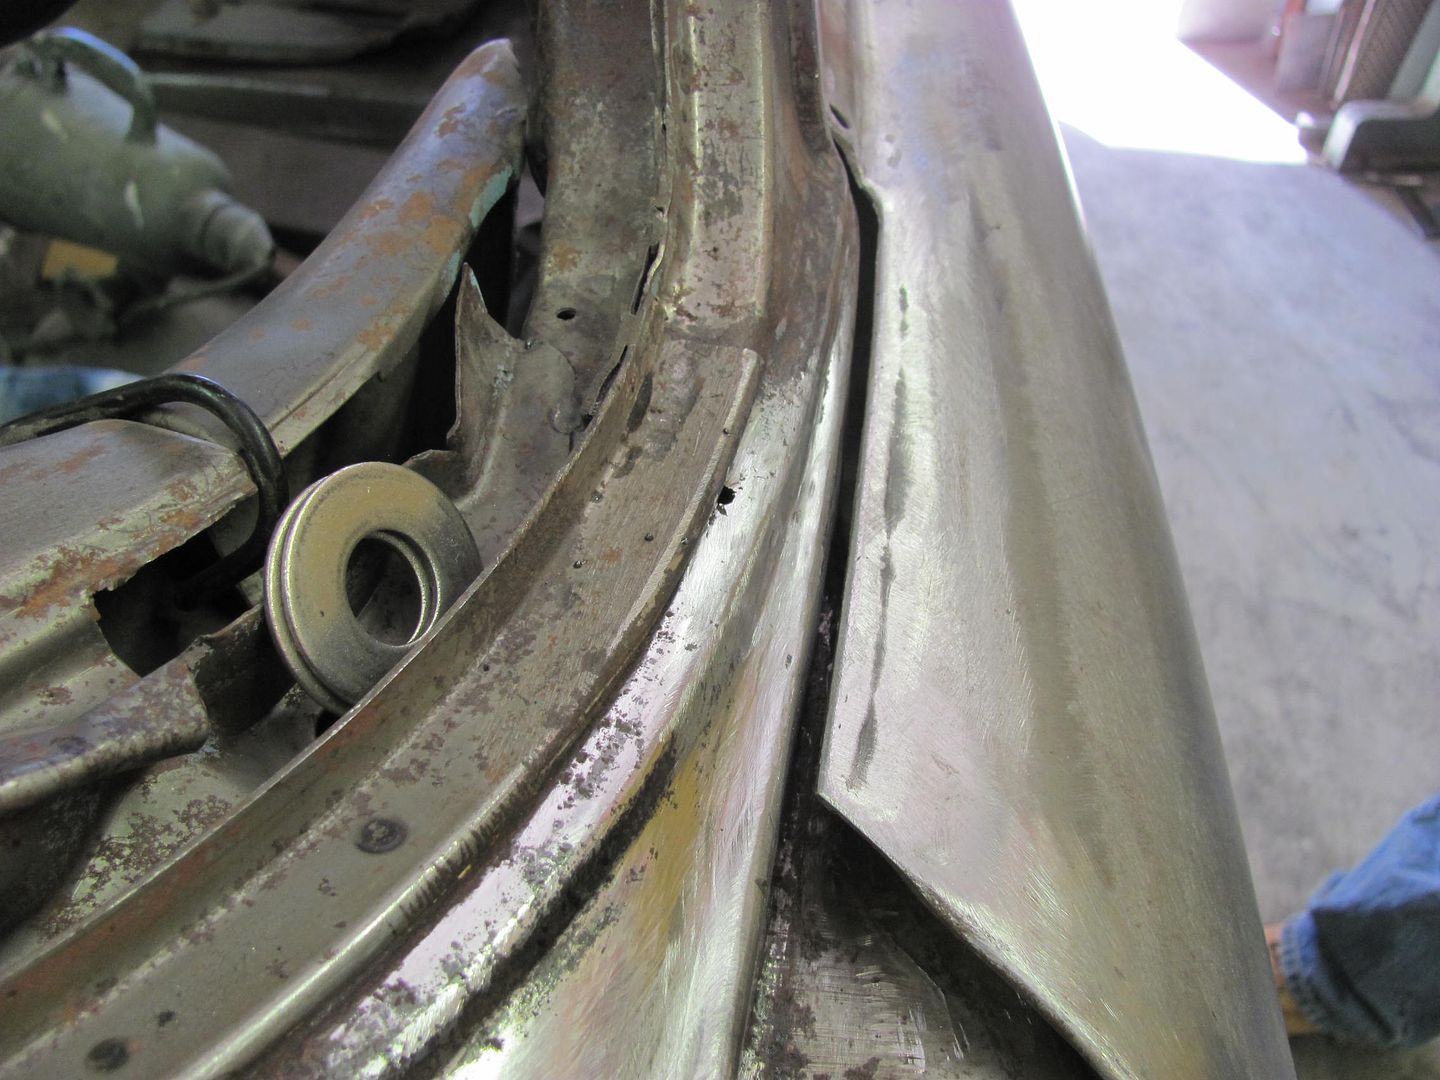
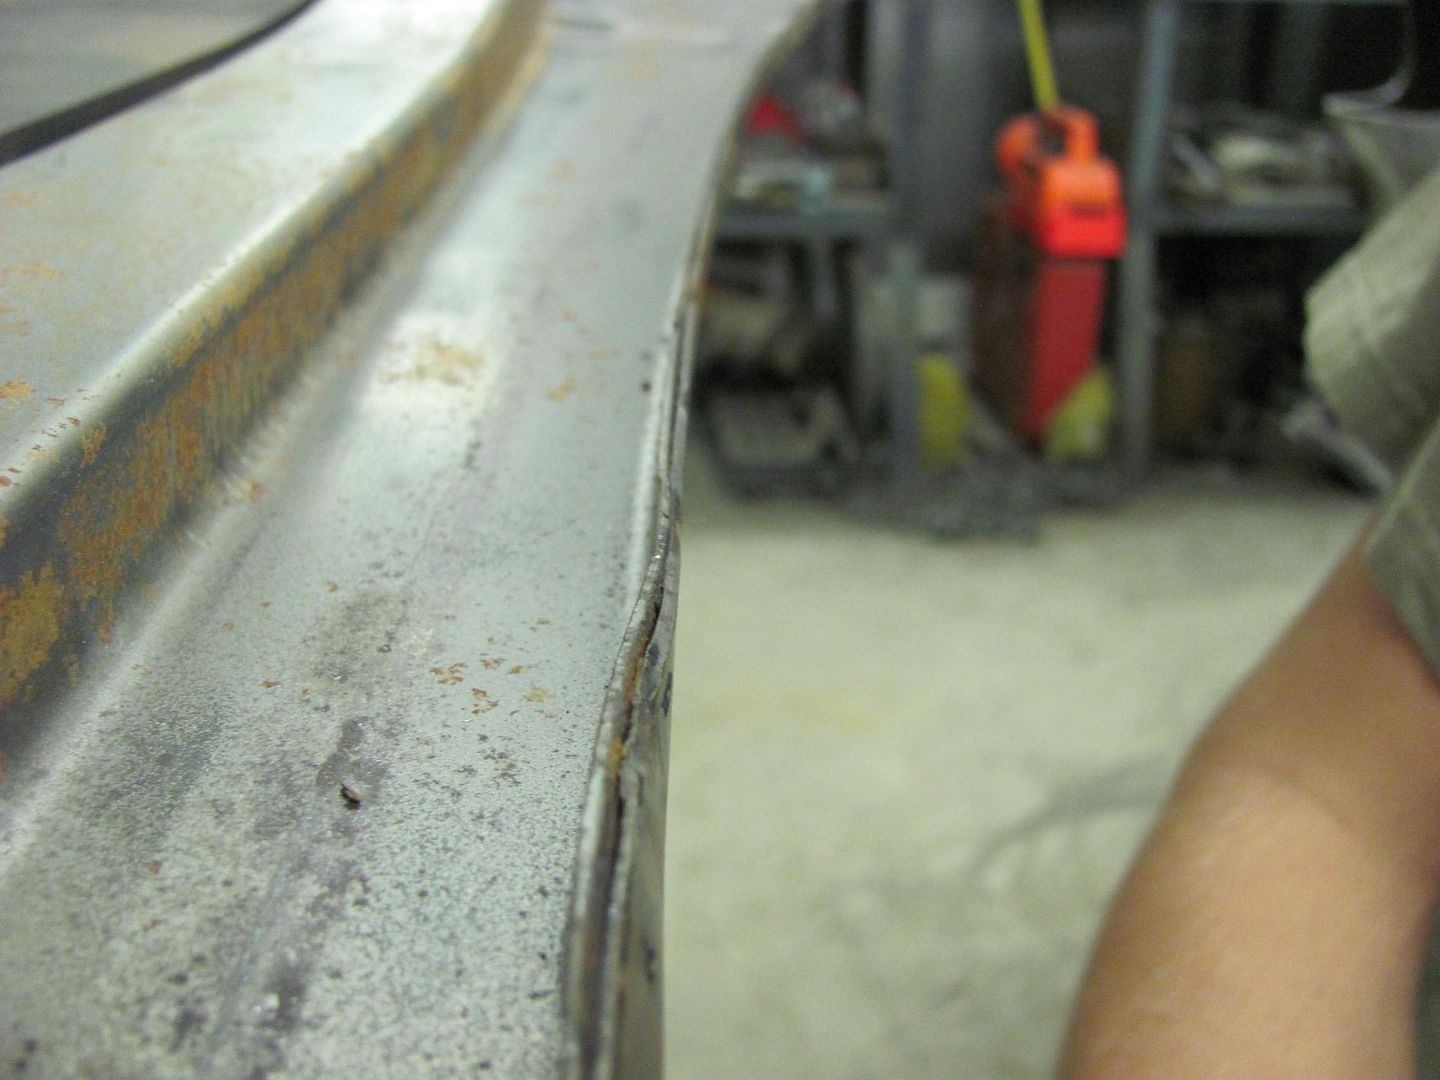
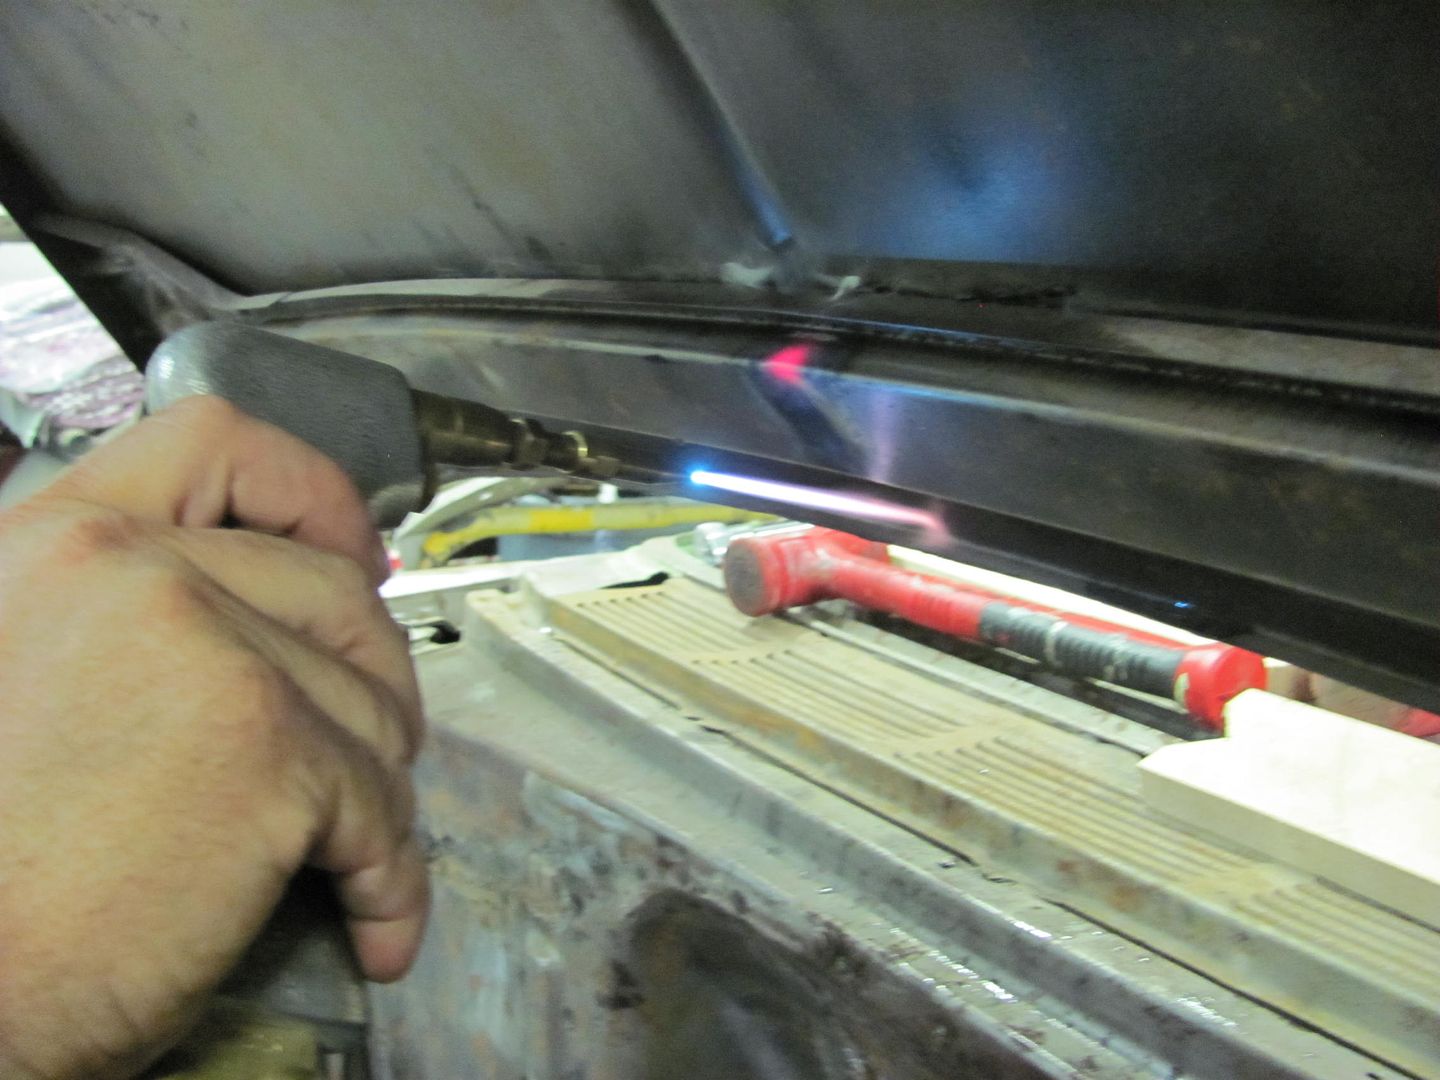
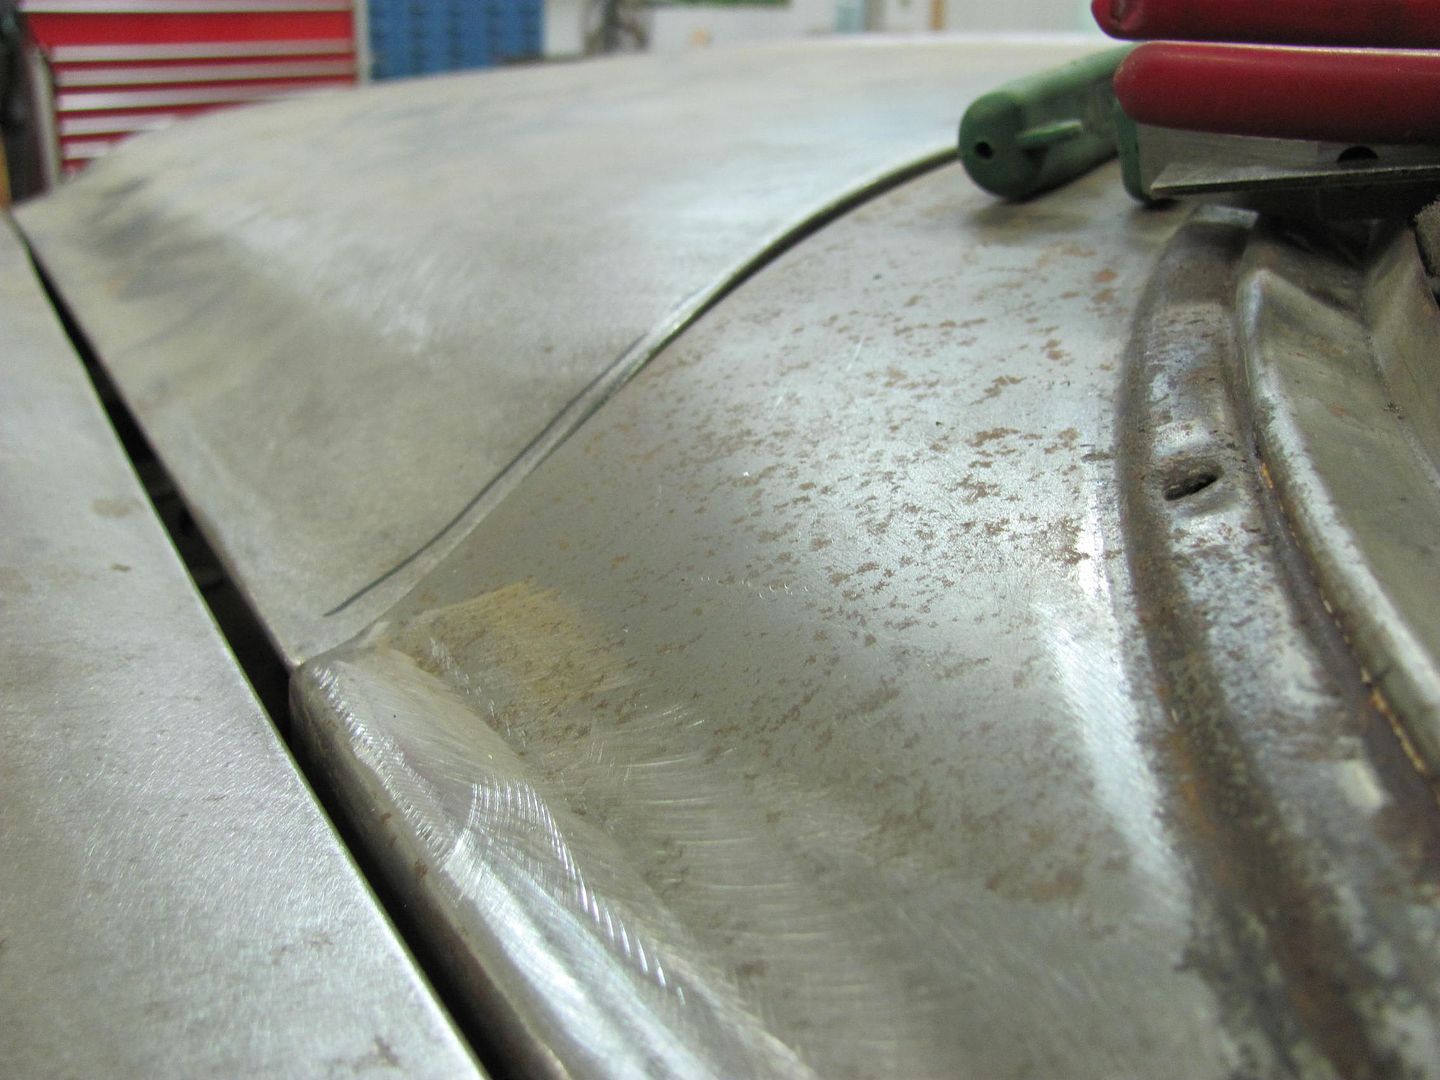
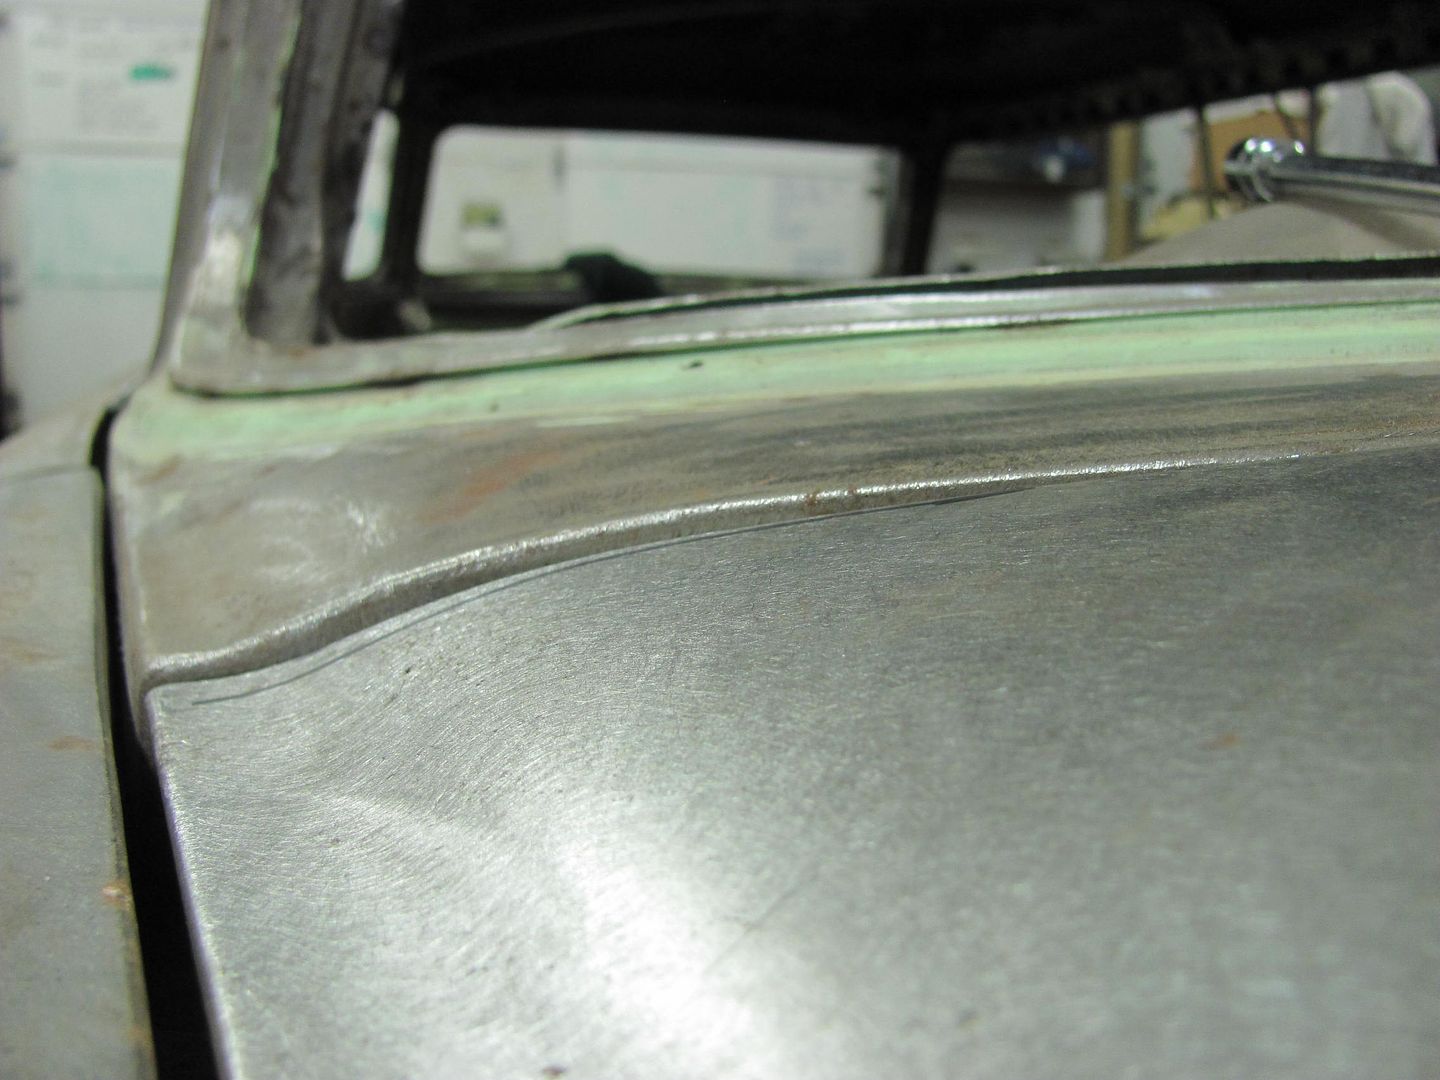
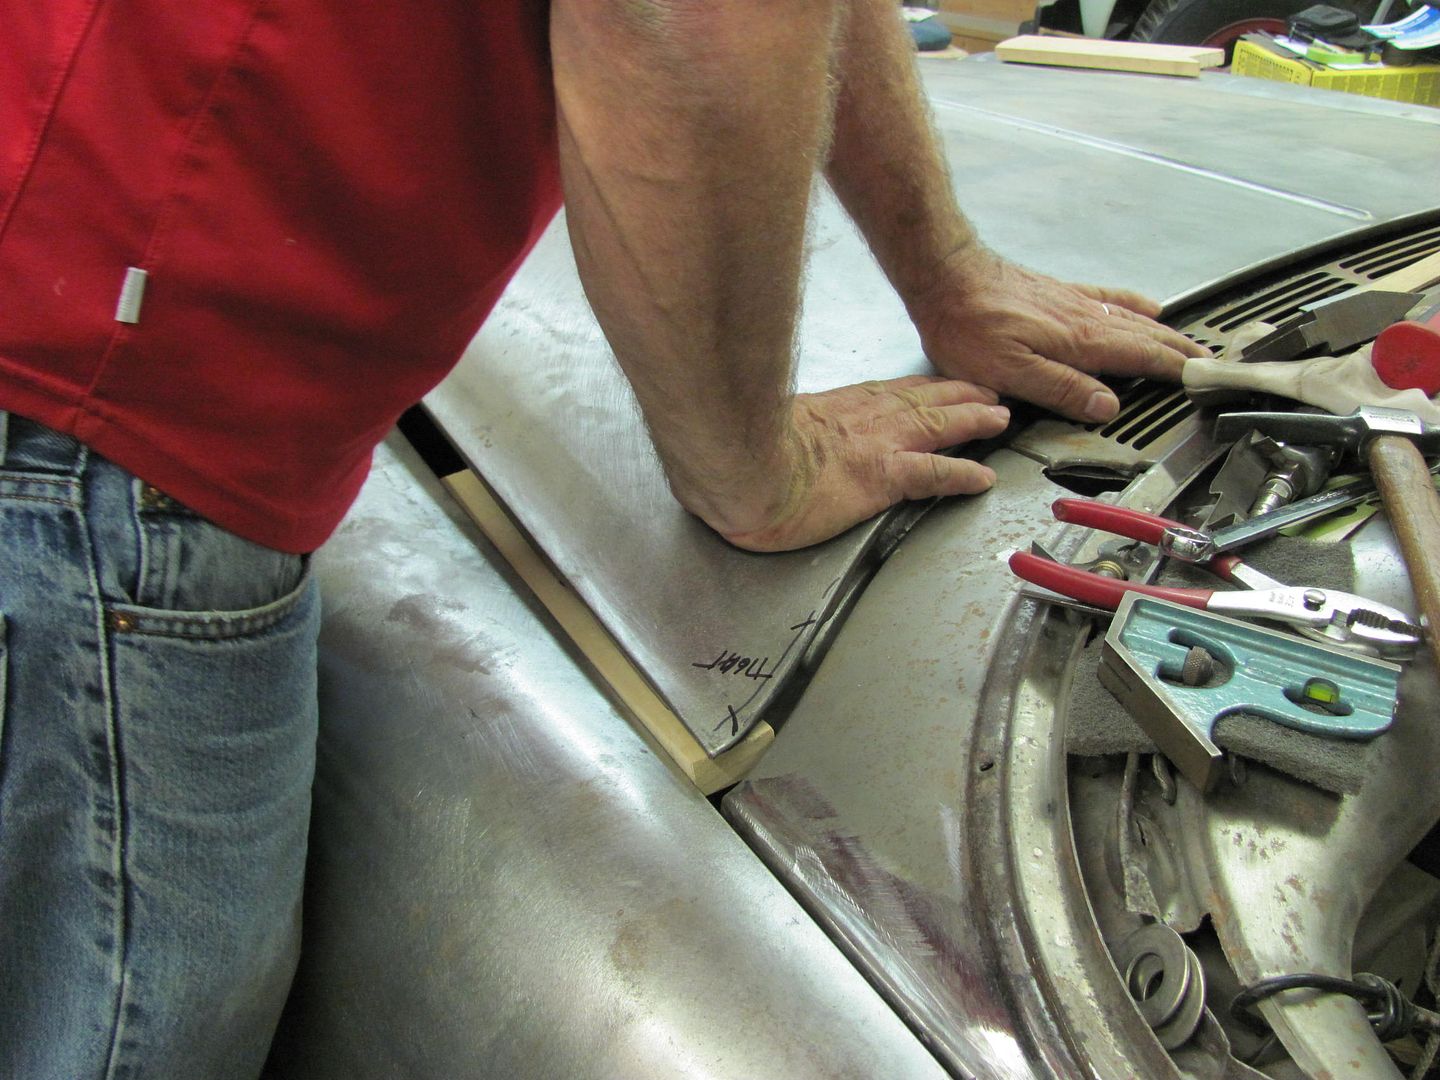
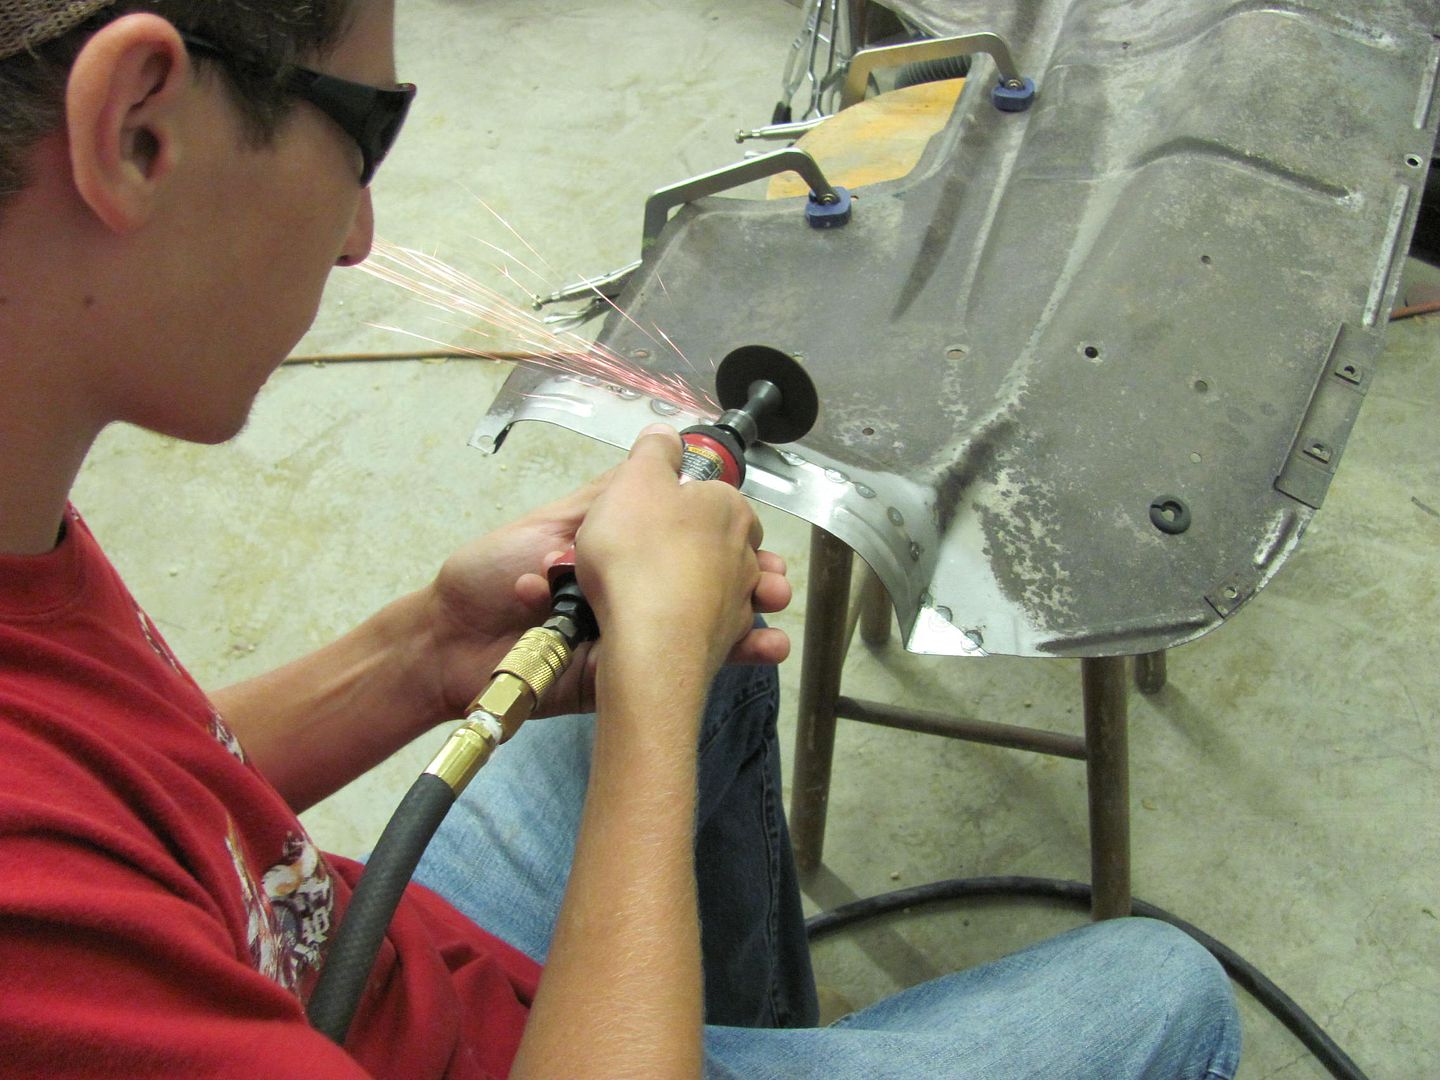
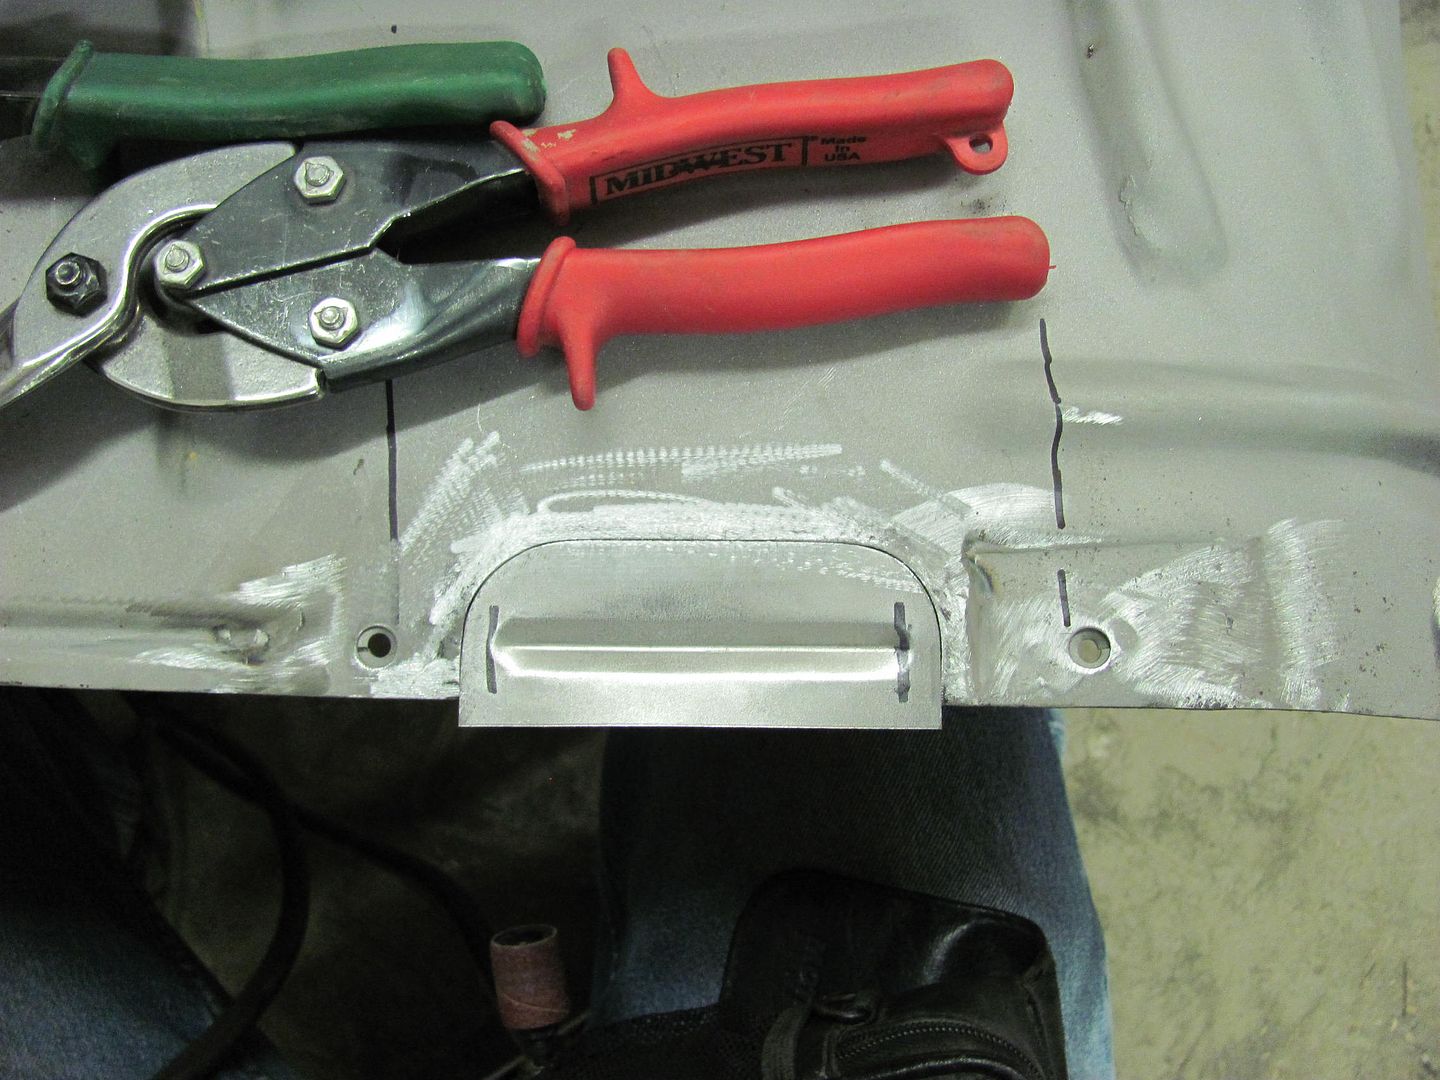
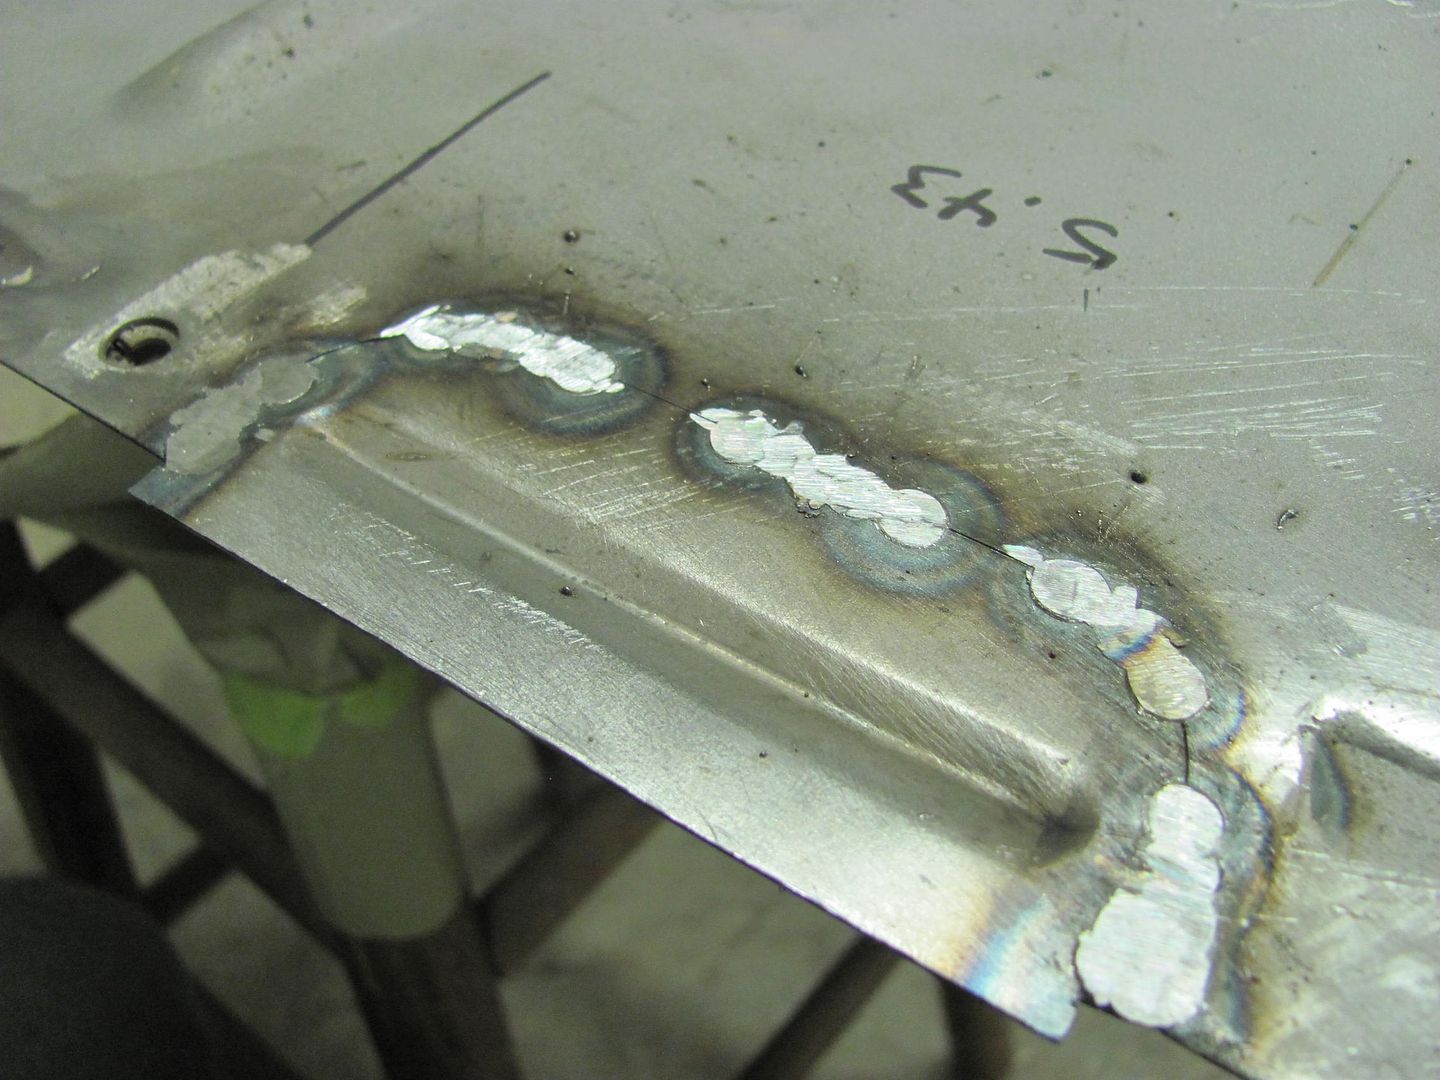
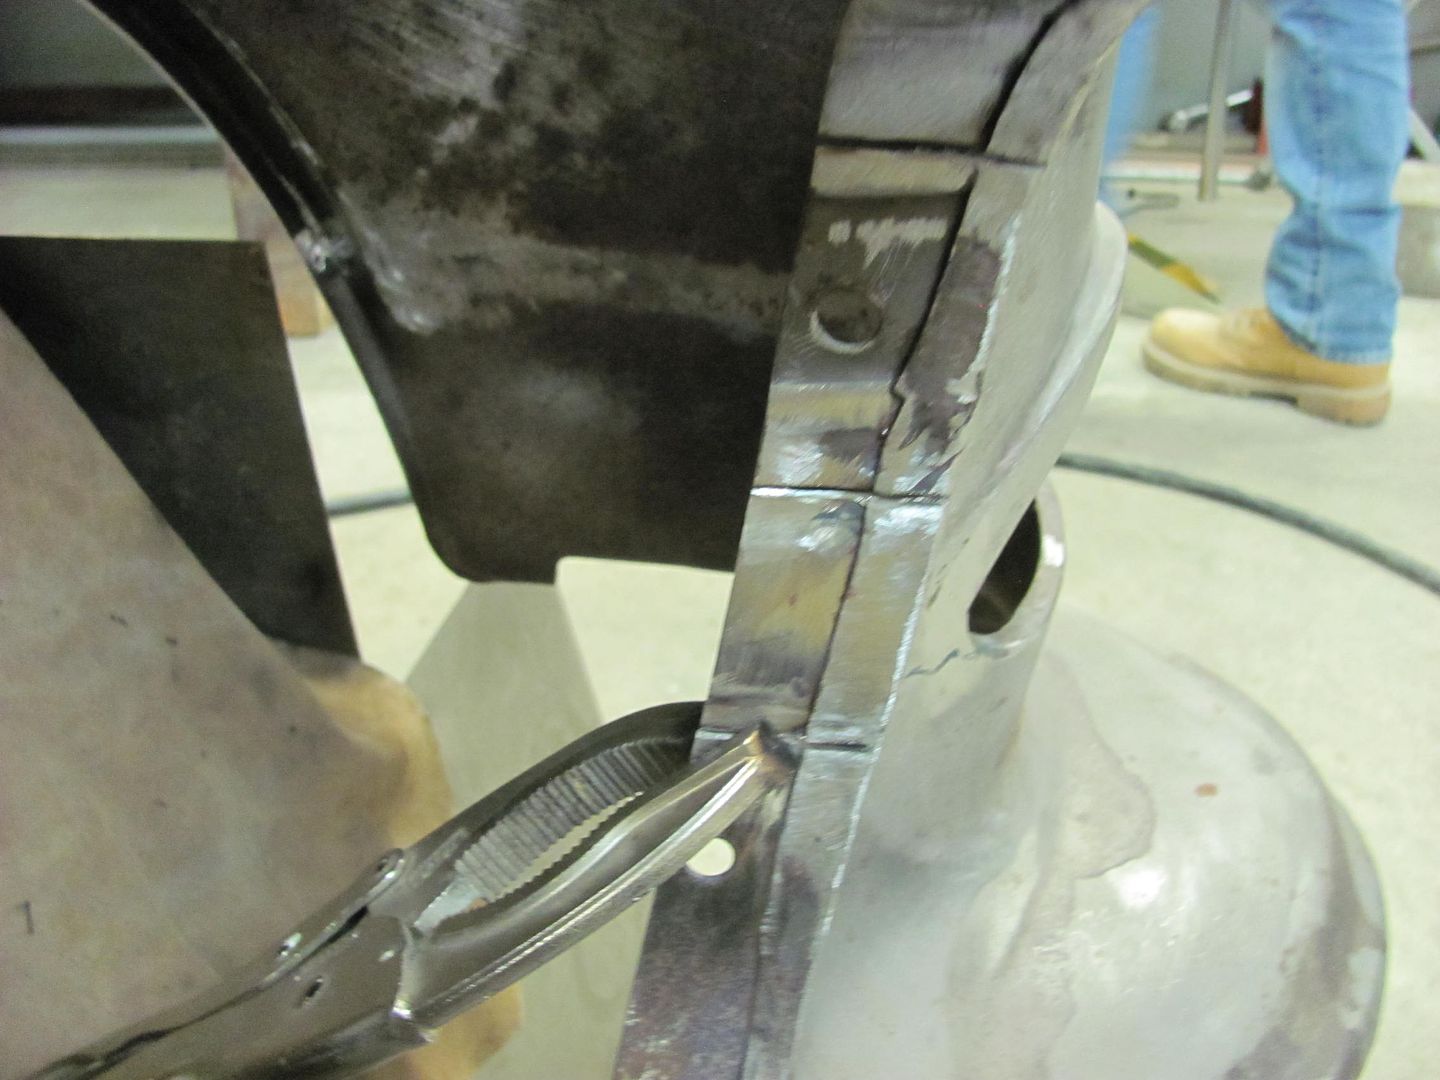
And while I was trimming more rust away, Kyle was working on the passenger side learning the fine art of dressing welds...

Picture1162.jpg


Picture1167.jpg


Picture1168.jpg
 
To avoid these ads, REGISTER NOW!

coronet

Member
Joined
Dec 24, 2009
Messages
8
Robert, I am truly in awe of your talent.It is amazing what you can do with sheetmetal.
 
OP
M

MP&C

Well-known member
Joined
Oct 21, 2009
Messages
4,396
Location
Leonardtown, MD
Thanks for the kind words!


While Kyle was working on dressing some welds this evening, I took some time to planish the weld on the driver's fender eyebrow. Here's the previous.....

Picture500.jpg


It had a noticeable dip throughout the weld seam. Here's the tool used.....

Picture1196.jpg


Picture1197.jpg


The eyebrow on the passenger side was planished all by hand, and probably has a couple hours of work. The Watervliet planishing hammer made short work of the driver's side, it took all of five minutes time to have it in a comparable state as the passenger side... with the dip all but disappeared

Picture1198.jpg


Continuing on with more inner fender work, starting on the driver's side....

Picture1188.jpg


Picture1189.jpg


Back side, full penetration welds.....

Picture1191.jpg


Staple holes for seal filled...

Picture1192.jpg


Picture1193.jpg


Should get both these finished up Saturday morning and mocked up with the battery tray..
 

NASTYZEN

Well-known member
Joined
Jun 11, 2010
Messages
2,823
Location
St-Colomban,Que. Canada
That wagon is looking great Robert! Looks like your getting down to the nitty gritty of things.
I see Epoxy paint happening in the near future...
That apprentice seems to be working out well for you. I guess he can appreciate how much can be learned from an old dude with know how like yourself. That's a motivator right there.:thumbup:
 
OP
M

MP&C

Well-known member
Joined
Oct 21, 2009
Messages
4,396
Location
Leonardtown, MD
Thanks for the comments Claude. Yeah, he is working out to be pretty good help!
 
Last edited:
OP
M

MP&C

Well-known member
Joined
Oct 21, 2009
Messages
4,396
Location
Leonardtown, MD
Here's the passenger side with the welds dressed and mocked up to the grille....

Picture1204.jpg


Picture1206.jpg


Picture1208.jpg


While Kyle media blasted the passenger side, I did some finish work on the driver's side. We still had this up at the top to fix...

Picture1210.jpg


A replacement was made and marked out on the inner fender..

Picture1211.jpg


Took a reference measurement to insure any shrinking effects were properly planished out...

Picture1213.jpg


Ice pick works well in marking the cutout pattern...

Picture1214.jpg


Picture1215.jpg


Trimmed and fitted

Picture1217.jpg


Tacked in place...

Picture1218.jpg


Rear side

Picture1219.jpg


Picture1224.jpg


After planishing and dressing the welds, re-checking the reference measurement....

Picture1225.jpg


Picture1226.jpg


Passenger side complete....

Picture1220.jpg


Picture1221.jpg


Driver's side complete.....

Picture1228.jpg


Picture1229.jpg


Next task will be to assemble the battery tray and send off the goodies for powder coating.
 
OP
M

MP&C

Well-known member
Joined
Oct 21, 2009
Messages
4,396
Location
Leonardtown, MD
Tonight we worked on fitting the new Gene Smith grille components. It started with the mandatory instructions...

Picture1230.jpg


To insure the studs didn't move once hand tightened, some thread lock stuff was used... We did find the qty of hardware was short by two each, and after a quick call to Gene Smith, Fred has some on the way for us..

Picture1231.jpg


Picture1232.jpg


The new grille fits just like the old one, it is VERY tight in the top corners..

Picture1233.jpg


Picture1235.jpg


To eliminate the paint rub syndrome and other possible front end squeaks from metal on metal, some templates were made so we can do some hammering on the new grille... and keep a consistent distance between.

Picture1234.jpg


Initial fitment:

Picture1237.jpg


Picture1238.jpg


Picture1239.jpg


Where the passenger side fit fairly well initially, the drivers side showed some rocking and gap issue.

Picture1245.jpg


Picture1246.jpg


Picture1247.jpg


I initially thought the driver's side piece was mis-shapen, but in placing them side by side they were pretty much a mirror image. Checking the front edge of the opening with a straight edge, the passenger side showed to be good and straight, the driver's side had a depressed area. This likely occurred when some fender shaving and rust repairs were performed, without the luxury of the chrome pieces for fitment. So some relief cuts were made to bring out the low area of the opening...

Picture1248.jpg


Picture1249.jpg


....for a drastic improvement in the fitment.

Picture1254.jpg


Picture1255.jpg


Picture1253.jpg


The surround trim studs did have some alignment issues with the grille. One of these "tweaking" devices is highly recommended to fine tune the fitment..

Picture1256.jpg
 

8man

Well-known member
Joined
Oct 16, 2013
Messages
630
Location
Bryan, Texas
Thanks to you and this write up I'm tackling my first roof panel patches this weekend. I've done some small stuff like screw holes and some inner fender patches where they weren't visible, but this will be the first really visible area, so hoping it goes well.
 
OP
M

MP&C

Well-known member
Joined
Oct 21, 2009
Messages
4,396
Location
Leonardtown, MD
I did mine twice as I wasn't happy with the results the first time out, so good luck and hopefully you can learn from some of my mistakes. :lol: 
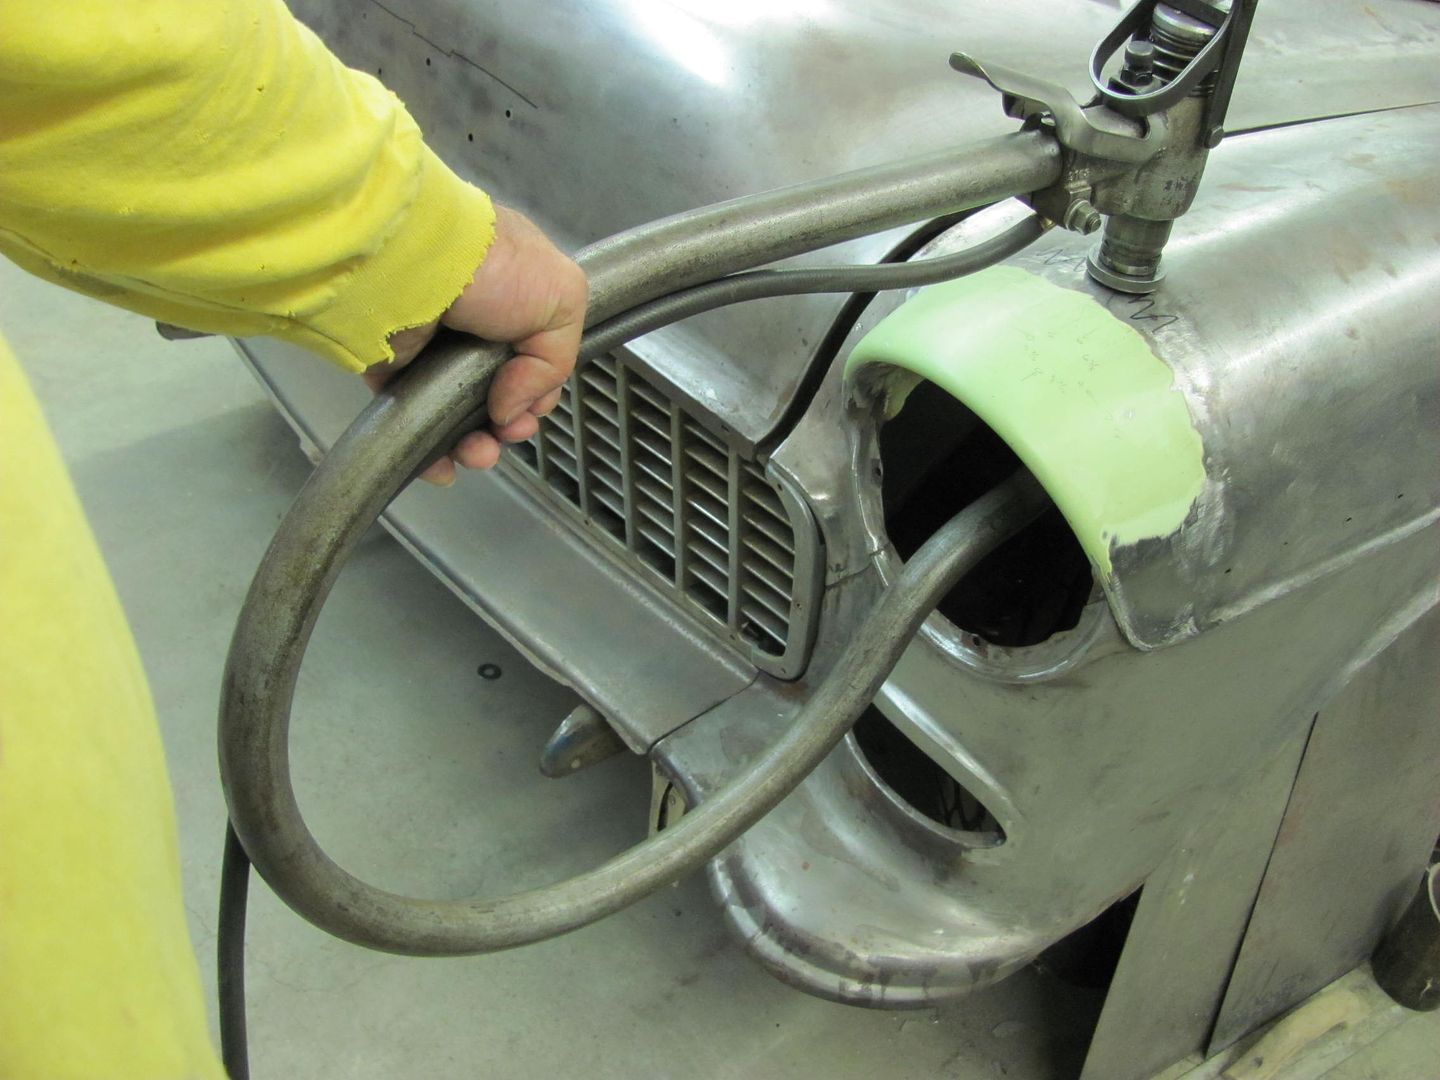
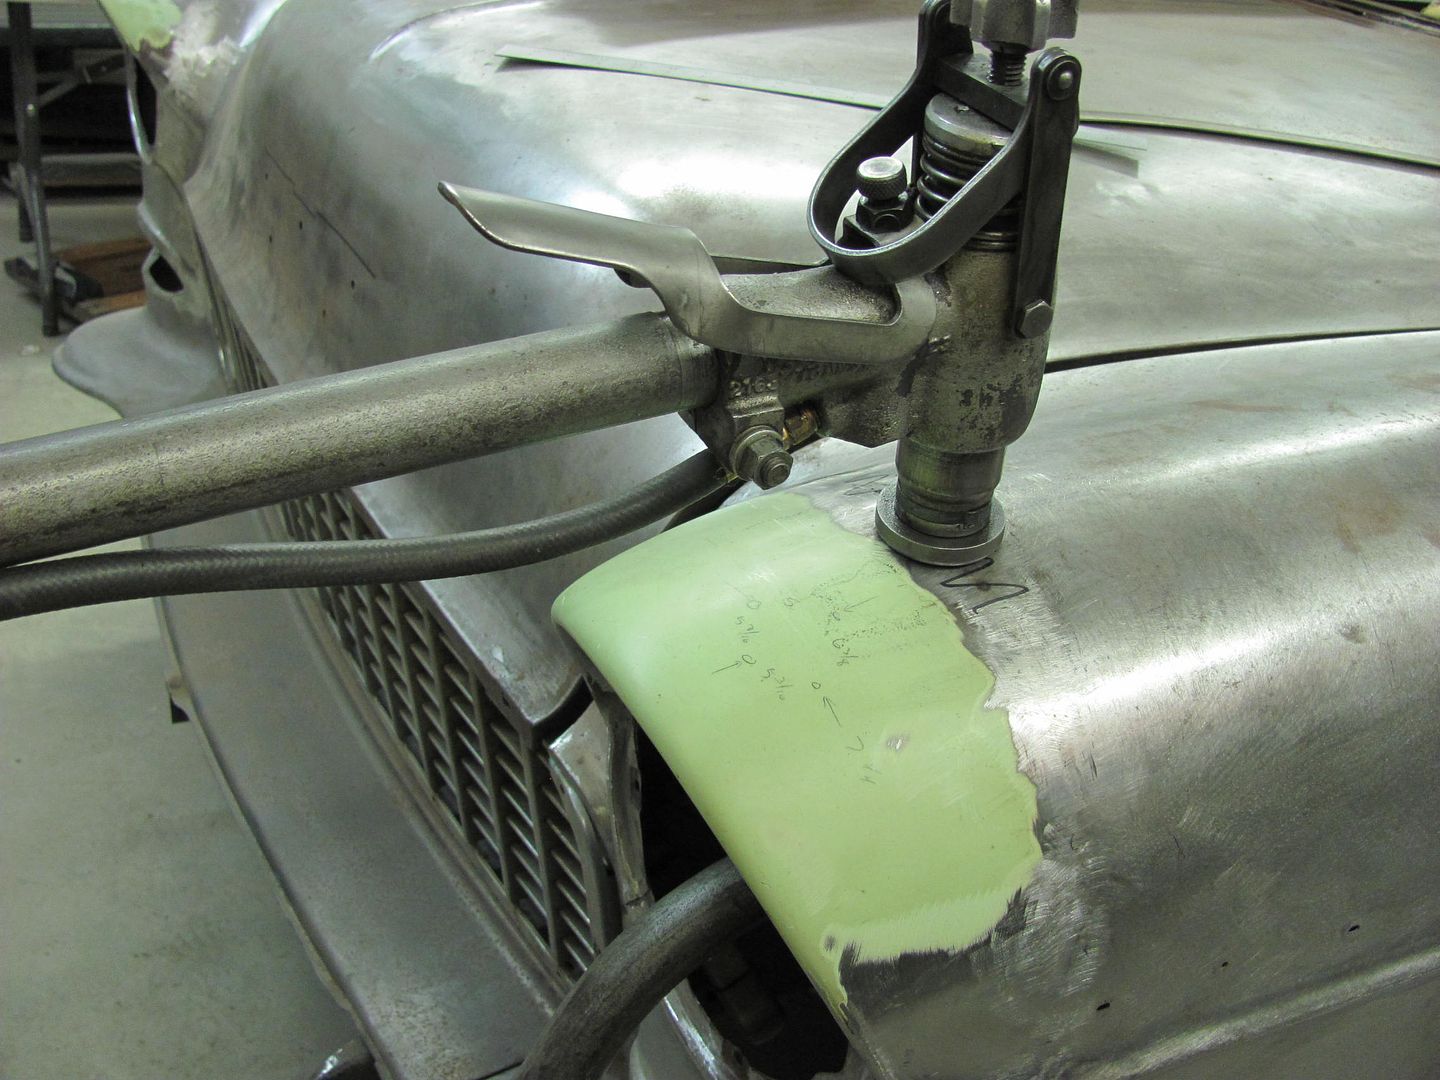
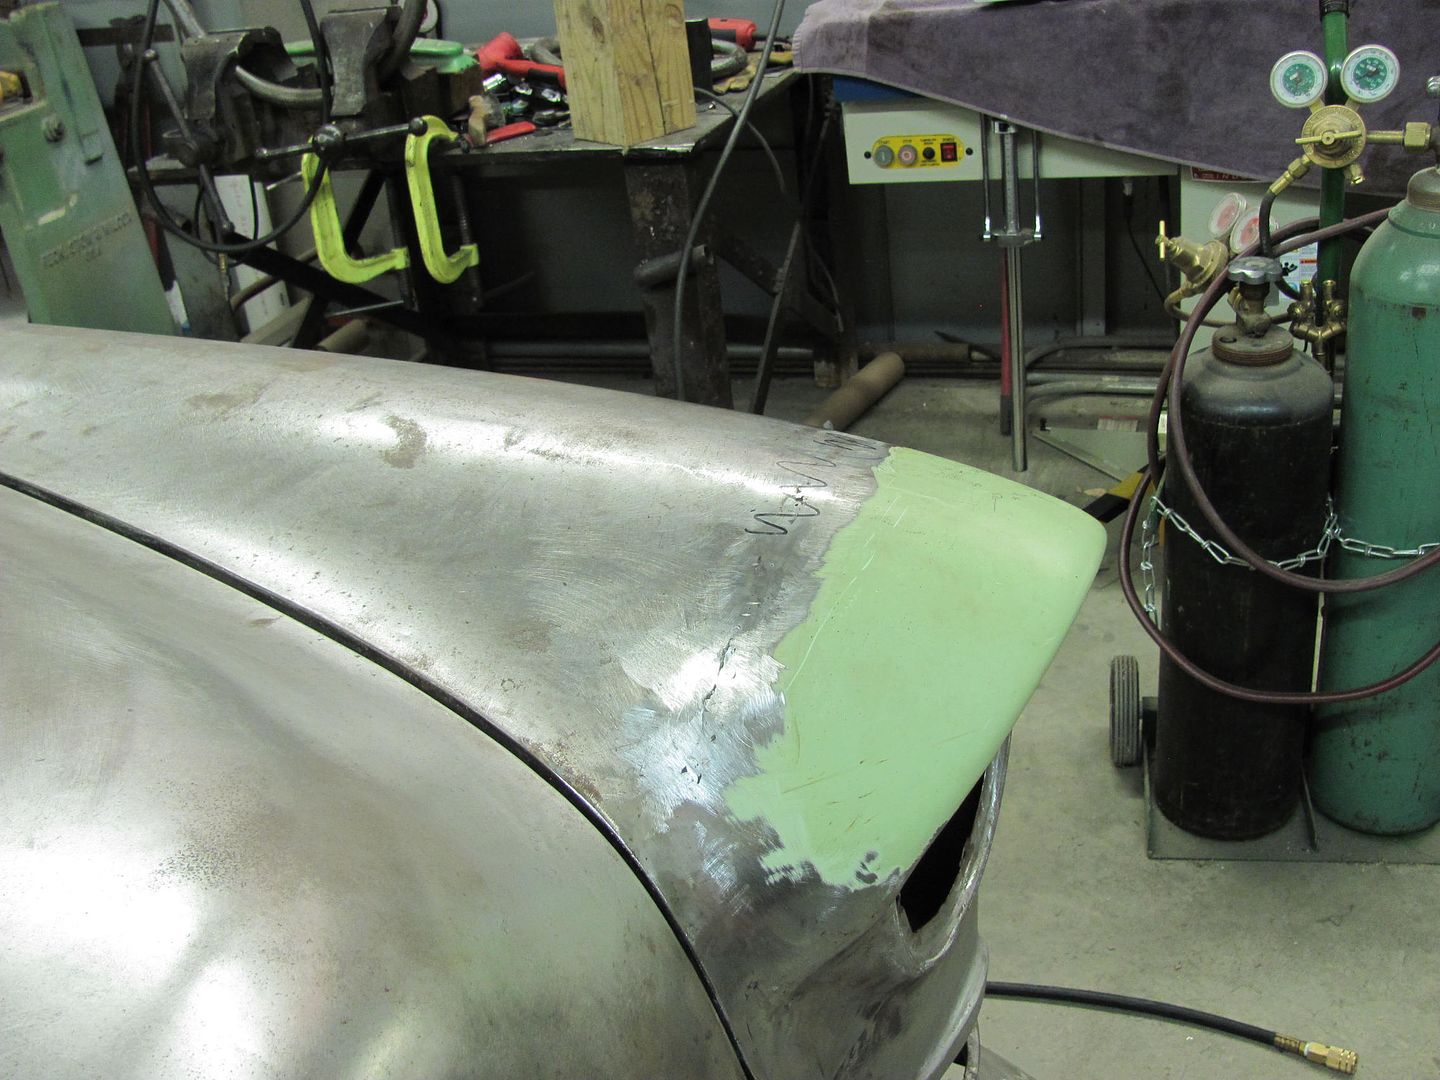
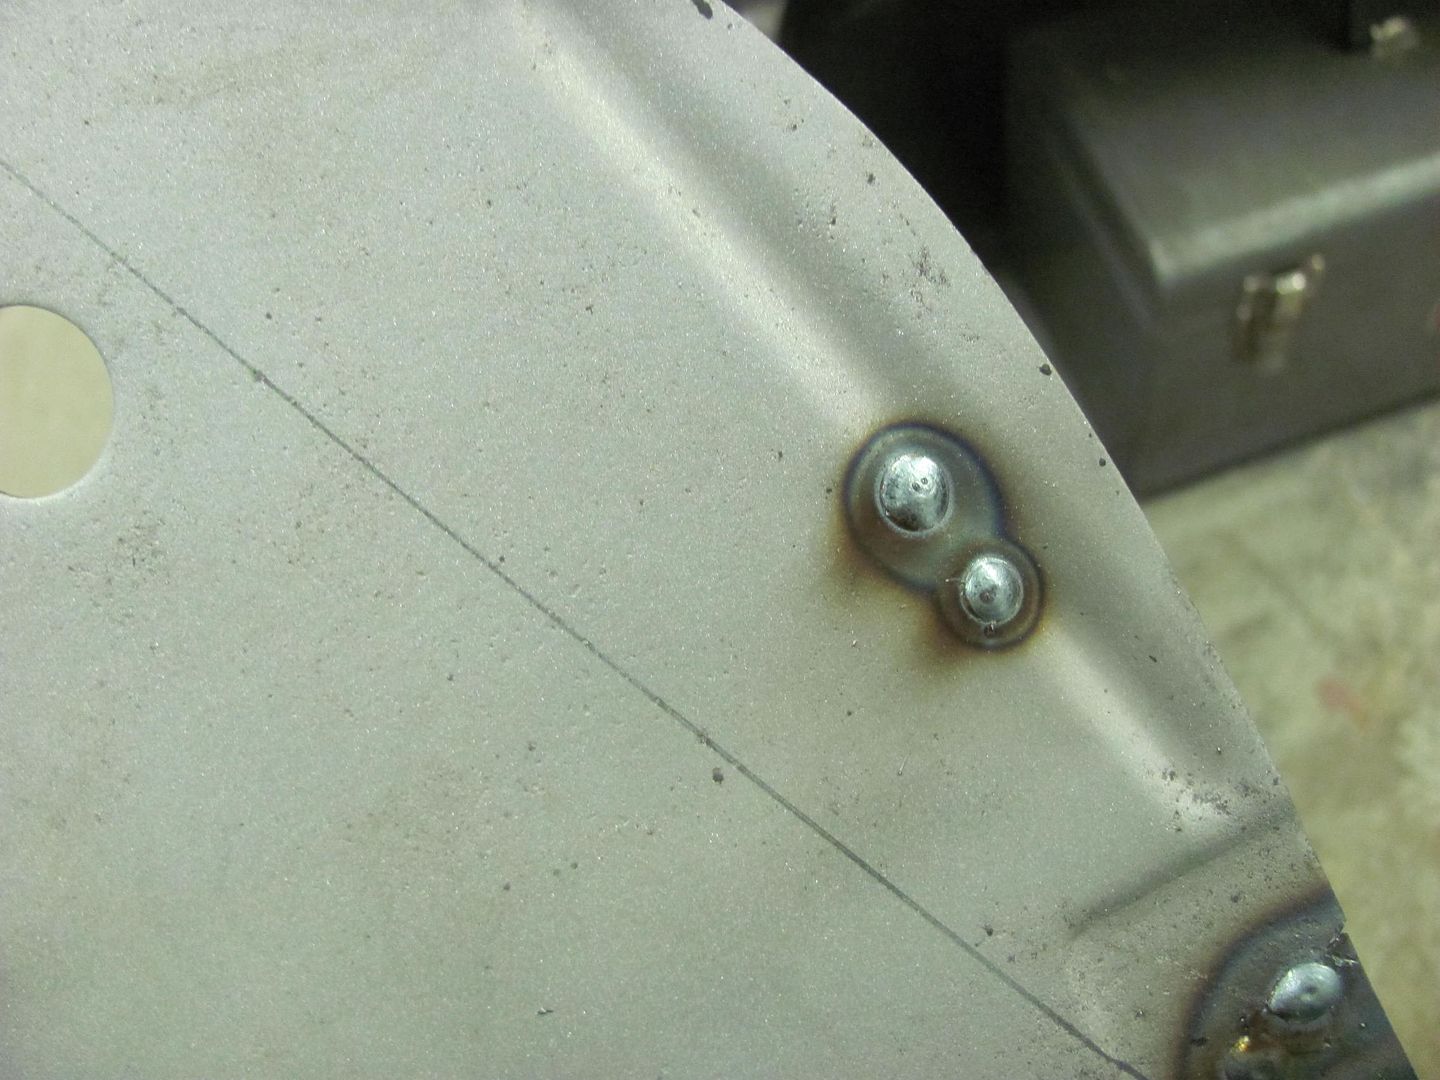
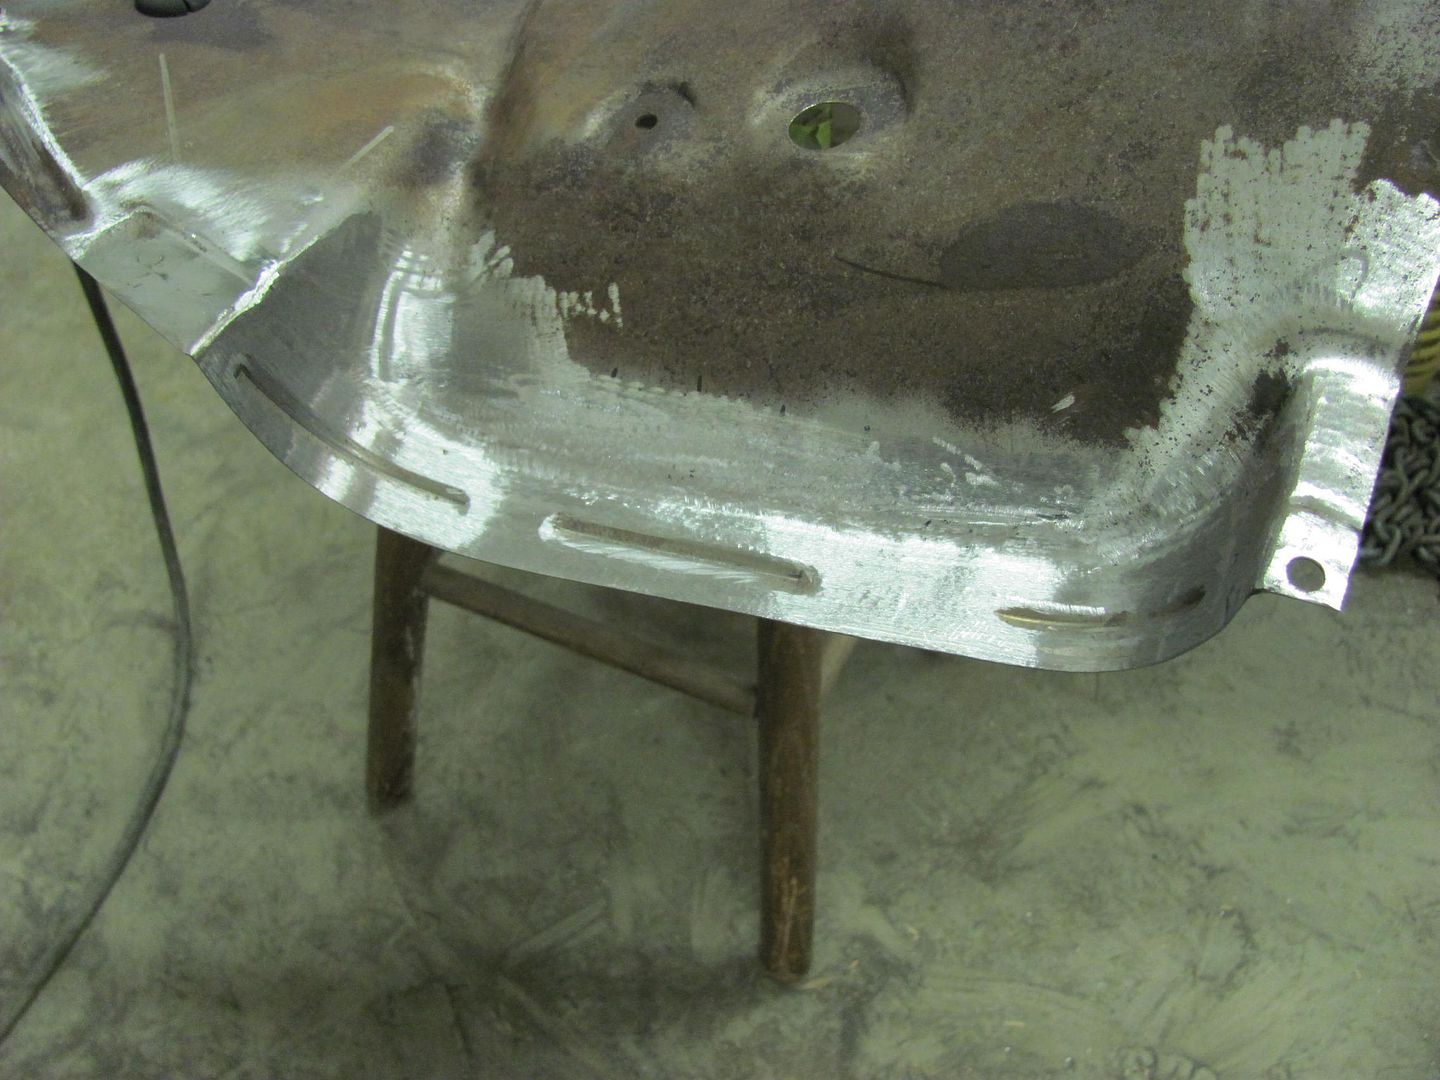
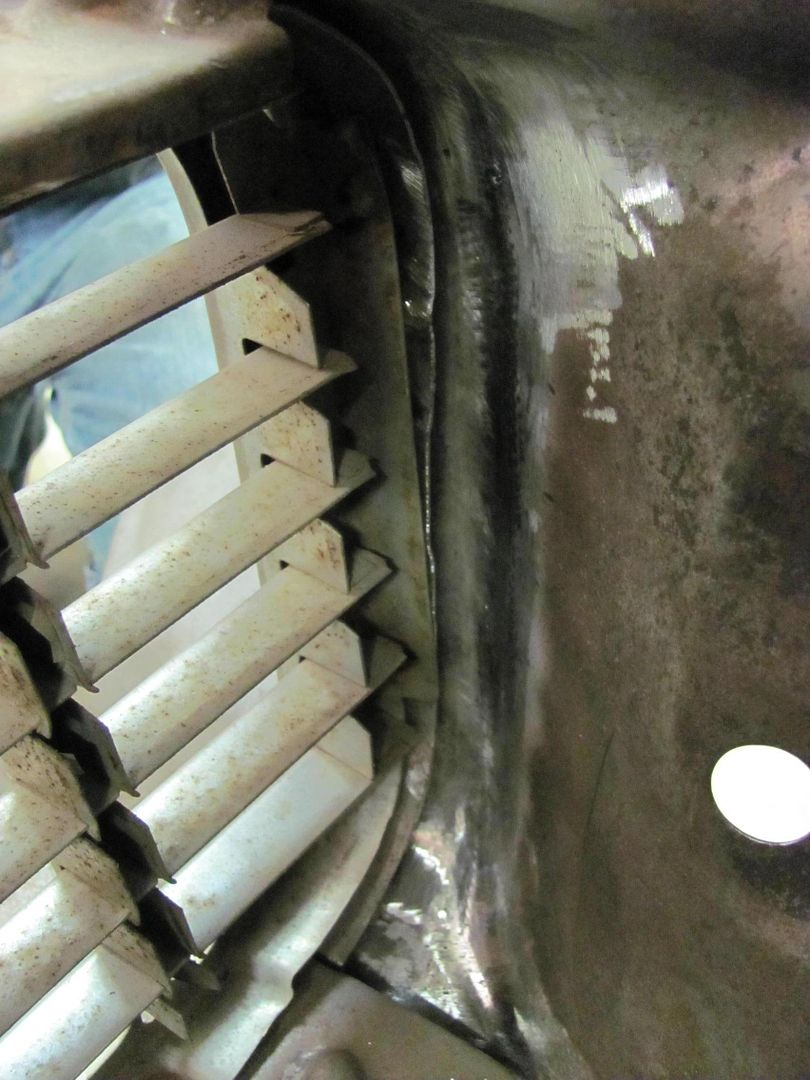
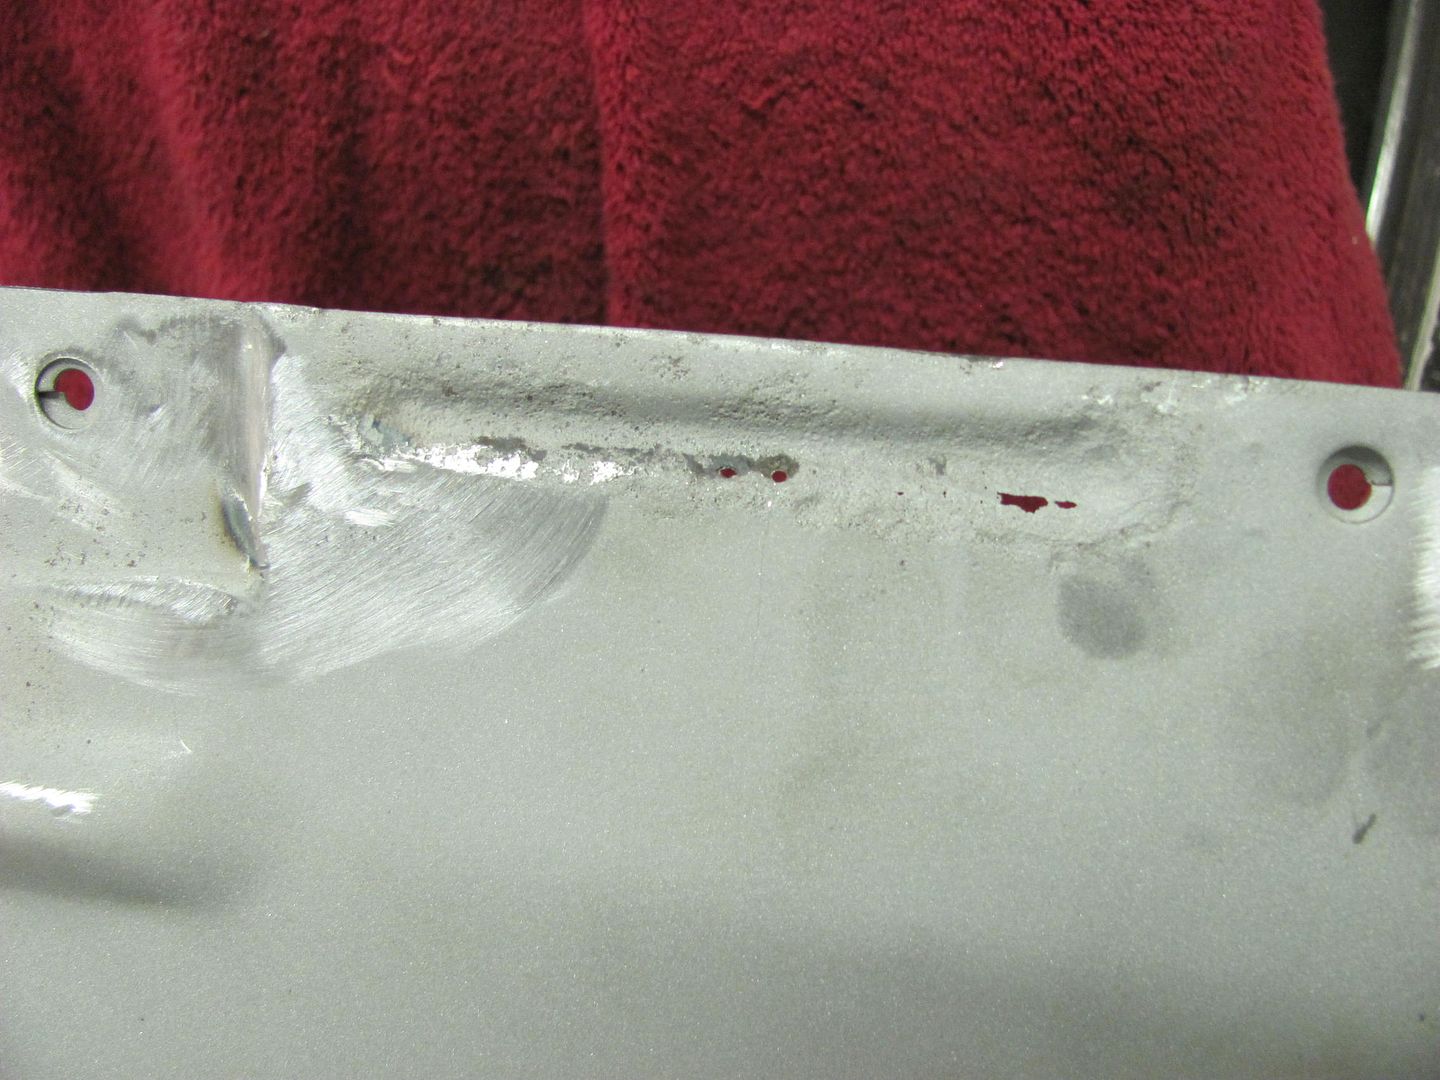
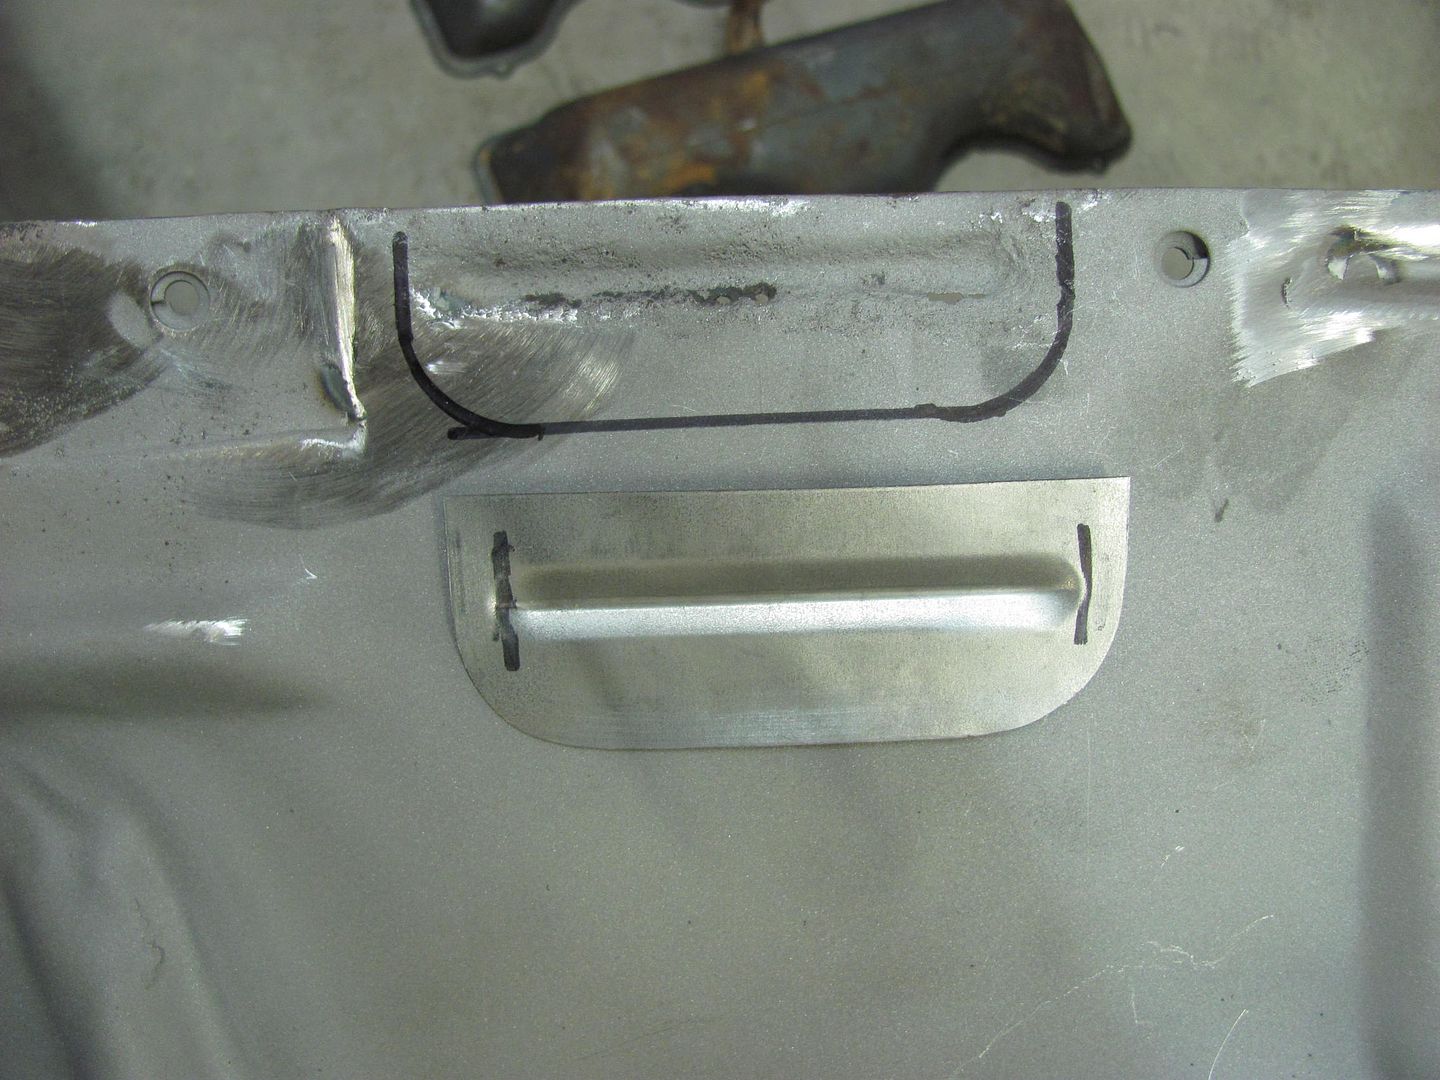
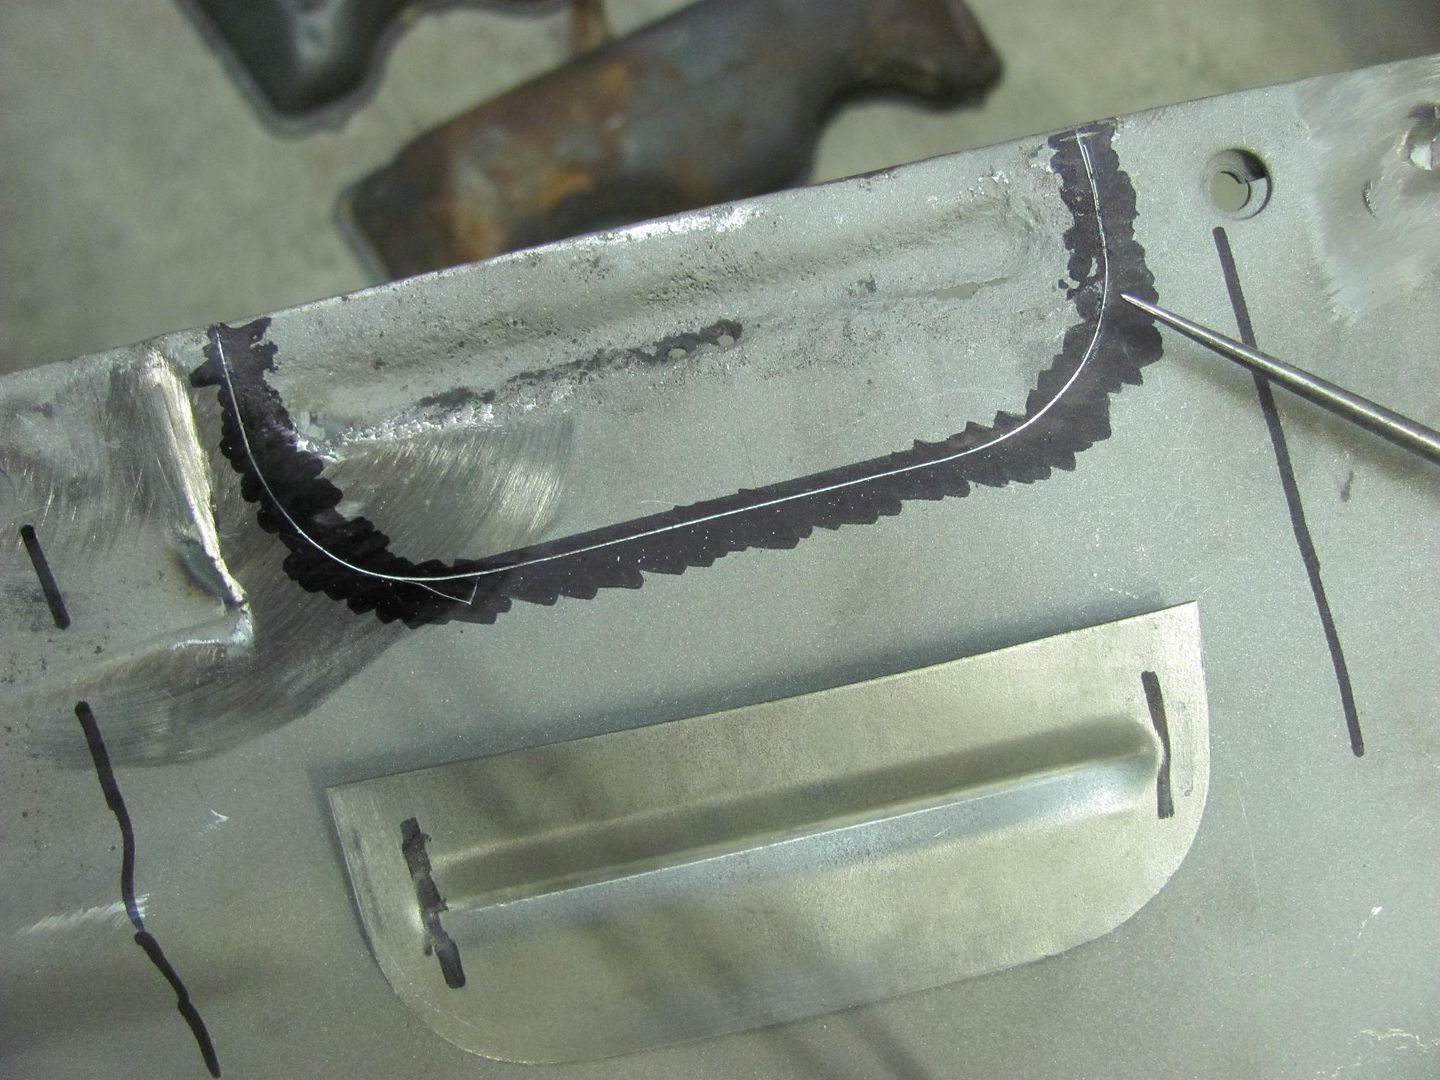
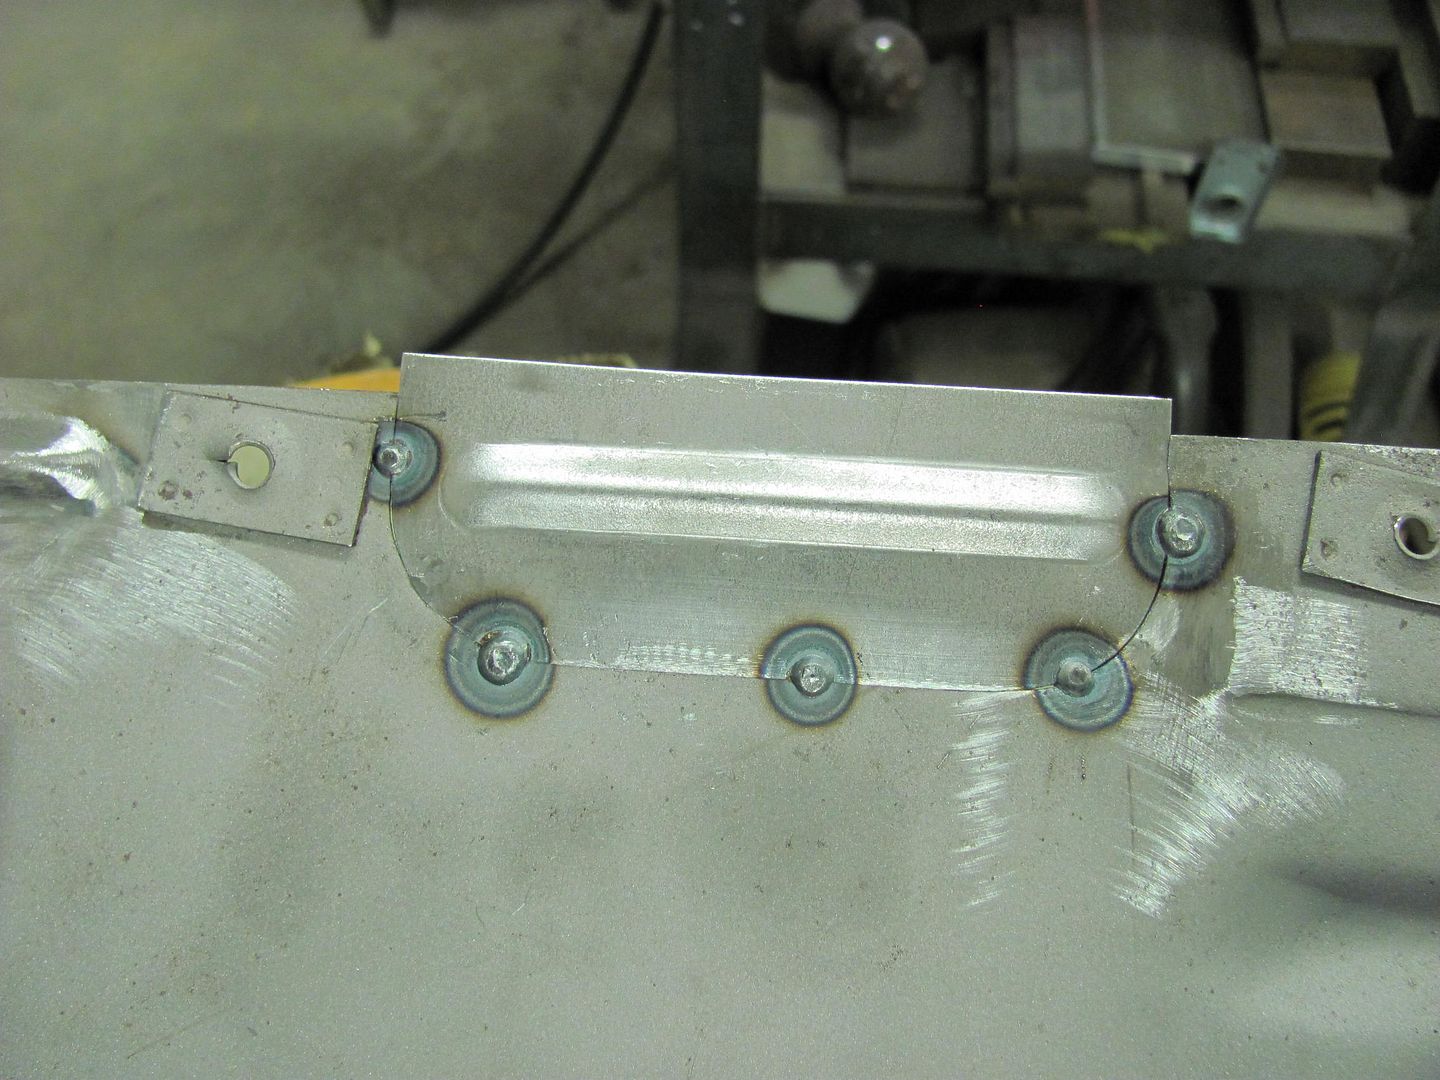
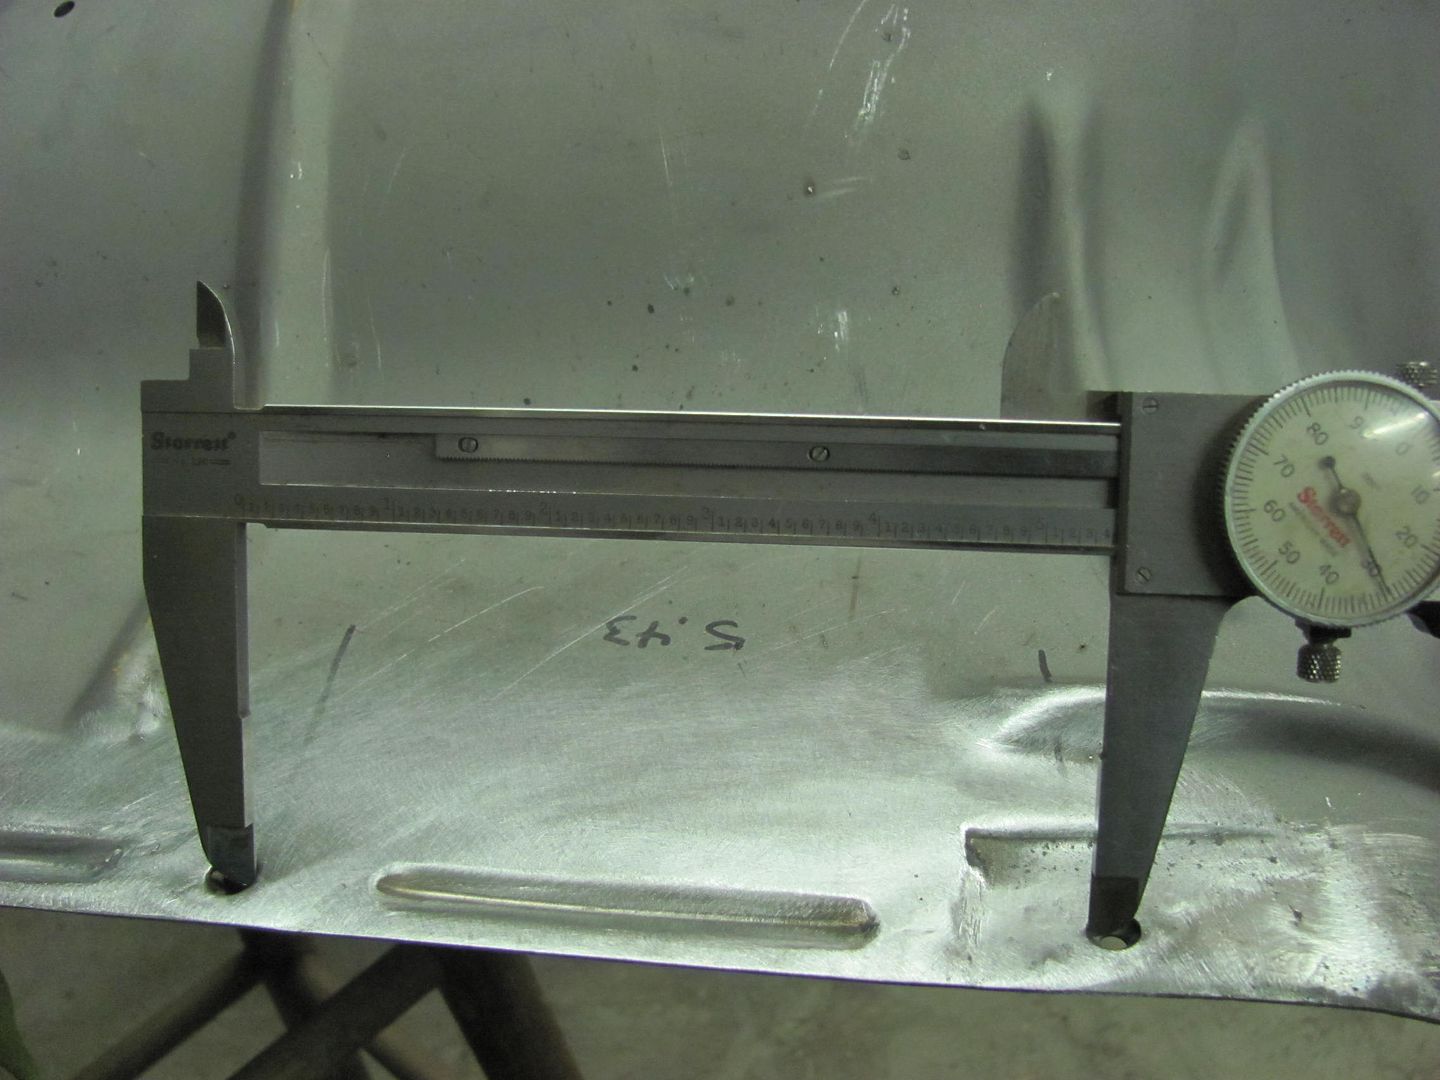
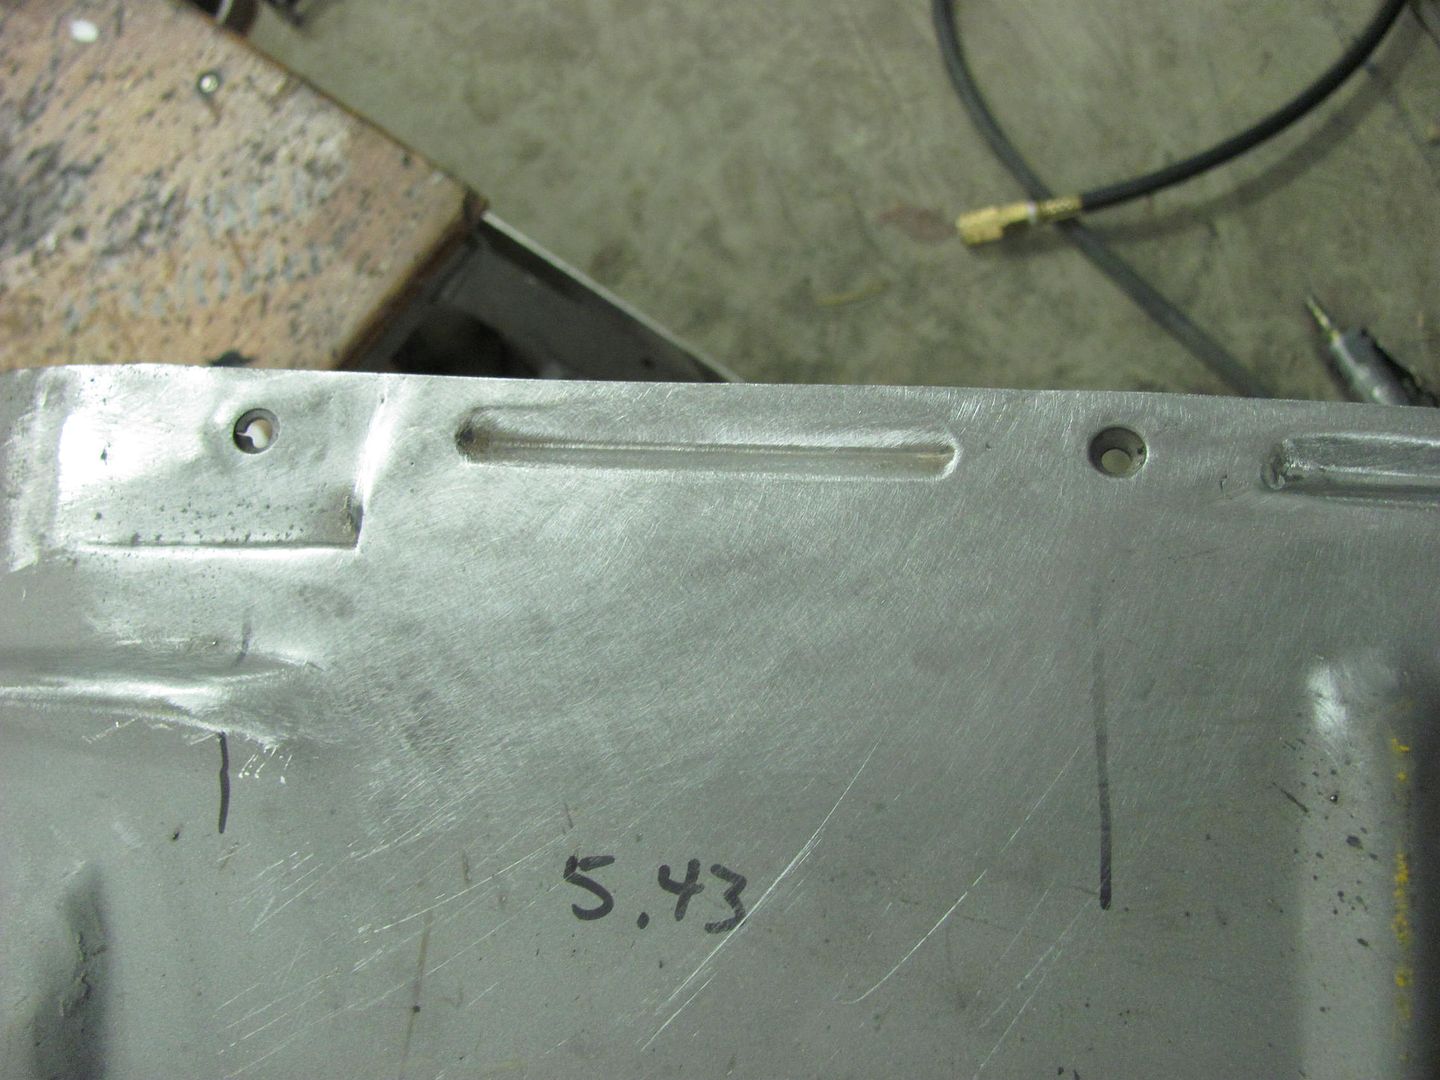
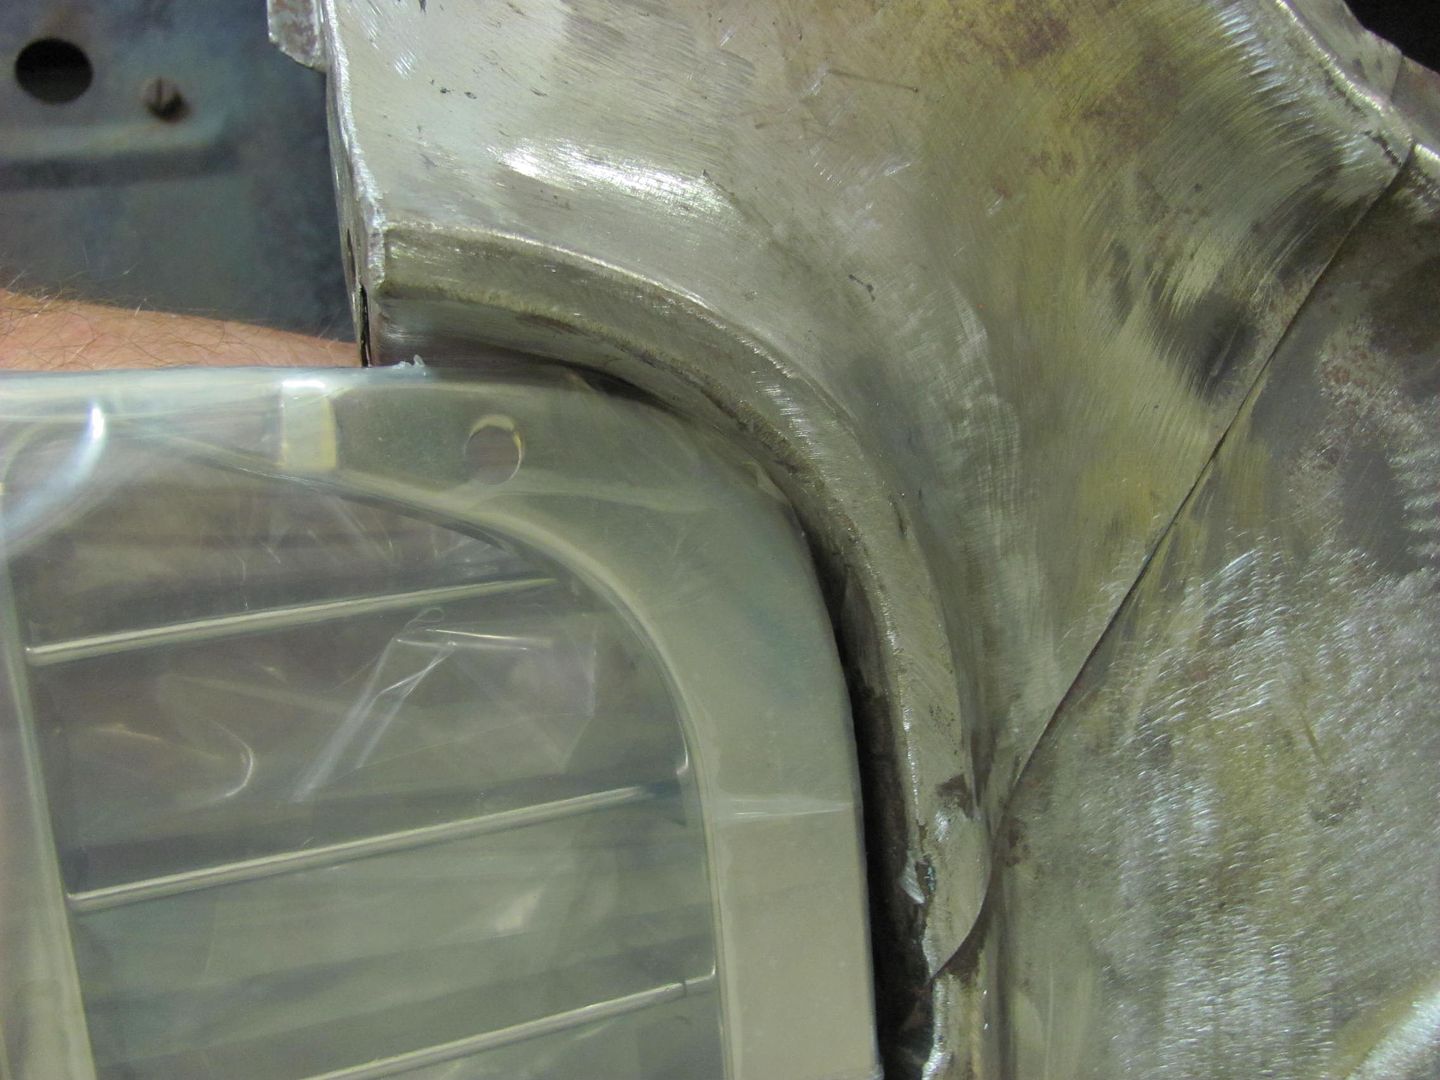
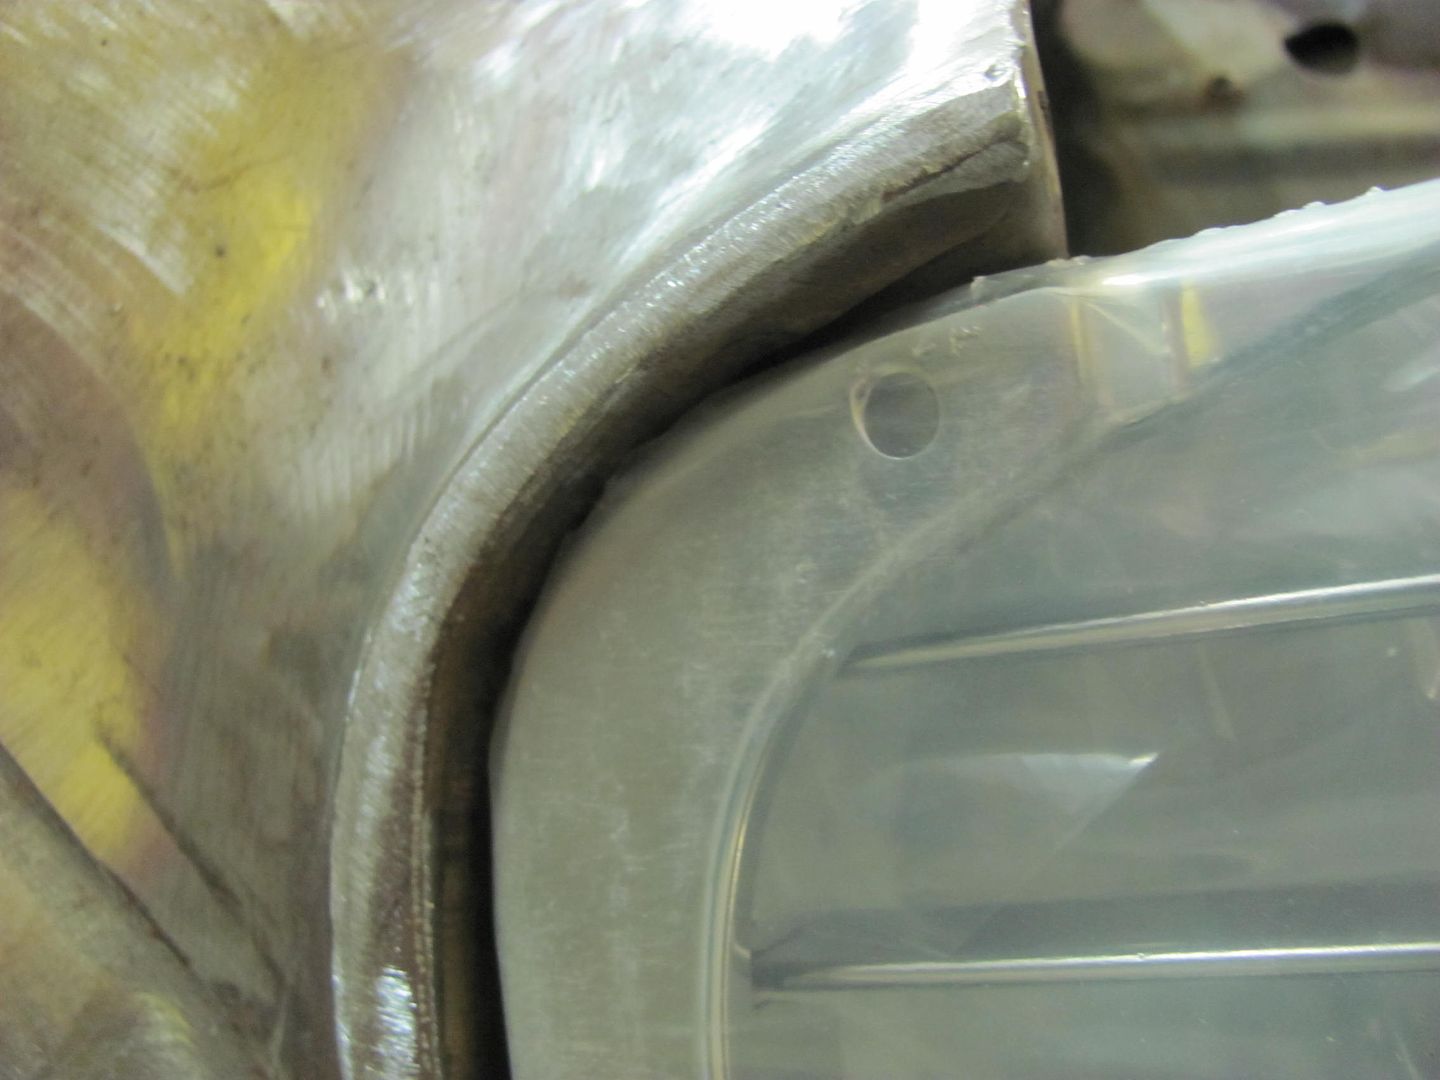
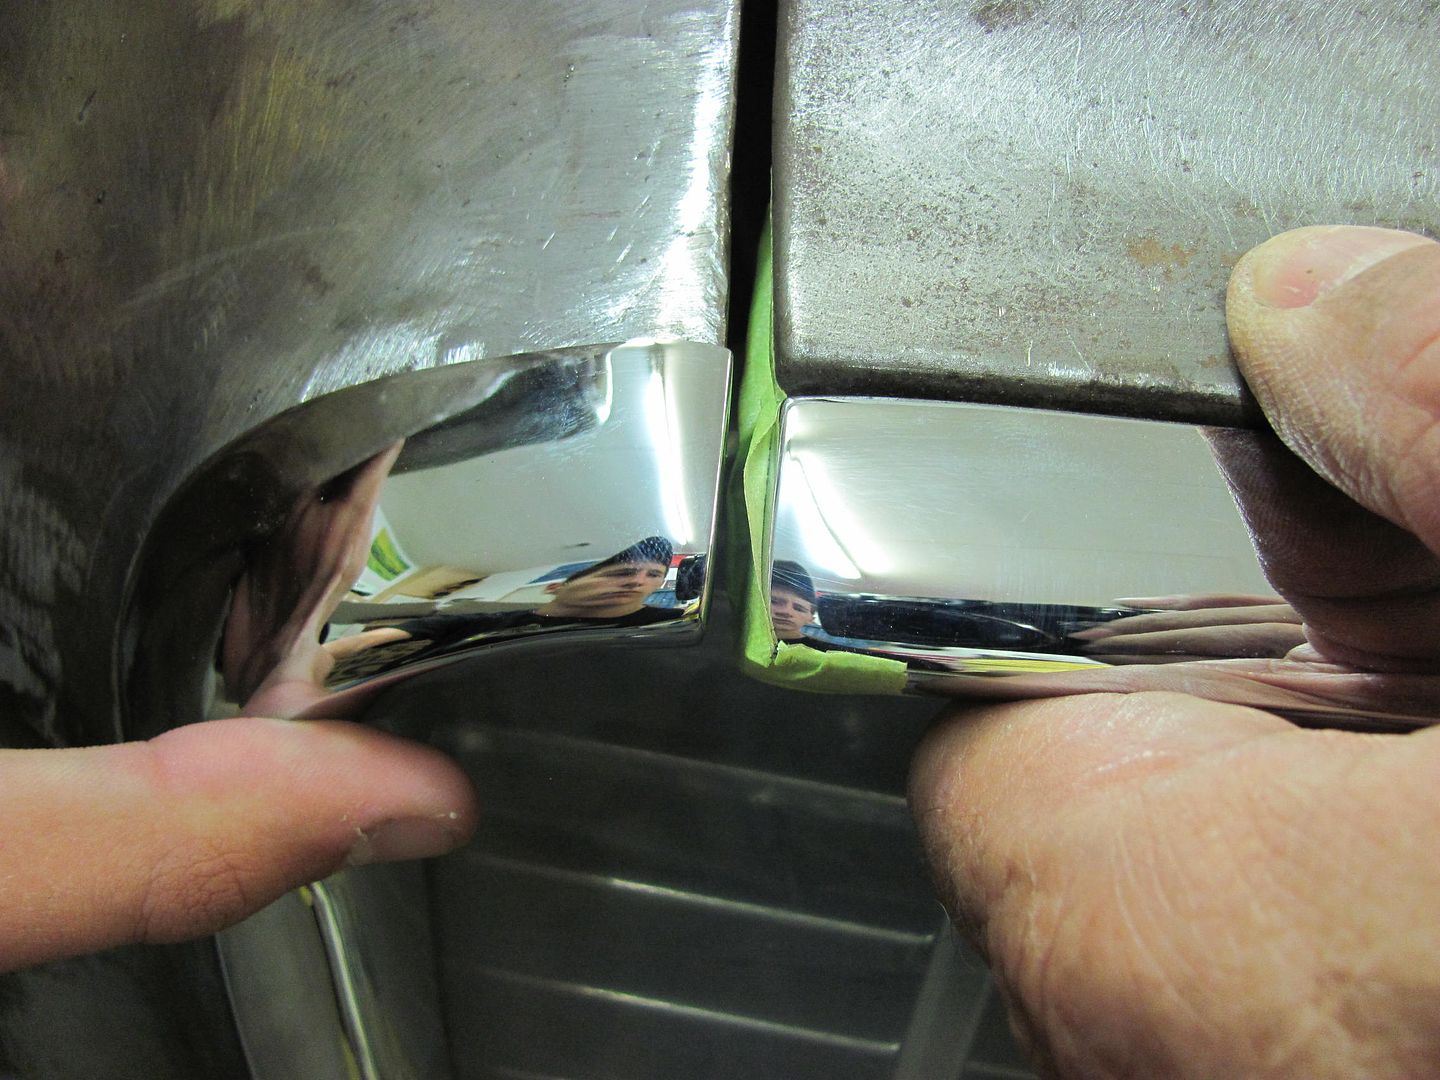
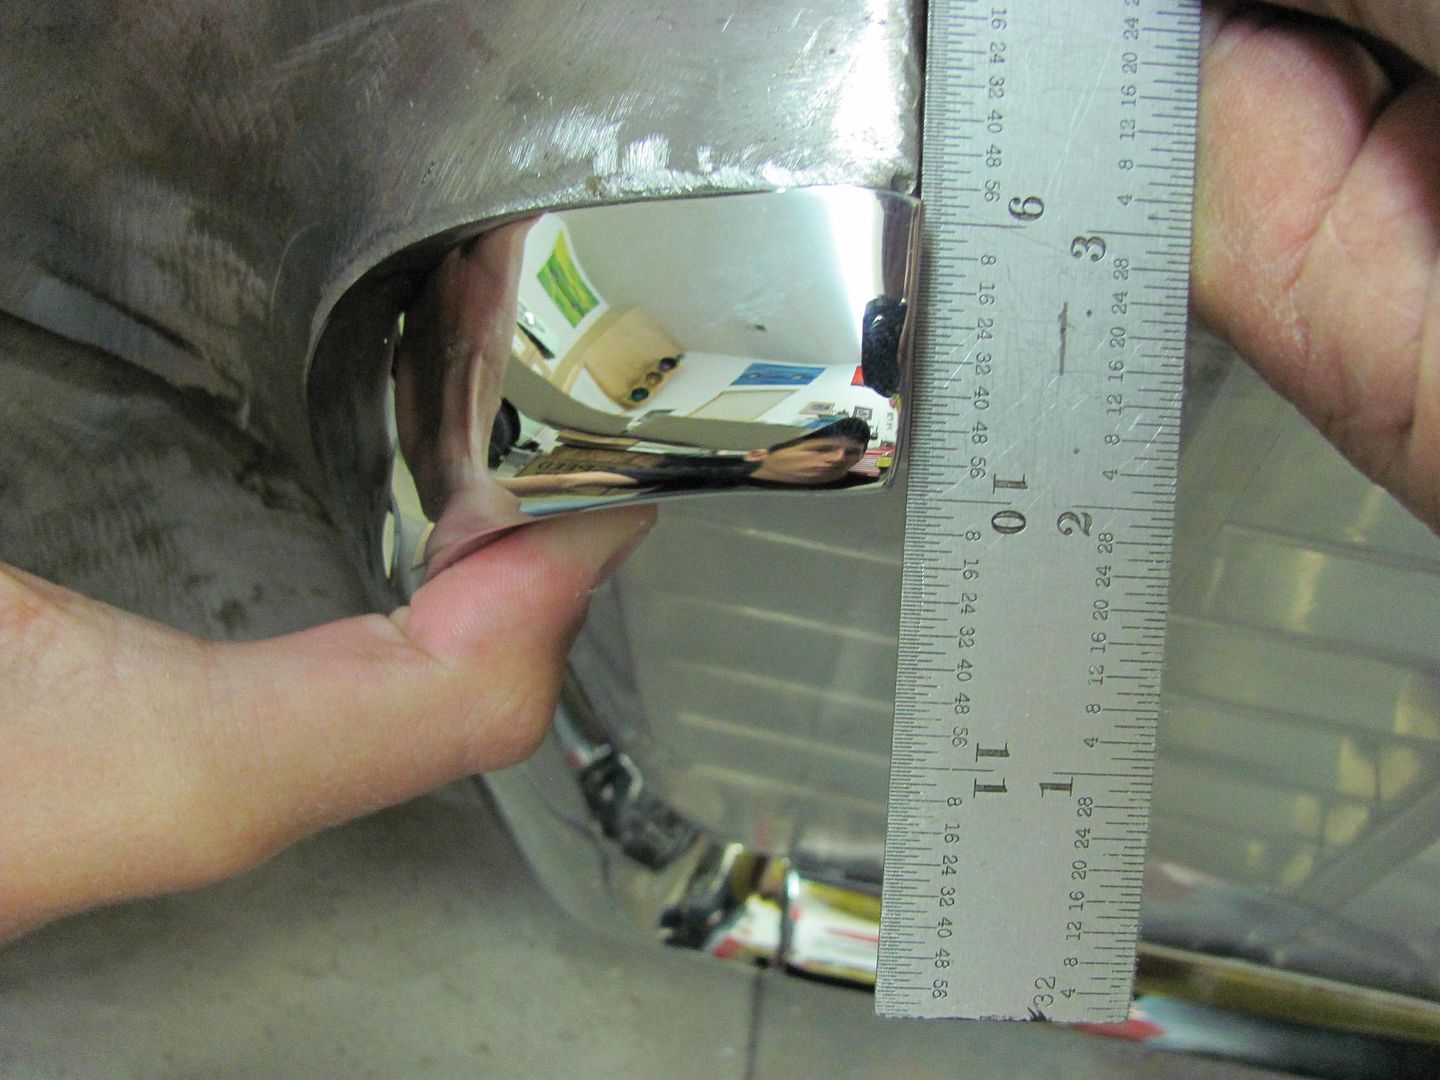
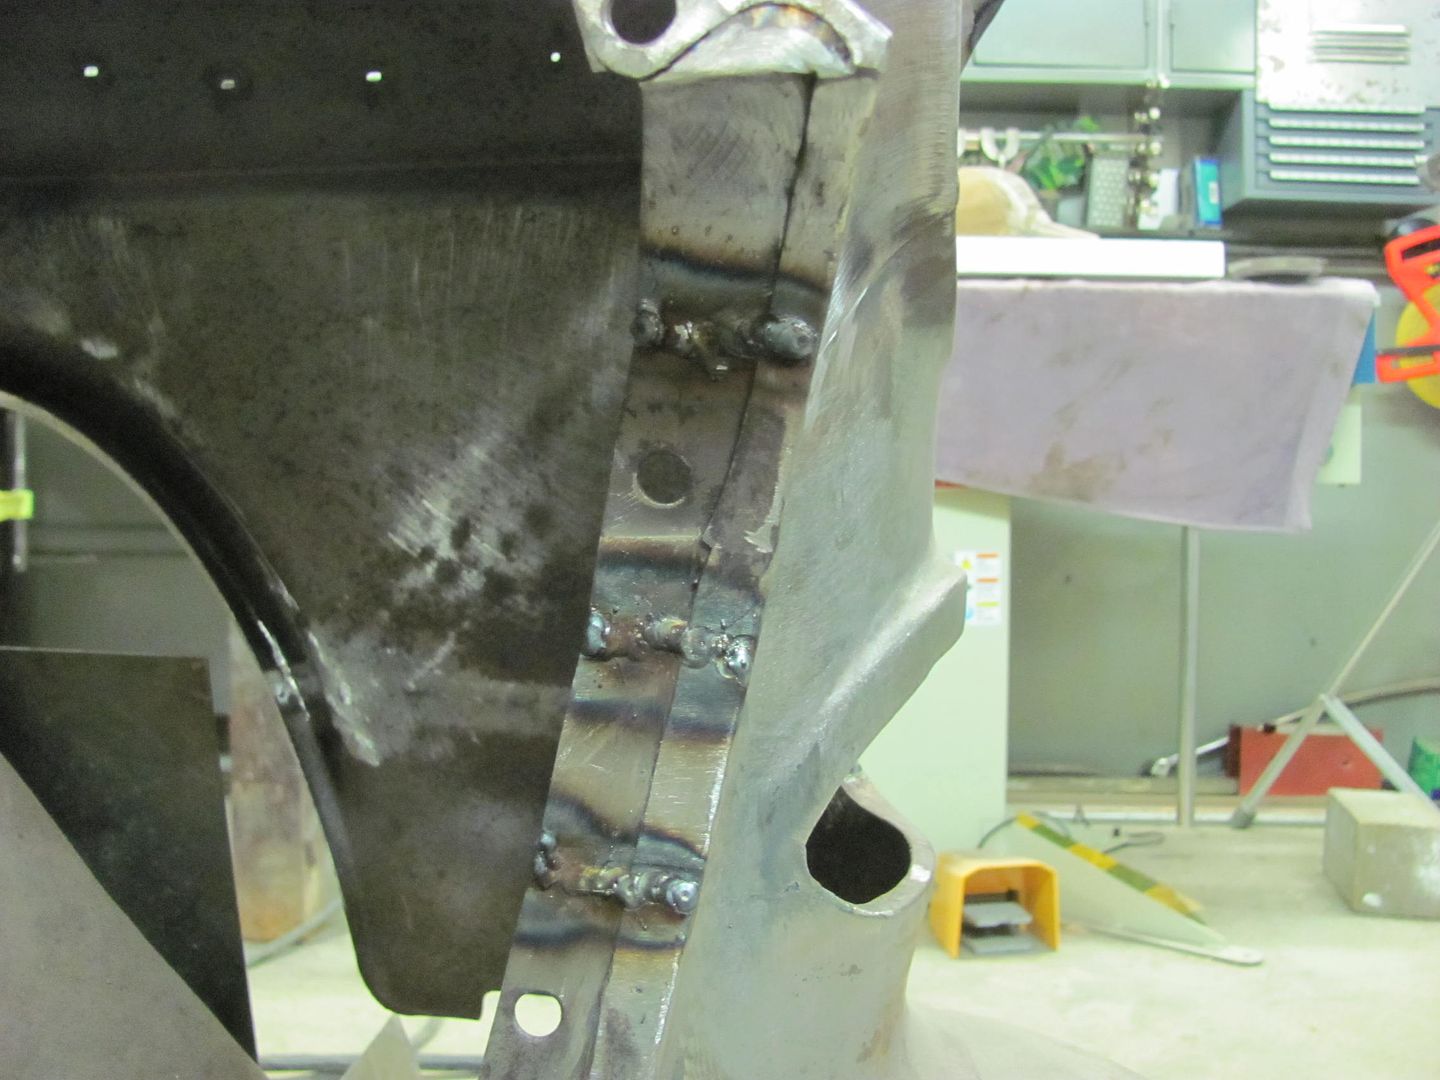
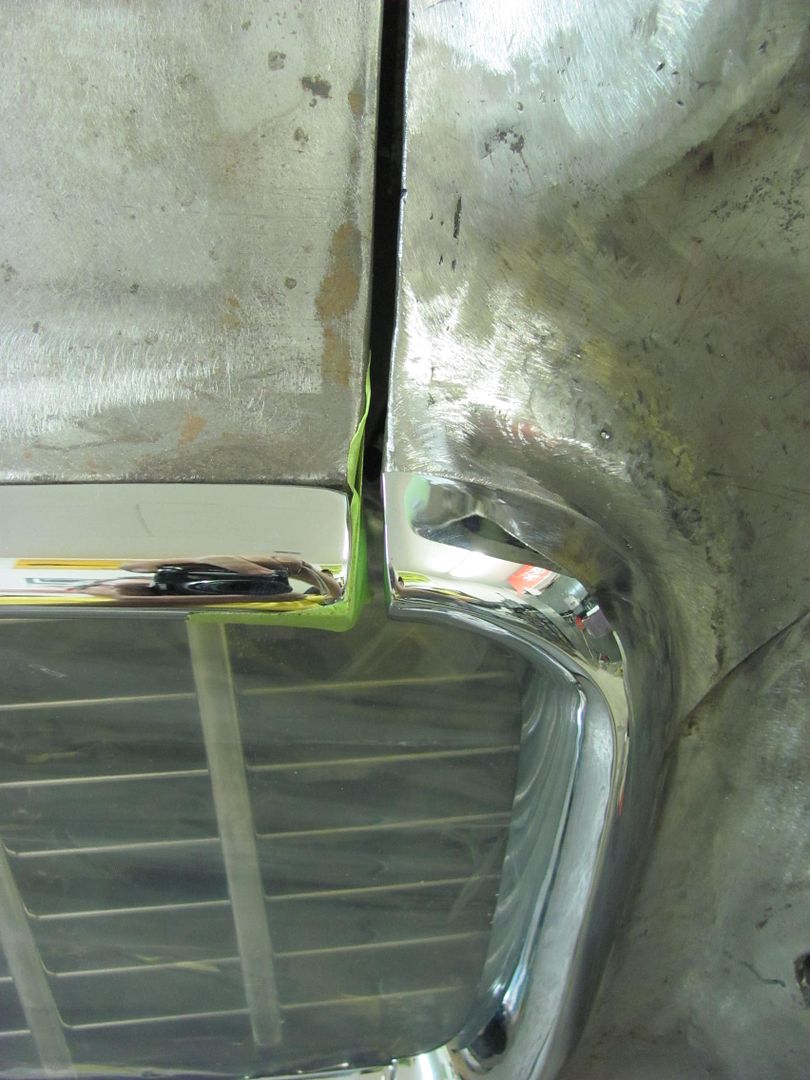
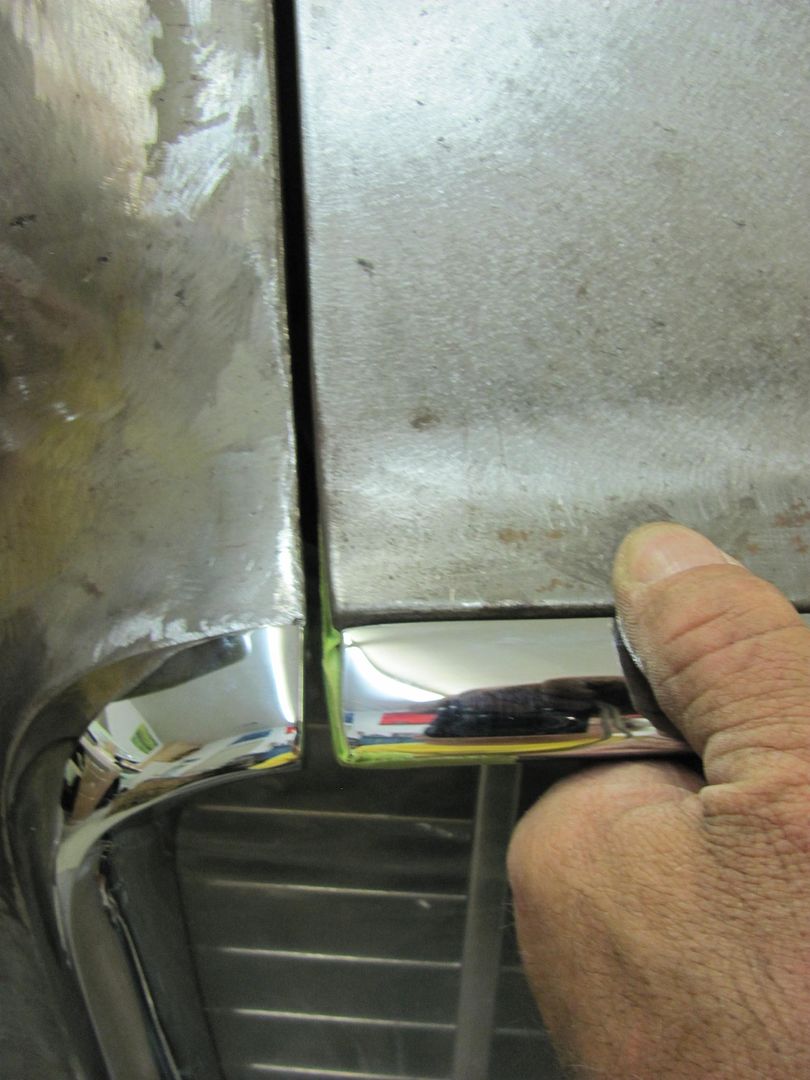
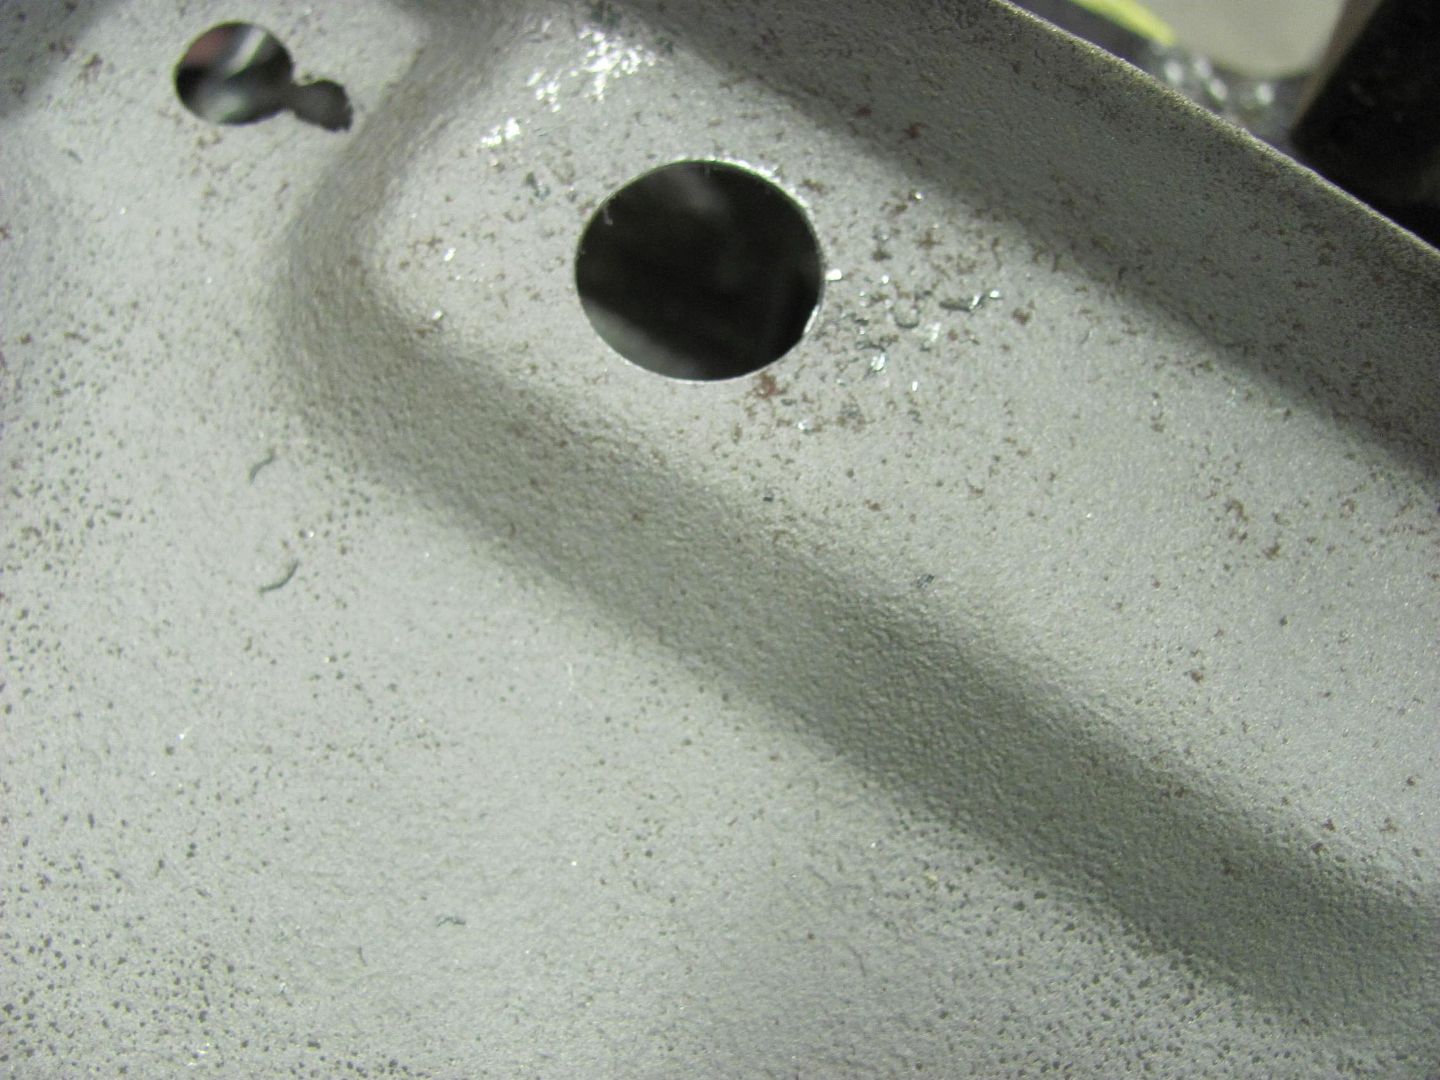
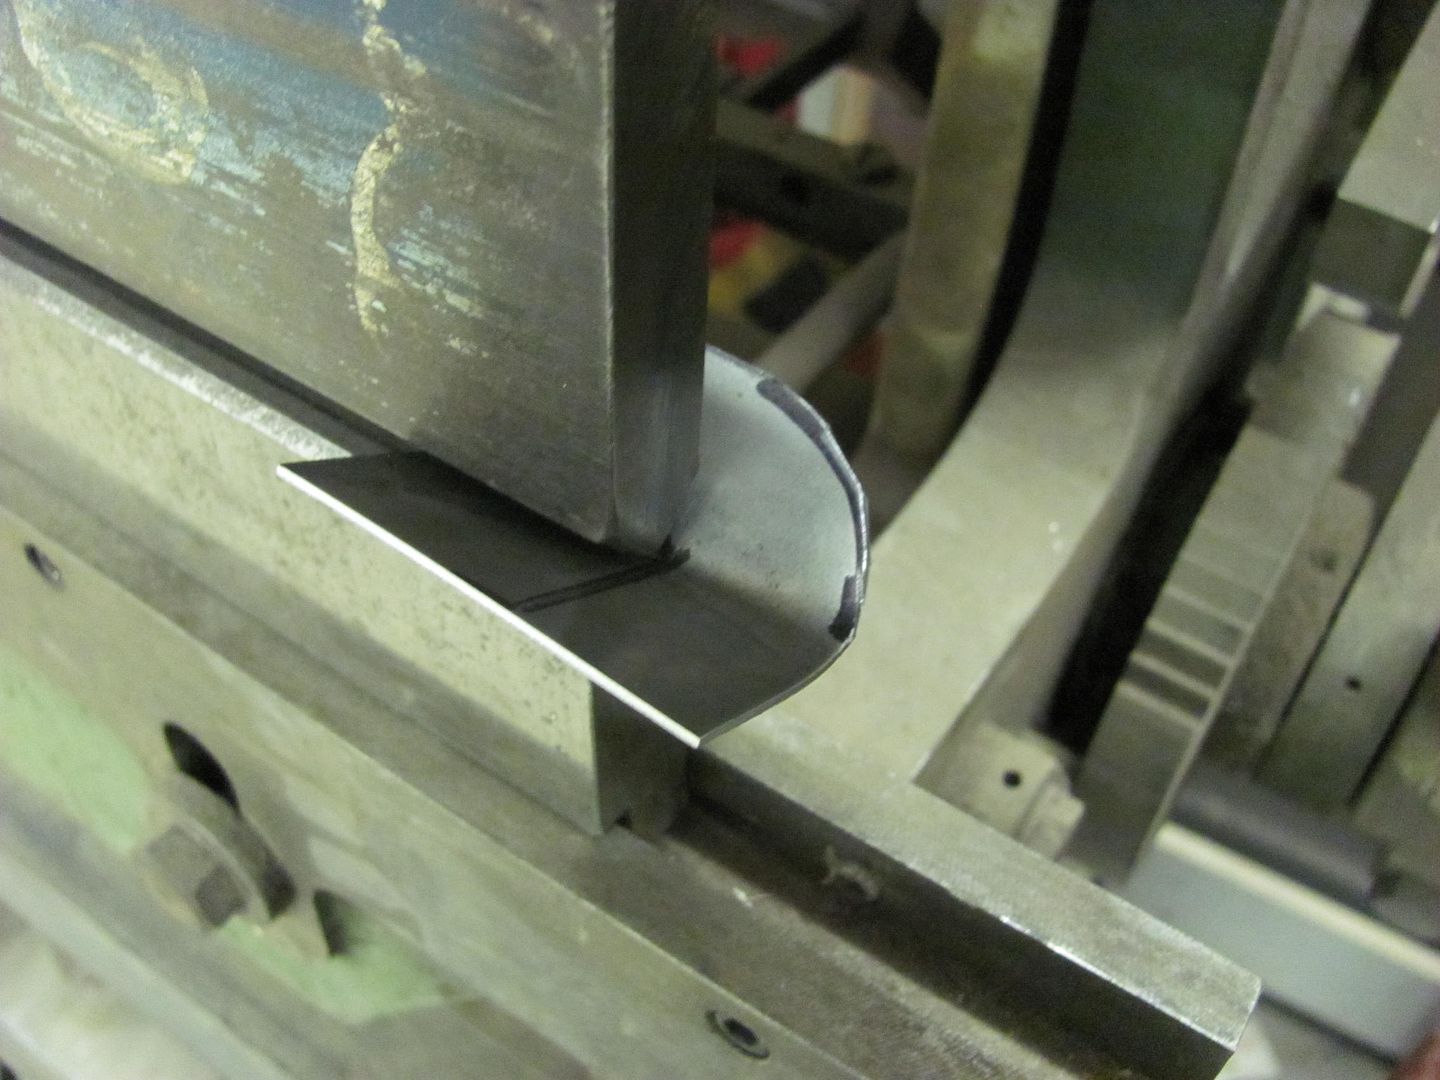
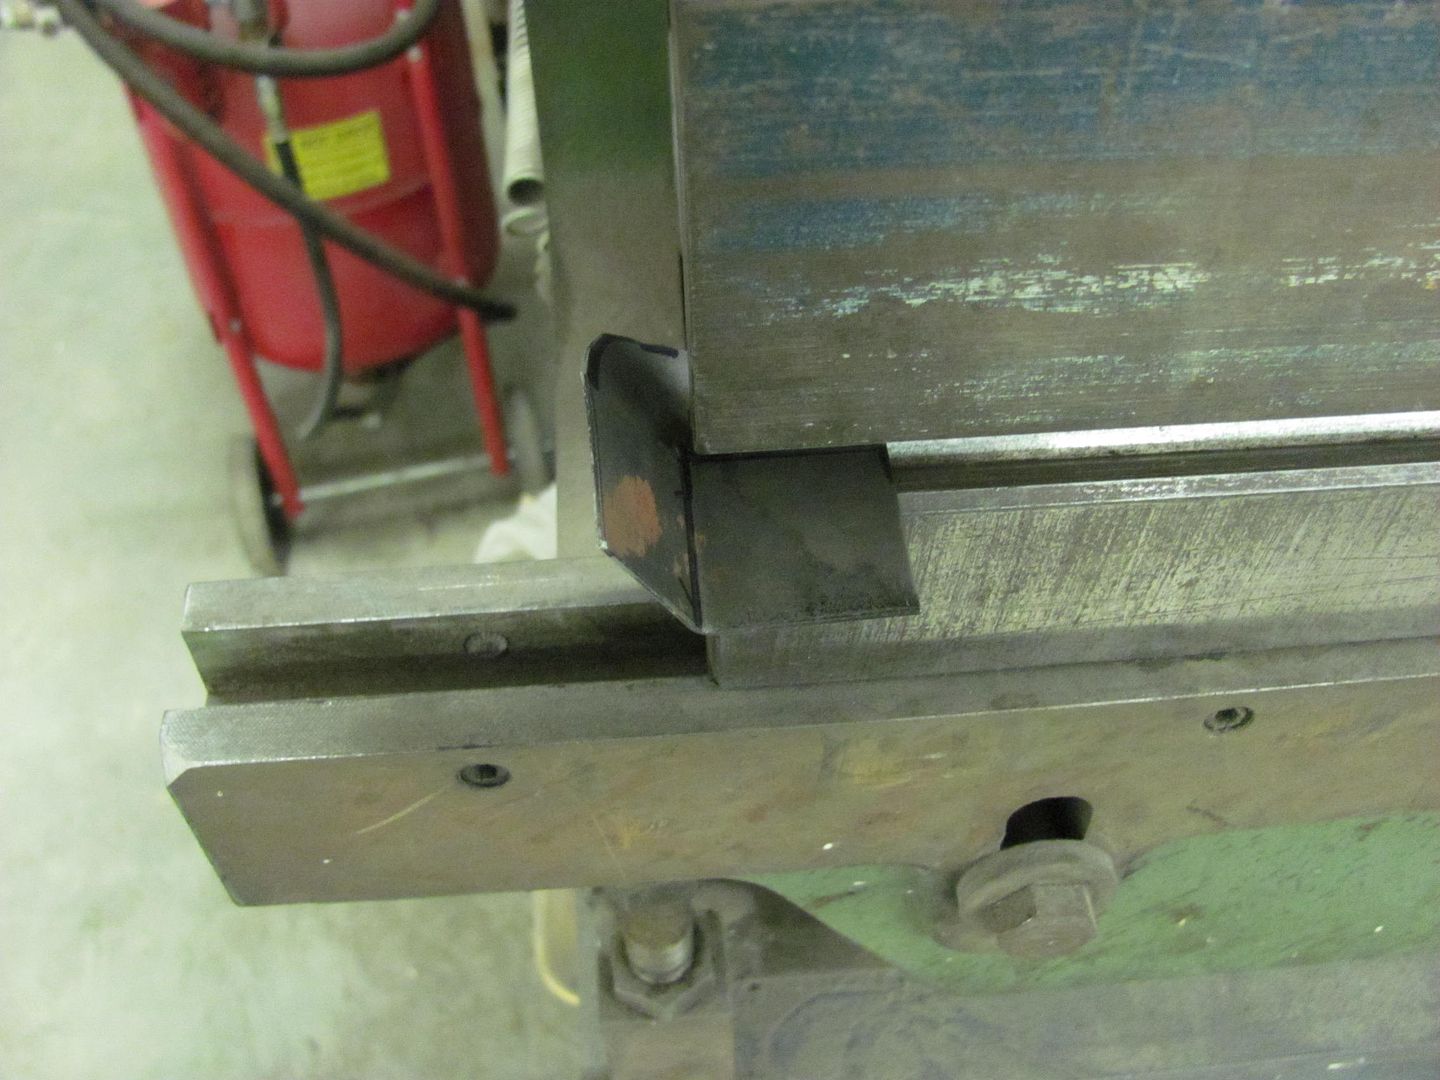
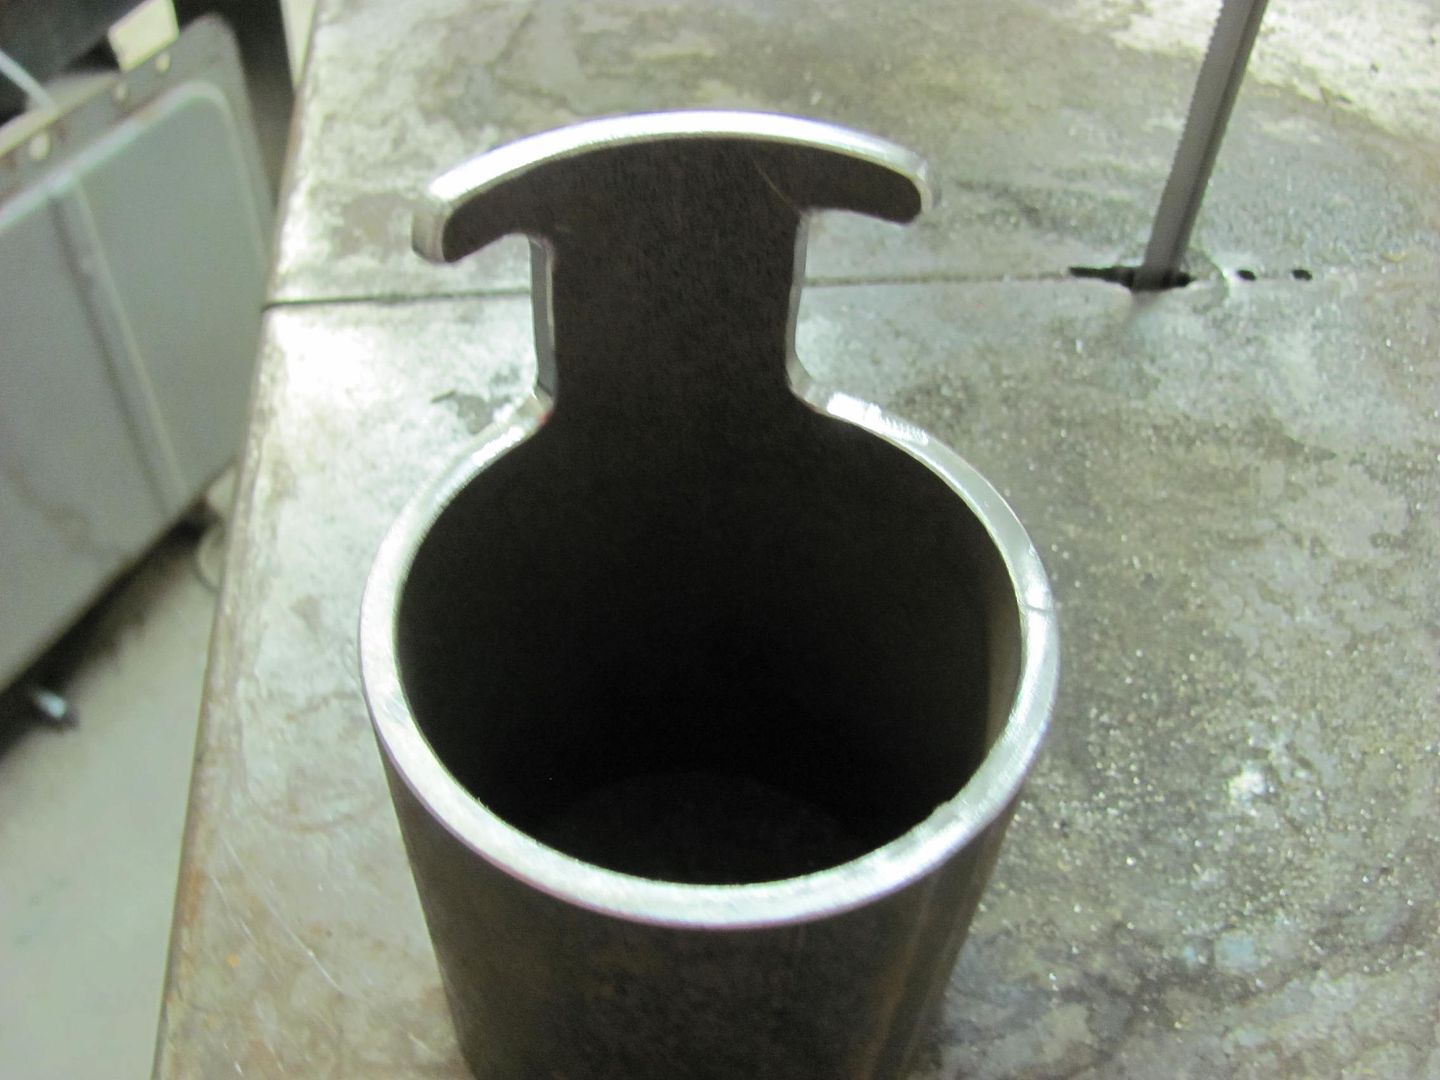
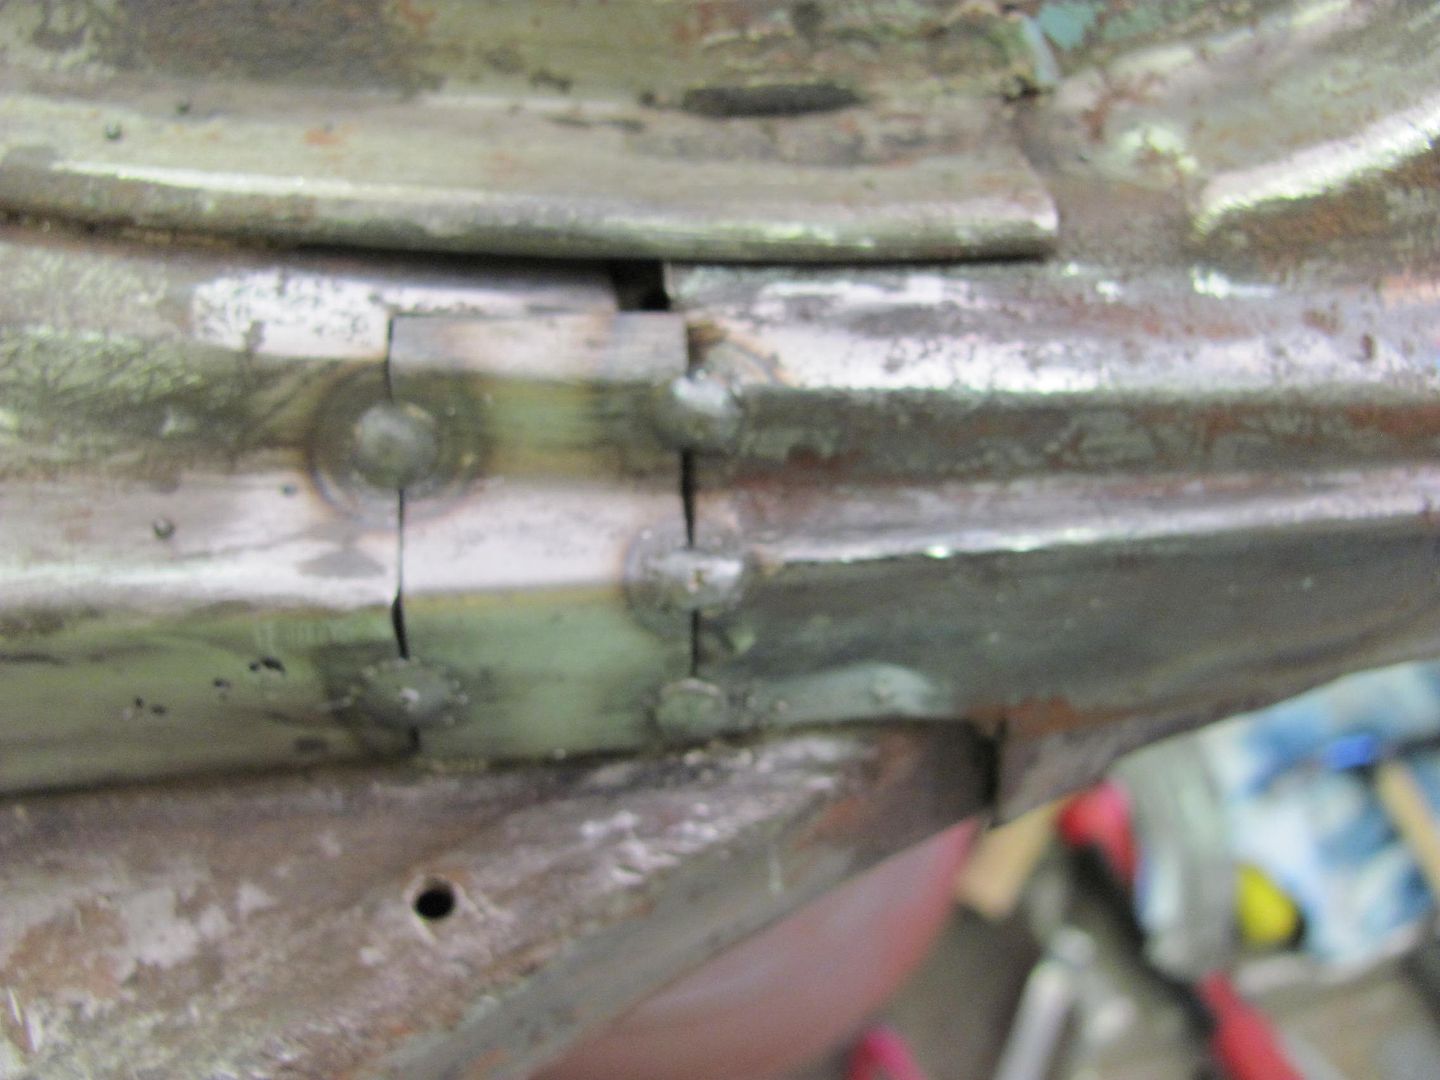
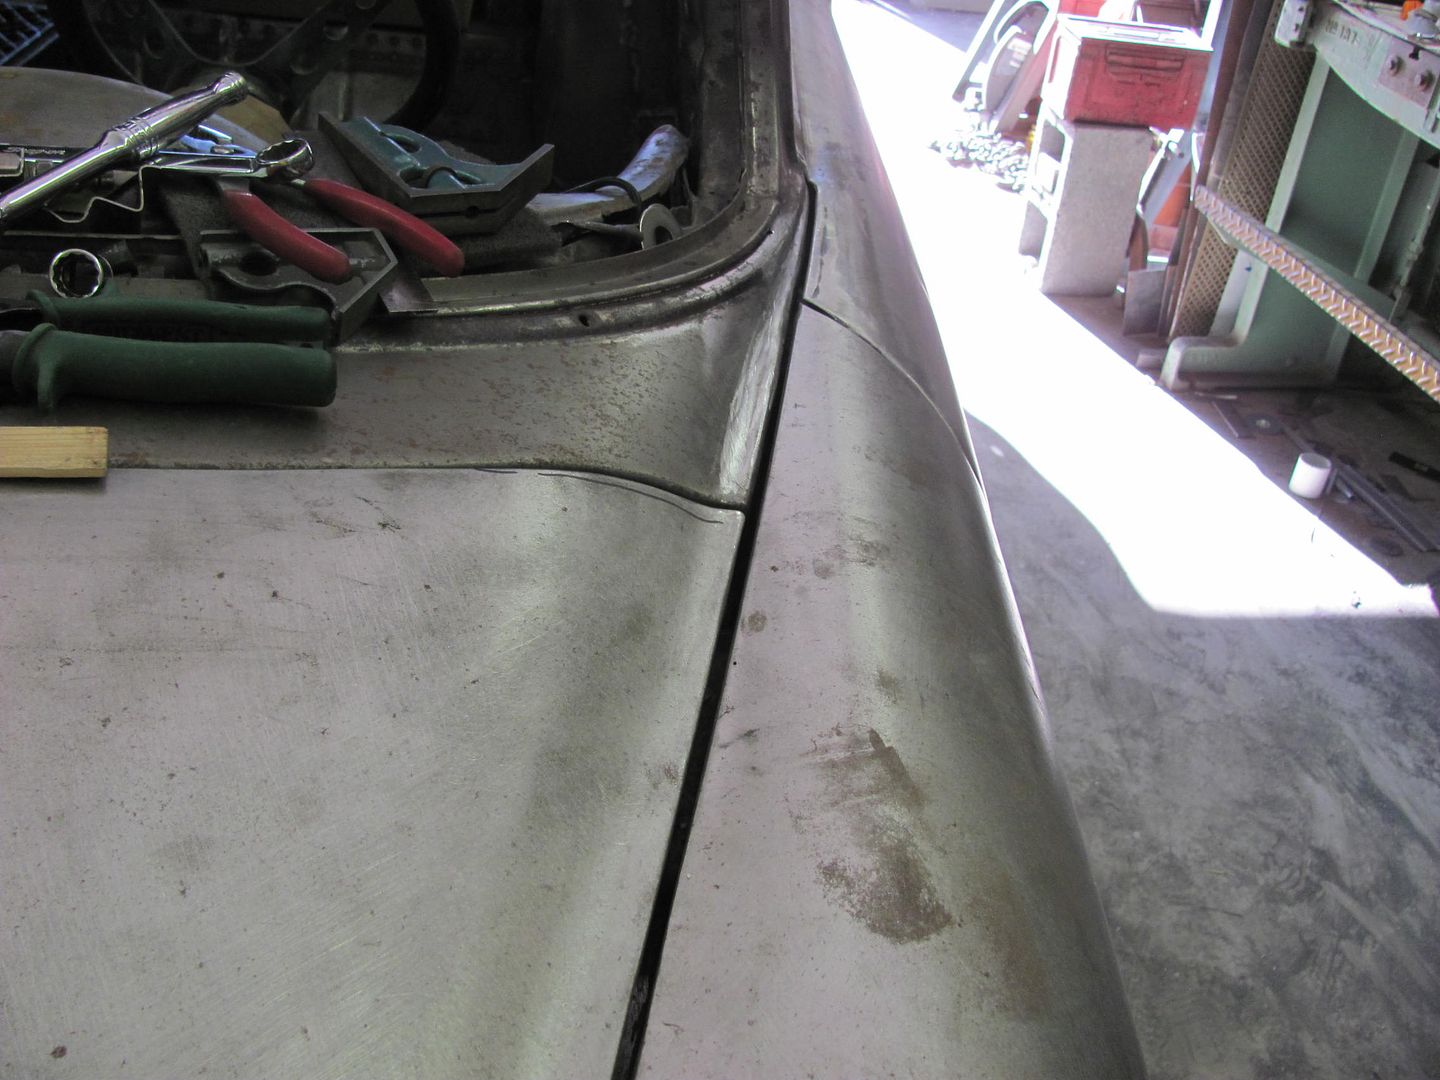
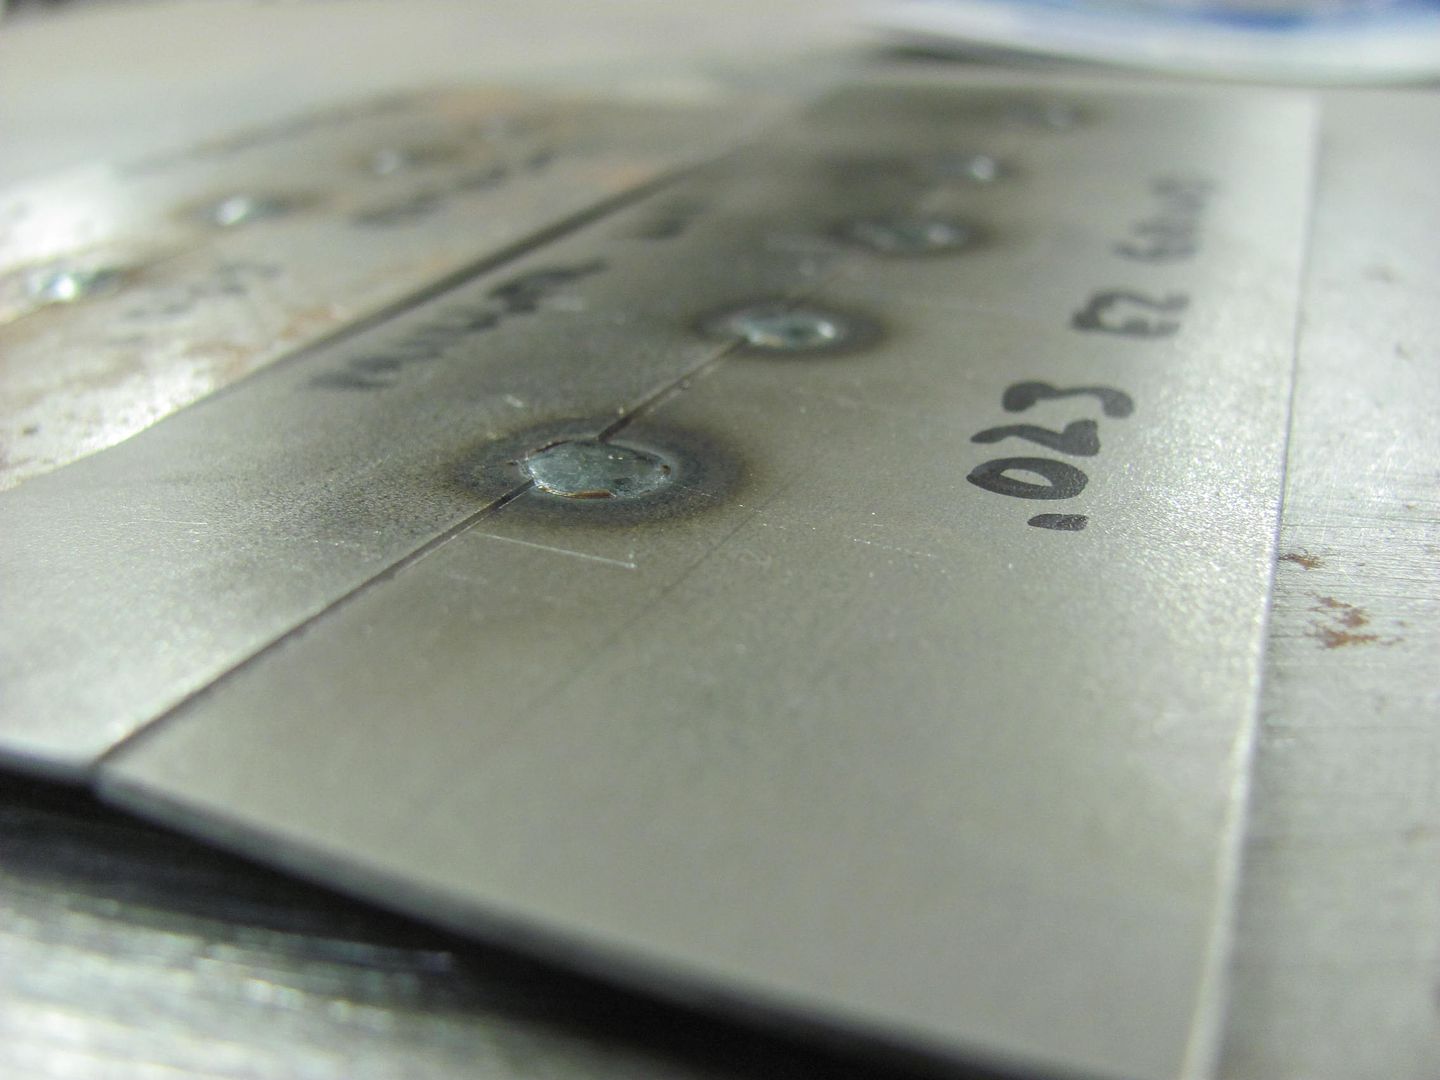
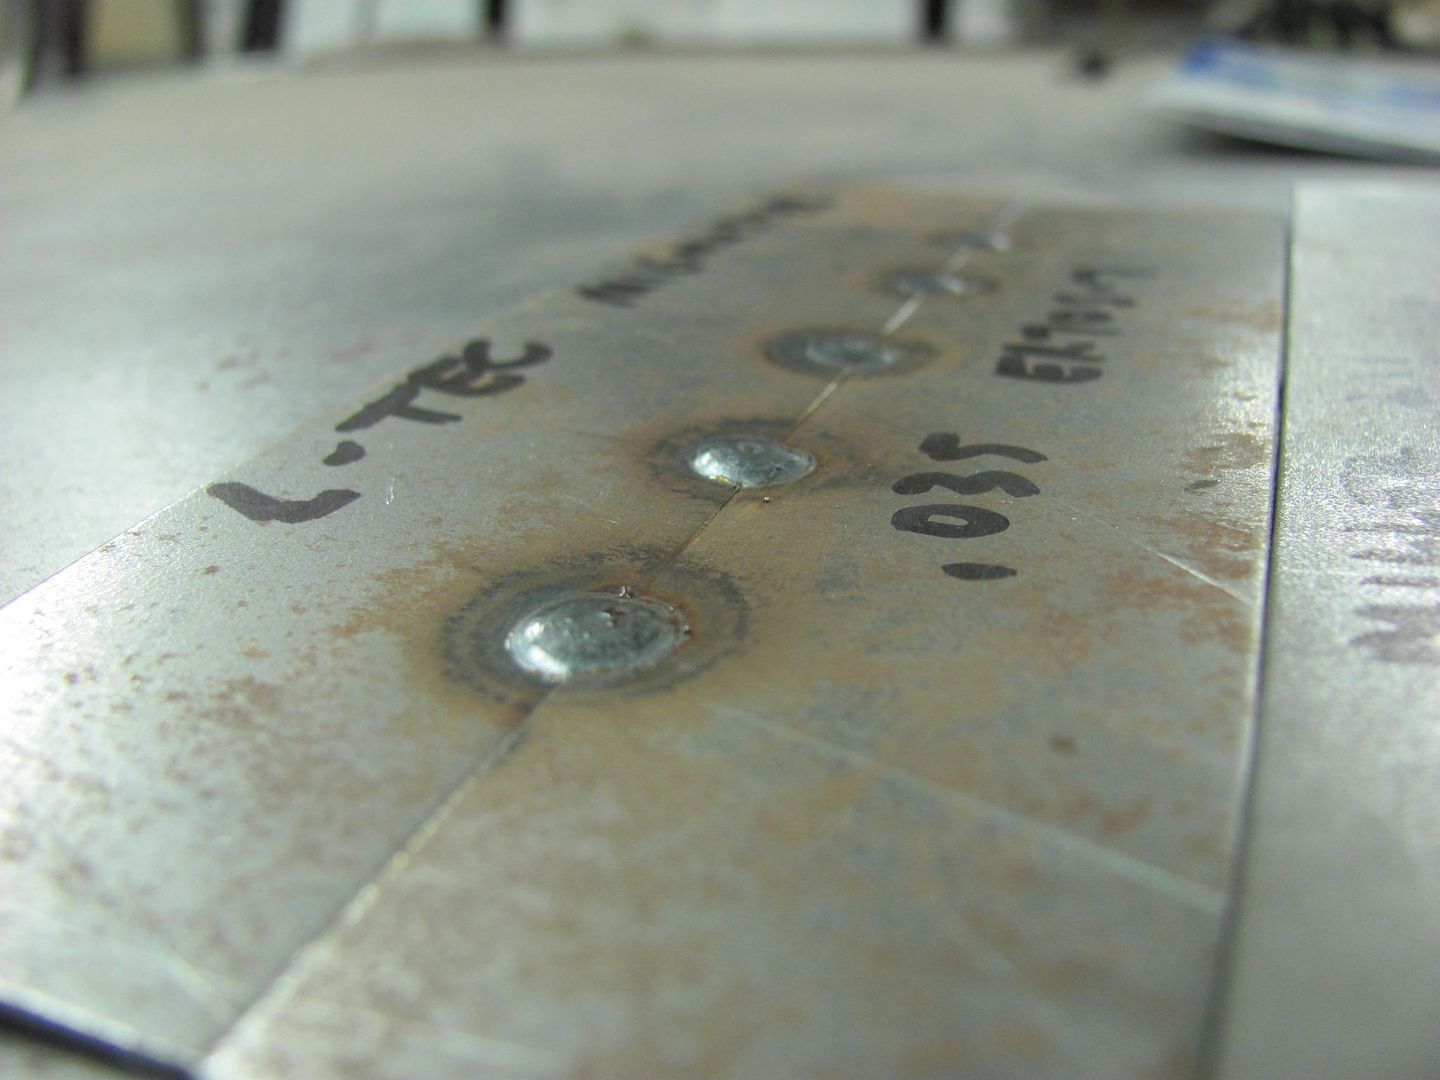
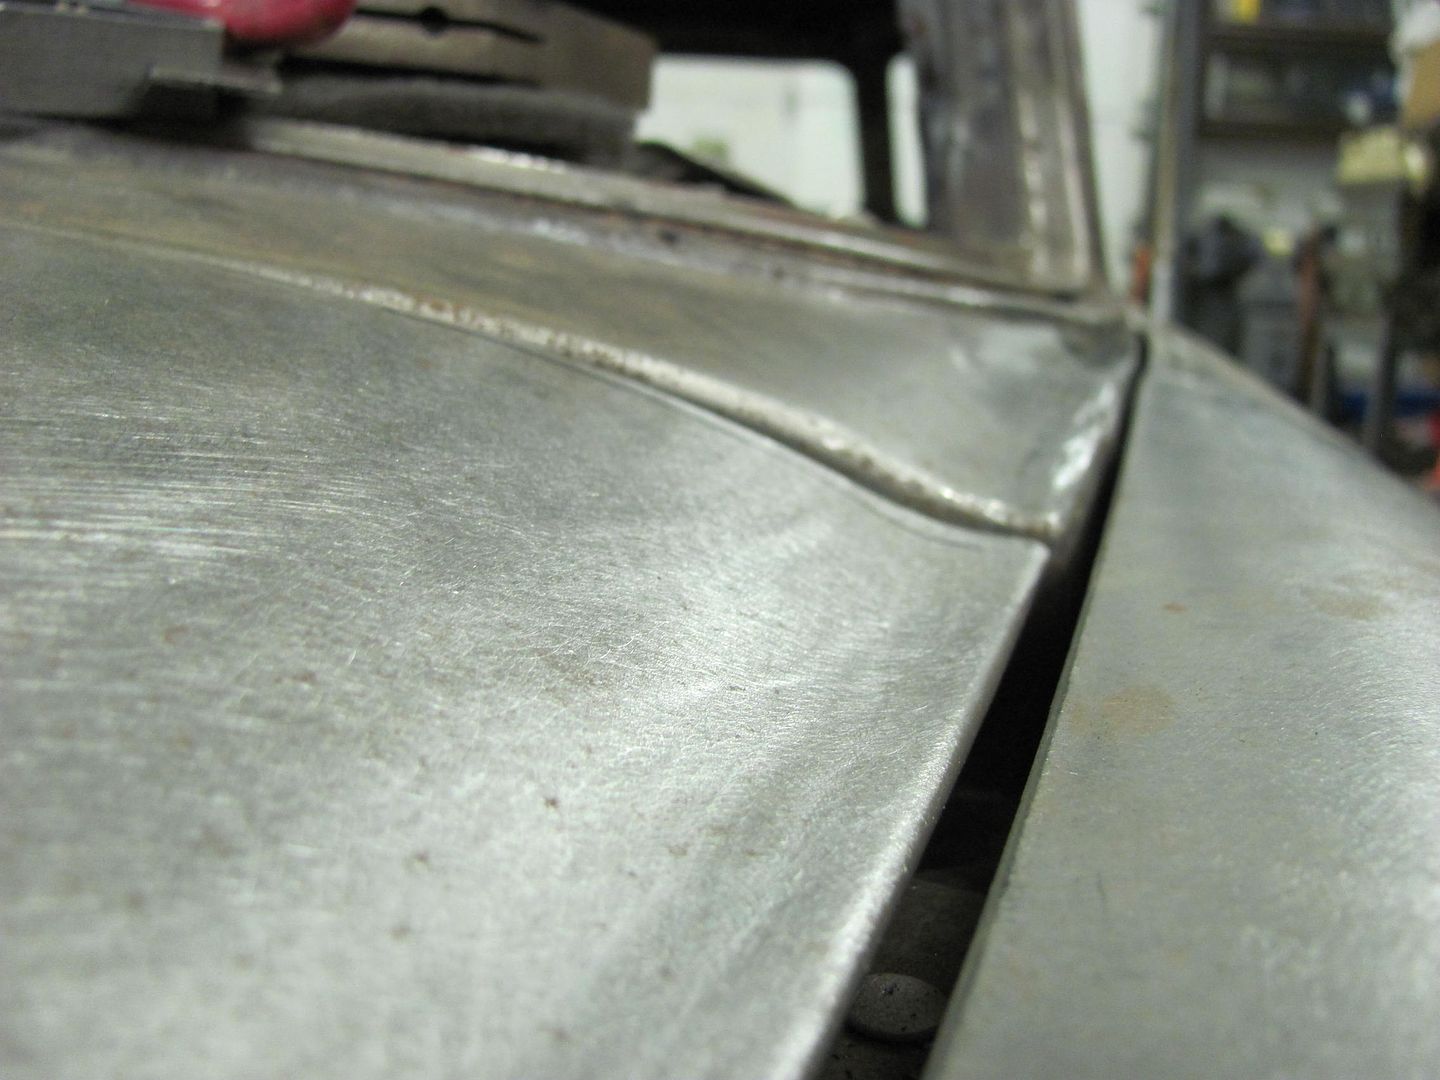
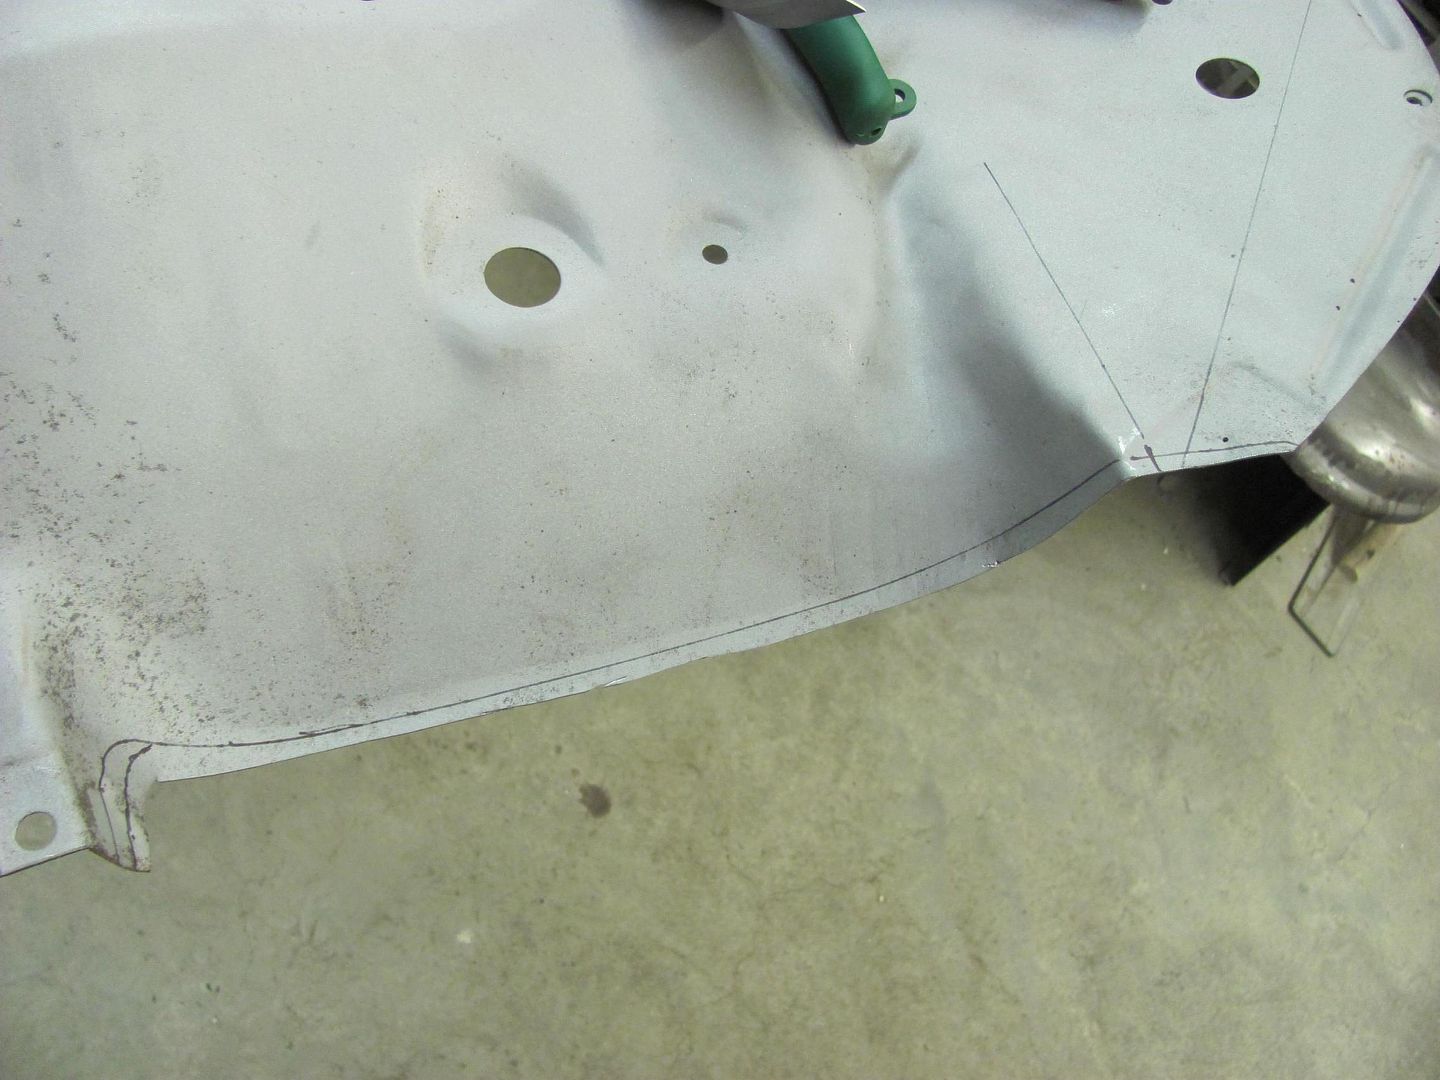
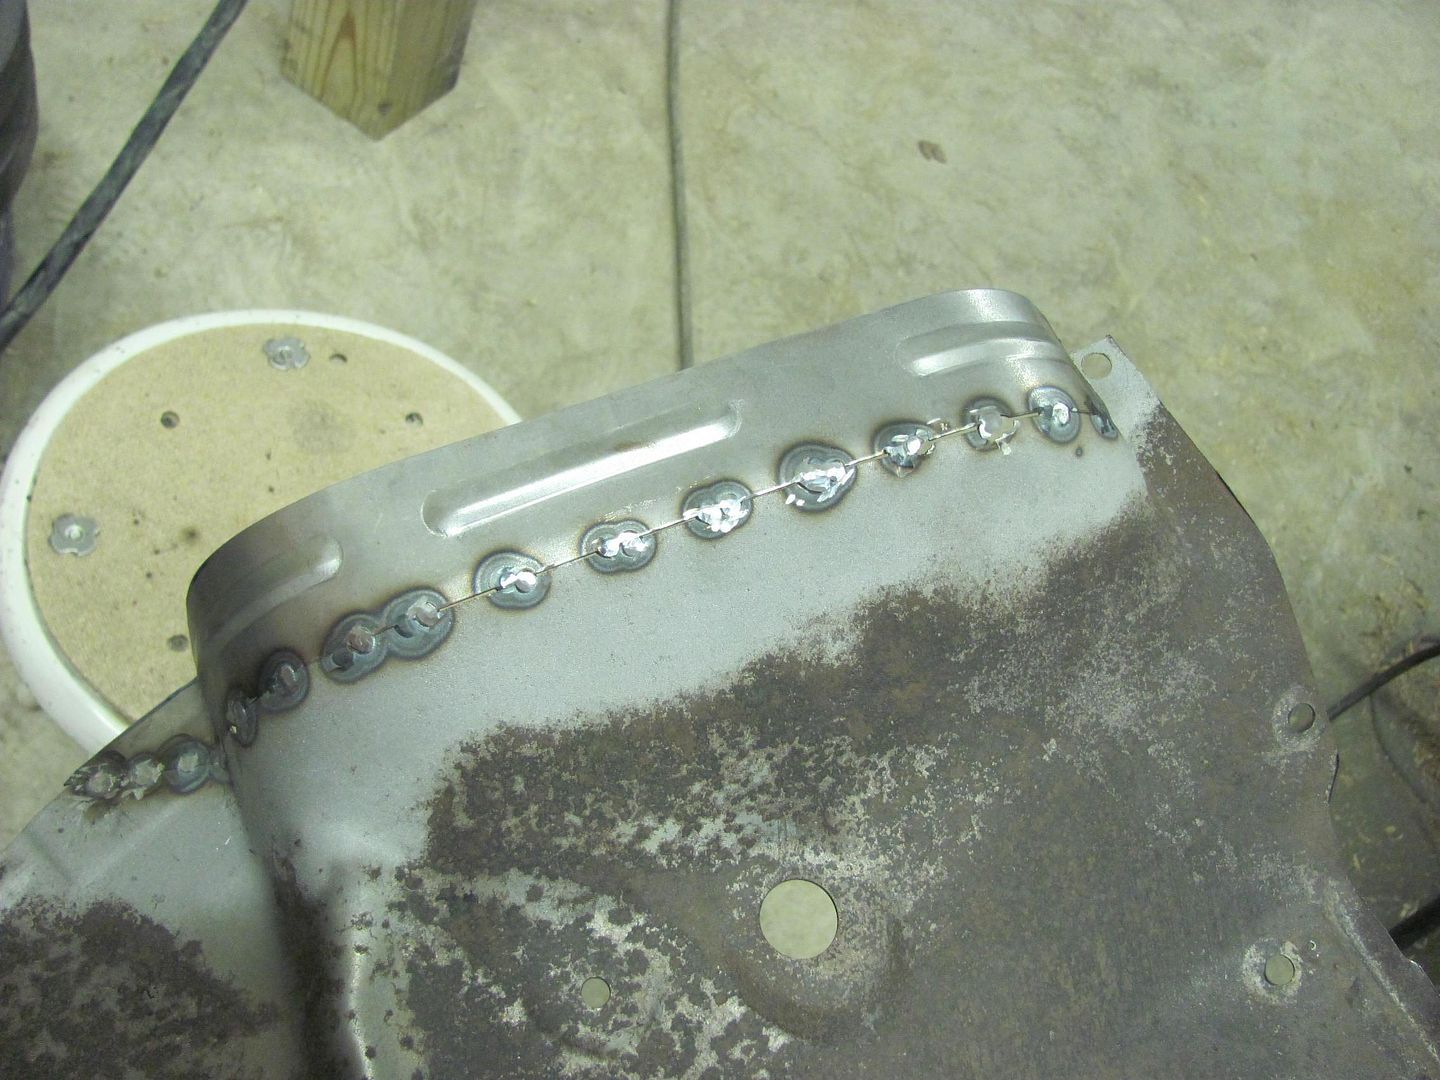
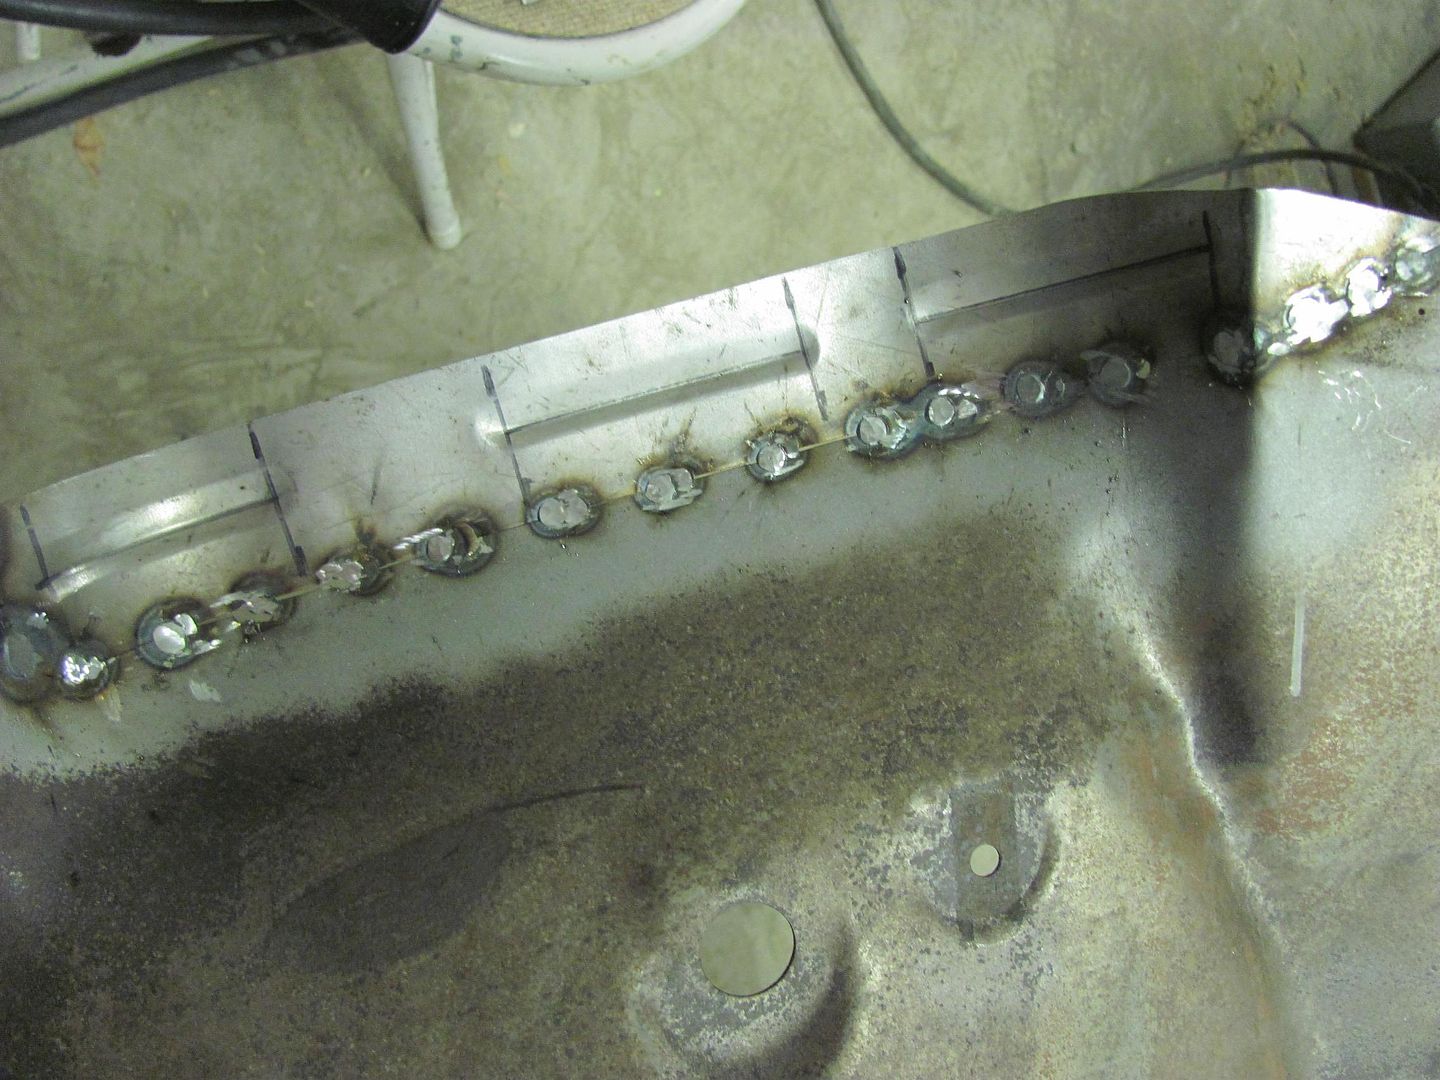
Place your seams where you can planish easily if at all possible....
 
OP
M

MP&C

Well-known member
Joined
Oct 21, 2009
Messages
4,396
Location
Leonardtown, MD
Today we worked on filling some holes in the battery trays so we could finish the inner fender mock up. Hard to drill out a slot, so we clamped on a plate with a pilot hole to use with the Blue Point sheet metal hole cutter:


Picture1257.jpg


Picture1258.jpg


Picture1260.jpg


Picture1262.jpg


Plugs.....


Picture1284.jpg


Picture1266.jpg


We tried this same repair in the corners, but the pitting was too far along and did a good job of blowing holes. So, time to back up an punt, let's make some new corners..


Picture1267.jpg


Picture1275.jpg


Picture1276.jpg


Picture1277.jpg


Picture1279.jpg


Shrinking the tuck....


Picture1270.jpg


Picture1272.jpg


Picture1274.jpg


New corners welded in....


Picture1280.jpg


Picture1281.jpg


Some of the lines from forming were left to duplicate those from the factory...


Picture1282.jpg


Gusset bracket added to core support....


Picture1288.jpg


Holes located on inner fender....


Picture1289.jpg


Stiffener brace and angle bracket bolted in....


Picture1291.jpg


Picture1292.jpg


Tray bolted to the gusset, and plug welded to the angle bracket....


Picture1300.jpg


Battery hold down brackets added....


Picture1303.jpg


Picture1304.jpg


Got a couple plug welds to grind, media blasting, and these parts are ready for powder coating!
 
OP
M

MP&C

Well-known member
Joined
Oct 21, 2009
Messages
4,396
Location
Leonardtown, MD
Simply amazing work Robert!

I could only wish I had half the talent or equipment . .

Looking at the results you get with a lot of effort in a good, thorough cleaning, I think you would enjoy metal shaping.. :rocker:


One thing I forgot to mention in the previous post, note the thickness change from the outer edge to the center. We actually had measured this and it went from about .045 at the edge to about .055 in the center.. This was using 18 ga that started at .045 thick.


Picture1274.jpg


This is about as good as it gets to show the characteristics of shrinking.

Shrinking: any process that will decrease the surface area of sheet metal while increasing the thickness. (hence mass does not change).
 
Last edited:

Duke55

Well-known member
Joined
Jan 18, 2013
Messages
370
Location
Utah
Always amazing work. Your apprentice if very lucky to be given the opportunity and experience. Hopefully he sticks with it to pass on the knowledge.
 
OP
M

MP&C

Well-known member
Joined
Oct 21, 2009
Messages
4,396
Location
Leonardtown, MD
Thanks for the comments! For tonight's efforts, as Kyle media blasted and otherwise prepped parts for powder coating, I turned my attention to the new grille. This looked to be a very accurate reproduction as it fit tightly in the corners exactly as the original did..

Picture1233.jpg


In order to do some metal bumping on the grille corners and provide some clearance, which should help eliminate future front end squeaks and paint rubs, we'll need to make an anvil. This piece of pipe looks close to our templates..

Picture1307.jpg


Unfortunately our grille shows some interference, so unless we plan on disassembly of a new grille, the anvil will need a specialized shape..

Picture1305.jpg


After some drilling, band saw and sanding action, here are the results:

Picture1309.jpg


This may just work...

Picture1310.jpg


Working the corners.... Luckily any markings that may occur here will be covered by the surround chrome..

Picture1313.jpg


Test fitment shows a nice consistent gap:

Picture1320.jpg
 

Strouty

Well-known member
Joined
Mar 21, 2010
Messages
38,209
Location
Southern Maine
I could have ten times the equipment you have and still not be able to do 10% of your quality. My hat goes off to you, I also enjoy all these posts. Thank you from all of us at GJ.
 
OP
M

MP&C

Well-known member
Joined
Oct 21, 2009
Messages
4,396
Location
Leonardtown, MD
Thanks for the comments. I guess part of the strive for quality comes from not wanting to settle for good enough, like this grille. If we can make it better, we should take that step.. :beer:
 
OP
M

MP&C

Well-known member
Joined
Oct 21, 2009
Messages
4,396
Location
Leonardtown, MD
My wife says I'm hoarding. Now I can tell her it's pre-planning. :rocker:


Today we worked on hood and gap alignment at the front of the car, the passenger side is all but done, so we started around to the driver's side. The windshield cowl showed a high spot behind the fender and door, that was bulged about 3/16. Good ol' factory fit!

Picture1328.jpg


So we made a vertical slice behind the fender and door, bumped the high spot down, and welded the joint.
We had a blowout near the leaded seam due to some rust that had collected on the back side.. Forgot to take a picture before slicing and dicing, but here's the culprit. Also had some porosity in the vertical weld that got cleaned out and re-welded later...

Picture1331.jpg


Fitted, tacked, and finished

Picture1333.jpg


Picture1334.jpg


Picture1336.jpg


Picture1337.jpg


Gaps...

Picture1338.jpg


Picture1339.jpg


Much better

Picture1341.jpg
 
To avoid these ads, REGISTER NOW!

JonBoehman

Well-known member
Joined
Oct 7, 2011
Messages
364
Location
Philpot, Ky
Dude, seriously you are my hero. I have learned so much by just watching this thread. Thank you for being such a motivation for me.
 

E12-535iTurbo

Well-known member
Joined
Feb 27, 2014
Messages
492
Location
The Netherlands
I'd be very afraid of rust appearing from the inside down the road. You must have this covert but how will you be working on these hard to reach places concerning rust protection? It already surprised me before that you keep the bear metal uncovered for quite a long time while working on this project. I've seen other people working on projects where they cover their work almost on a daily bases with epoxy. They clean an area what they will be working on and after finishing it they cover it immediatelly on both sides.
 
OP
M

MP&C

Well-known member
Joined
Oct 21, 2009
Messages
4,396
Location
Leonardtown, MD
The car is going back on a rotisserie when done with the rust repairs. There are many areas that will have paint poured in and the car rotated for good coverage, this cowl area being one of them. The shop has heat/AC, so normally use either just enough to keep the humidity low..

Thanks for the questions and comments!
 

Bob Heine

ALLIANCE MEMBER
Joined
Oct 24, 2009
Messages
10,703
Location
Boca Raton, Florida
I have found that humidity control is critical to prevent rust from forming on bare metal. In October 2011 I lifted the body a few inches off the frame of my '72 Corvette.

20101109_0374.jpg


I sanded through the thin black paint and light rust, leaving bare steel exposed. It has been exposed like this for three years and no rust has formed.

FrameGrinding2_zpsfddf146a.jpg


My garage is located 1.5 miles from the ocean in Boca Raton, FL --a pretty humid part of the country. I don't run the air conditioner in the garage every day but it is on at least a few times every week. When I pull one of the cars in when it's wet from rain, I do give it a quick towel dry most of the time.

I think the most common cause of rust forming is from condensation overnight. The garage/shop cools off at night and the water in the warm air condenses. My garage is fairly well insulated so the temperature in there rarely exceeds 85 or goes below 77.
 

Kevin54

MEMBER EMERITUS
Joined
Jan 12, 2005
Messages
29,341
Location
Urbana, Ohio
Robert....I may have asked you this in the past, but do you give the owner something like a scrapbook of everything that you have done, when the car is completed?

The reason I ask is that any individual that would walk up on the car at a car show, would have no idea whatsoever of the hours and the work that went into this. I did follow along on the Fairlane when you did that car, but I think at that time, you may have been fairly new to the Garage Journal, and didn't go into detail like you do on this '55 wagon, of which BTW....still needs to have different wheel openings in the rear :lol:

And what is the woman going for? Is she going towards a concourse restoration, a resto mod, or just a hotrod? I actually imagine that by the time you are done, it won't be too far from a Concourse Restoration.

The detail that you put into it just blows me away. Truly first class amazing.

And that bring up another question. I was watching PowerBlock, or whatever it is called now, and on Detroit Muscle, Tommy Broshes and Joe Elmore were replacing the roof on the project car they are doing. It is a '73 Challenger that had rust. They peeled the roof off, then cut the drip edge off. They put a new drip edge in and spot welded those in place, then dressed the welds. After that, they dropped the roof skin on and spot welded it in, but they didn't show what seals the seam. I think I know the answer, but do they just go back before paint and use seam sealer in that area? I'm thinking that is all that is used, then it gets primed and painted.

Now grant you, this is aftermarket parts, but originally from the factory, isn't that called the pinch weld, and the drip edge and roof skin, one complete piece? That is one area of body work that I never had to do is replace a roof skin, so I never really paid attention to it. And it's been what......30 years since cars have had a drip edge?
 
OP
M

MP&C

Well-known member
Joined
Oct 21, 2009
Messages
4,396
Location
Leonardtown, MD
Kevin, I have all the pictures on my Photobucket. On the Fairlane, I had printed some of the pictures for the first show we took it to, but the resolution wasn't the best. He wanted better ones to take to car shows, and since I have the high res photos on my computer, I just burned a disc so Brad could get some 8-1/2 x 11 photos printed up. His album on my PB has over 800 entries, I think he printed somewhere around 350. He has three very full photo albums he takes to car shows, all 8-1/2 x 11 prints in high res. He said most people will go through the album to see the work done and then go look at the car trying to find the repairs.. He also said that at the past two Fairlane Nationals he's been to, he's had quite a few people walk up and know the car based on the build thread here online.. :lol: At the 50th anniversary of the Thunderbolt at this year's Nationals at Dearborn, he finished second in his class.

The work to Dana's car has been quite a bit more extensive, she's up to over 3400 pictures right now. I hope she doesn't want me to print them. :eyecrazy:
The wagon will be a resto-mod.

Yes, that is the typical assembly for the roof skin. The structural framework is completed, drip rail spot welded to that, and roof skin spot welded into the drip rail. Seam sealer in the drip rail is typically used to seal this seam.
 
OP
M

MP&C

Well-known member
Joined
Oct 21, 2009
Messages
4,396
Location
Leonardtown, MD
Bob, thanks for that input. My shop is stick built, 2x6 insulated exterior walls, insulated doors. So it is well insulated as well. During our summer months when we typically have the humidity problems, I'll set the AC a couple degrees less than outside temps so it comes on just enough to dehumidify.
 
OP
M

MP&C

Well-known member
Joined
Oct 21, 2009
Messages
4,396
Location
Leonardtown, MD
I've had my Mig welder for quite a while now, and thought I'd downsize a bit. Most of the work I do is sheet metal, and the occasional 1/8 or 3/16 plate. I had looked at the Miller 211's online and on eBay, so I had a price range in mind. I stopped by my local Welding supply and was pleased to find that he had those prices beat by a good bit. So it came home with me..

Picture1343.jpg


Picture1344.jpg


First order of business was to test it out and do a comparison to the coupon I had done with the old machine. I still had the 11 lb. roll of .023 EZ Grind, so that was used in the new machine. Here are the results...

Picture1351.jpg


Picture1352.jpg


Picture1353.jpg


Picture1354.jpg


Both versions, .023 EZ grind and the .035 ER70S-7 in the old machine had very similar results. Good wetting, nice flat weld for minimal build, less grinding, less cleanup.

Picture1355.jpg


Back to the front end of the car, the hood had been giving us fits when opening, it was dragging the cowl vent in a few spots...

Picture1359.jpg


Removed the hood and altered the angle of the rear flange for better clearance to the cowl vent....

Picture1356.jpg


Picture1357.jpg


Picture1358.jpg


After refitting, the problem persisted, but was not as pronounced. We did notice the center of the hood was sagging a bit. So I jumped inside the engine compartment with the torch and did some contracting of the rear brace to give the center a lift...

Picture1365.jpg


Picture1366.jpg


Cooling off the hot spots with a damp rag did the trick. Next we worked on getting the hood's rear edge to match up to the cowl. This is something that the driver will stare at continually, so it needs to be a whole lot better than it is now:

Picture1361.jpg


Picture1362.jpg


Picture1363.jpg


Further refinements included this and others:

Picture1367.jpg


After taking the hood on and off about a dozen times, this is closer, and the outer edge adjacent to the fender needs to "droop" a bit more. We're running out of time this evening, so we'll try our luck next time with the rocker panel roller to see how well it addresses the edge.

Picture1369.jpg


Picture1370.jpg
 

56vette461

Well-known member
Joined
Jan 13, 2013
Messages
491
Location
Northern California
The MillerMatic 211 and the Cobra torch are two of my favorite tools. You will welcome the versatility of the 211 and the multitude of uses in both power input ranges. You have some very nice flat welds on those panels. Please keep the posting photos of your progress.
 

aggierailroad

Well-known member
Joined
Jan 8, 2012
Messages
581
Location
Houston, TX
Hey Robert,

Quit making the rest of us look so bad.

Your dearest friends,

The garagejournal amateurs that read your awesome stuff.
 
OP
M

MP&C

Well-known member
Joined
Oct 21, 2009
Messages
4,396
Location
Leonardtown, MD
I'm just hoping my wife doesn't see your pictures of crown molding and wainscot. I have enough to do now... :lol_hitti
 

aggierailroad

Well-known member
Joined
Jan 8, 2012
Messages
581
Location
Houston, TX
Fair enough.

Send me her email so I can get you to slow down so I can catch up. I estimated that I did close to 300 trips up and down the stairs for that little jewel of a project...
 

hippie2cams

Well-known member
Joined
Jul 15, 2012
Messages
384
Location
Huffman,TX
I have spent 2 days reading every word and watching every video in this thread and I can hardly believe the talent that I have witnessed here. Not just your metal working talent but your ability to explain how to's is amazing. I can say that i'm proud to be a part of the same forum as you.
 

Kevin54

MEMBER EMERITUS
Joined
Jan 12, 2005
Messages
29,341
Location
Urbana, Ohio
So Robert.....Is the new help retaining the things you are showing him? You haven't said anything unfavorable, so I assume he is working out great. Is he going to stay on with you throughout, or was this just a summer sort of thing? Sorry for all of the questions. I can't imagine him not learning things and then wanting to end up showing others on down the road what he has been taught.

Today, hardly anyone takes the time to go into the detail like you do, and it's a great thing to be able to pass the knowledge onto someone else. That's what separates the pro's from the hacks. Anyone can mud things up to make the final product look good, but it takes a real professional to minimize the mud work to nearly nothing. And there will always be older cars to work on. So having ones like you, and hopefully the person you are mentoring, just keeps those old cars on the roads for years to come for future generations.
 
OP
M

MP&C

Well-known member
Joined
Oct 21, 2009
Messages
4,396
Location
Leonardtown, MD
I have spent 2 days reading every word and watching every video in this thread and I can hardly believe the talent that I have witnessed here. Not just your metal working talent but your ability to explain how to's is amazing. I can say that i'm proud to be a part of the same forum as you.


Thanks for the kind words. At my previous employer part of my tasking was to write mechanical work instructions as part of our ISO certification. So I'd say that background lends some direction to the "format" of the how-to's.


So Robert.....Is the new help retaining the things you are showing him? You haven't said anything unfavorable, so I assume he is working out great. Is he going to stay on with you throughout, or was this just a summer sort of thing? Sorry for all of the questions. I can't imagine him not learning things and then wanting to end up showing others on down the road what he has been taught.

Today, hardly anyone takes the time to go into the detail like you do, and it's a great thing to be able to pass the knowledge onto someone else. That's what separates the pro's from the hacks. Anyone can mud things up to make the final product look good, but it takes a real professional to minimize the mud work to nearly nothing. And there will always be older cars to work on. So having ones like you, and hopefully the person you are mentoring, just keeps those old cars on the roads for years to come for future generations.


Kevin, Kyle is working out very well. I do hit him up with some "pop quizzes" to see if he is paying attention or retaining info. I also talk out problems we encounter and ask what his approach would be, to help get him thinking about the process involved. He is presently working one night after school and one day on the weekend. You mention mudding things up. This is one thing I've told him he won't learn from me. While some filler is almost inevitable for most projects, I told him we'd focus on making the replacement parts as accurately as we can to our ability, to minimize the use of filler (or abuse, as I'm sure most of us have seen at some point or another...)
 

aggierailroad

Well-known member
Joined
Jan 8, 2012
Messages
581
Location
Houston, TX
How are you liking the 211? I've been finding that with mine, I turn down the heat about half of a "number" and turn the feed speed up to get it to hum. I was having a horrible time with burn-back before I did this - referring to arcing off and the wire burning back into the tip and balling up and causing much cursing and anger.
 
OP
M

MP&C

Well-known member
Joined
Oct 21, 2009
Messages
4,396
Location
Leonardtown, MD
I think the burn back is due to not enough wire feed speed, regardless of the heat setting. On the 19 ga shown below to the right, done on the 211, the heat setting was at 4 (16 ga range) and the wire feed was at about 67. We did find there was a happy medium even at those settings. Perhaps because I have seen/heard the welding for a while I had a sense of when to let off the trigger. I was letting Kyle practice some weld dots and he was letting off the trigger faster than I was. He had a few that were just barely starting to show weld penetration on the back side and the weld on the front side seemed to be more pronounced than those in the pictures. It's as if the heat was just getting ramped up as he let off the trigger. I was holding the trigger about a half second or so longer, and the welds seemed to flatten out nicely... I'll likely play with the settings some more, and see how it likes more heat, less duration.


Picture1352.jpg
 

Kevin54

MEMBER EMERITUS
Joined
Jan 12, 2005
Messages
29,341
Location
Urbana, Ohio
Kevin, Kyle is working out very well. I do hit him up with some "pop quizzes" to see if he is paying attention or retaining info. I also talk out problems we encounter and ask what his approach would be, to help get him thinking about the process involved. He is presently working one night after school and one day on the weekend. You mention mudding things up. This is one thing I've told him he won't learn from me. While some filler is almost inevitable for most projects, I told him we'd focus on making the replacement parts as accurately as we can to our ability, to minimize the use of filler (or abuse, as I'm sure most of us have seen at some point or another...)

That's fantastic, and a very good way to make sure he is learning. That's basically the same thing I have done with ones I have mentored over the years. It makes them think for sure. And I know that you would never do it, as I never did it either when training someone, is to joke around or tell them that they are way off base and make them out to be stupid. I have witnessed others do that when training someone. They think it makes them feel superior over the ones they are trying to teach something to. Patience with teaching a person something wins out every time.

You never know.......maybe you will have some fulltime help in the future. I don't think you ever mentioned it, but how old is Kyle?

And he really should consider himself lucky, because metalworking is a dying breed of people. Hopefully with ones like you, and ones on Metal Meet, can keep the trade going. It's not a job, it is truly an art. That's one thing Kyle will hopefully realize. Within every piece of metal is a part just waiting to get out, and it takes a special person to find that piece of artwork.
 

22george

Well-known member
Joined
Jan 26, 2011
Messages
1,634
Location
SW Ohio
I think the burn back is due to not enough wire feed speed, regardless of the heat setting. On the 19 ga shown below to the right, done on the 211, the heat setting was at 4 (16 ga range) and the wire feed was at about 67. We did find there was a happy medium even at those settings. Perhaps because I have seen/heard the welding for a while I had a sense of when to let off the trigger. I was letting Kyle practice some weld dots and he was letting off the trigger faster than I was. He had a few that were just barely starting to show weld penetration on the back side and the weld on the front side seemed to be more pronounced than those in the pictures. It's as if the heat was just getting ramped up as he let off the trigger. I was holding the trigger about a half second or so longer, and the welds seemed to flatten out nicely... I'll likely play with the settings some more, and see how it likes more heat, less duration.


Picture1352.jpg

l've had the same problem as aggierailroad with my 211 on higher heat settings welding thicker steel. Thanks for the info:thumbup::thumbup:
 
OP
M

MP&C

Well-known member
Joined
Oct 21, 2009
Messages
4,396
Location
Leonardtown, MD
Kevin, he's the 16yo son of a guy I went to school with. He plans on restoring the 57 pickup his dad drove in high school, so he's got motive for learning.
 
To avoid these ads, REGISTER NOW!
Top Bottom