
You are using an out of date browser. It may not display this or other websites correctly.
You should upgrade or use an alternative browser.
You should upgrade or use an alternative browser.
MP&C Shop Projects
- Thread starter MP&C
- Start date
Kevin54
MEMBER EMERITUS
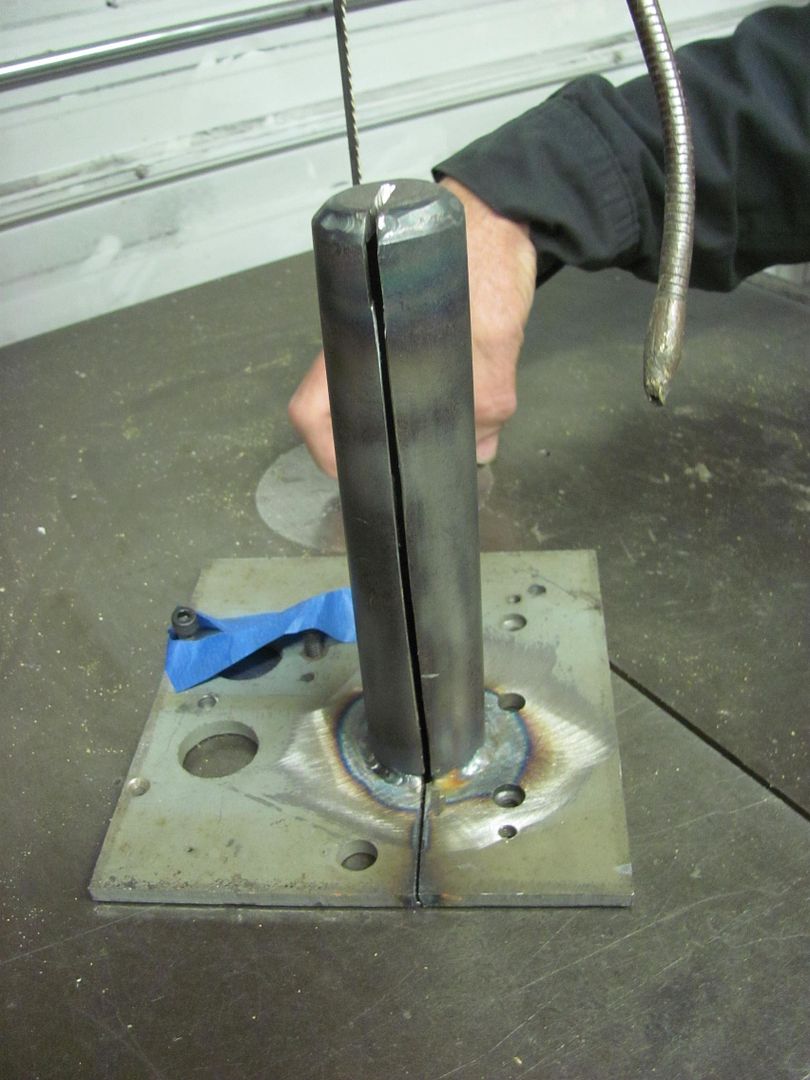
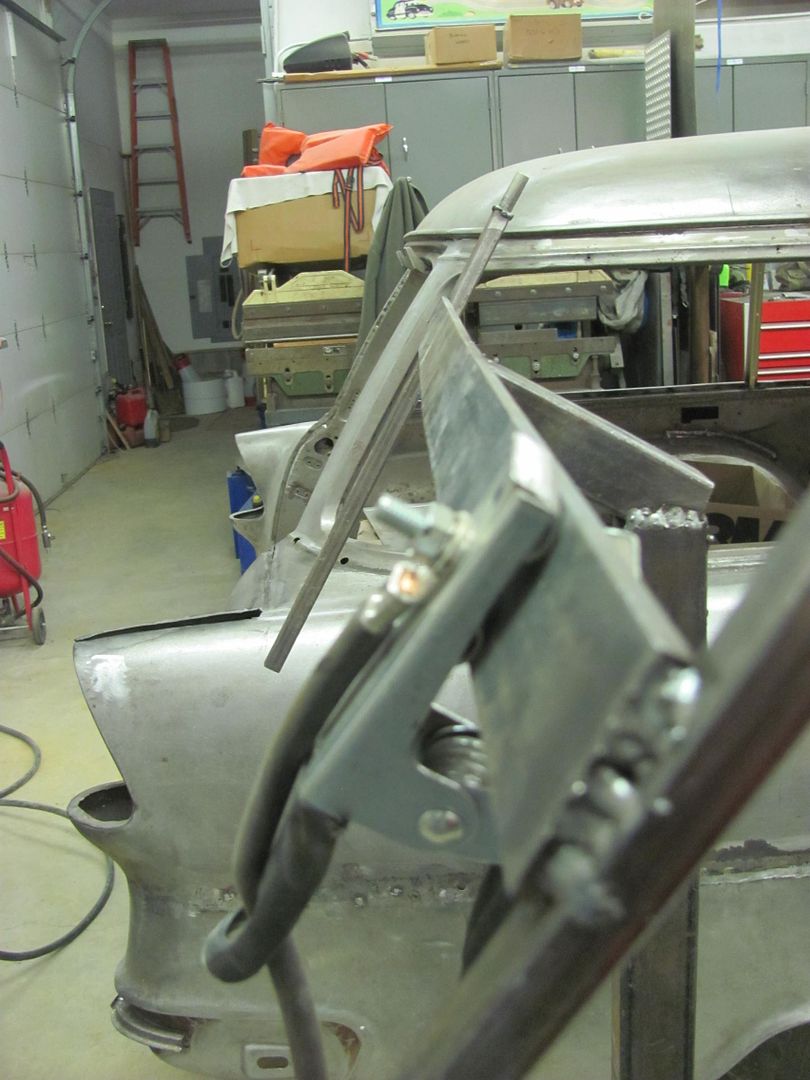
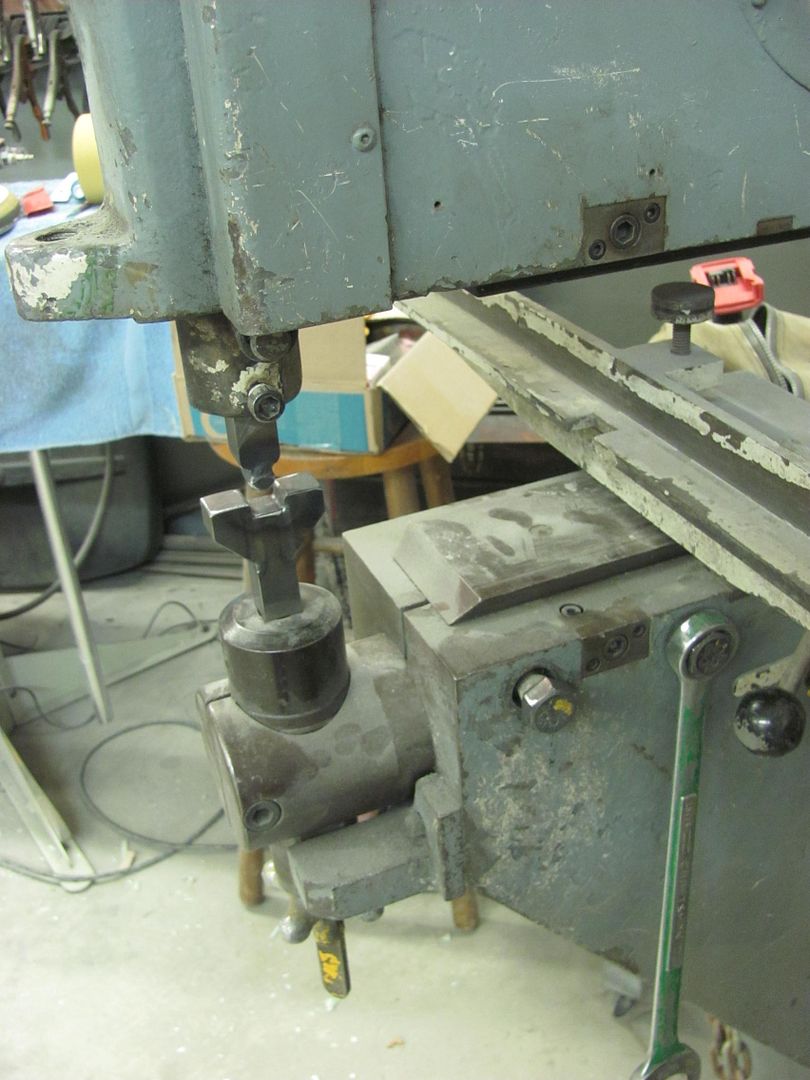
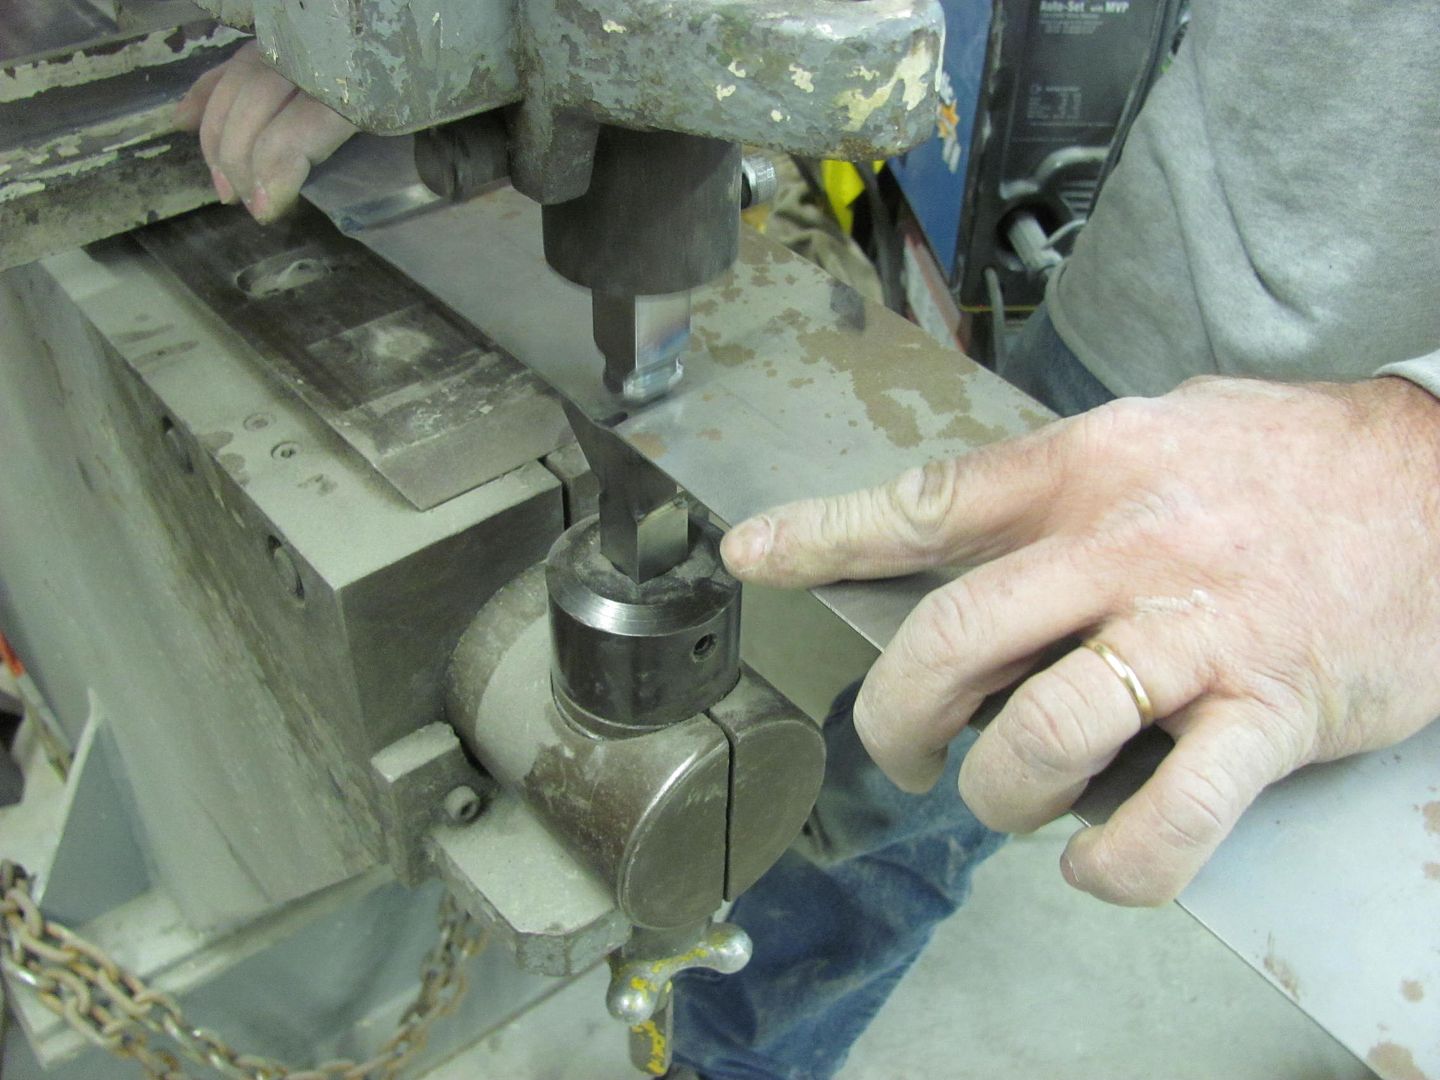
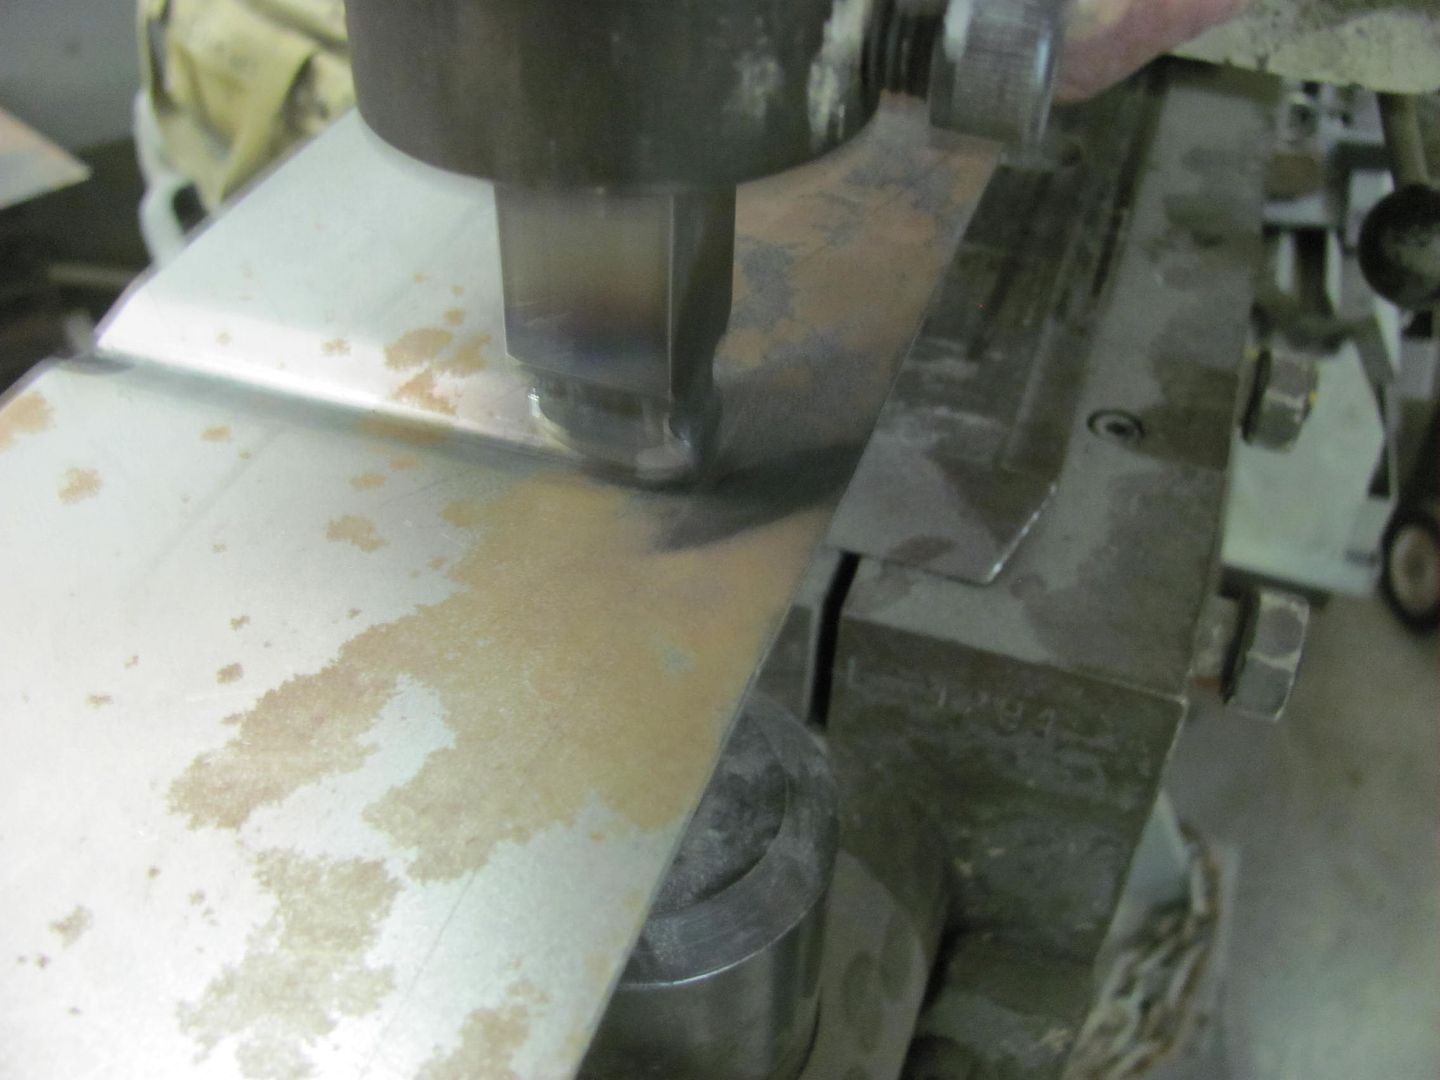
For ones that may not know, and want to make one of these for their home bandsaw, or shop bandsaw.......The blade needs to be in the tool before cutting, then bolted down, or clamped down somehow. If it is away from the blade as shown in the pic, which I am assuming is just a pic of the tool when not being used, the blade will pull your metal down. With the blade inside of the tool, then clamped, the tool gives your metal support.
Plus you can make the top of the tool either flat, or rounded. What you are looking for is something to support the metal you are cutting. On the ones we made at work, they were used to cut out wing lighting housings for the big birds mostly. (aircraft...737's 747,s and so on.) Plus if you make one for your bandsaw, you may want to make one with interchangeable post. Long post, short post, larger diameter at the top, and smaller diameter at the top. The goal is to have the most support you can get.
Sorry to jump in, but I'd hate to see someone get pinched up, or ruin parts by not knowing that the blade rides inside of the post.
Sorry Robert....I failed to see where you said it slides into the blade.
Last edited:
Ohmthis
Well-known member
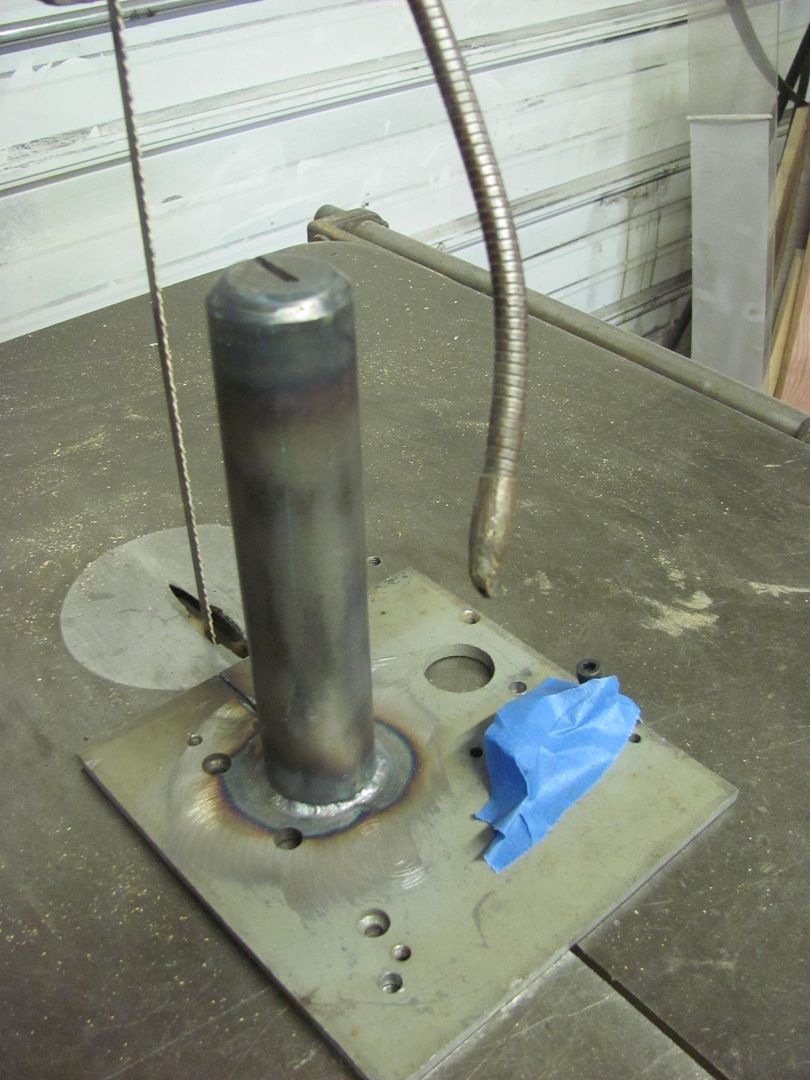
Can you show a part that would be cut on that bandsaw jig?
Kevin, thanks for clarifying. I did indicate the following....

I was taking a bunch of pictures and rushing through things as I was leaving soon thereafter, so didn't take the time to properly "stage" the fixture for the shot. But thanks for pointing out in greater detail as others may have missed it.Band Saw "guide" for cutting convex shapes on the band saw... Slides into the blade and gets bolted to the table....
Can you show a part that would be cut on that bandsaw jig?
Imagine cutting a motorcycle fender down the middle to add a strip to widen it. Or any other convex part, any crowned panel that leaves a gap between it and the table surface at the point the blade goes through, at some point it will tend to grab and pull the panel downward, binding on the blade in the process. This fixture moves the surface that the blade pulls against upward to allow room for crowned panels without interfering or binding with the blade.
Ohmthis
Well-known member
Thanks, makes great sense.
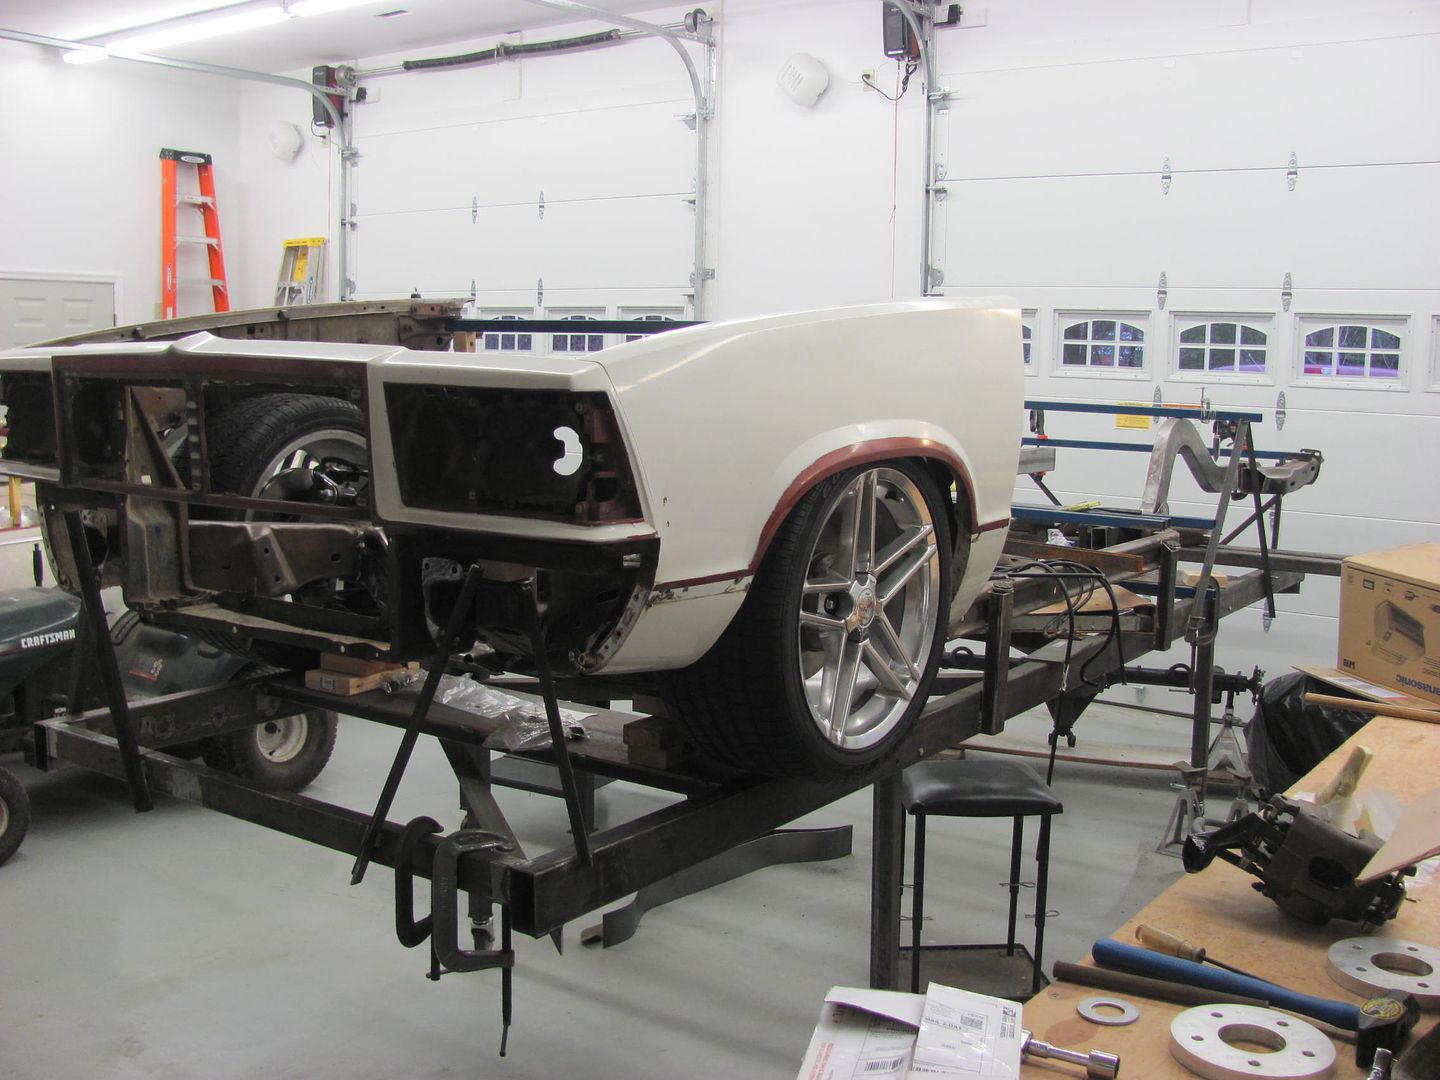
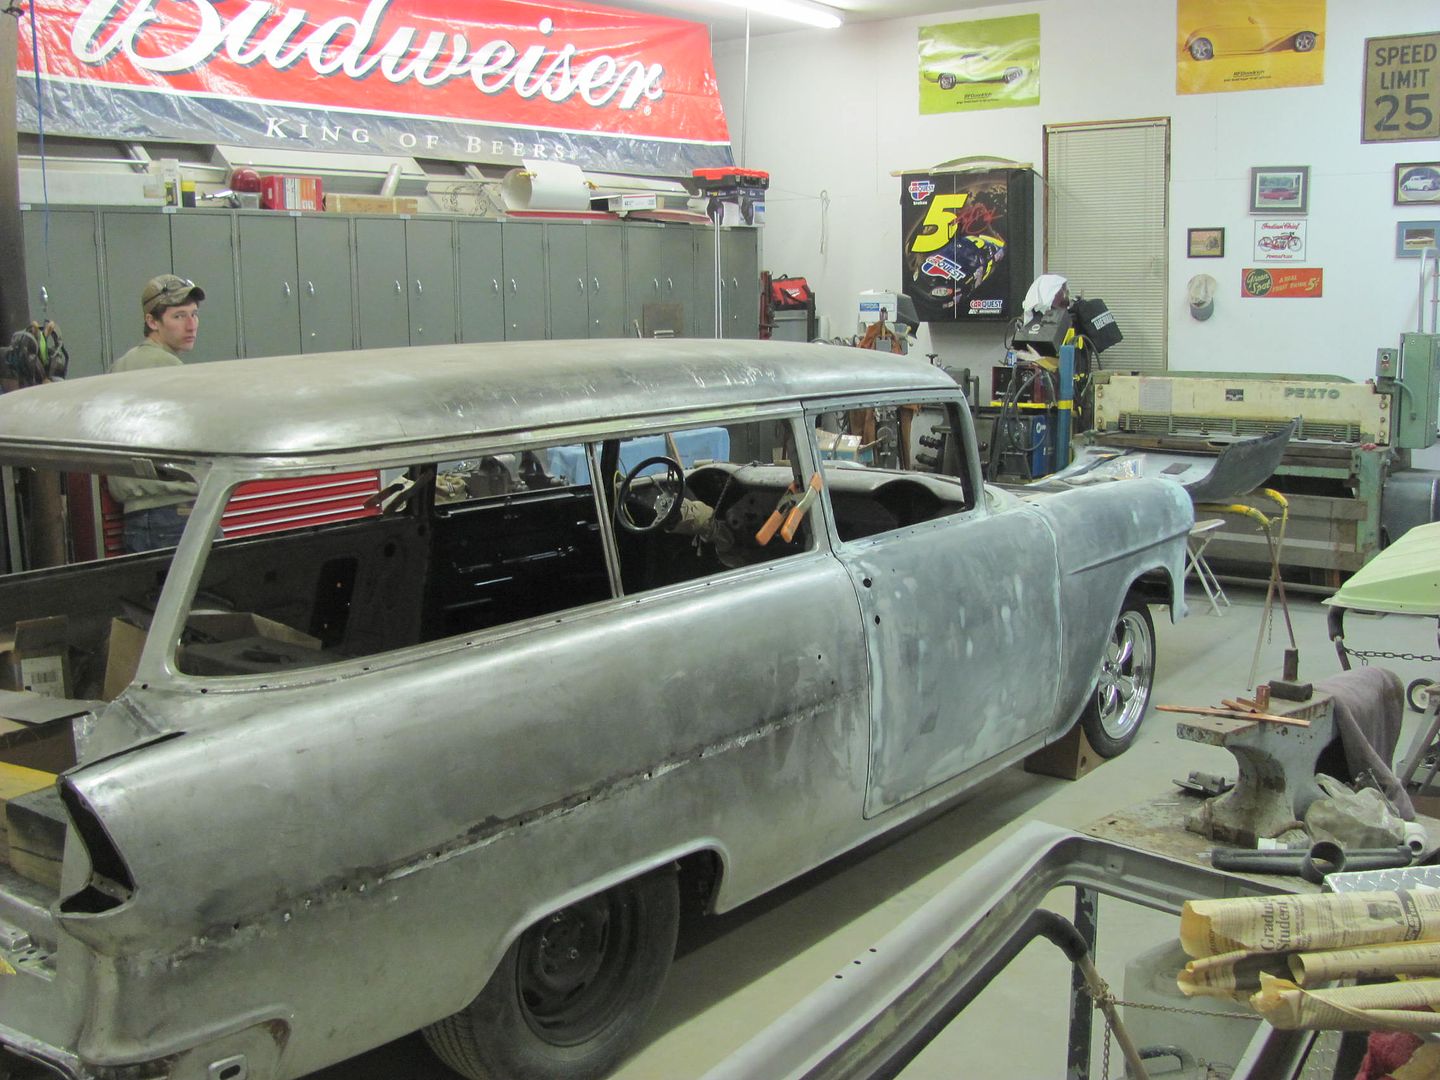
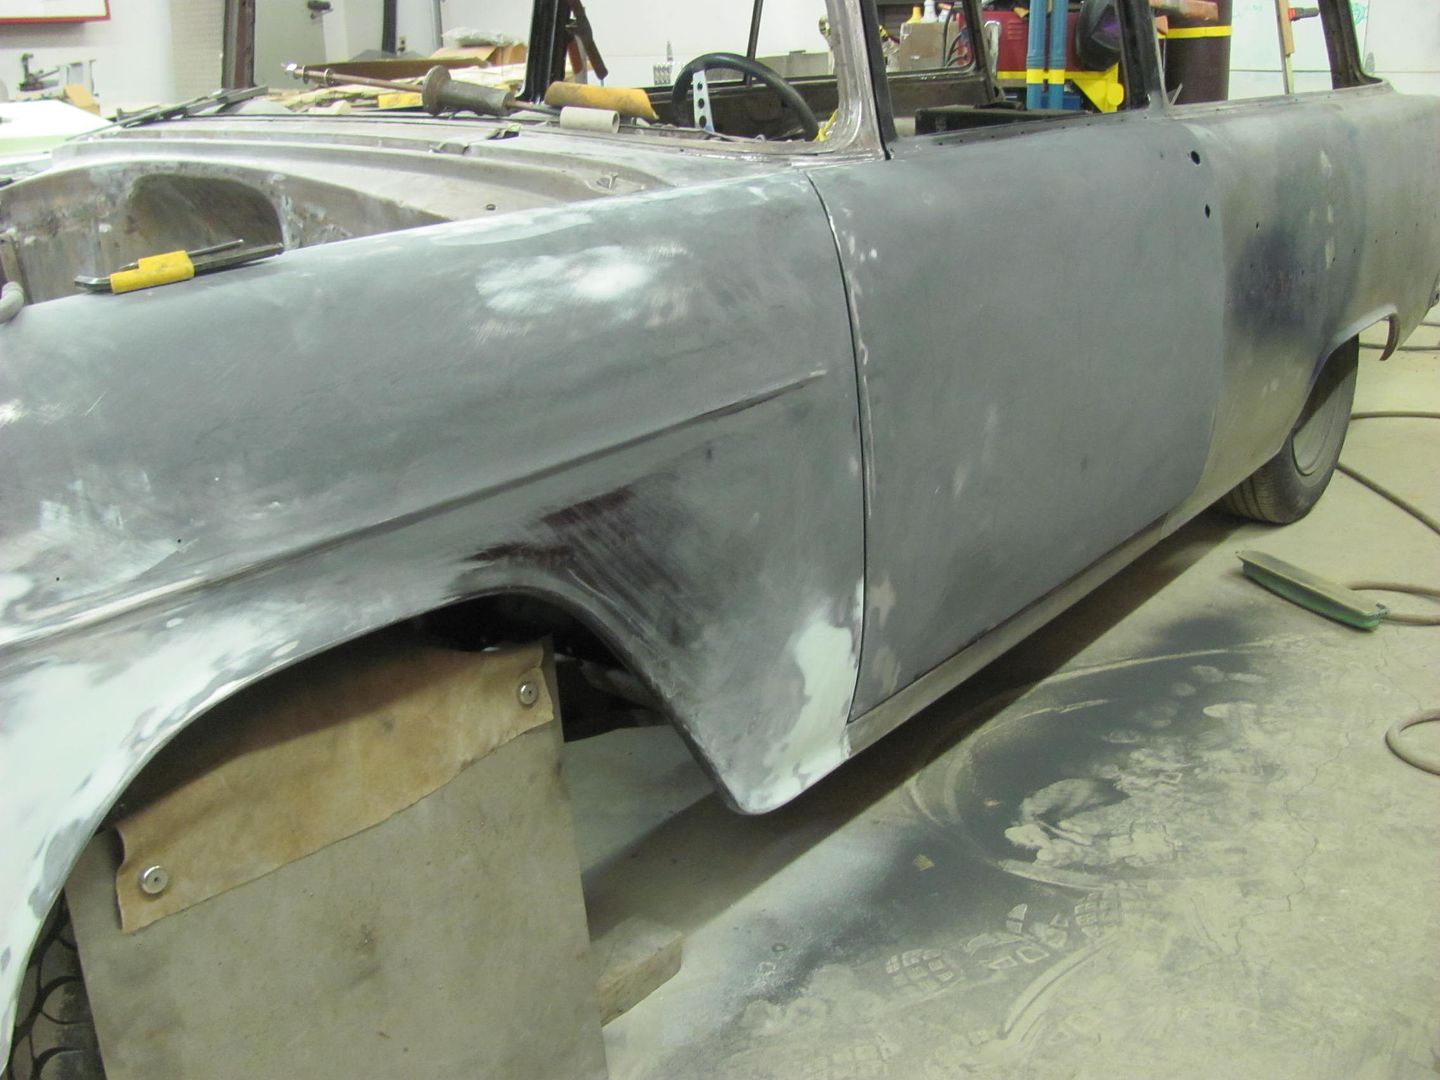
Tonight's shop progress. Got the 55 moved into the paint booth....
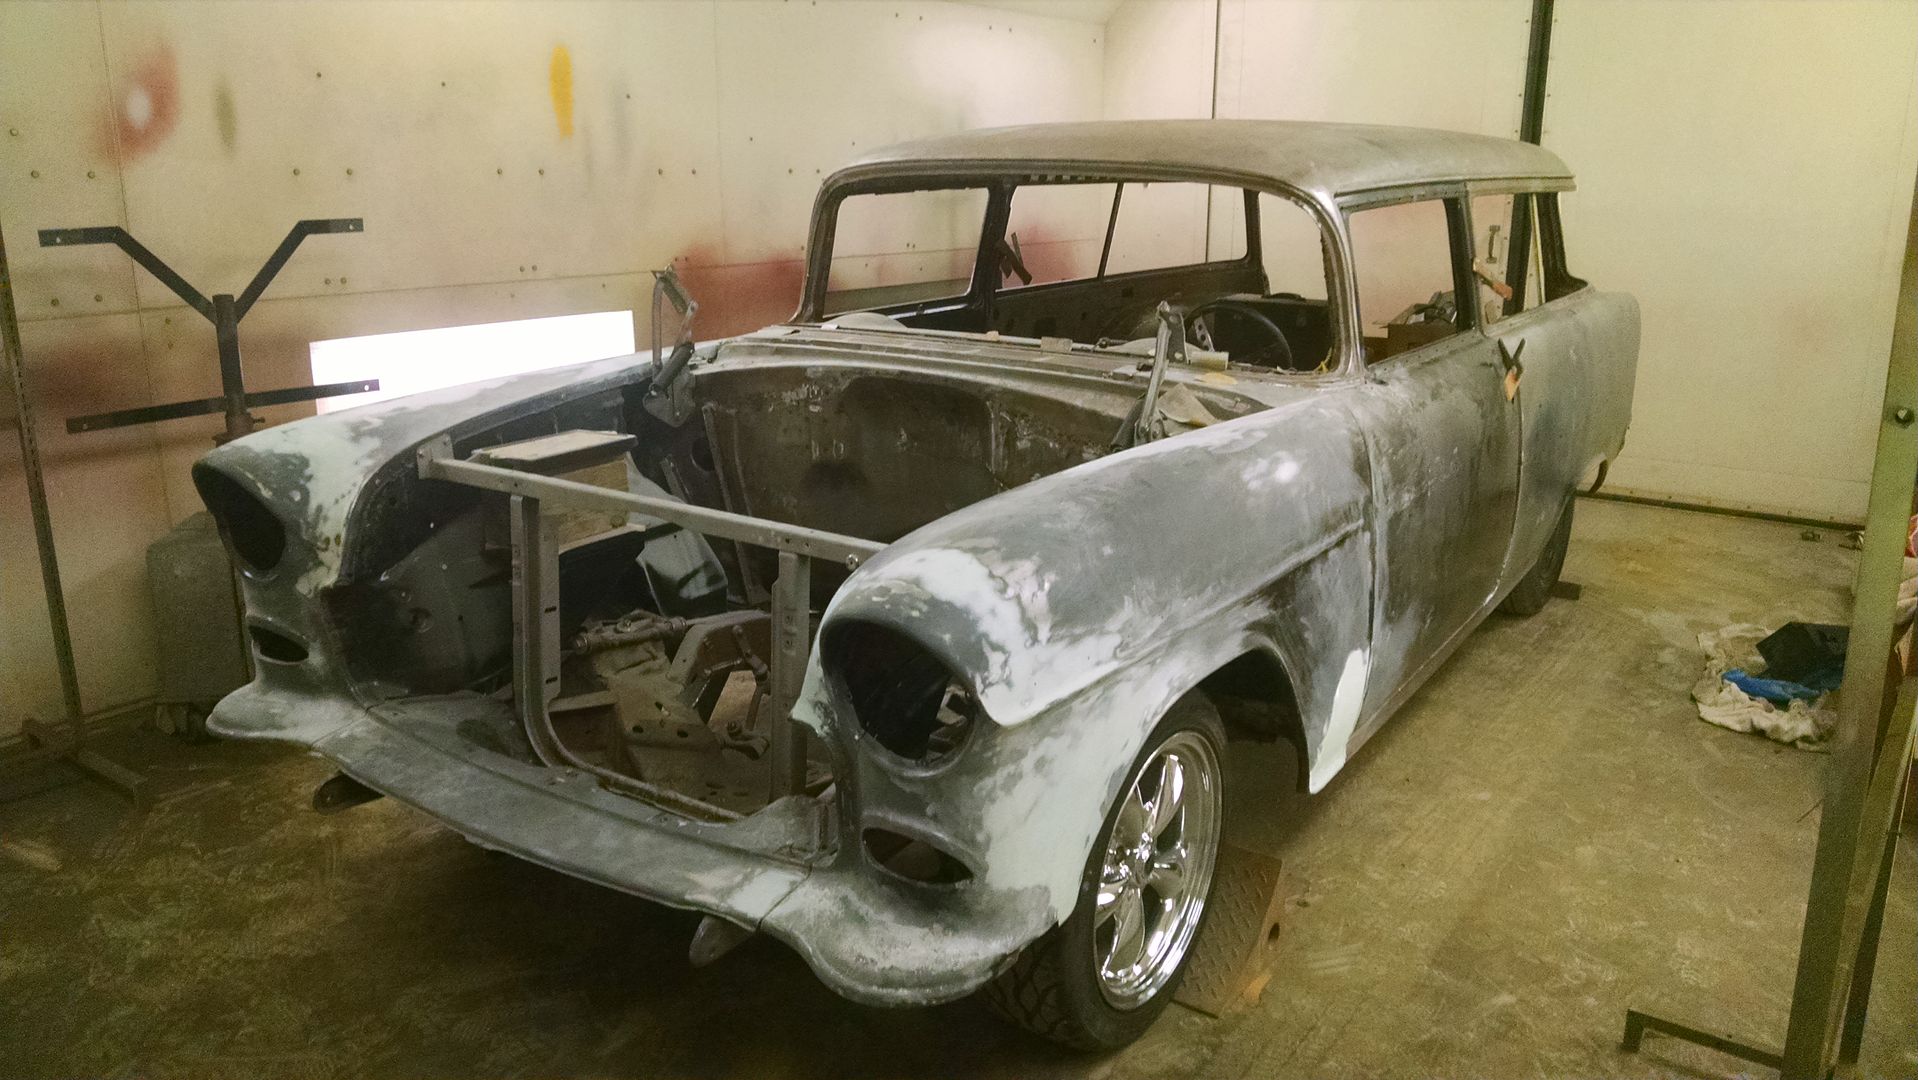
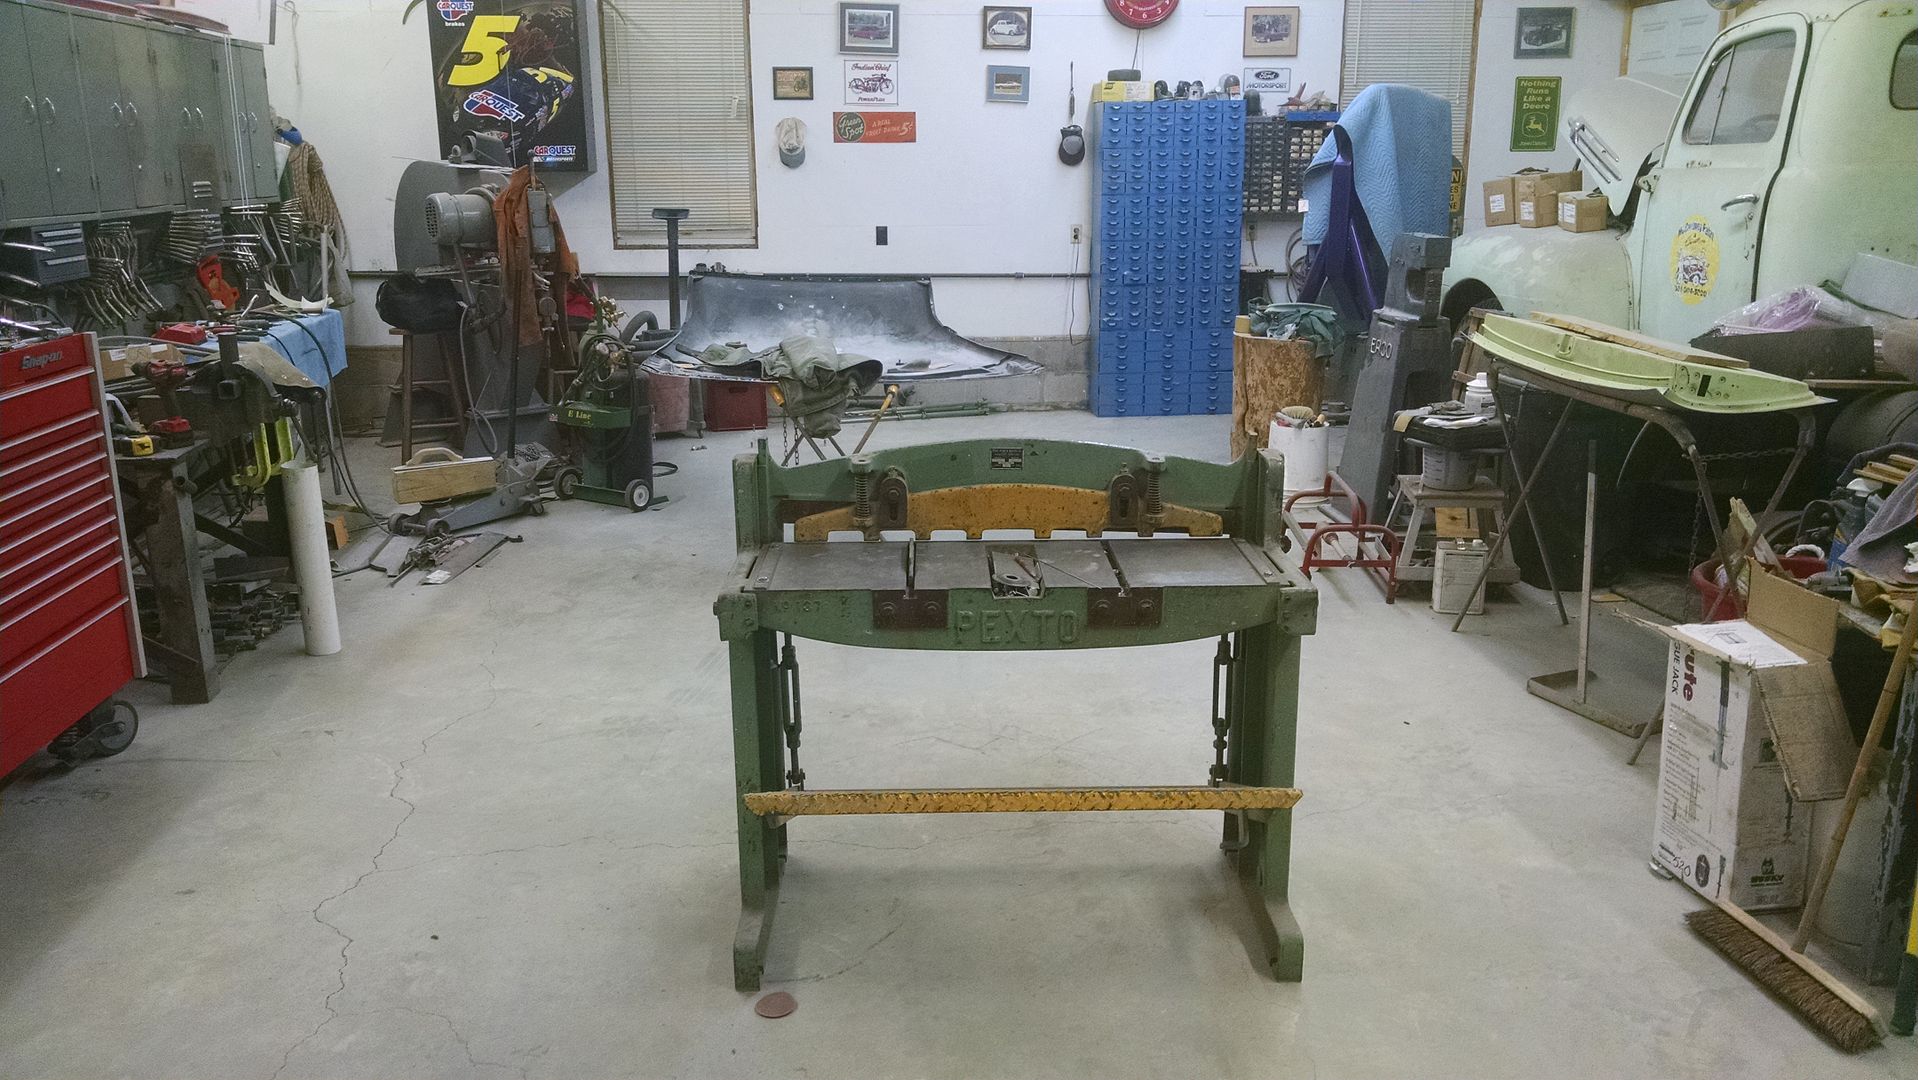
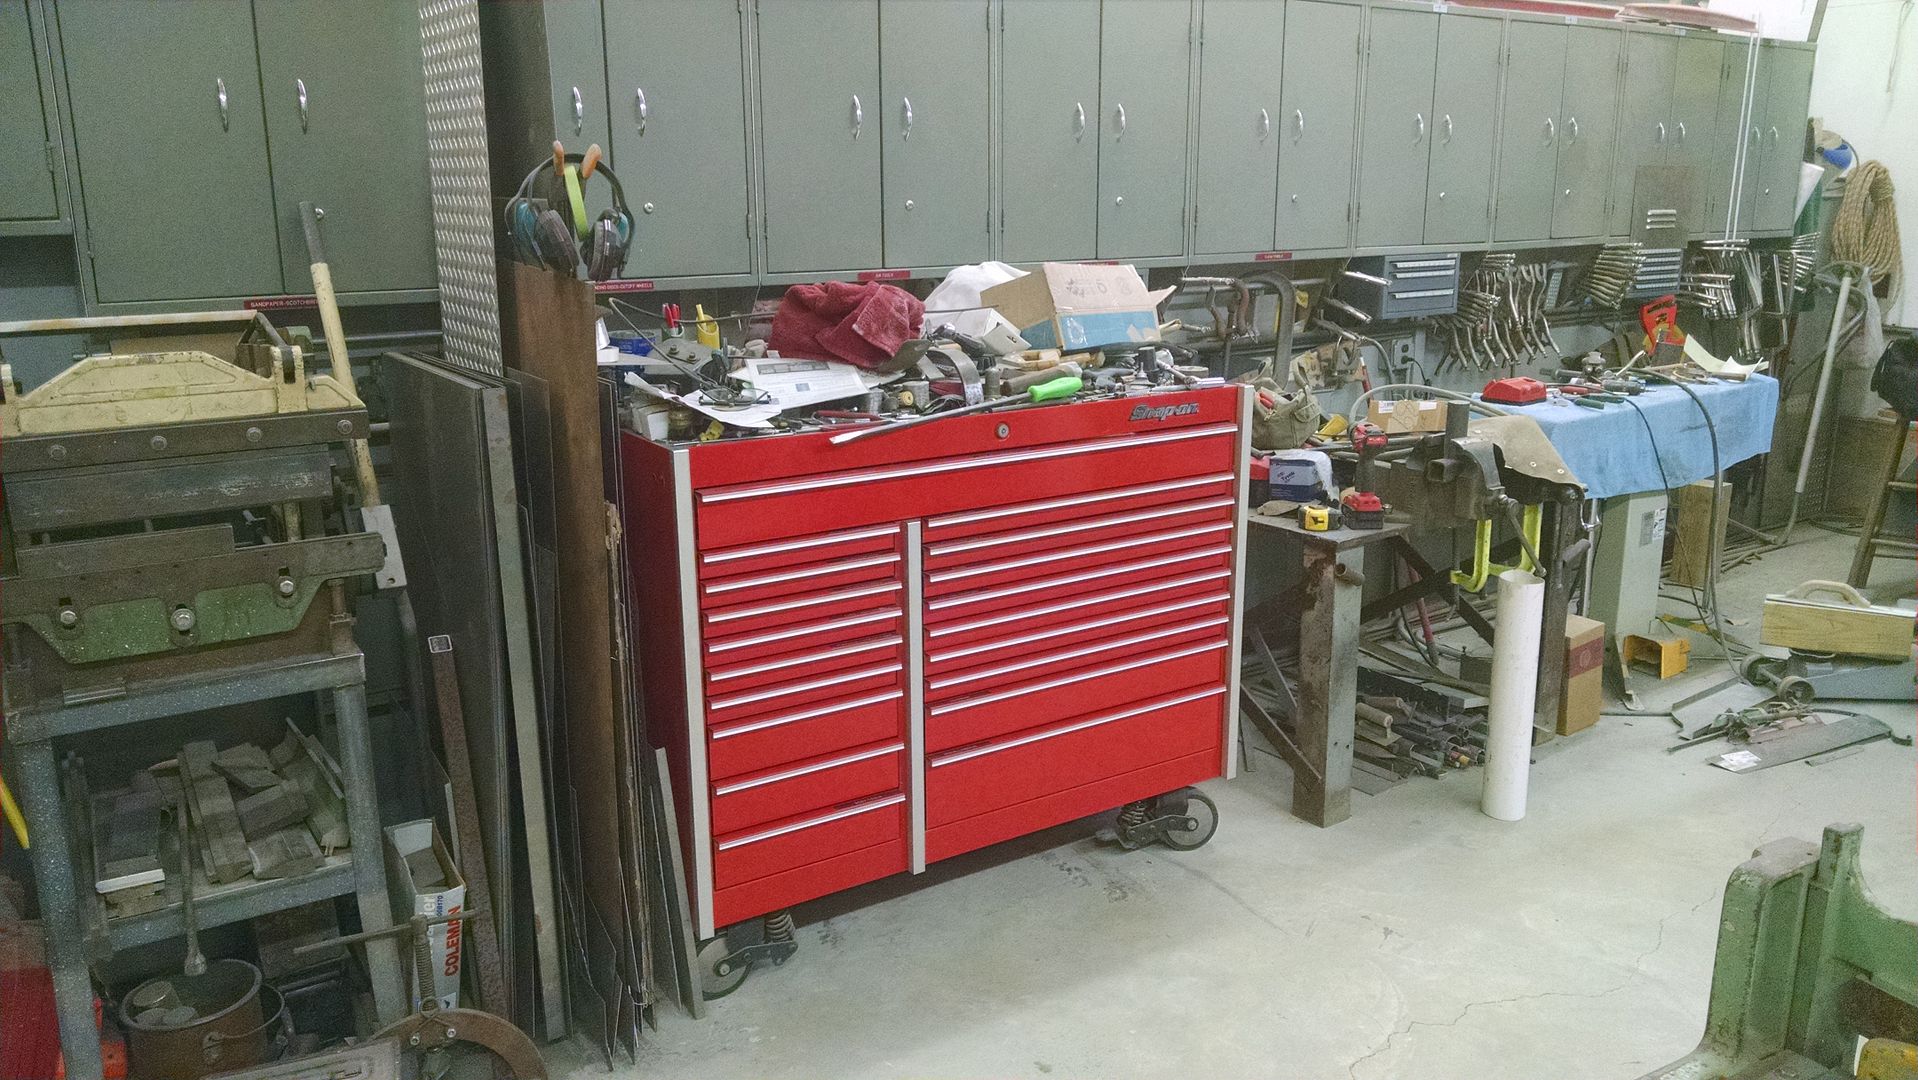
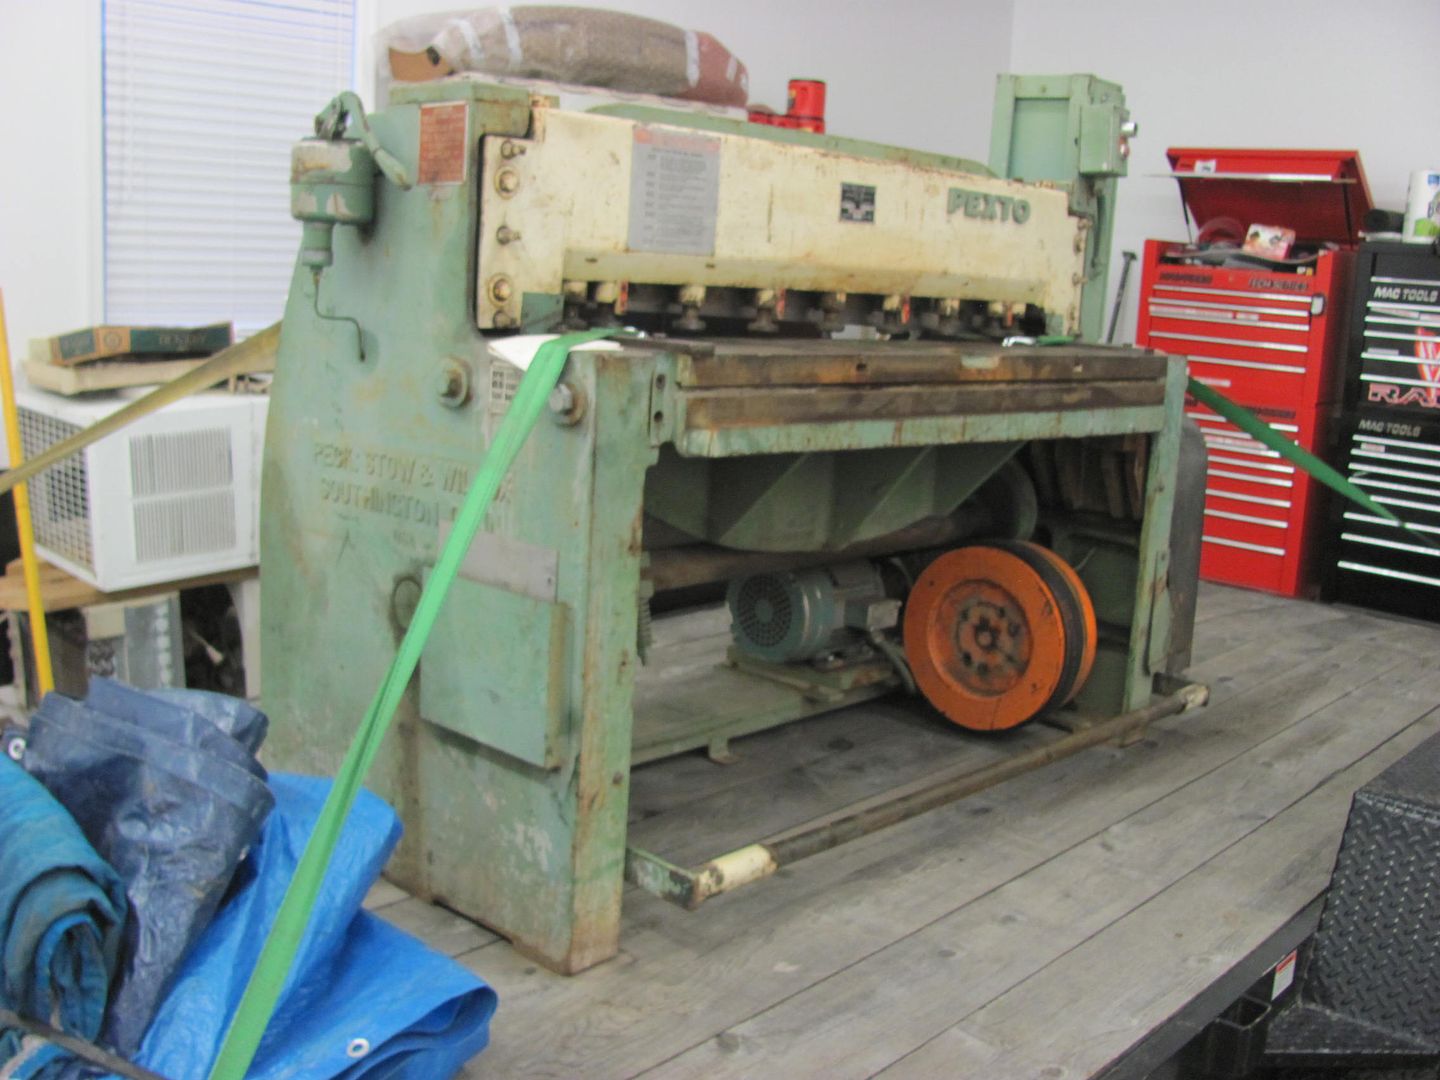
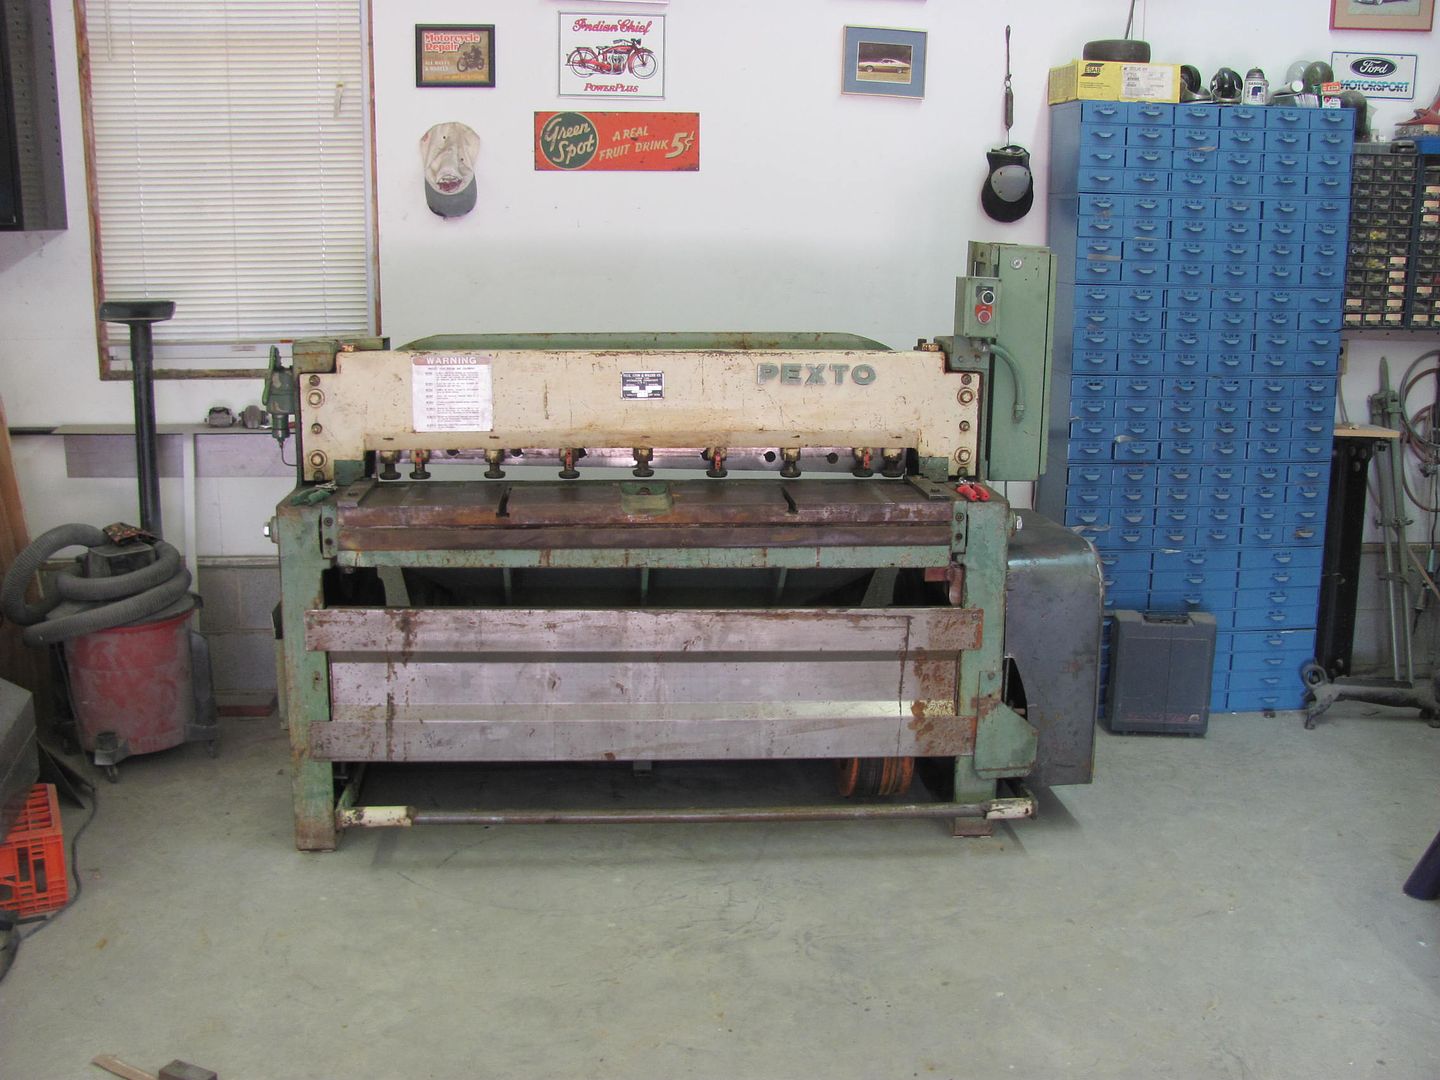
.....but only temporarily, not quite ready for paint yet.. Shuffling some stuff around to make room for bringing in the new shear on Saturday, and needed the car out of the way. The new shear is just shy of 7 feet long, so it wouldn't fit in the same spot as the old one without moving something else as well. In measuring the tool box, it looked like a good fit in that spot, so moving it and the kick shrinker will make a better spot for the new shear against the back wall.
.....and as we haven't used the radial arm drill press in over a year, I think that's getting ready to go on CL to make room for the planishing hammer, when that gets finished up..
Last edited:
NASTYZEN
Well-known member
Cool score on the shear Robert. I,m liking your tow vehicle, then again I might be slightly biased.
Kevin54
MEMBER EMERITUS
Kevin, thanks for clarifying. I did indicate the following....
I was taking a bunch of pictures and rushing through things as I was leaving soon thereafter, so didn't take the time to properly "stage" the fixture for the shot. But thanks for pointing out in greater detail as others may have missed it.
Yea, I posted under the pic after I went back through and saw where you posted that.
I can see the '55 is in the paint booth but only temporarily. I can see a couple of modifications that should be done yet, but I won't mention those.
 I understand how touchy that subject of the modification is
And I got my exhaust fixed yesterday. I ran it over to Monroe, had them take out the muffler and just put in a straight pipe in it's place. Has a nice sound to it now just running off of the cat's.

And while it was on the lift, I did some looking at it.
 The driver side rocker is starting to go, and the passenger side cab corner is starting to go. Sitting outside for two years has really taken it's toll on it. That is the only vehicle that I have ever owned that has been that rusty. And it's the only vehicle that I have owned for years and years that has even sit outside in all sorts of weather. So I have some decisions to make. Drive it until it is done with, or throw some coin at it and fix it up. Or halfass fix it and trade the Hoopty and it in on a different truck. Decisions, decisions.
If you are going to get rid of your radial drill press, when you list it on CL, you ought to see if you could possibly trade for an older decent Bridgeport mill. You may be able to find someone that has a round ram that has another dovetail ram, and possibly trade for a round ram mill. I don't know how prices are in your neck of the woods on things as far as machinery, but dovetail ram mills can be bought for $2-$3000 around here, and a round ram BP for $750-$1500. I missed out on a real nice one last year that I could have bought for $1000. Probably one of the nicest and tightest older BP that I have ran across. I bought my Lagun off of him, and when I called him back on the BP he had just sold it. I would have swapped it for a radial DP. What brand is it, and I'll keep an ear out if you are seriously going to sell it.
This morning started at my brother-in-laws to pick up the new shear. It's been parked in his garage since last week while my driveway has been drying out..
Here's his El Camino project, narrowing the frame rails in the rear....
One of the neighbors a few miles down the road has a Pettibone forklift. I had him lined up to help lift the shear off the trailer today. He made it about 1/4 mile and had the brakes locking up and frying, so we had to back up and punt. Another buddy has a skid steer with the fork attachment, but the shear was on his trailer. So we dropped off the trailer/shear at the shop, went and got another trailer and picked up the skid steer.. I will say this shear is about at the limits of the lifting capacity of this skid steer, the back end was trying to go airborne when lifting it off the trailer. So we inched it up in the air and then pulled the trailer out from under it. Here's the placement...
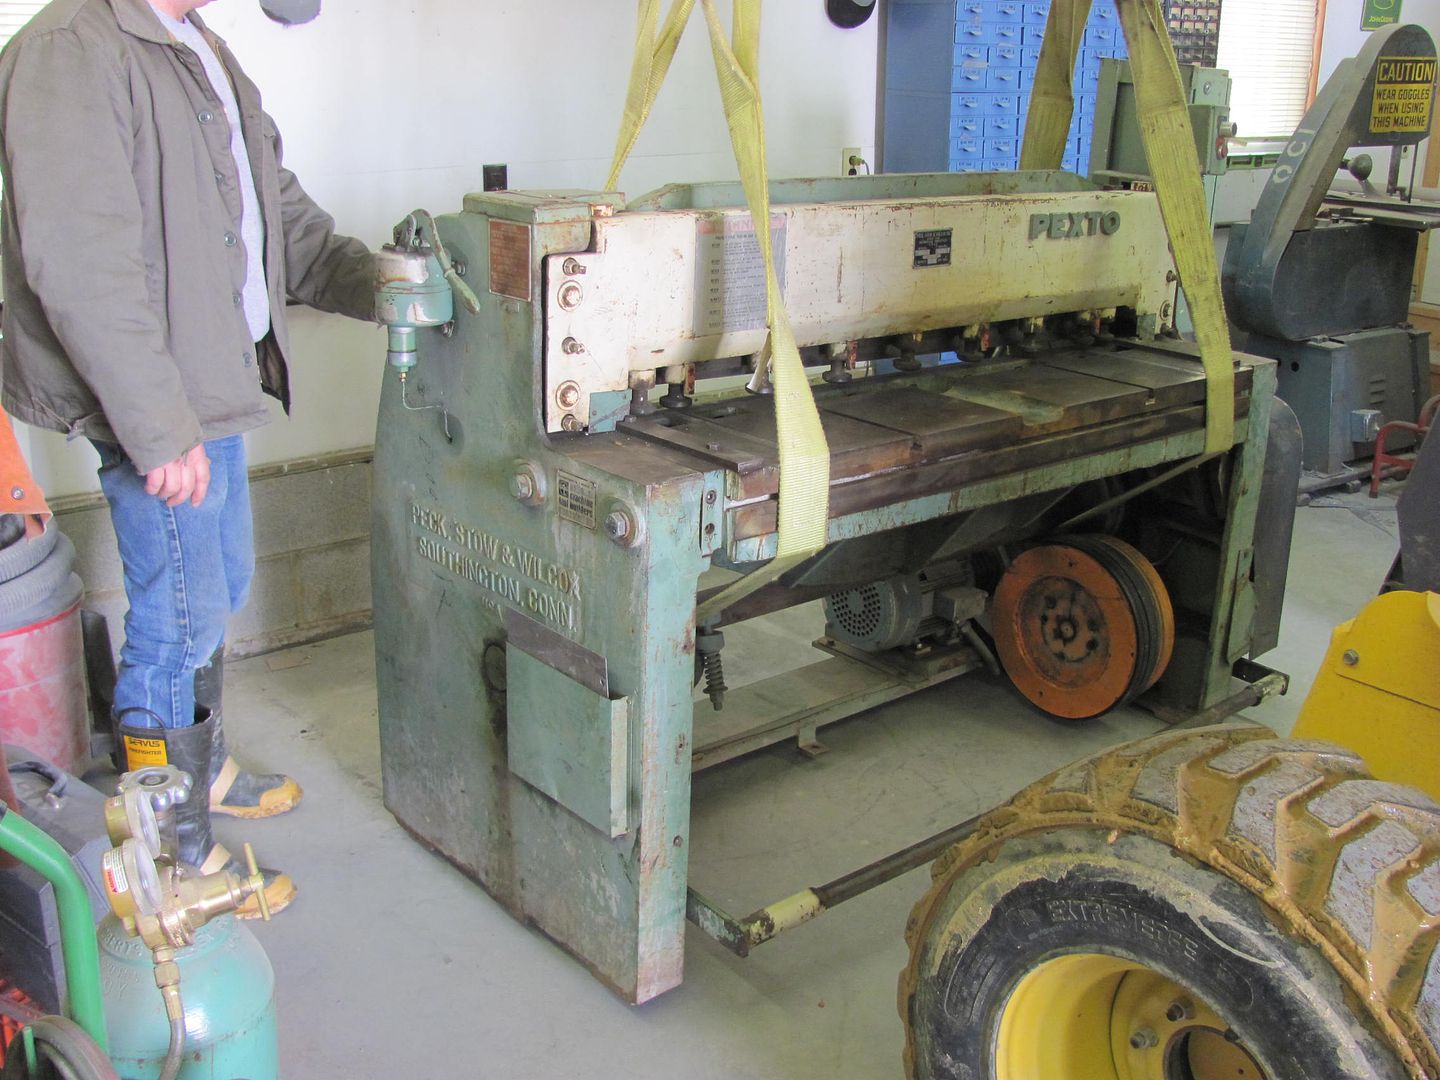
Now just need to finish the electrical hookup...
Here's his El Camino project, narrowing the frame rails in the rear....
One of the neighbors a few miles down the road has a Pettibone forklift. I had him lined up to help lift the shear off the trailer today. He made it about 1/4 mile and had the brakes locking up and frying, so we had to back up and punt. Another buddy has a skid steer with the fork attachment, but the shear was on his trailer. So we dropped off the trailer/shear at the shop, went and got another trailer and picked up the skid steer.. I will say this shear is about at the limits of the lifting capacity of this skid steer, the back end was trying to go airborne when lifting it off the trailer. So we inched it up in the air and then pulled the trailer out from under it. Here's the placement...
Now just need to finish the electrical hookup...
RickP
Well-known member
Nice looking shear Robert - that thing is a monster! I can't wait to see what it will do after you get power to it.
Got some electrical work done this evening, wired up the phase converter first, checked the voltage, then wired up the shear..


When I went to Minnesota to pick up the shear, I noticed that Dan had a couple pair of snips laying on the shear.. Didn't put two and two together at first.


He had the shear installed without the back gauge due to the space restrictions, and I had even less shop room than he did. This is where the snips come in. Mark your panel for the cut line...

Use the red shears to make a slight cut on the right side of the panel....


.....and the green shears to make a slight cut on the left side...

Now you have the cut line "marked" on both ends...

Slide the panel into the shear just past the cut edge, then gently pull back until it stops against the lower blade...


Now shear. No back gauge or second person to help sight in a full width sheet needed.. No fuss no muss. Thanks to Dan for the helpful hint!
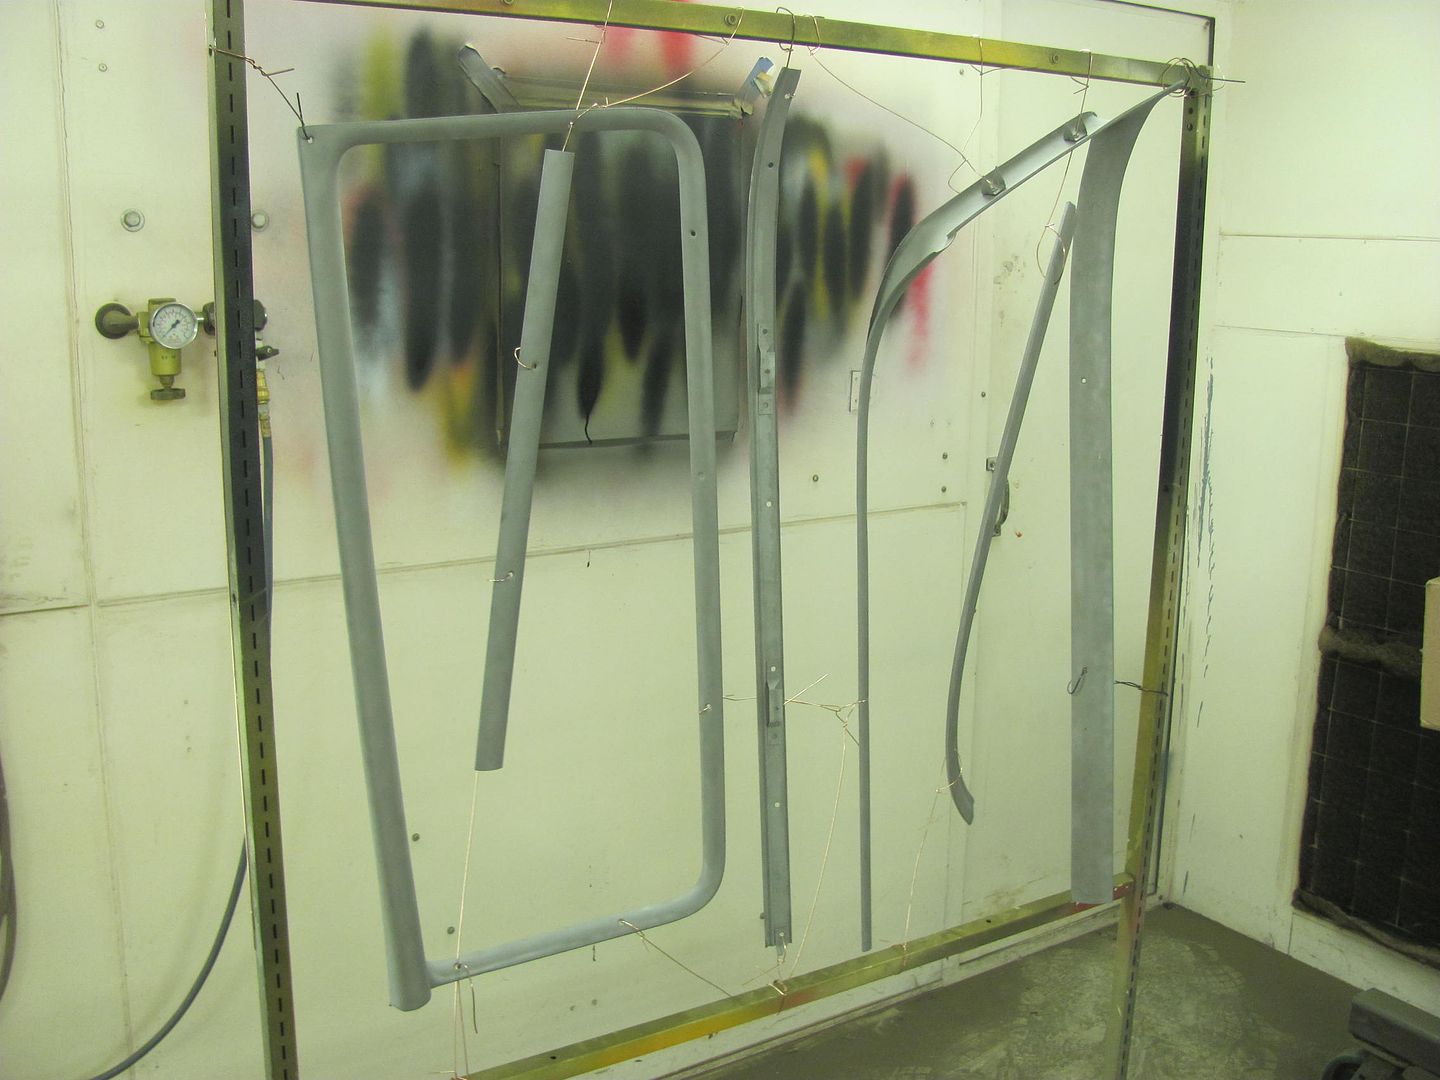
While I've been playing electrician, Kyle has been plugging along in getting various pieces media blasted so they can get epoxy primed....


When I went to Minnesota to pick up the shear, I noticed that Dan had a couple pair of snips laying on the shear.. Didn't put two and two together at first.
He had the shear installed without the back gauge due to the space restrictions, and I had even less shop room than he did. This is where the snips come in. Mark your panel for the cut line...
Use the red shears to make a slight cut on the right side of the panel....
.....and the green shears to make a slight cut on the left side...
Now you have the cut line "marked" on both ends...
Slide the panel into the shear just past the cut edge, then gently pull back until it stops against the lower blade...
Now shear. No back gauge or second person to help sight in a full width sheet needed.. No fuss no muss. Thanks to Dan for the helpful hint!
While I've been playing electrician, Kyle has been plugging along in getting various pieces media blasted so they can get epoxy primed....
Last edited:
EdT
Well-known member
I have a similar size shear and, like you, really not enough space for the back gauges. So, I really want to thank you for posting the right and left side hand shear trick. That will save a lot of fussing when making long cuts. Thanks again.
NASTYZEN
Well-known member
That is a neat trick with the shears. I learn stuff on here all the time.
My backstop is fully functional but this trick is great for odd shapes and angles.
Makes it a no brainer.
My backstop is fully functional but this trick is great for odd shapes and angles.
Makes it a no brainer.
Kevin54
MEMBER EMERITUS
Nice trick with the shears, and I'll have to remember that one. I know the Strippits at work used to put round dimples in parts, and the dimples were used for the shear department to locate against, but for home use, the shear trick is a keeper for sure.
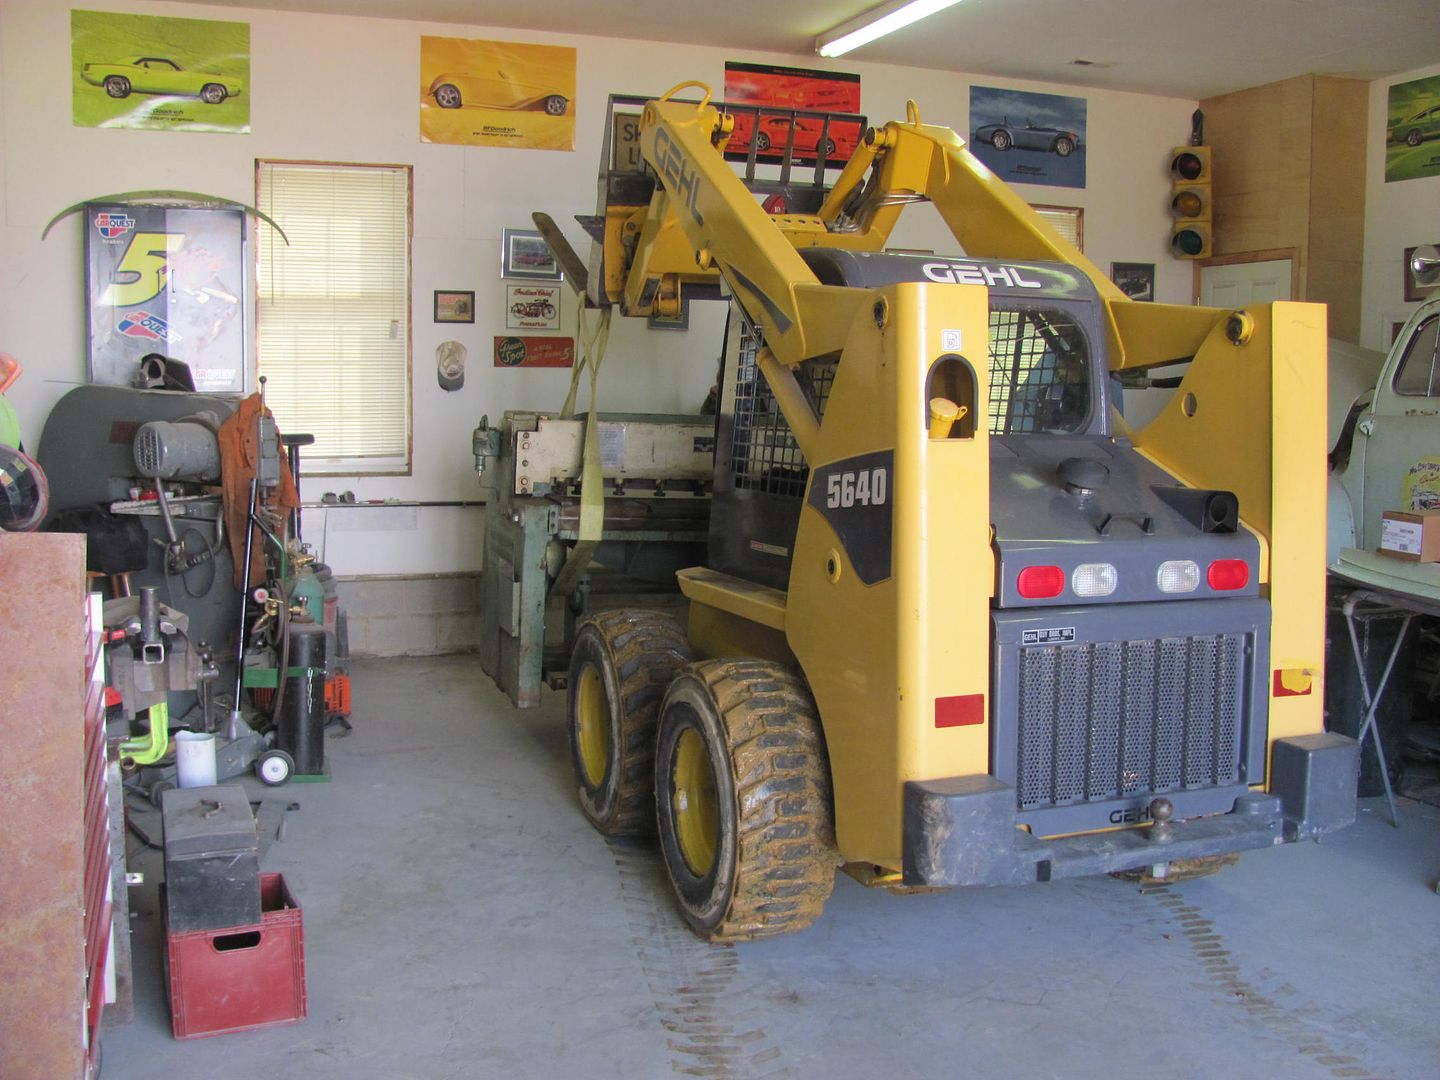
I would think the Gehl skidsteer wouldn't have had a problem with the shear. That shear must be a tank. I guess that once it's set, there's no moving it around by scooting it on the floor by hand.
I would think the Gehl skidsteer wouldn't have had a problem with the shear. That shear must be a tank. I guess that once it's set, there's no moving it around by scooting it on the floor by hand.
aggierailroad
Well-known member
Brilliant tip. Sometimes it's the simplest things...
Thanks guys!
While the wagon was still in the booth, the floor and welding table got the semi-annual cleaning....

even the top of the tool box...
Kyle had finished a bunch of media blasting so they were hung up in the booth to get ready for some epoxy, likely next week....

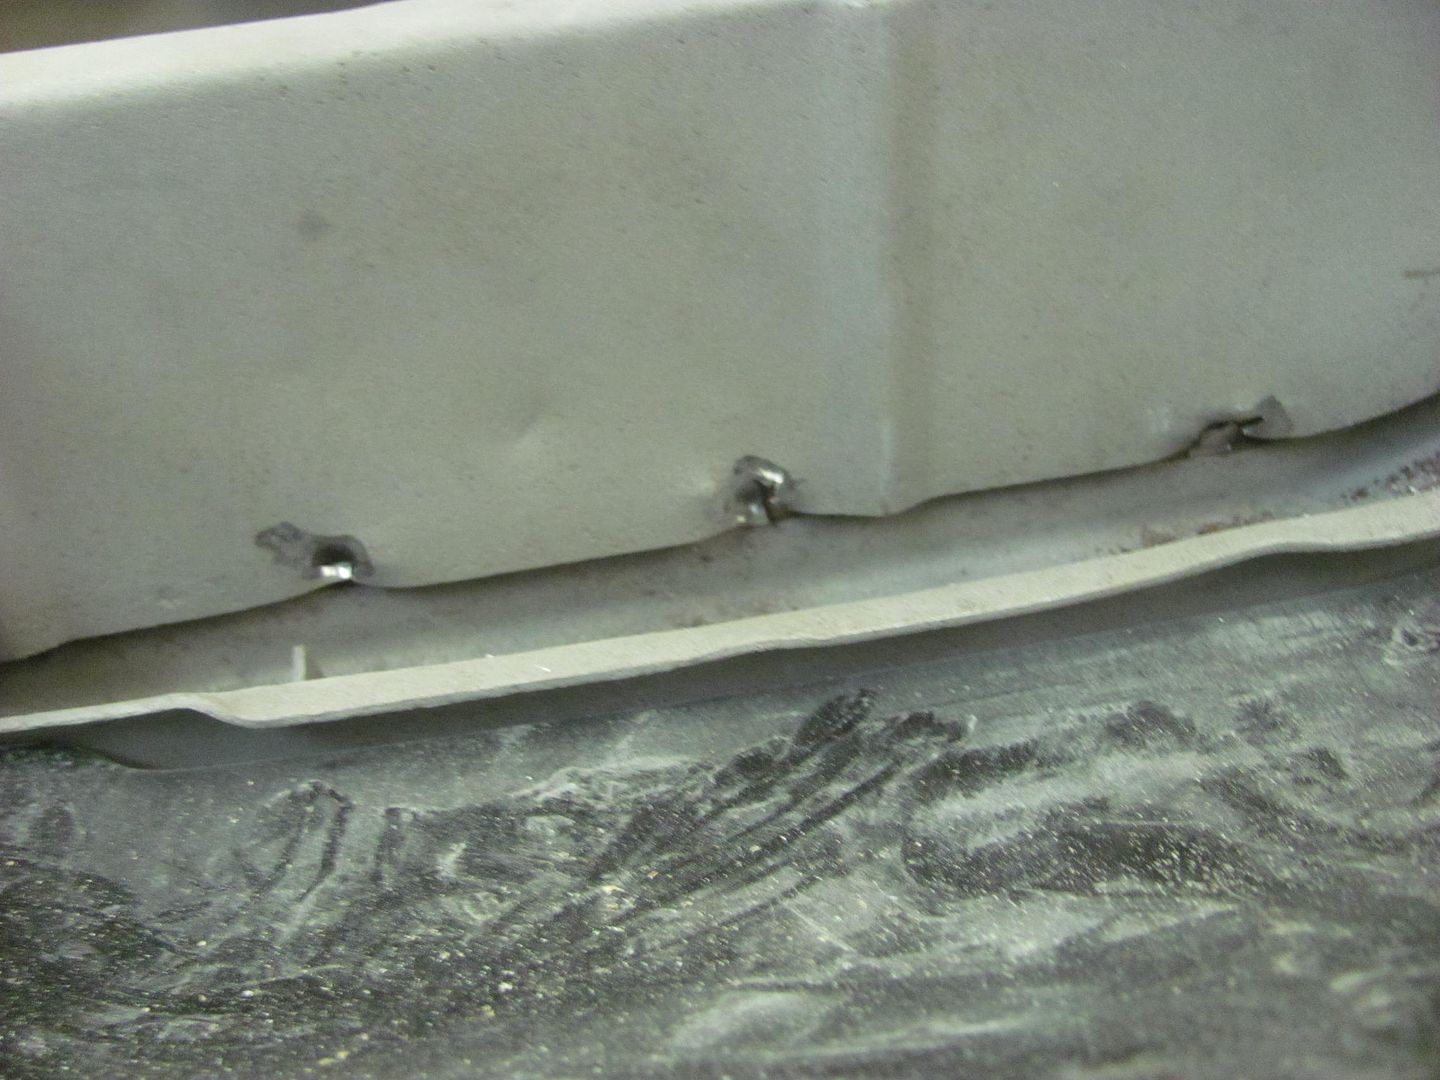
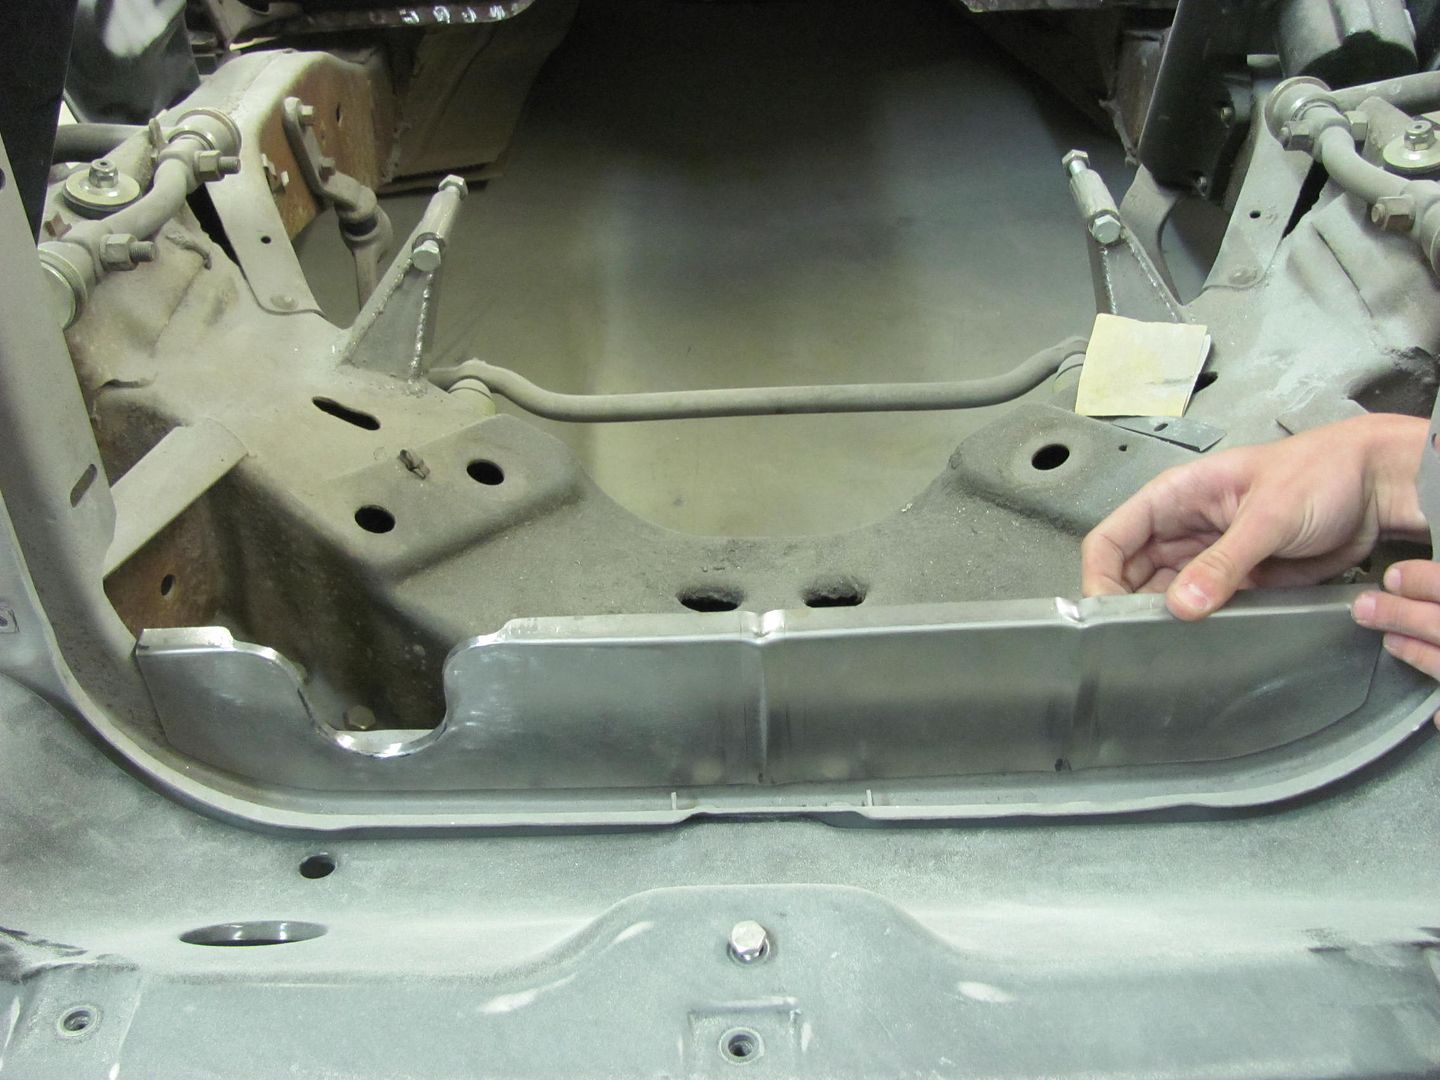
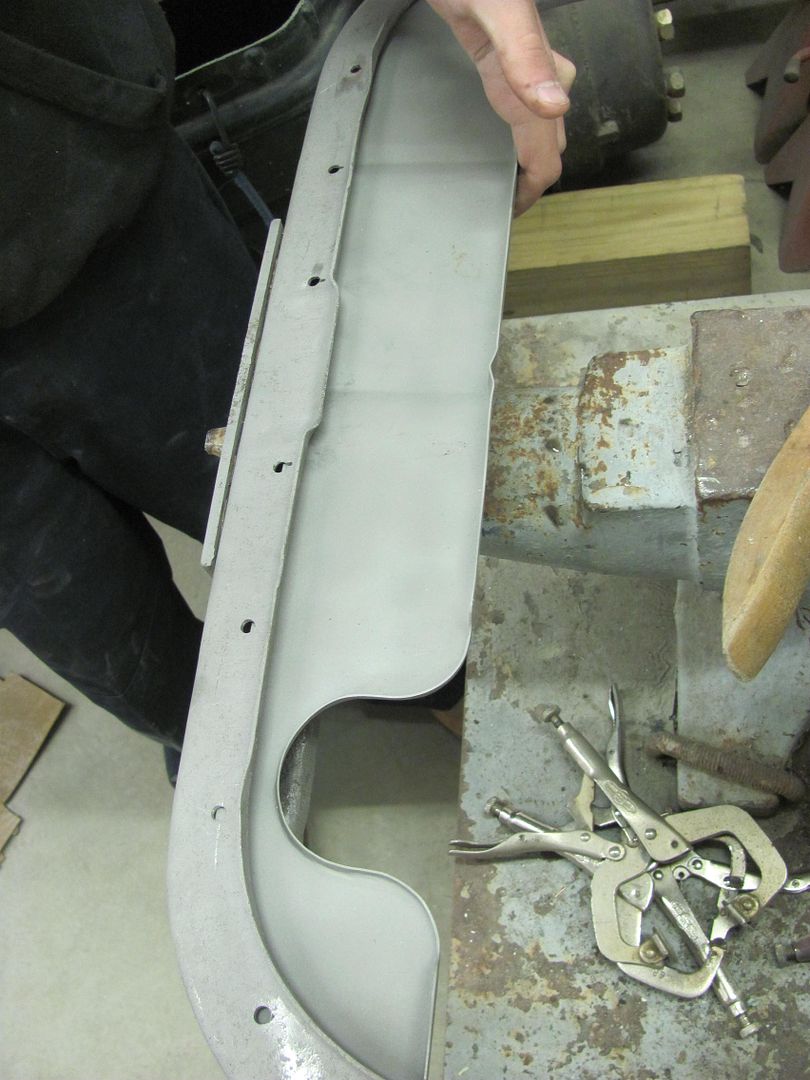
Kyle used the ball end carbide in a die grinder to remove the lower baffle of the core support, so we can get rid of the remaining rust there...
Starting on the replacement piece, we'll get this finished next time..
Everything back in place....
While the wagon was still in the booth, the floor and welding table got the semi-annual cleaning....
even the top of the tool box...
Kyle had finished a bunch of media blasting so they were hung up in the booth to get ready for some epoxy, likely next week....
Kyle used the ball end carbide in a die grinder to remove the lower baffle of the core support, so we can get rid of the remaining rust there...
Starting on the replacement piece, we'll get this finished next time..
Everything back in place....
zmotorsports
ALLIANCE MEMBER
Neat trick/tip with the shears. I will have to remember that one.
Thanks Robert.
Mike.
Thanks Robert.
Mike.
Ohmthis
Well-known member
Another trick is to mark the side fence with a scribe a known measurement. Then when you make a cut add the known measurement to your cut measurement. Slide the sheet in and match up the mark with the scribed mark and shear. We had this on a shear when I work making duct fittings.
RonnieJ-57
Member
- Joined
- Feb 11, 2015
- Messages
- 9
Ronnie, can you show a picture of the area?
I have continued to read your post and think I will borrow the portable E-wheel idea. I will take a pic as well. Soon as the weather breaks. Like many, I have a driveway shop. The tools are the only items that stay dry and sometimes warm.
I purchased the David Gardiner DVD and it was all that I anticipated. I watched it from beginning to end. Thru lunch, supper...non stop. I learned that education never ends. You only need an open mind and accept experience from others.
If there was a room full of the people you have help it would have to be called a stadium. Hope future generations have a mentor like you.
Ronnie, thanks for the comments. I'll have to say, we all learn somewhere. I have been to many workshops and the best thing going there is input from different perspectives. Attendees from different backgrounds may have different approaches. I may do something one way, and it is largely based on machinery capabilities (or lack thereof), tools available, and past experience. The next person with a different background or availability to other machinery may see it differently. Or they may be working in a driveway as you describe, but as David Gardiner shows in his DVD, you don't need much to accomplish a lot. Having all the inputs from various backgrounds may not change your mind on how you approach that task for today, but it's something you add to your bag of tricks that may be just the solution for the next challenge.
So we can keep our methods a secret, hidden from all, or put it out there and generate interest, discussion, and different points of view where everyone benefits.. I've learned so much from the generosity of others, the little bit I've shared here is only paying it forward..
So we can keep our methods a secret, hidden from all, or put it out there and generate interest, discussion, and different points of view where everyone benefits.. I've learned so much from the generosity of others, the little bit I've shared here is only paying it forward..
Last edited:
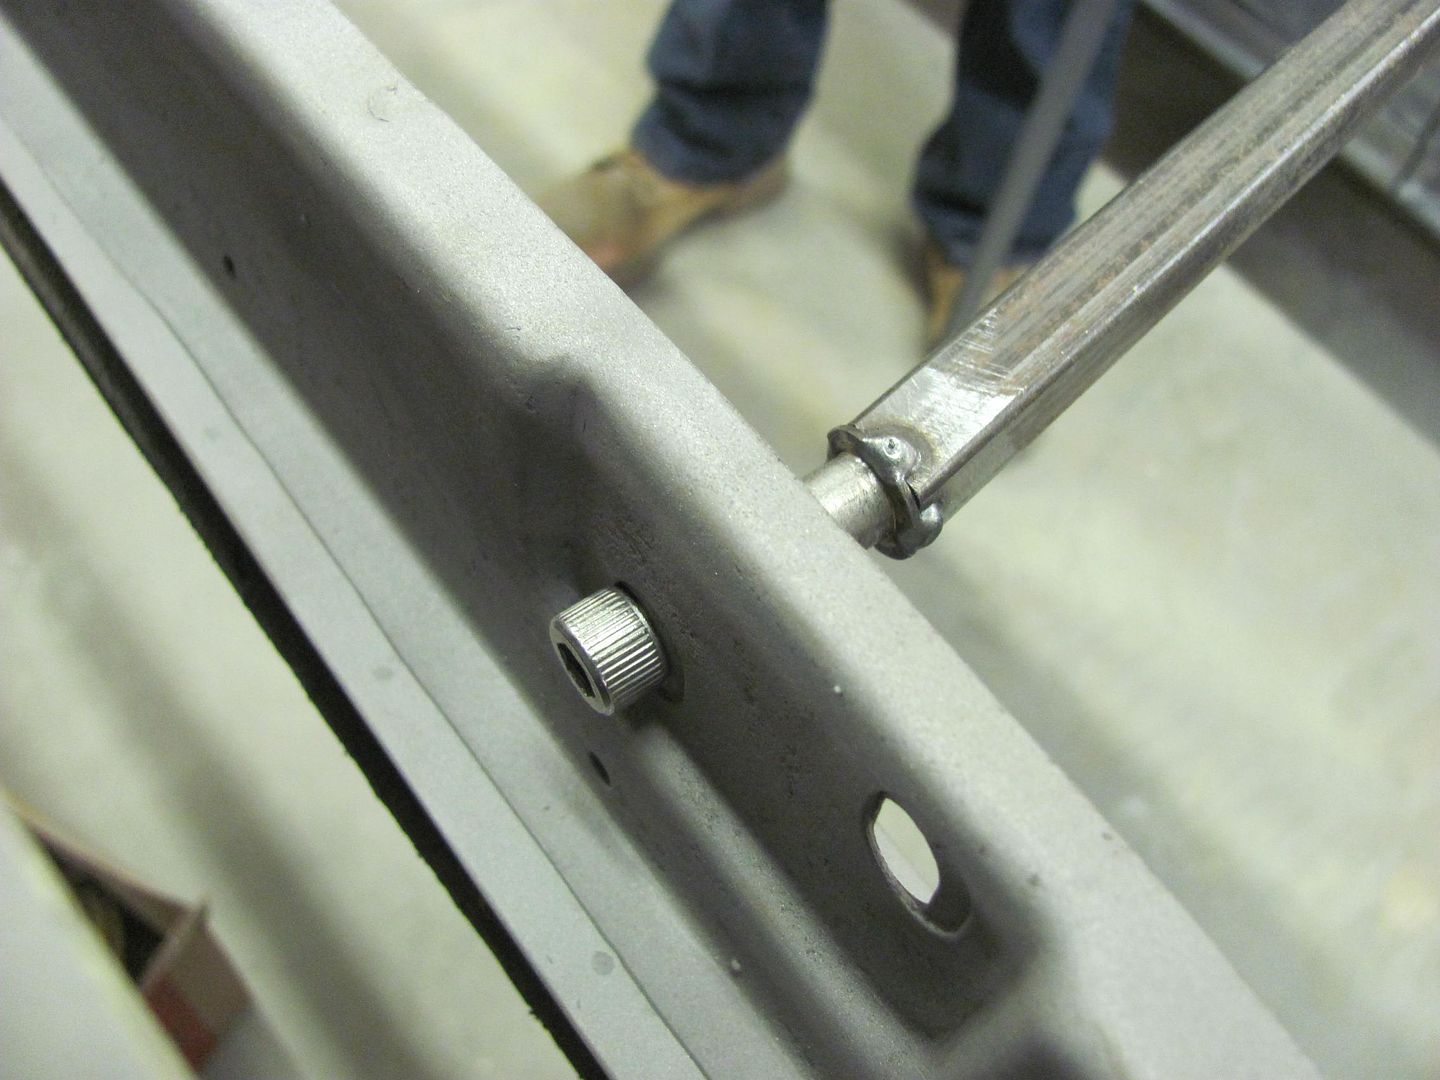
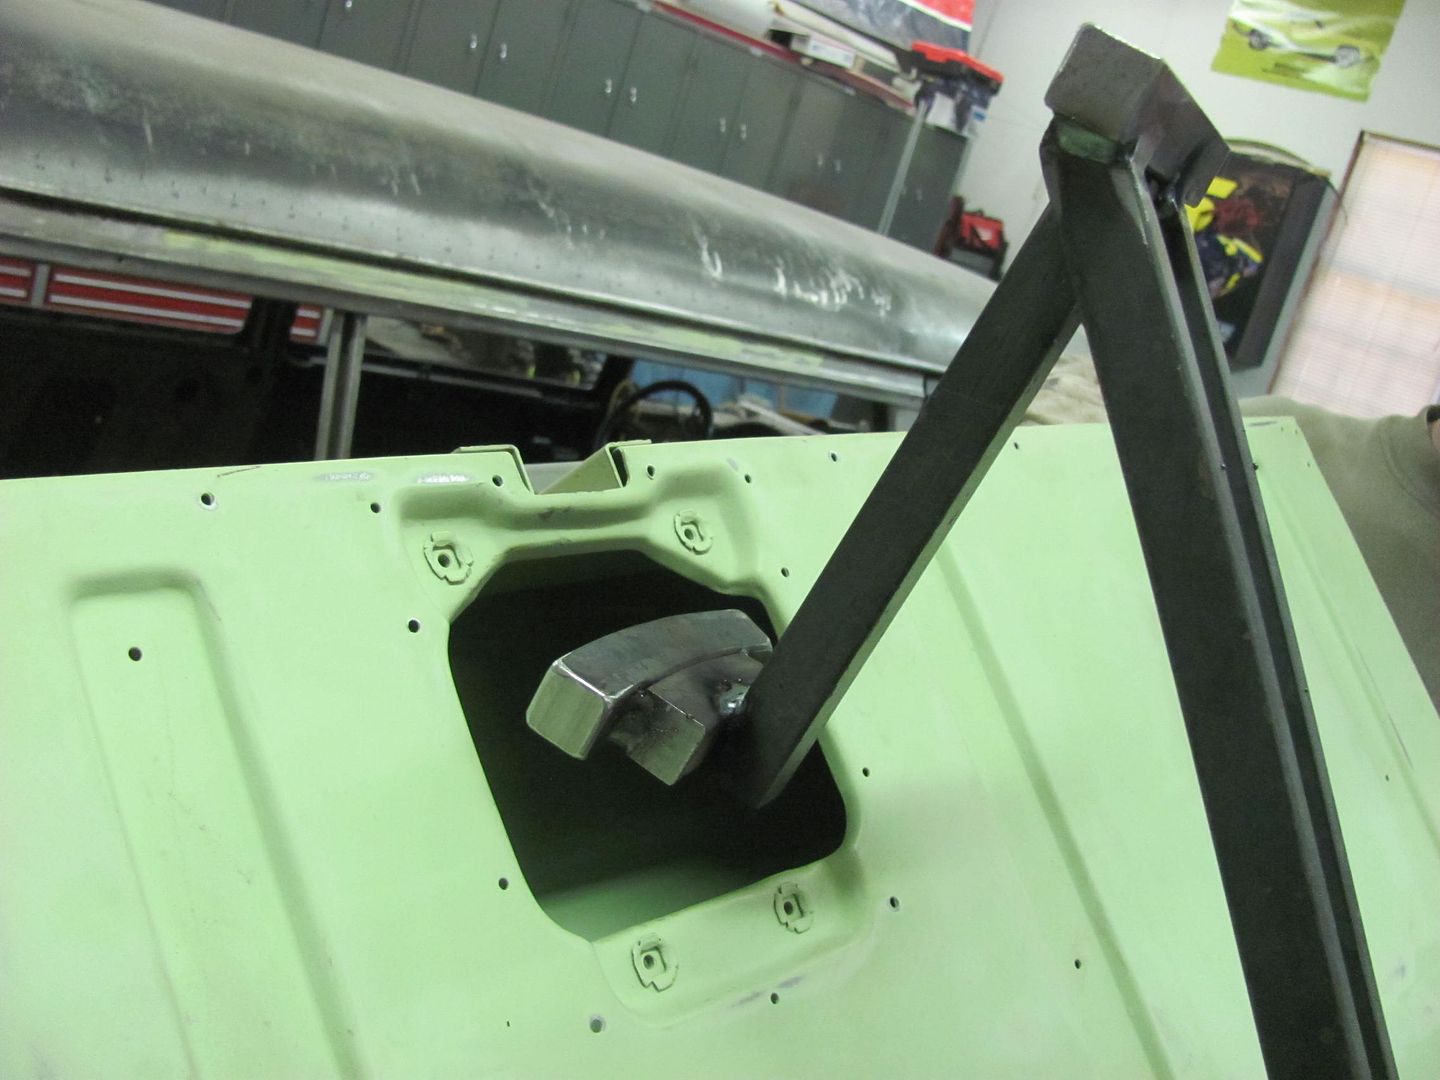
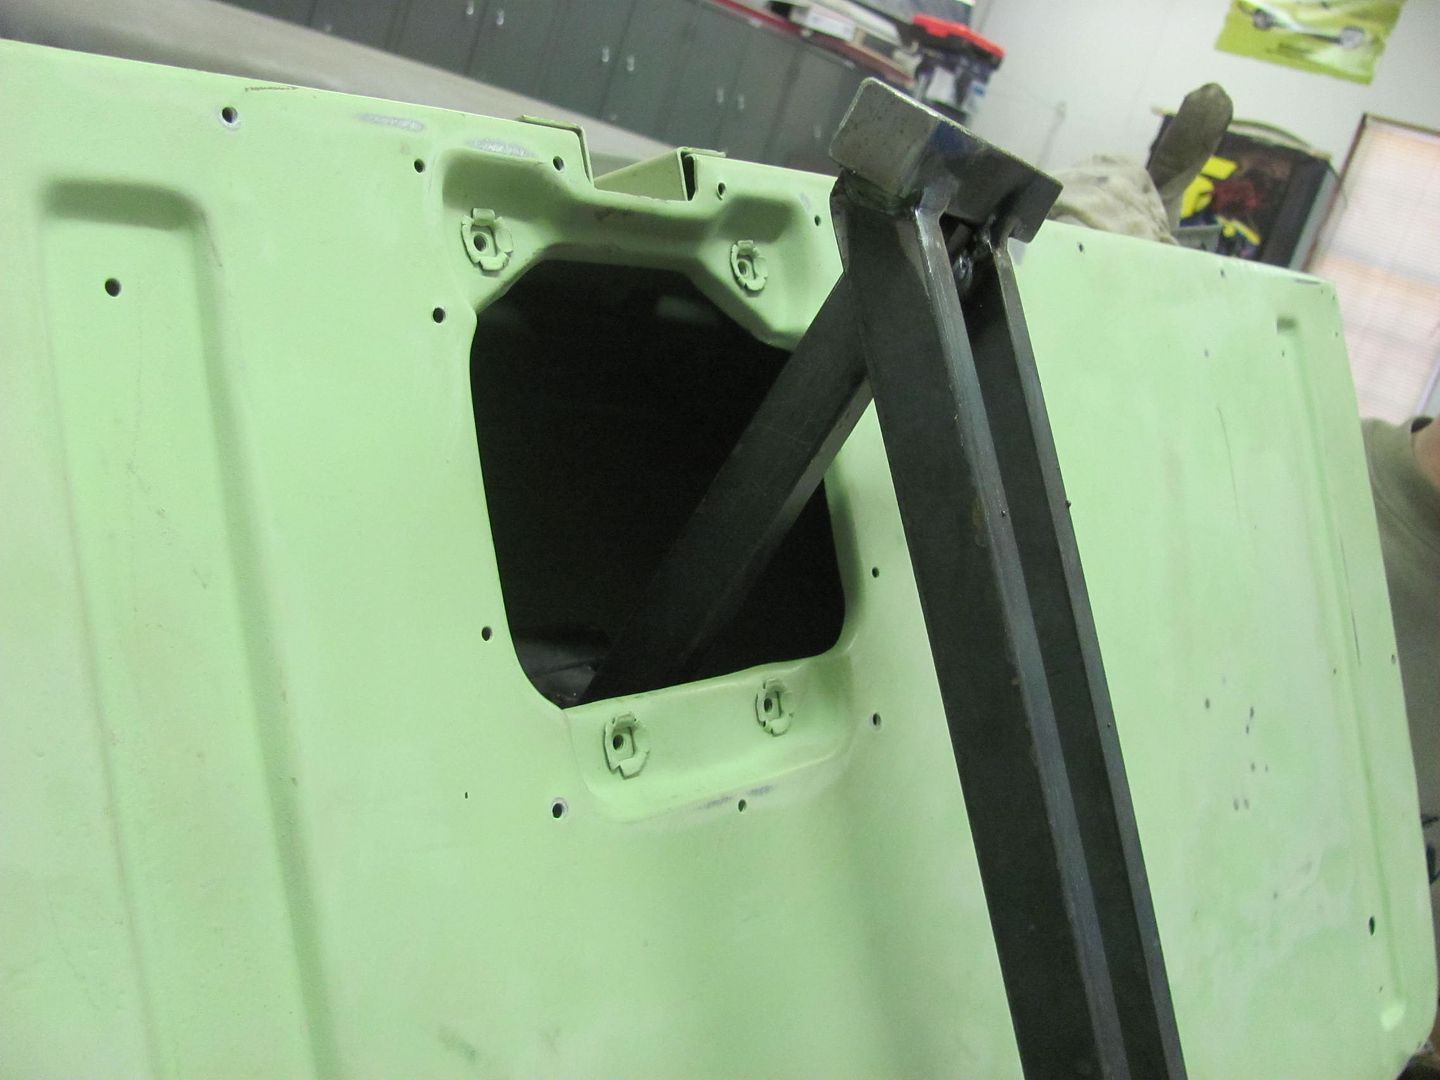
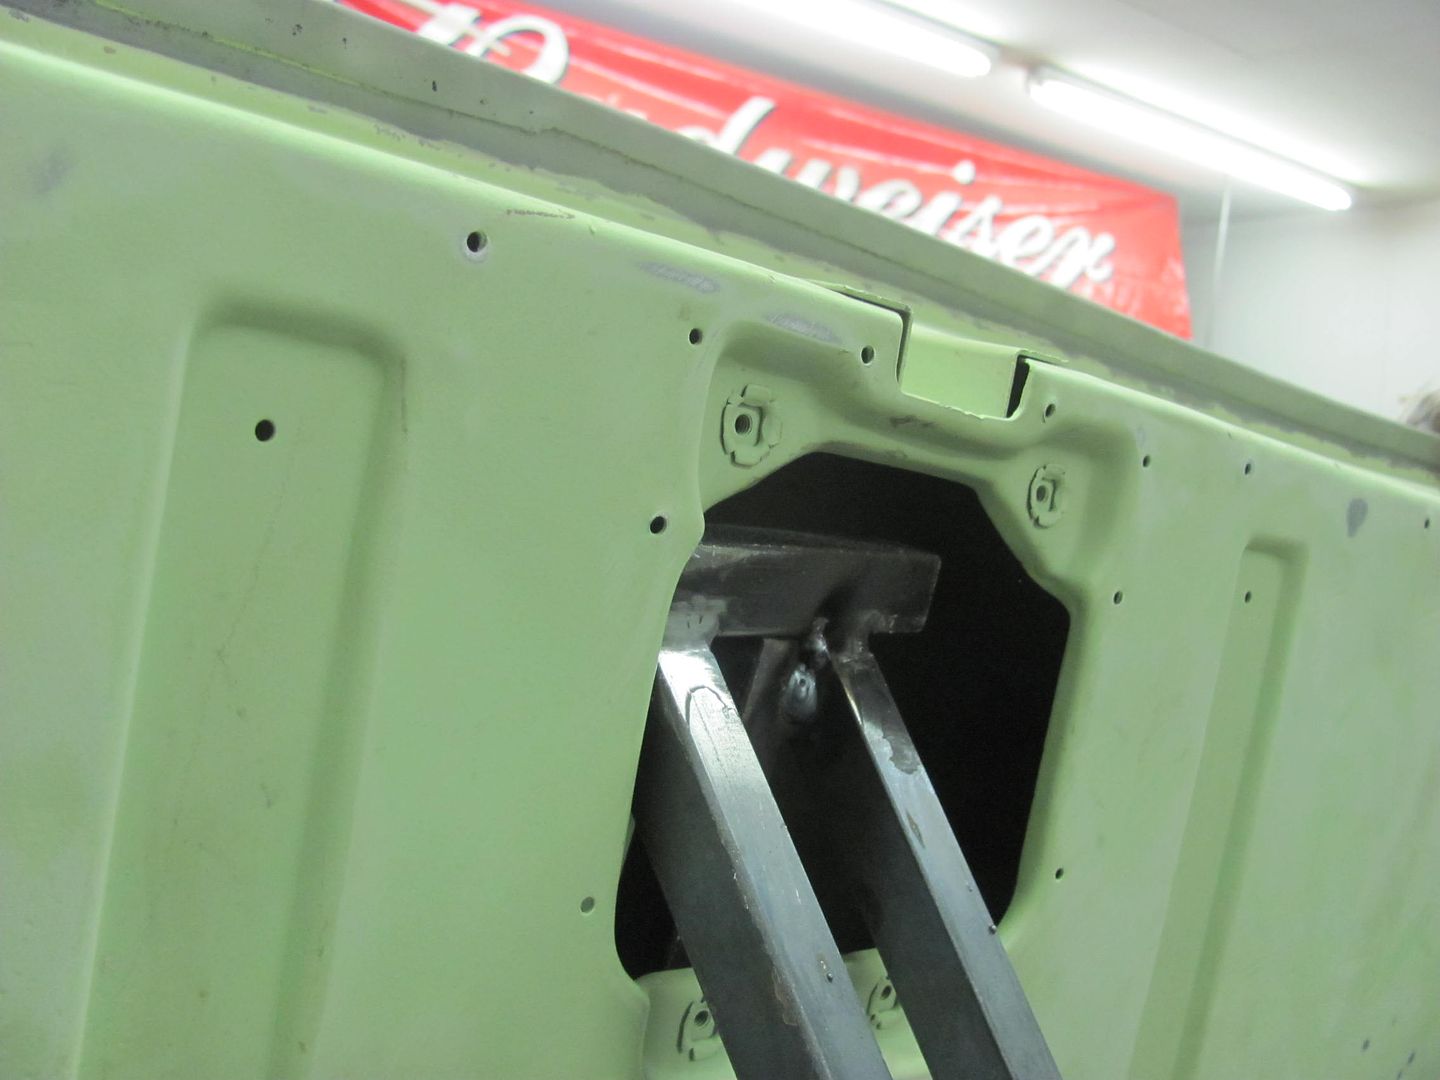
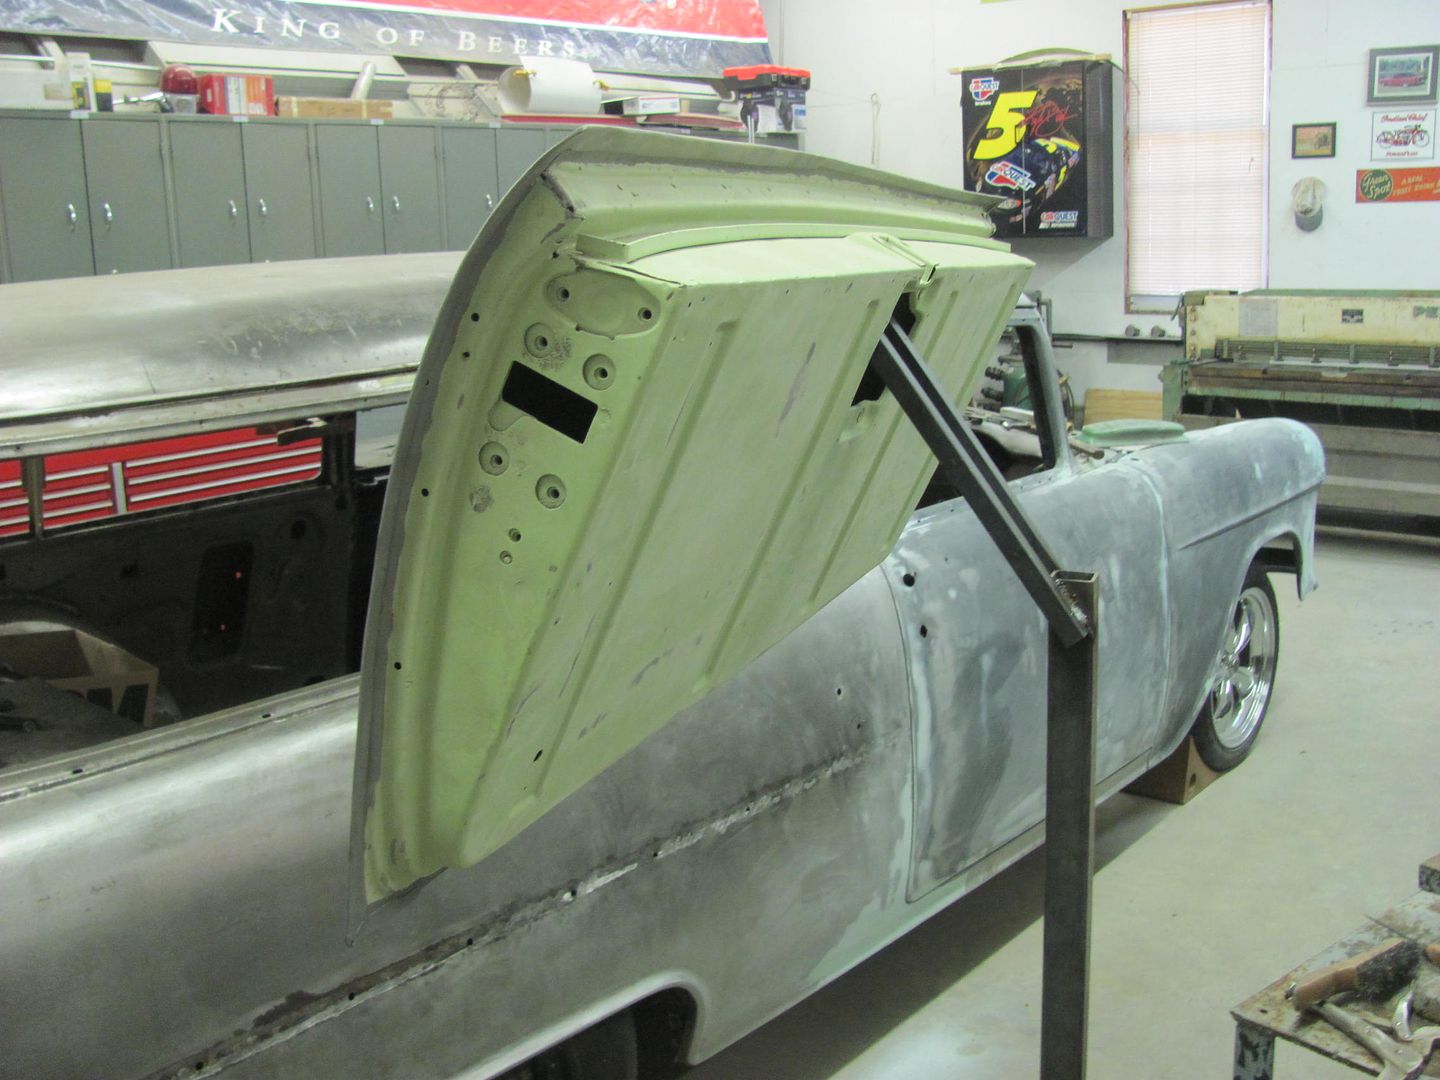
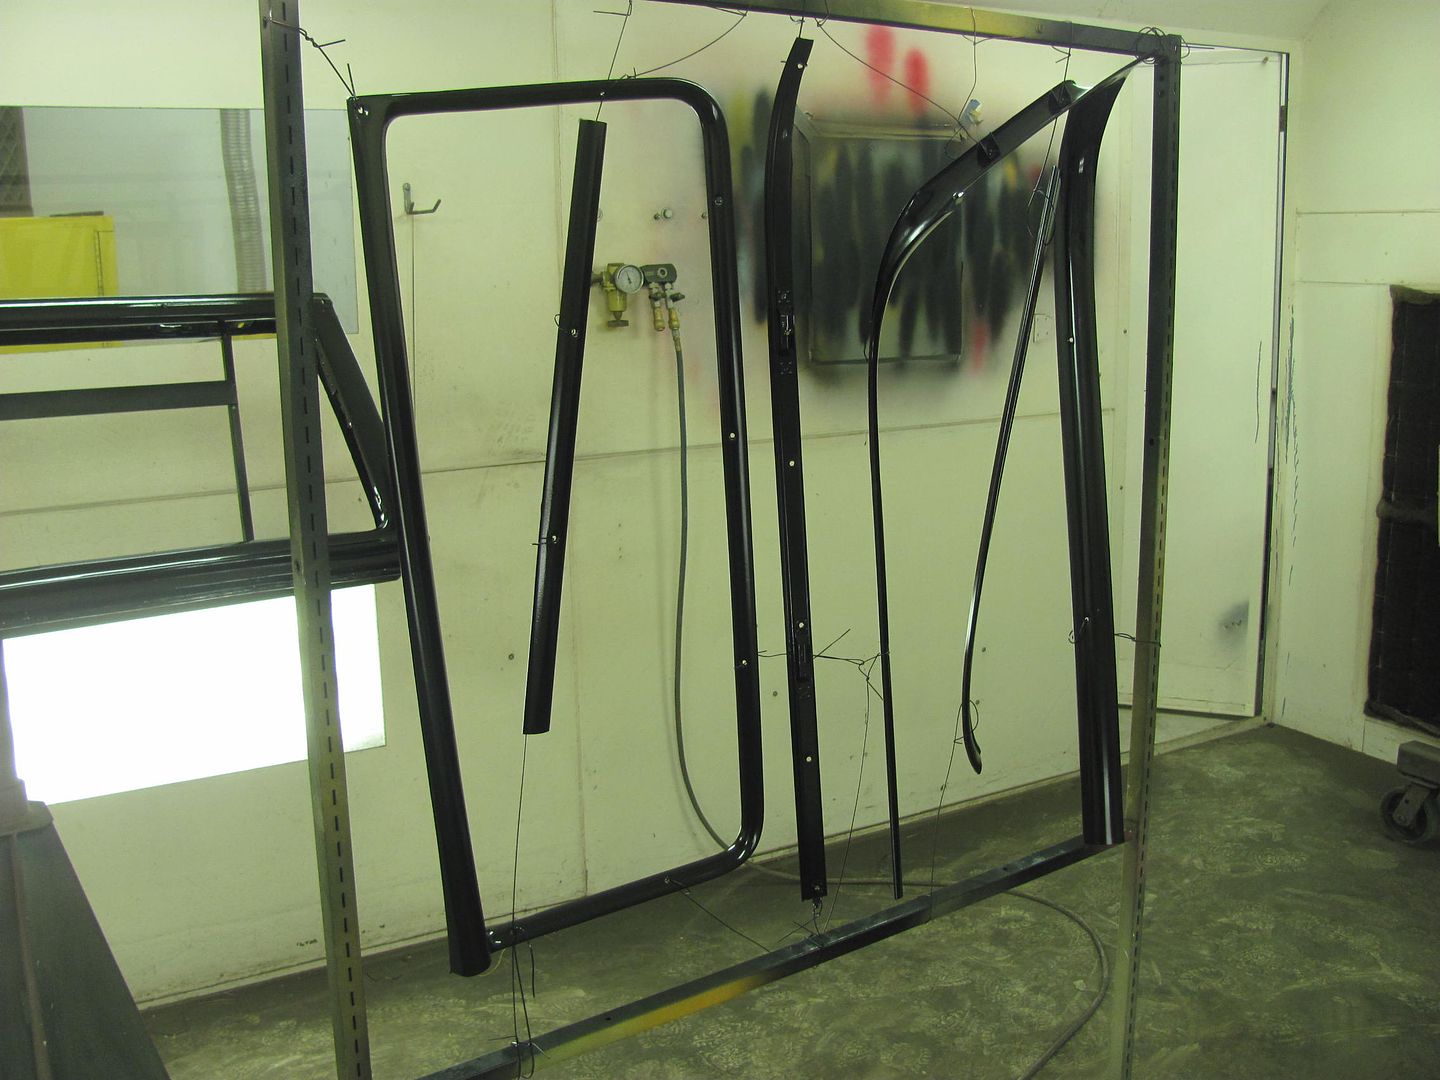
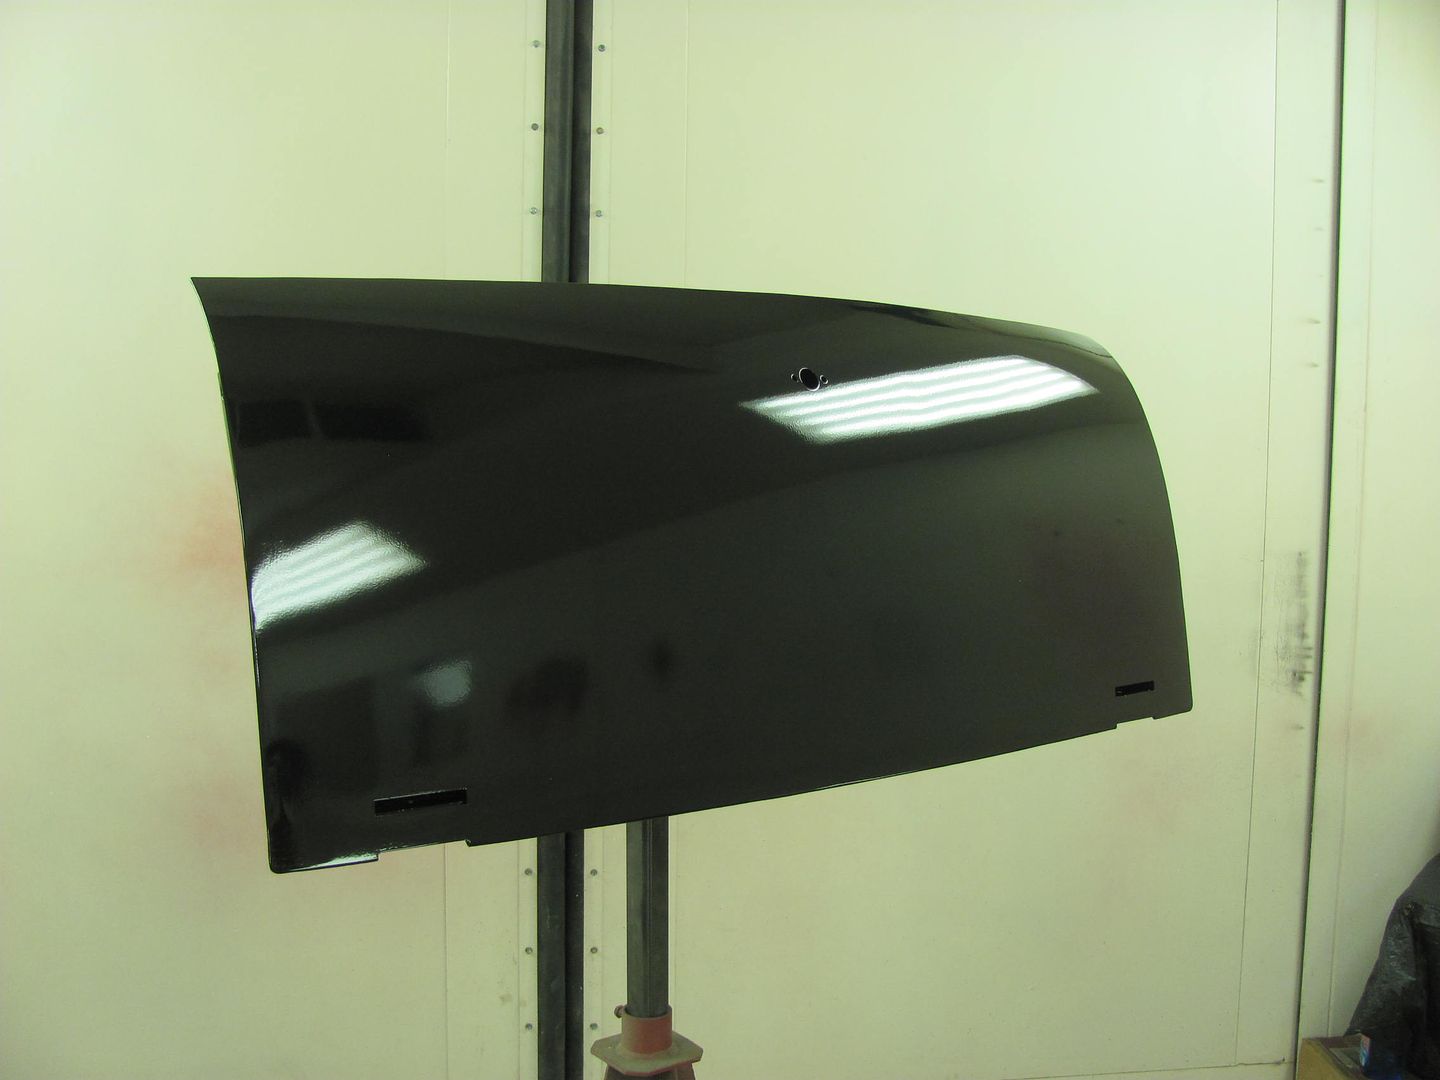
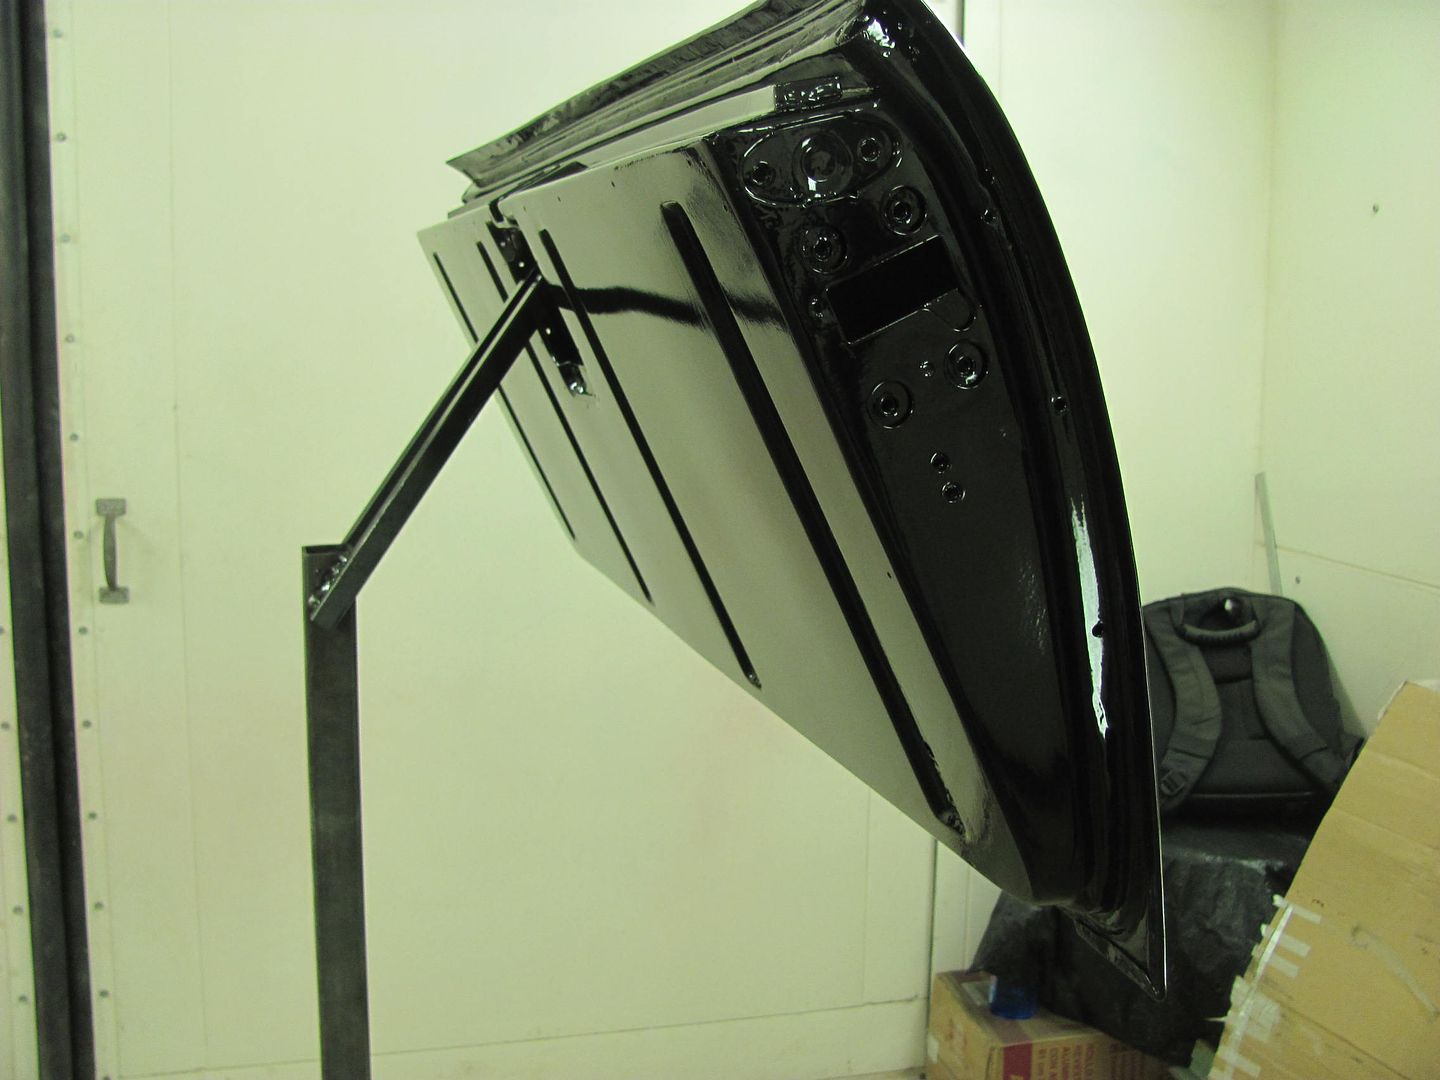
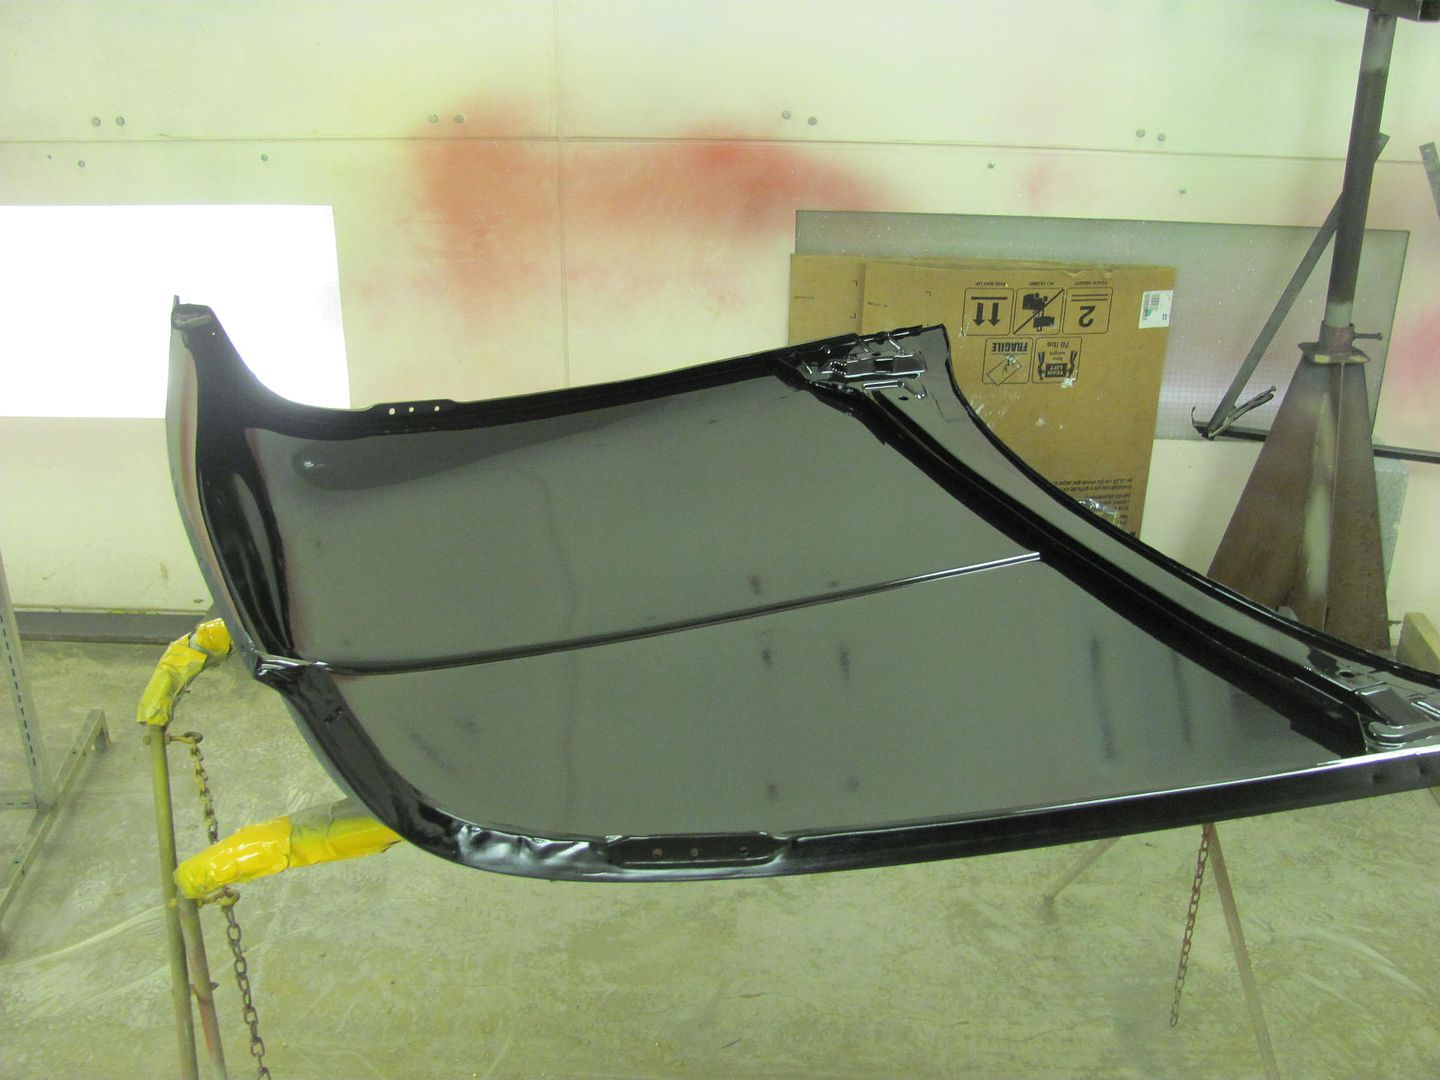
Our Saturday progress had us making more painting fixtures, this time for the rear gates. The lift gate used some square tube and riv-nuts for attachment...

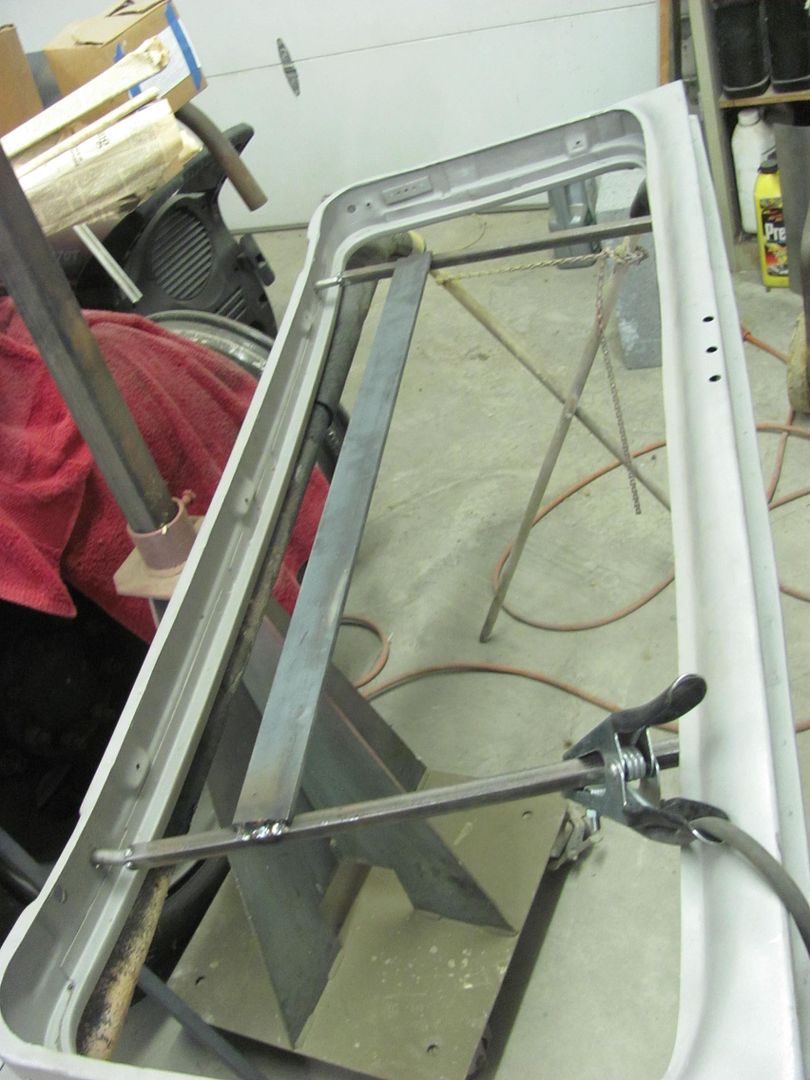
Fixture was made to hold lift gate in same position as on car for spraying...

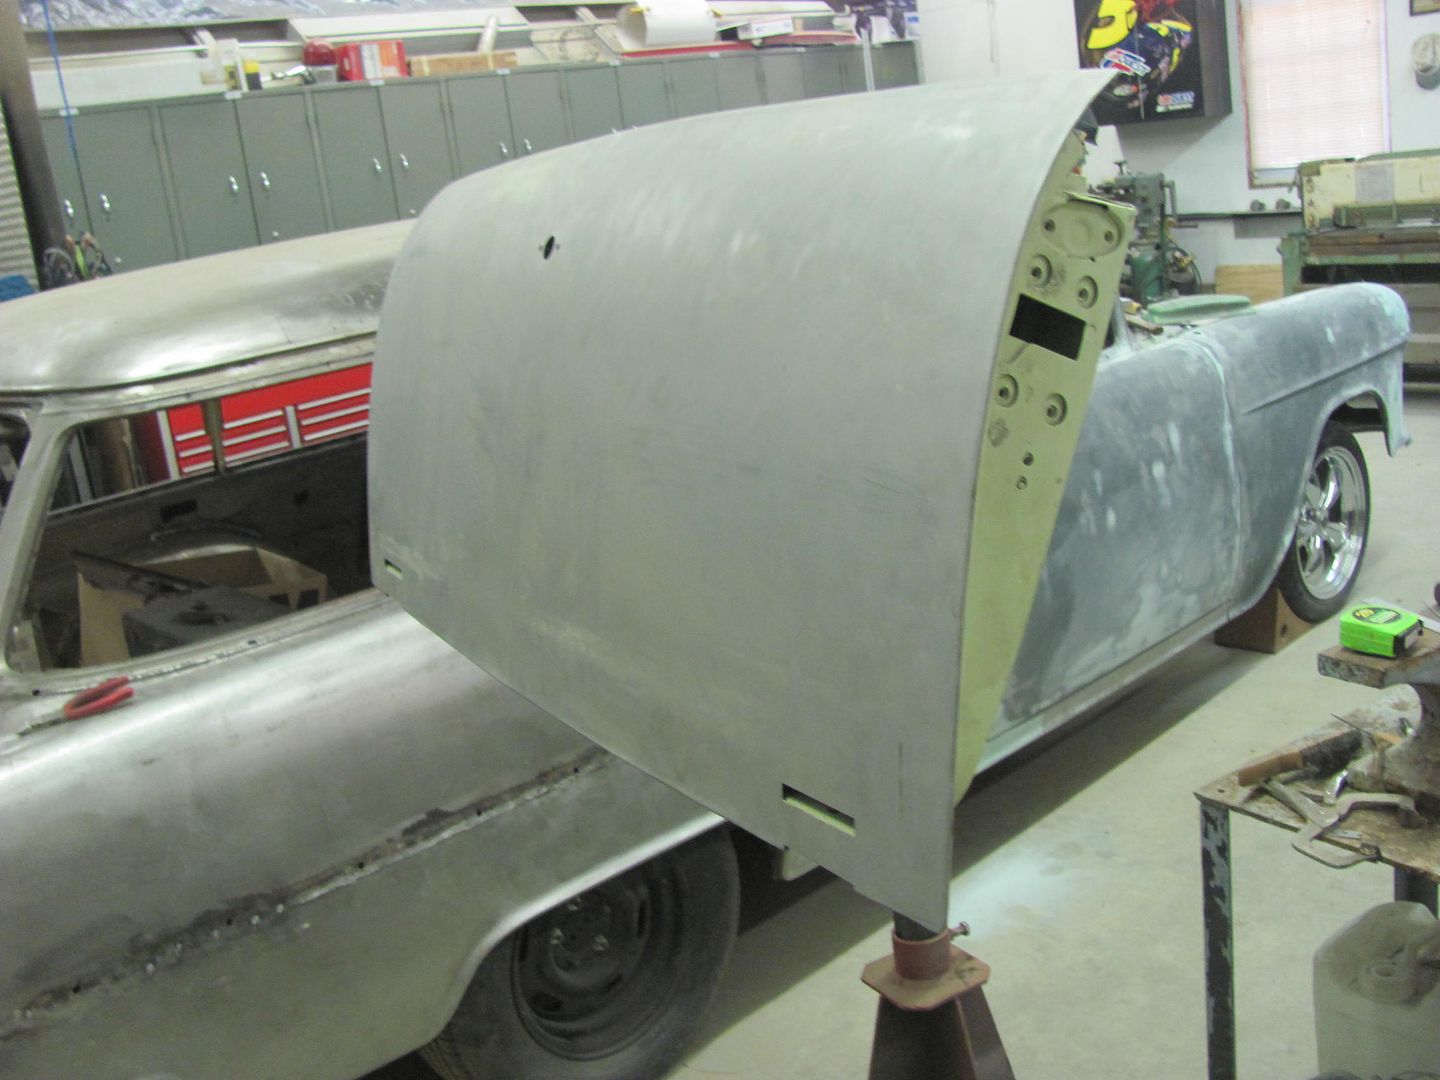
More blocking....
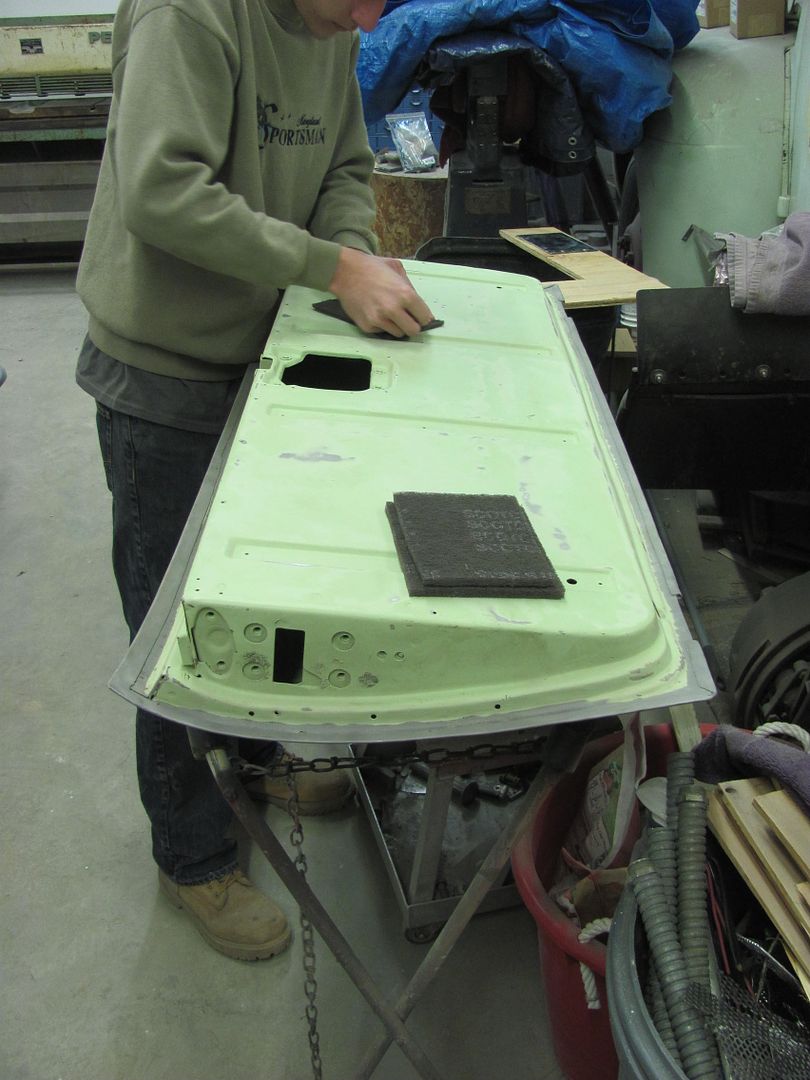
Tail gate painting fixture....
Then a bit of scuffing to get ready for the next coat of epoxy....
Fixture was made to hold lift gate in same position as on car for spraying...
More blocking....
Tail gate painting fixture....
Then a bit of scuffing to get ready for the next coat of epoxy....
Last edited:
I have spent past hours going to through this thread. Let me put it this way:
They have "the thread of awesome" in the free parking section of this forum.
In my humble opinion the real threads of awesome are thread like this - where people with amazing skills share the beauty of their work and their knowledge. Take the time to answer questions and explain things and simply call it - paying it forwards!!
Among the wizards and mentors of Garage Journal - you are among the best Robert.
Thanks for sharing!
Olafur, thanks for the kind words. You'll see quite a bit of that sharing here on the Fab forum, and we all learn new skills in the process.
Sorry it's been a while since any progress posts, we've been block sanding lately and no matter how many pictures I take, they all seem to look the same..
Kyle should get to some more metal forming tomorrow, so hope to have some updates..
Sorry it's been a while since any progress posts, we've been block sanding lately and no matter how many pictures I take, they all seem to look the same..
Kyle should get to some more metal forming tomorrow, so hope to have some updates..
zmotorsports
ALLIANCE MEMBER
Nice work as usual Robert. I used to have a few various painting fixtures that would get cut and modified from project to project like that. Sure made it nice to avoid tape edges.
Mike.
Mike.
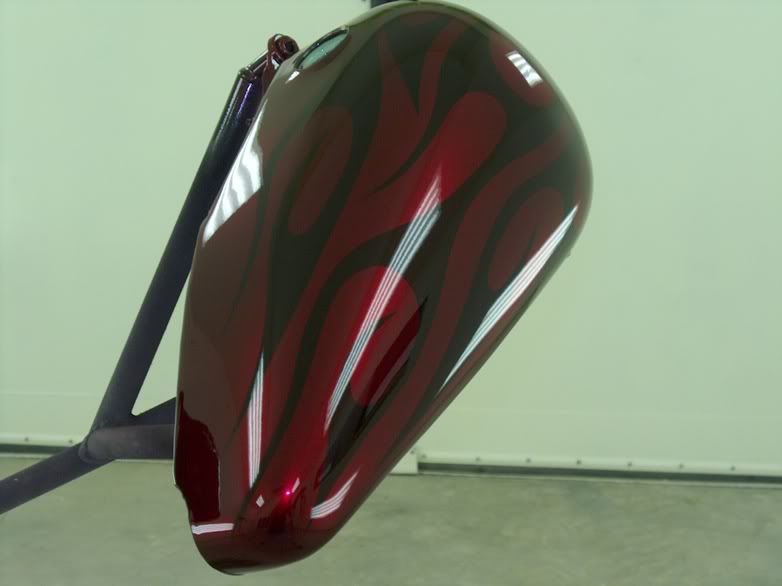
Mike, I started making up paint fixtures when I was spraying HD's on a regular basis. I'd seen other guys hang tanks from the ceiling in the booth on a couple wires, only to have them sway and spin all around as you're trying to spray. I made these up where you could spray every surface on the tank with no movement..
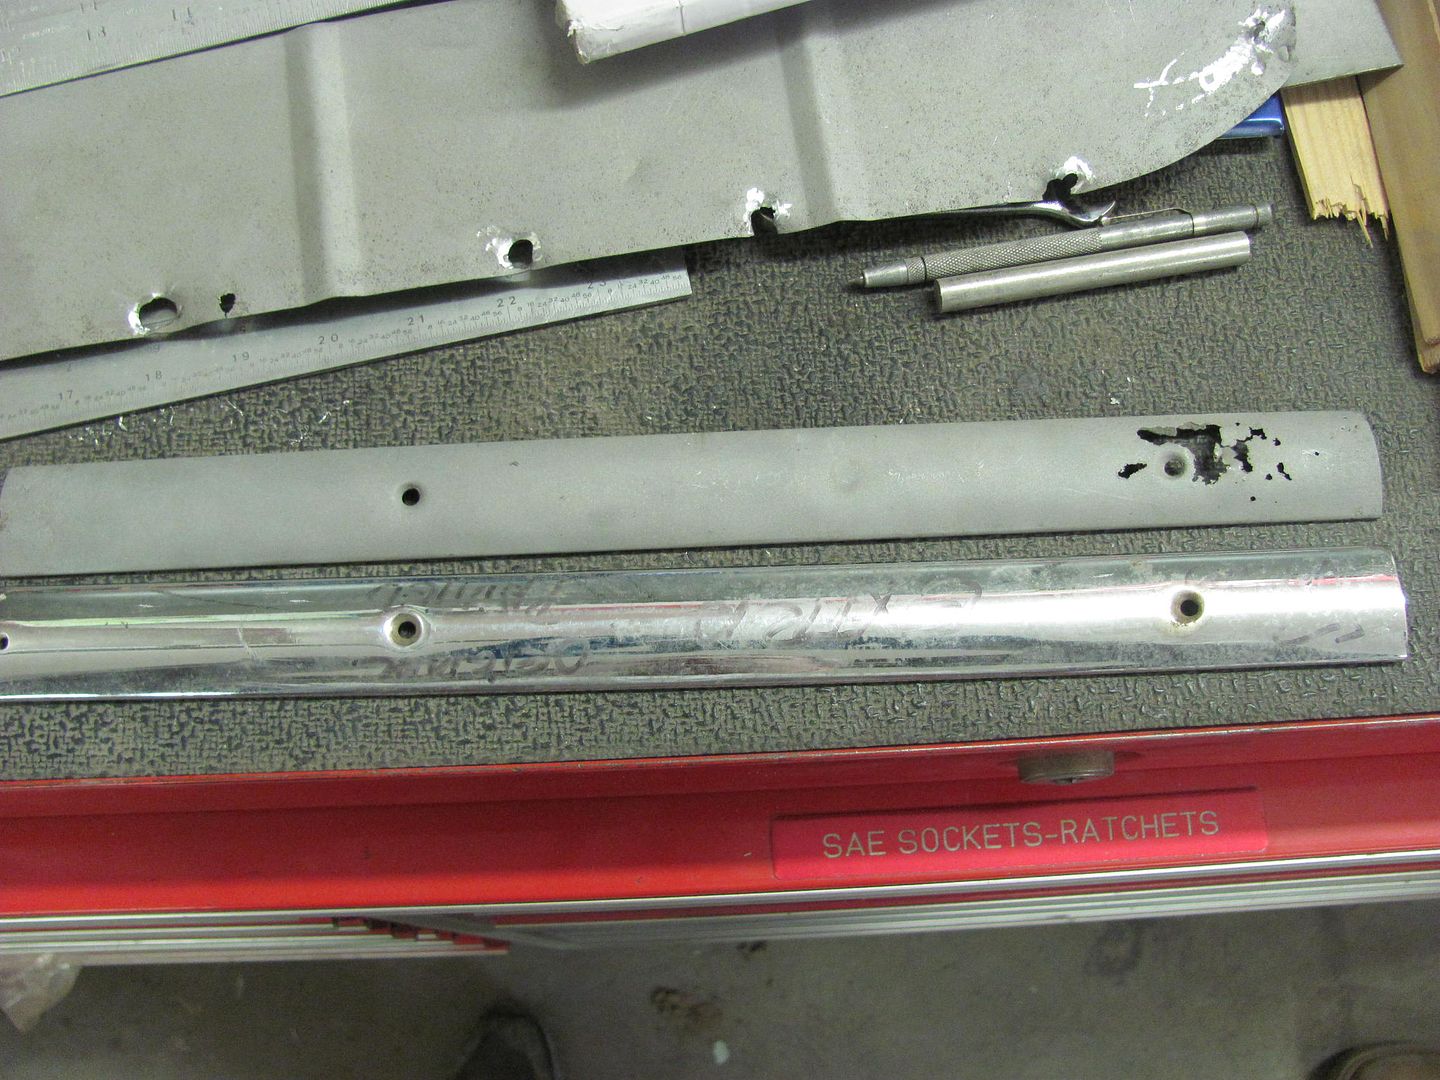
As Kyle was going through the interior trim pieces the last couple weeks he did find one that had a few pits...
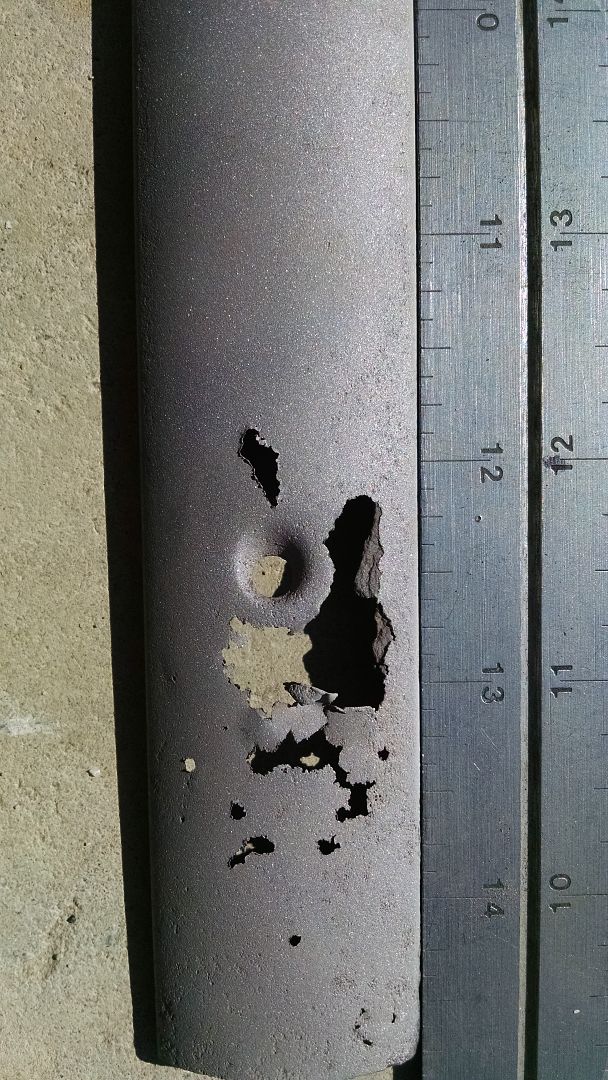
So we got a used replacement from the Stainless Shoppe in Seymour WI. A shame to paint this one.
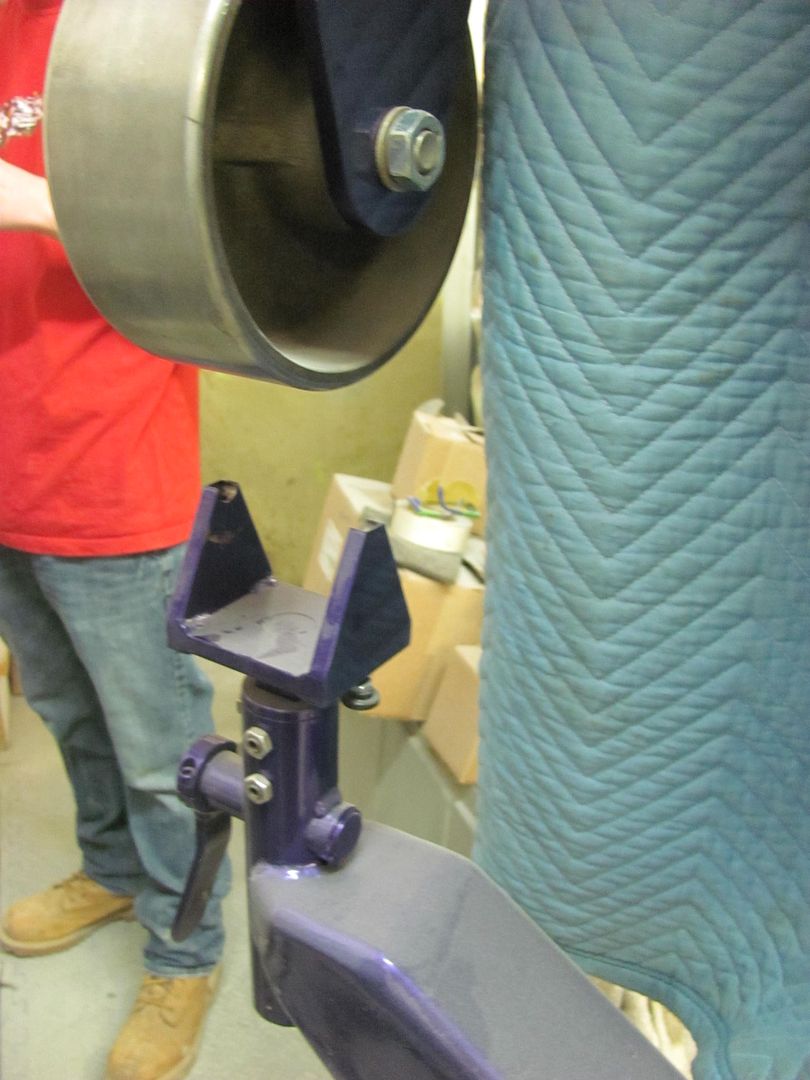
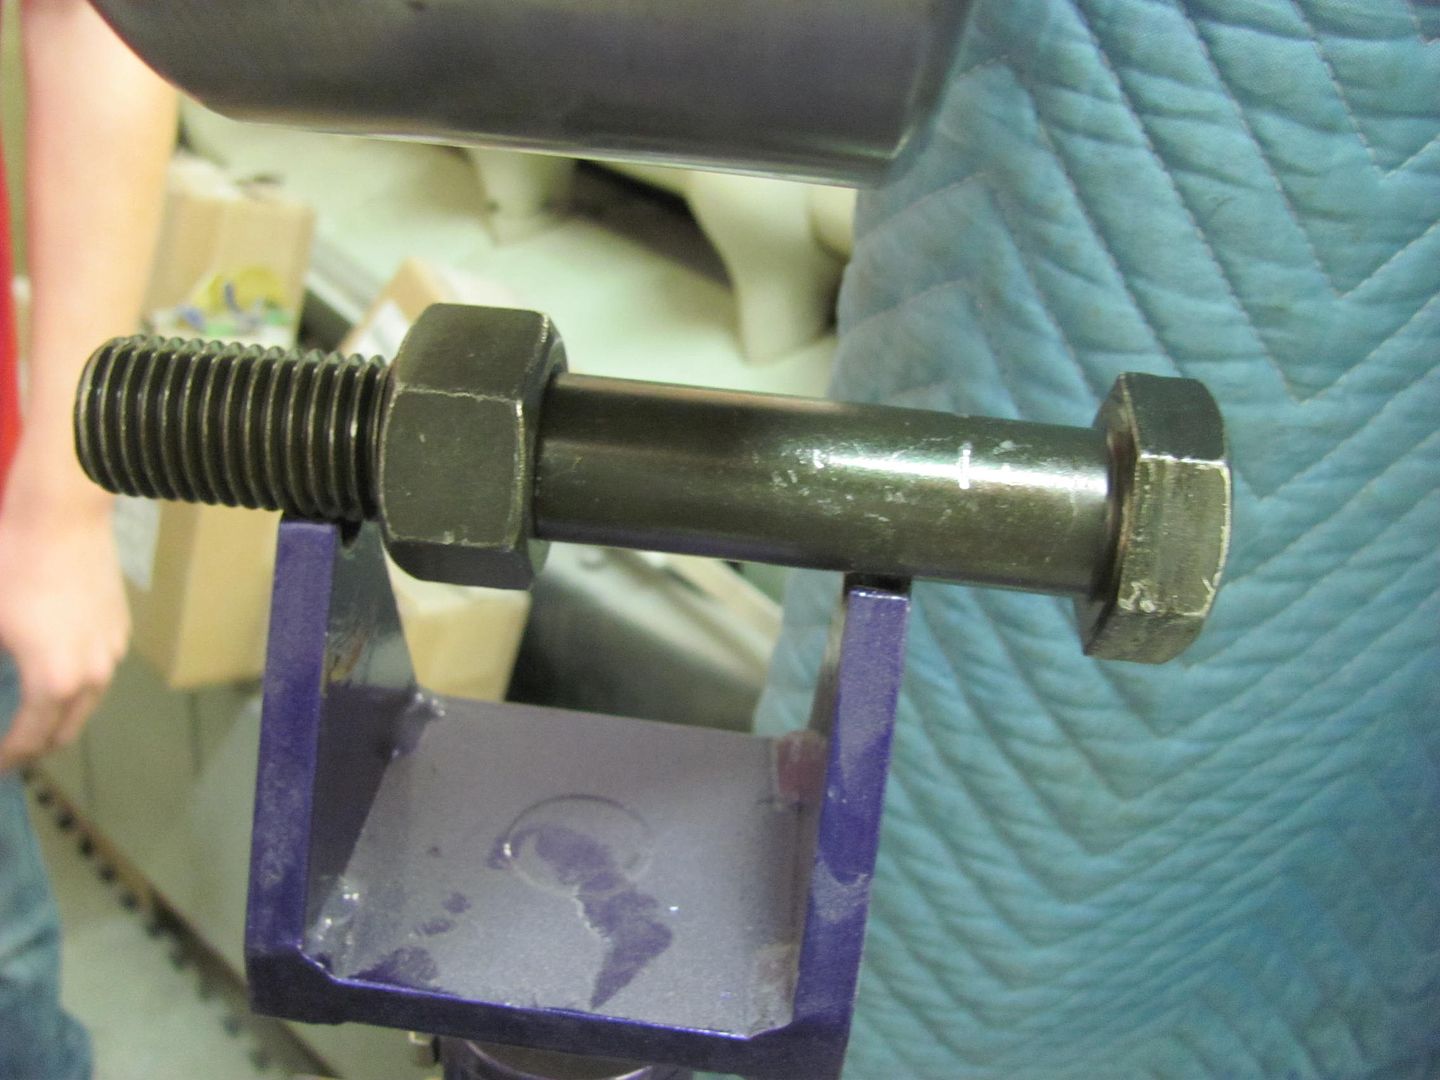
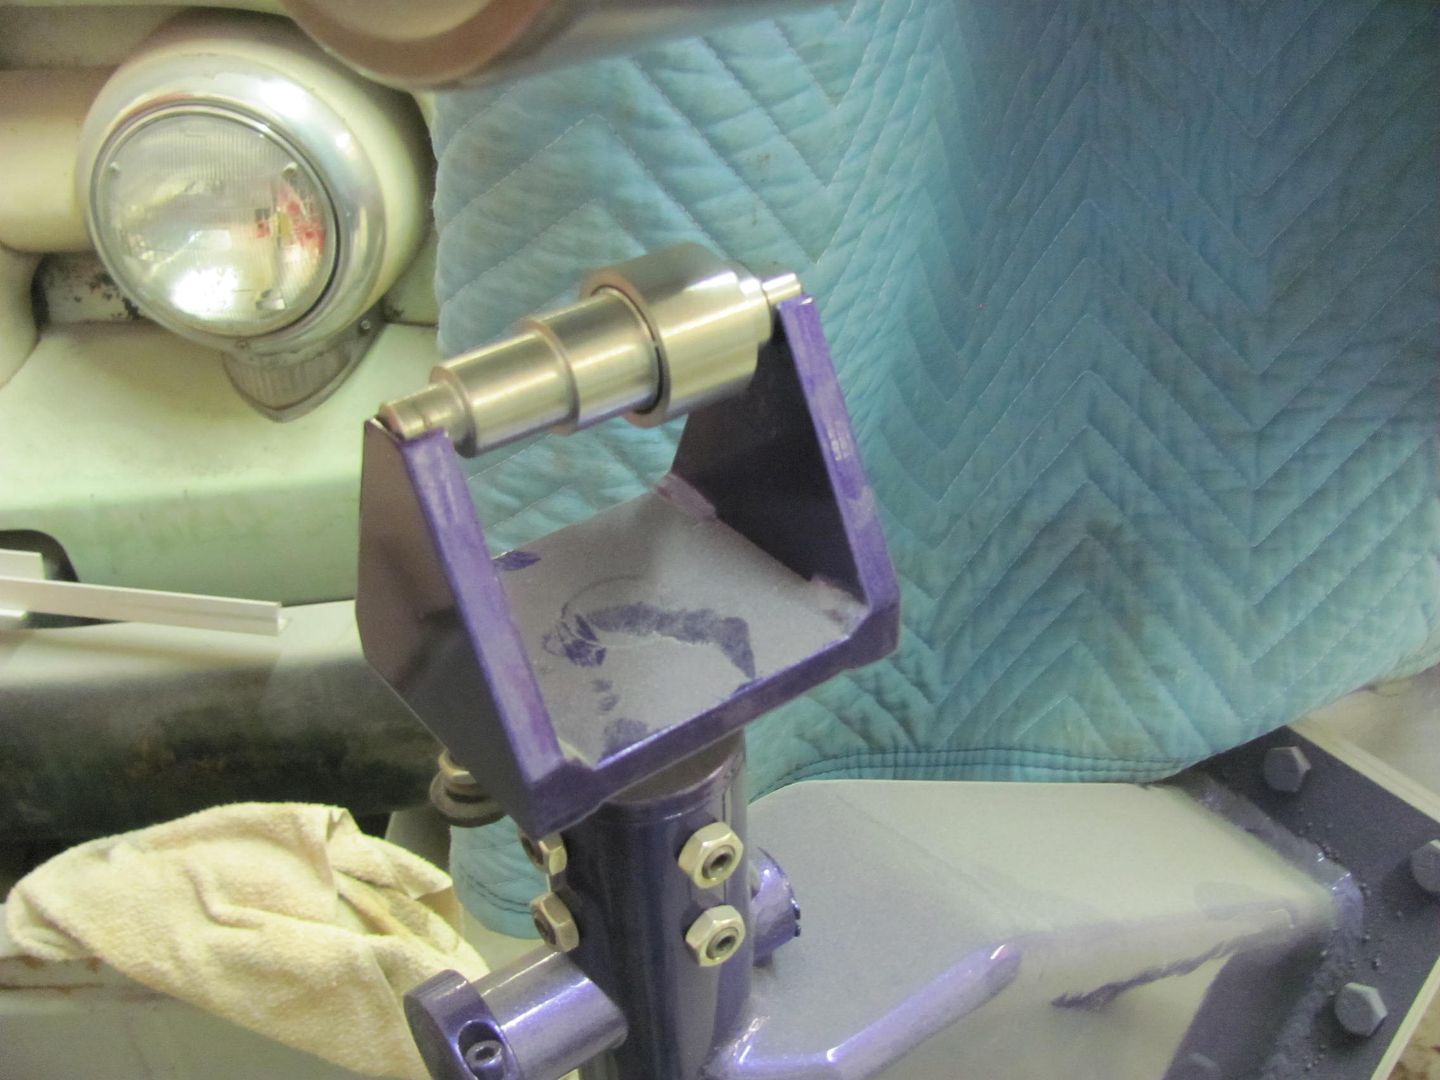
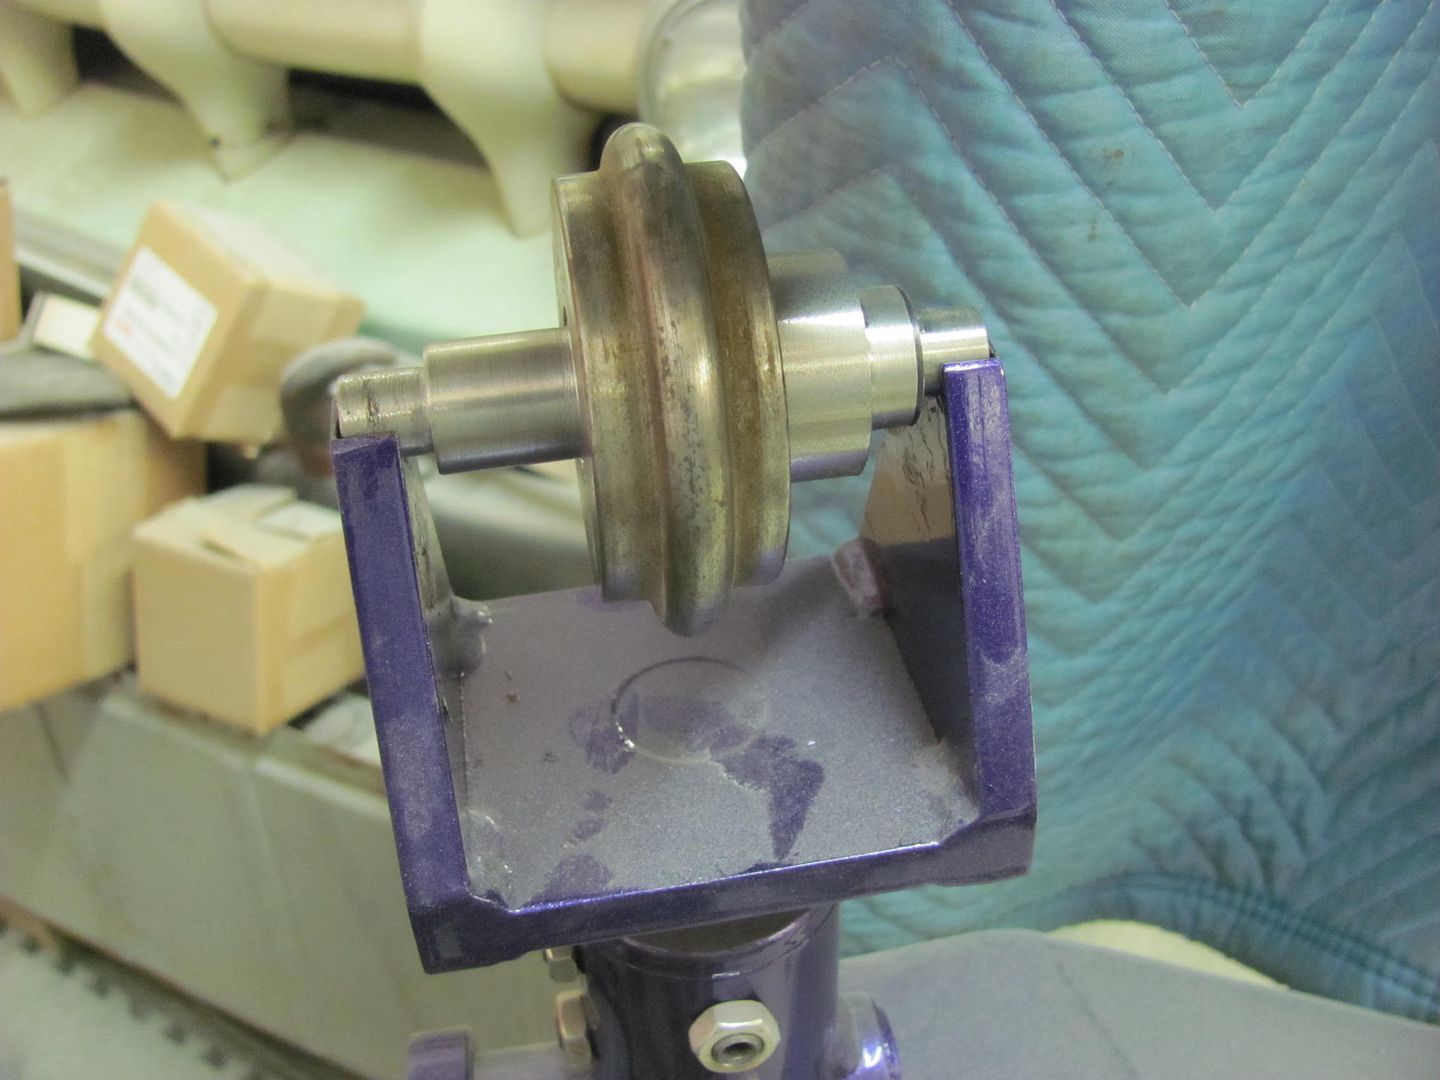
As I was getting the next batch of parts ready for epoxy, Kyle was setting up the bead roller for making the lower baffle of the core support. But looking at the center bead, the Fasti didn't have quite the reach...
I had wanted to make axles for the bead roller dies to fit the English wheel, so today was as good a day as any. This will give Kyle some practice on the South Bend..
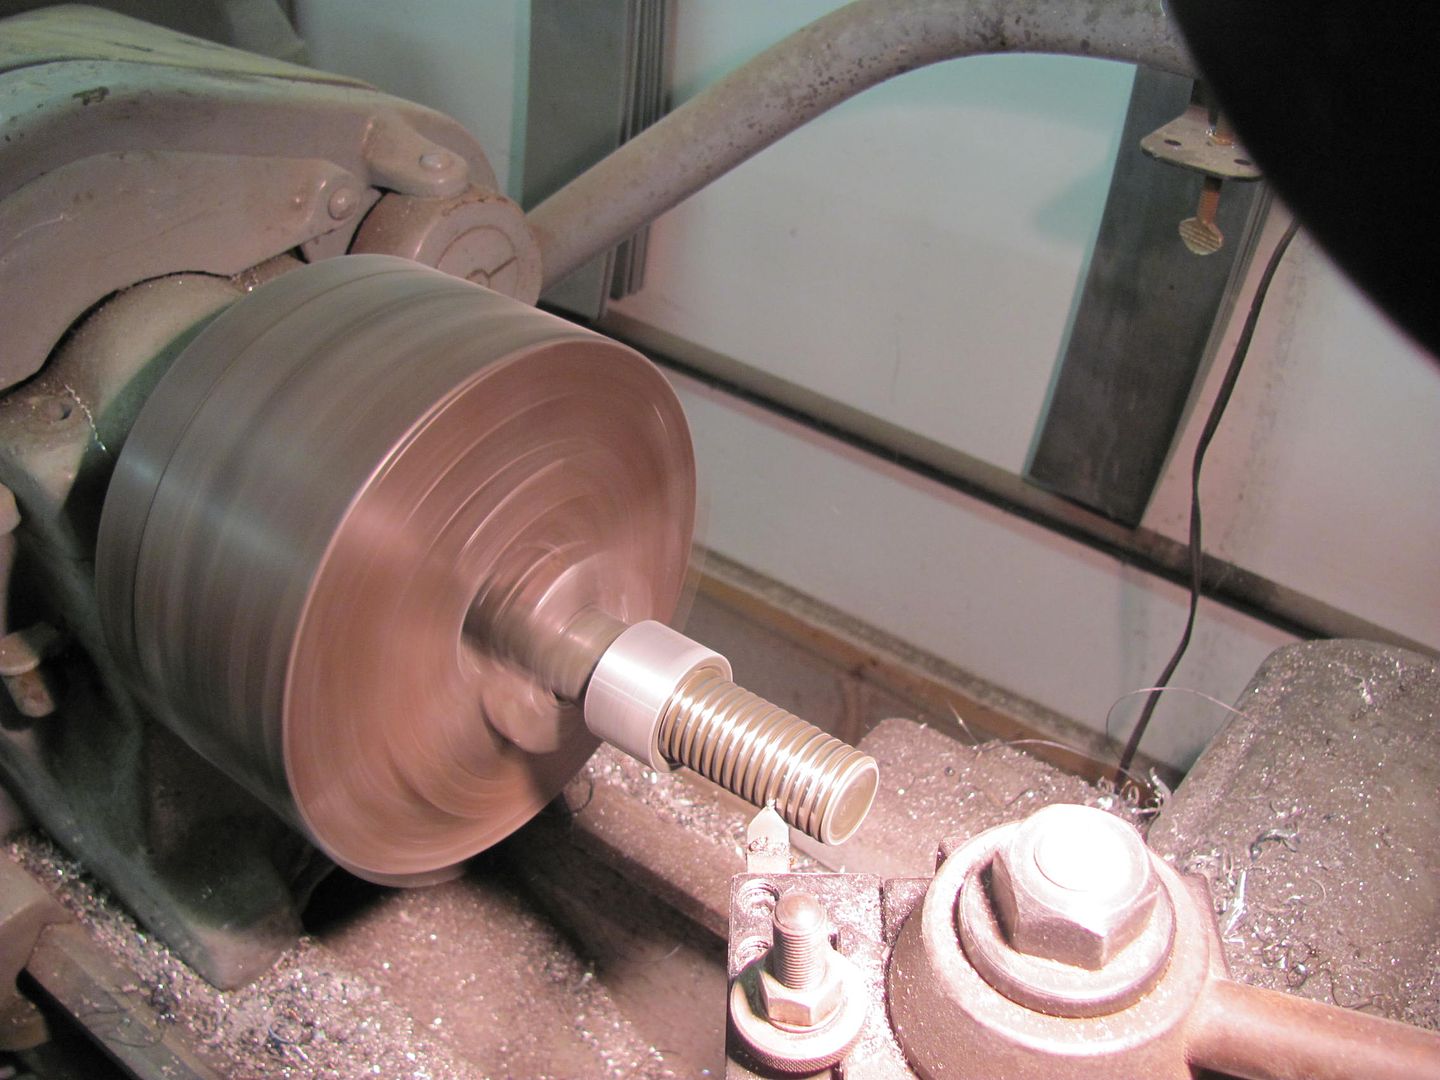
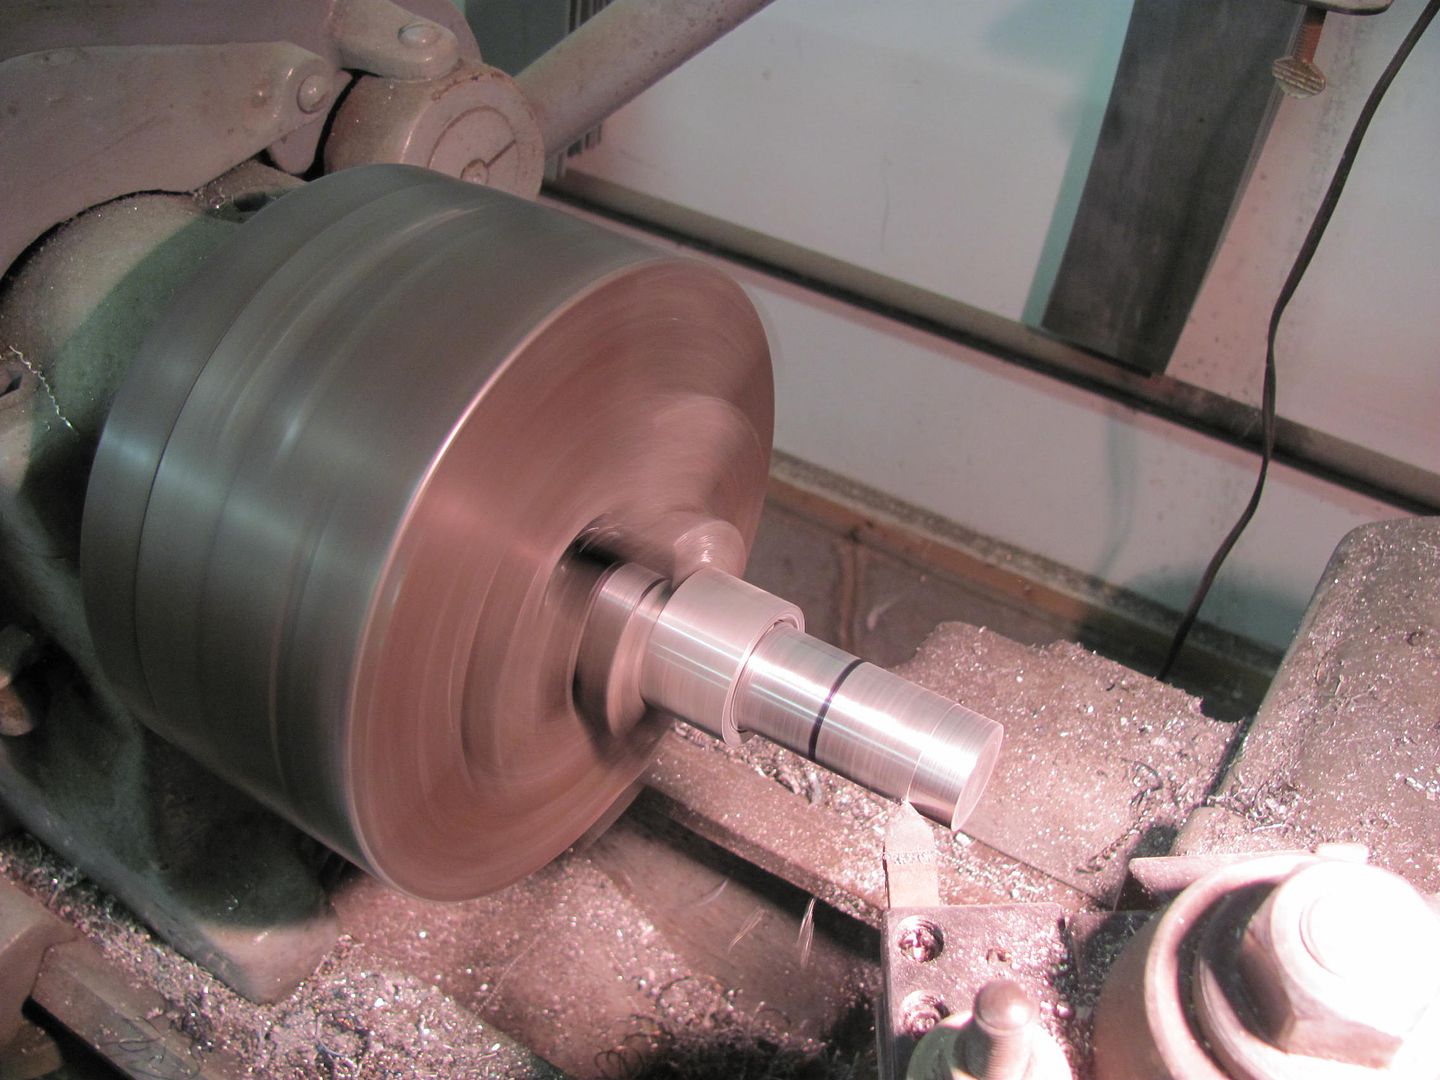
And my accomplishments for today...


And as I had a bit of epoxy left over, time to seal the inner door to the door skin.. Both had been primed before assembly...
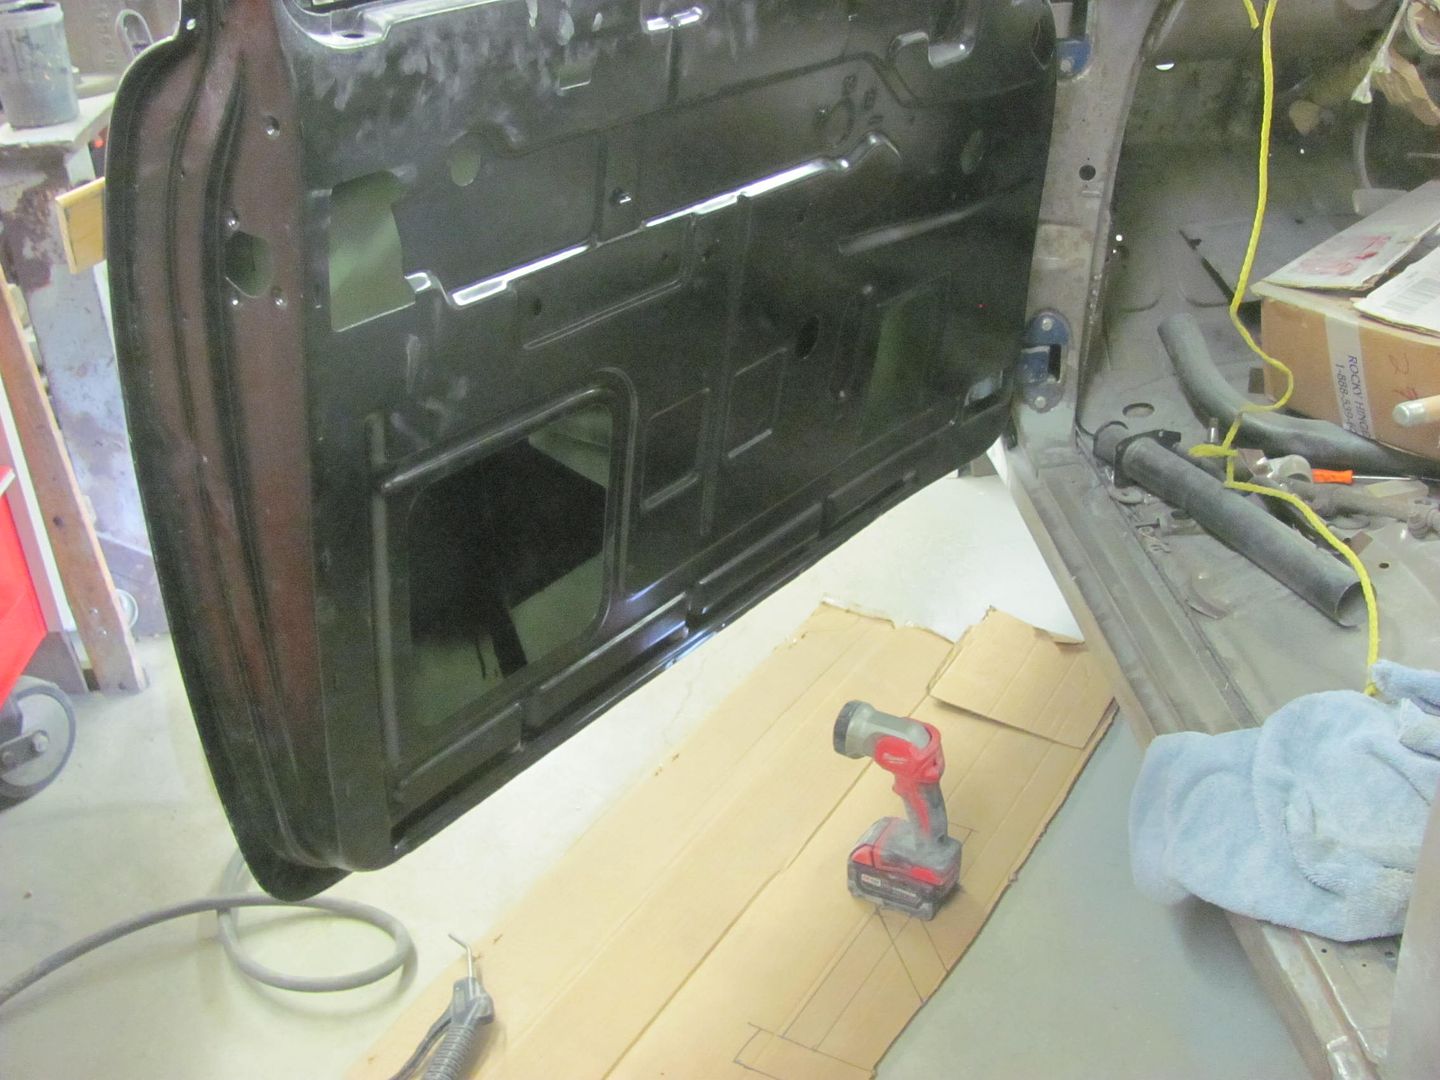

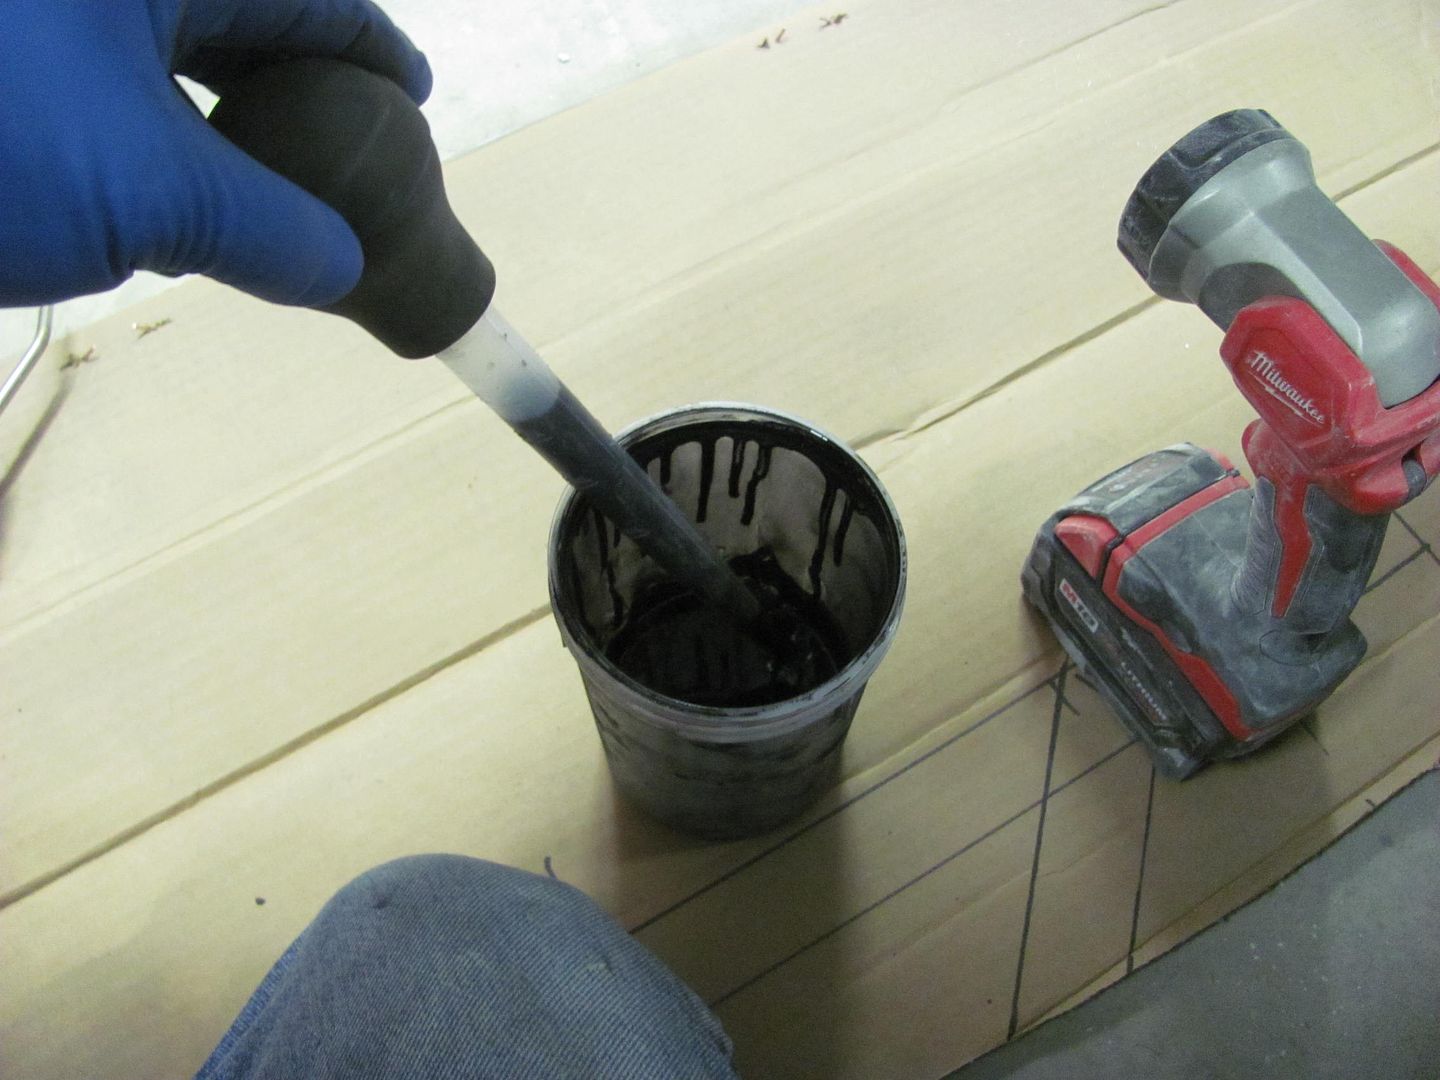
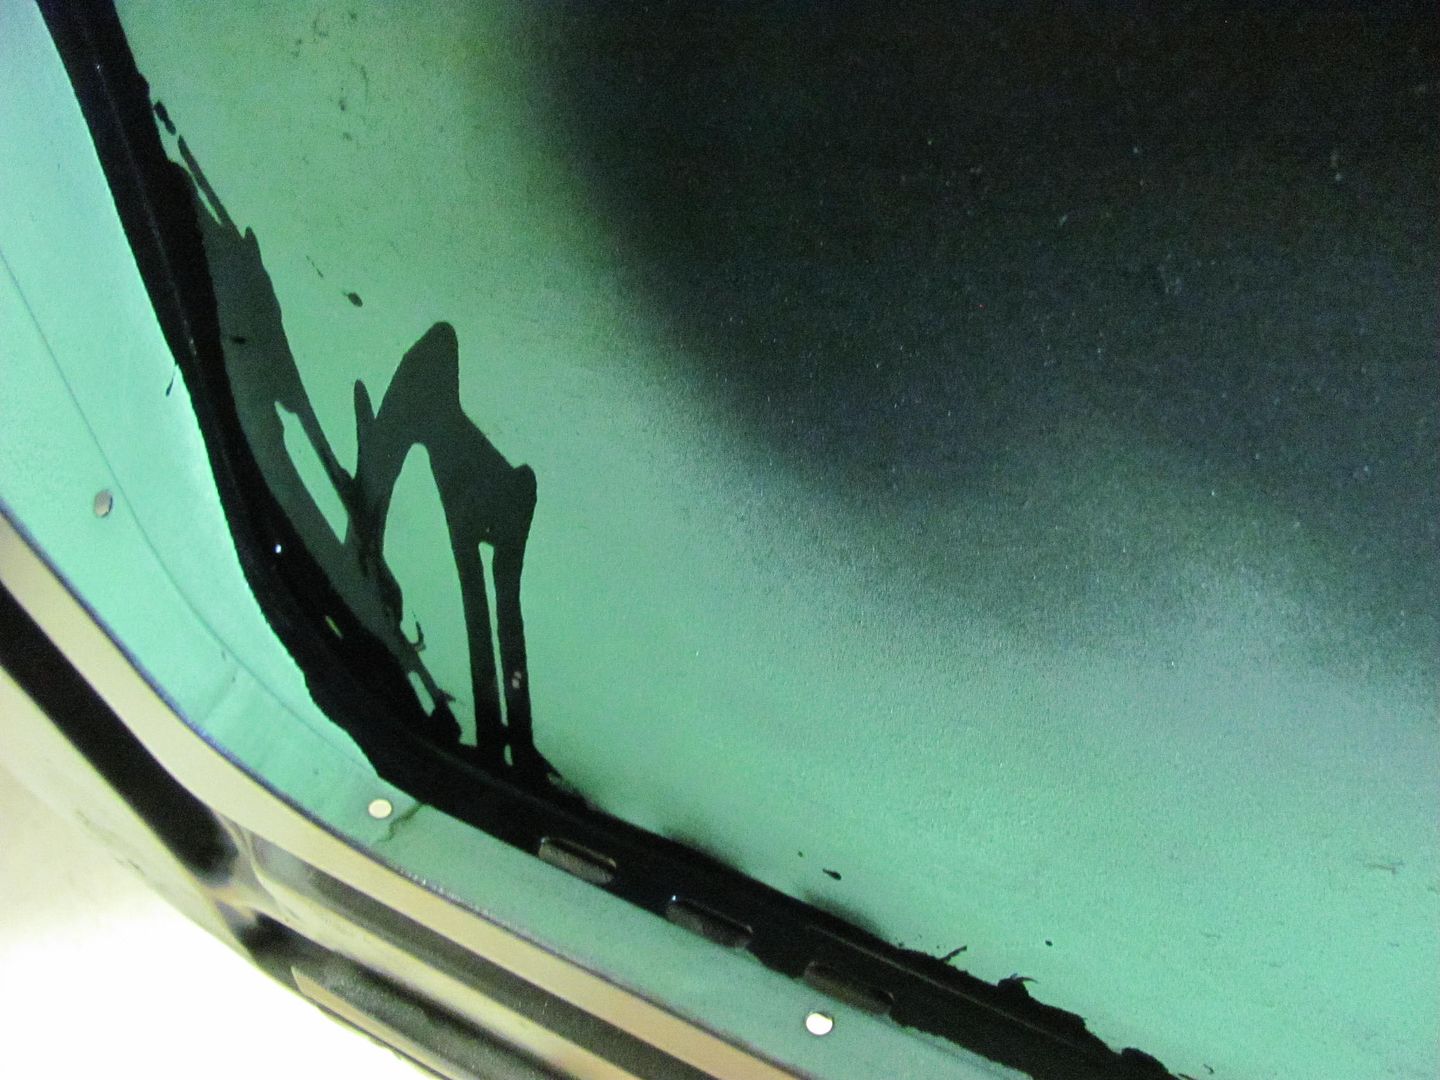
Definitely want to cover the floor in doing this...
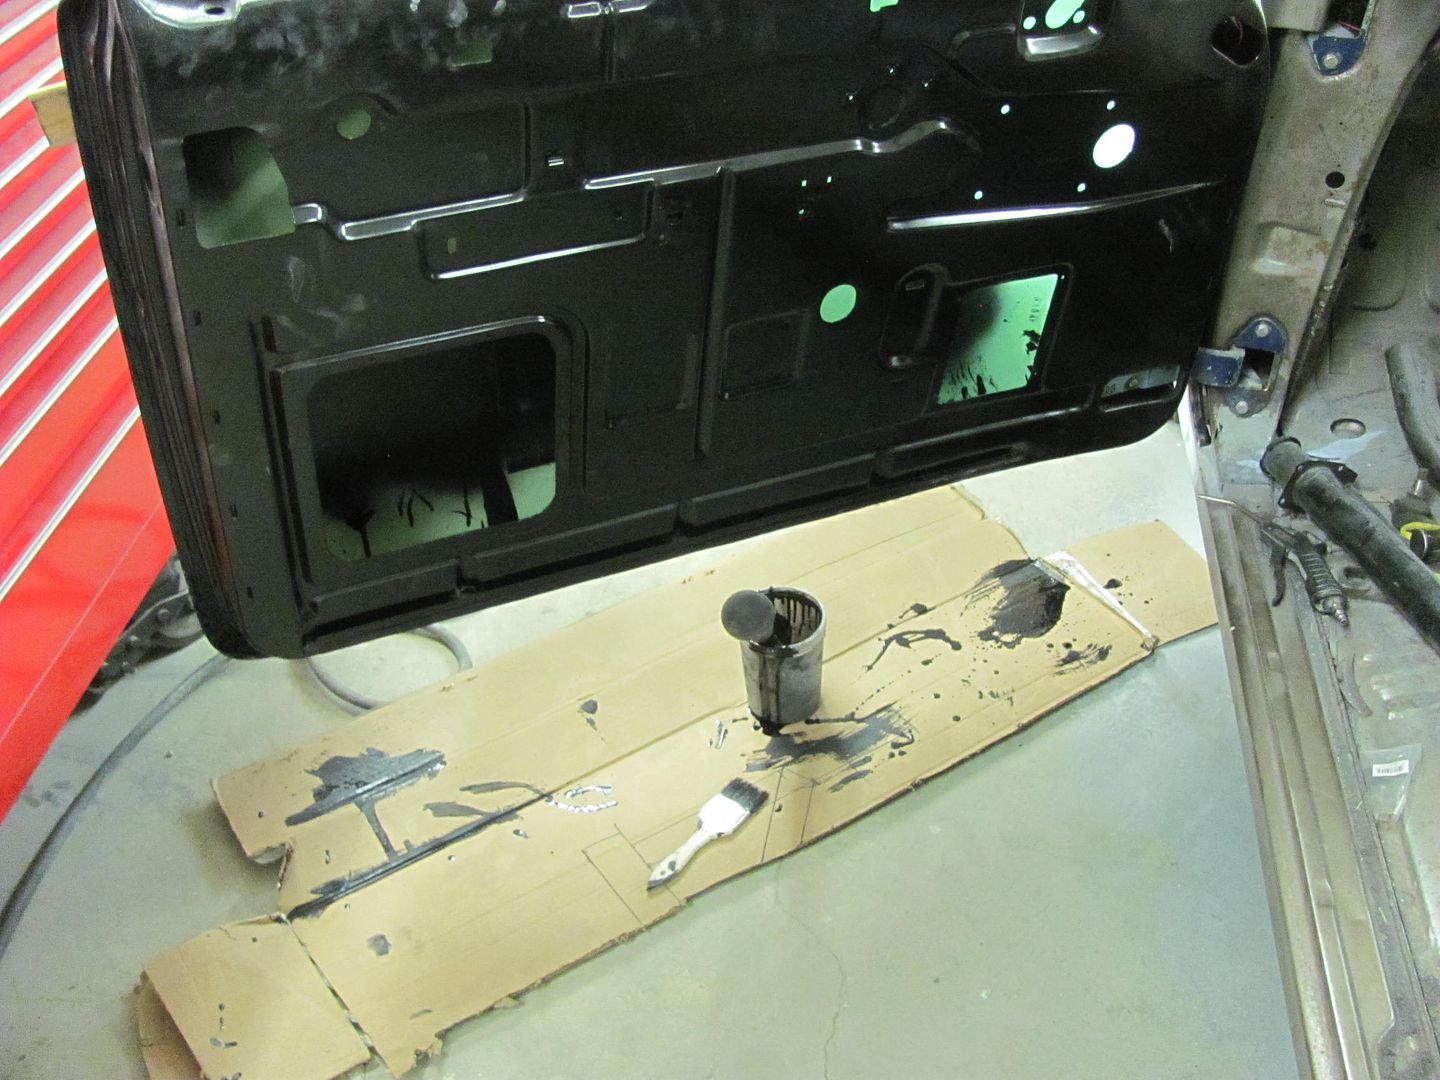
Had enough to do both doors, should keep the rust bugs gone for a long time to come..
As Kyle was going through the interior trim pieces the last couple weeks he did find one that had a few pits...
So we got a used replacement from the Stainless Shoppe in Seymour WI. A shame to paint this one
.
As I was getting the next batch of parts ready for epoxy, Kyle was setting up the bead roller for making the lower baffle of the core support. But looking at the center bead, the Fasti didn't have quite the reach...
I had wanted to make axles for the bead roller dies to fit the English wheel, so today was as good a day as any. This will give Kyle some practice on the South Bend..
And my accomplishments for today...
And as I had a bit of epoxy left over, time to seal the inner door to the door skin.. Both had been primed before assembly...
Definitely want to cover the floor in doing this...
Had enough to do both doors, should keep the rust bugs gone for a long time to come..
shortykorte
Well-known member
i might have missed it, is the black epoxy paint or sealer? Sure is a nice glass finish so I'll say paint.
zmotorsports
ALLIANCE MEMBER
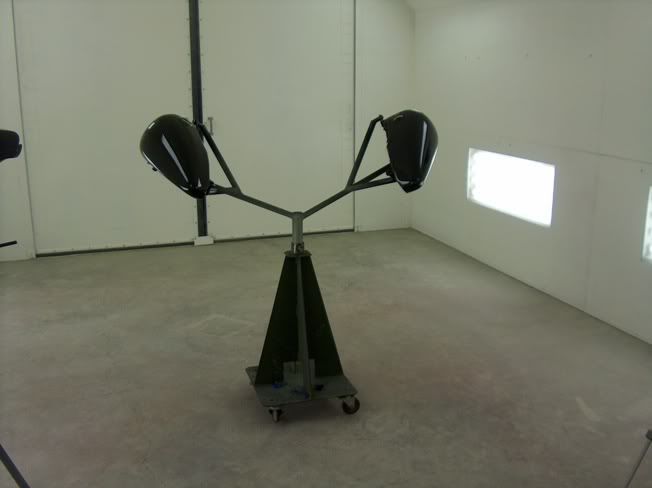
Robert, those motorcycle sheet metal stands are very similar to what I built years ago, with the exception that I used a large semi truck drum brake to weight them down. I too had seen people hang parts but didn't like chasing them around to paint. I wanted something more rigid to paint and then was able to use them to cut/polish as well. Better than having them bang around on blankets on the bench or table.
Mike.
Mike.
Hi Robert,
I absolutly love your thread and have learned a LOT!
And for that I thank you.
I am doing a rather large patch (14x8 wheel well) and have large gaps that require a copper backer. My problem is the weld dots dont look to good from the back side(porosity)
and they wont grind out smooth.
Do you weld from the back side also?
Thanks
Don
If using a copper backer, try cleaning it until nice and shiny with a smooth file. Once it gets charred from welding exposure it will tend to give more porosity in the back side of the weld. You'd be better off to weld from one side only, less heat, less shrinking, less planishing to fix it.

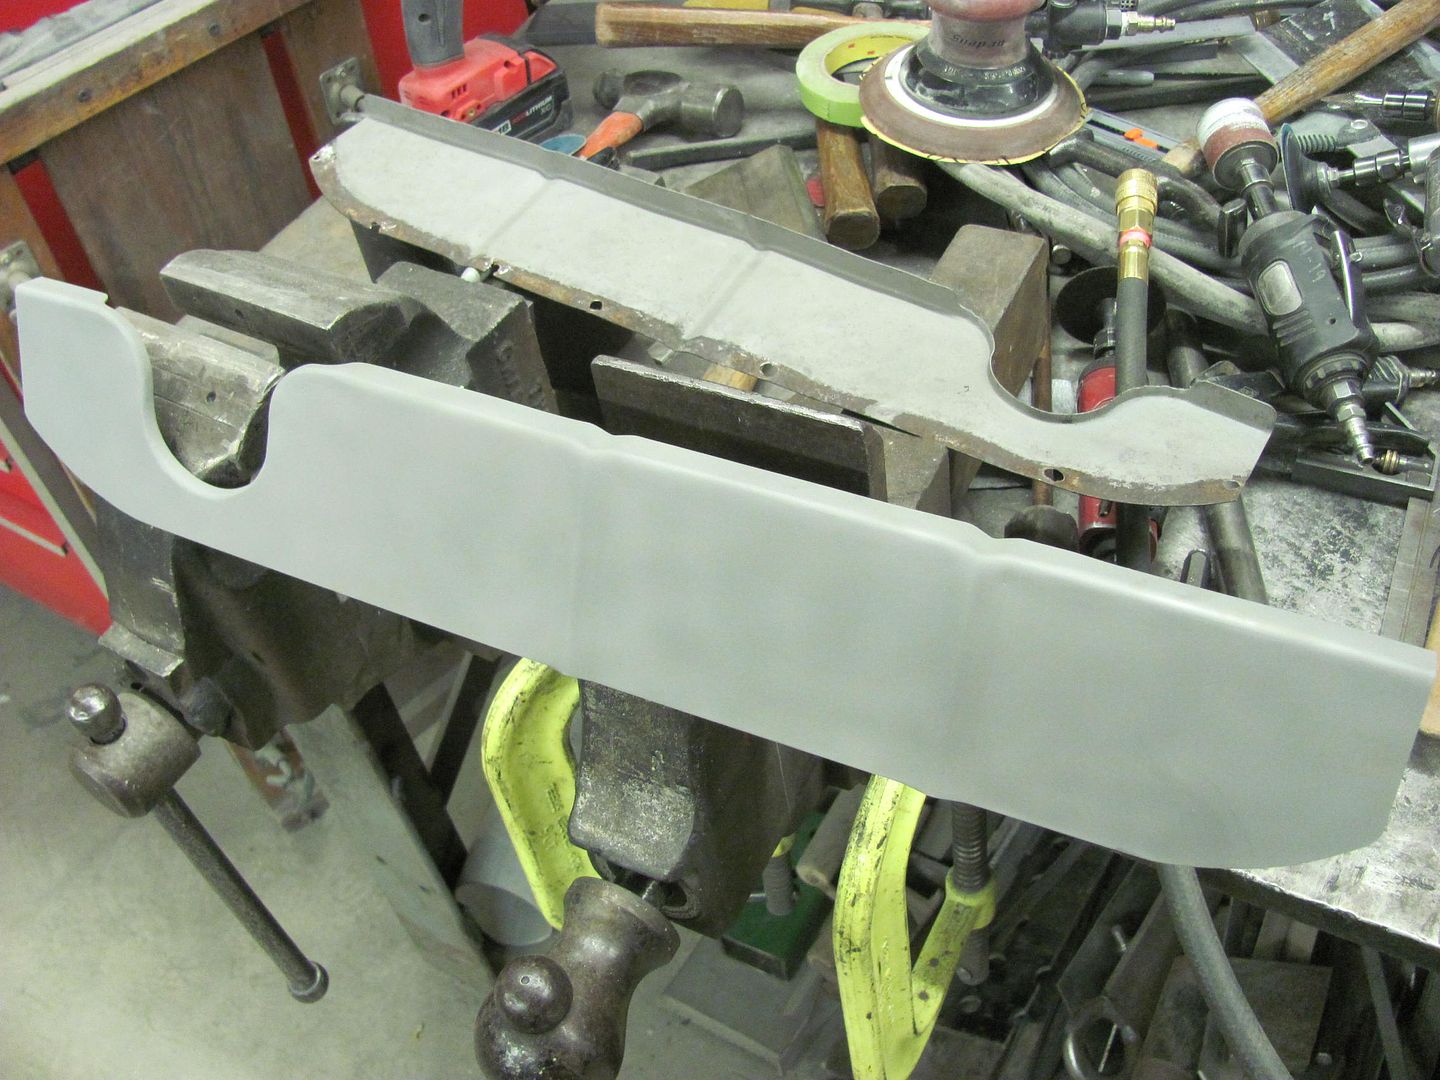
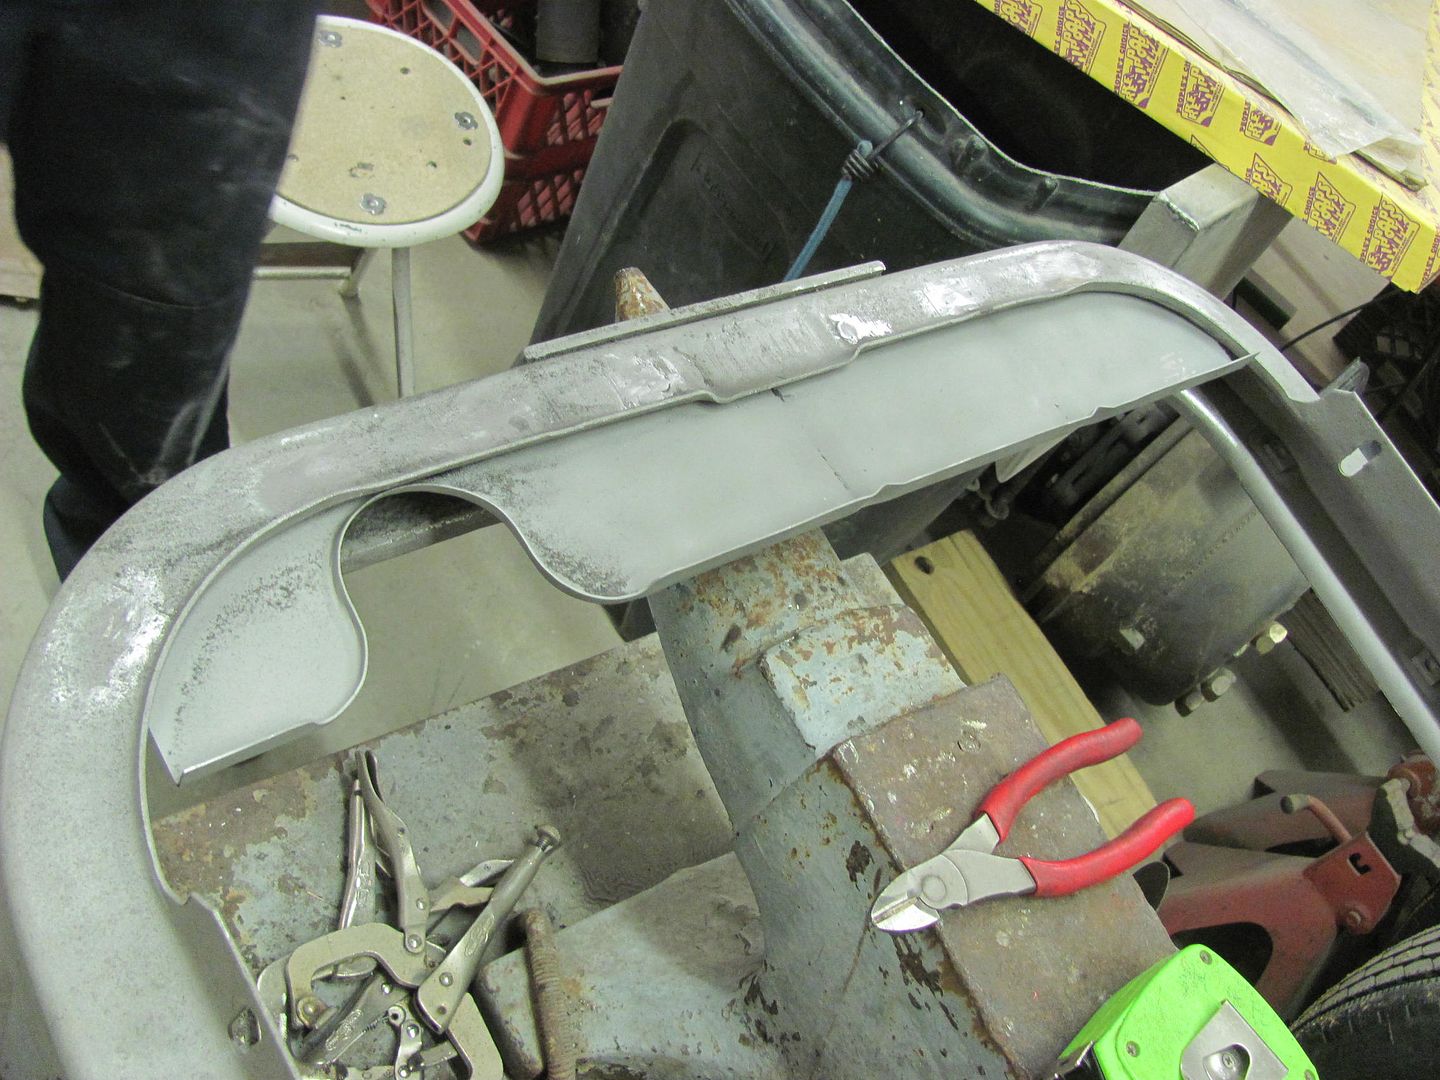
Well it was taking a little longer on the English wheel adapter kit than I thought, and since that is on the shop's dime, I thought we'd try something that we could get done a little quicker. So the other machine with plenty of throat was the Lennox, so let's make some dies for it..... Also got in some more block sanding while Kyle was cutting out pieces for the dies.
Pre-stretching the bead areas of the baffle...

Adding the bead, using the backstop...

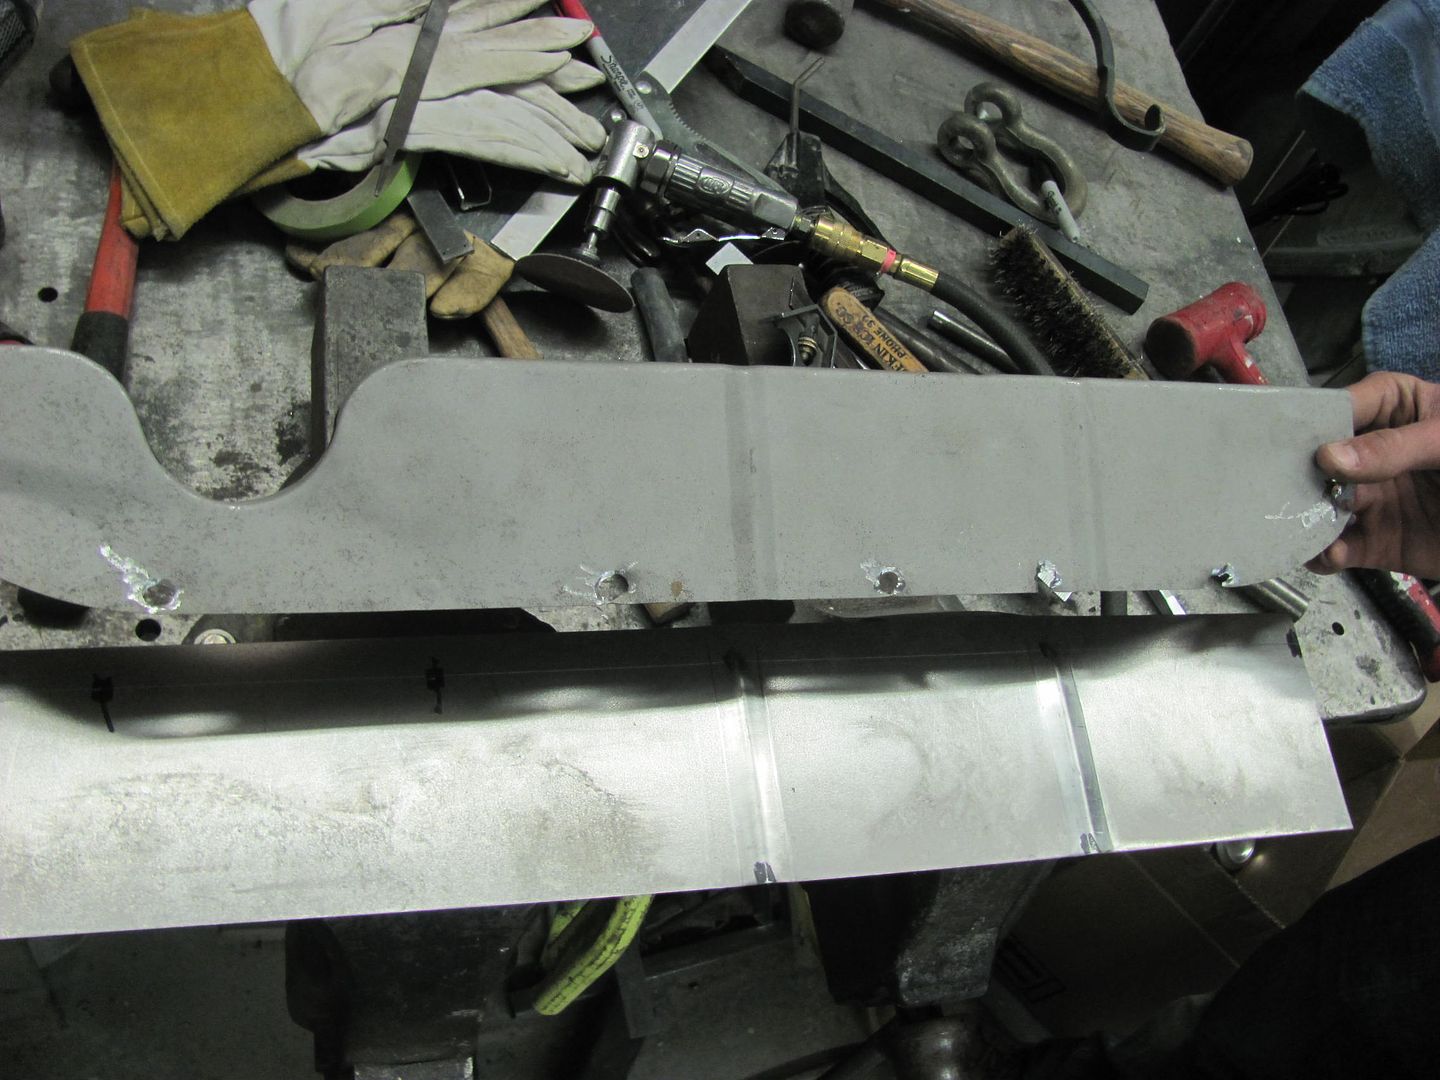
Laying out the petcock recess. This is about a 1/2" lower than the factory to alleviate the clearance issue..
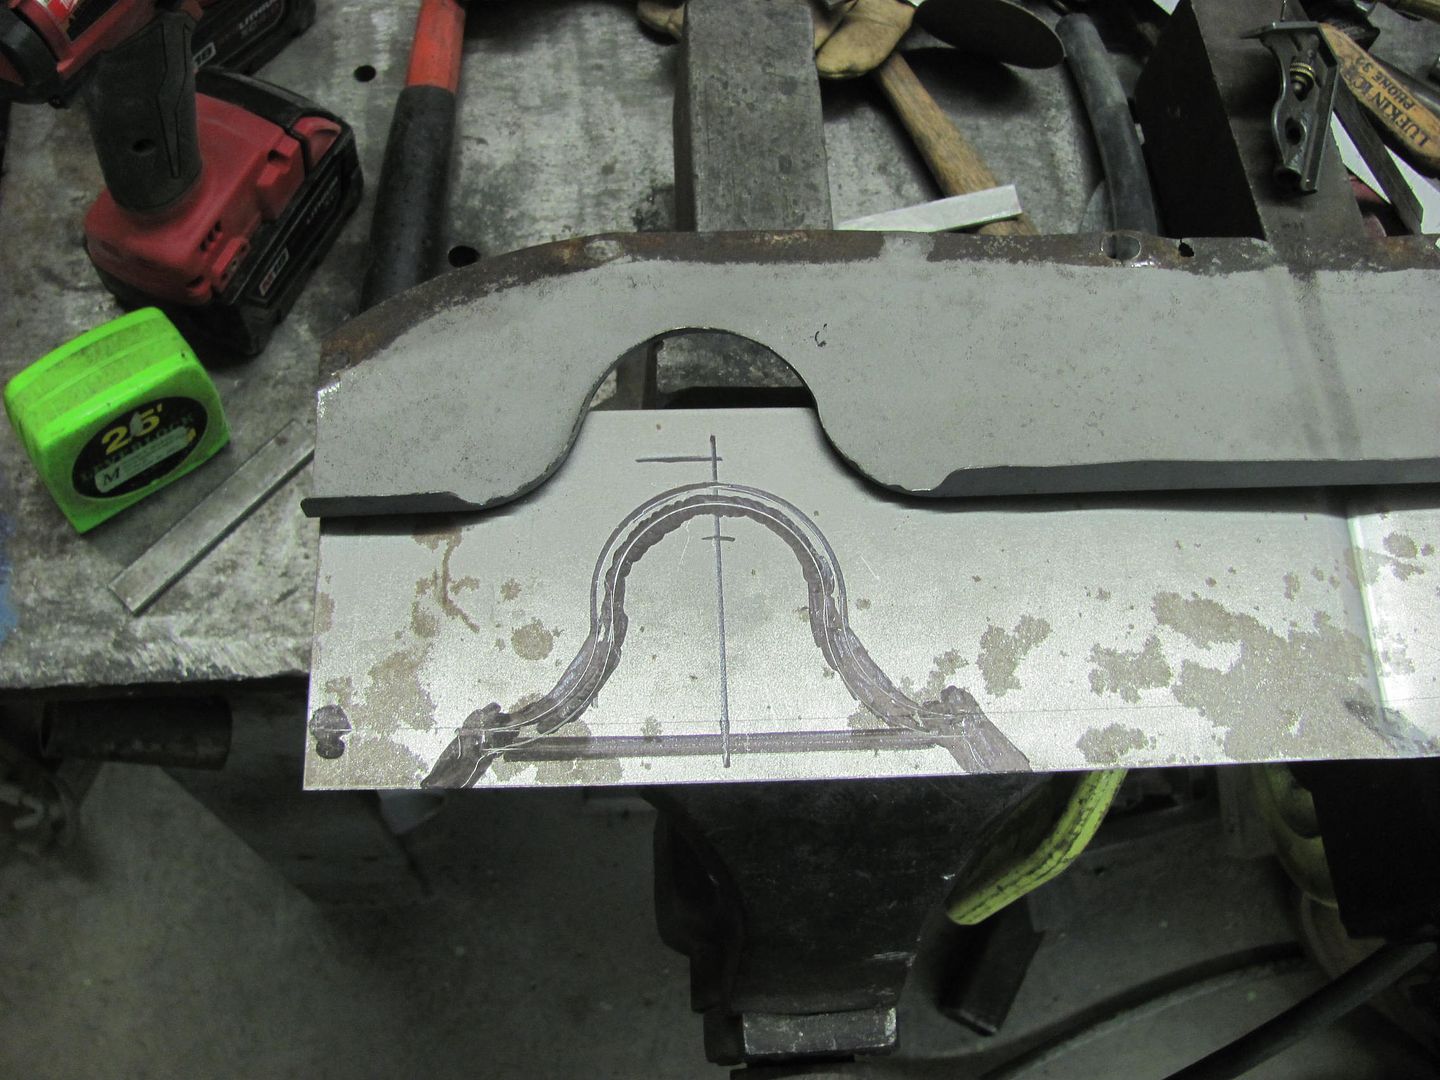
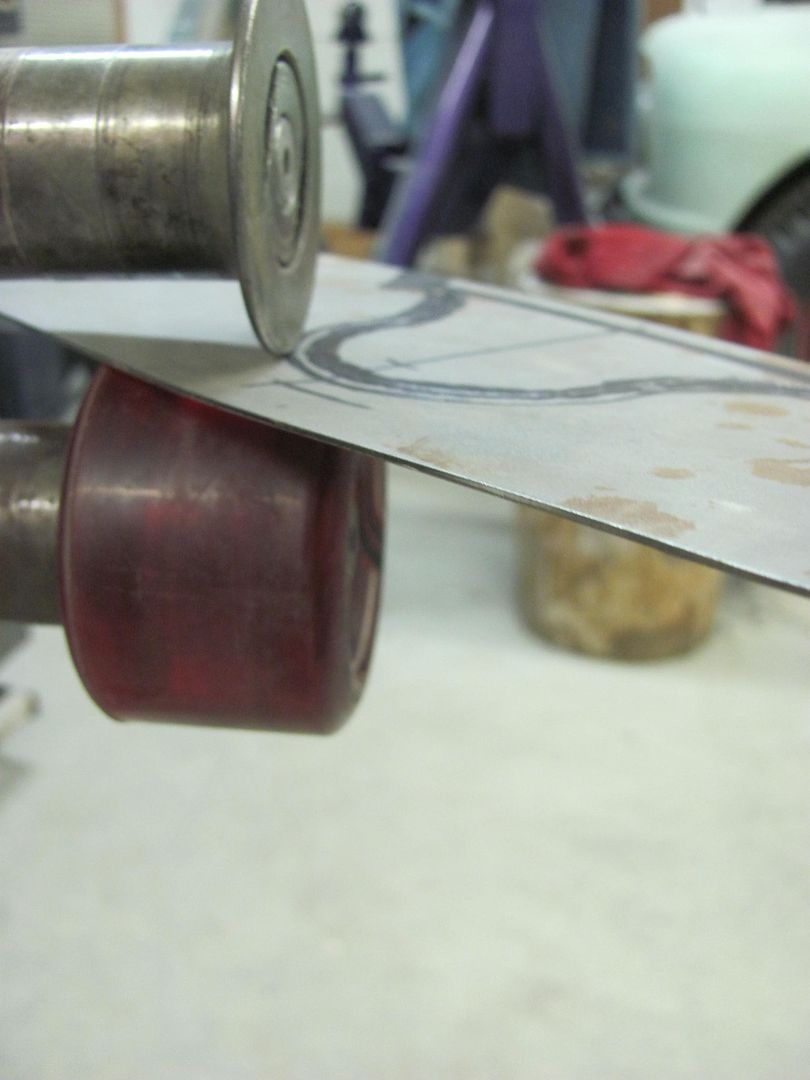
The tipping and skateboard wheels are used to "trace" the bend line to make any hammering a bit easier to locate the correct "edge".....
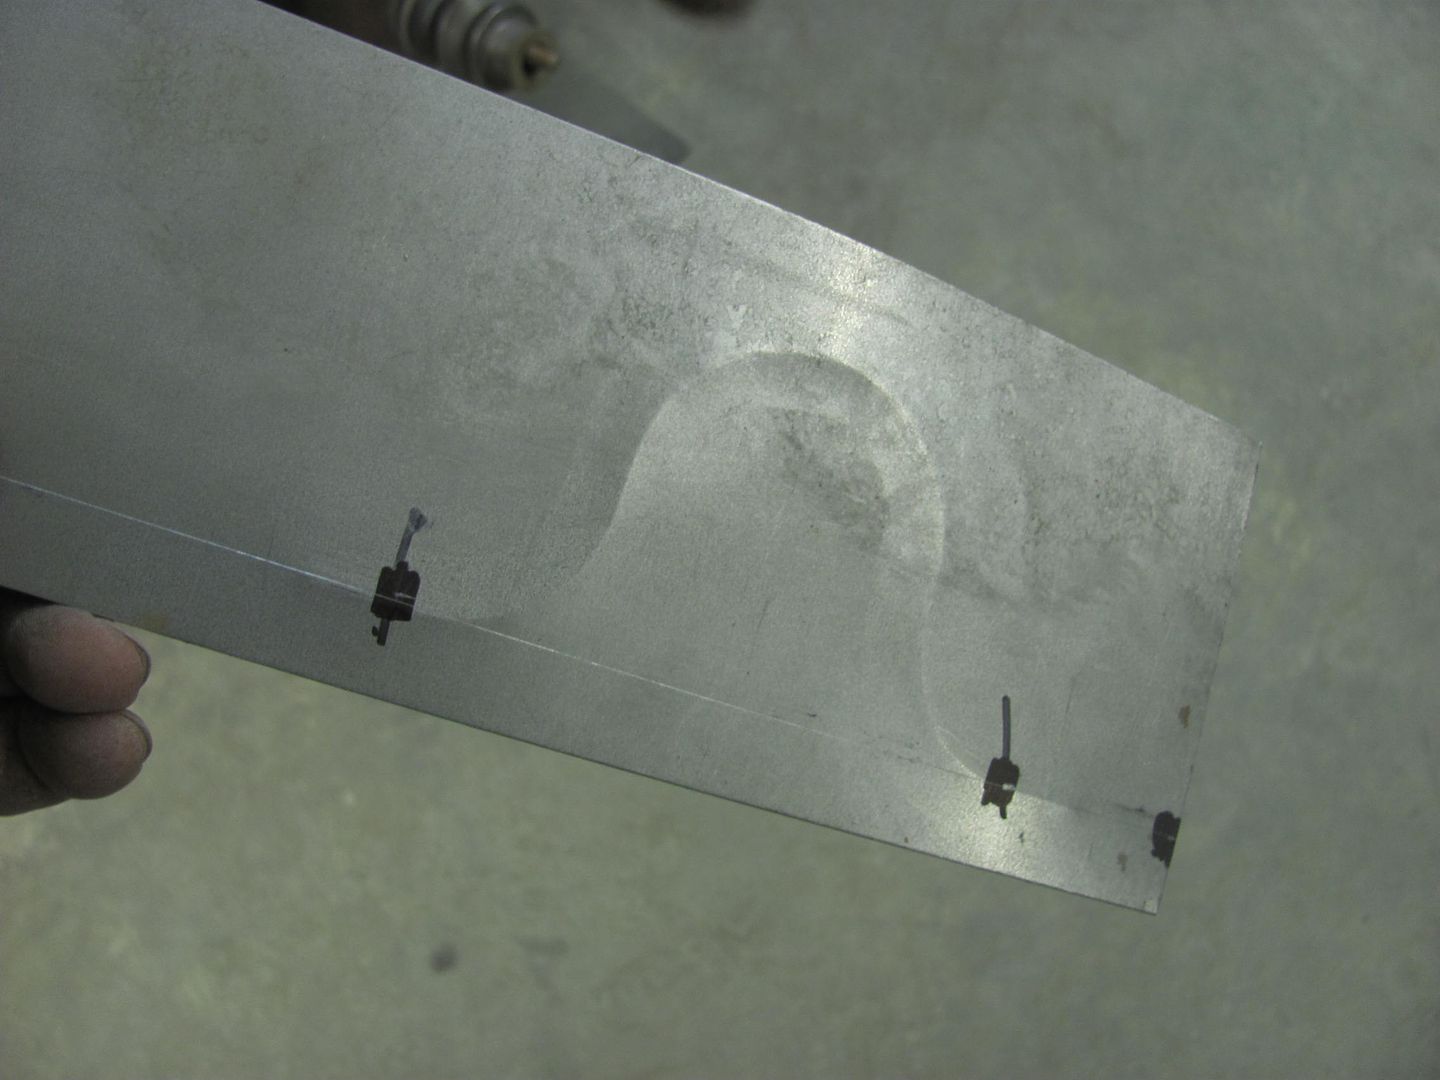
Relief trimmed, ready to make the folds....
Pre-stretching the bead areas of the baffle...
Adding the bead, using the backstop...
Laying out the petcock recess. This is about a 1/2" lower than the factory to alleviate the clearance issue..
The tipping and skateboard wheels are used to "trace" the bend line to make any hammering a bit easier to locate the correct "edge".....
Relief trimmed, ready to make the folds....
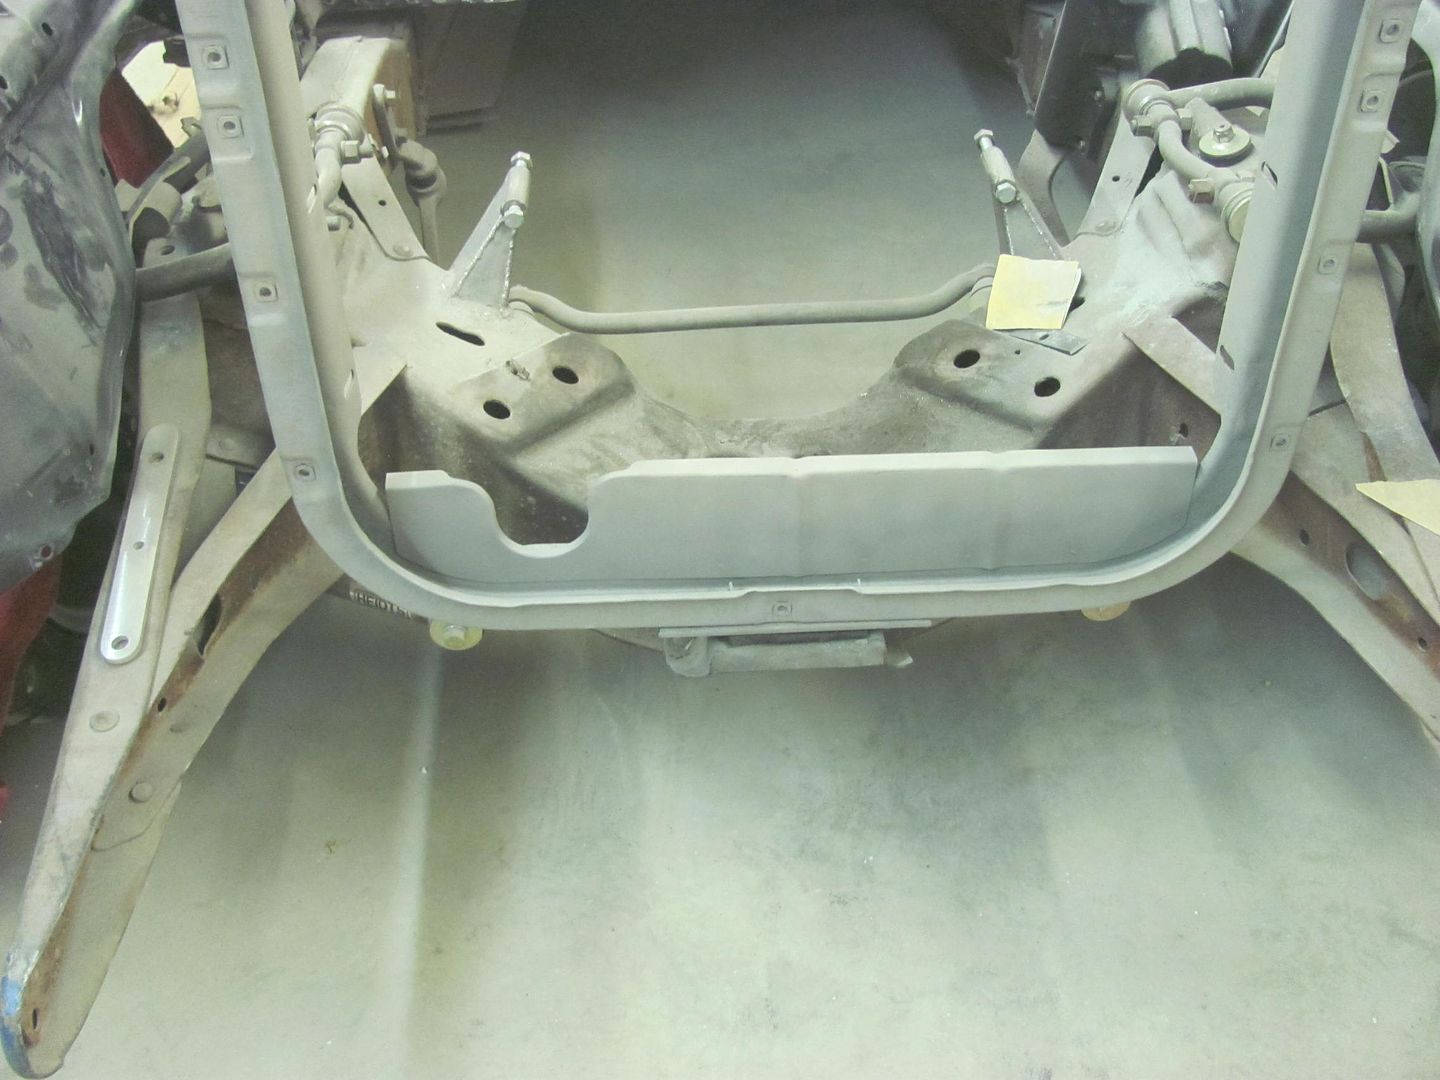
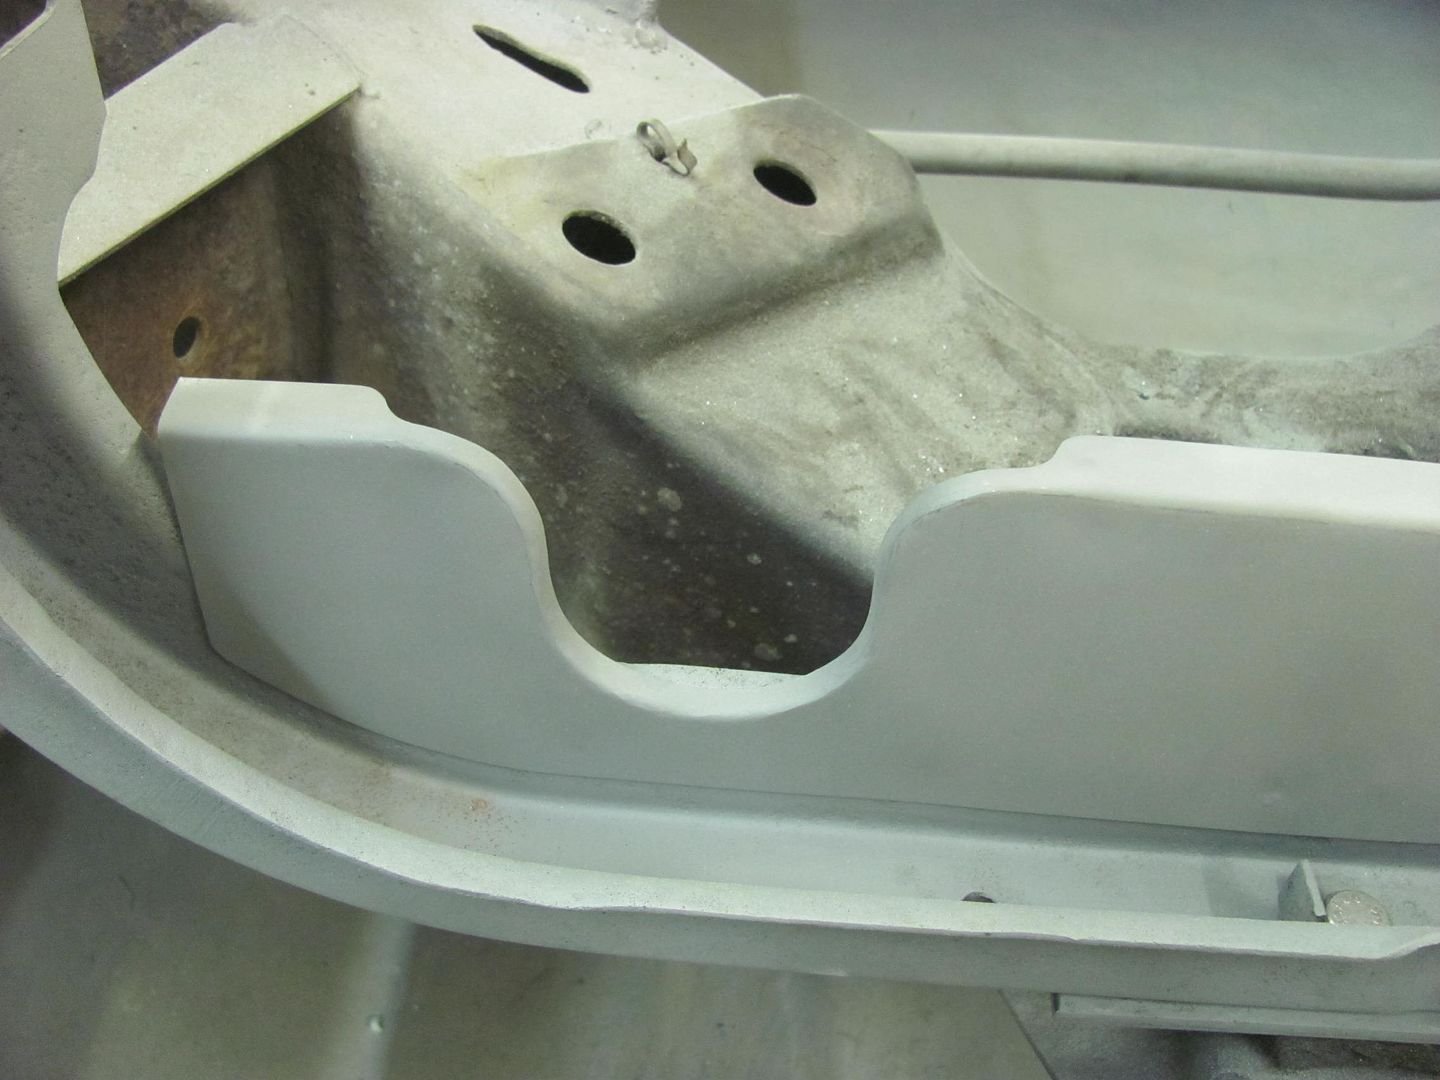
Tonight we got the recess finished on the baffle plate.

Test fitted...
Media blasted, ready to install....
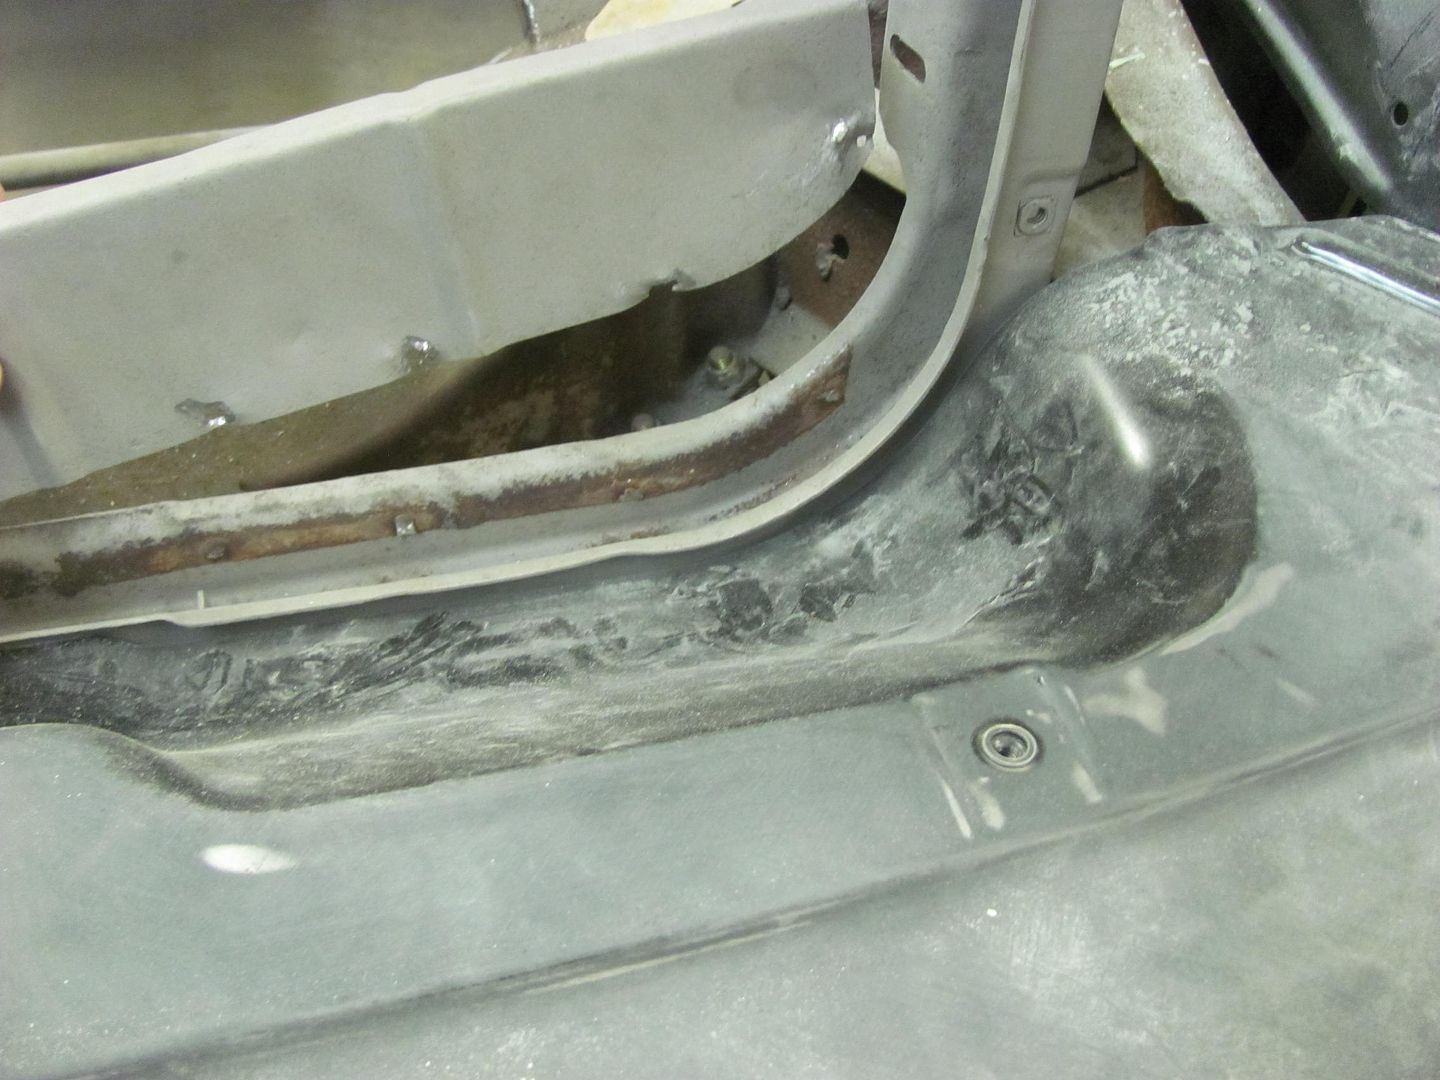
Then Kyle removed the splash pan so he could clean up the core support prior to welding it in....
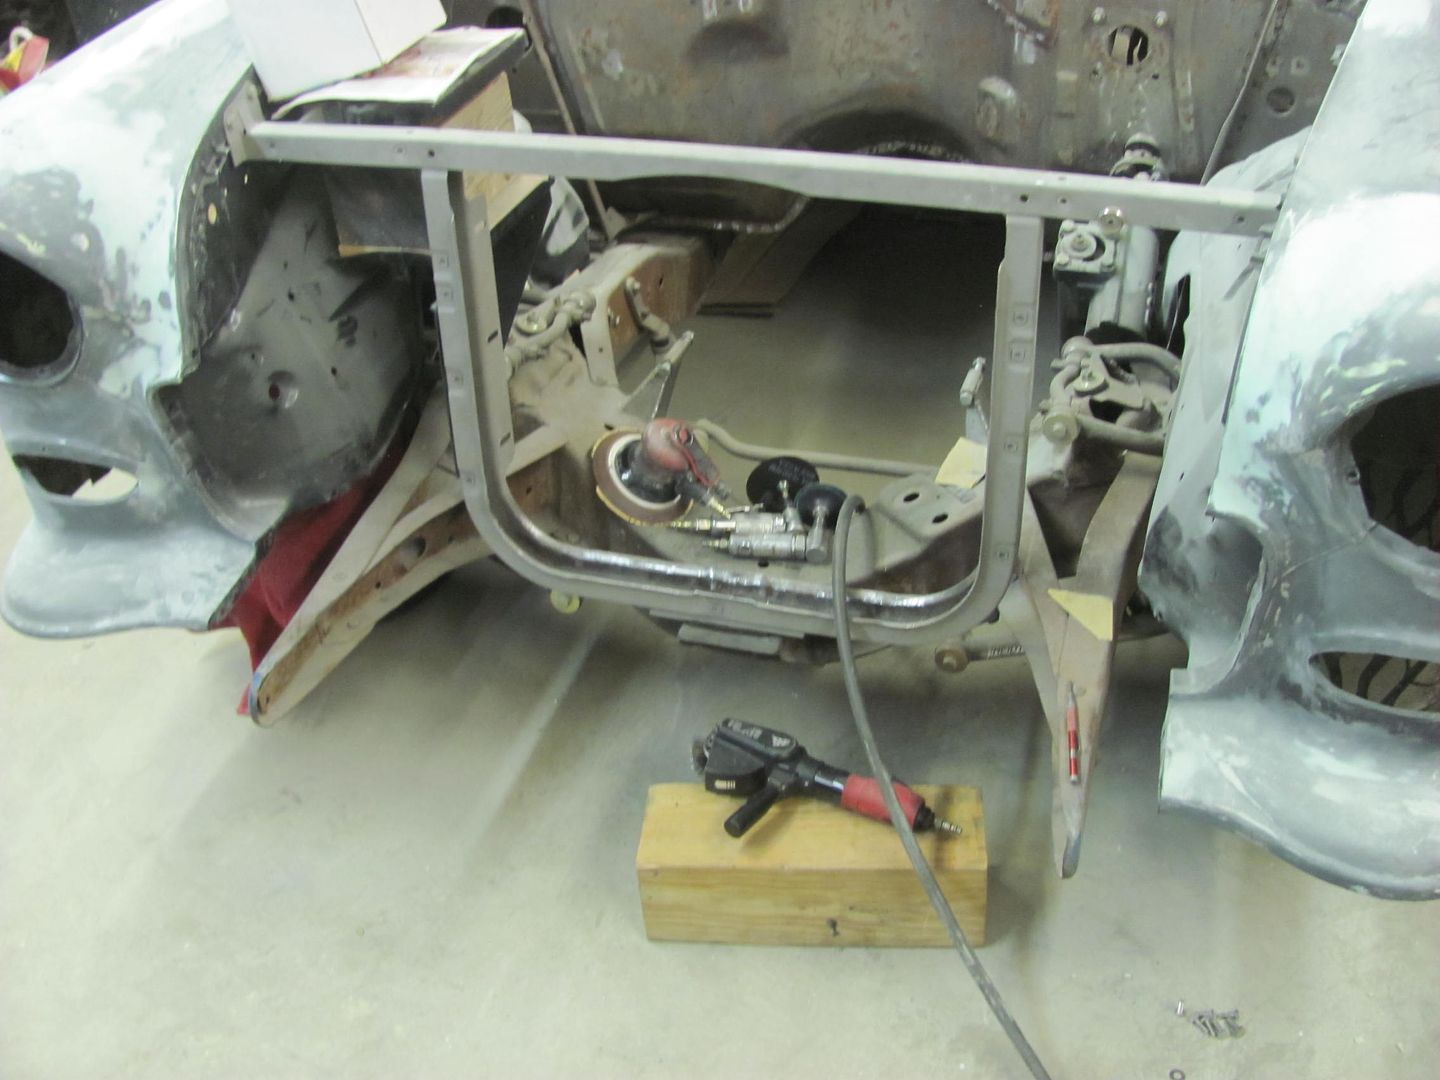
We also got started on some blocking of the parts sprayed last week. For not having access to planish the welds on the lower portion of the lift gate, these turned out better than I expected..

Test fitted...
Media blasted, ready to install....
Then Kyle removed the splash pan so he could clean up the core support prior to welding it in....
We also got started on some blocking of the parts sprayed last week. For not having access to planish the welds on the lower portion of the lift gate, these turned out better than I expected..
Last edited:
[email protected]
New member
- Joined
- Feb 28, 2014
- Messages
- 2
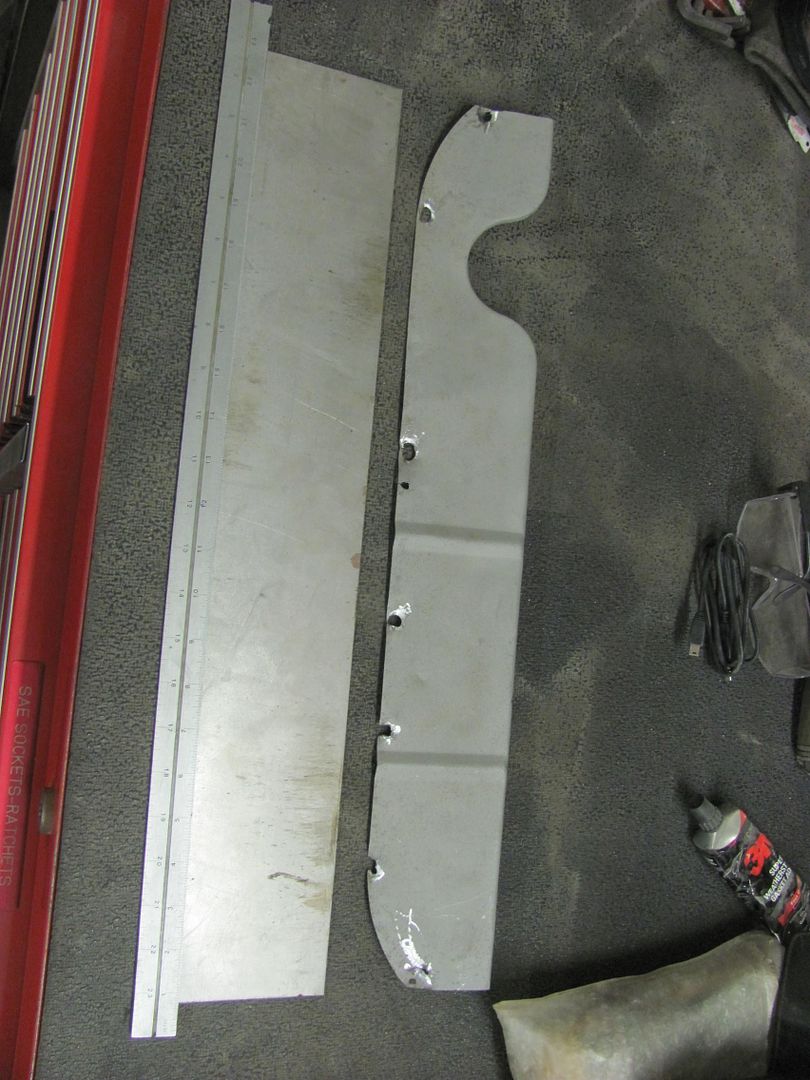
Great stuff, it is awesome to how this is all done. A true artisan. What gauge sheet metal are you using for all these panels? Thanks.
Sent from my iPad using Tapatalk
Sent from my iPad using Tapatalk
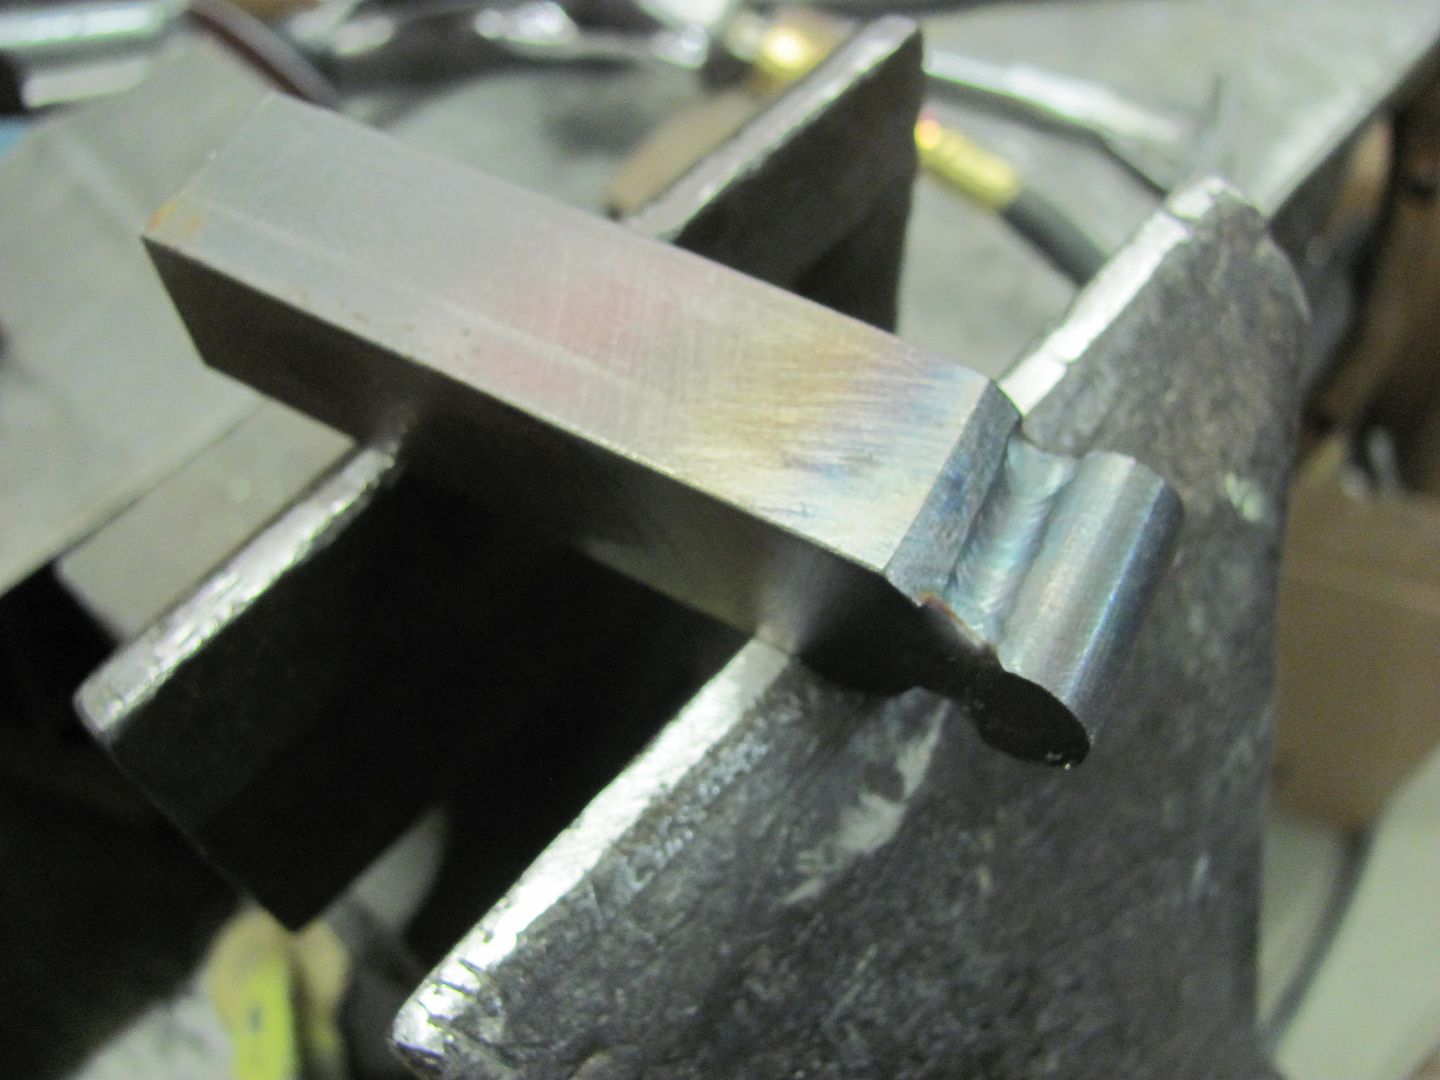
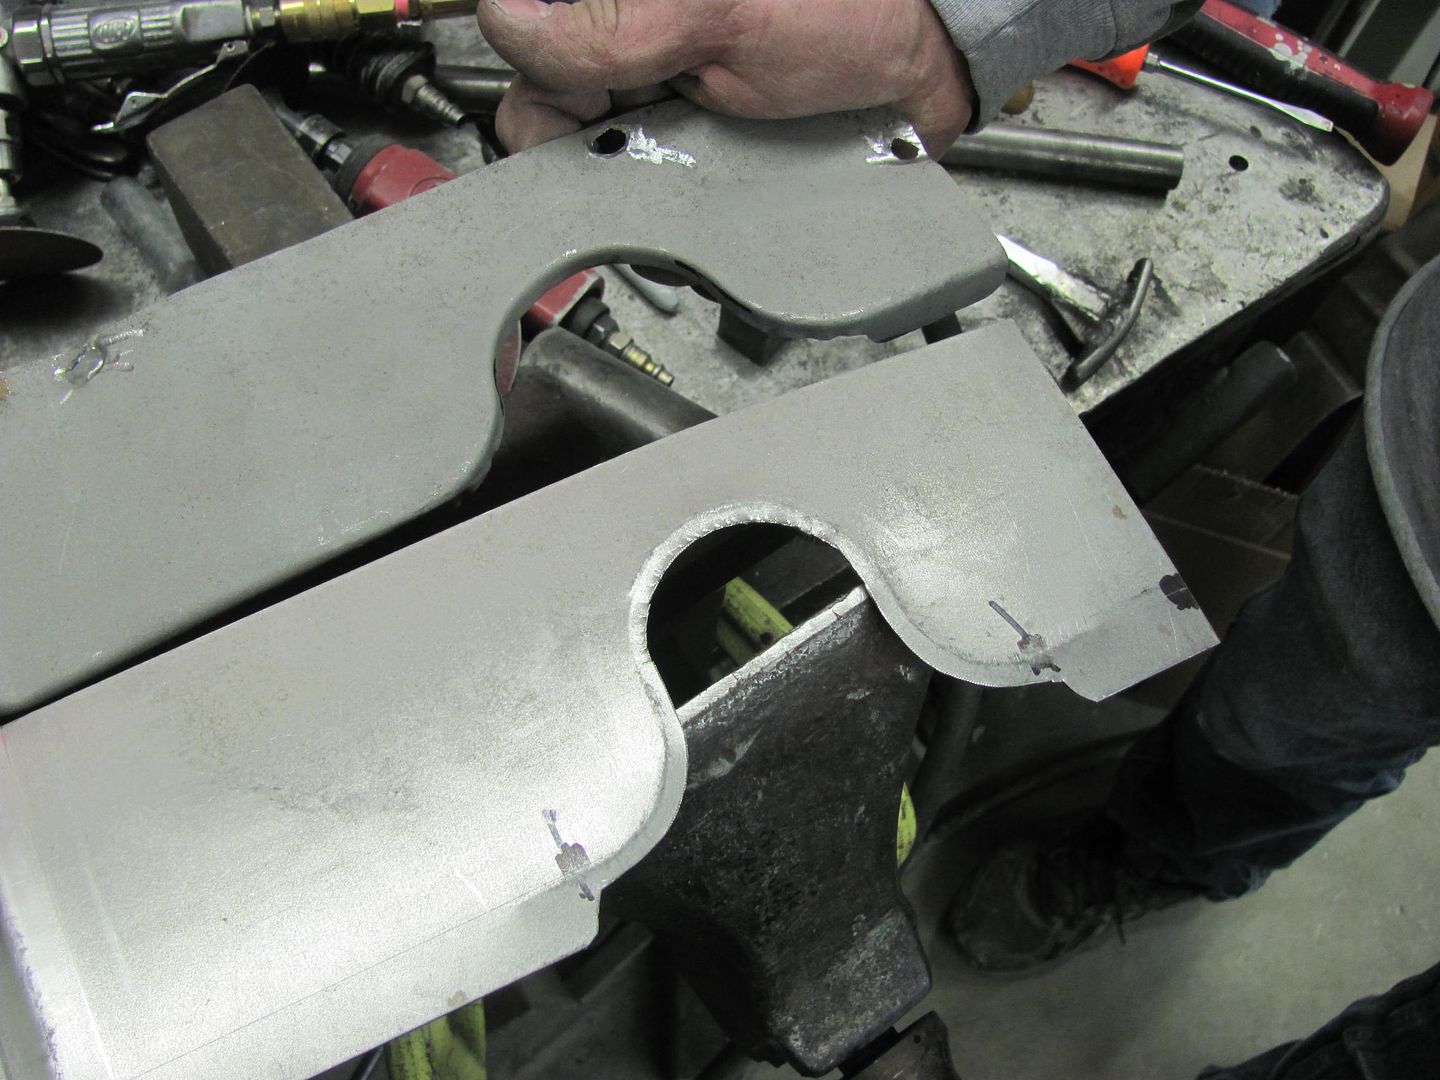
Today the baffle got welded into the core support, here with the plug weld holes drilled.
The modified relief we fabricated shows to be about as low as we could have made it..
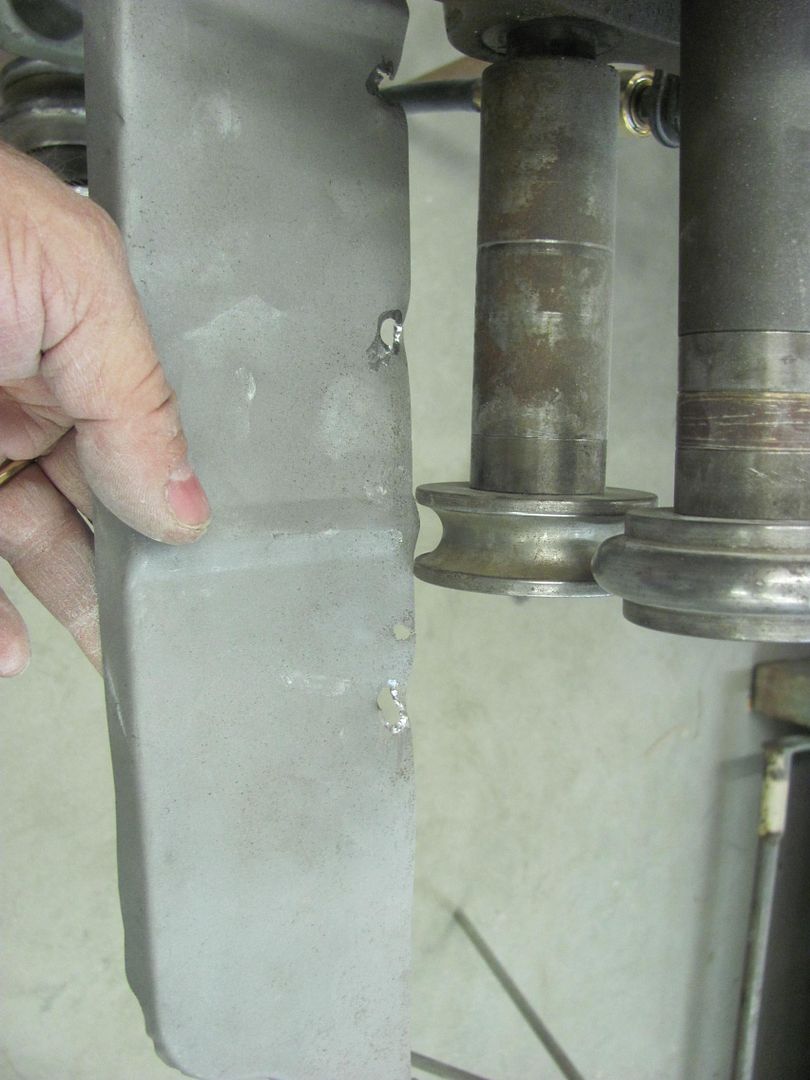
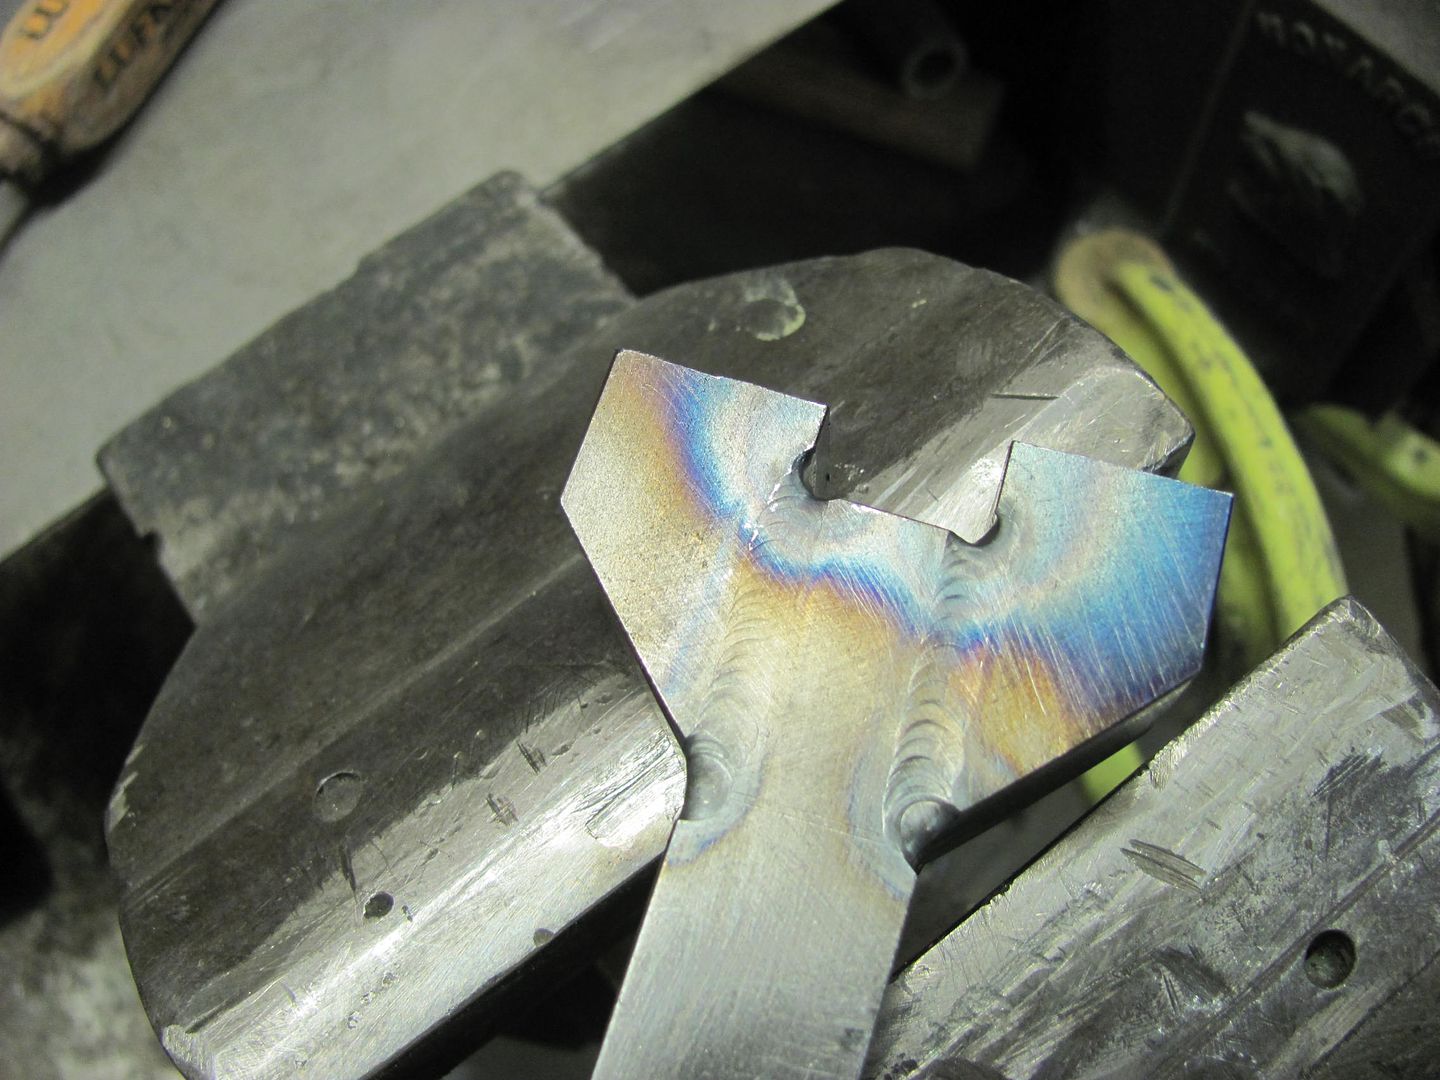
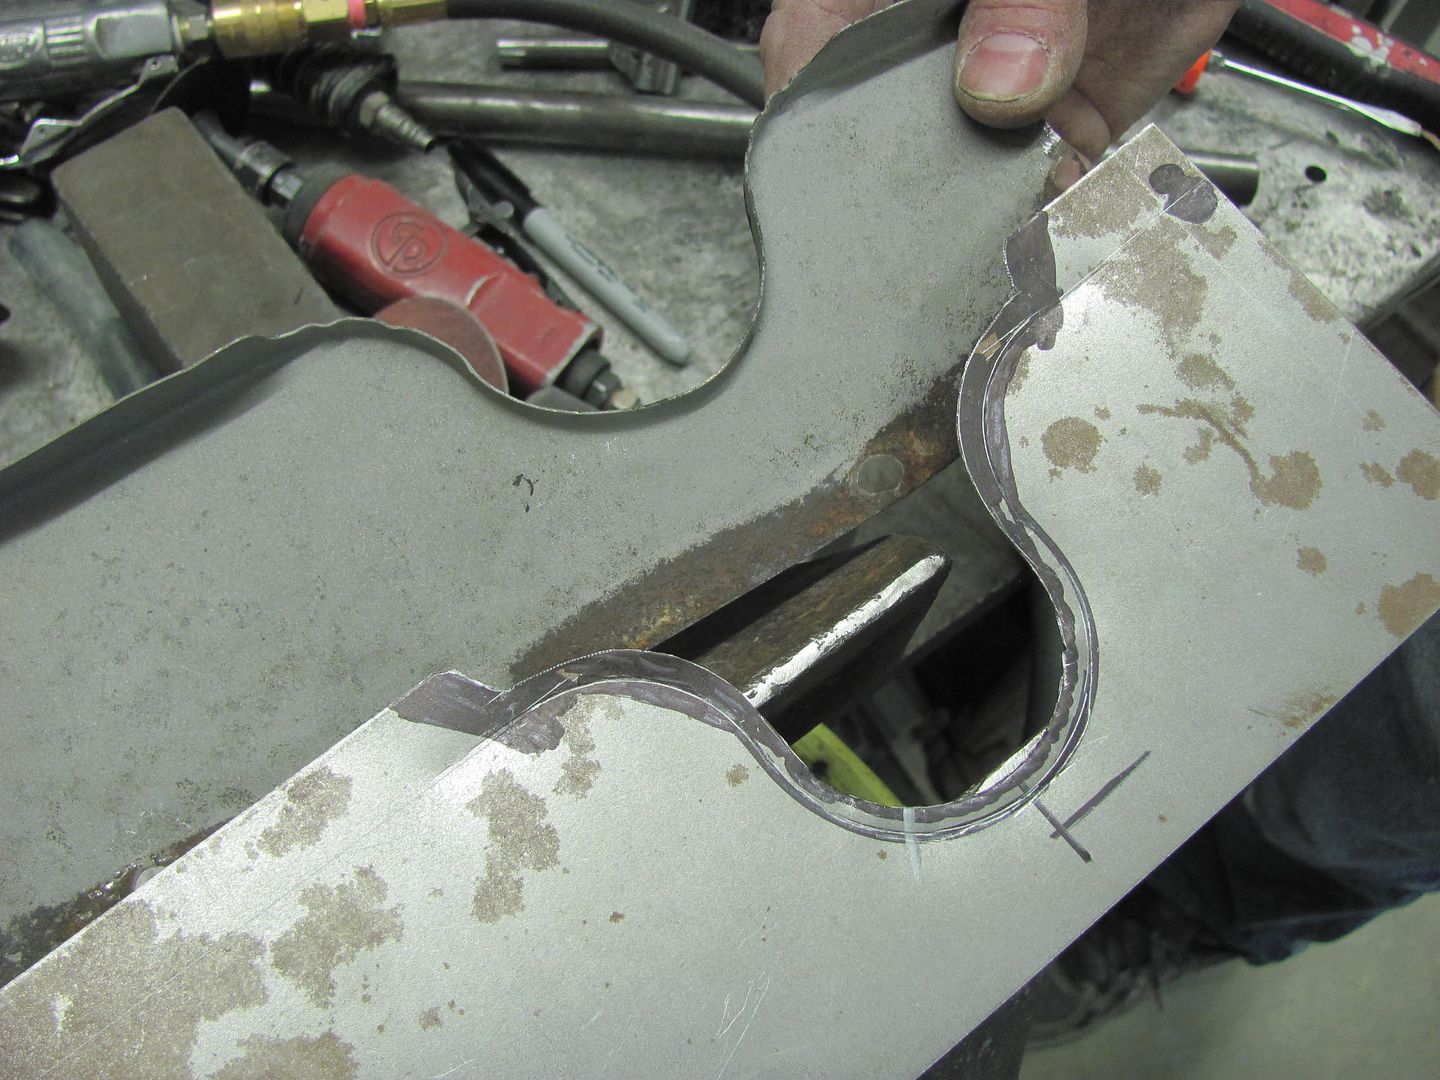
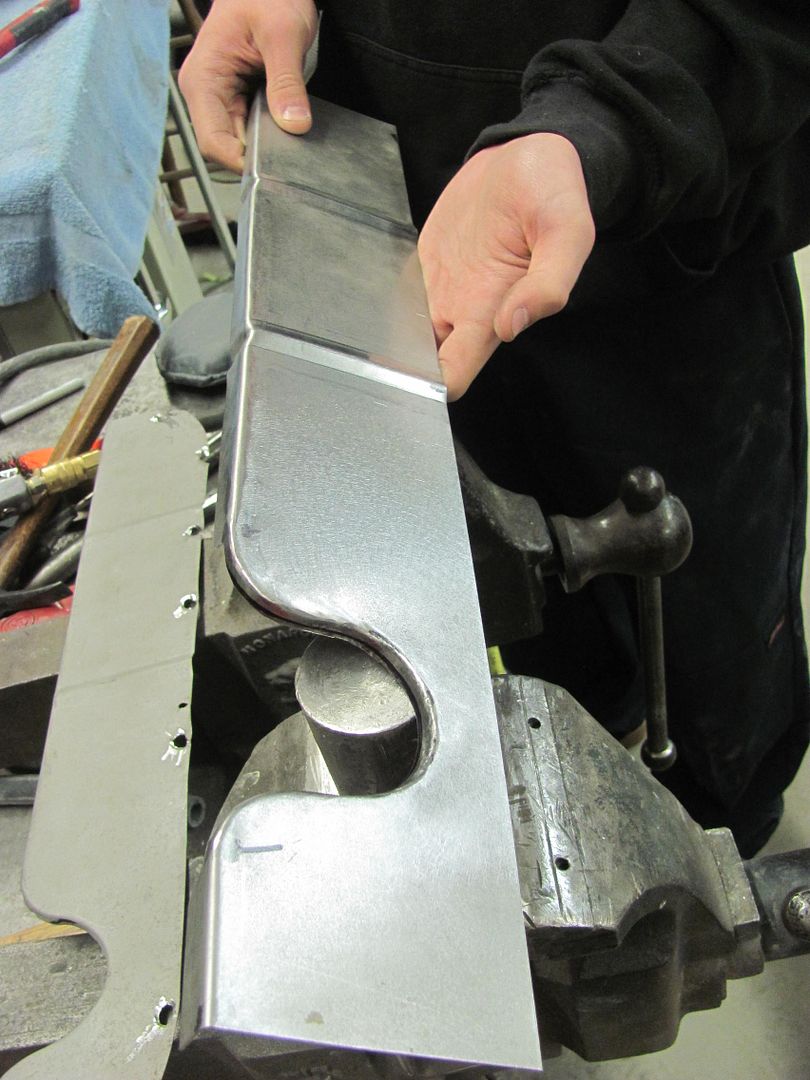
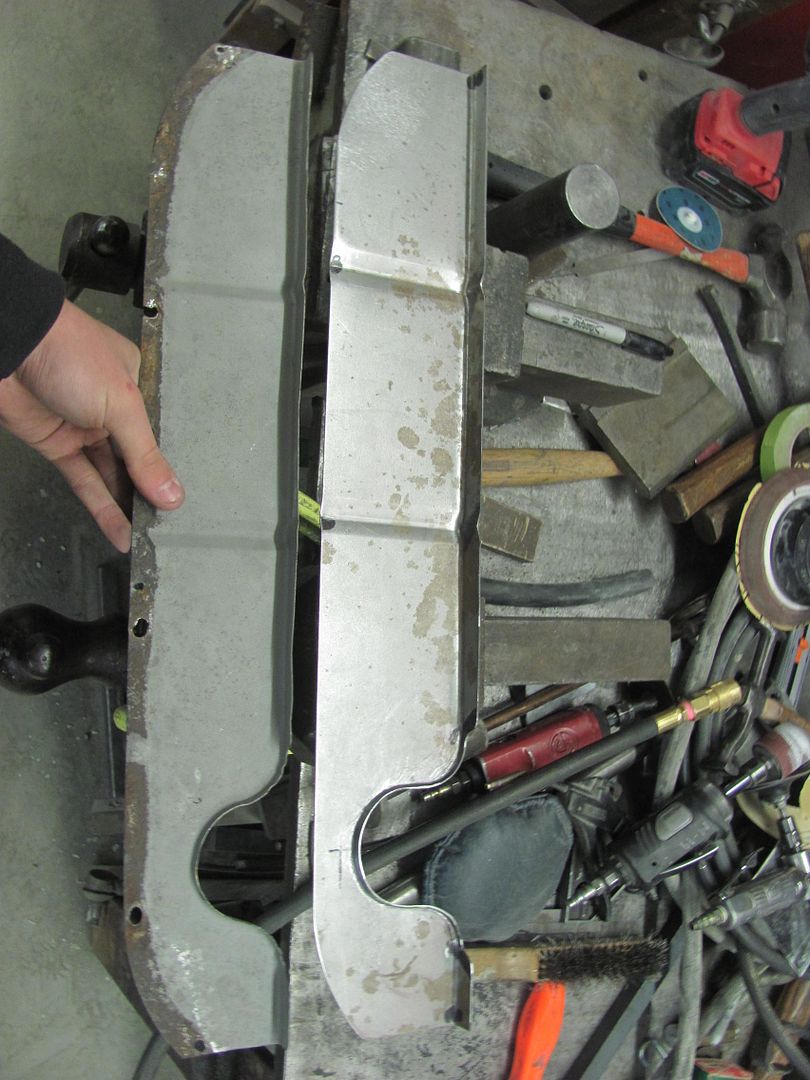
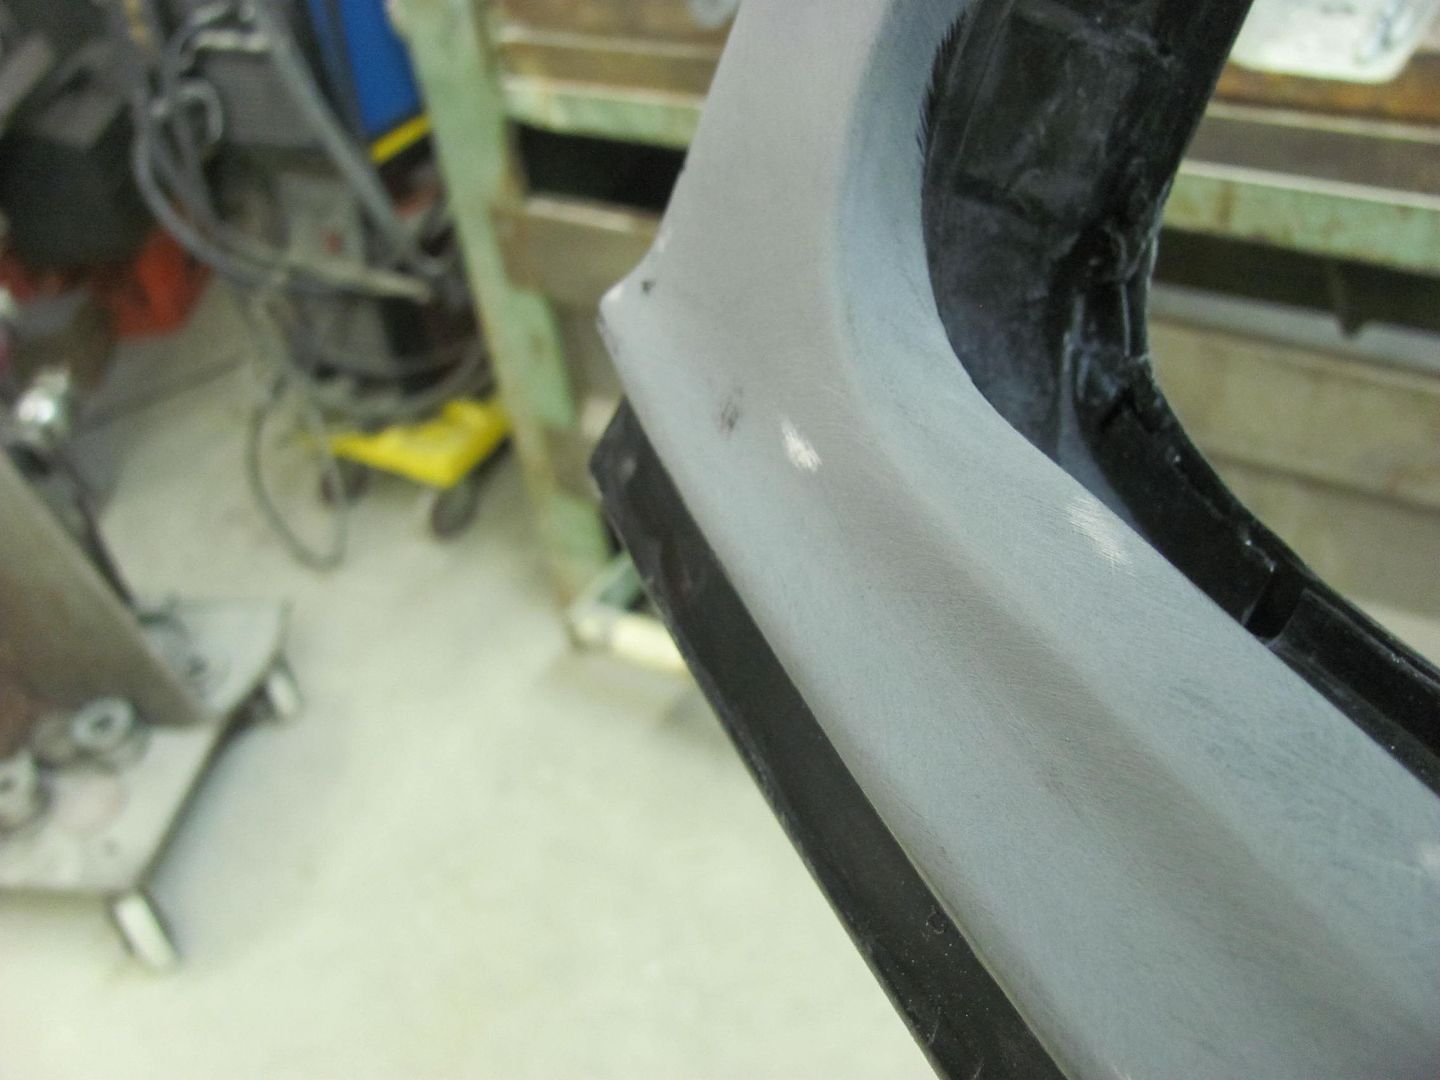
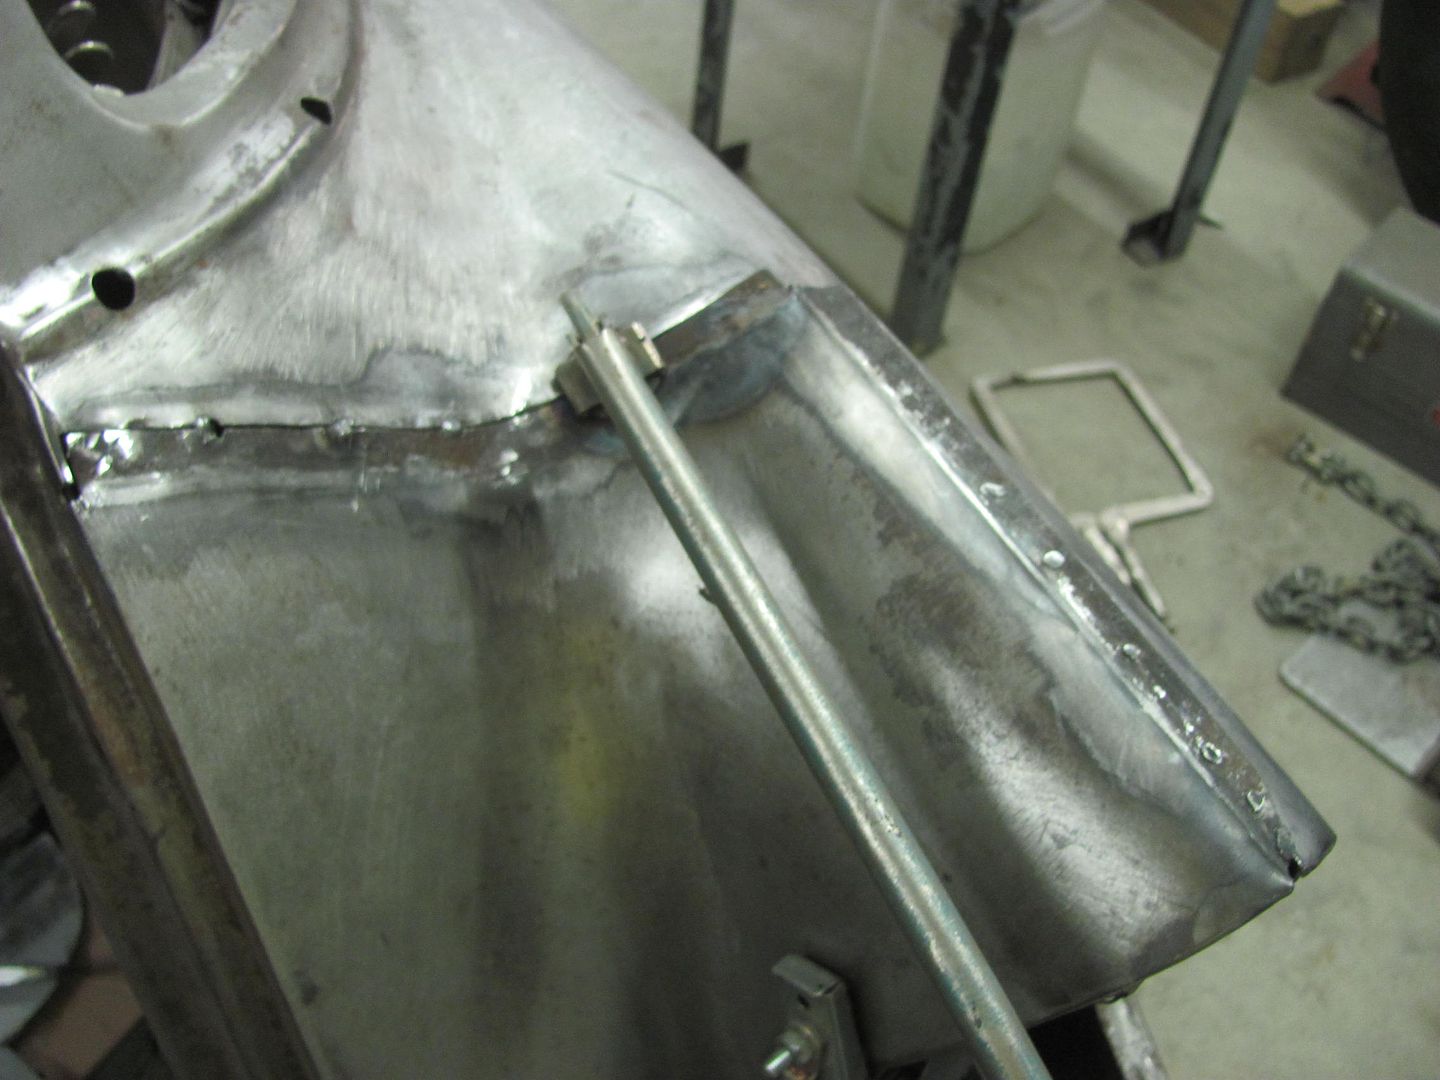
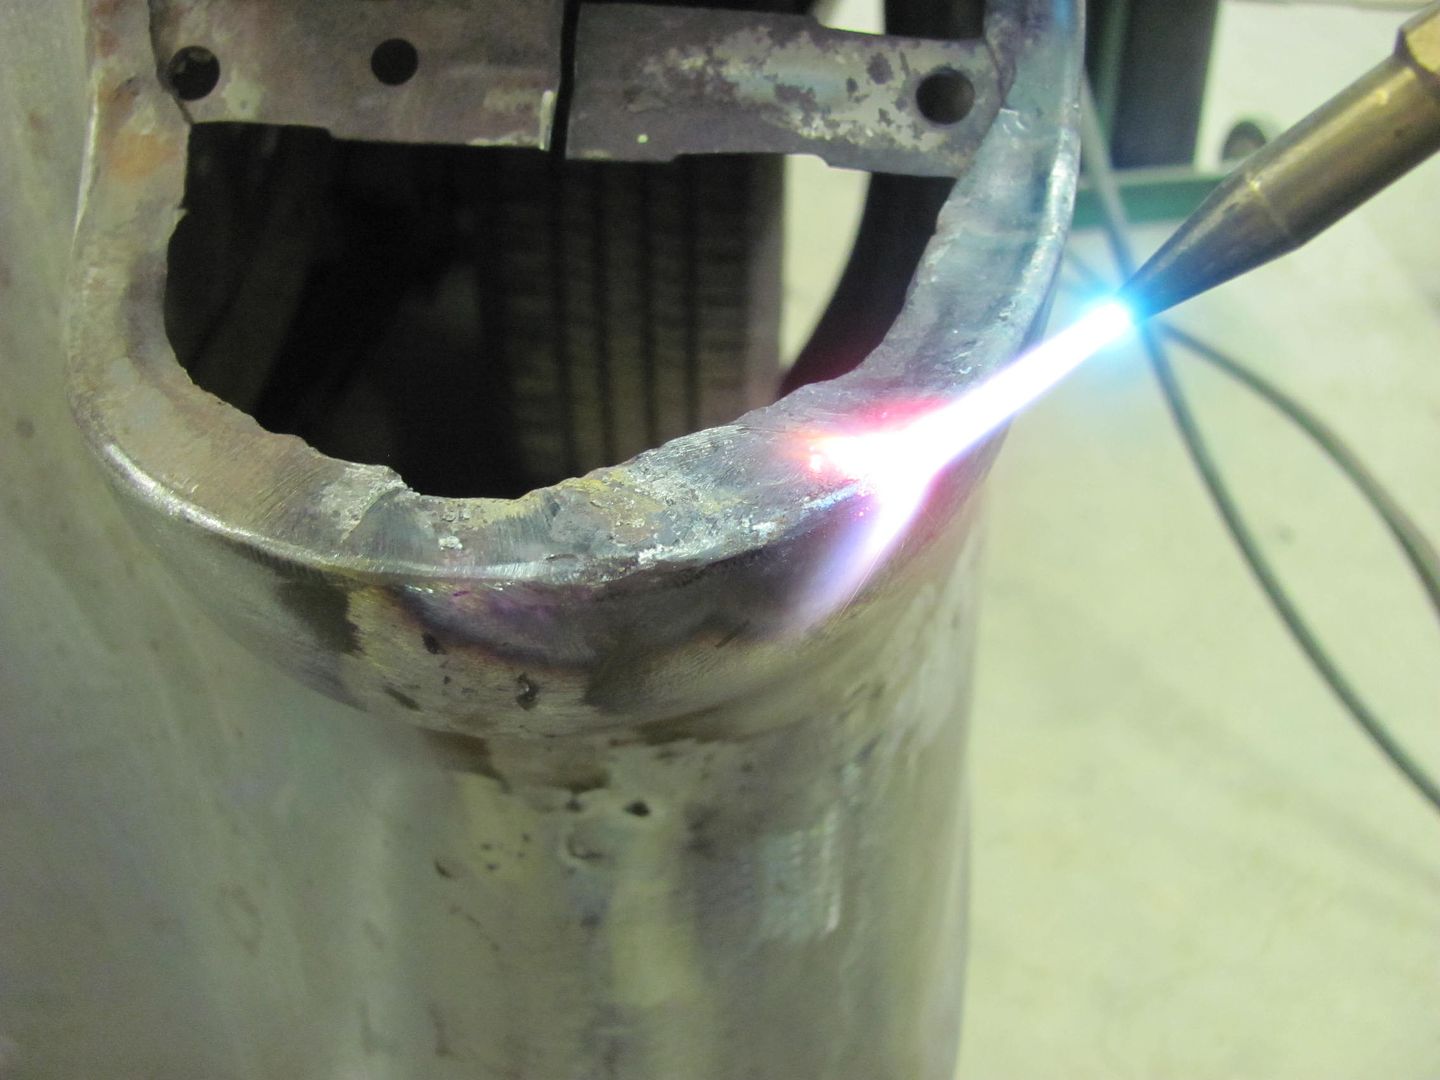
Then attention was turned to the rear quarter on the passenger side where we had shaved the lead seam..

We had held off on the tail light opening as we wanted to fit the opening to the light bezels. We had received the reproduction chrome light bezels a couple weeks ago, and gave them a protective layer to keep the chrome nice and shiny..
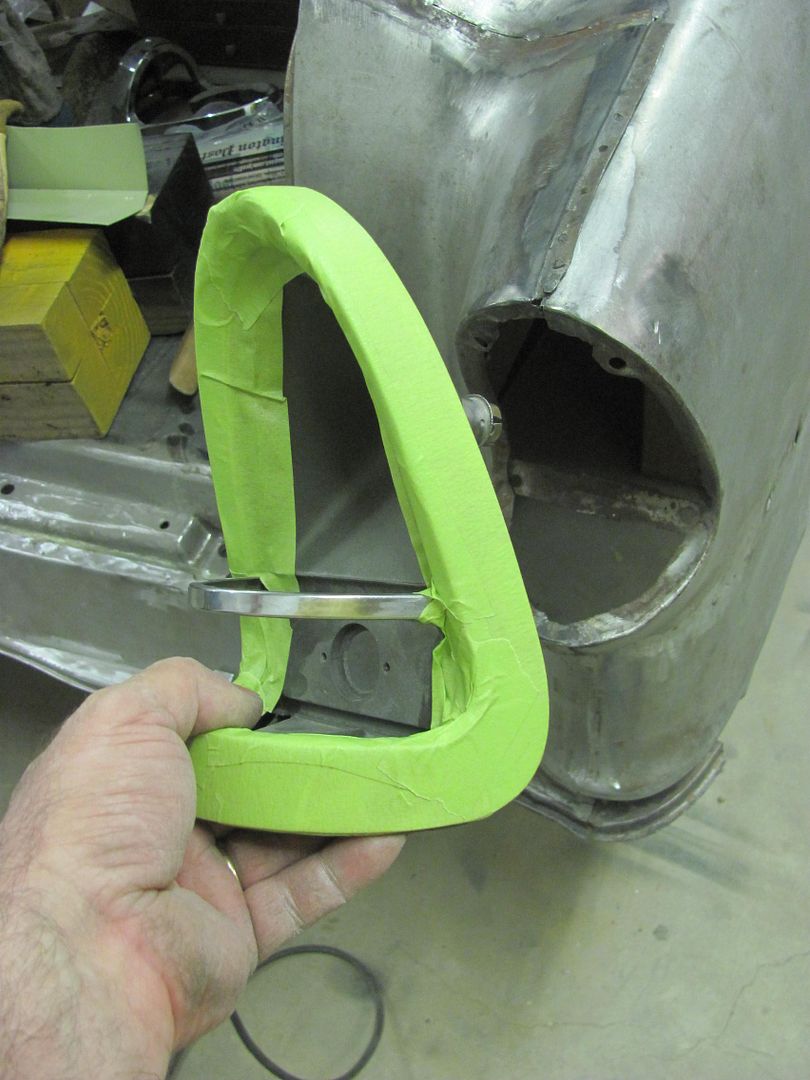
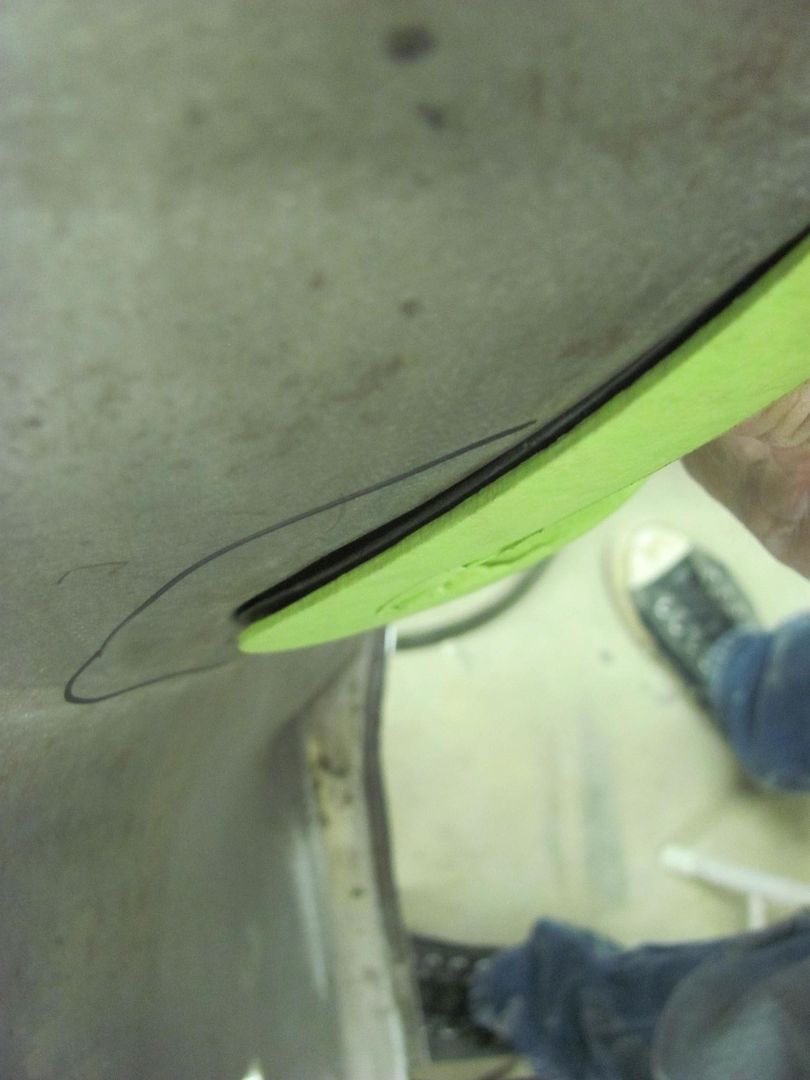
The light opening seemed all out of sorts, with a bulge protruding out past the corner of the bezel here....
Let the modifications begin!
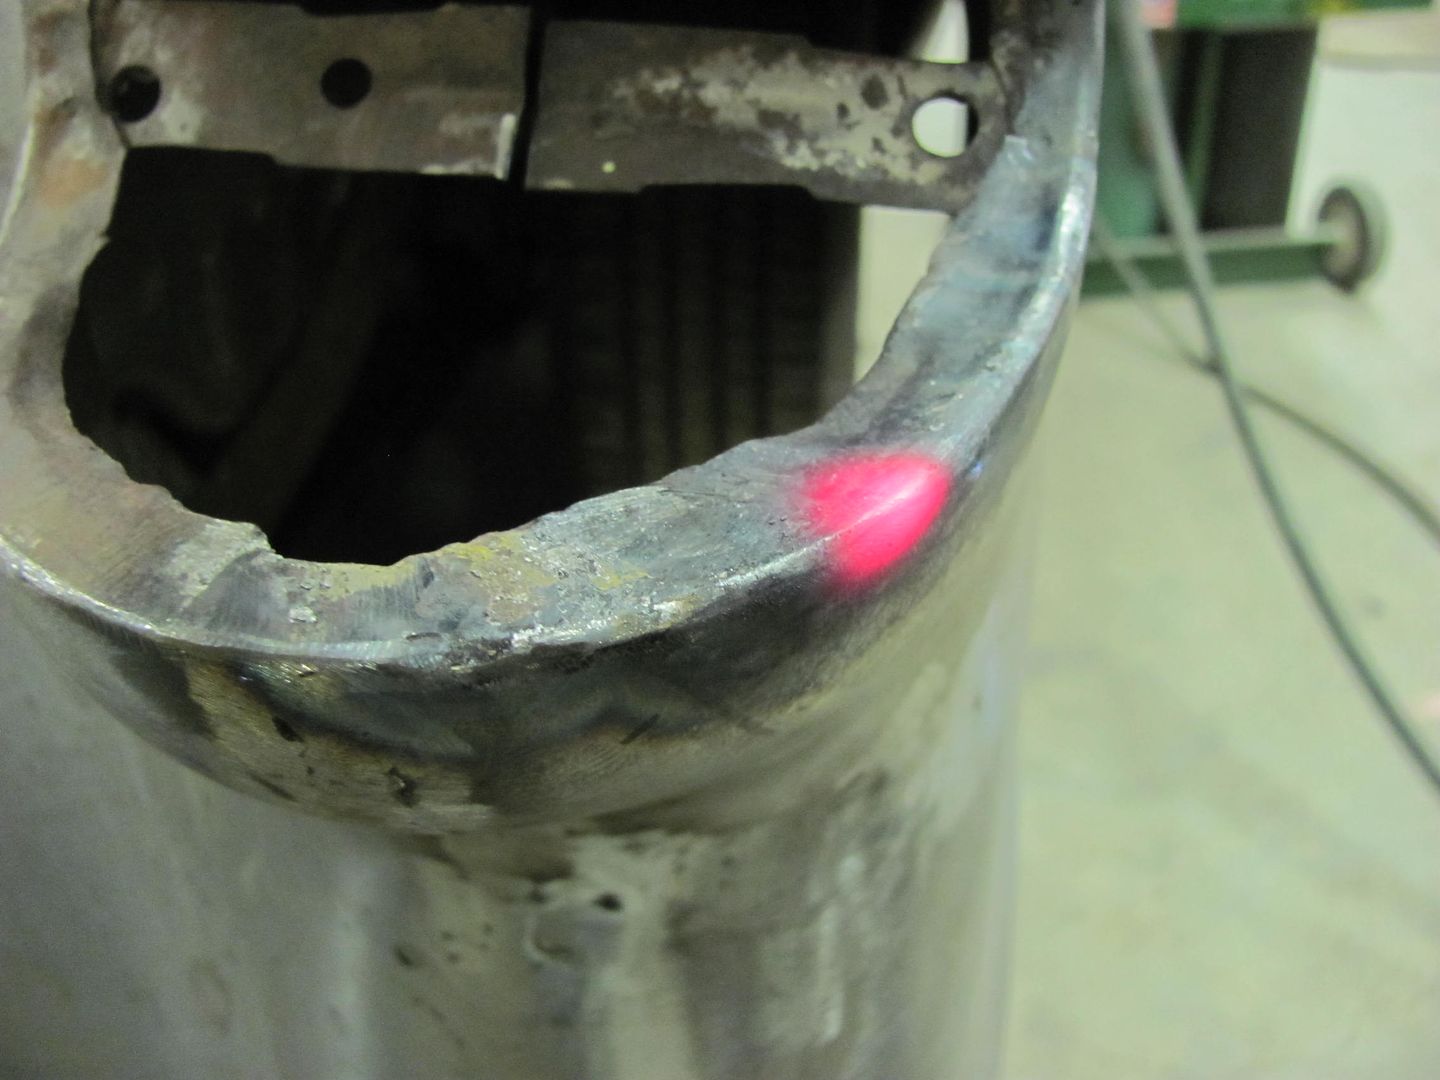
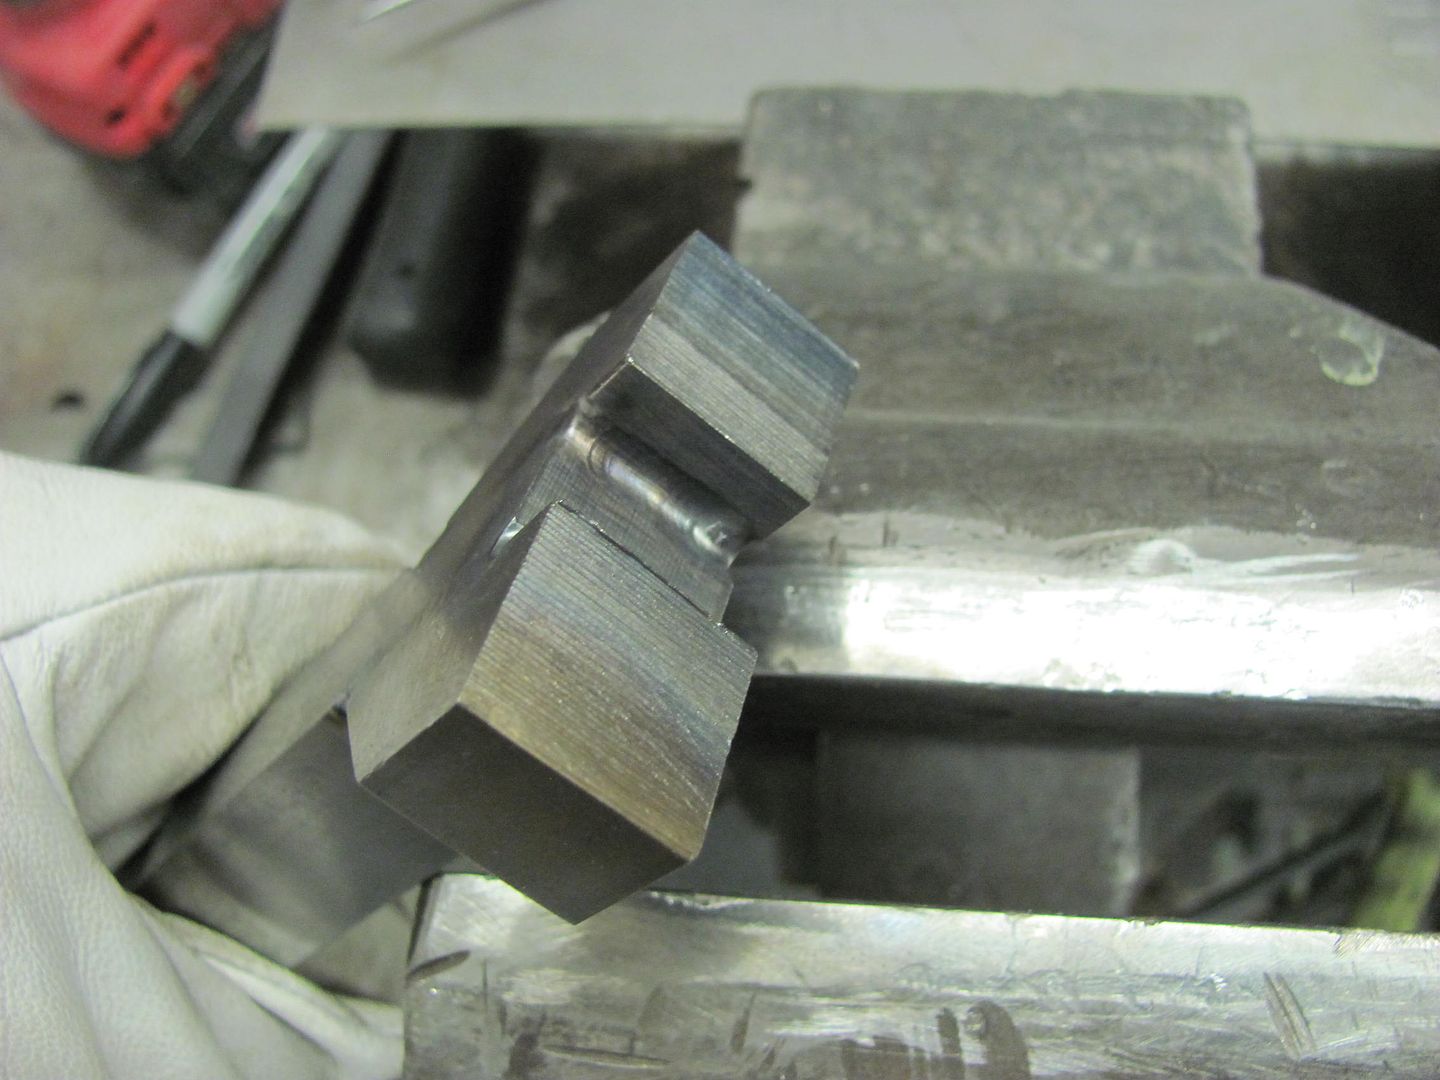
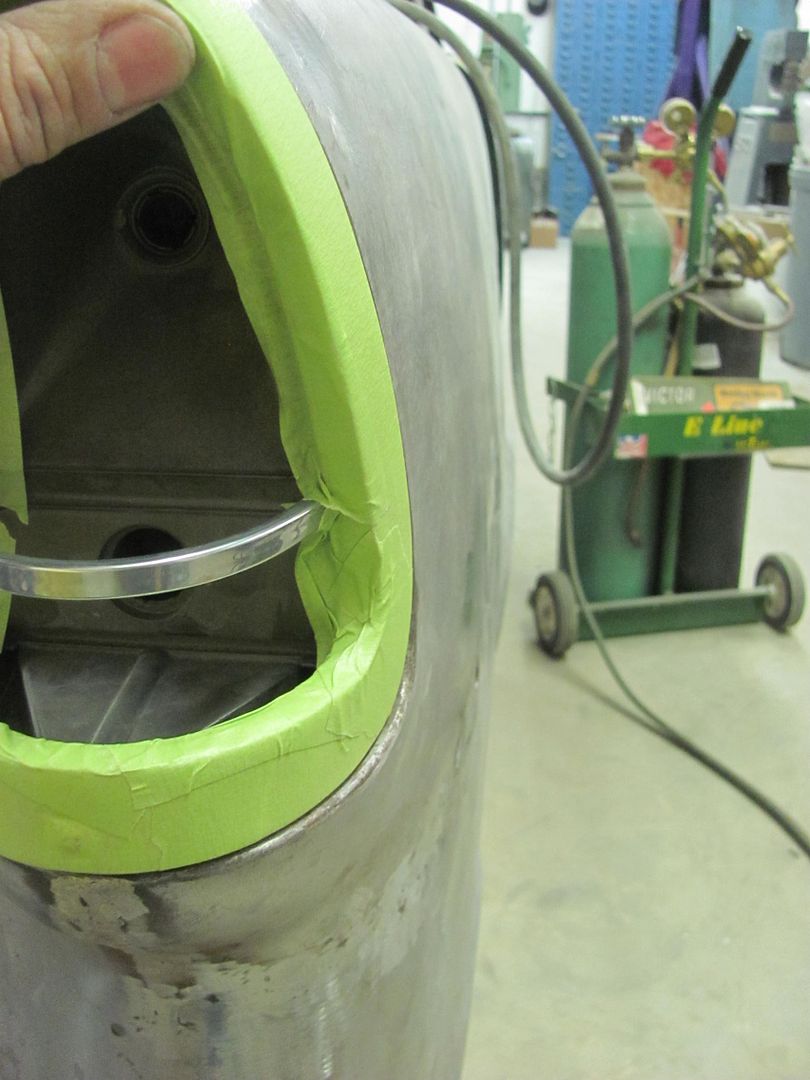
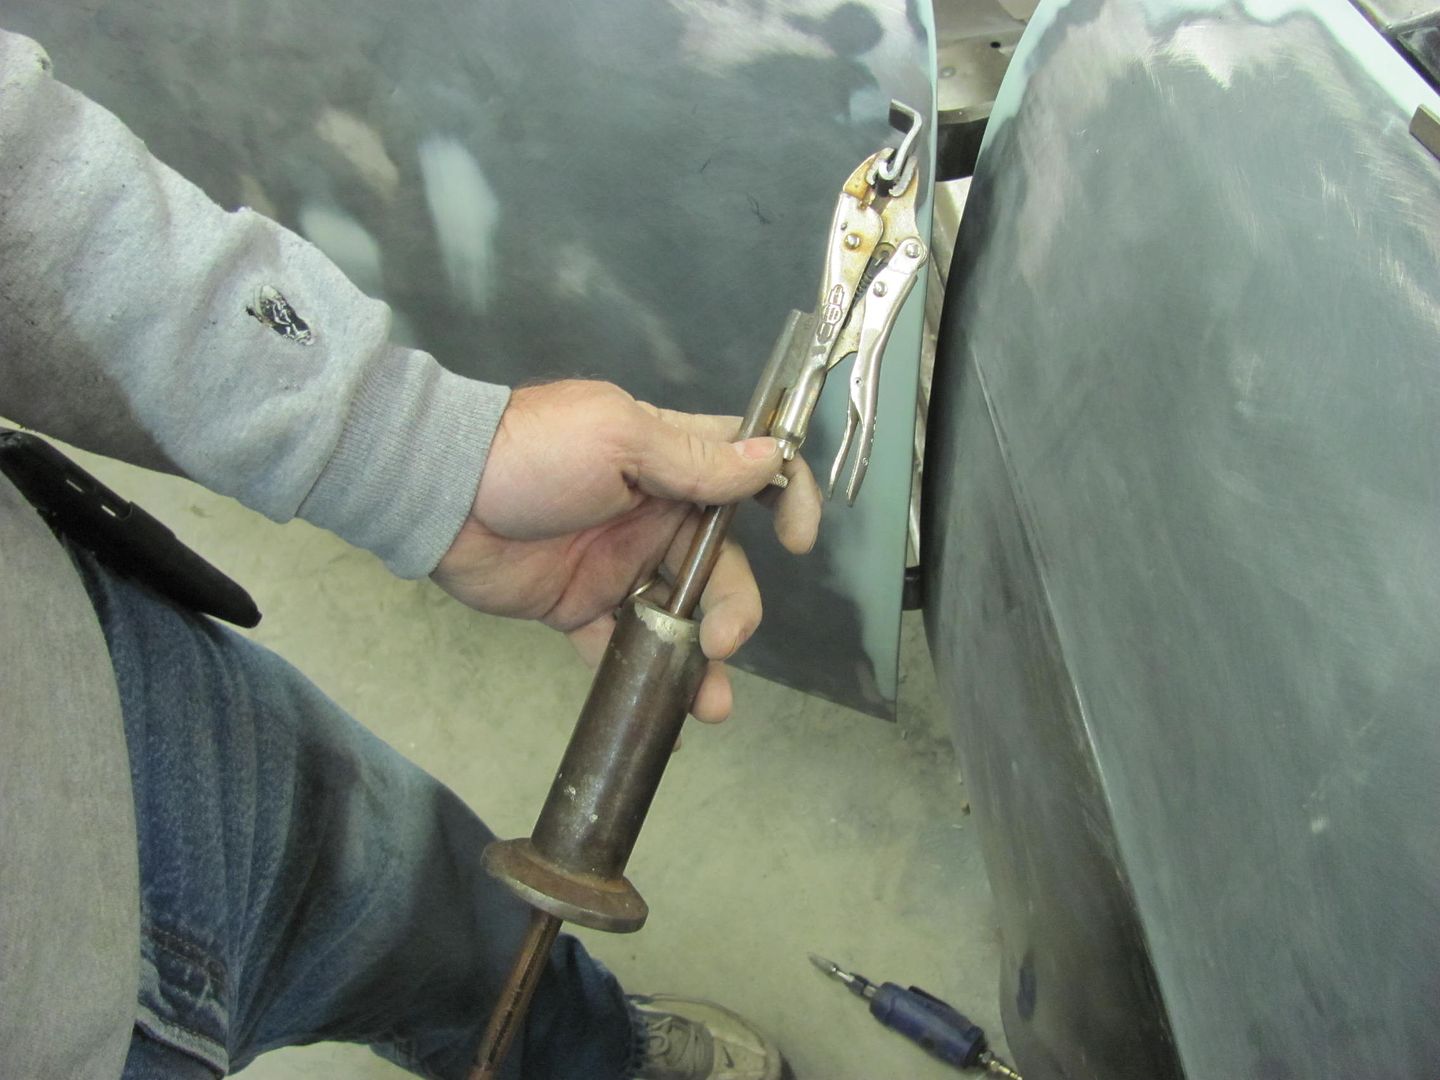
And we had the opposite problem on the inner side...
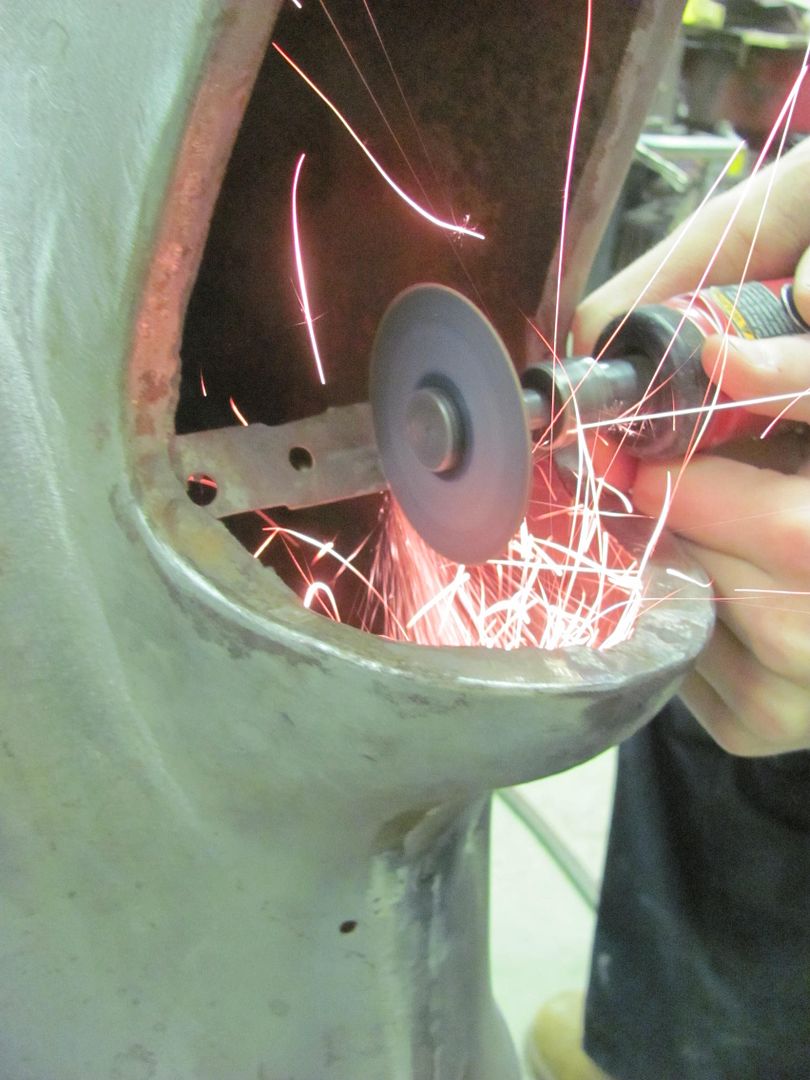
The vise grip dent puller and the special hook was used to spread the opening...
A bit better.....

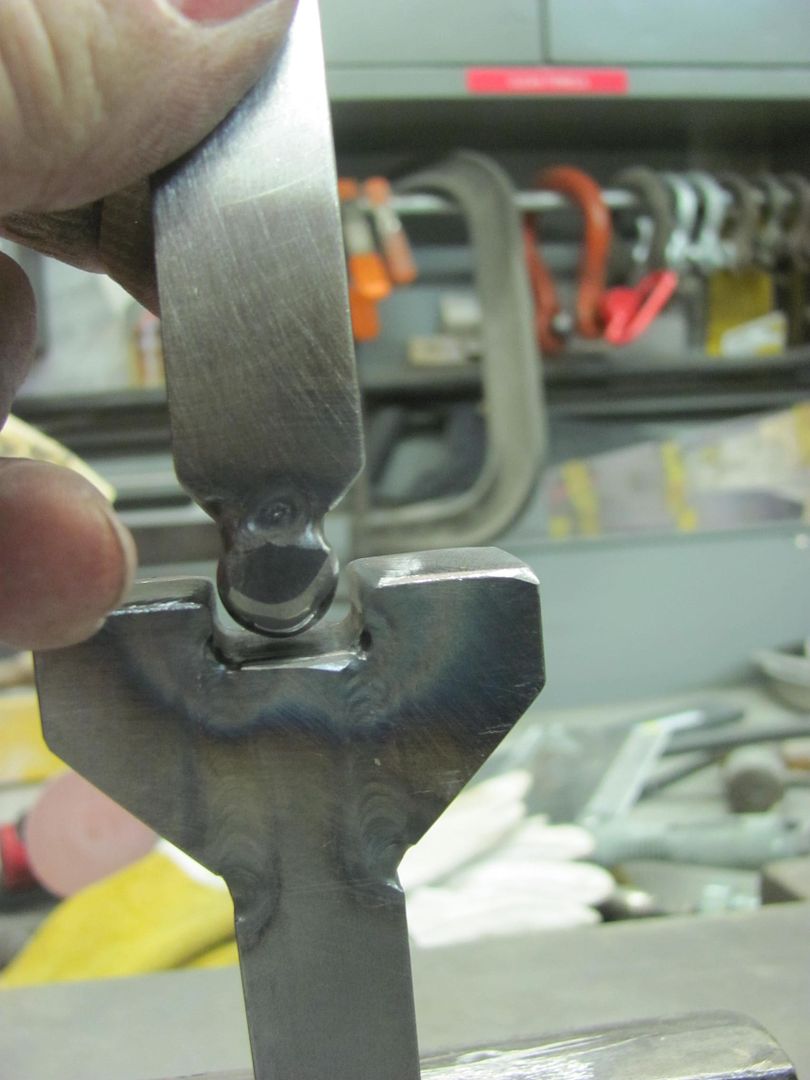
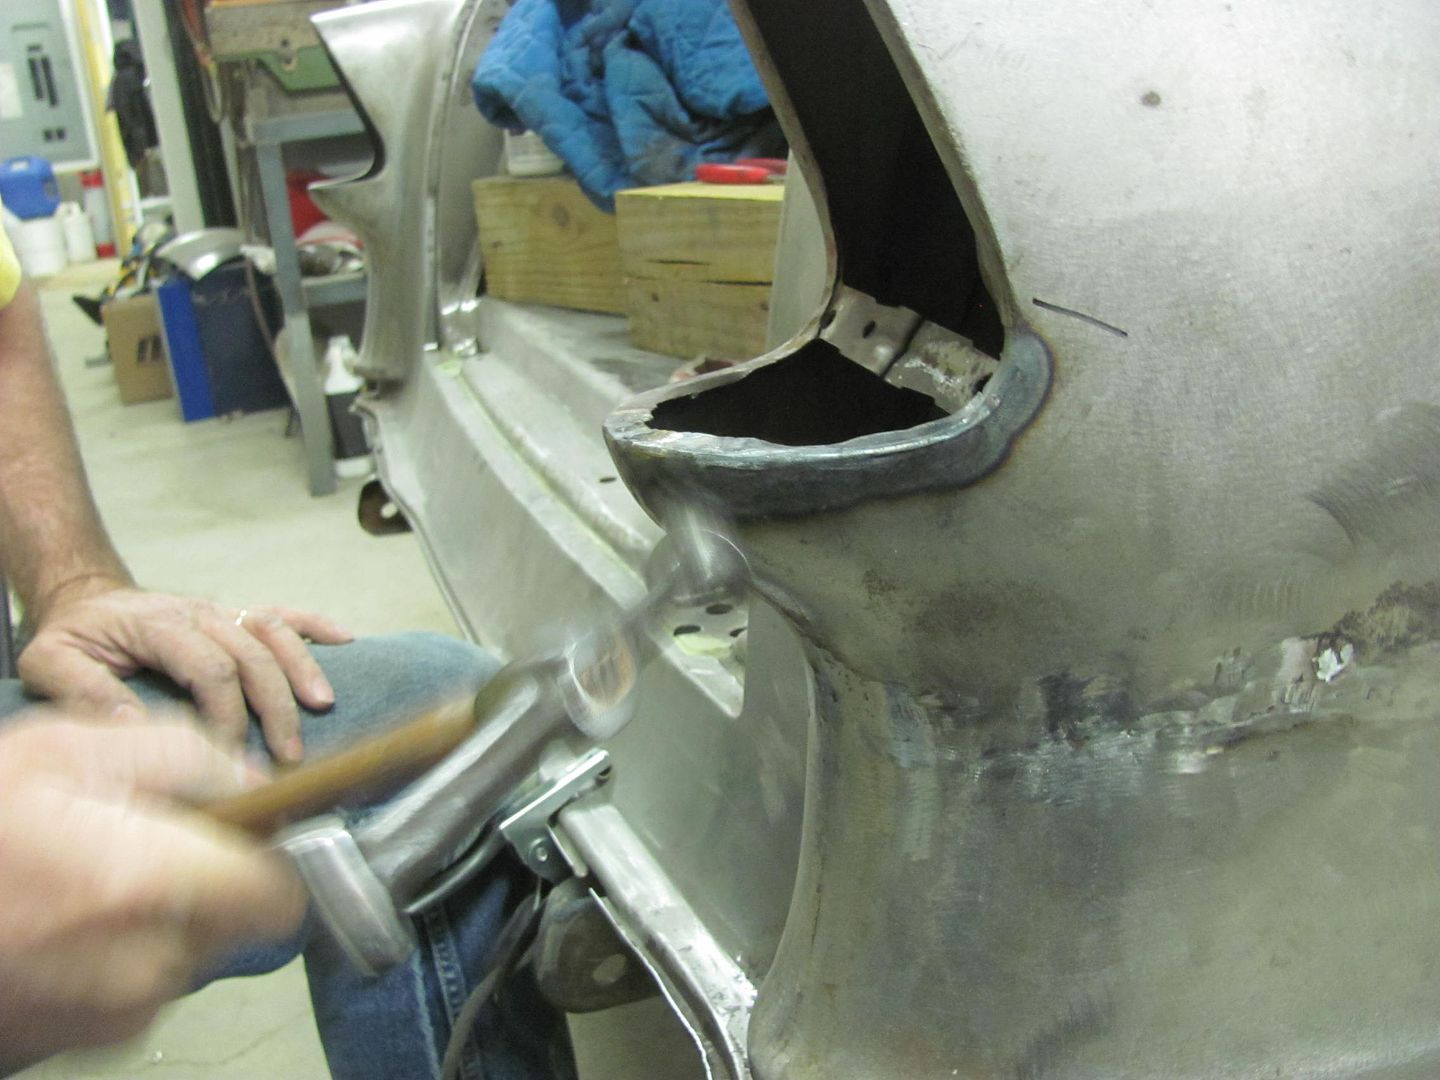
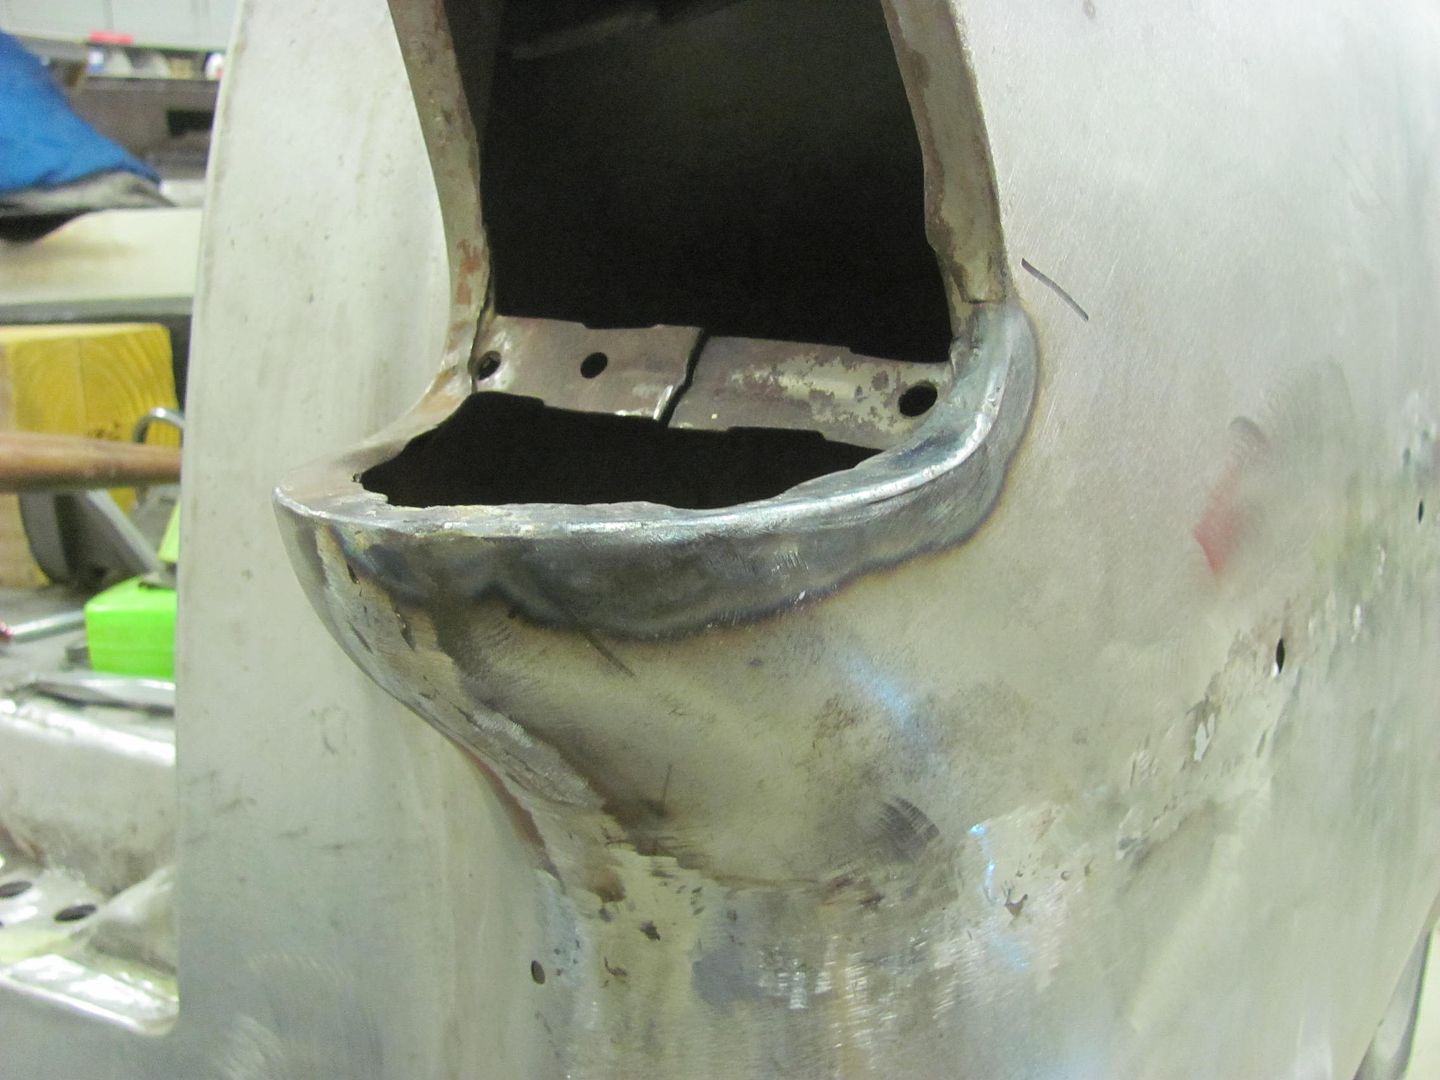
...and the tail light bracket is welded back together.. This mod seemed to make the attaching holes align better as well..
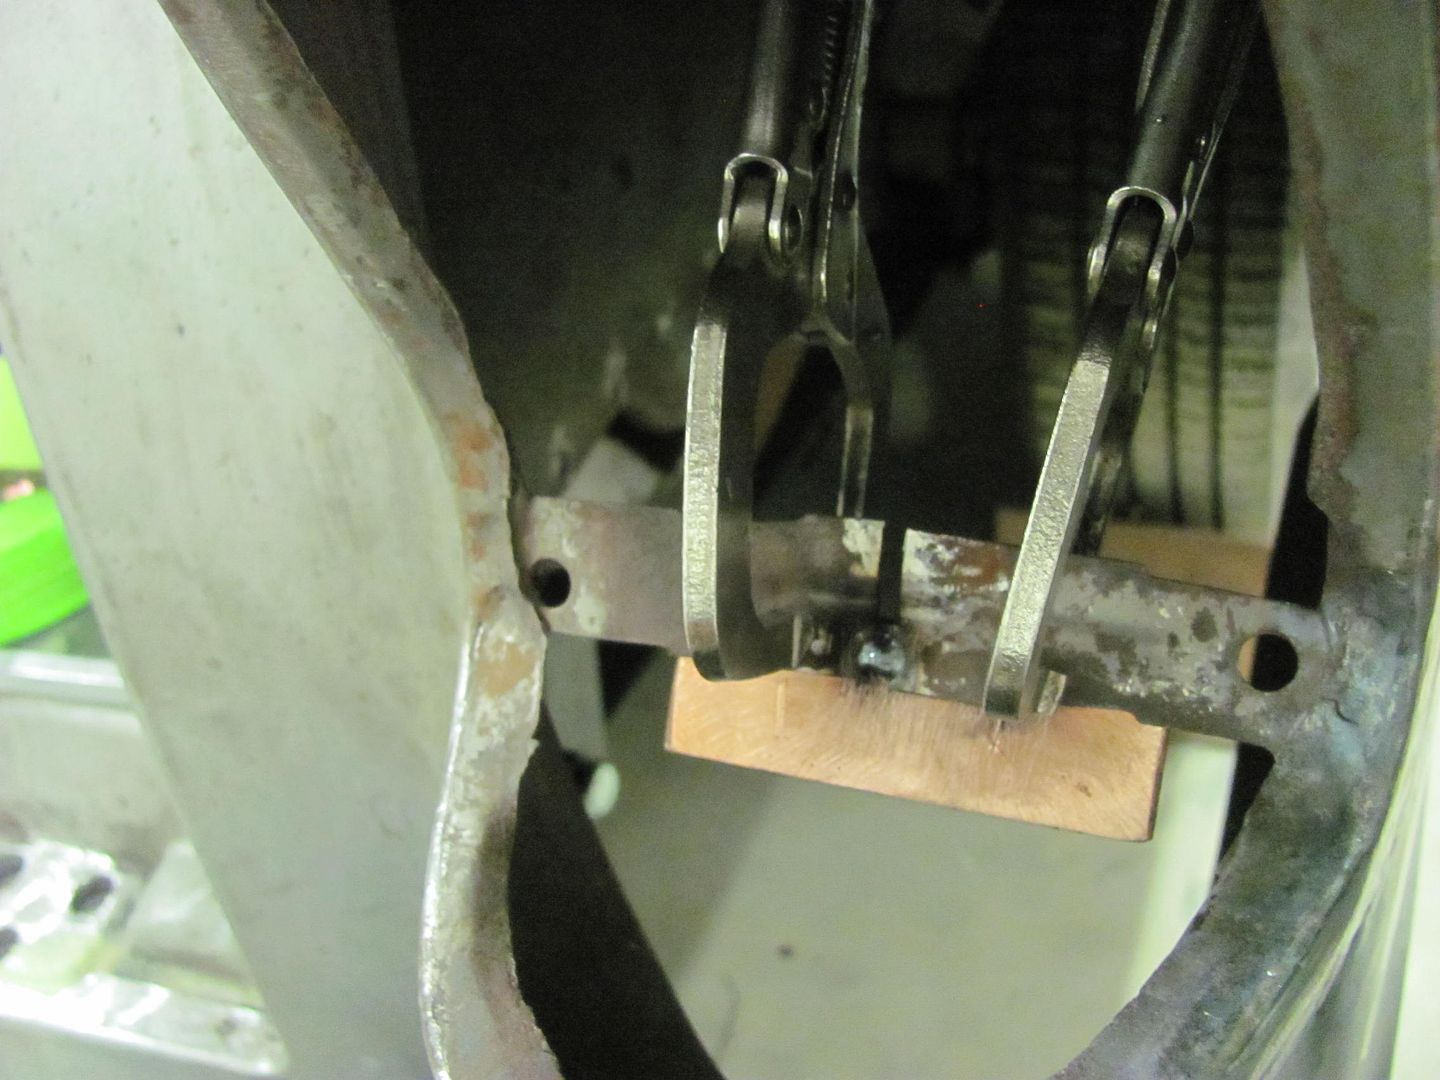
And Kyle continues to finish up the seam and we'll fine tune the opening once more when the welding and planishing is complete.

The modified relief we fabricated shows to be about as low as we could have made it..
Then attention was turned to the rear quarter on the passenger side where we had shaved the lead seam..
We had held off on the tail light opening as we wanted to fit the opening to the light bezels. We had received the reproduction chrome light bezels a couple weeks ago, and gave them a protective layer to keep the chrome nice and shiny..
The light opening seemed all out of sorts, with a bulge protruding out past the corner of the bezel here....
Let the modifications begin!
And we had the opposite problem on the inner side...
The vise grip dent puller and the special hook was used to spread the opening...
A bit better.....
...and the tail light bracket is welded back together.. This mod seemed to make the attaching holes align better as well..
And Kyle continues to finish up the seam and we'll fine tune the opening once more when the welding and planishing is complete.
aggierailroad
Well-known member
Do you feel like you will ever finish?
This reminds me of the whack-a-mole game... !
Great job as always, Robert.
This reminds me of the whack-a-mole game... !
Great job as always, Robert.