I'm on a few metalshapers groups on Facebook, one shows quite a bit of coachwork like your describing, with another group dedicated strictly to building bucks, software to use, etc.. All are private groups so you don't have to contend with ads.. If you're on FB and want to PM me your account name, I can forward the links to the applicable groups through FB.

You are using an out of date browser. It may not display this or other websites correctly.
You should upgrade or use an alternative browser.
You should upgrade or use an alternative browser.
MP&C Shop Projects
- Thread starter MP&C
- Start date
Mr onetwo
Well-known member
Thanks Robert...I'll PM you after I figure the whole Facebook thing out


This weekend we got the three hex nuts welded underneath seat bracket number two, fourth hole is a bolt through......
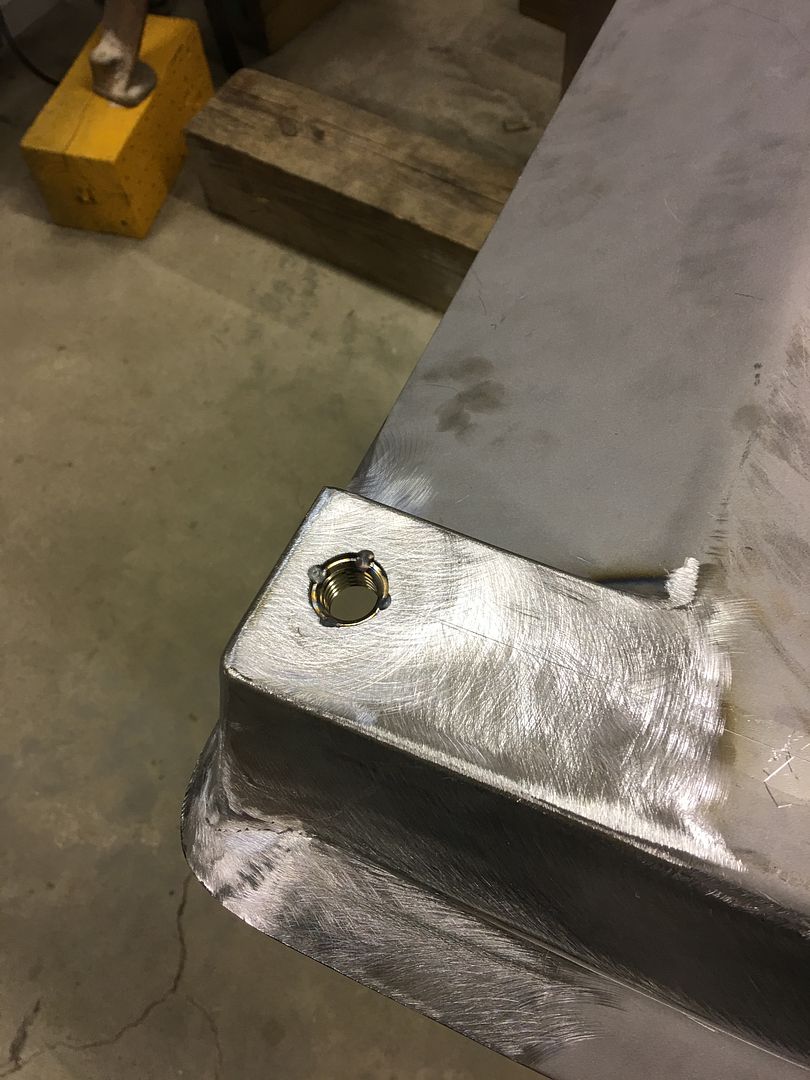
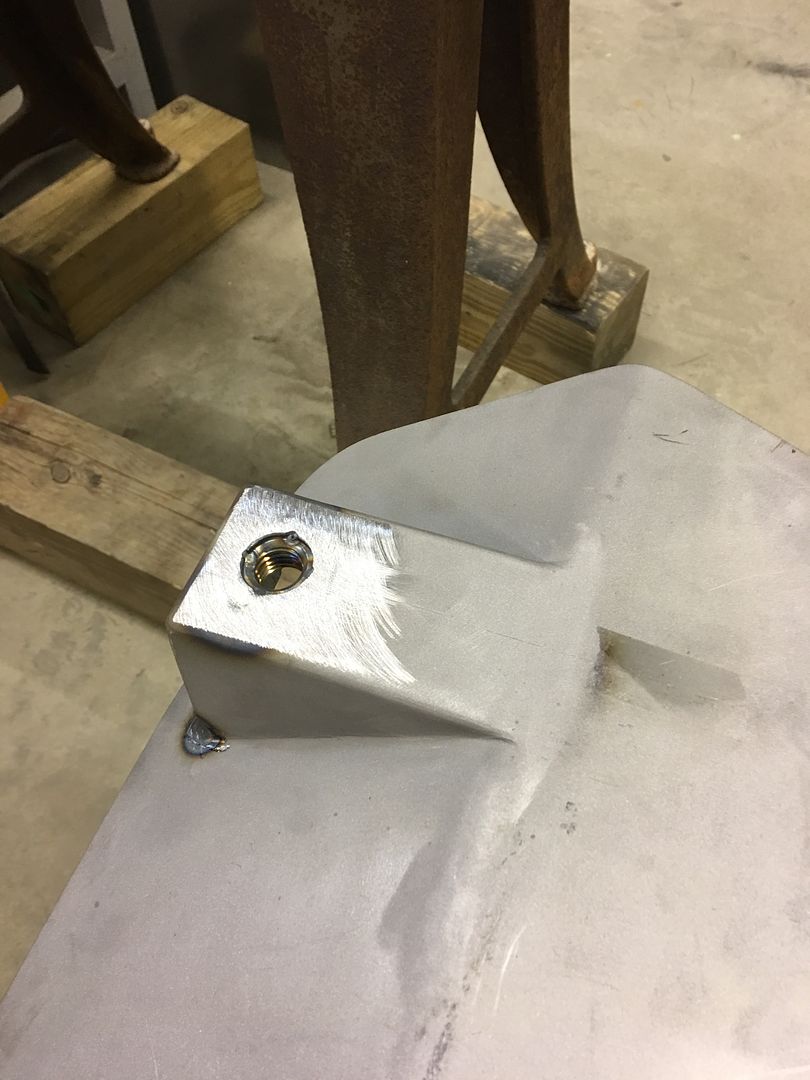
1/4" tall spacers fabricated to make the seat tracks level, then tacked in place on the front holes..

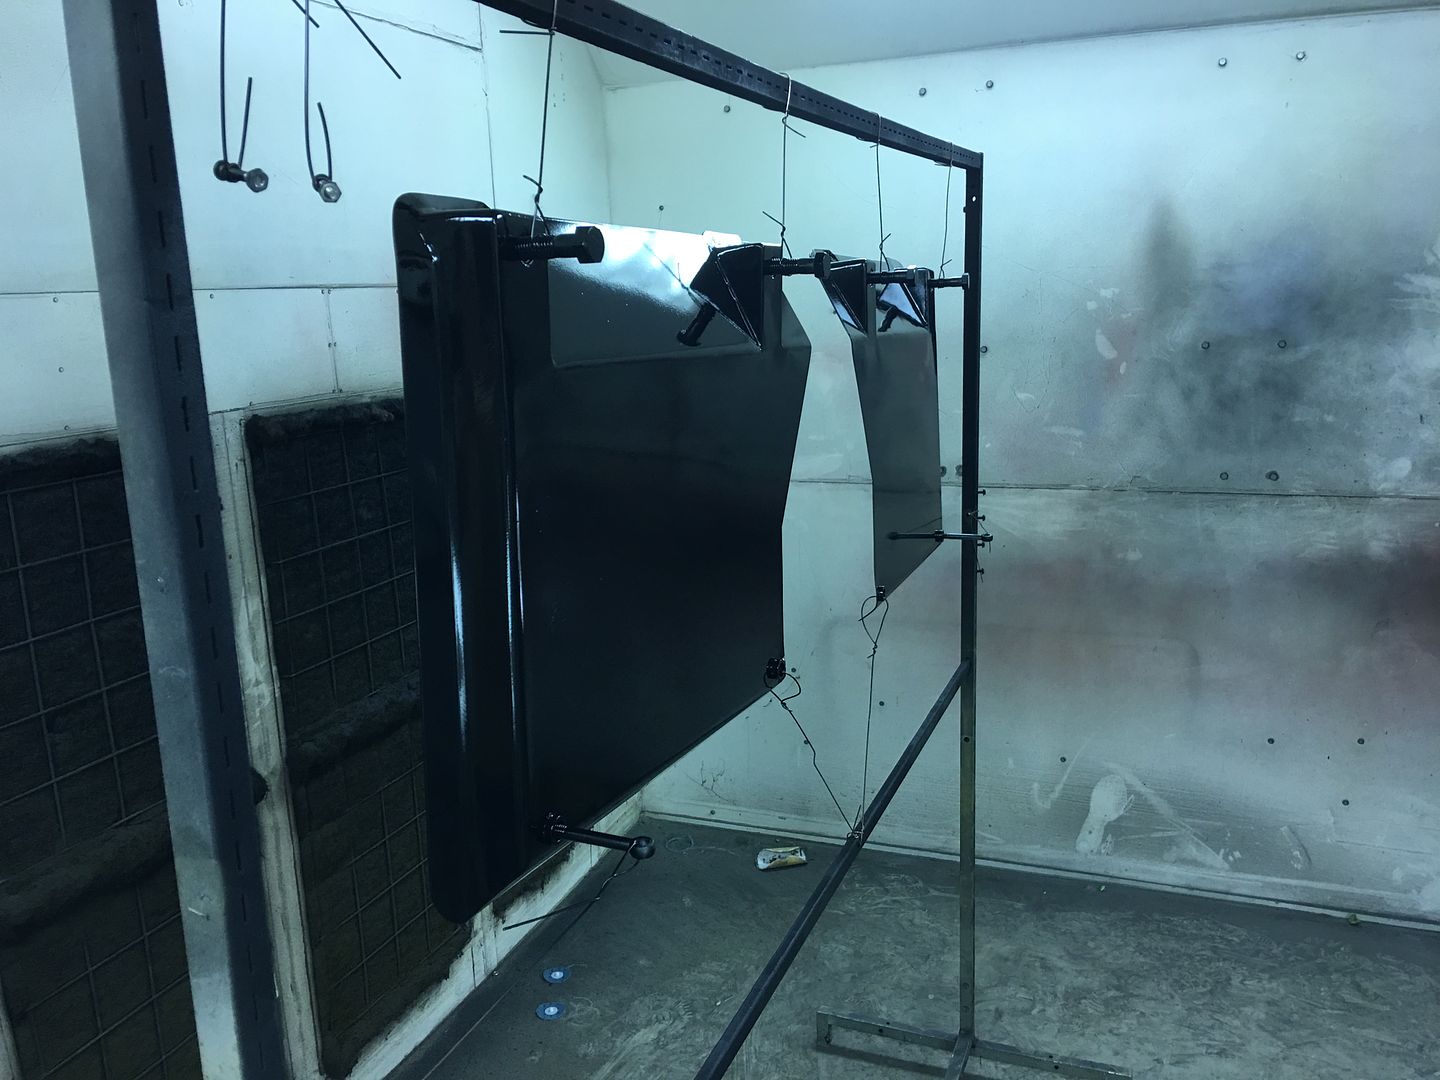
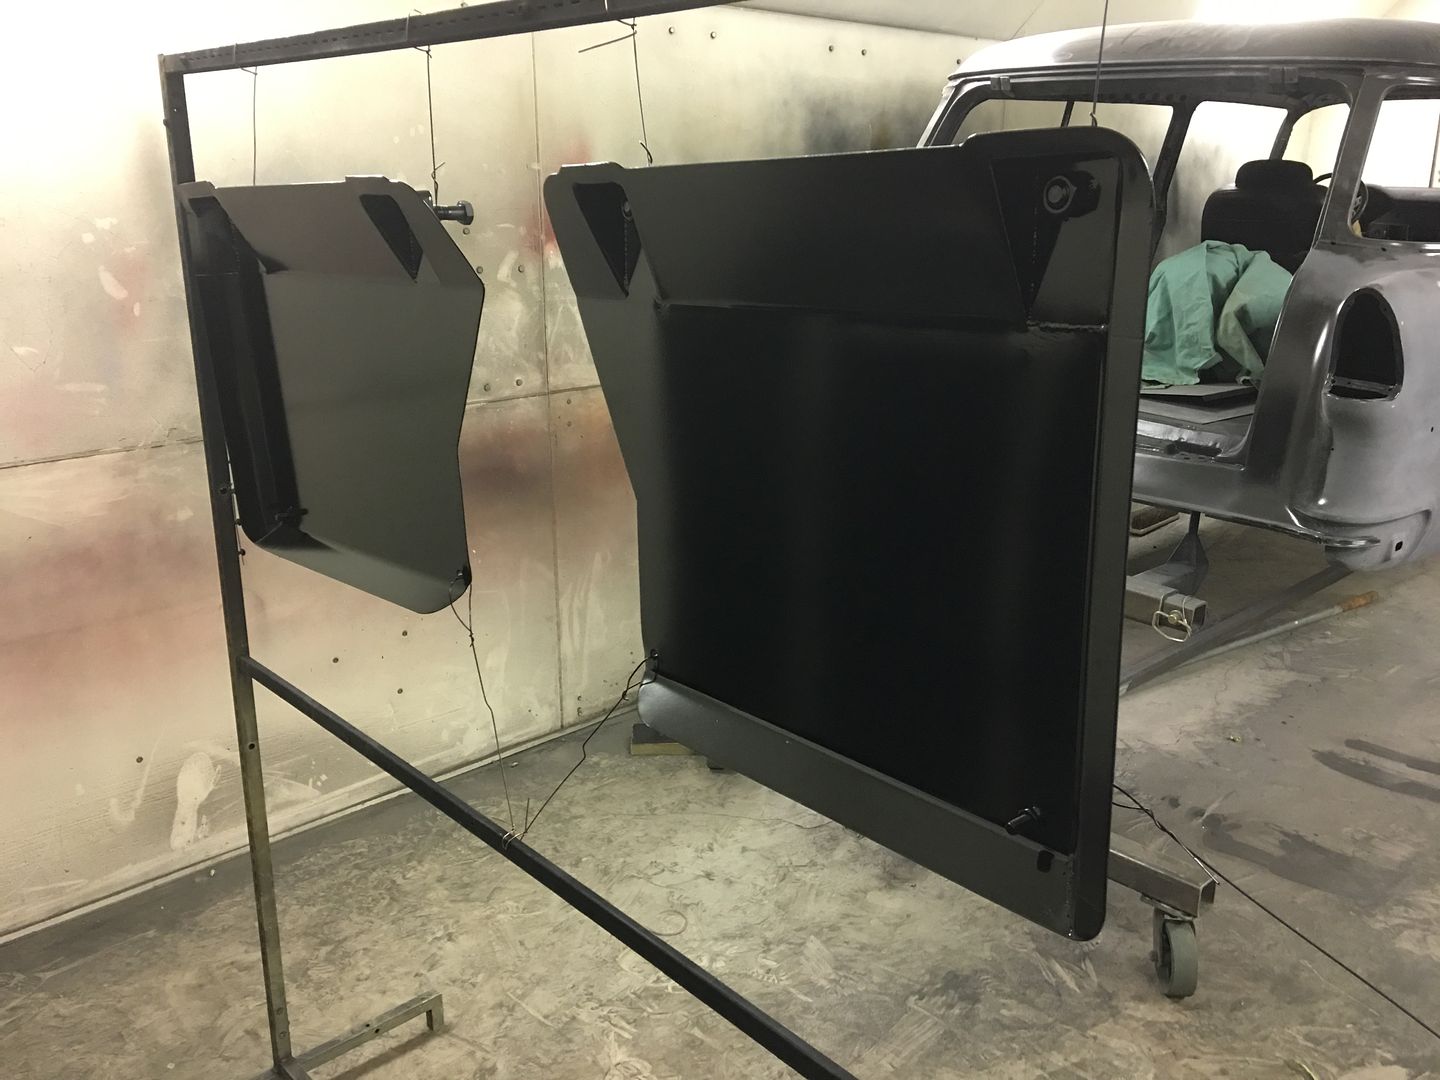
Prepped and hung up for epoxy primer...
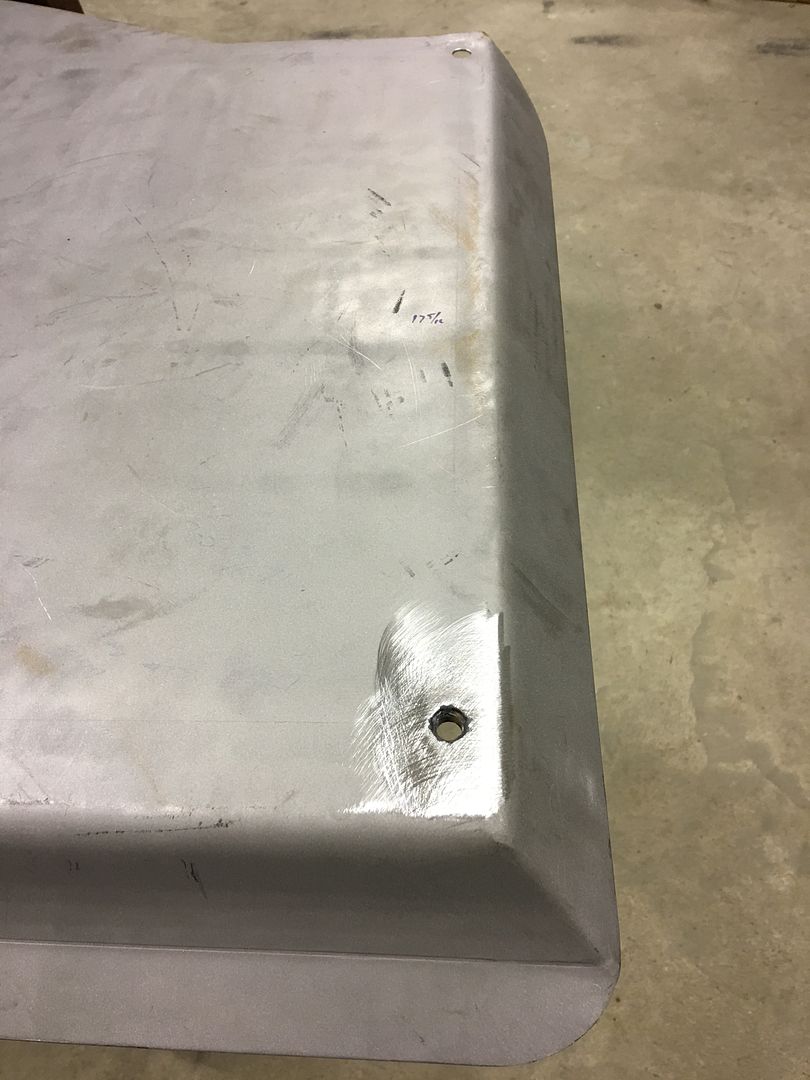
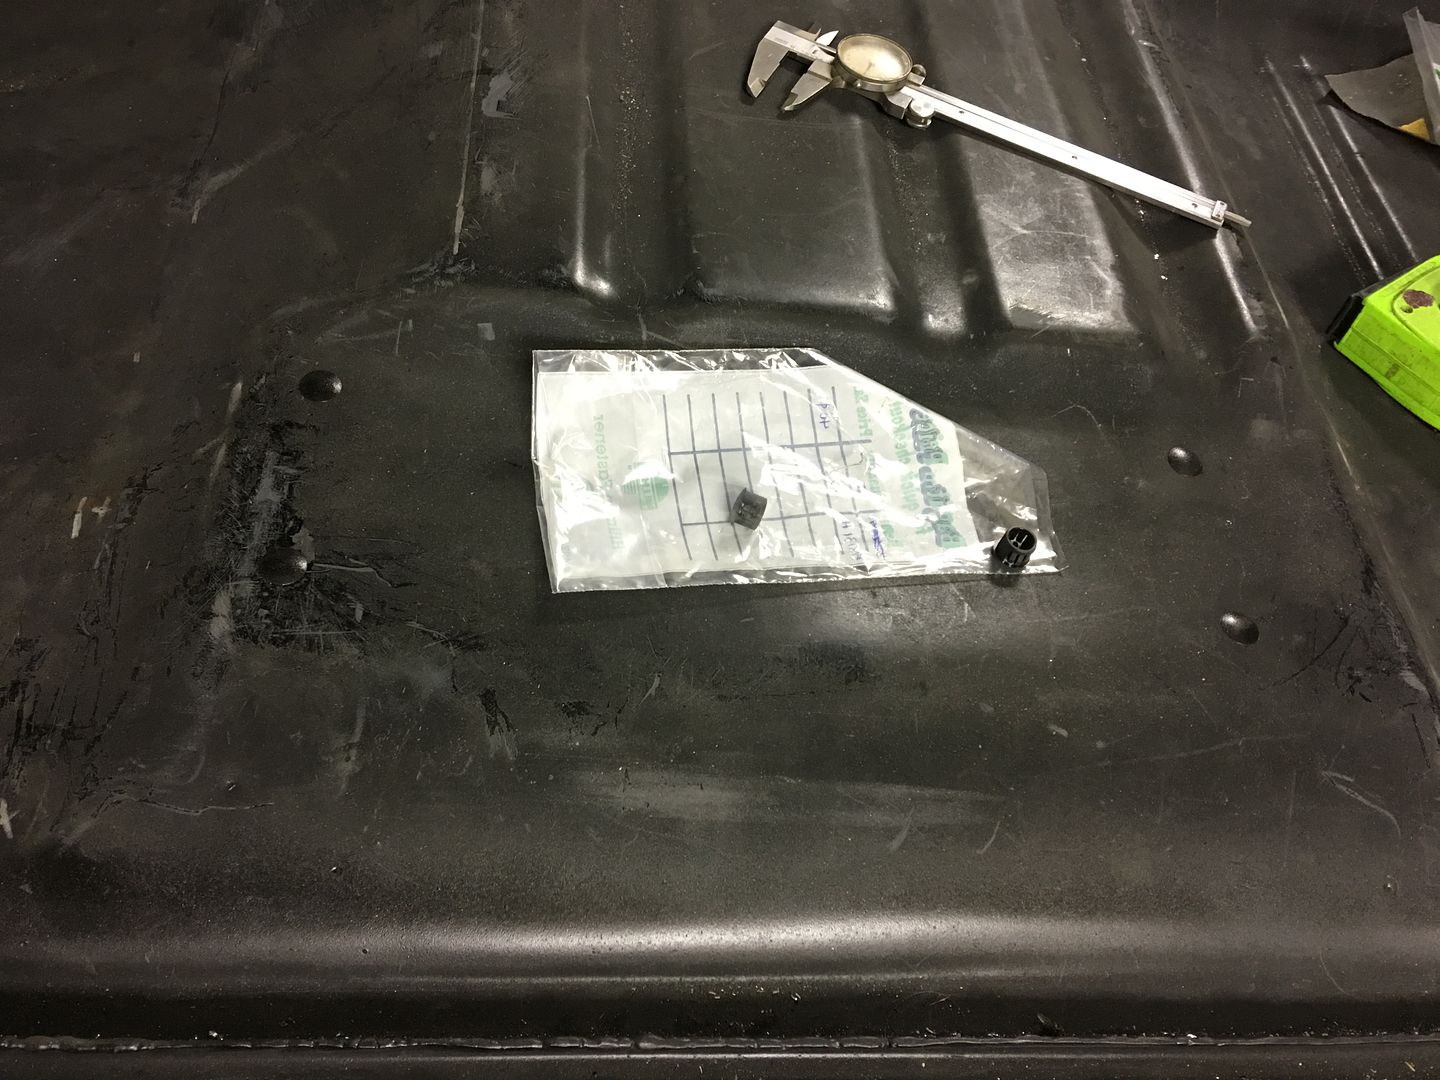
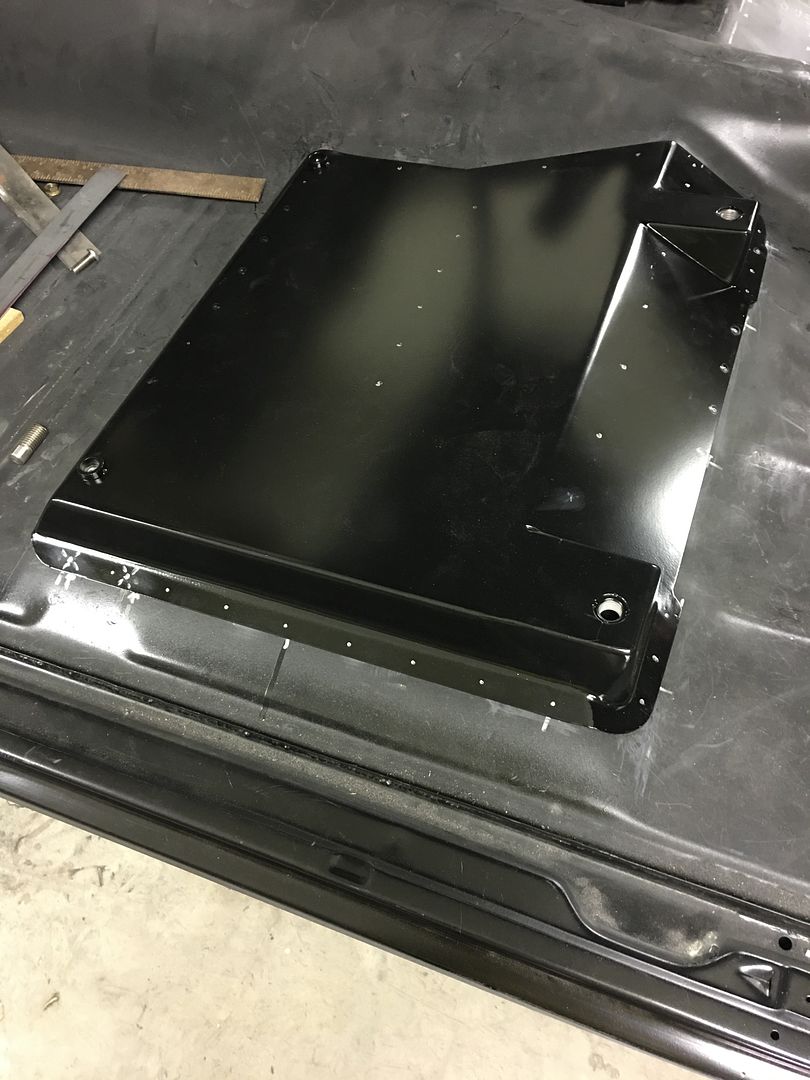
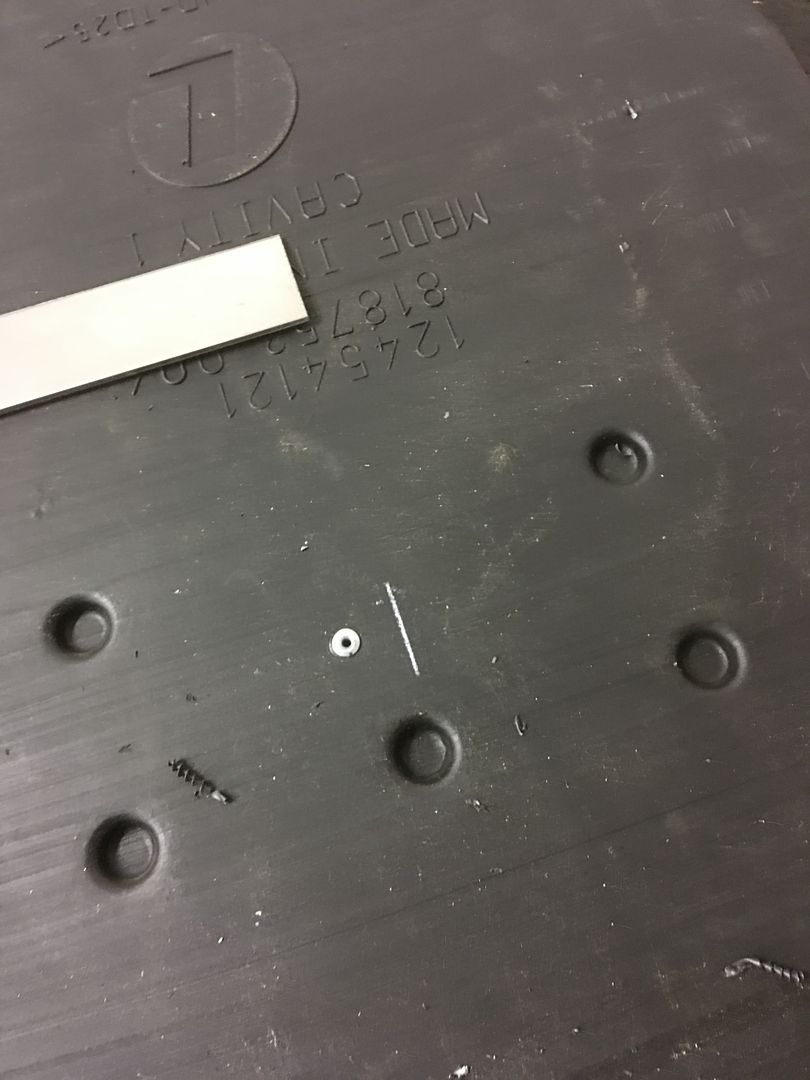
OEM seat bracket holes in the floor pans open to the inside of floor crossmembers. Rather than weld them closed and warp the floor pan, we opted for these fancy hole plugs.
SPI epoxy primer applied...
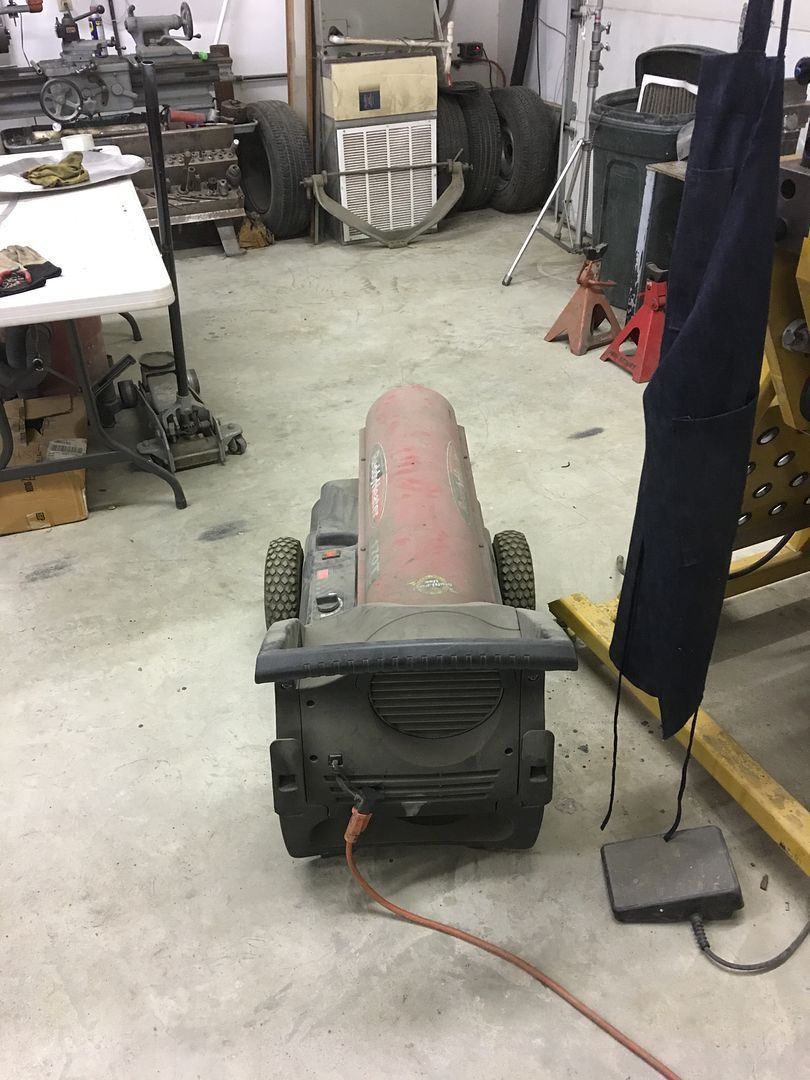
When it's 39* outside and the paint booth is sucking the heat out of the building, this is how you keep the temps up to a balmy 75* in the paint booth..
We'll let the seat brackets cure for a few days and then get started on plug welding them in place..
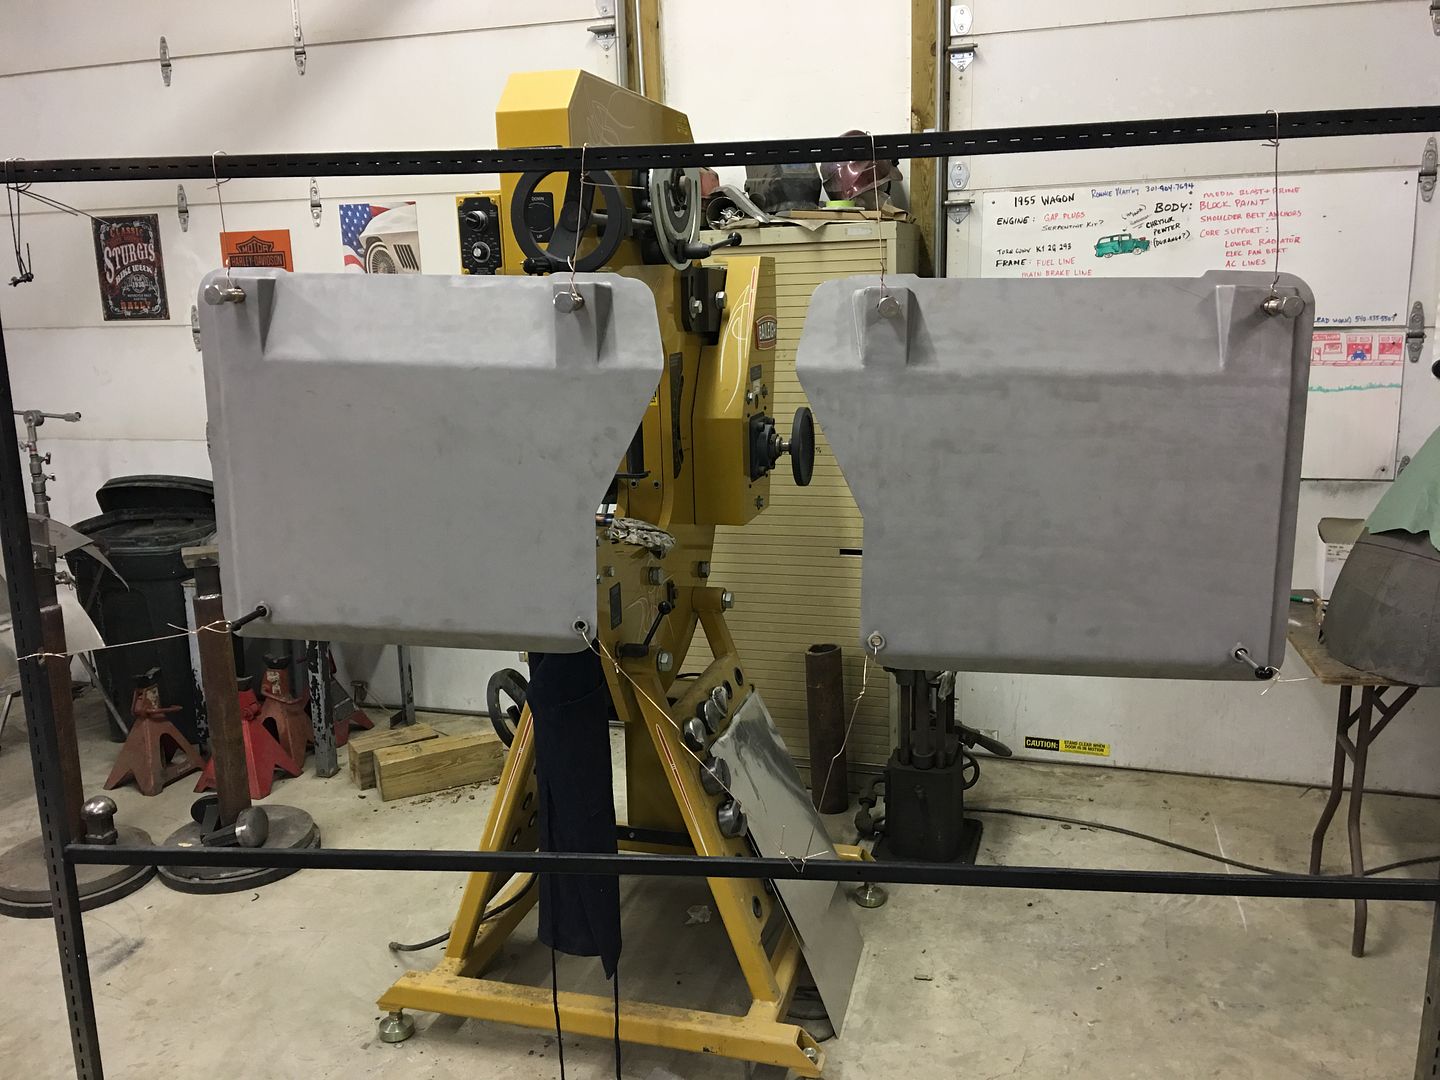
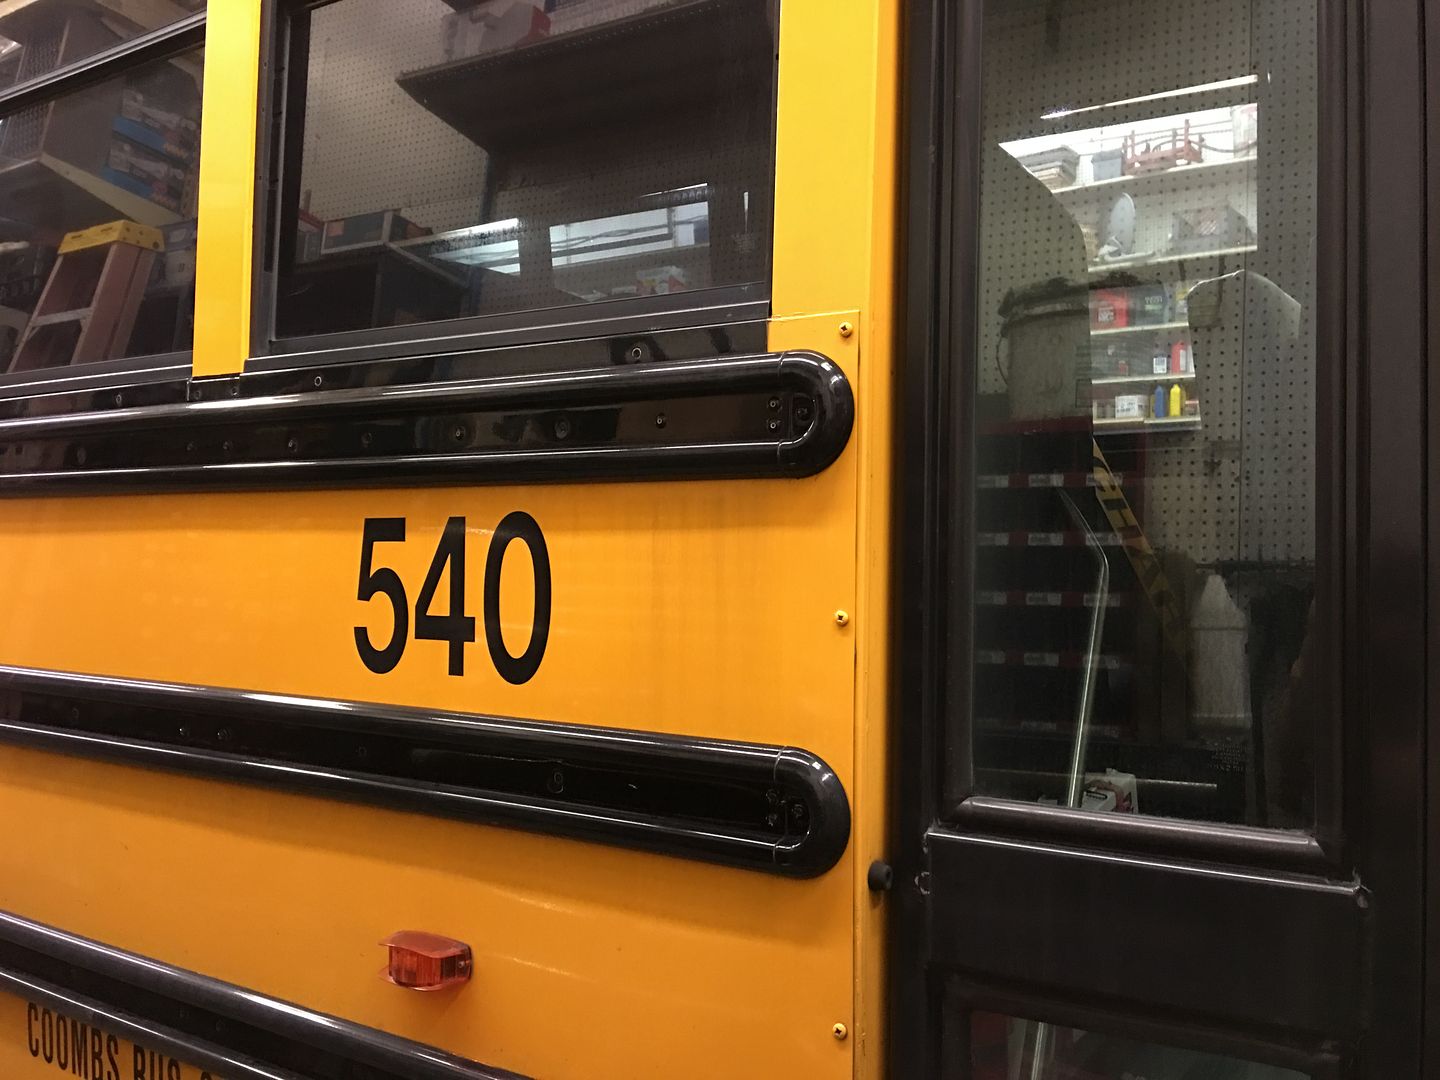
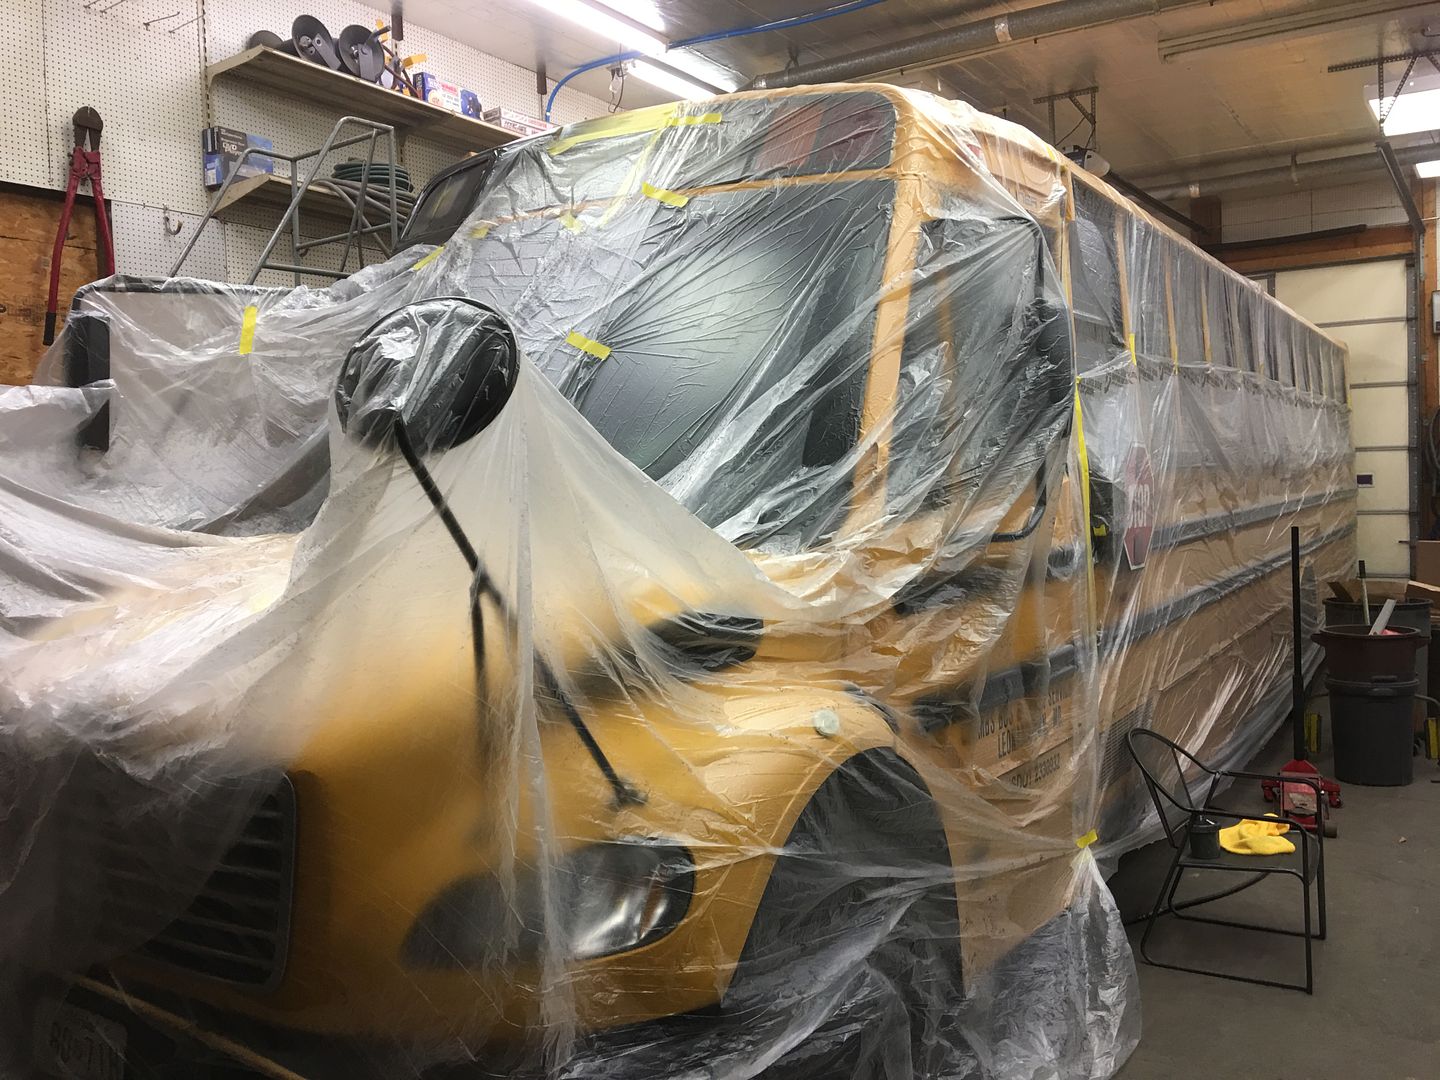
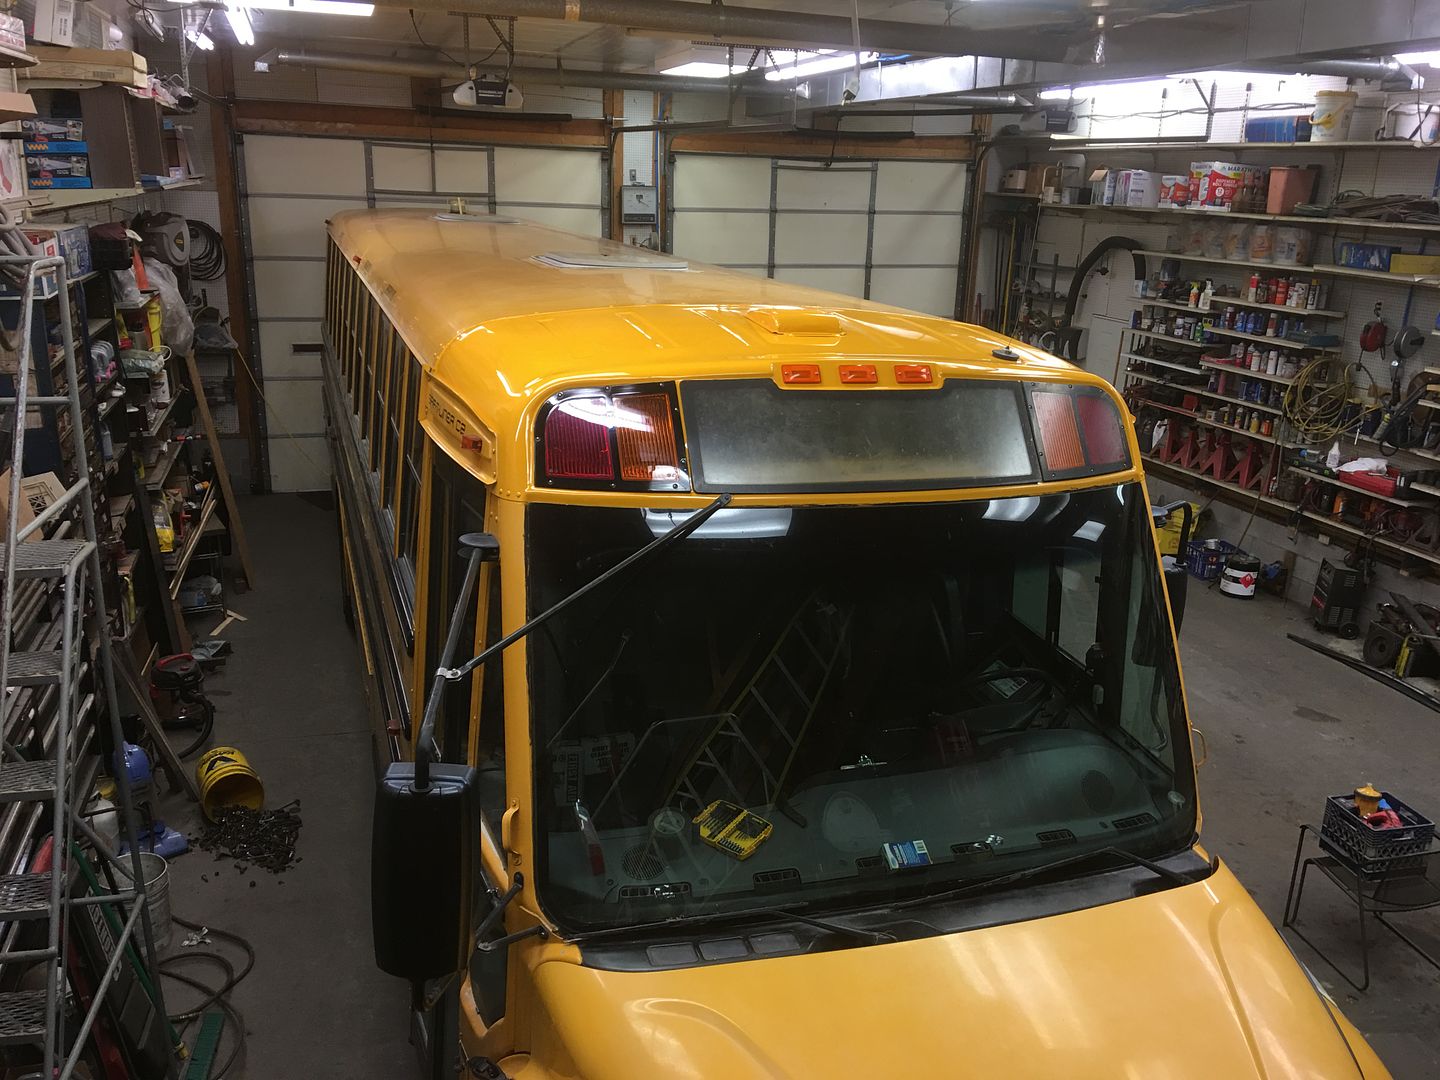
Stopped by to visit the next big yellow project...
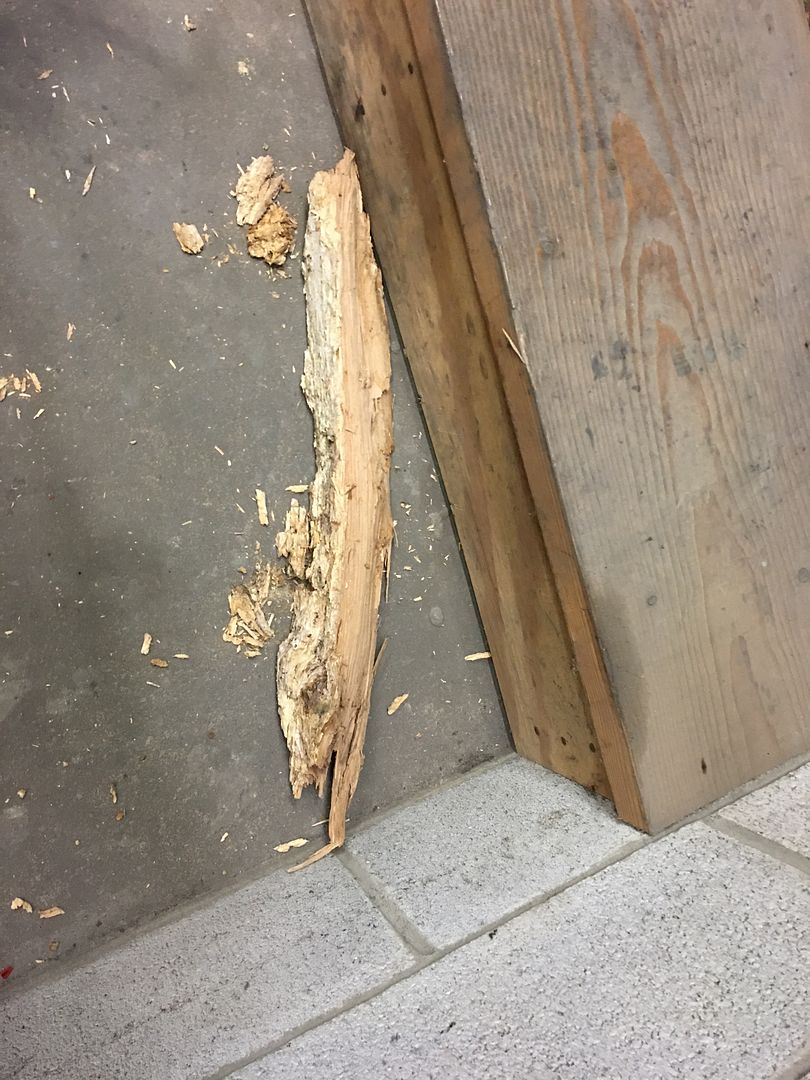
Got the larger bits of the oak tree removed, still some vacuuming to do for the remaining splinters..

Looks like we have an electrical repair as well.. While we're fixing the Atlantic Ocean syndrome on the roof top, may as well clean up this rusty cover.....
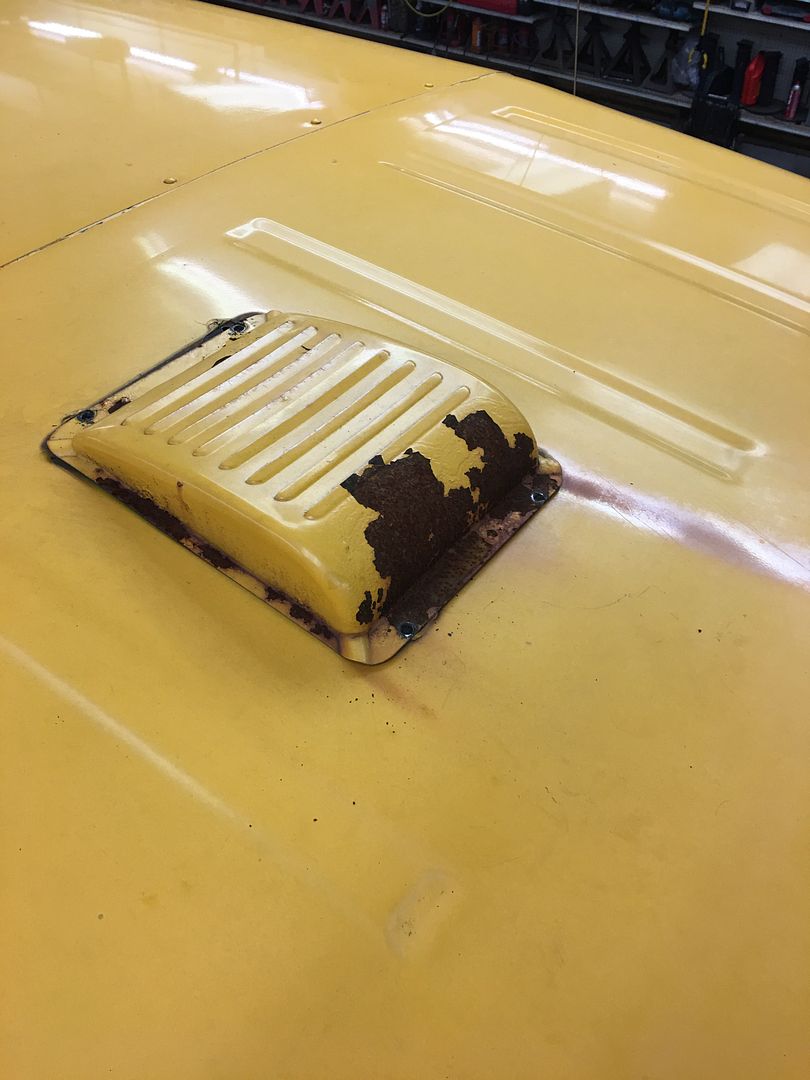
After a bit of media blasting, I think we'll change course and get a new vent cover. Too much ventilation in this one..


And let's not forget the Biederman.. Time to start the layout of fender repair number 2... Proposed horizontal cut line was added using our trusty Carpenter laser...
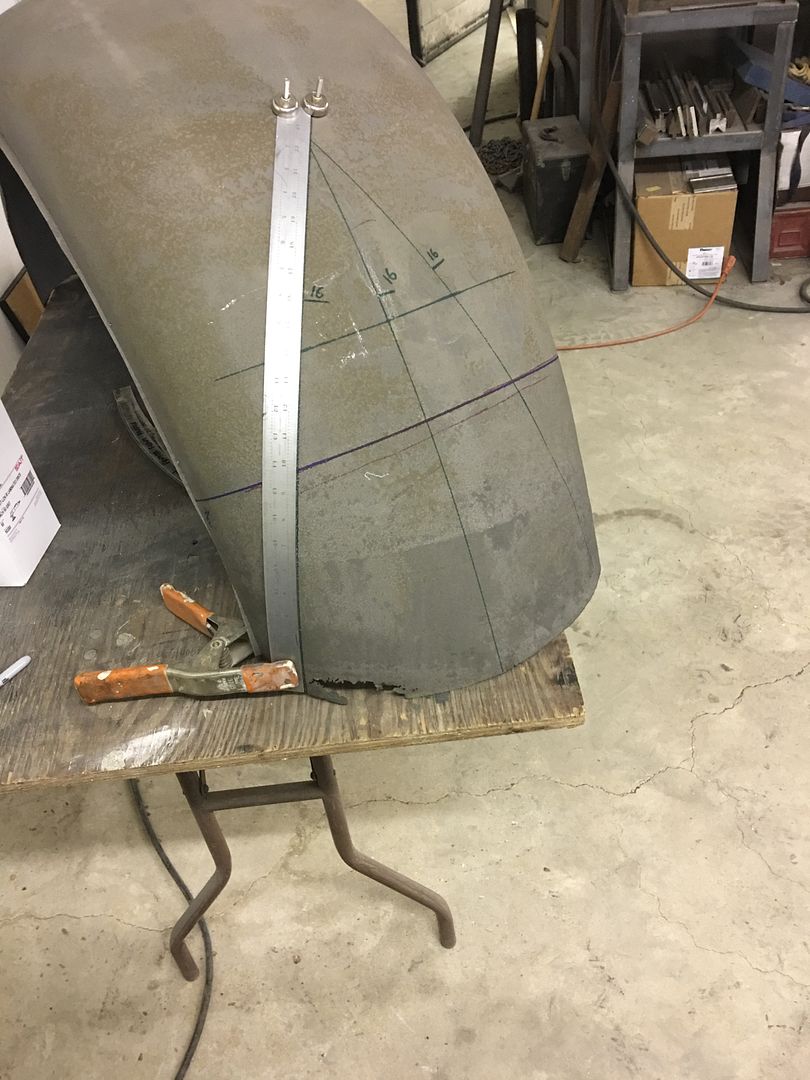
And some reference lines marked to locate the bottom edge after welding on the new patch..
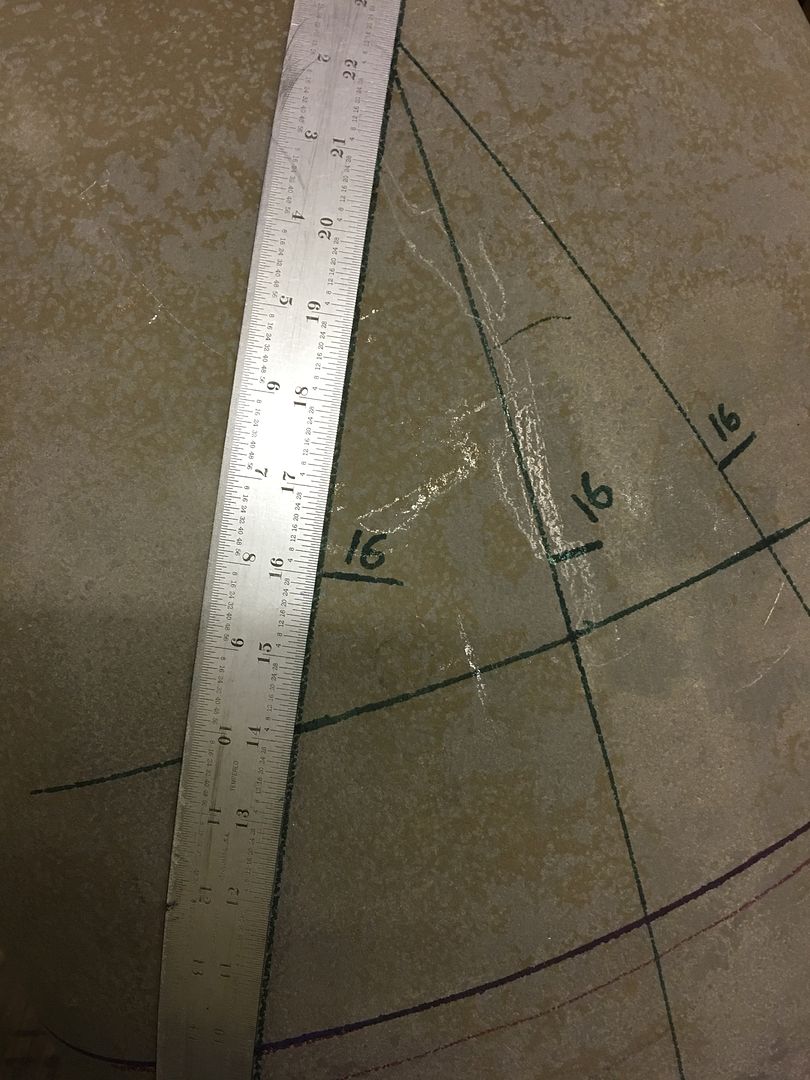
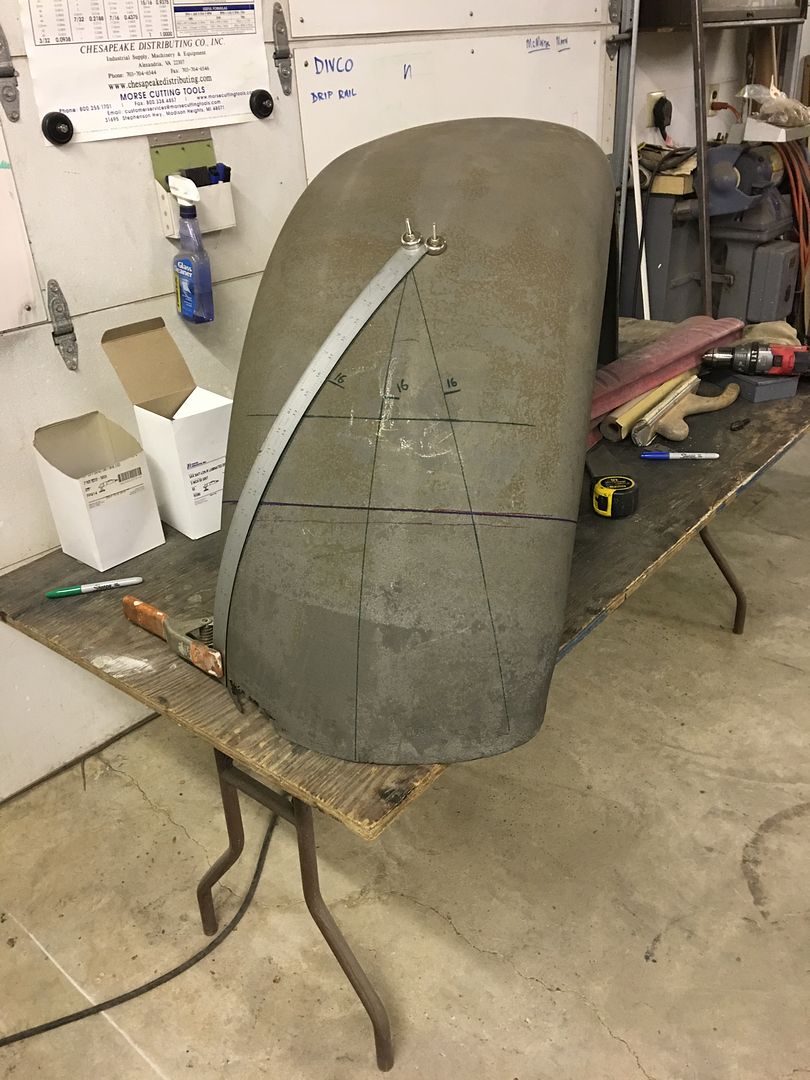
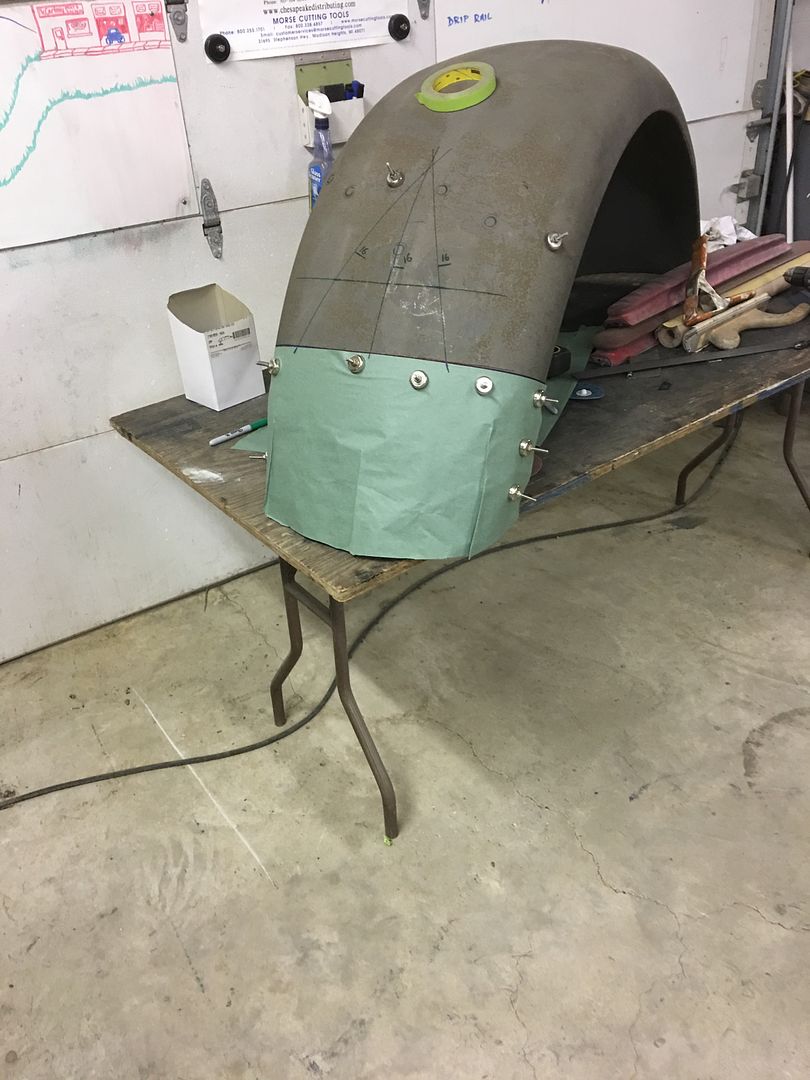
....and a paper pattern used to get the size we need for our patch.
1/4" tall spacers fabricated to make the seat tracks level, then tacked in place on the front holes..
Prepped and hung up for epoxy primer...
OEM seat bracket holes in the floor pans open to the inside of floor crossmembers. Rather than weld them closed and warp the floor pan, we opted for these fancy hole plugs.
SPI epoxy primer applied...
When it's 39* outside and the paint booth is sucking the heat out of the building, this is how you keep the temps up to a balmy 75* in the paint booth..
We'll let the seat brackets cure for a few days and then get started on plug welding them in place..
Stopped by to visit the next big yellow project...
Got the larger bits of the oak tree removed, still some vacuuming to do for the remaining splinters..
Looks like we have an electrical repair as well.. While we're fixing the Atlantic Ocean syndrome on the roof top, may as well clean up this rusty cover.....
After a bit of media blasting, I think we'll change course and get a new vent cover. Too much ventilation in this one..
And let's not forget the Biederman.. Time to start the layout of fender repair number 2... Proposed horizontal cut line was added using our trusty Carpenter laser...
And some reference lines marked to locate the bottom edge after welding on the new patch..
....and a paper pattern used to get the size we need for our patch.
Thanks Royce!
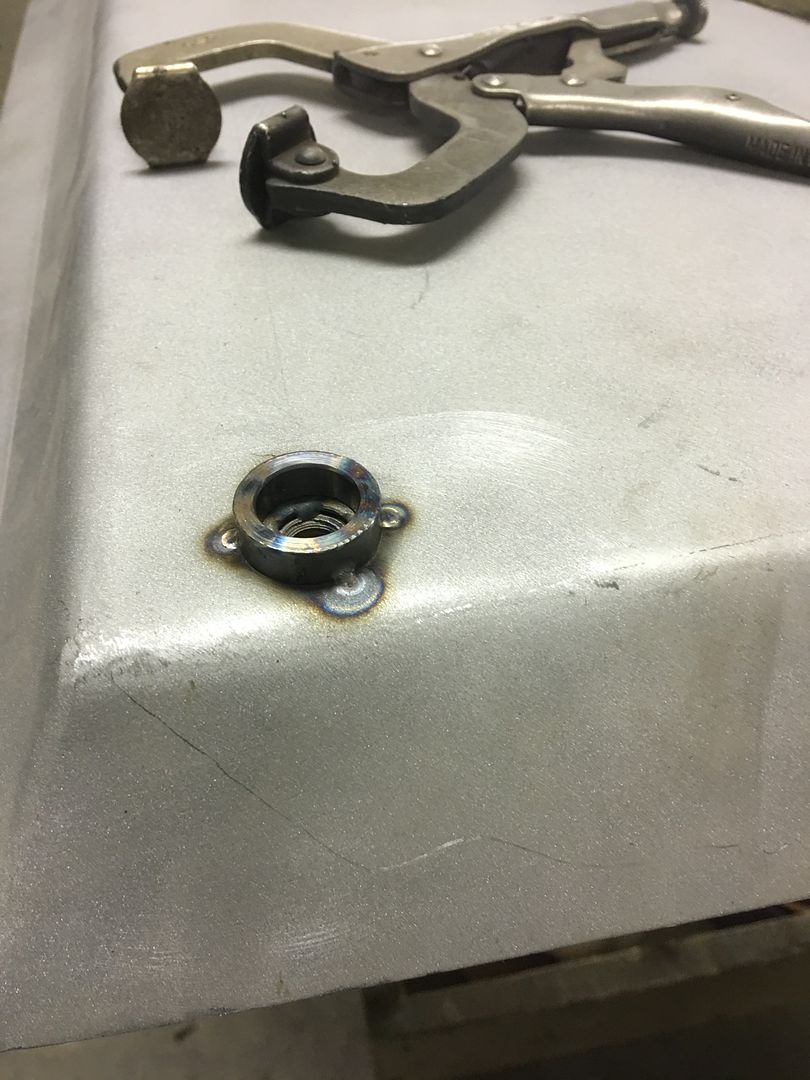
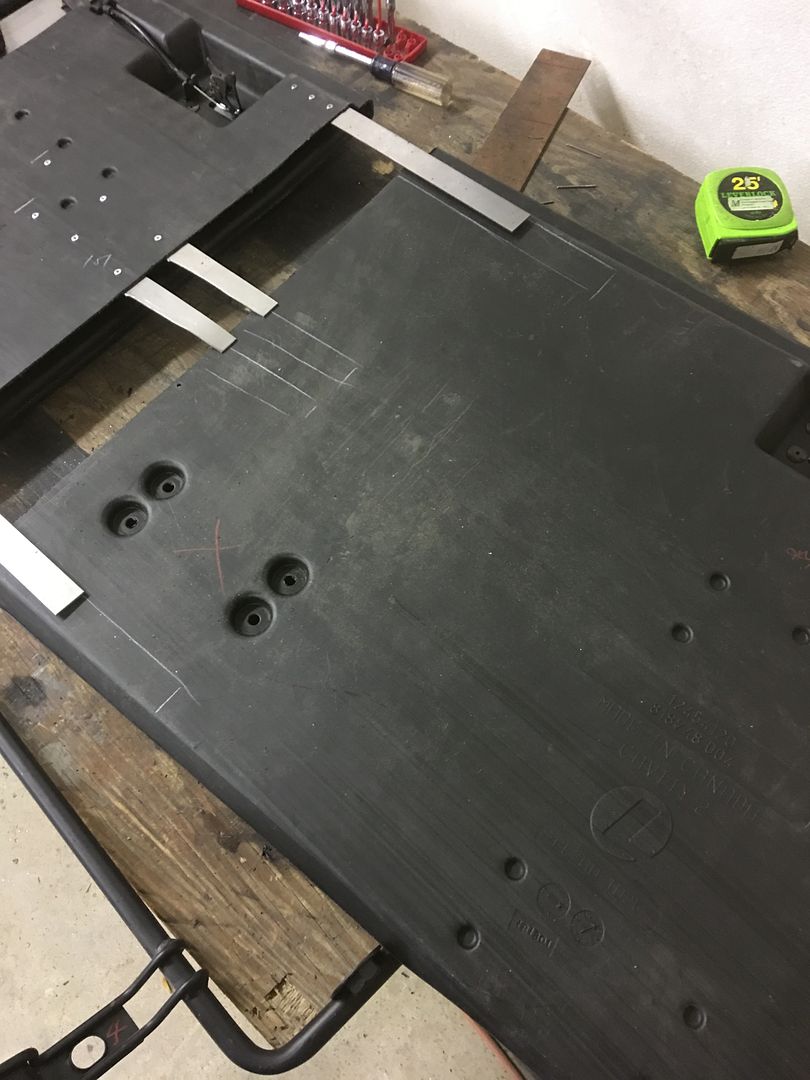
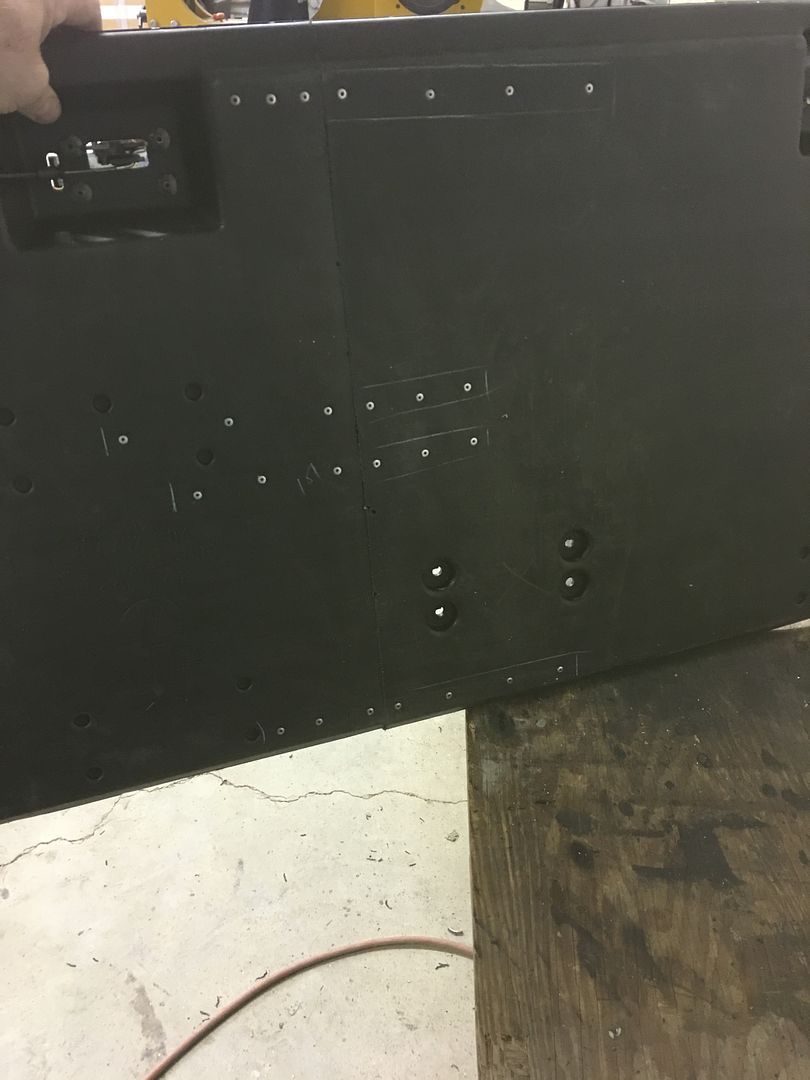
Got started on drilling plug weld holes this evening, here laying out the hole patterns to align with the floor crossmember where possible...
Once drilled to match our piloted burnishing brush, the paint surrounding the plug weld gets cleaned to prevent weld contamination..
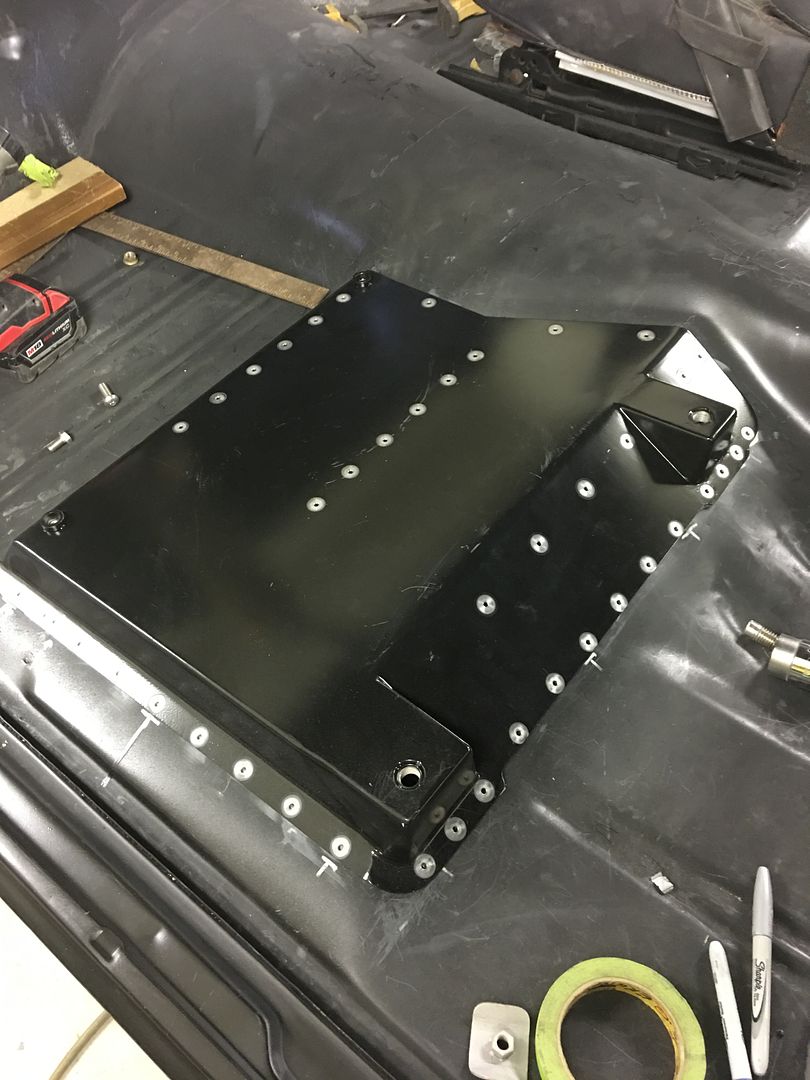
Got started on drilling plug weld holes this evening, here laying out the hole patterns to align with the floor crossmember where possible...
Once drilled to match our piloted burnishing brush, the paint surrounding the plug weld gets cleaned to prevent weld contamination..
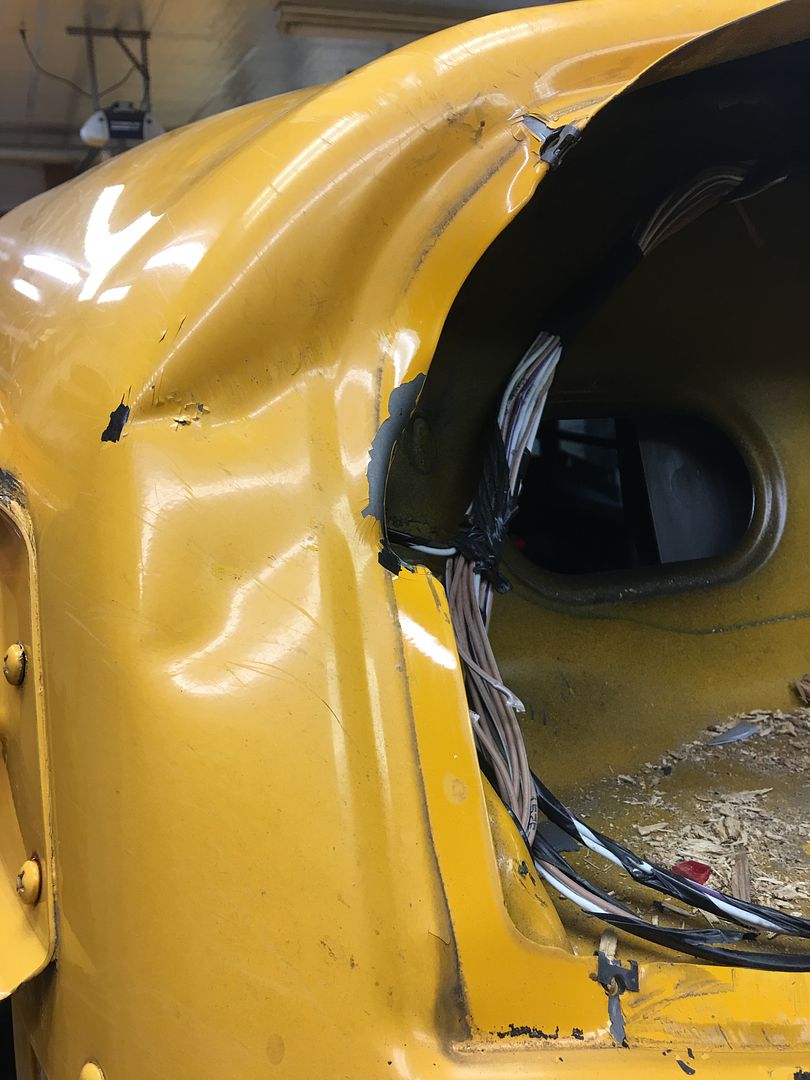
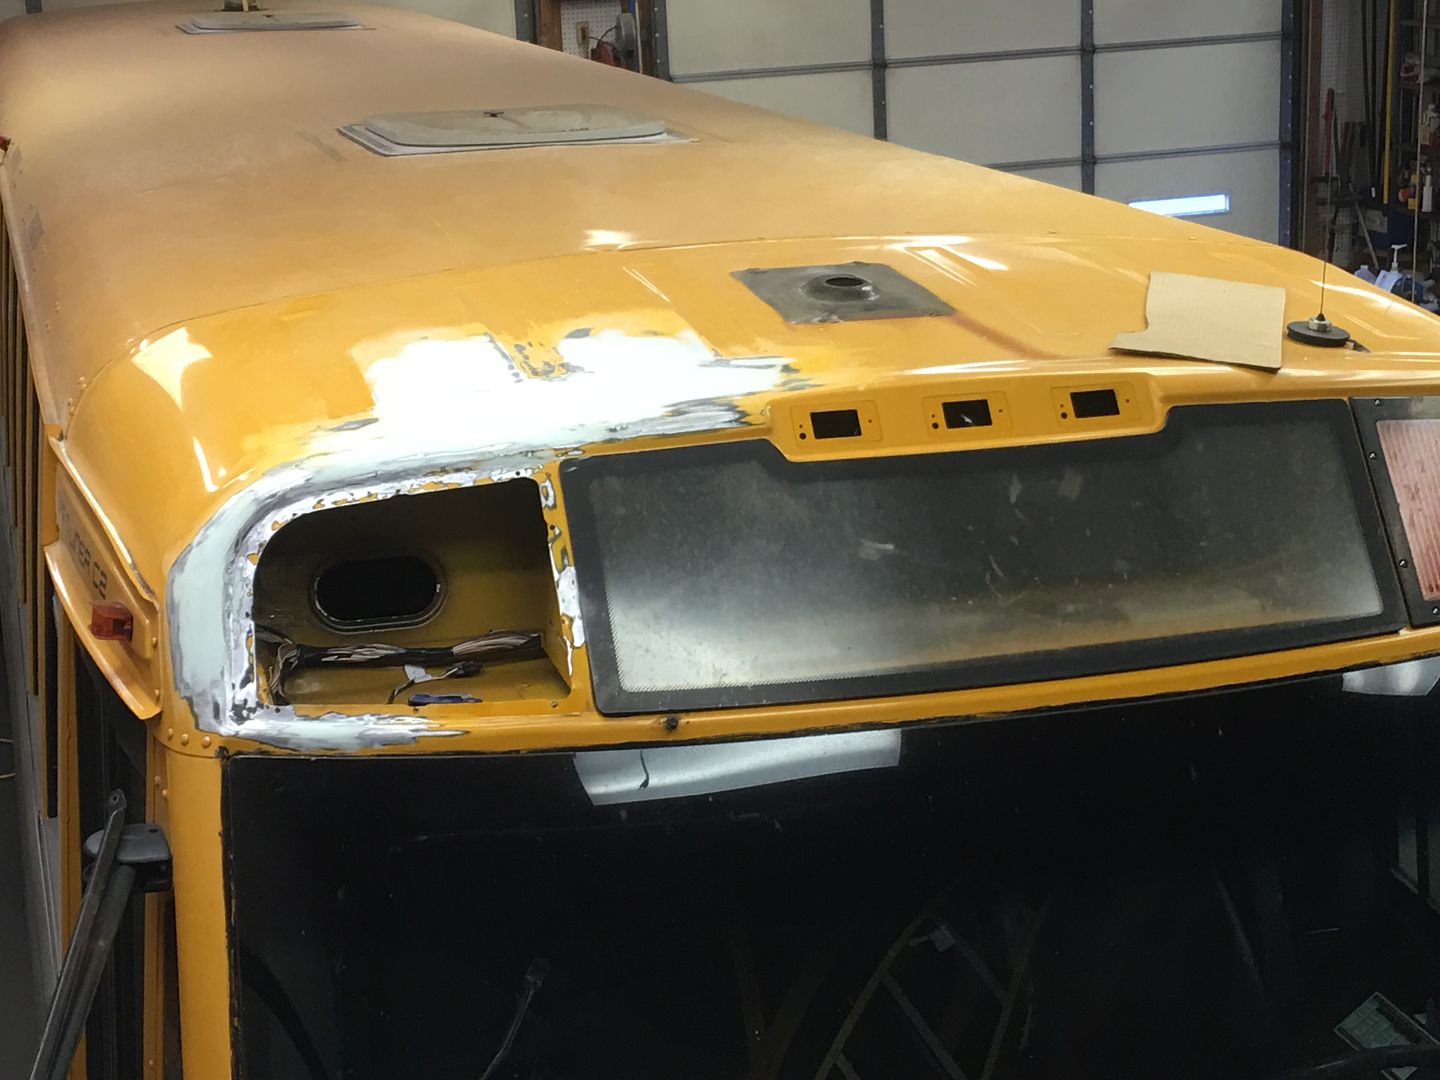
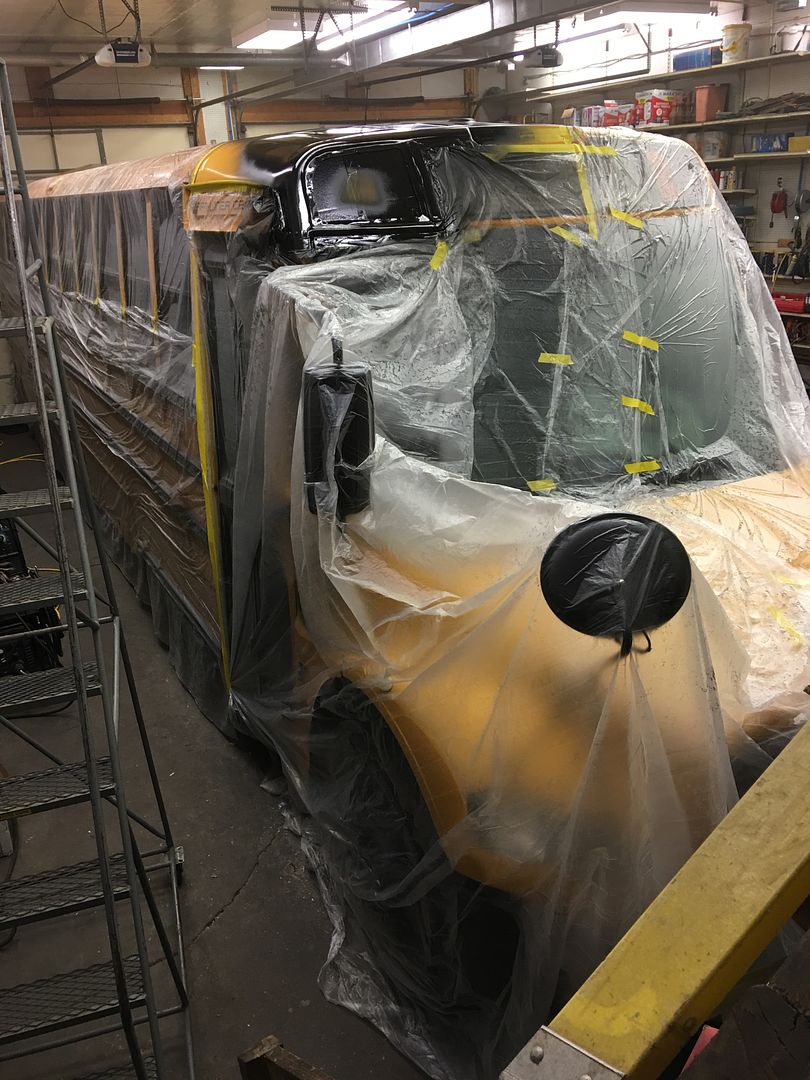
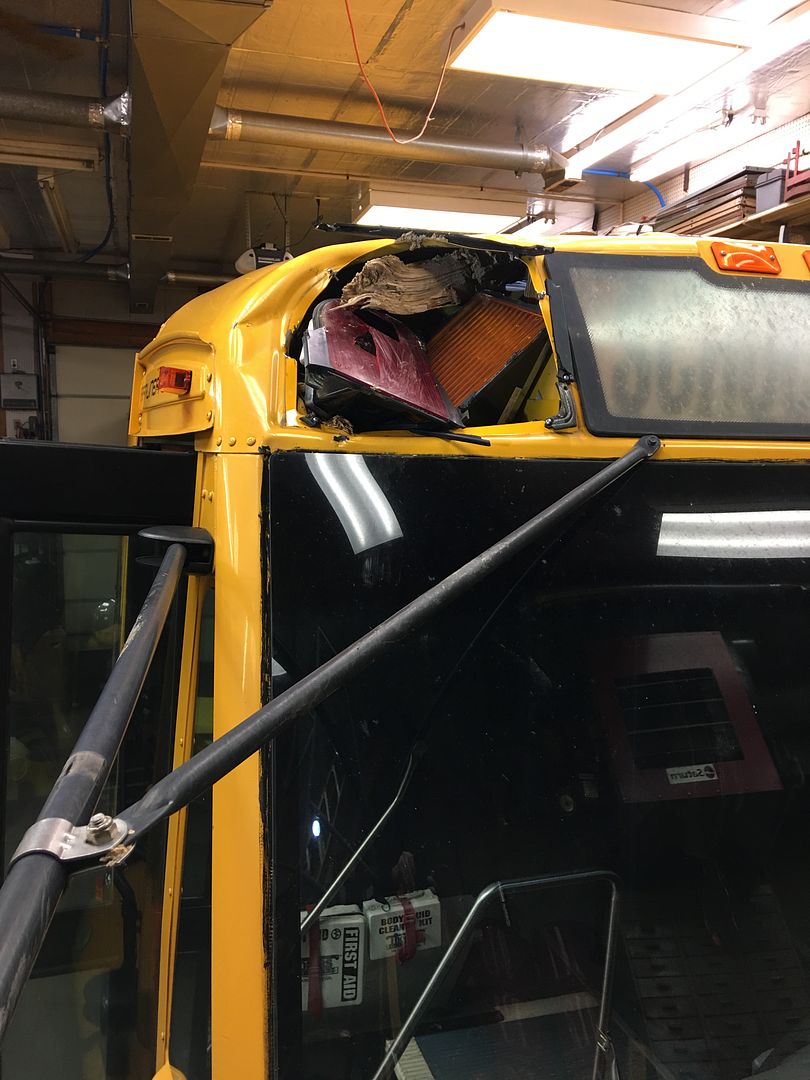
Tonight found us working on the bus to remove some of the damage from an oak tree. Here's our damage...
The headliner above the step area was cut out to give us better access to the roof skin..
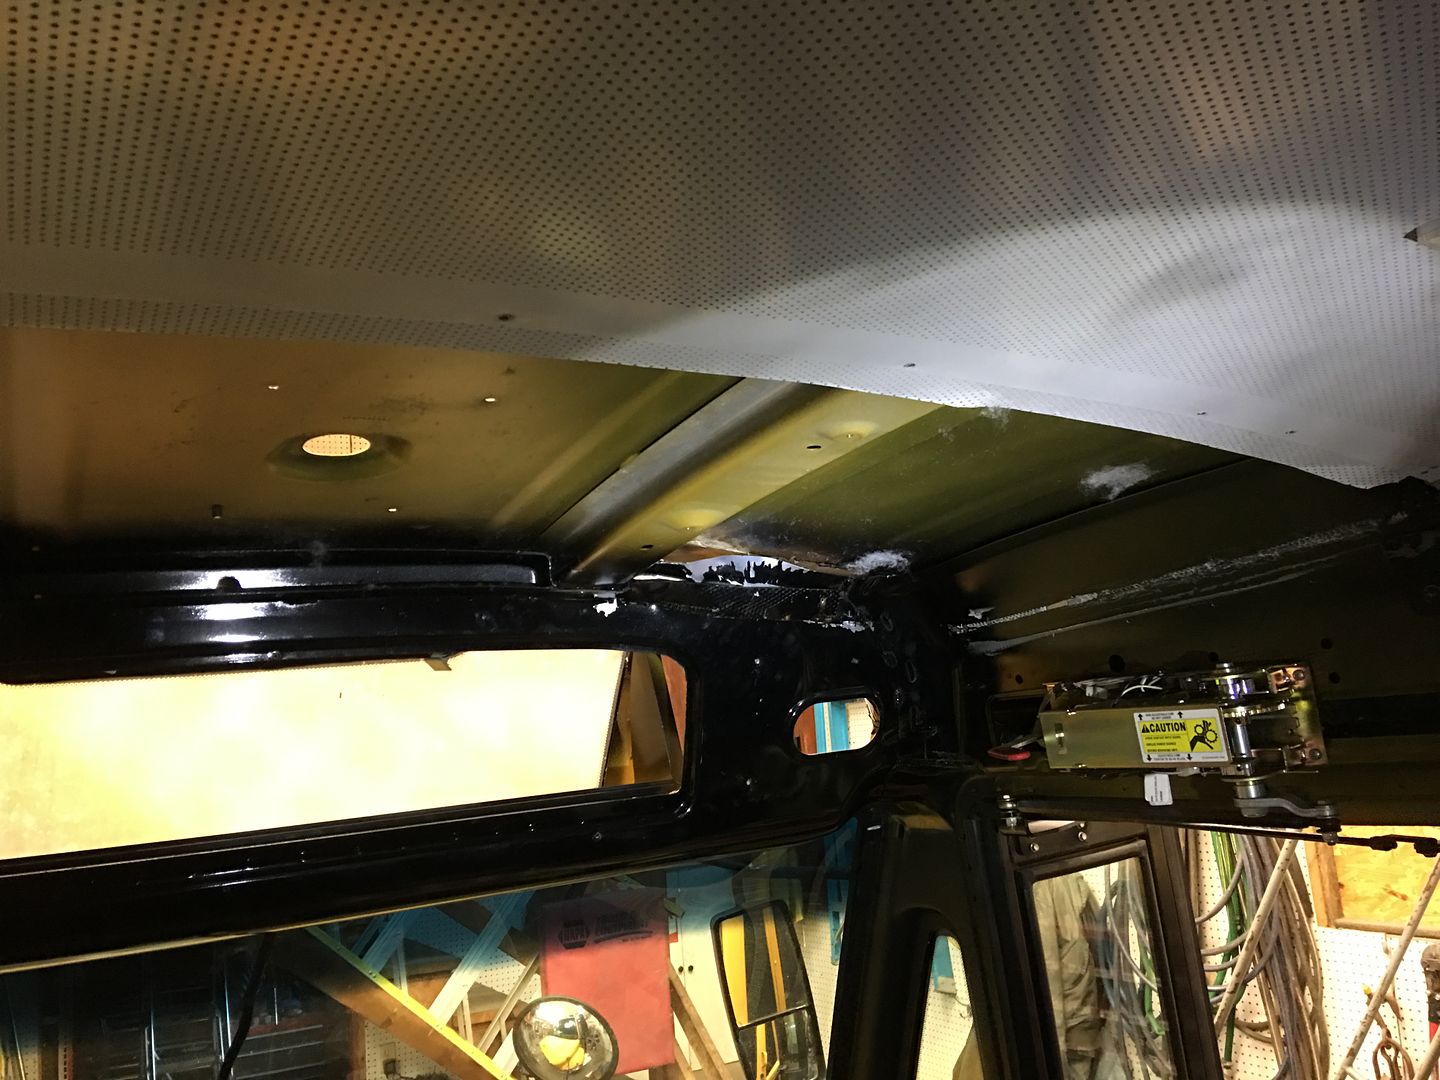
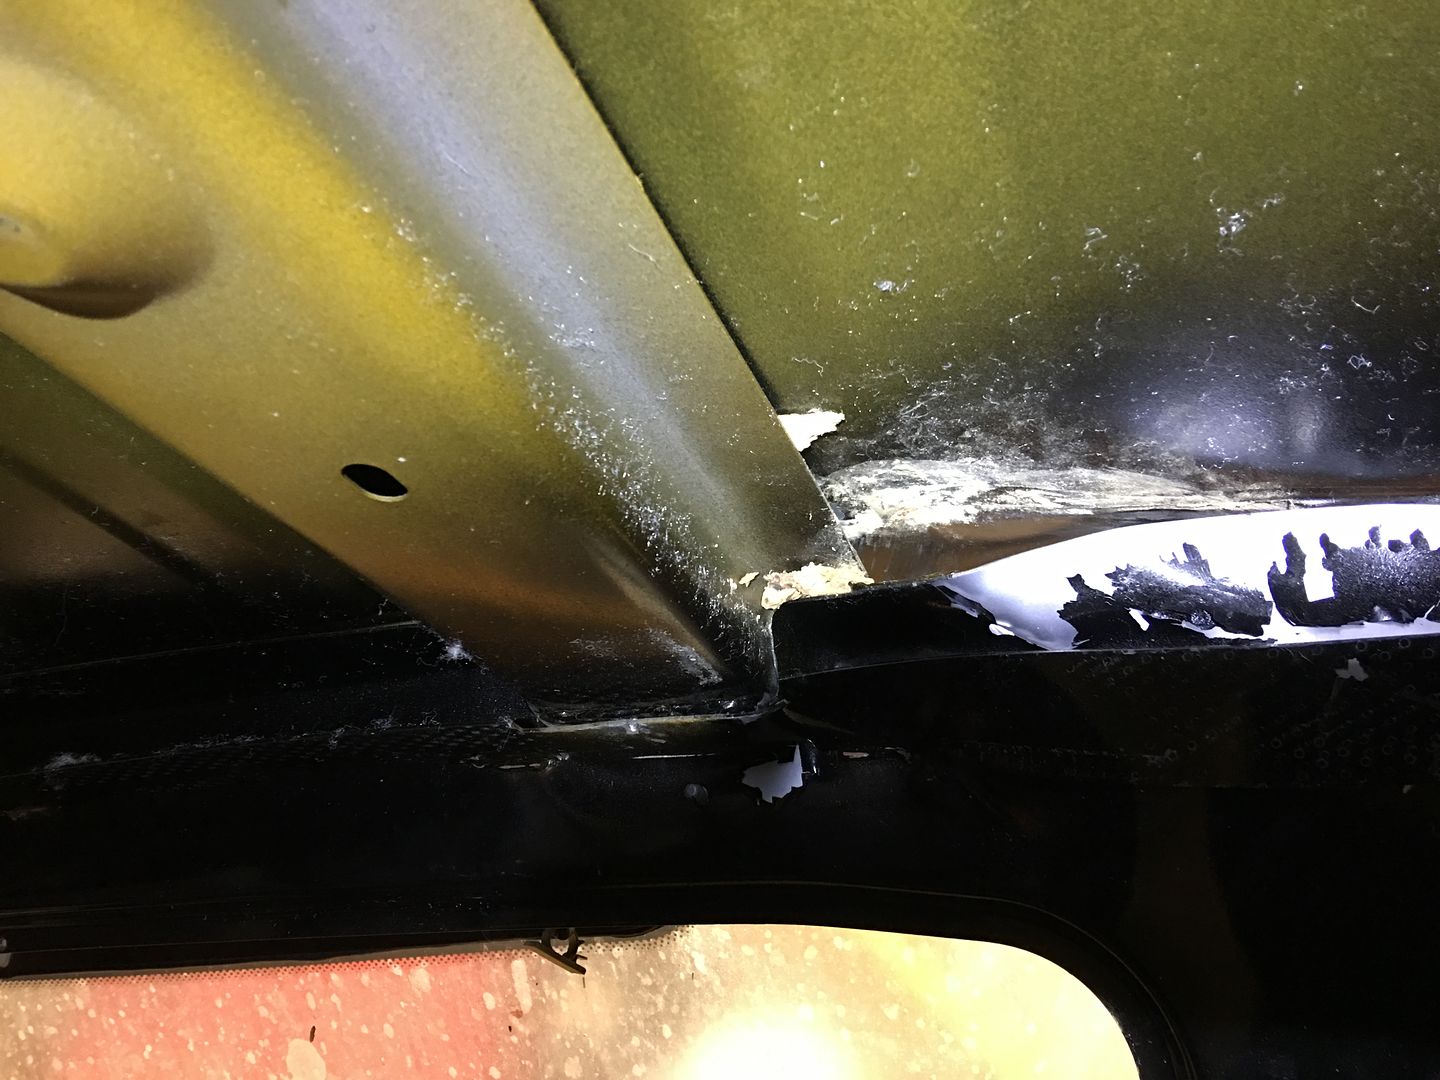
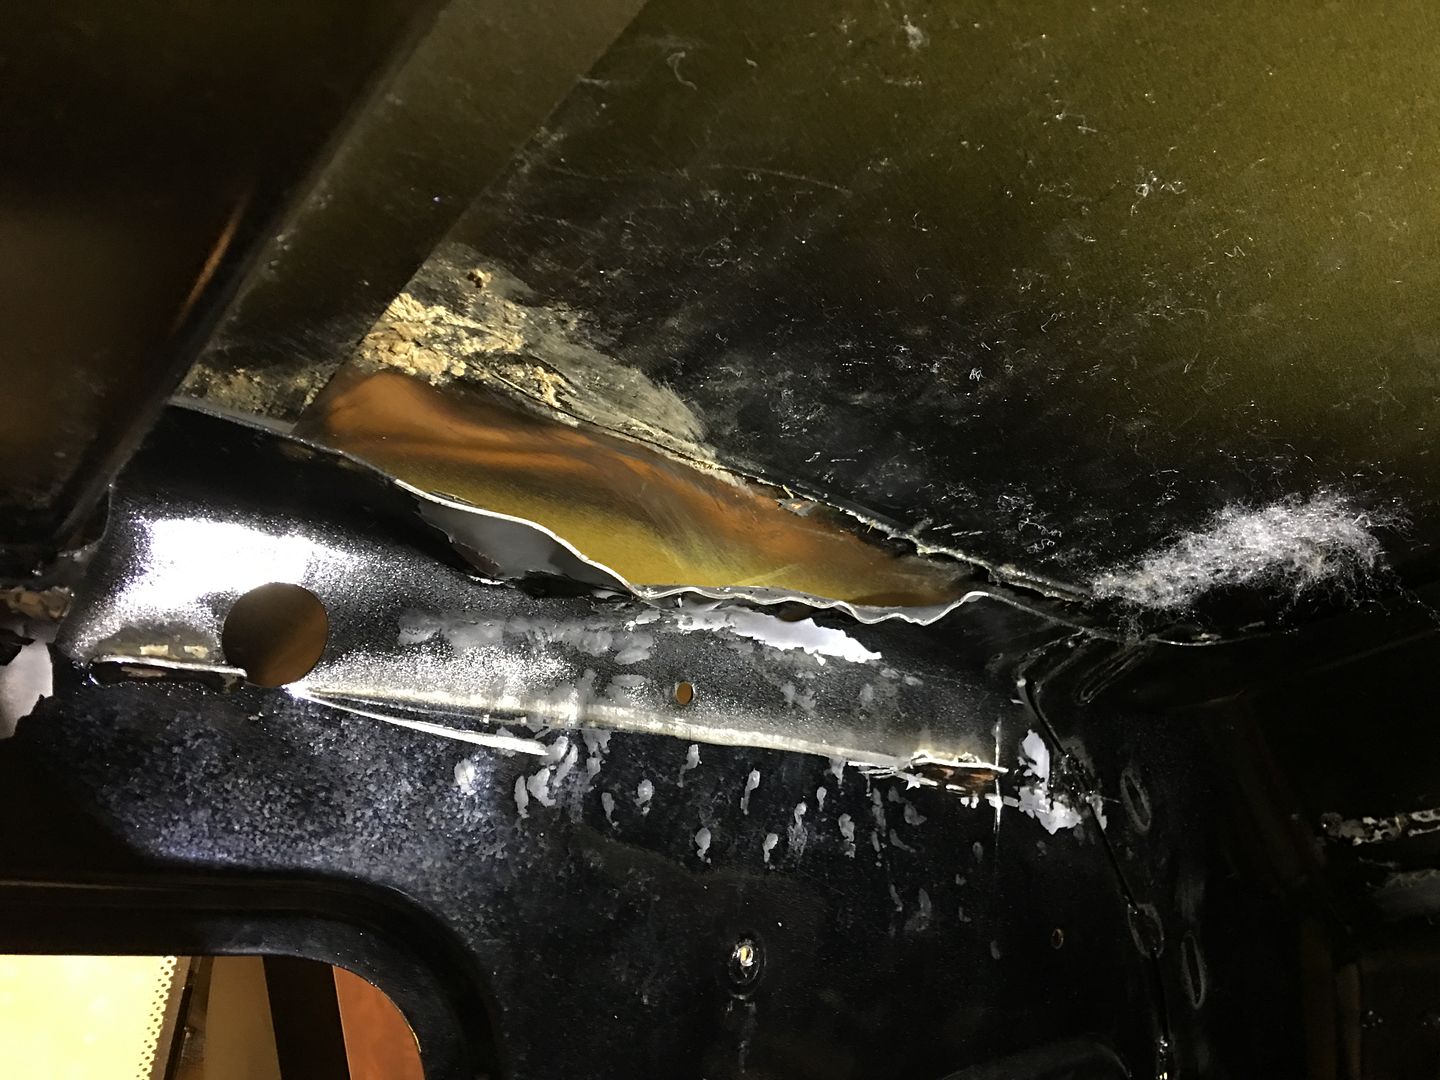
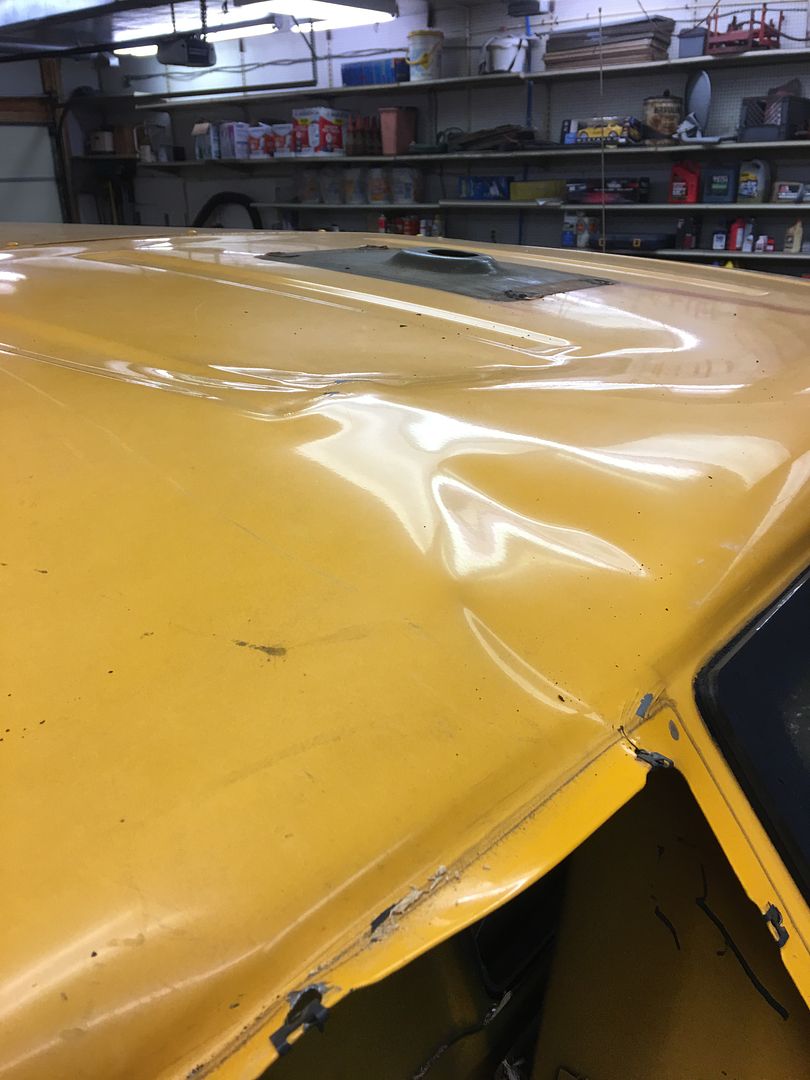
We got much of the damage roughed out, but there's quite a bit of stretch in that roof skin still to remove.

The headliner above the step area was cut out to give us better access to the roof skin..
We got much of the damage roughed out, but there's quite a bit of stretch in that roof skin still to remove.
TimeWarpF100
Well-known member
Thanks Royce!
Got started on drilling plug weld holes this evening, here laying out the hole patterns to align with the floor crossmember where possible...
Once drilled to match our piloted burnishing brush, the paint surrounding the plug weld gets cleaned to prevent weld contamination..
Fantastic piece for the seat mounting! Wish I could apply a fraction of what you do to what I do . .
That bus roof looked like Lake Superior on a day with 80 mph wind gusts.
And what do you do in your "spare" time?
What spare time?
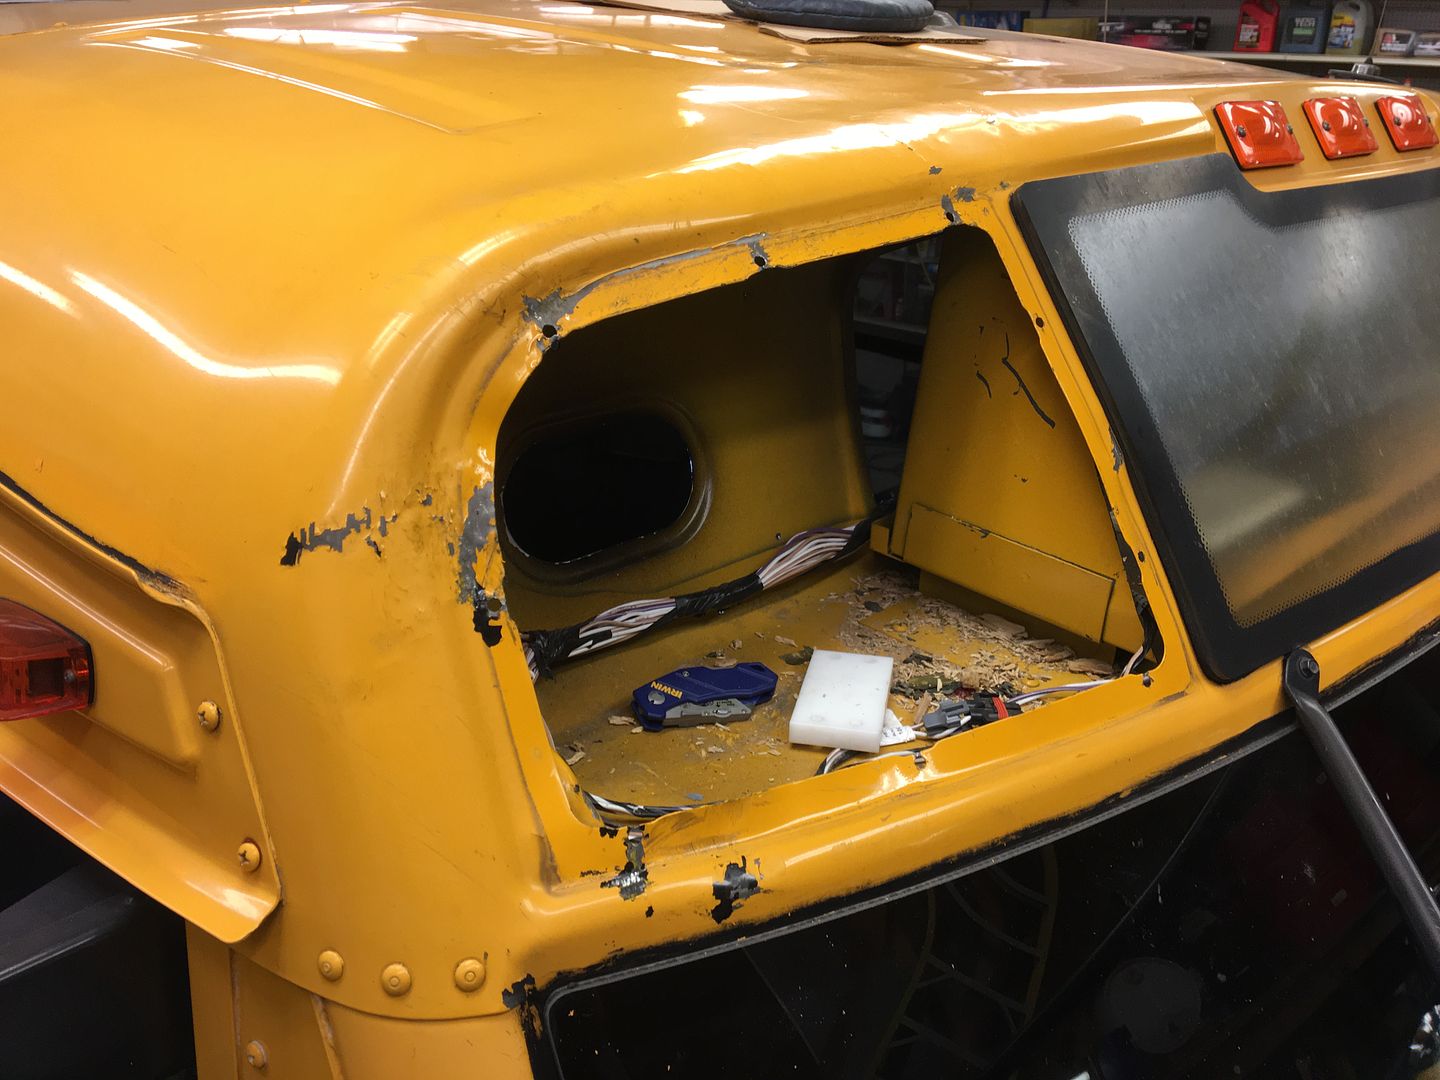
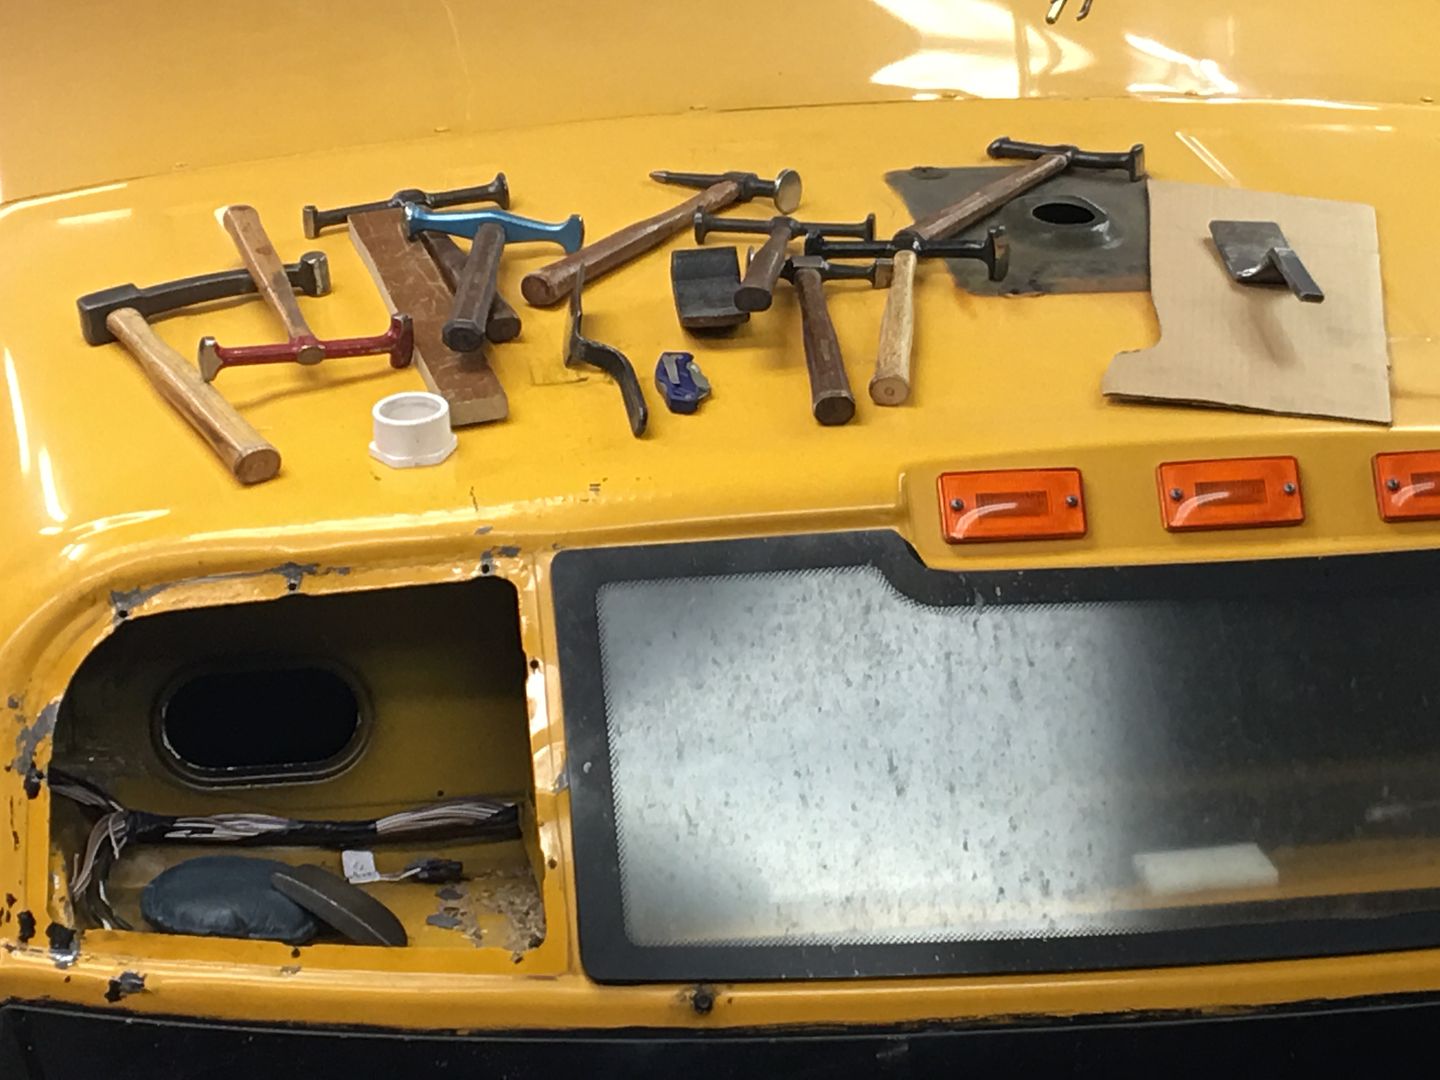
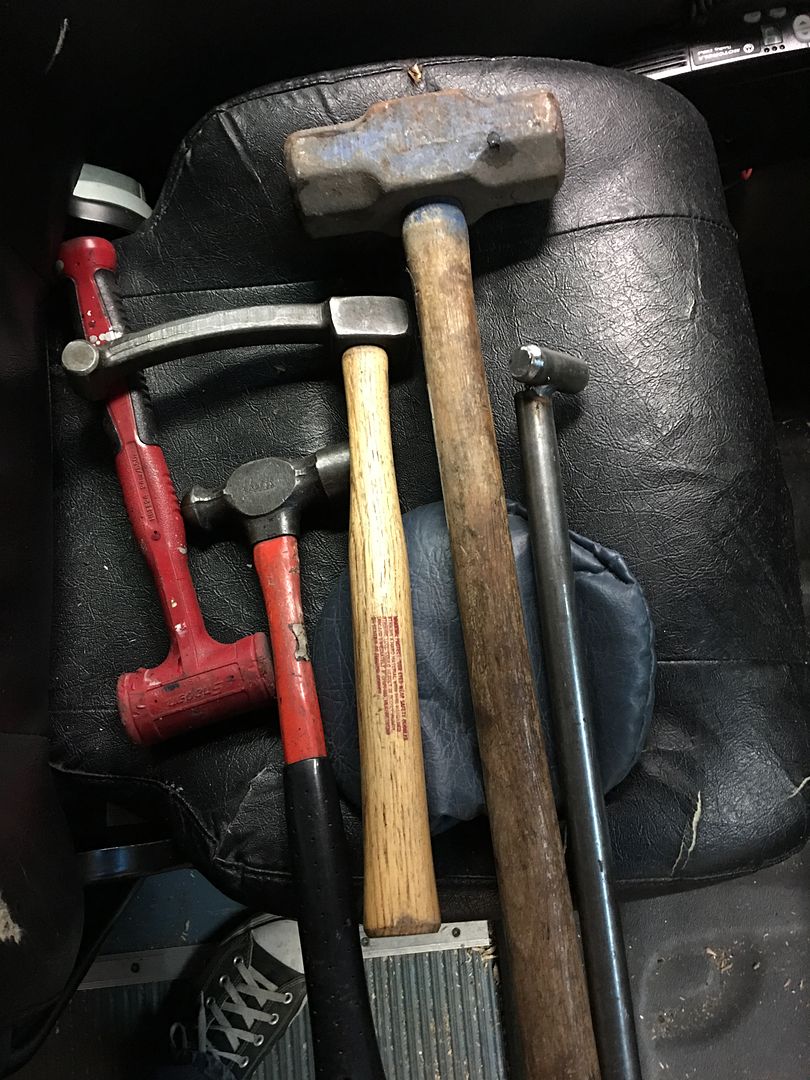
Spent a few more hours getting the light opening to match the new, unbroken light, welded up some of the screw holes that had torn, and given some of the structural members in the way of the roof, we had to settle for no oil canning and a slight low that needed filler.. Here's some of our implements of correction
A few more sanding sessions and we'll get some epoxy primer on....
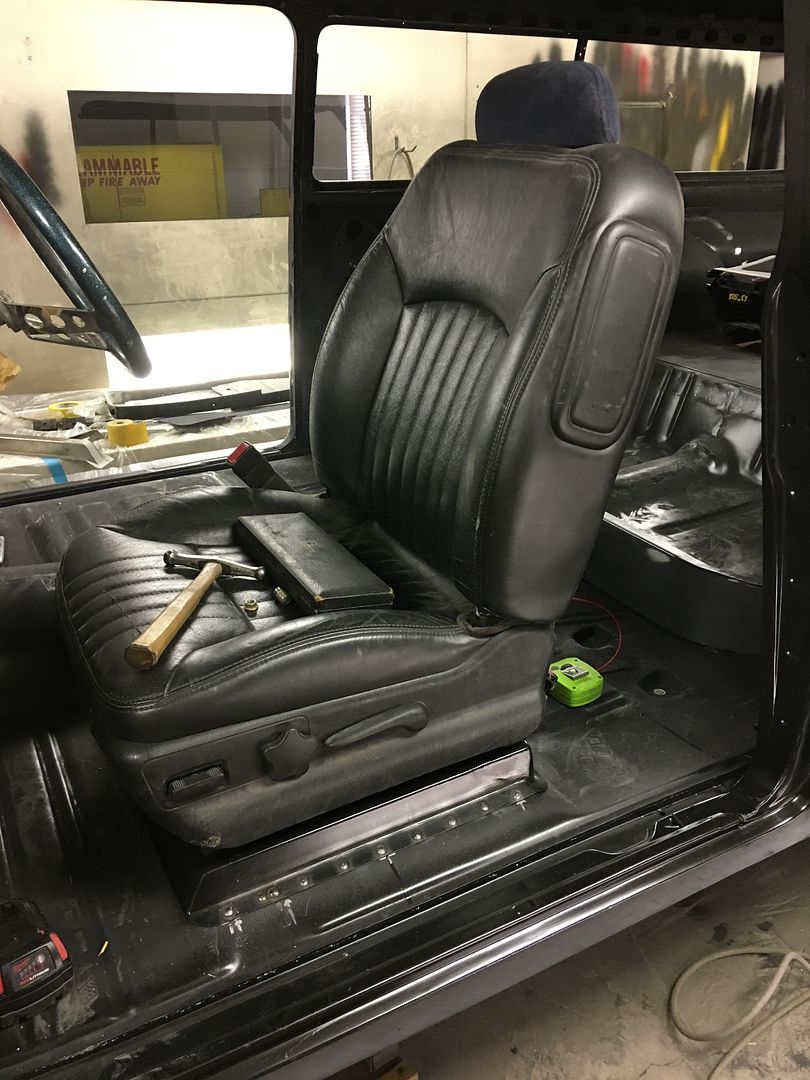
Getting some seat brackets welded in so we can finish off the bottom of the floor...
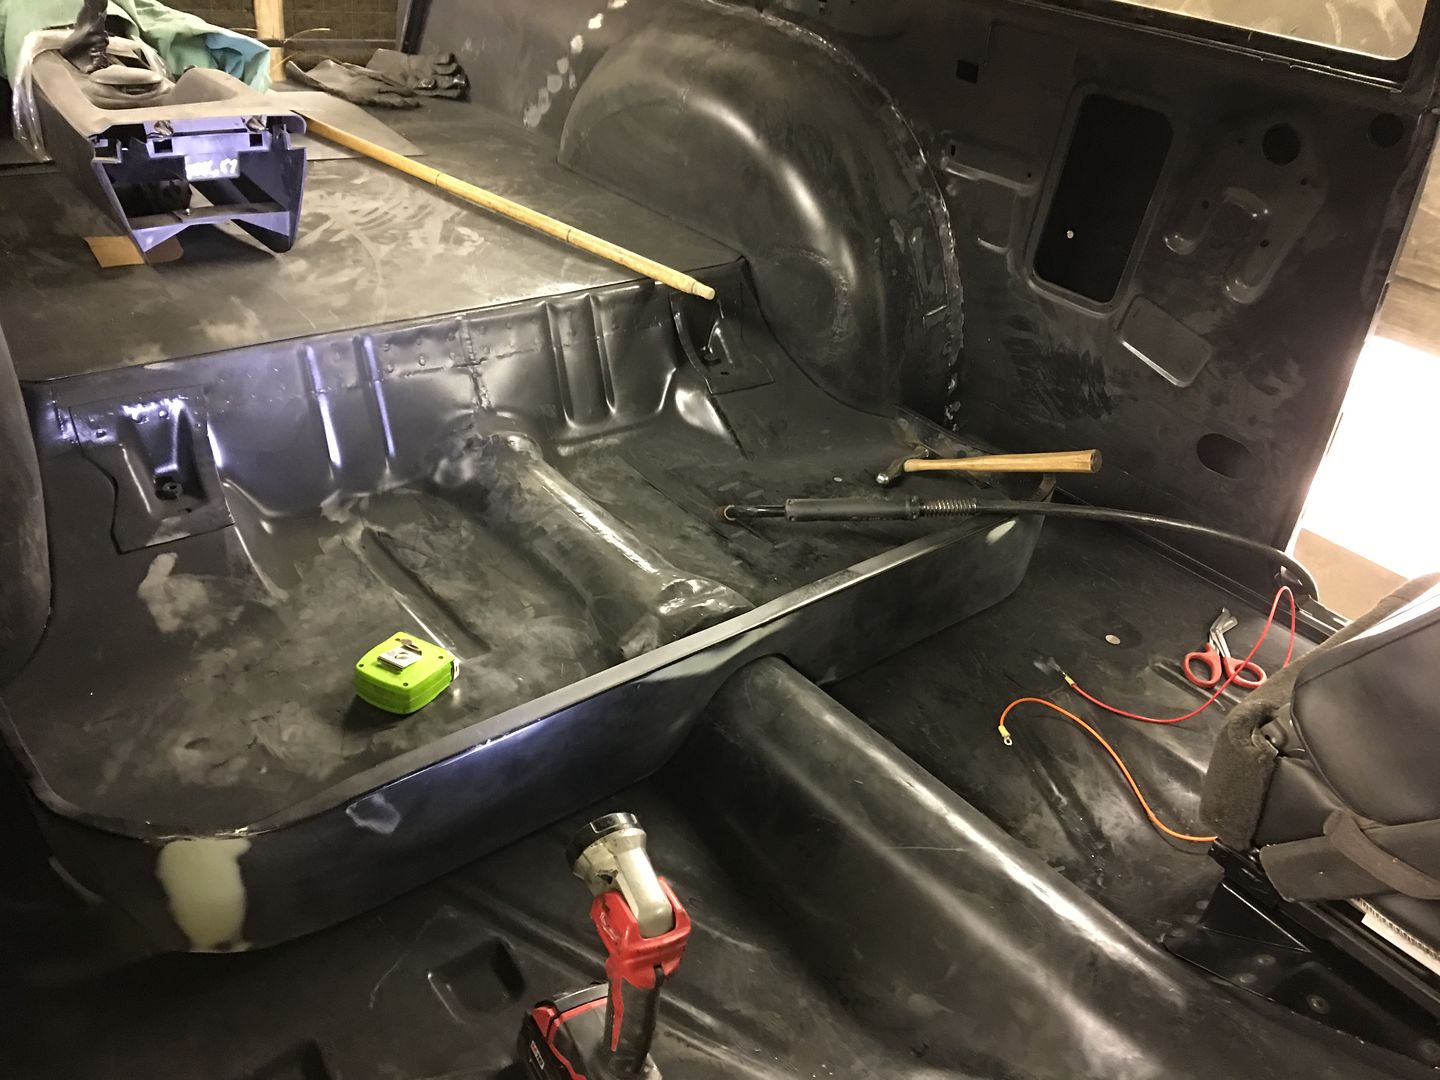
Plug welding...
But before we get all the front seats in and make it harder to access the back, lets get the seat riser plug welded in for the back seat...
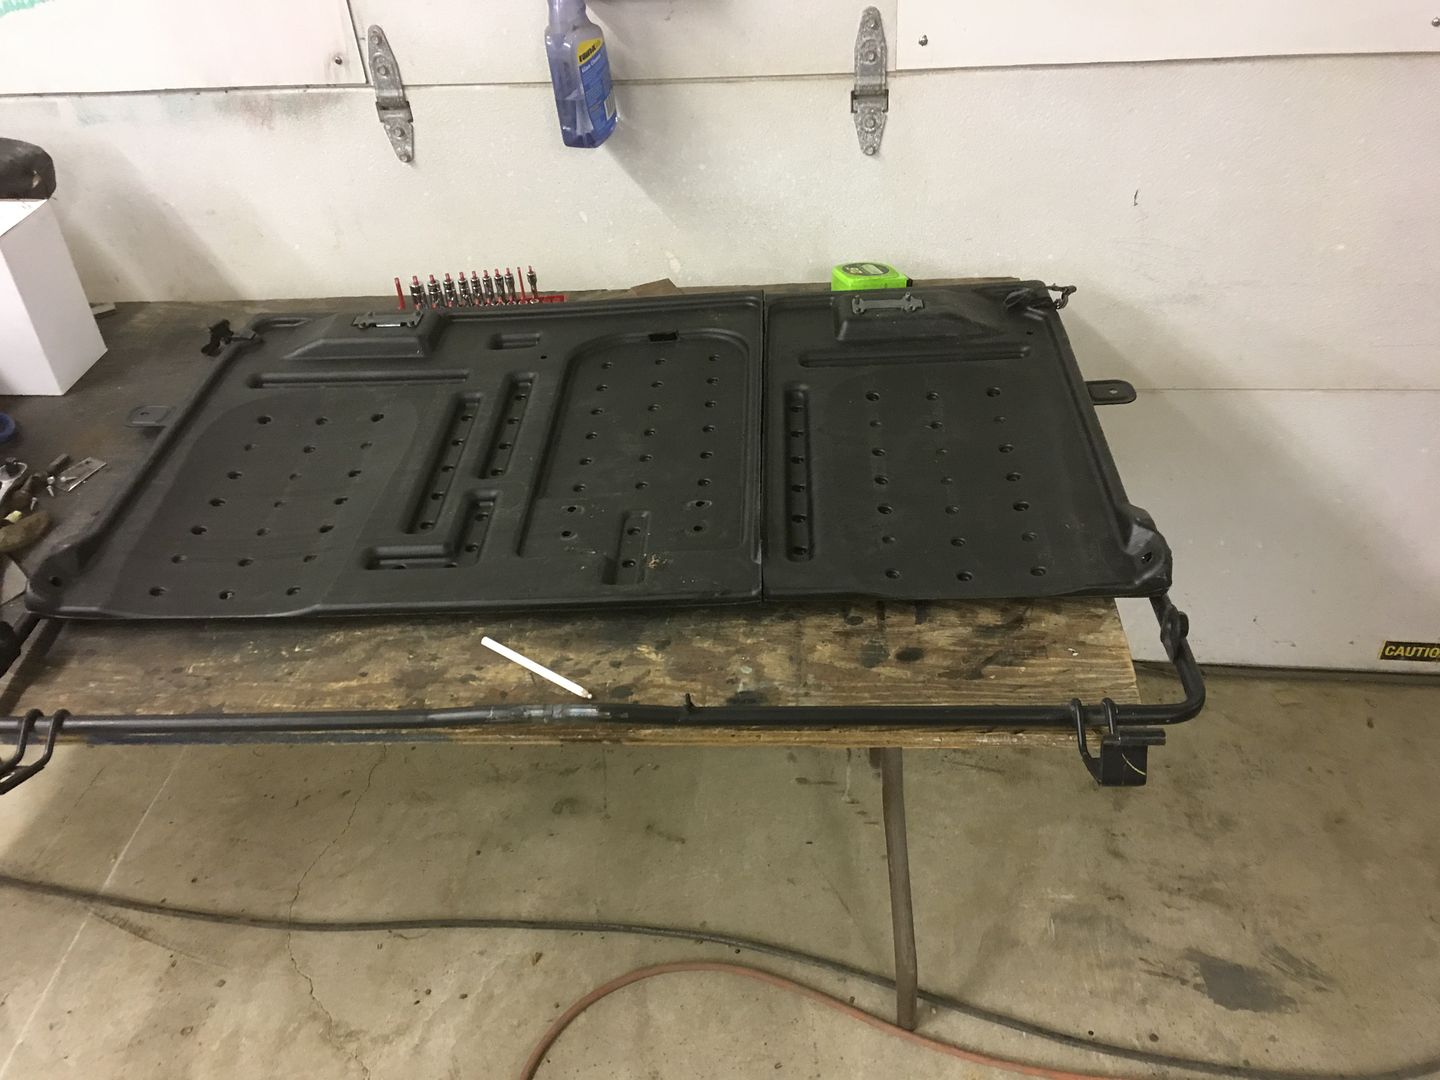
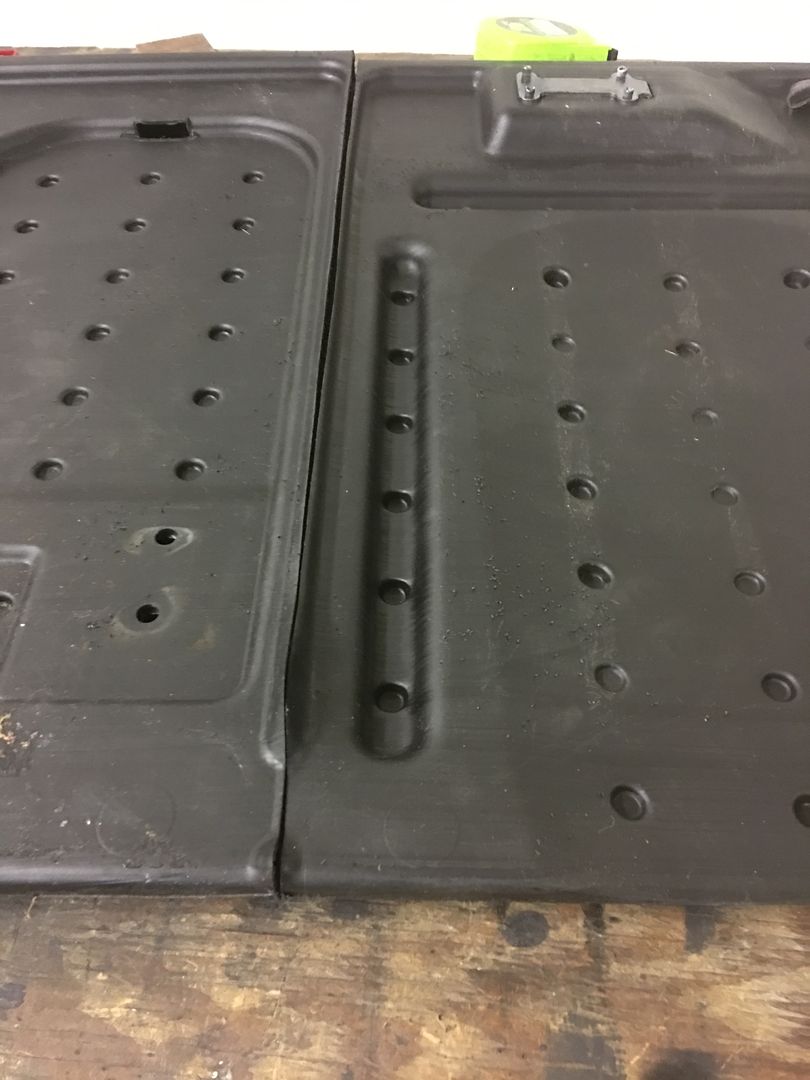
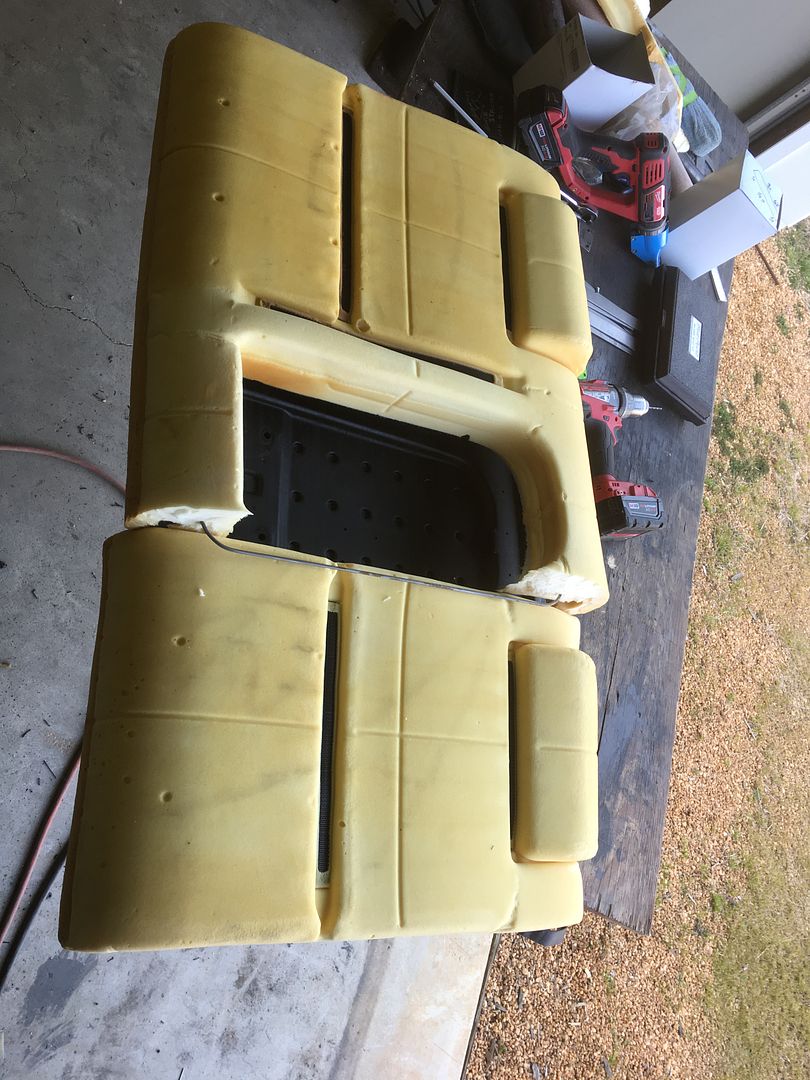
Next, our rear seat that came with the buckets was slightly oversize for our widened wheel wells. Some quick measurements showed we need to lose about 2" in width..
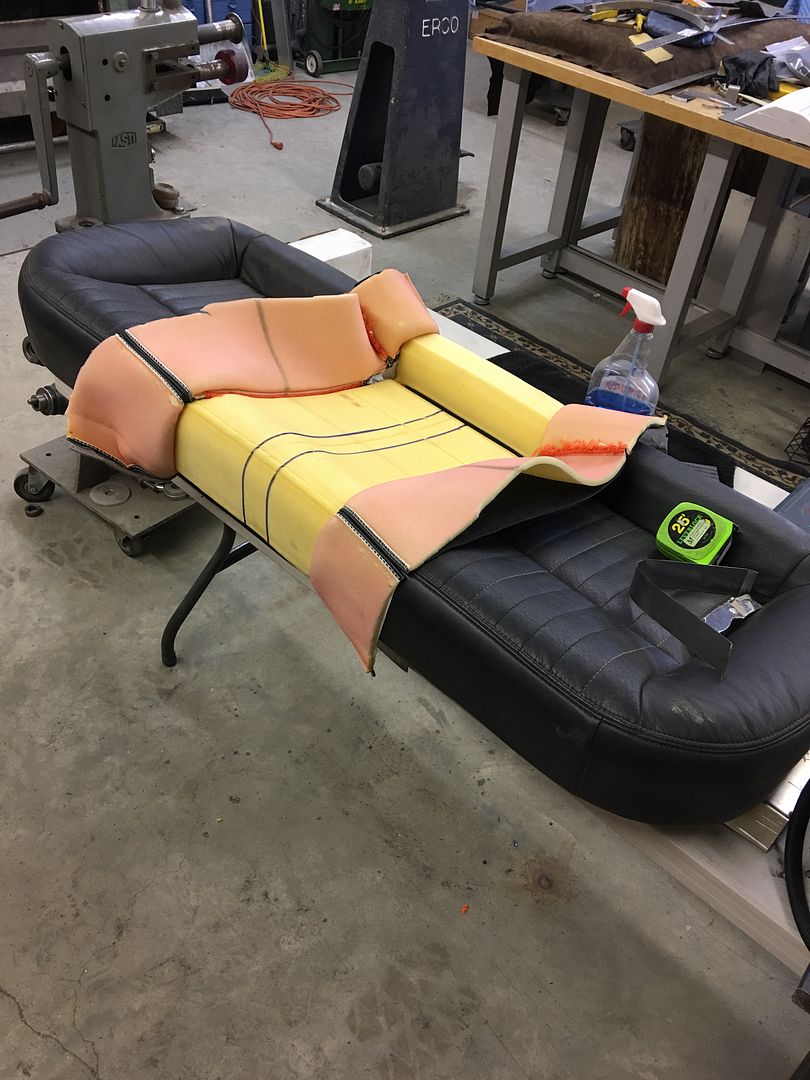
Then the rear corners needed relieving for the wheel tubs.....
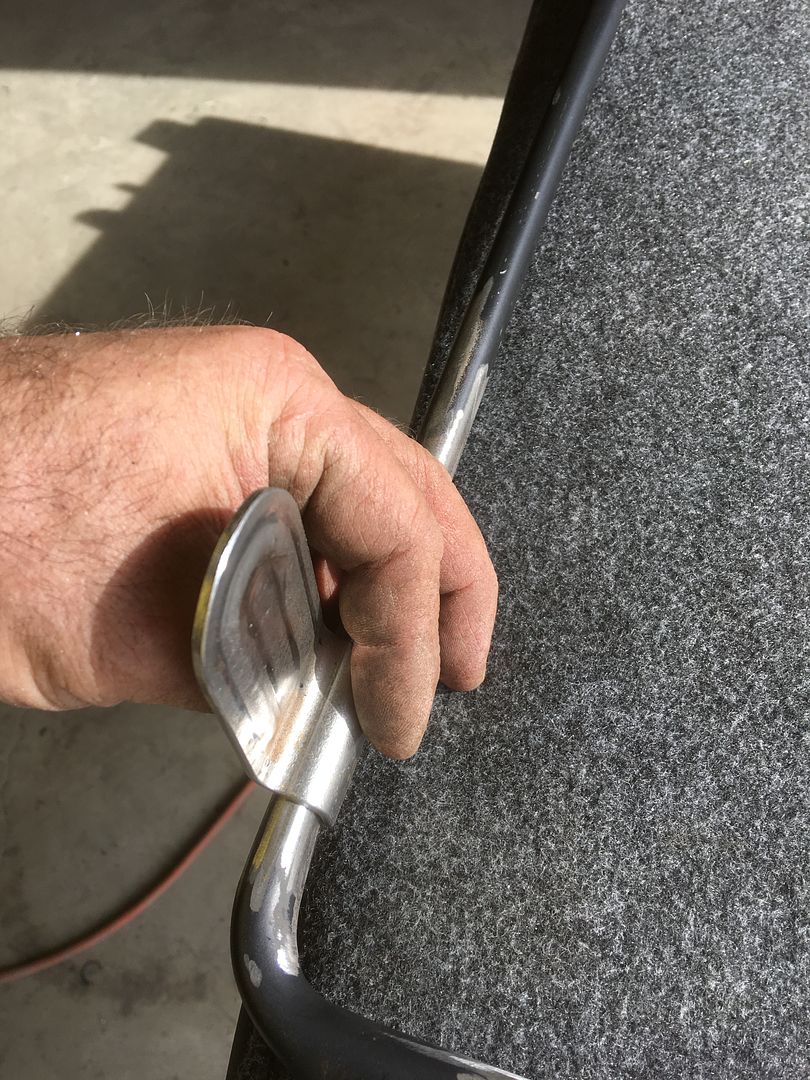
Some 3/16 diameter stainless rod was used to reconnect the pieces in the new rear corners
Some fire prevention for the foam..
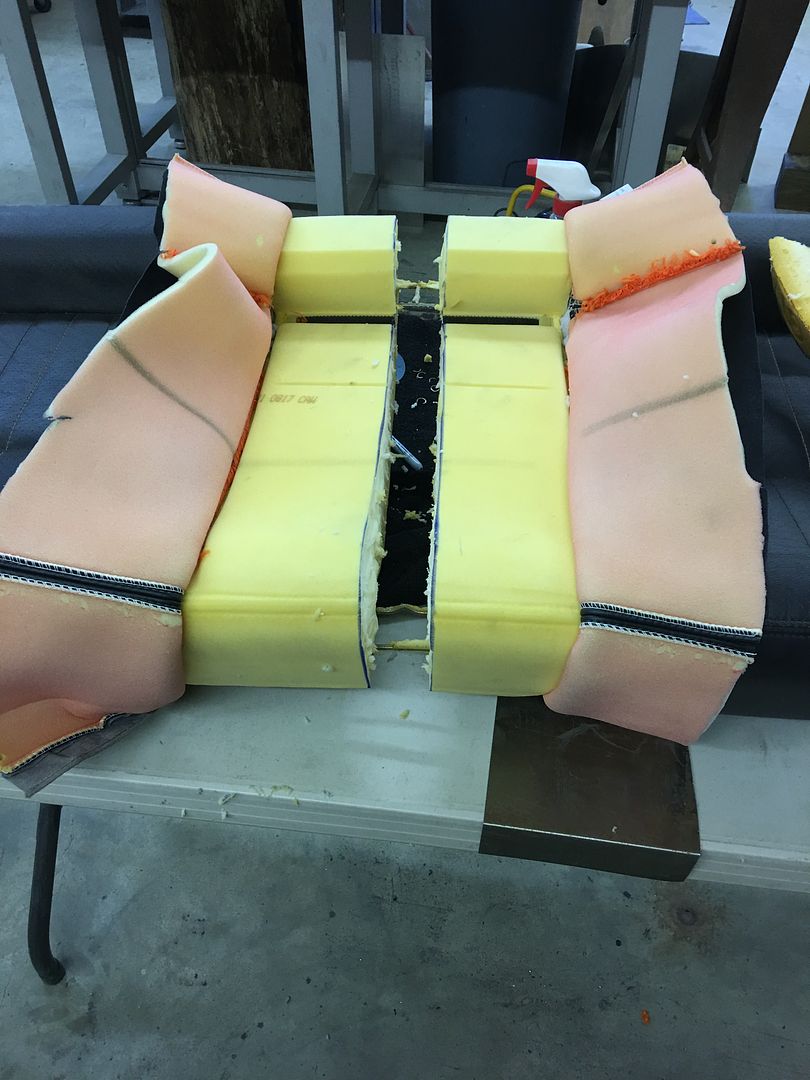
With both sides fitting individually, time to join our sides back together...
Video of the surgery results....
With the overlap of material trimmed, this part is looking pretty good!
Spent a few more hours getting the light opening to match the new, unbroken light, welded up some of the screw holes that had torn, and given some of the structural members in the way of the roof, we had to settle for no oil canning and a slight low that needed filler.. Here's some of our implements of correction
A few more sanding sessions and we'll get some epoxy primer on....
Getting some seat brackets welded in so we can finish off the bottom of the floor...
Plug welding...
But before we get all the front seats in and make it harder to access the back, lets get the seat riser plug welded in for the back seat...
Next, our rear seat that came with the buckets was slightly oversize for our widened wheel wells. Some quick measurements showed we need to lose about 2" in width..
Then the rear corners needed relieving for the wheel tubs.....
Some 3/16 diameter stainless rod was used to reconnect the pieces in the new rear corners
Some fire prevention for the foam..
With both sides fitting individually, time to join our sides back together...
Video of the surgery results....
With the overlap of material trimmed, this part is looking pretty good!
shortykorte
Well-known member
Thank you for the rear seat alteration. My first project was my 67 442. Since it was original, I had the mindset that it had to stay orginal (excluding intake & headers") ). Since then, I always think things have to orginal. One of the most important lessons learned on GJ is if you have a way to cut it & weld it, you can do anything you want.
). Since then, I always think things have to orginal. One of the most important lessons learned on GJ is if you have a way to cut it & weld it, you can do anything you want.
). Since then, I always think things have to orginal. One of the most important lessons learned on GJ is if you have a way to cut it & weld it, you can do anything you want.NASTYZEN
Well-known member
One more task off the list. turned out nice. Your list must be nearly empty by now?
You might pick up some more work with the snow on the way if they send out the buses..
You might pick up some more work with the snow on the way if they send out the buses..
Last night we finished up sanding the roof repair on the bus, and started to get things covered up for primer.. Being the lighter of us two, guess who got roof duties for rolling out the shark grip?
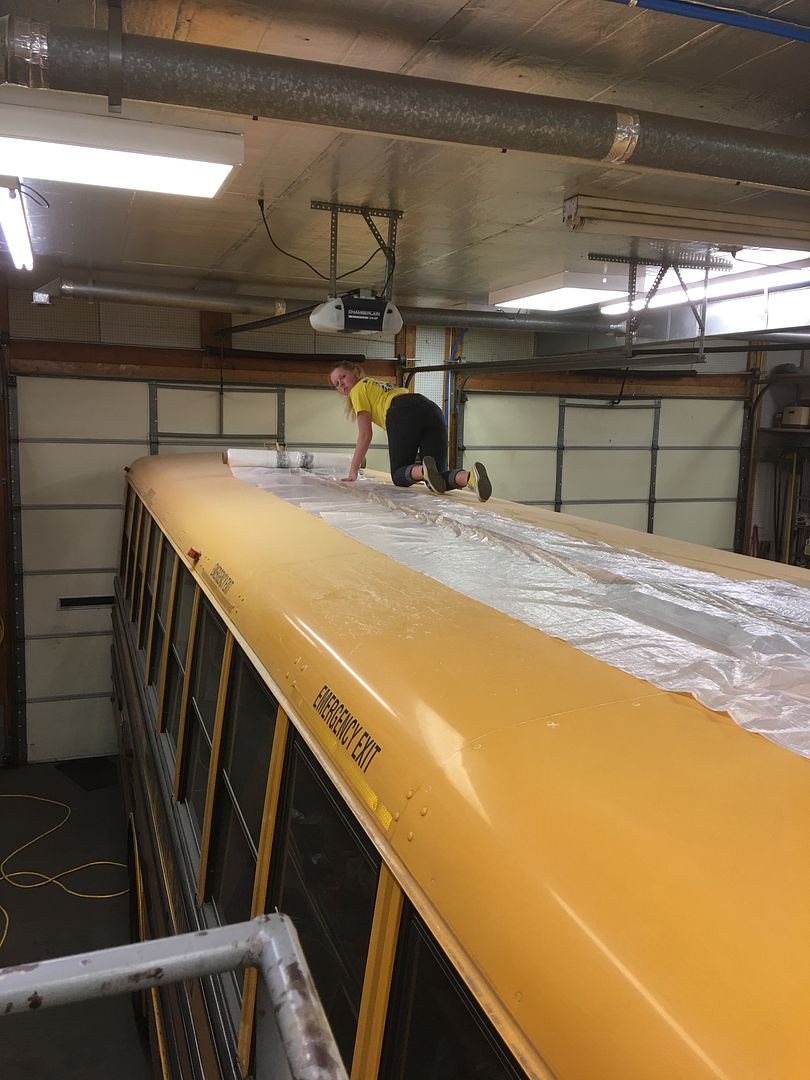
This is starting to look like a hazmat incident...
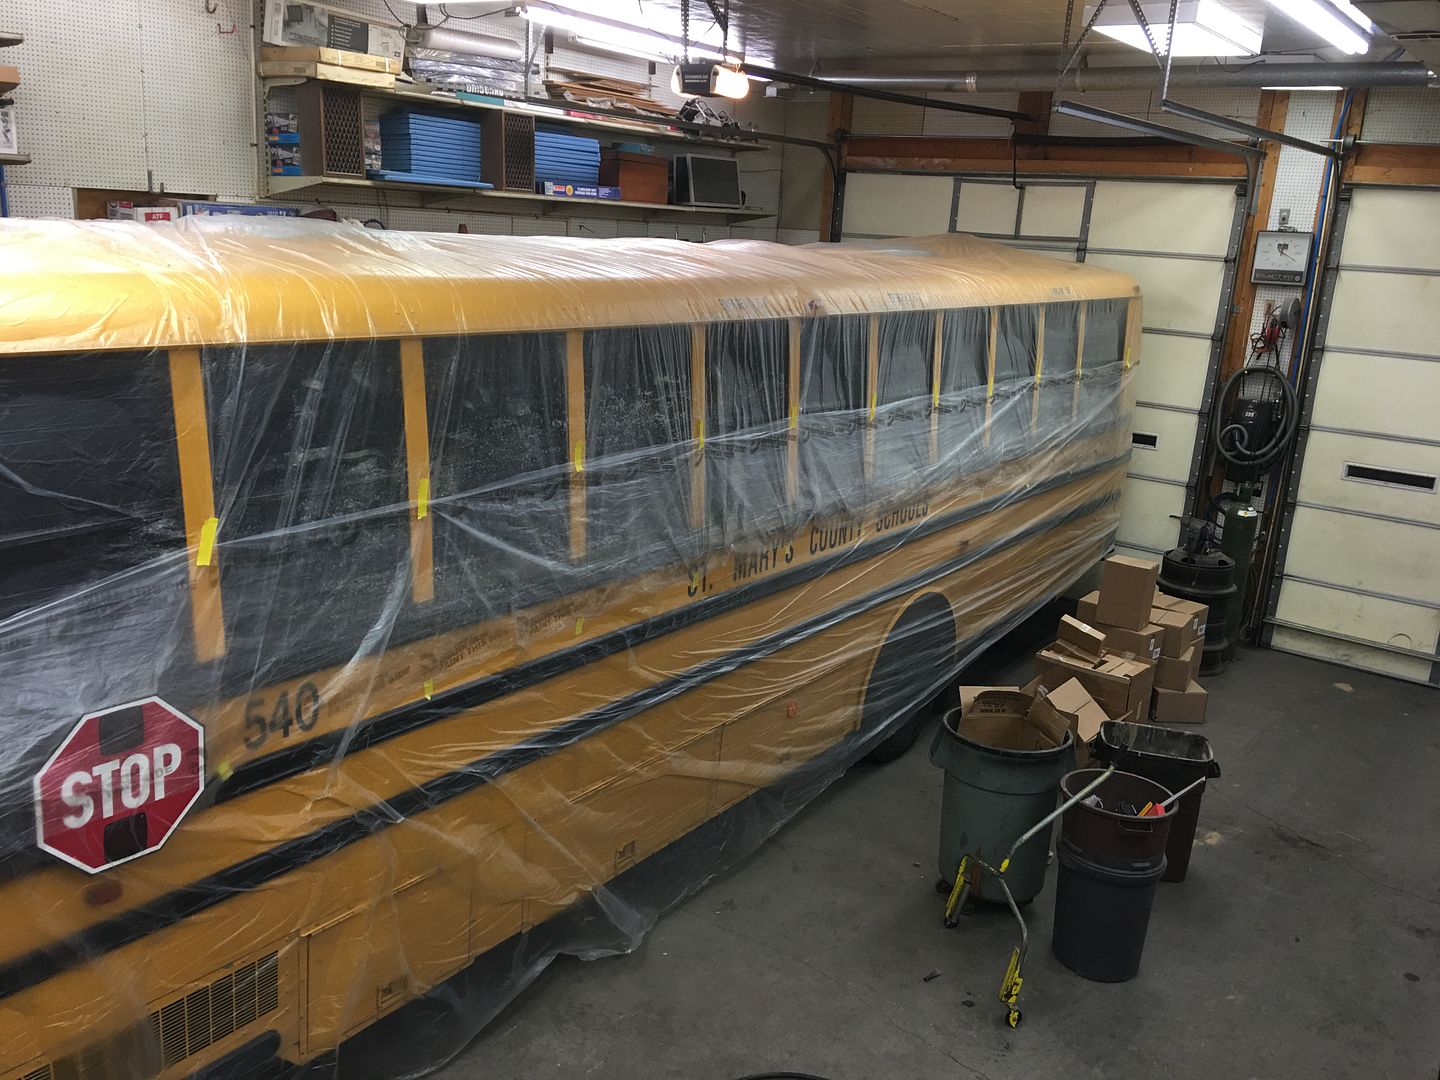

Tonight we'll get some SPI epoxy on the bare spots and filler

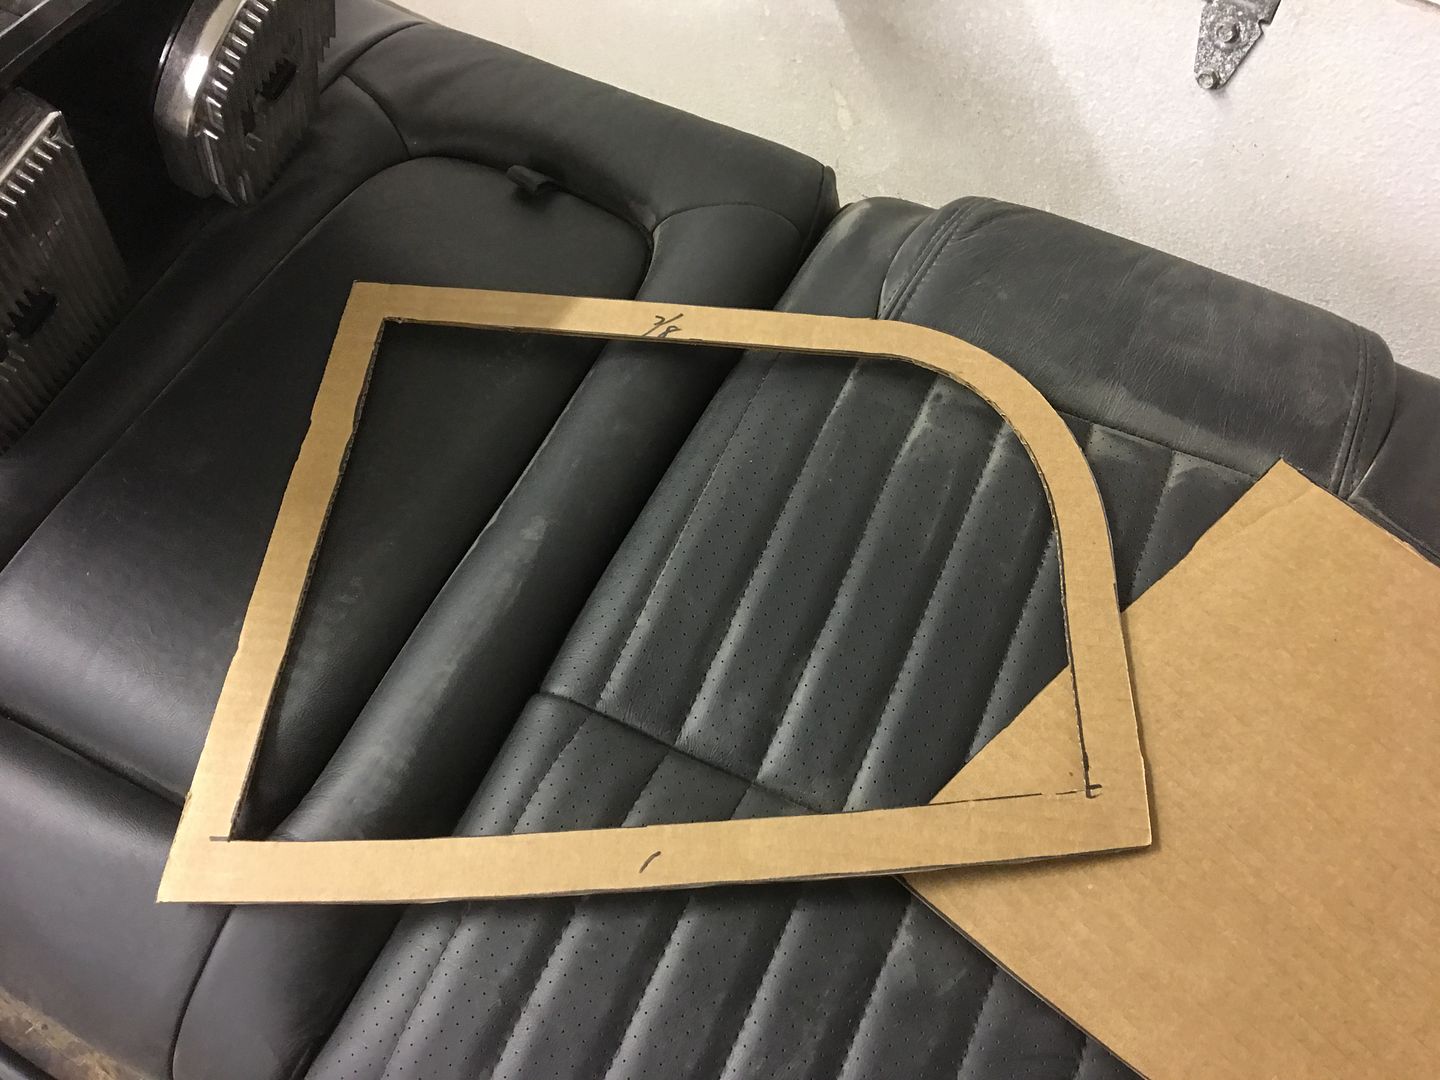
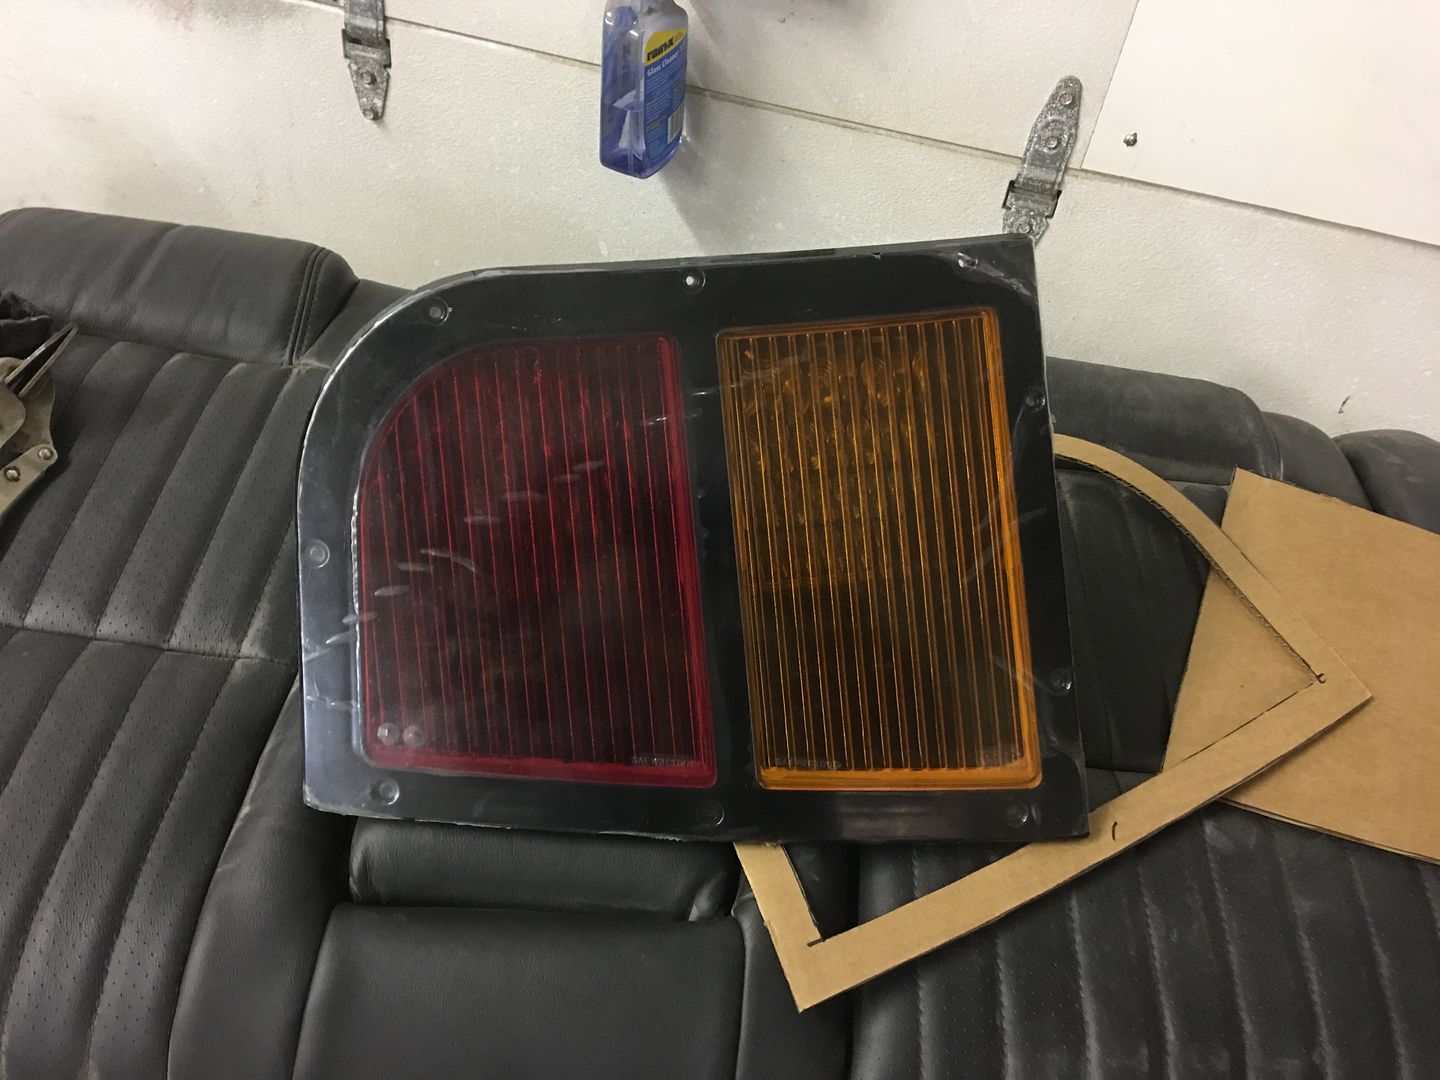
The sheet metal on the front cap seems a bit thin for it's purpose, so rather than trust the new light to clip nuts again, a surround ring is made from 14 gauge cold rolled steel to make an anchor plate. The Vise-jigsaw is used to cut out the center...
note throttle control...

Using transfer punches, mounting holes from light are marked onto the ring and drilled to 17/64 to accommodate 8-32 rivet nuts...


It was also media blasted to prep it for the epoxy primer session for this evening.
This is starting to look like a hazmat incident...
Tonight we'll get some SPI epoxy on the bare spots and filler
The sheet metal on the front cap seems a bit thin for it's purpose, so rather than trust the new light to clip nuts again, a surround ring is made from 14 gauge cold rolled steel to make an anchor plate. The Vise-jigsaw is used to cut out the center...
note throttle control...
Using transfer punches, mounting holes from light are marked onto the ring and drilled to 17/64 to accommodate 8-32 rivet nuts...
It was also media blasted to prep it for the epoxy primer session for this evening.
sberry
Banned
The bump work looks good, my bet is no one will care if there is a little filler in it.
All ready to spray...
Here's the SPI epoxy sprayed on the repair area...
as well as on our bolting plate we fabricated. This will be riveted behind the panel using stainless pop rivets..

First coat of BASF Urethane, and a shot of the scaffolding setup used...
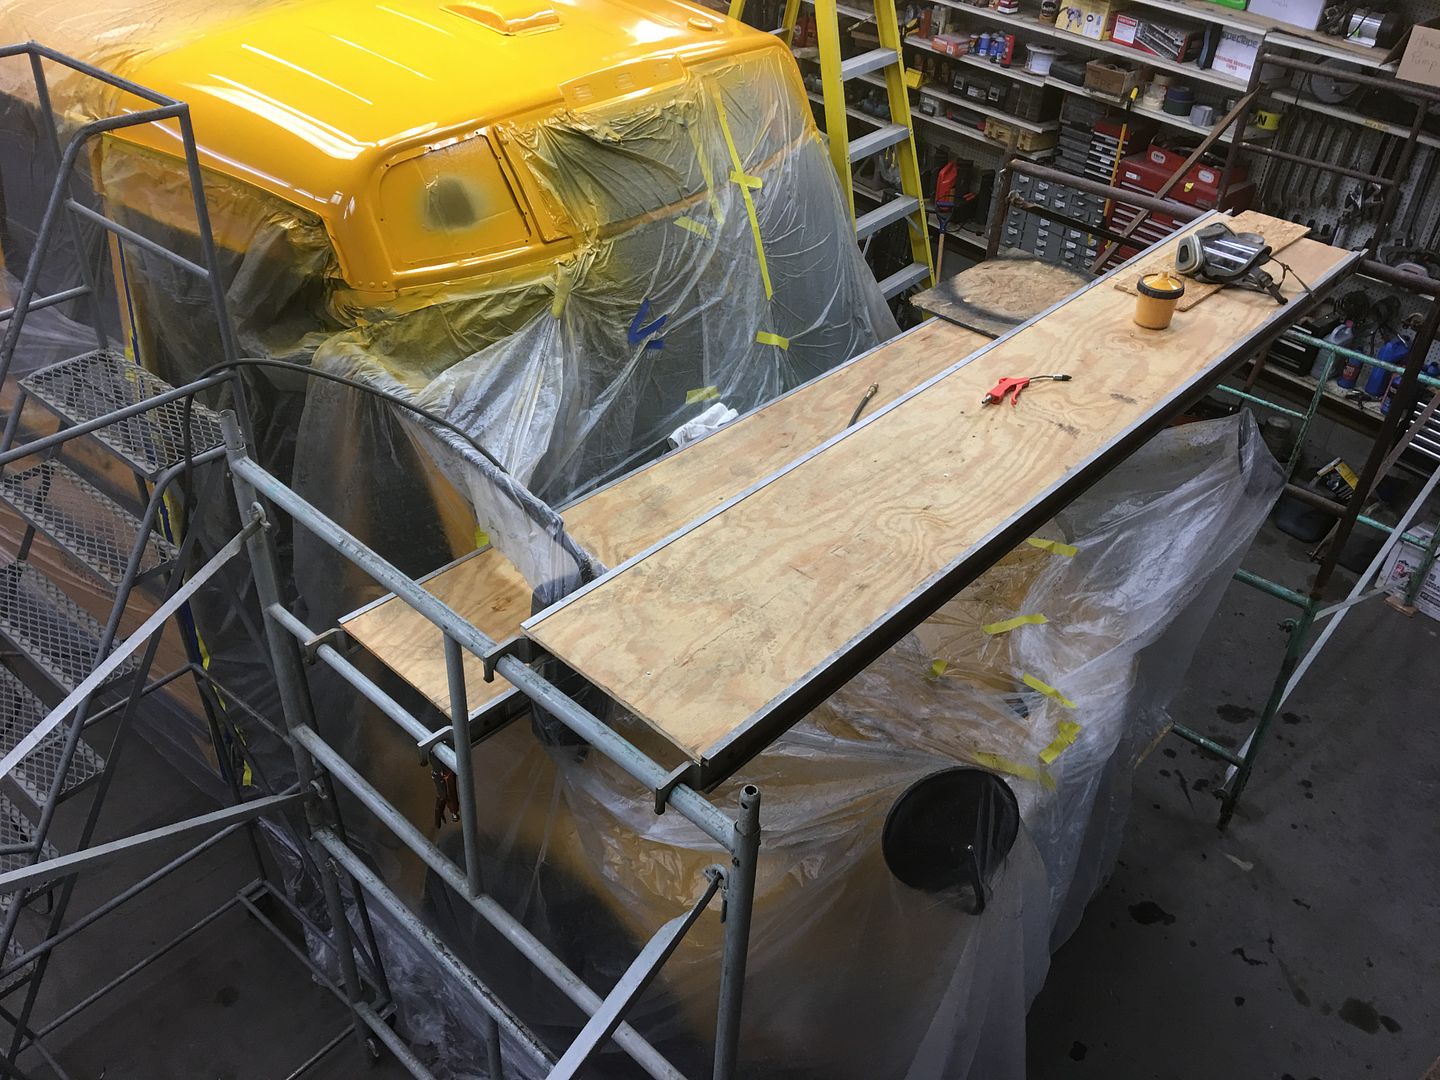
Final coat...
Unmasked, we'll let this set a bit and get it re-assembled on Tuesday night.
Here's the SPI epoxy sprayed on the repair area...
as well as on our bolting plate we fabricated. This will be riveted behind the panel using stainless pop rivets..
First coat of BASF Urethane, and a shot of the scaffolding setup used...
Final coat...
Unmasked, we'll let this set a bit and get it re-assembled on Tuesday night.
1953mercury
Well-known member
Nice job on the repair. I imagine that could be a pretty lucrative side line once the word gets out. Mike
Mike, all the bus work I've done thus far is for a buddy of mine that has a fleet of about 20 buses. Most of that work has been removable pieces that I've been able to paint in my booth and then assemble in my driveway or in his shop as mine is not large enough to hold a bus.. This painting was done in his shop. I don't mind doing the repairs for him, but don't know that I'd want much more of it than I'm doing now. Too new for me..
Most body shops shy away from this work as much of it involves fabrication as well..
Most body shops shy away from this work as much of it involves fabrication as well..

larry4406
Well-known member
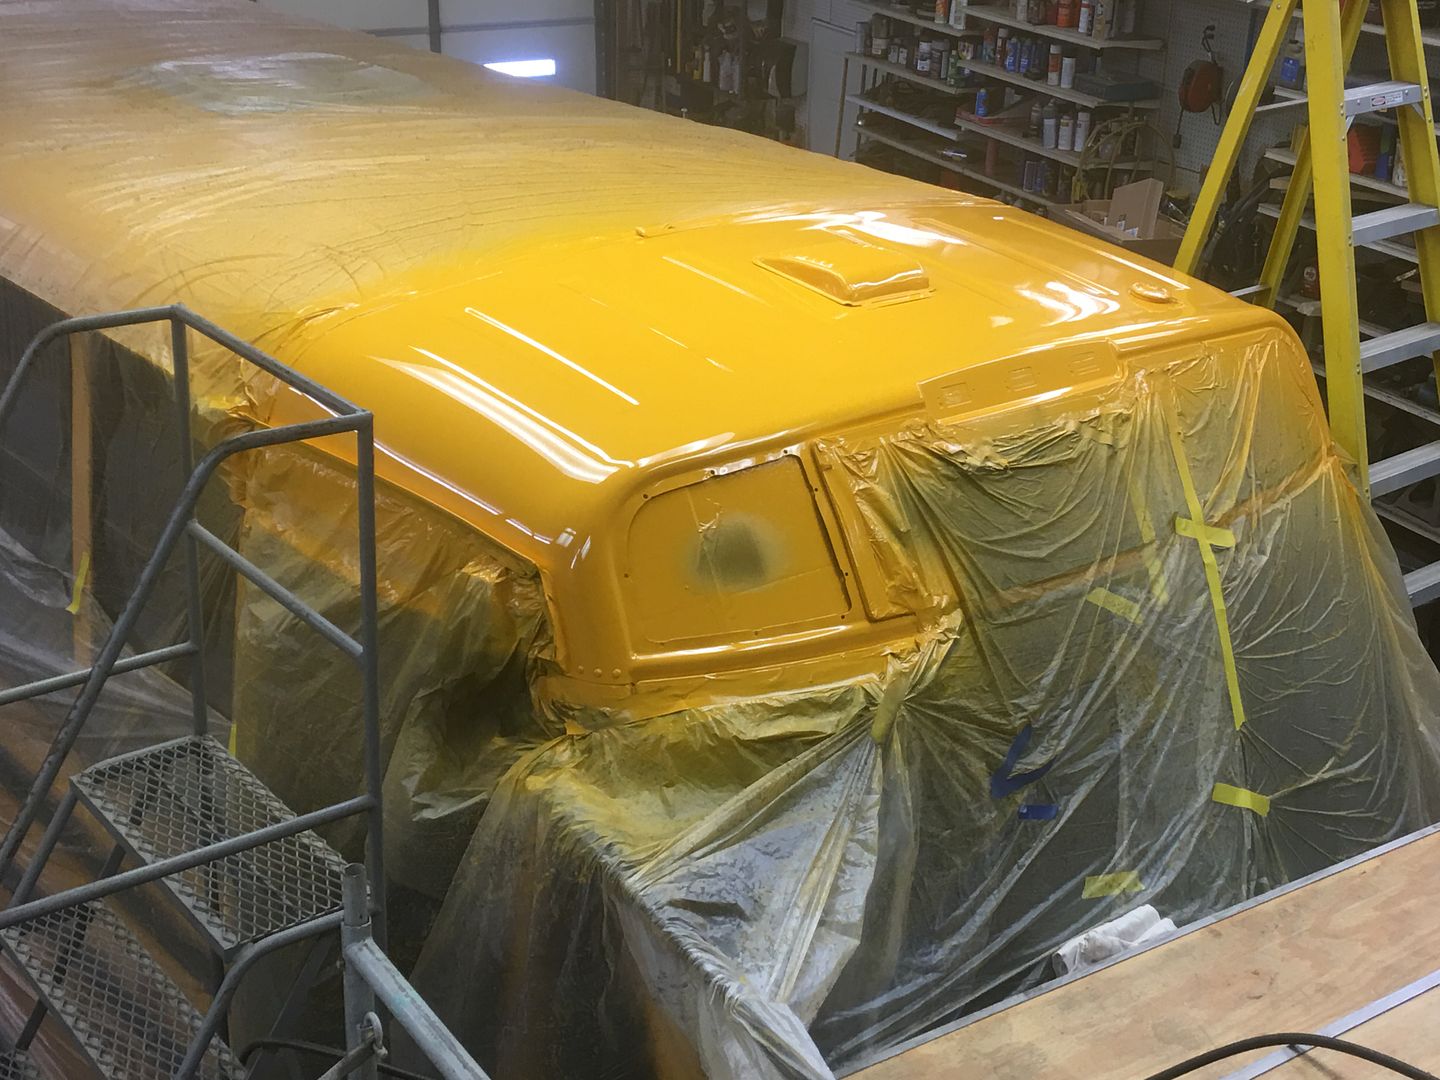
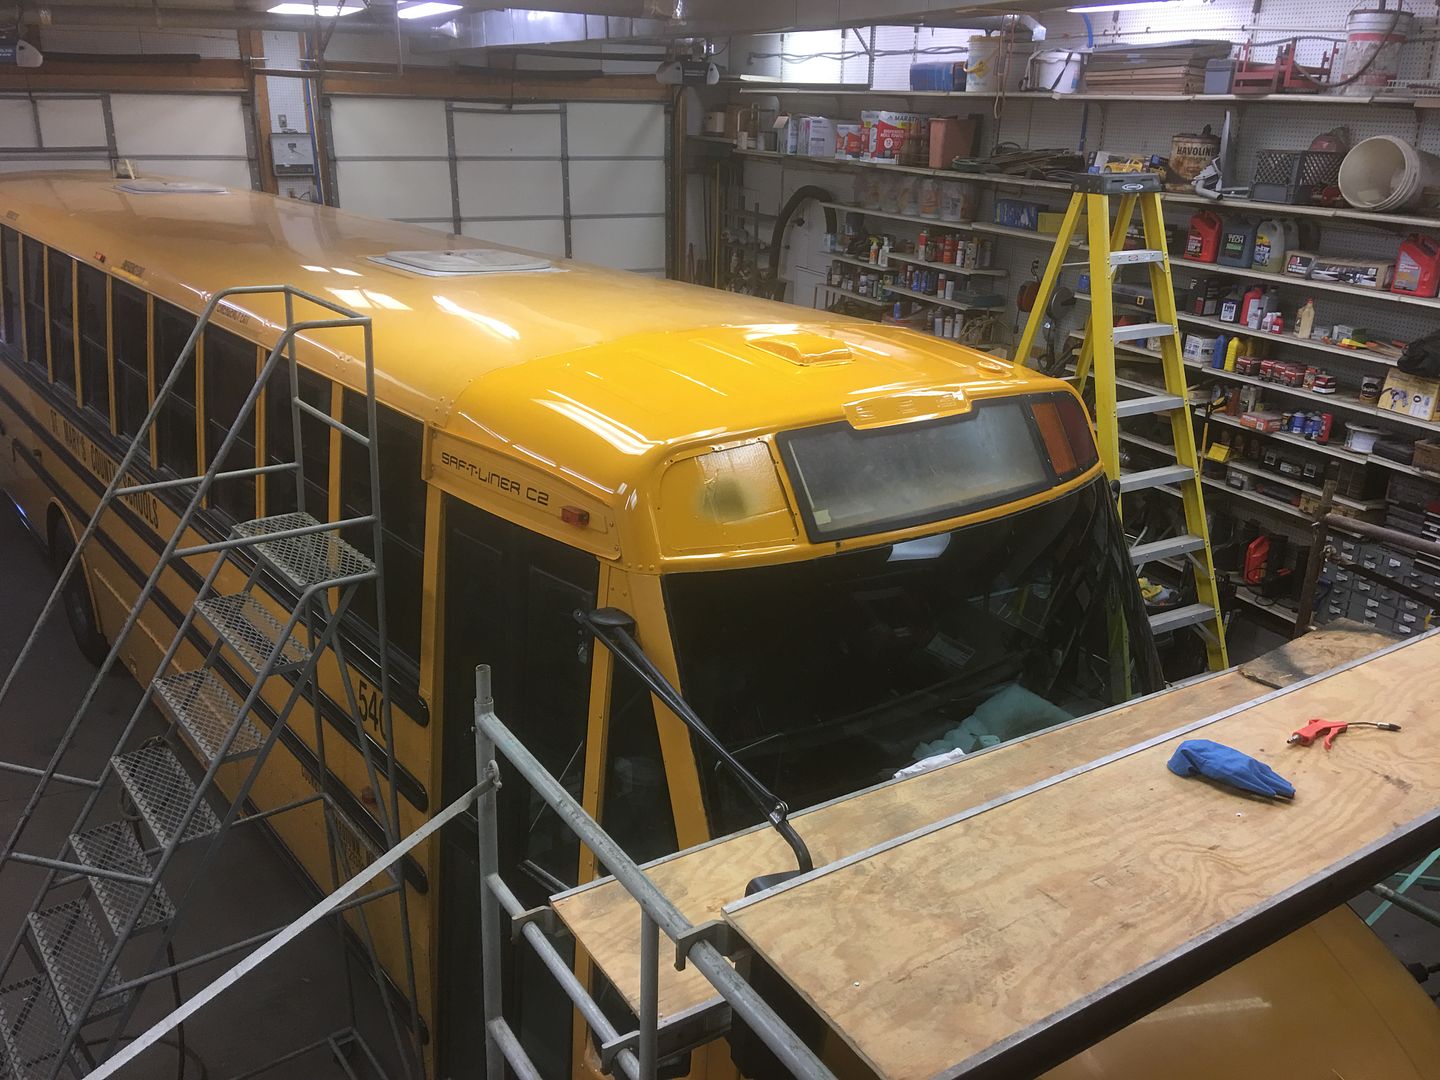
Nice job! Fresh roof paint really shows the faded remaining paint.
jimkinney
Well-known member
Almost need to scuff it up with scotchbrite to match...
This bus is over seven years old, we have better luck with paint matching on the 4 years and newer buses.. That and the sides don't fade as much as the roof, most of the repairs are to the luggage doors..
You could have buffed out the rest of the bus to match the new paint, NOT.
Great job as usual.
Jim
TimeWarpF100
Well-known member
Almost need to scuff it up with scotchbrite to match...
This bus is over seven years old, we have better luck with paint matching on the 4 years and newer buses.. That and the sides don't fade as much as the roof, most of the repairs are to the luggage doors..
Way Cool! Few to ZERO body shops would have attempted to repair that roof. It would have been panel replacement or 100 gallons of bondo . .
larry4406
Well-known member
Basketball wrapped in tin foil covered with bondo would have kept it down to maybe 1-2 gallons of bondo.
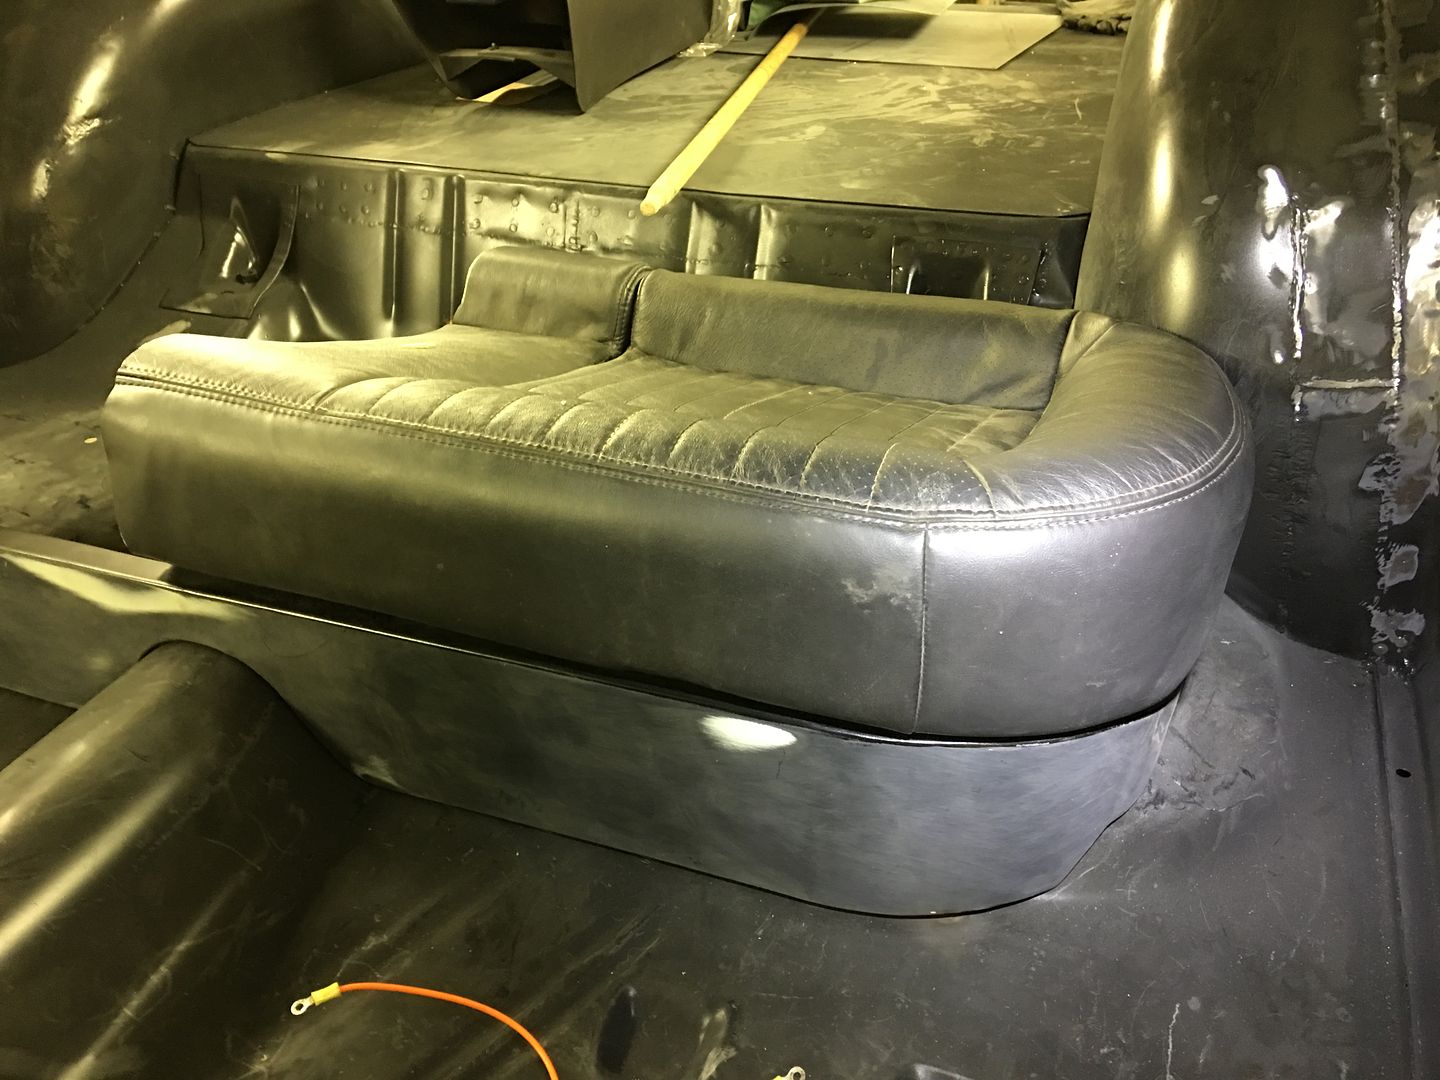
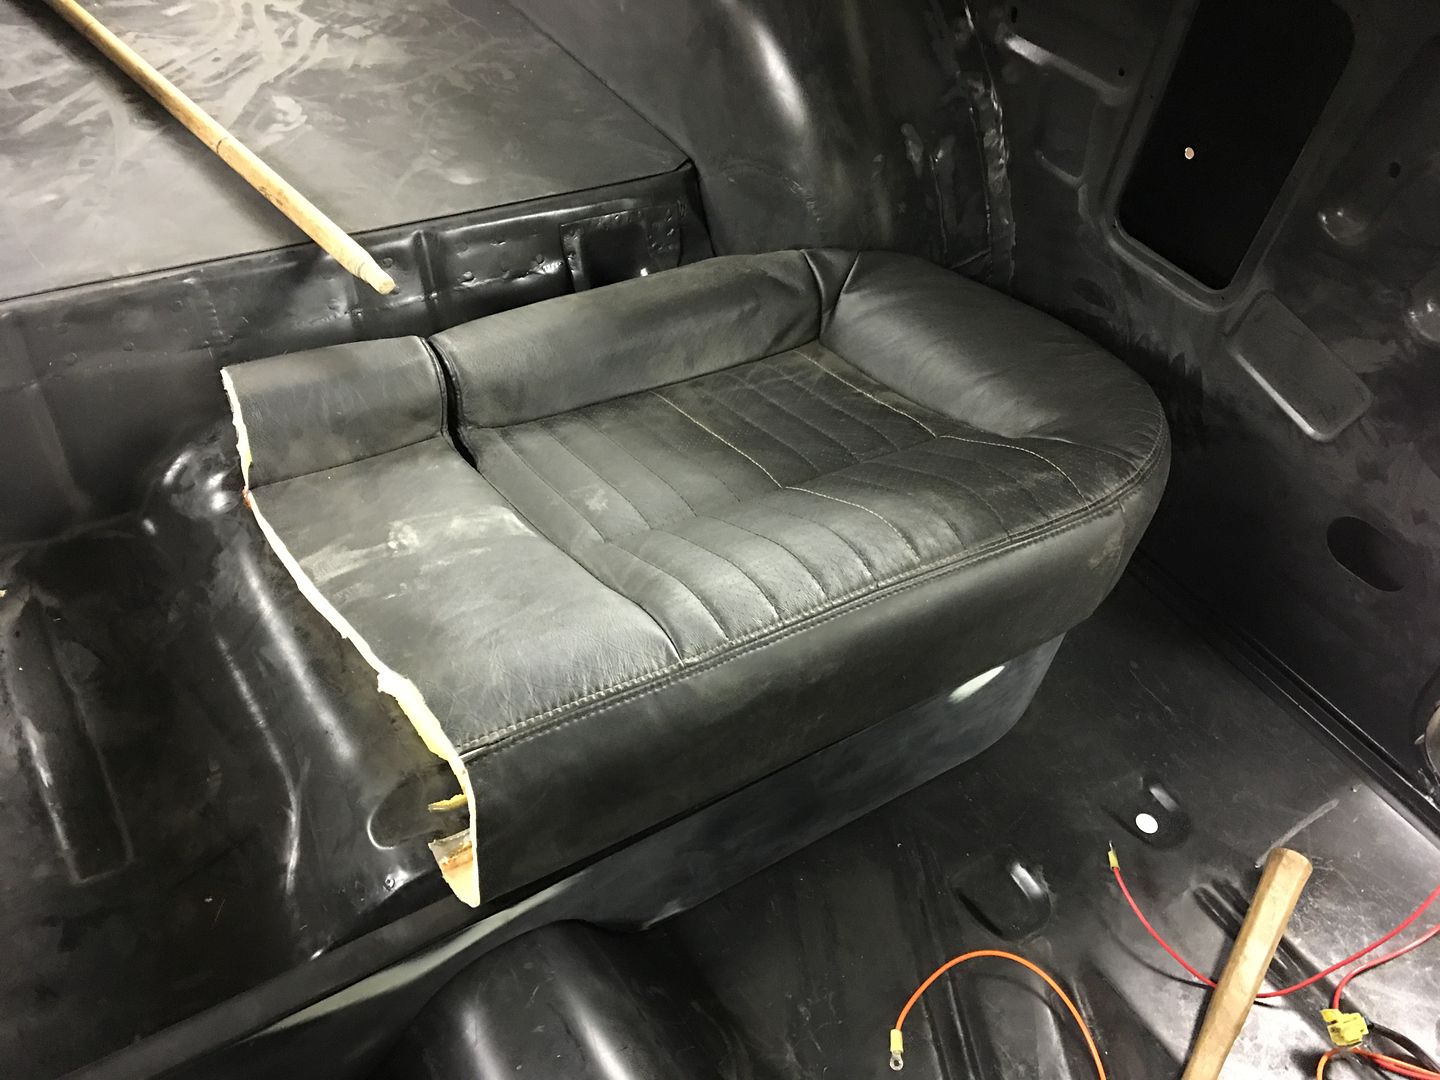
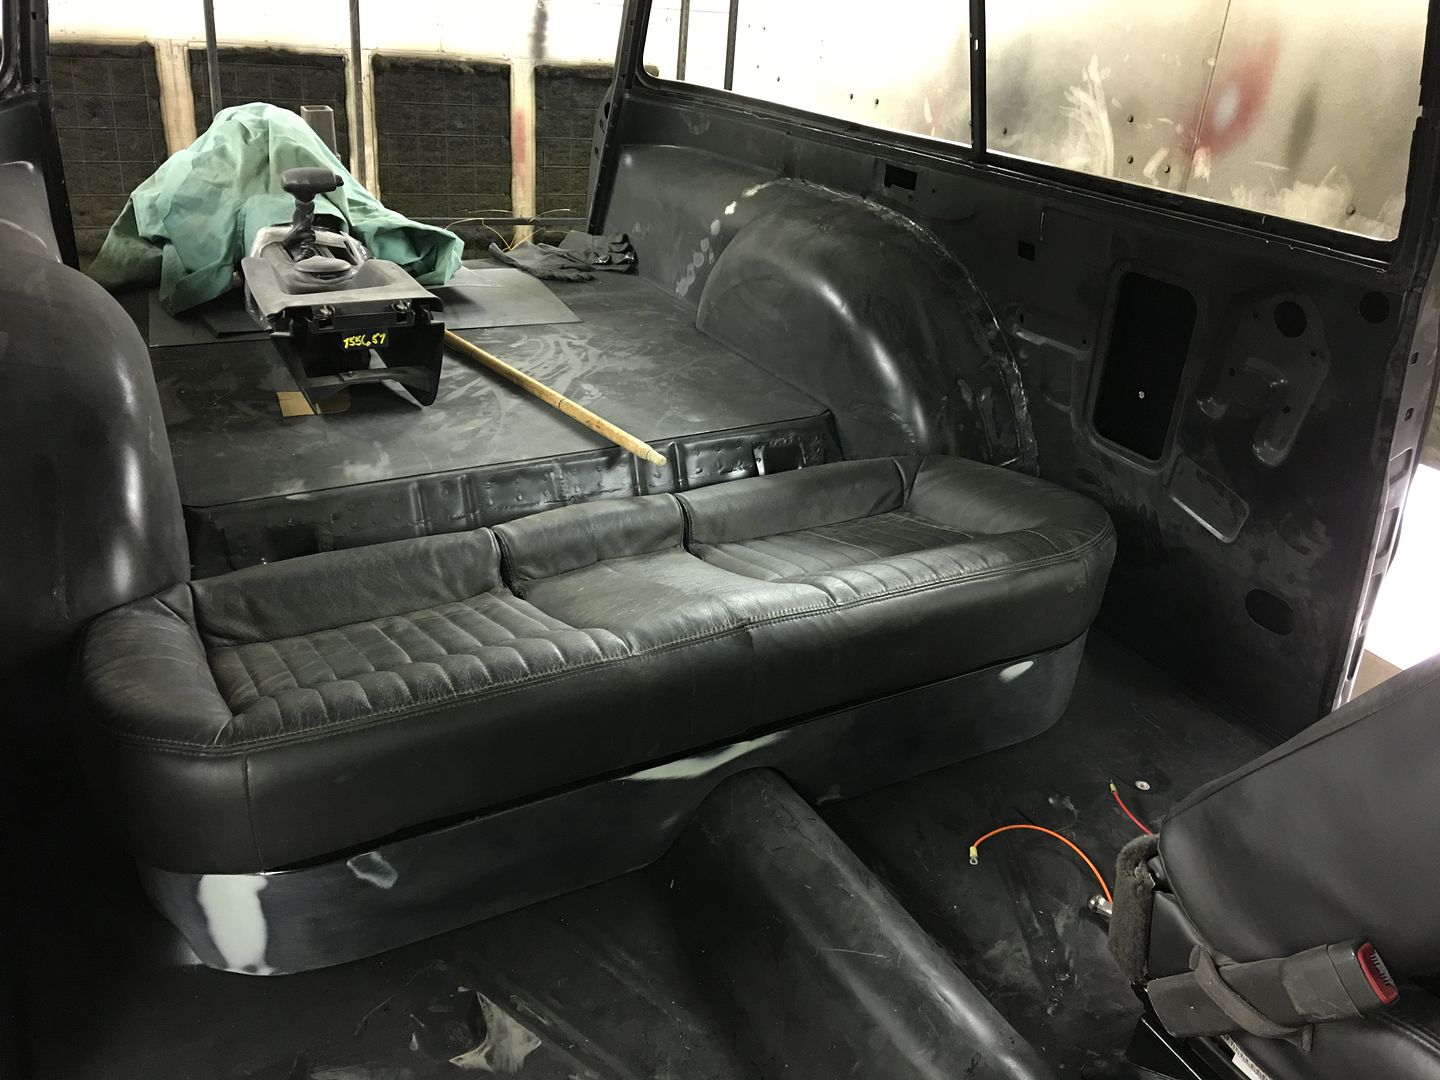
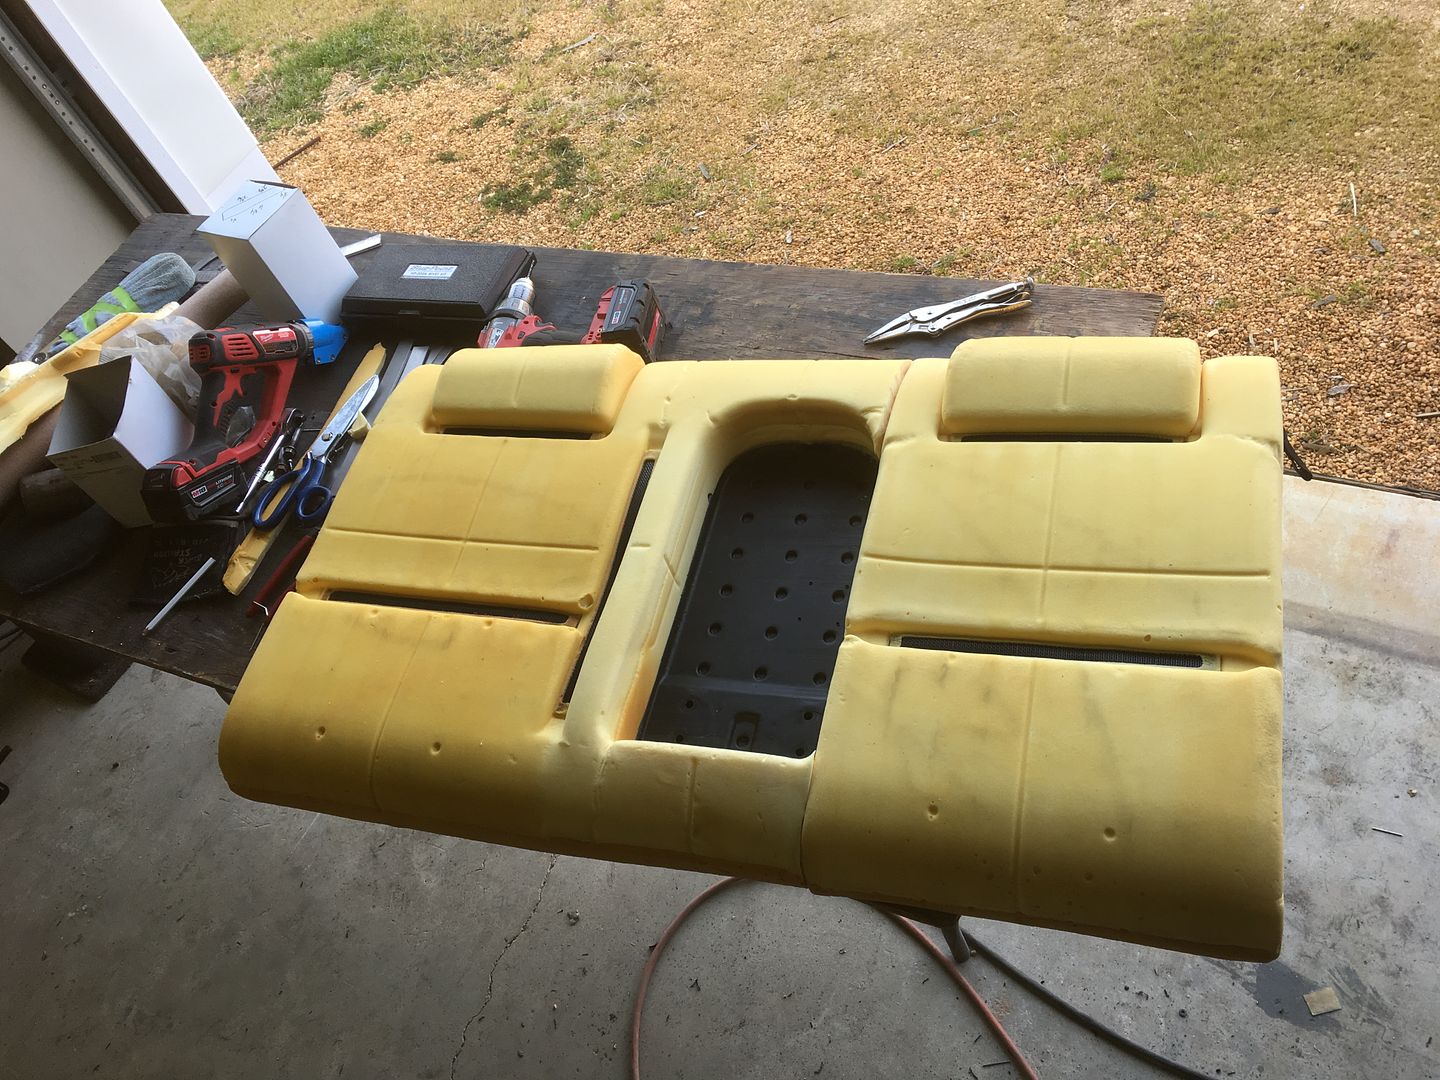
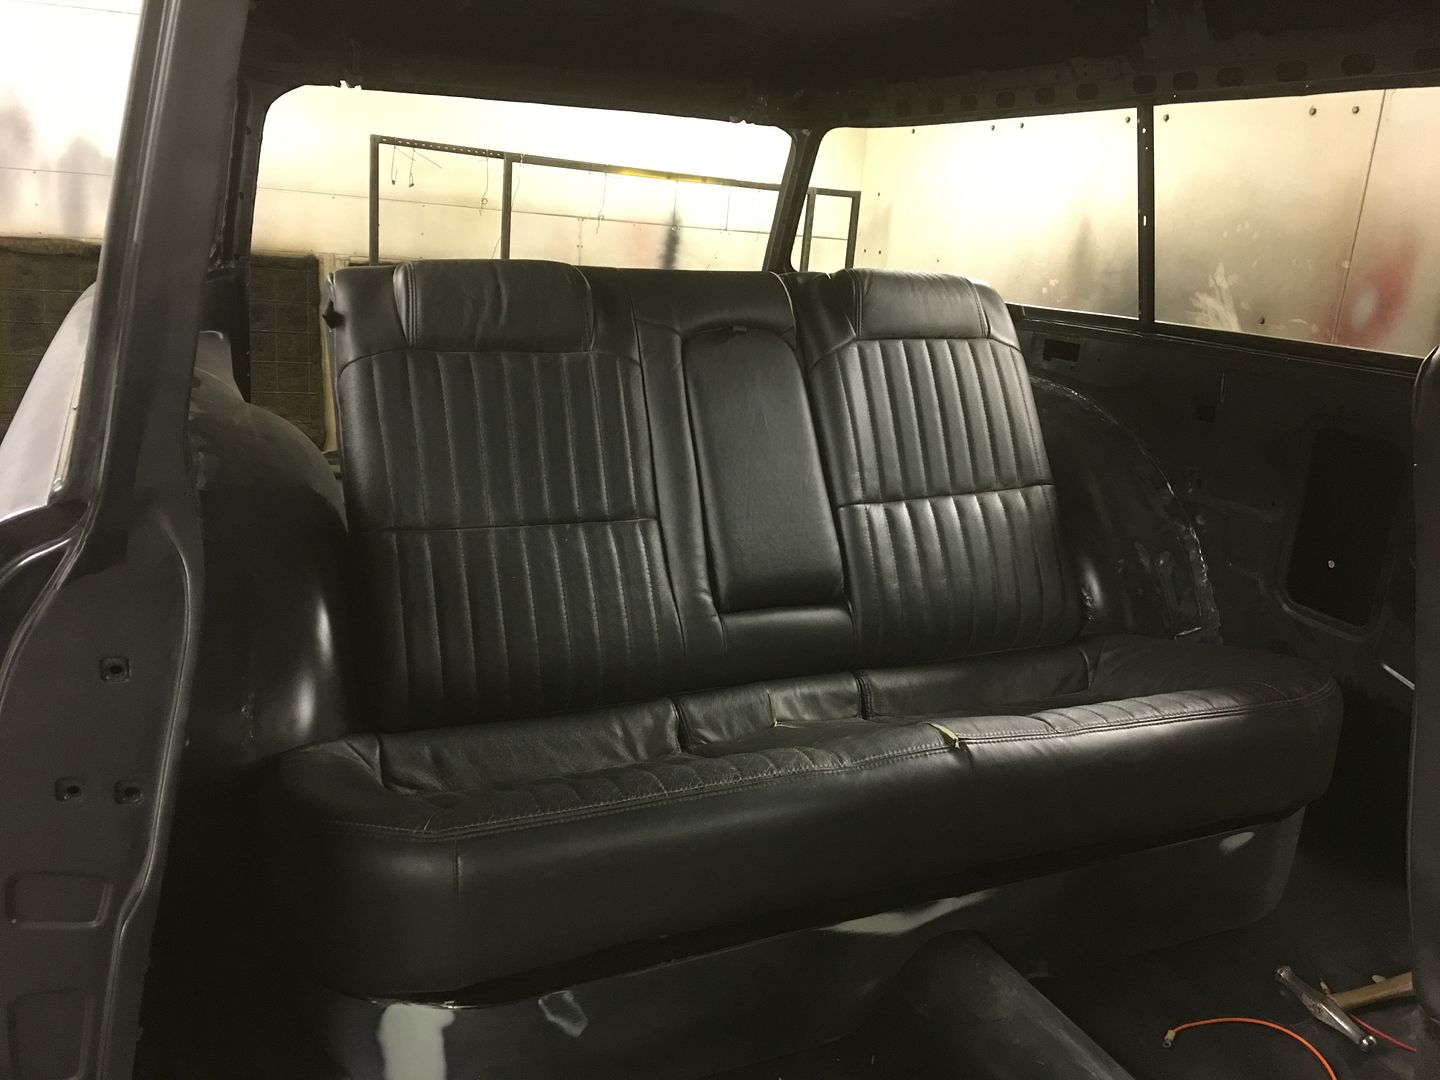
With the 55's rear seat bottom narrowed to fit the wheel tubs.....
....time to do the same for the seat back. First to blow it apart....
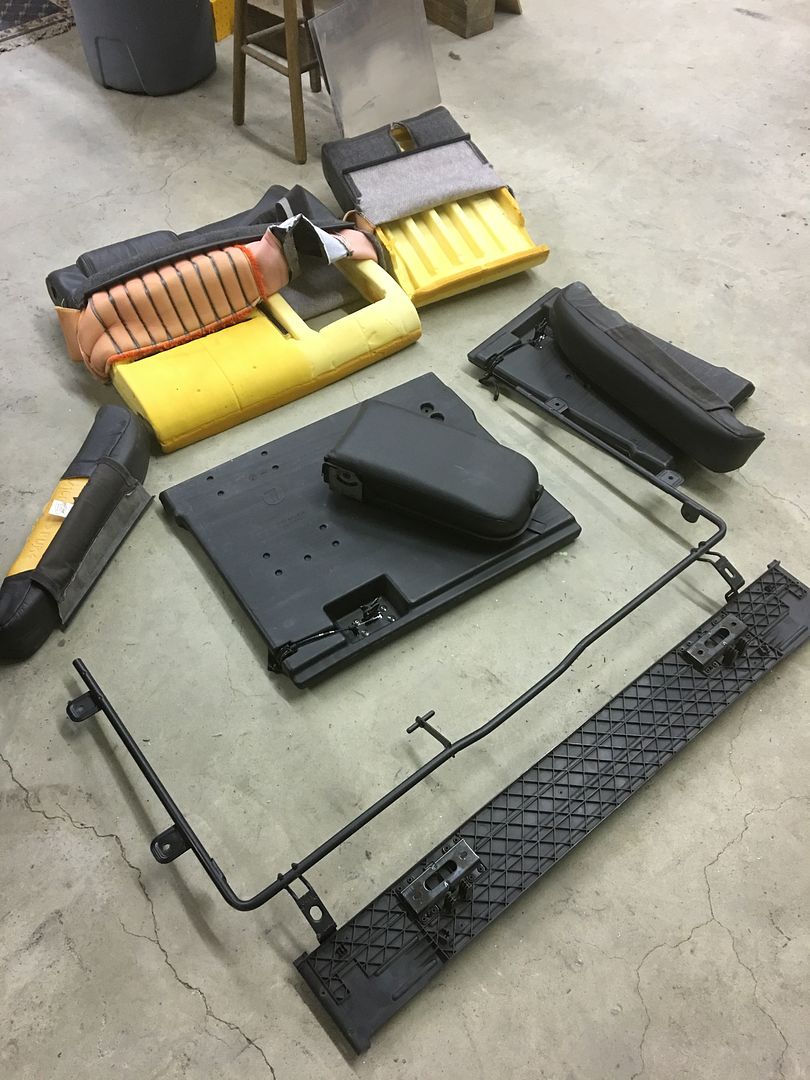
This had a multiple fold down, arm rest in the middle, non 55 looking arrangement. The arm rest will be first to go, and we'll attach the fold down sections together..
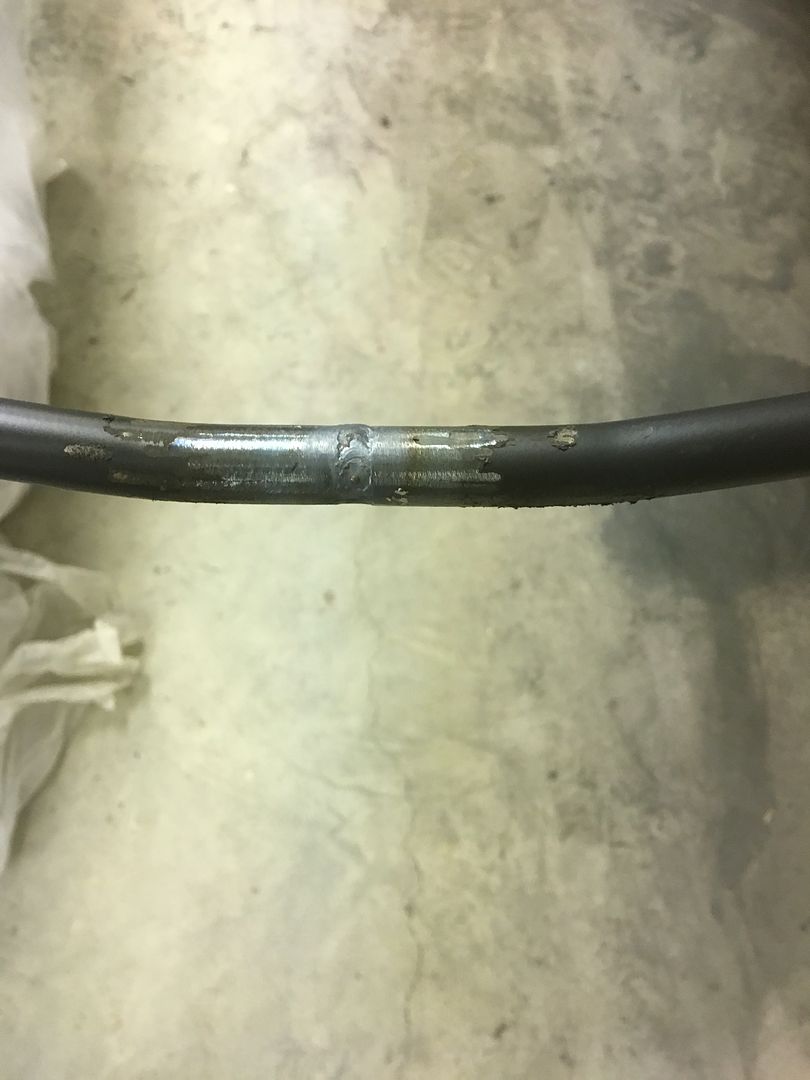
The frame is sectioned in the middle, a tube driven inside, and TIG welded around the perimeter..
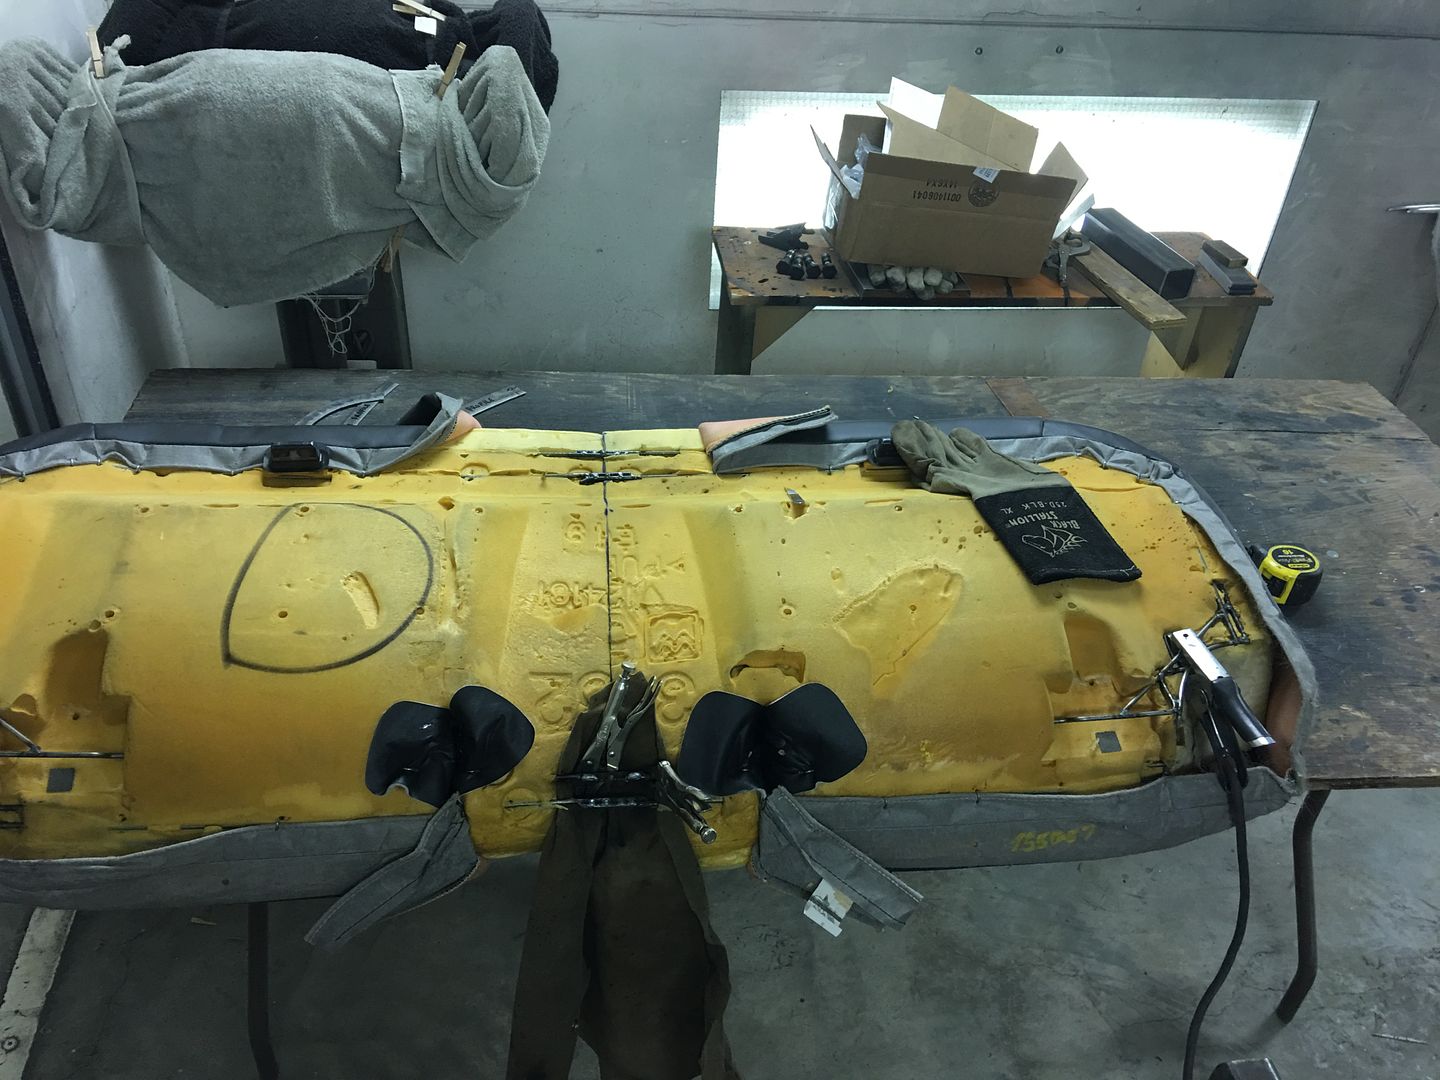
Then the seat innards are trimmed accordingly to make a one piece back..
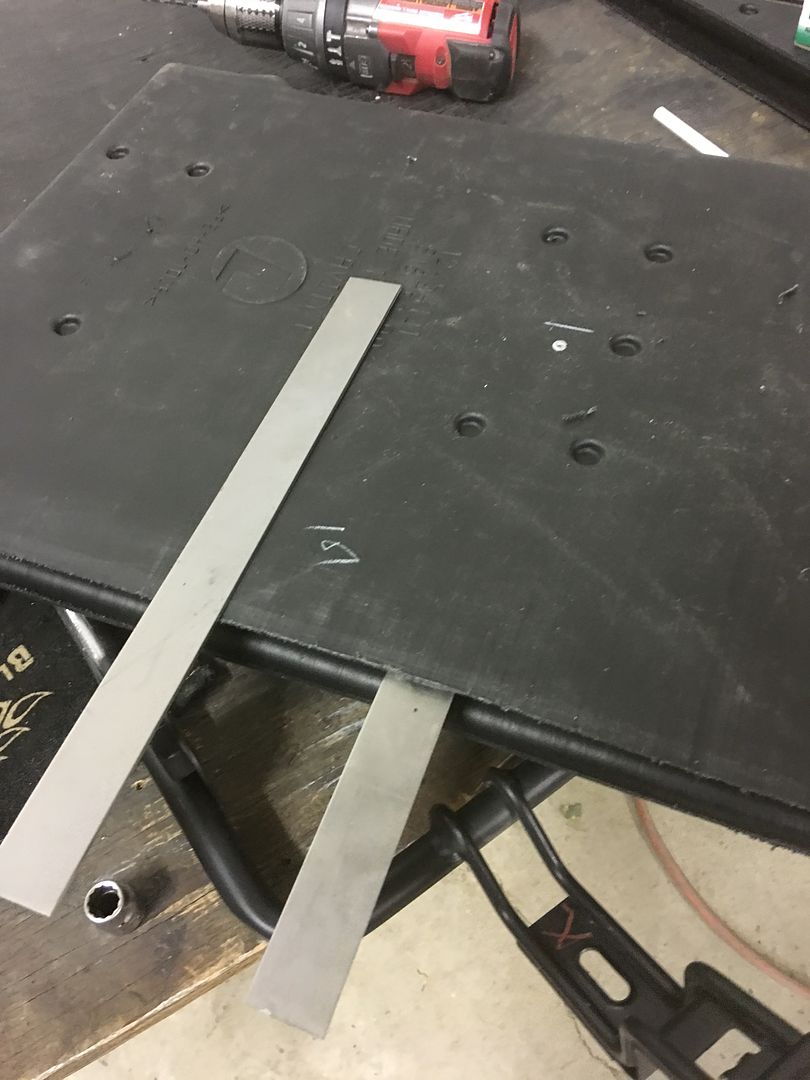
Then some 14 gauge strips are cut out to join the two sections together..

That should work, tomorrow we'll work on the new pivot brackets..
....time to do the same for the seat back. First to blow it apart....
This had a multiple fold down, arm rest in the middle, non 55 looking arrangement. The arm rest will be first to go, and we'll attach the fold down sections together..
The frame is sectioned in the middle, a tube driven inside, and TIG welded around the perimeter..
Then the seat innards are trimmed accordingly to make a one piece back..
Then some 14 gauge strips are cut out to join the two sections together..
That should work, tomorrow we'll work on the new pivot brackets..
Last edited:
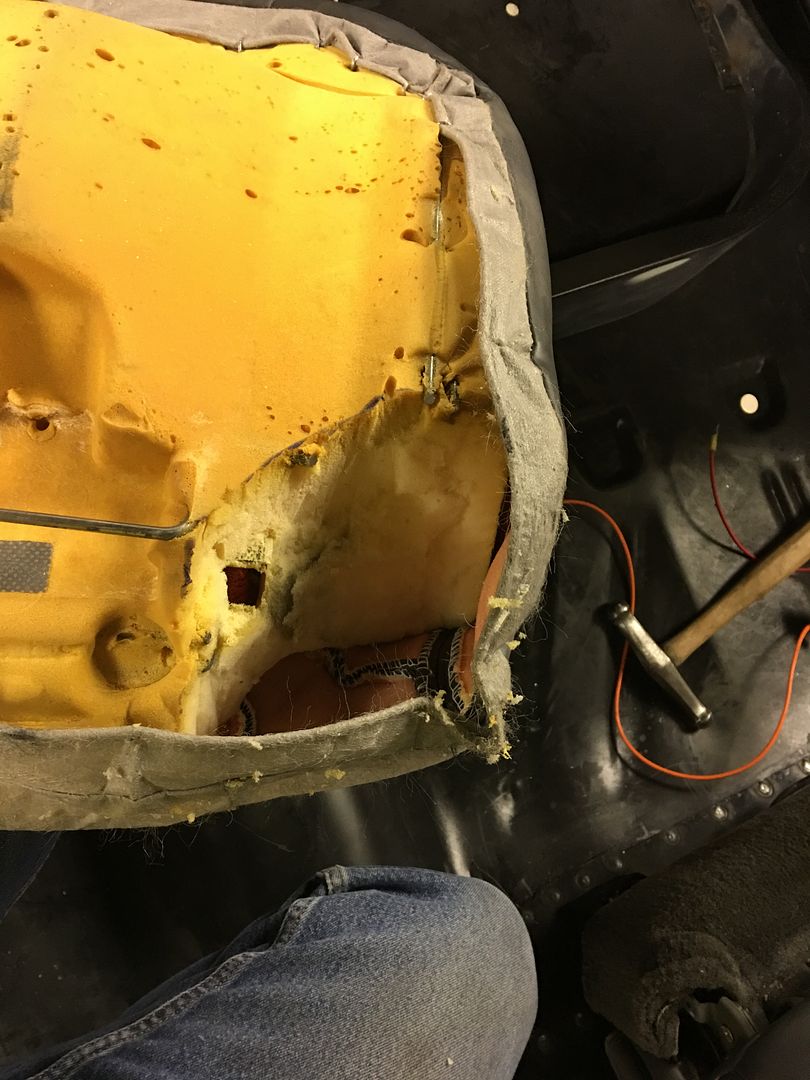
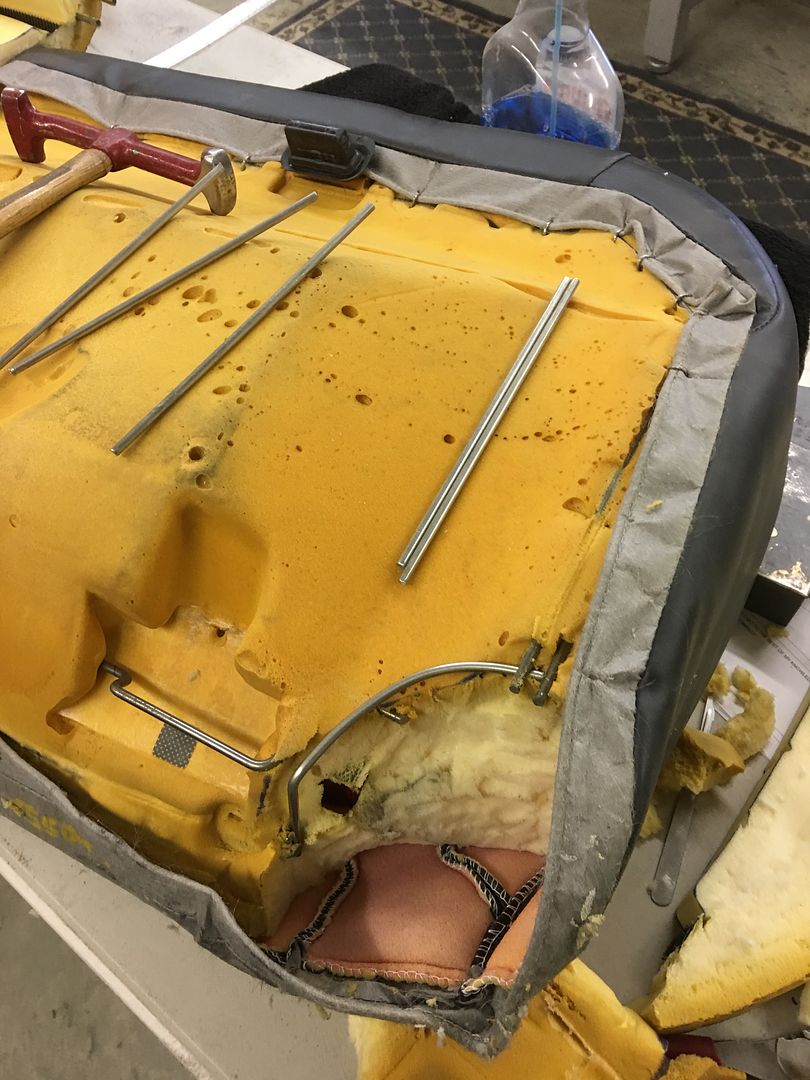
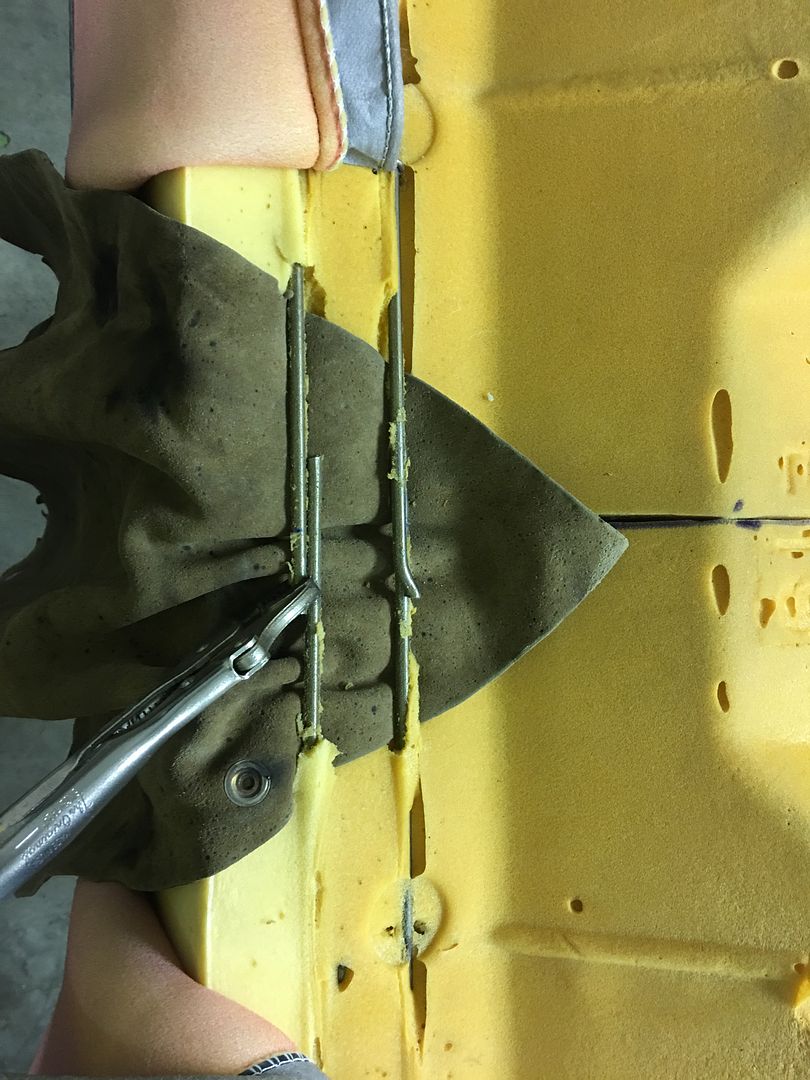
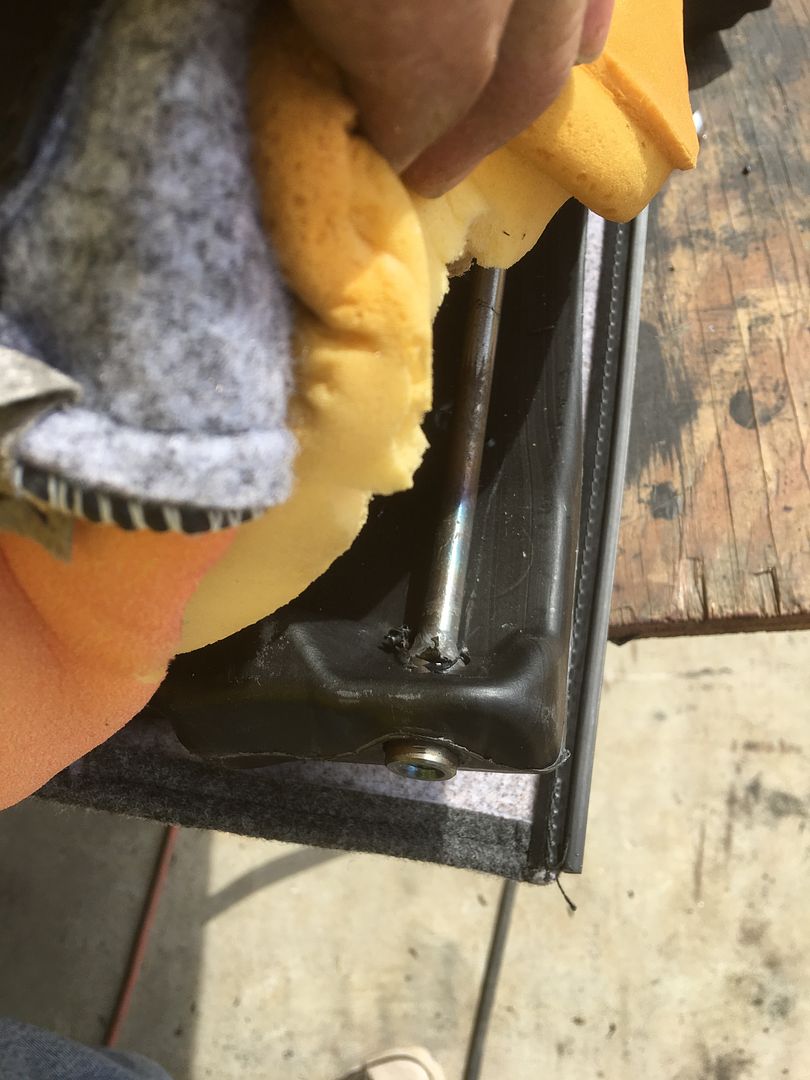
In removing the section of foam on the seat back we find the cushion has a wire around the arm rest void. As we are removing the arm rest altogether (when it gets reupholstered) we removed the wire..

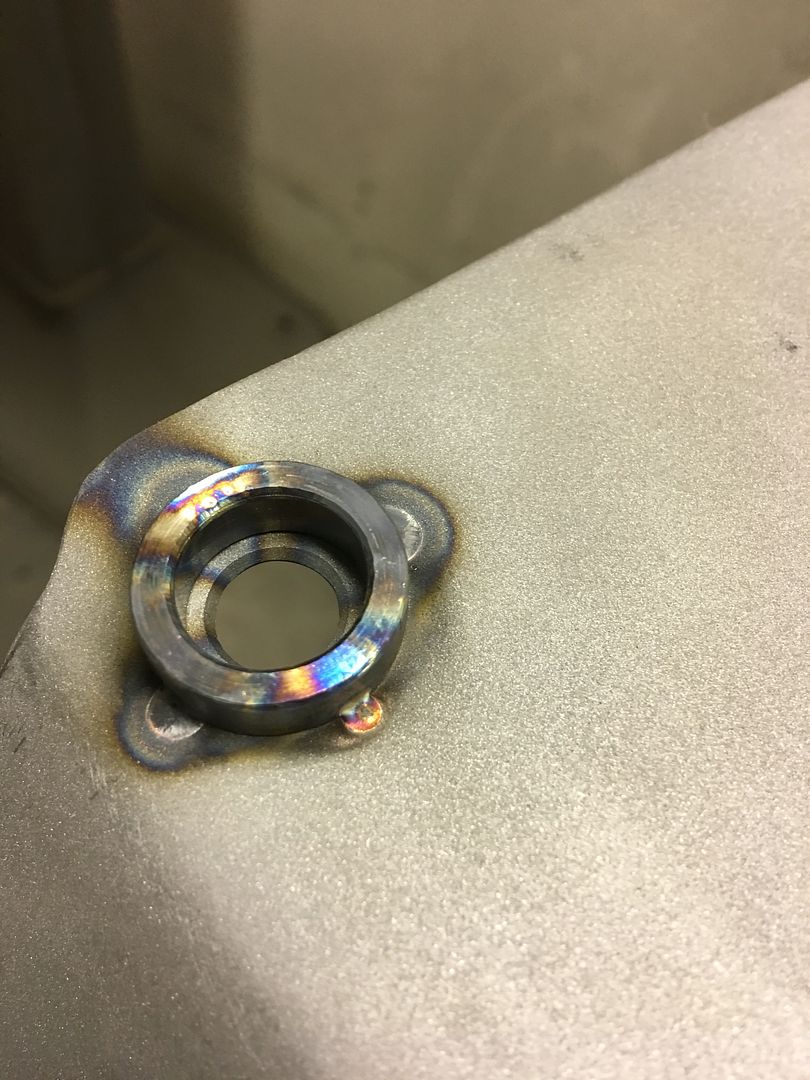
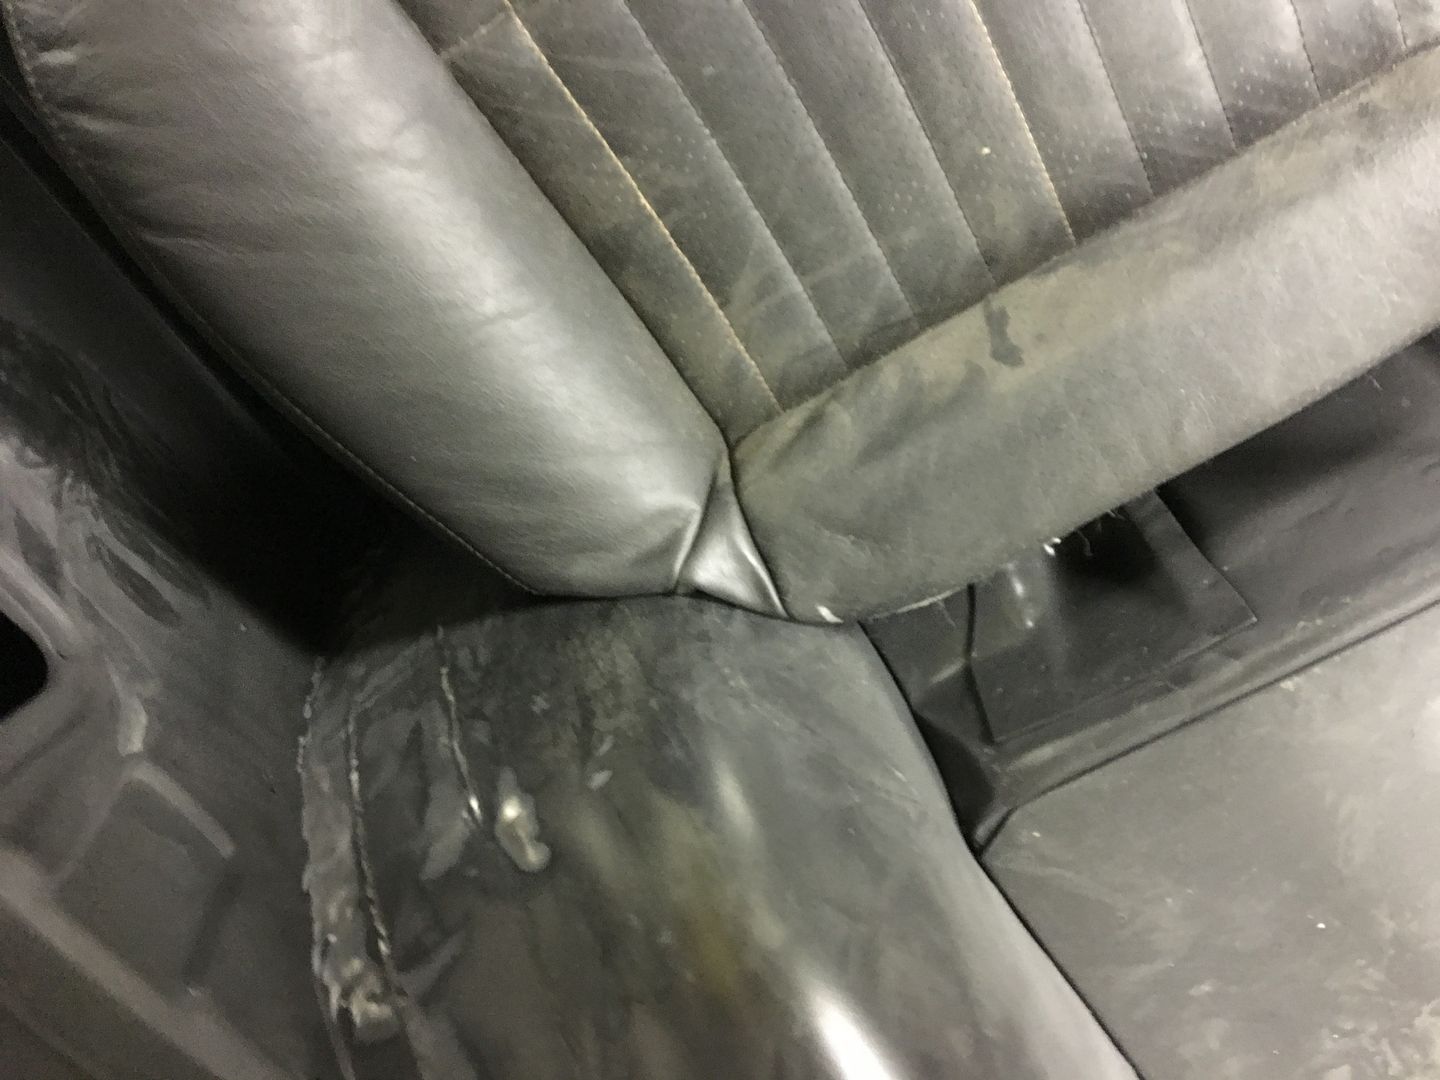
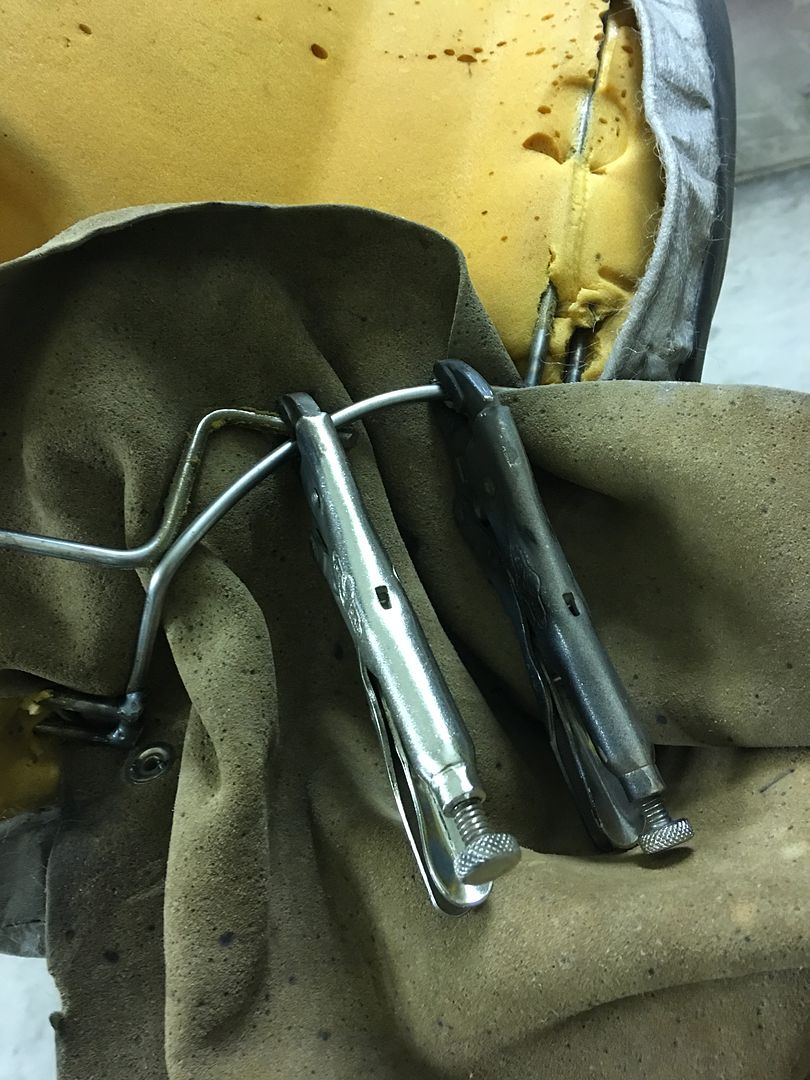
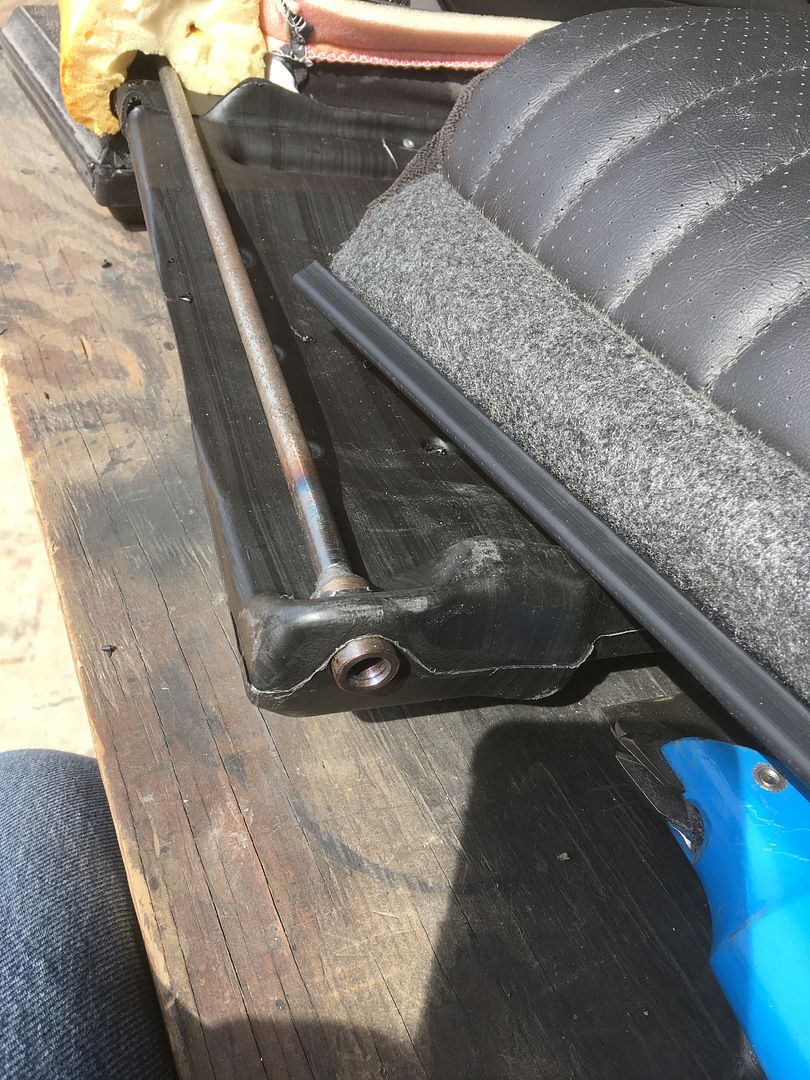
The previous pivot for the seats had a tapered pin hex bolt that secured into a hex nut that was welded onto the pivot bracket, which can be seen here:
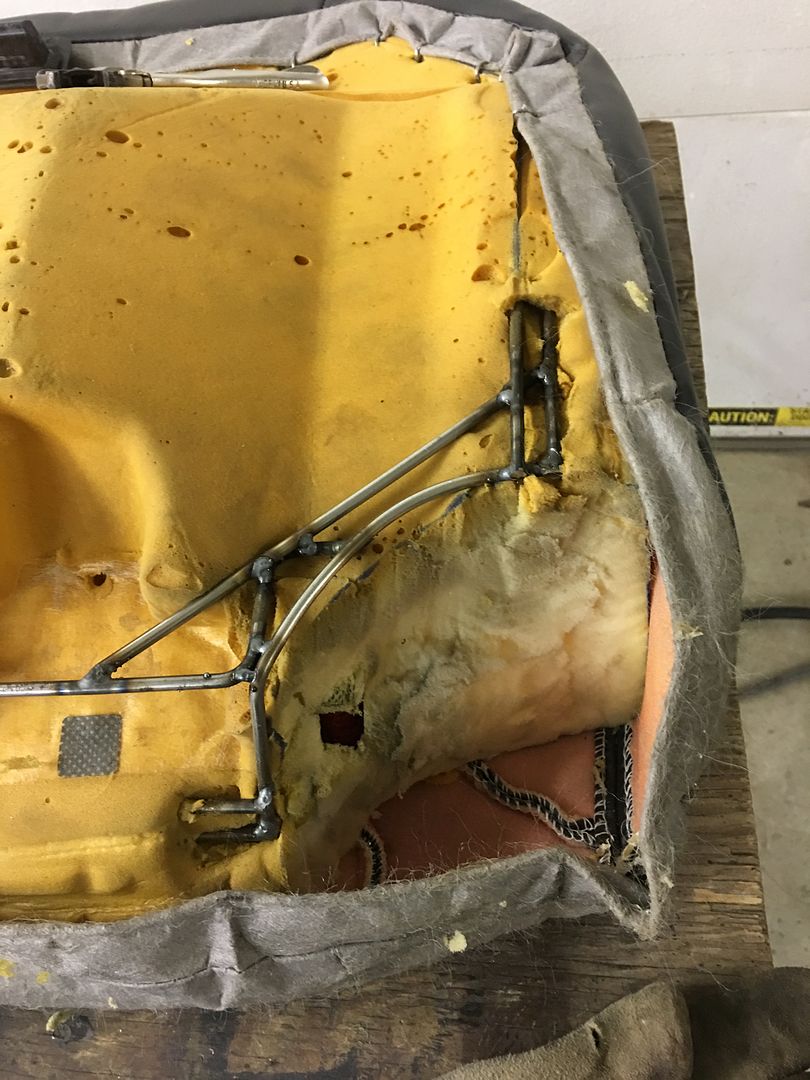
Due to our width constraints, we need to remove all that excess hardware.. So we chose to put the "securing nut" inside the seat, and use a simple pan head allen screw through the 12 gauge bracket.. Here's our Pivot "axle" inside the seat back..
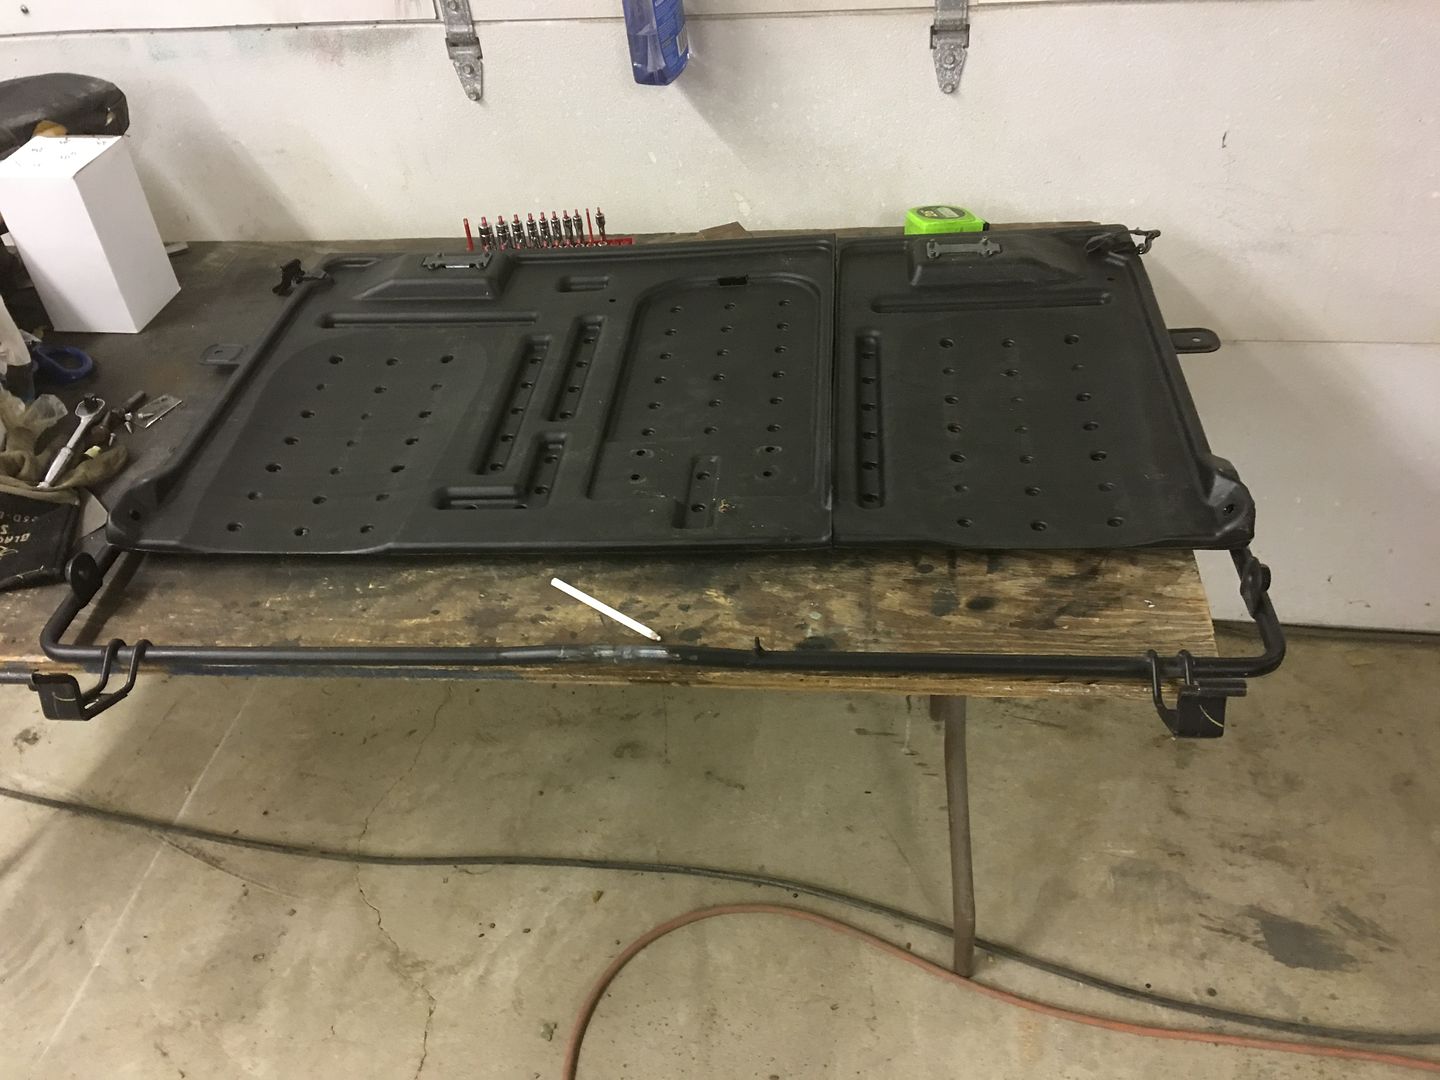
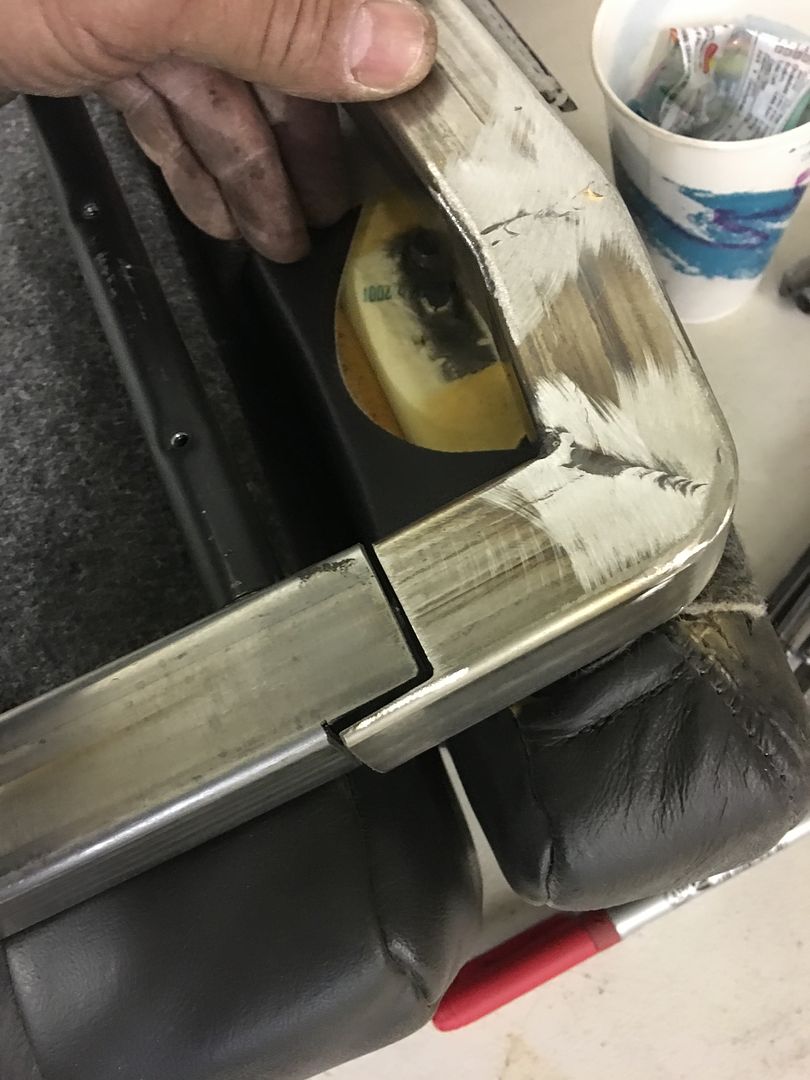
Here's the test fit of our 12 gauge steel pivot bracket. Radius was used on the bends to match the tube. The tube was originally round, and the side uprights were flattened out using the MH19 hammer to buy us some more clearance between wheel tubs..
The bead shown on the bracket was done on the Lennox Nibbler.
This should give us a bit of clearance on the edges to help prevent binding of the upholstery.
Bead turned out pretty well for 12 gauge steel! Some TIG welding to put the parts together:
Video of it in operation:
One part down, next we'll tackle the brackets to the floor.
The previous pivot for the seats had a tapered pin hex bolt that secured into a hex nut that was welded onto the pivot bracket, which can be seen here:
Due to our width constraints, we need to remove all that excess hardware.. So we chose to put the "securing nut" inside the seat, and use a simple pan head allen screw through the 12 gauge bracket.. Here's our Pivot "axle" inside the seat back..
Here's the test fit of our 12 gauge steel pivot bracket. Radius was used on the bends to match the tube. The tube was originally round, and the side uprights were flattened out using the MH19 hammer to buy us some more clearance between wheel tubs..
The bead shown on the bracket was done on the Lennox Nibbler.
This should give us a bit of clearance on the edges to help prevent binding of the upholstery.
Bead turned out pretty well for 12 gauge steel! Some TIG welding to put the parts together:
Video of it in operation:
One part down, next we'll tackle the brackets to the floor.
Doesn't seem like much got done this weekend, but here's what we did..
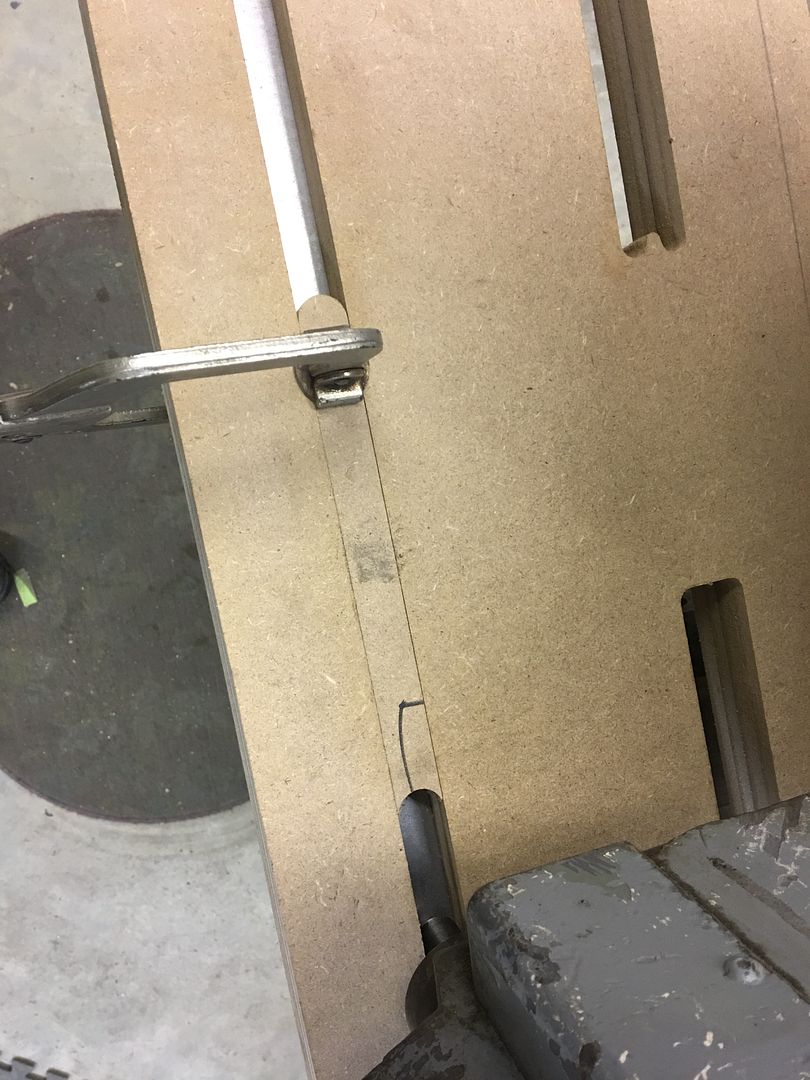
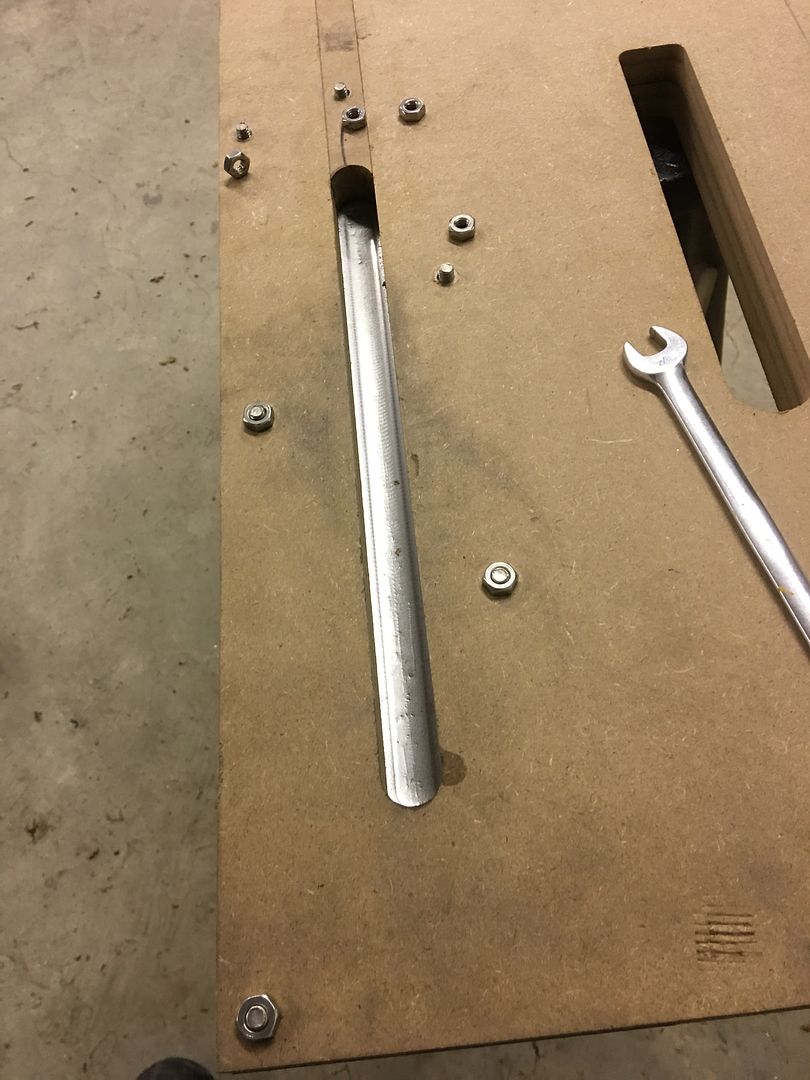
Stopped by the local CNC router facility to get some generic guides made for bead detail on the Lennox Nibbler...
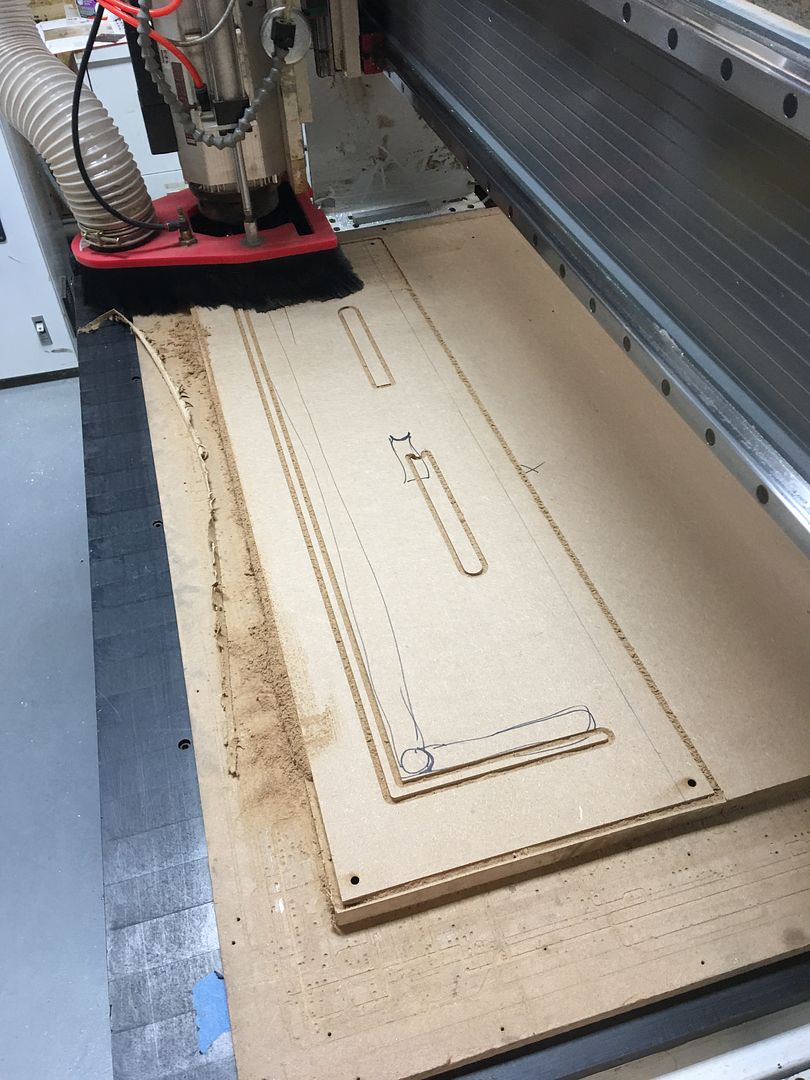
Also had some blanks cut out over there to the right side. These were to form stops so we can adjust length of our pattern shorter as needed..
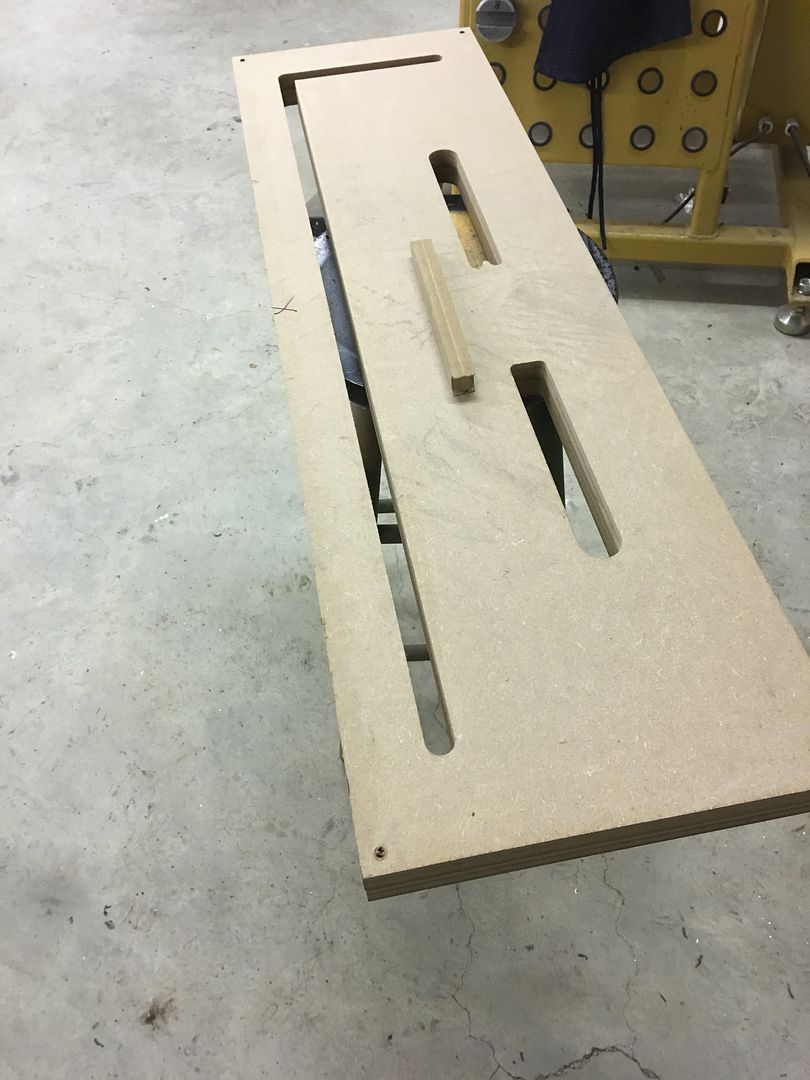
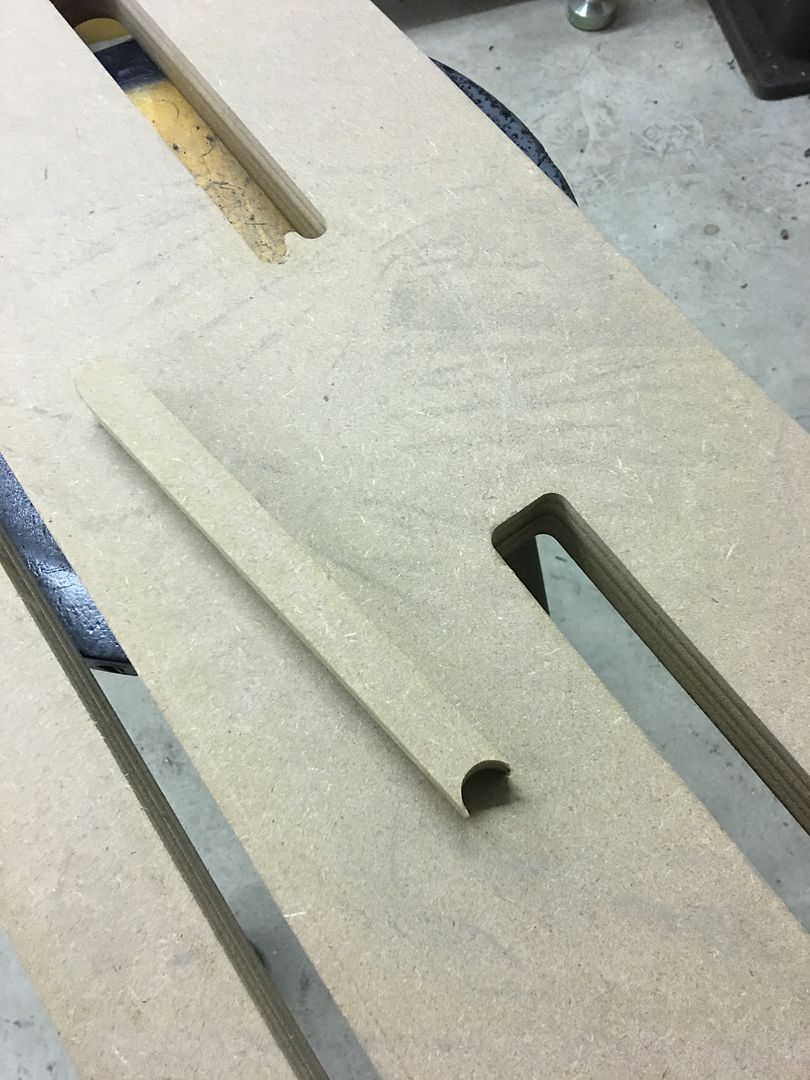
It has a snug fit like so:

Next was to turn up a new die with less crown than the other we've been using, just to have a different look, a flatter bead..
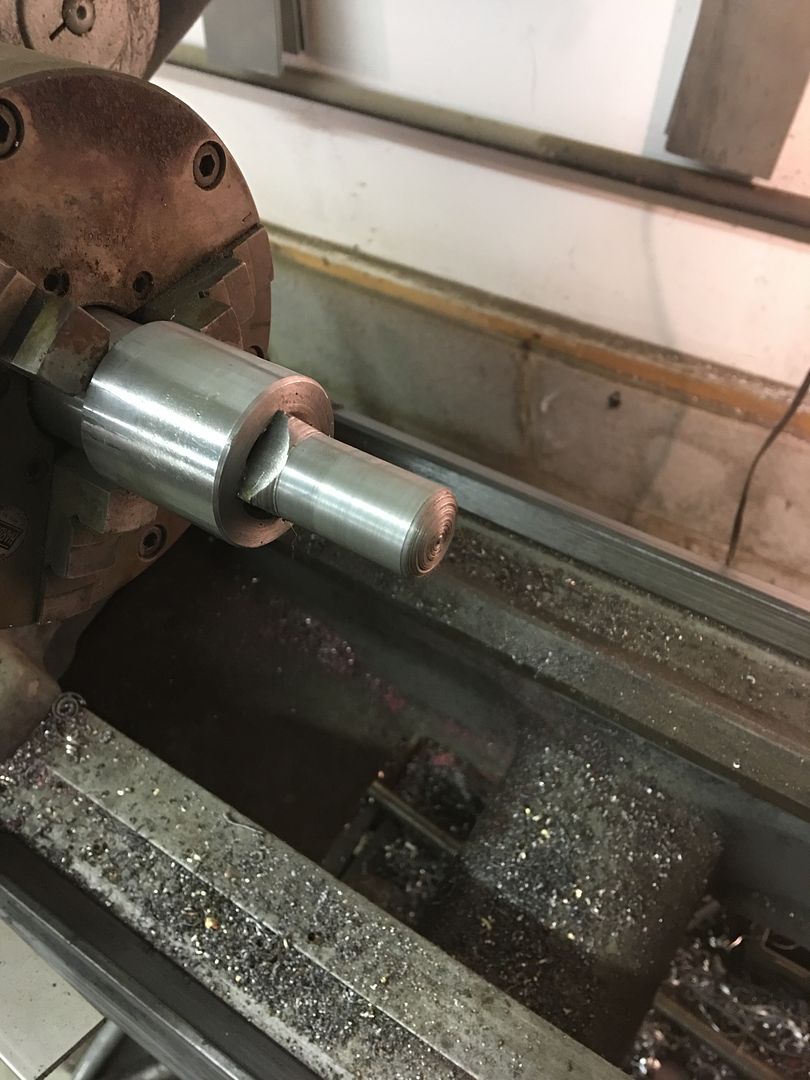
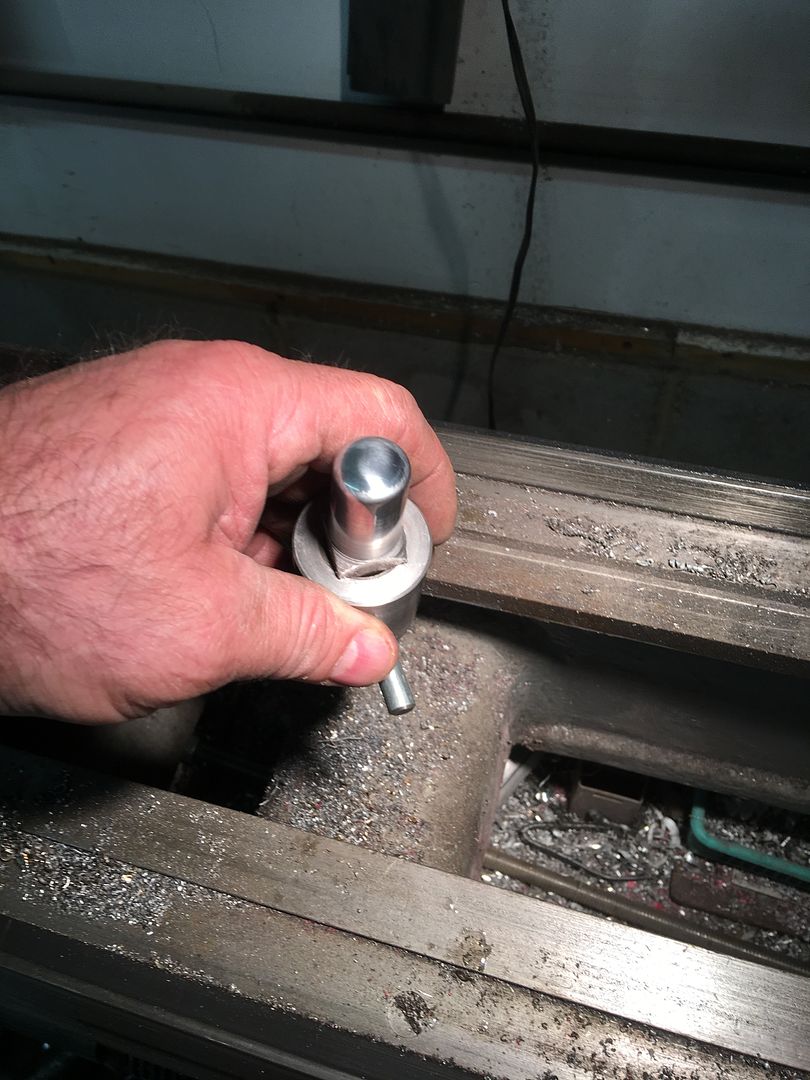
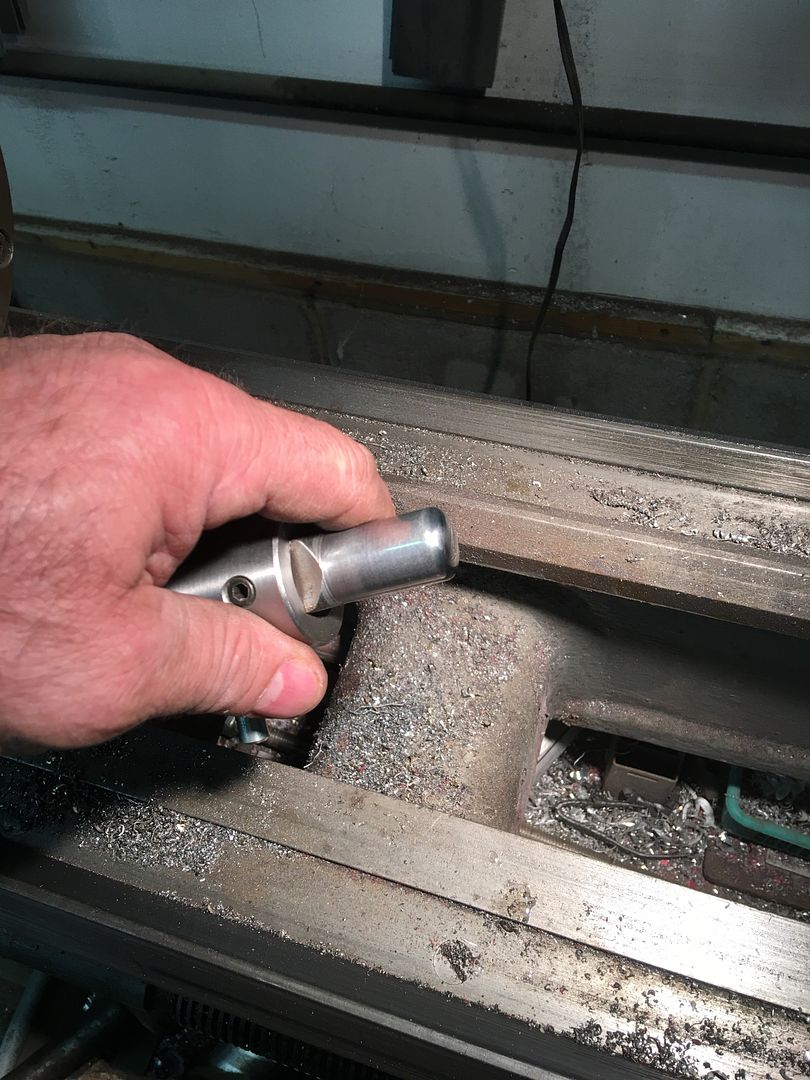
Setting up for some practice runs...
Here's a comparison between the new die and the fuller radius we've been using..
Thursday night headed over to Virginia, the 52 Chevy tail pan now resided in Fredericksburg and I needed to borrow the original and new one for the Coming Out car show in Charlotte Hall, being held Sunday (today). I had been dragging my feet about even going to the show, but the weather forecast promised beautiful weather, so I went ahead and reserved a vendor spot to show off our fabrication work. Friday night started gathering some samples to take and a put some pictures together for an album..
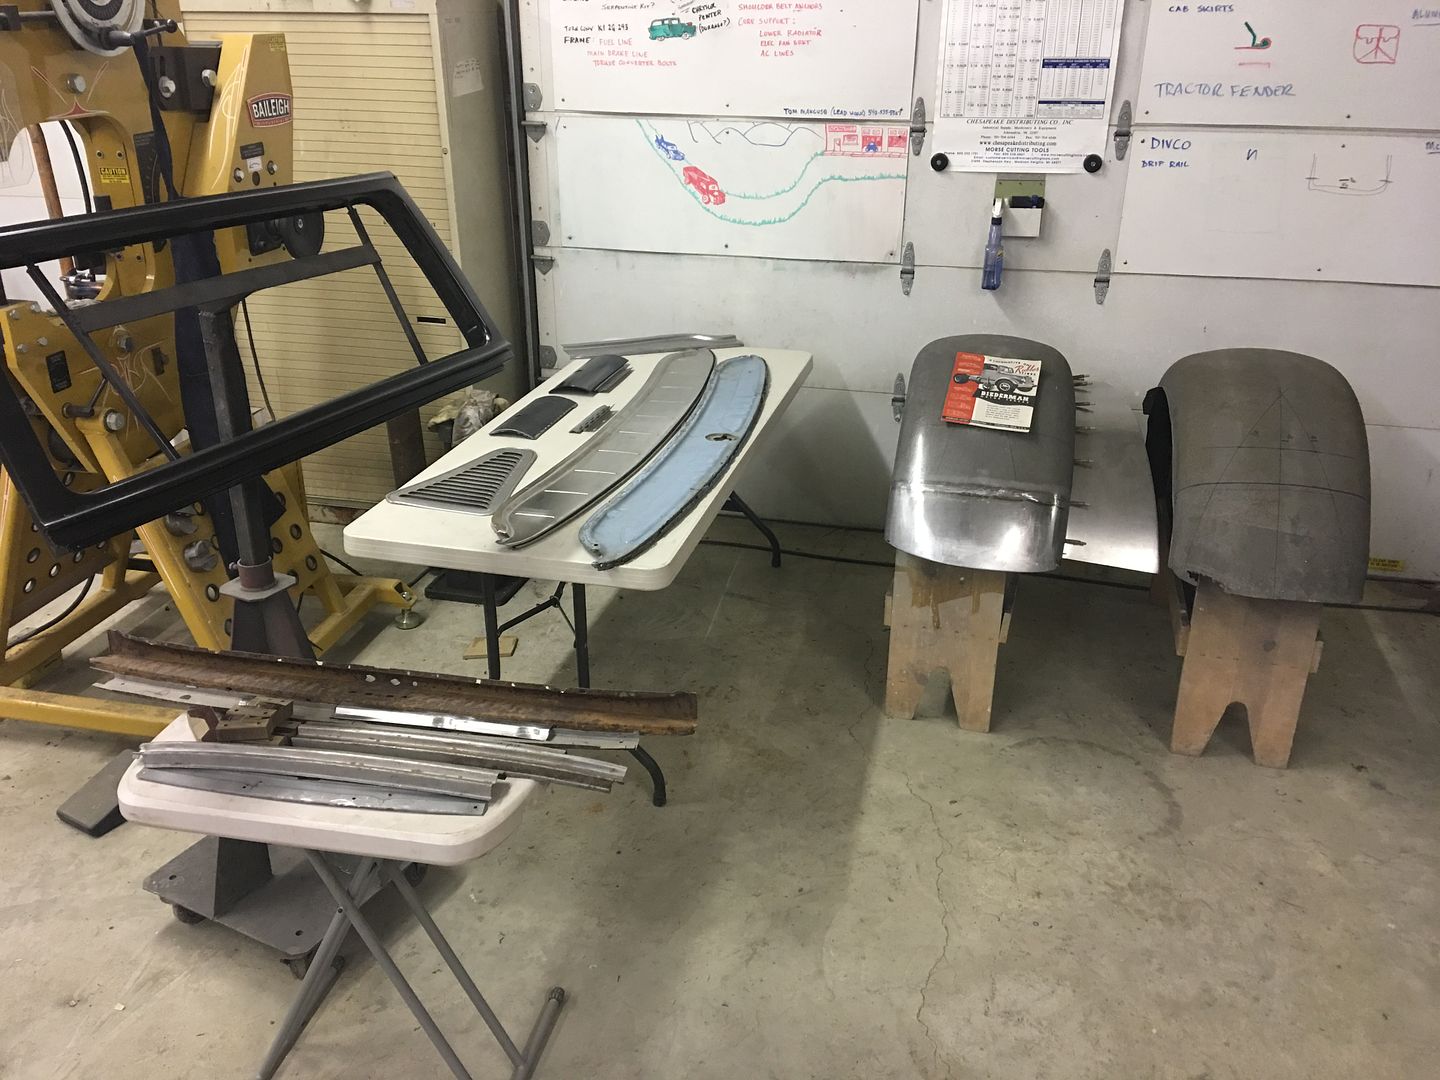
We still had all the original pieces for the lift gate repair, so that was a good sample..
Set up at the show, I figured parked next to the Ice Cream truck would be easier on my will power than the smell of three BBQ trucks on the other side...

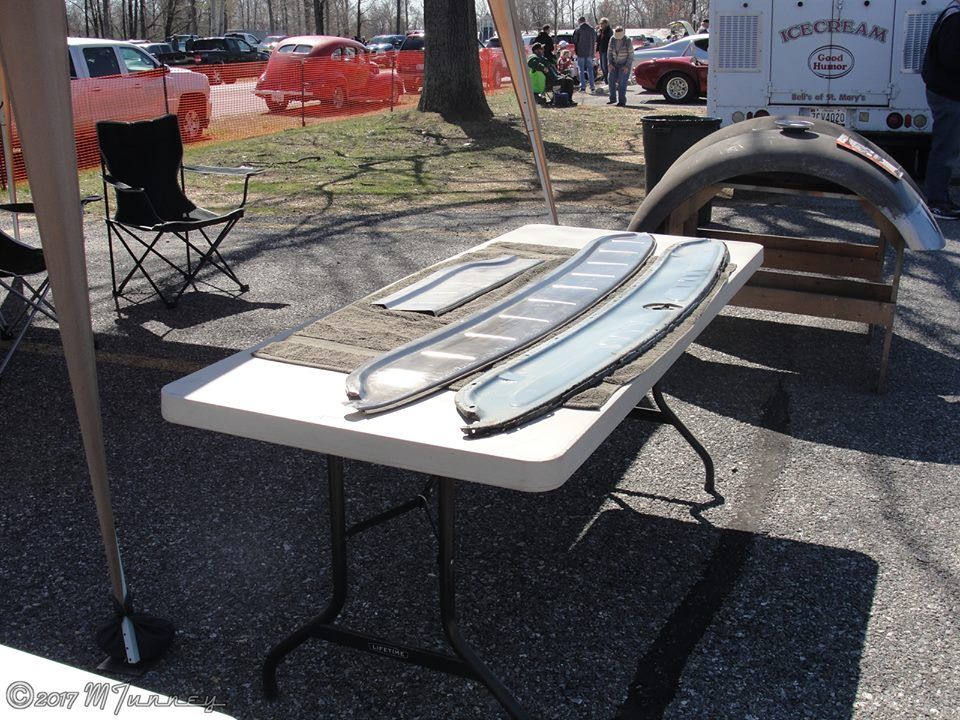
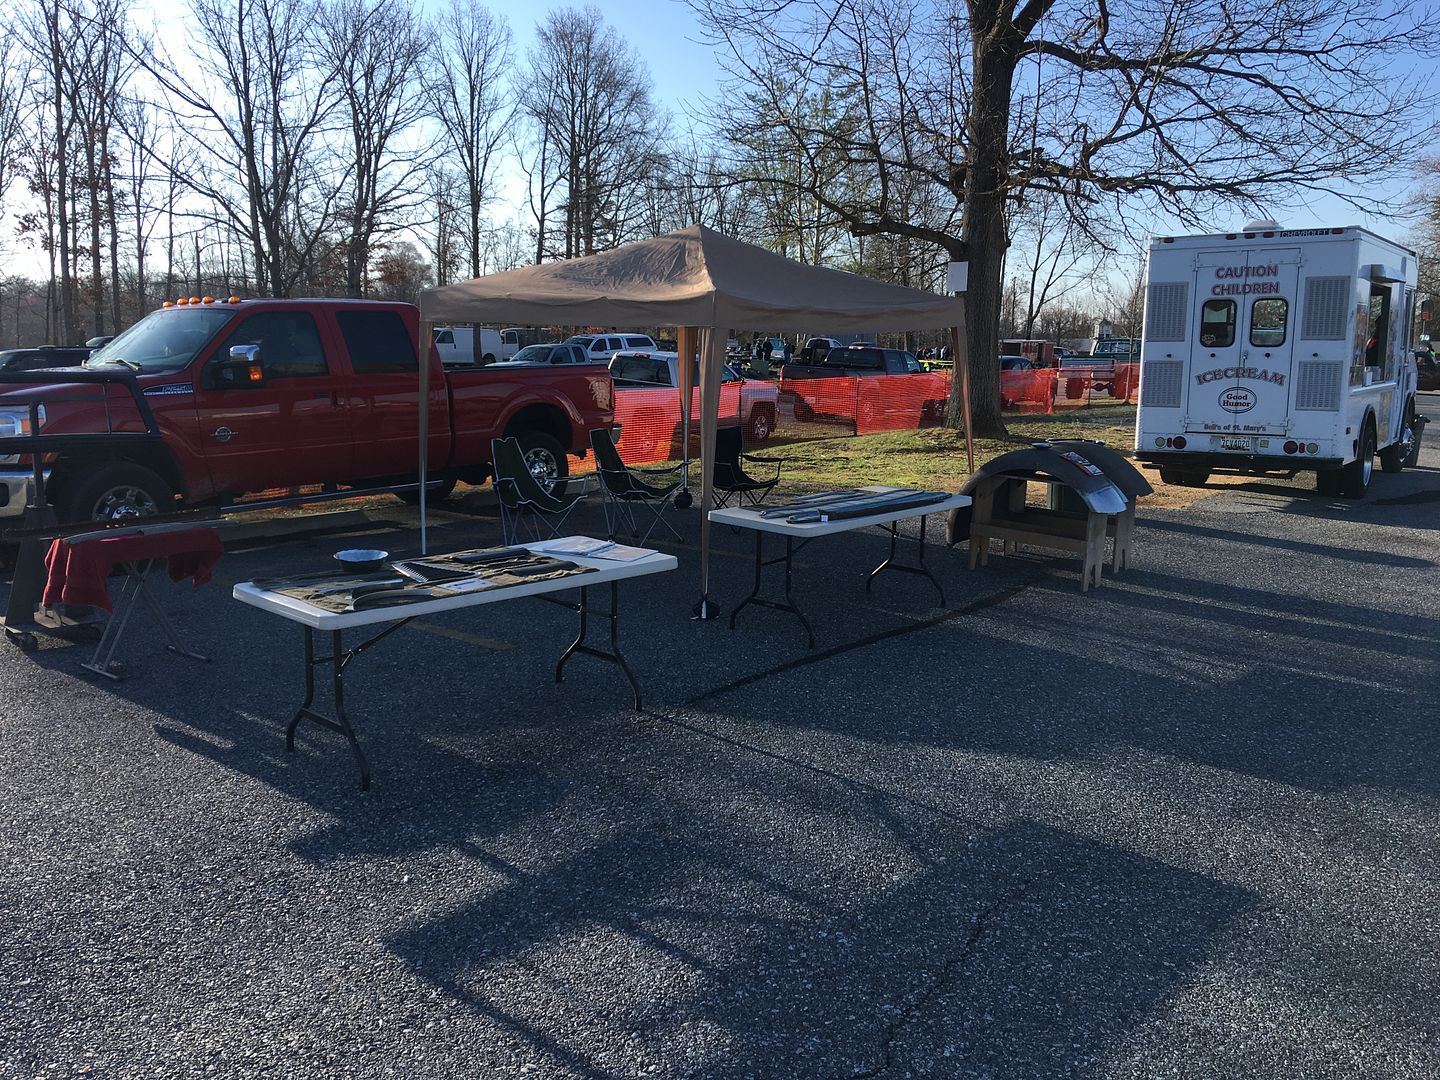
Got these pictures right after we set up and before all the crowd showed up. Had a blast, talking metalshaping, rust repair, etc. for most of the day.. I guess I've got to get back to work now...
Stopped by the local CNC router facility to get some generic guides made for bead detail on the Lennox Nibbler...
Also had some blanks cut out over there to the right side. These were to form stops so we can adjust length of our pattern shorter as needed..
It has a snug fit like so:
Next was to turn up a new die with less crown than the other we've been using, just to have a different look, a flatter bead..
Setting up for some practice runs...
Here's a comparison between the new die and the fuller radius we've been using..
Thursday night headed over to Virginia, the 52 Chevy tail pan now resided in Fredericksburg and I needed to borrow the original and new one for the Coming Out car show in Charlotte Hall, being held Sunday (today). I had been dragging my feet about even going to the show, but the weather forecast promised beautiful weather, so I went ahead and reserved a vendor spot to show off our fabrication work. Friday night started gathering some samples to take and a put some pictures together for an album..
We still had all the original pieces for the lift gate repair, so that was a good sample..
Set up at the show, I figured parked next to the Ice Cream truck would be easier on my will power than the smell of three BBQ trucks on the other side...
Got these pictures right after we set up and before all the crowd showed up. Had a blast, talking metalshaping, rust repair, etc. for most of the day.. I guess I've got to get back to work now...
Last edited:
TimeWarpF100
Well-known member
Doesn't seem like much got done this weekend, but here's what we did..
Stopped by the local CNC router facility to get some generic guides made for bead detail on the Lennox Nibbler...
Also had some blanks cut out over there to the right side. These were to form stops so we can adjust length of our pattern shorter as needed..
It has a snug fit like so:
Next was to turn up a new die with less crown than the other we've been using, just to have a different look, a flatter bead..
Setting up for some practice runs...
Here's a comparison between the new die and the fuller radius we've been using..
Thursday night headed over to Virginia, the 52 Chevy tail pan now resided in Fredericksburg and I needed to borrow the original and new one for the Coming Out car show in Charlotte Hall, being held Sunday (today). I had been dragging my feet about even going to the show, but the weather forecast promised beautiful weather, so I went ahead and reserved a vendor spot to show off our fabrication work. Friday night started gathering some samples to take and a put some pictures together for an album..
We still had all the original pieces for the lift gate repair, so that was a good sample..
Set up at the show, I figured parked next to the Ice Cream truck would be easier on my will power than the smell of three BBQ trucks on the other side...
Got these pictures right after we set up and before all the crowd showed up. Had a blast, talking metalshaping, rust repair, etc. for most of the day.. I guess I've got to get back to work now...
So Cool!
How has that 6.7 power stroke been working out for you?
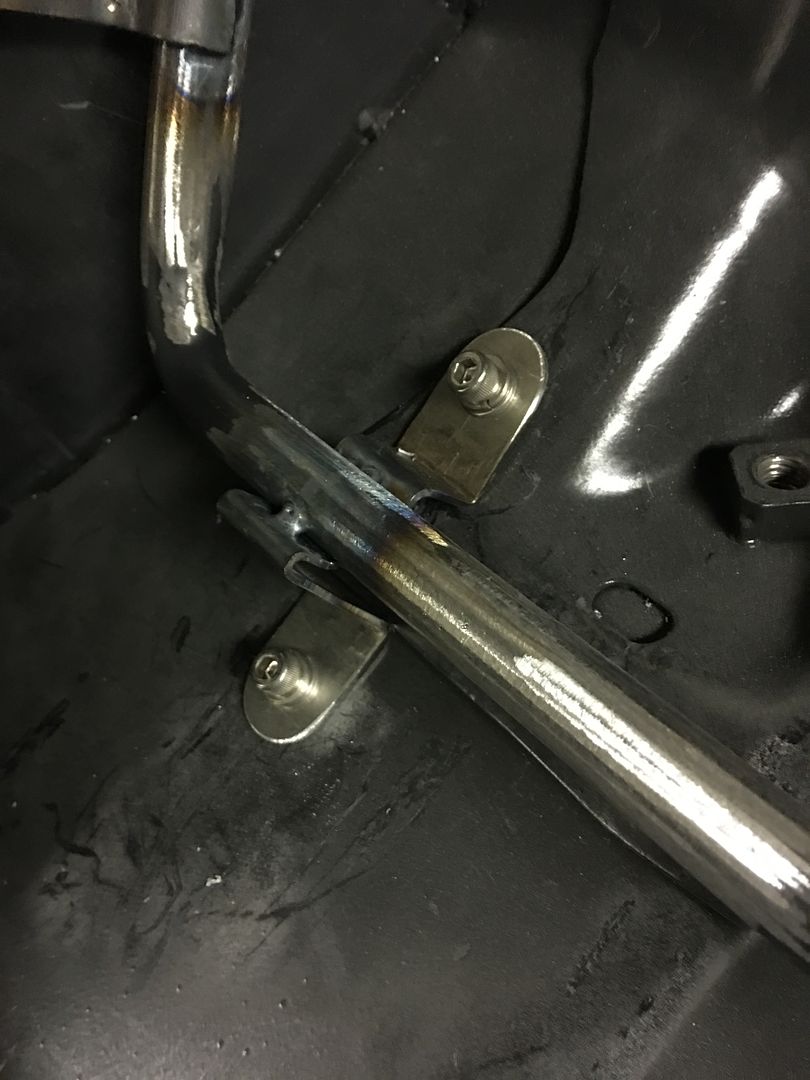
Back in the shop this evening, time to make some bolting brackets to hold the seat back frame to the floor..
Locating...
Brackets TIG welded on....
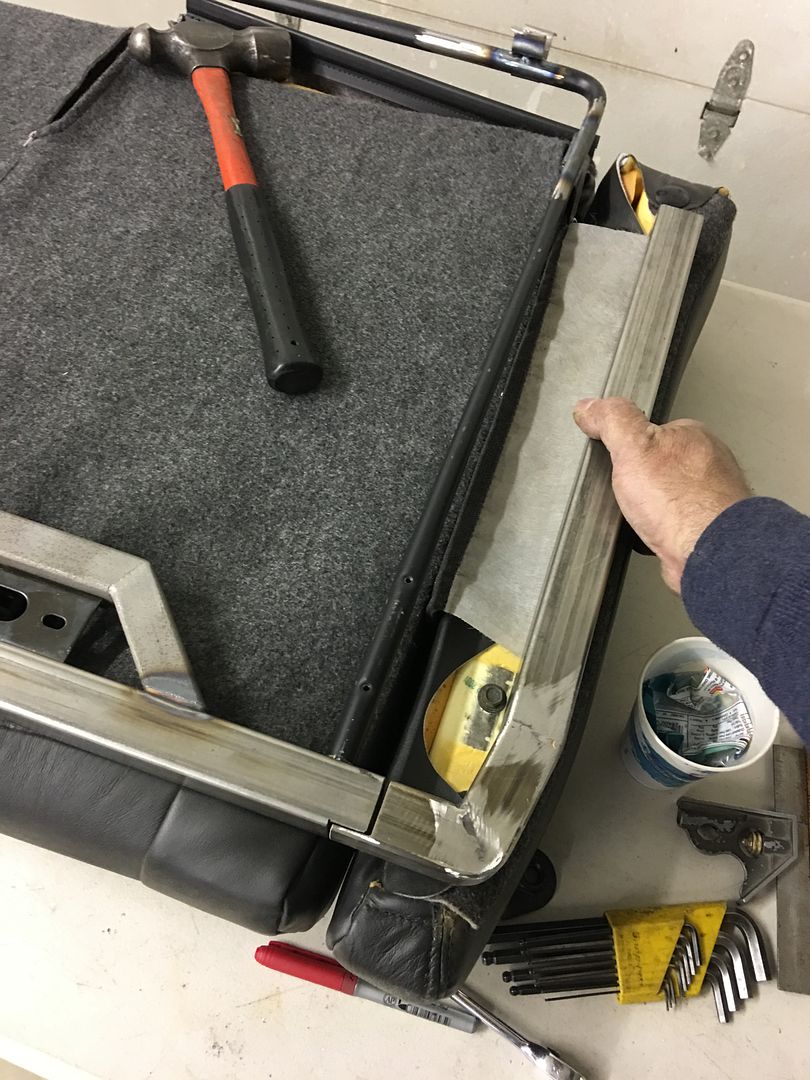
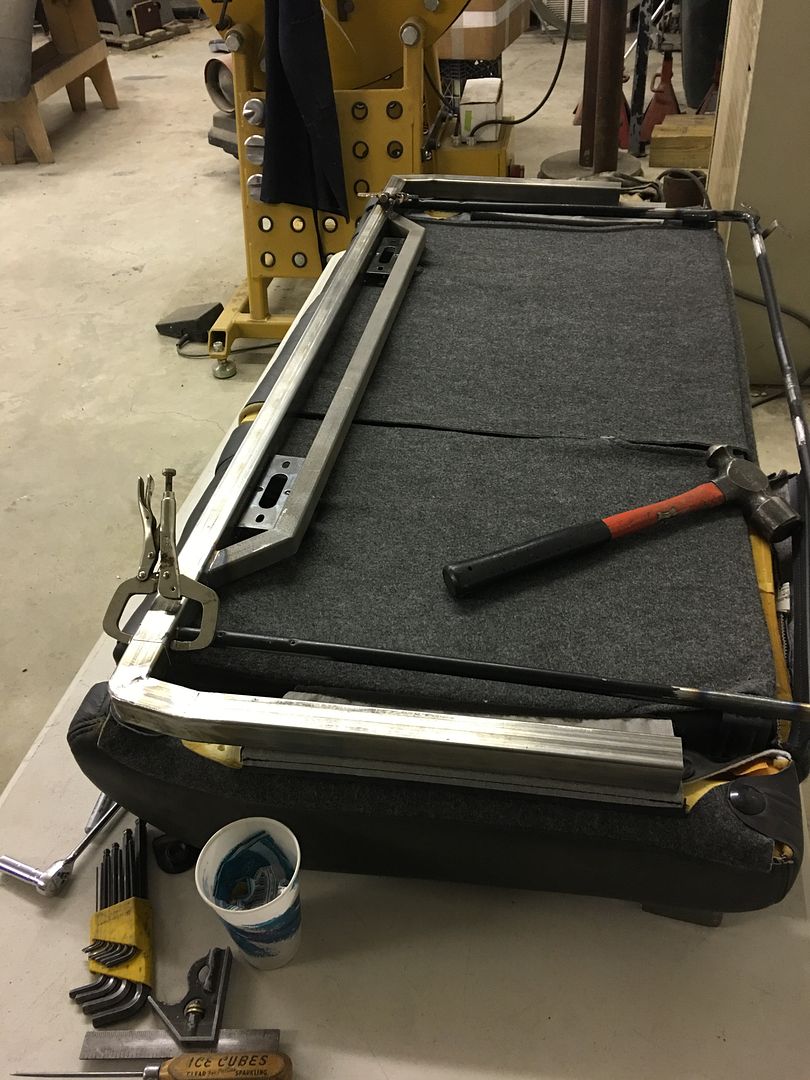
This shows it in place, we have about 1/4" clearance at the tight spots....
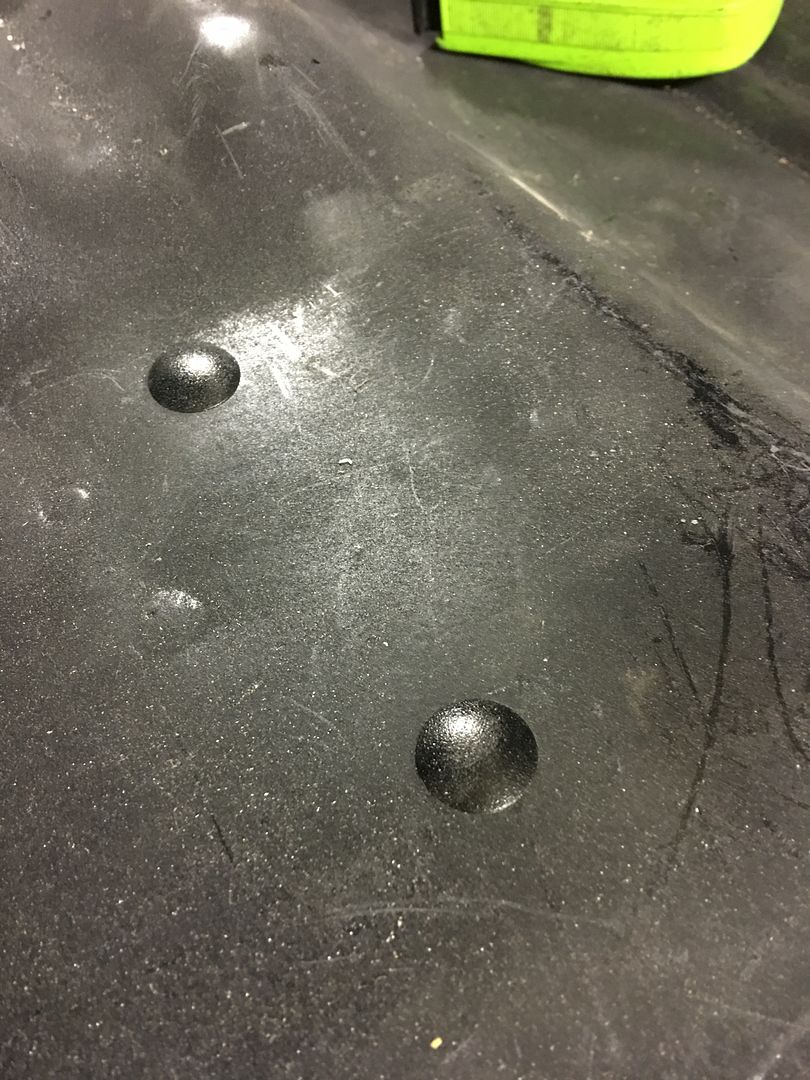
The cleco's were removed and 1/4-20 AVK rivet nuts installed in the floor... Missed that picture...
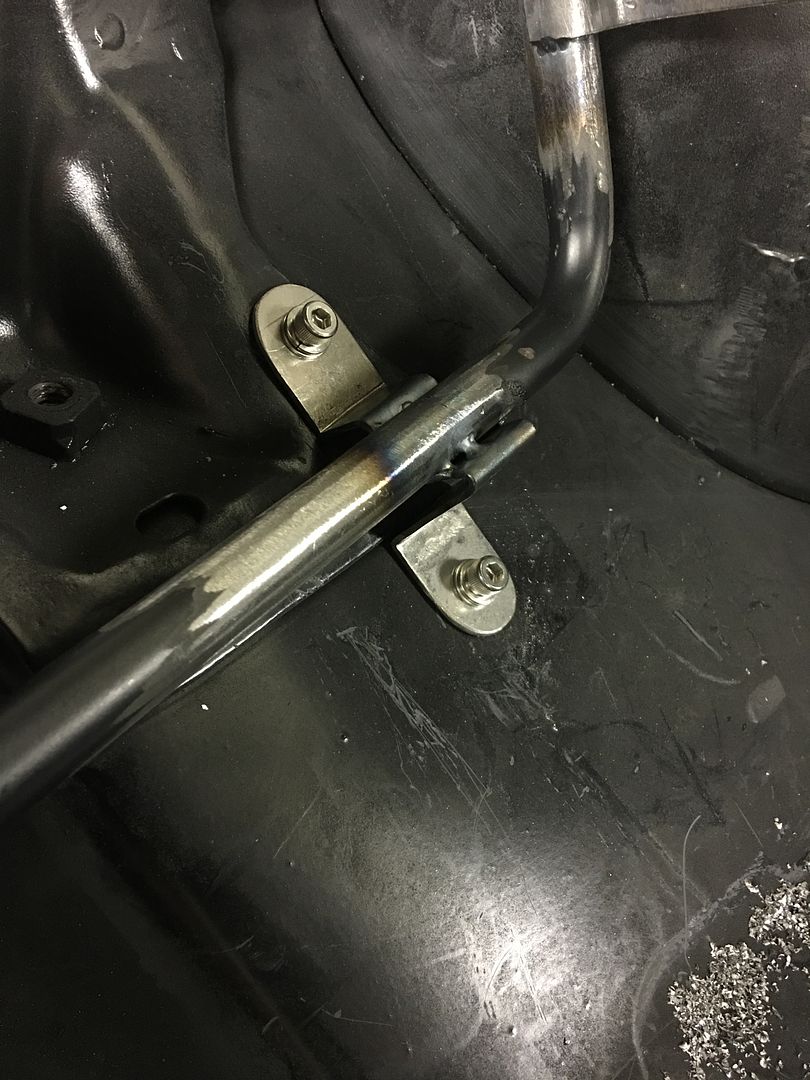
Next will be the top support....
Locating...
Brackets TIG welded on....
This shows it in place, we have about 1/4" clearance at the tight spots....
The cleco's were removed and 1/4-20 AVK rivet nuts installed in the floor... Missed that picture...
Next will be the top support....
Last edited:
larry4406
Well-known member
Very clever solution!
Thanks Larry!
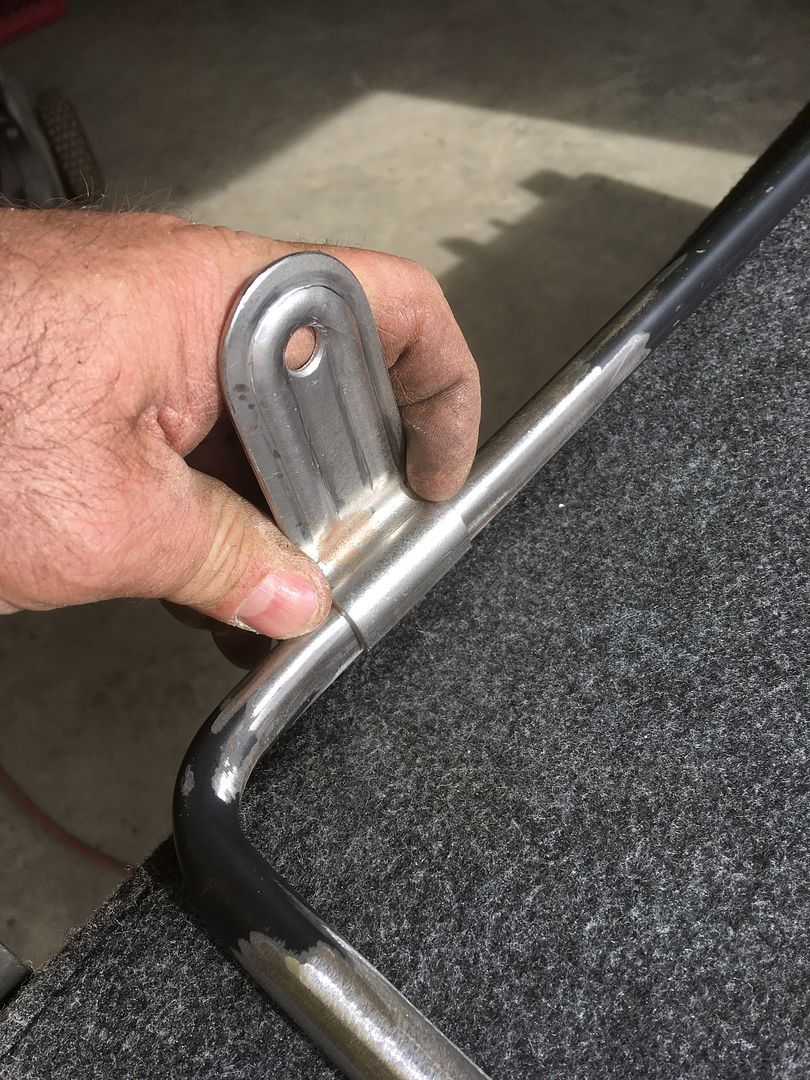
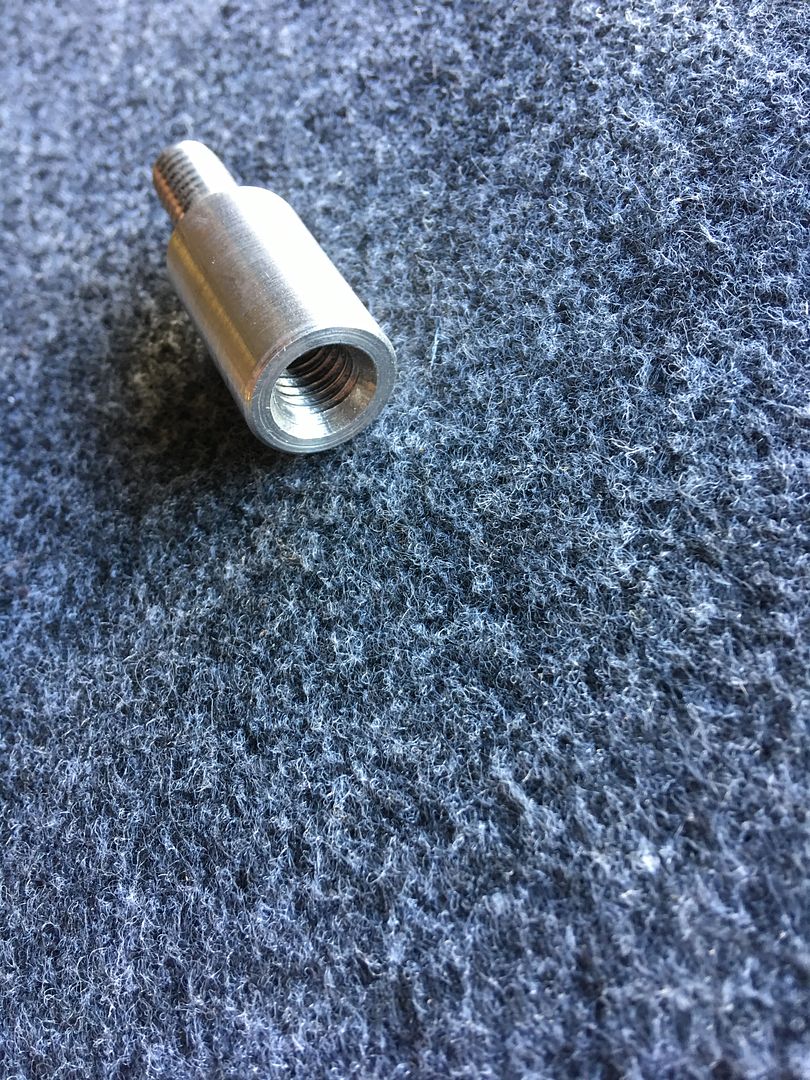
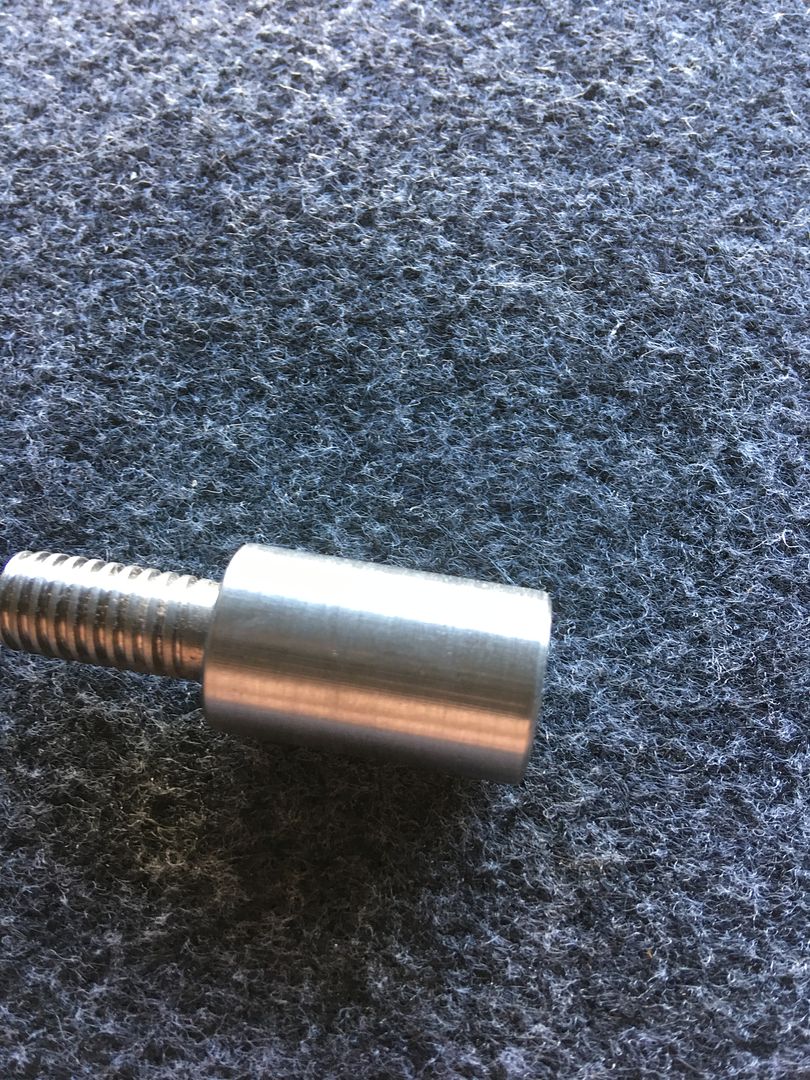
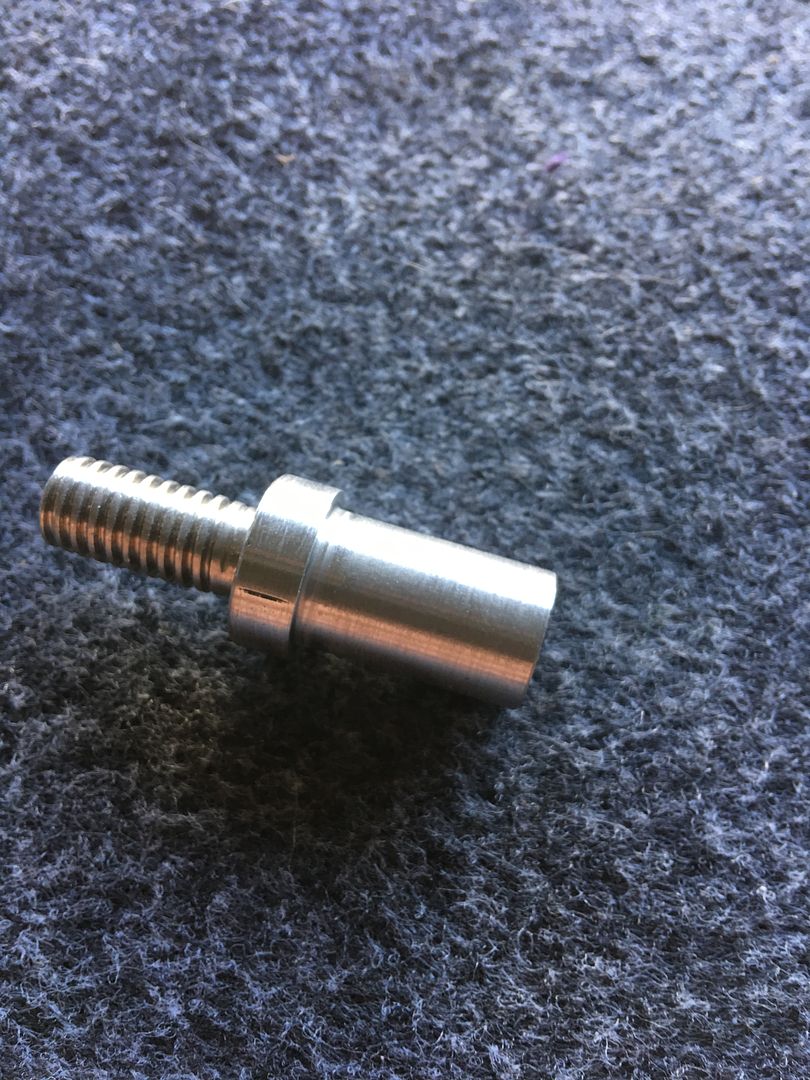
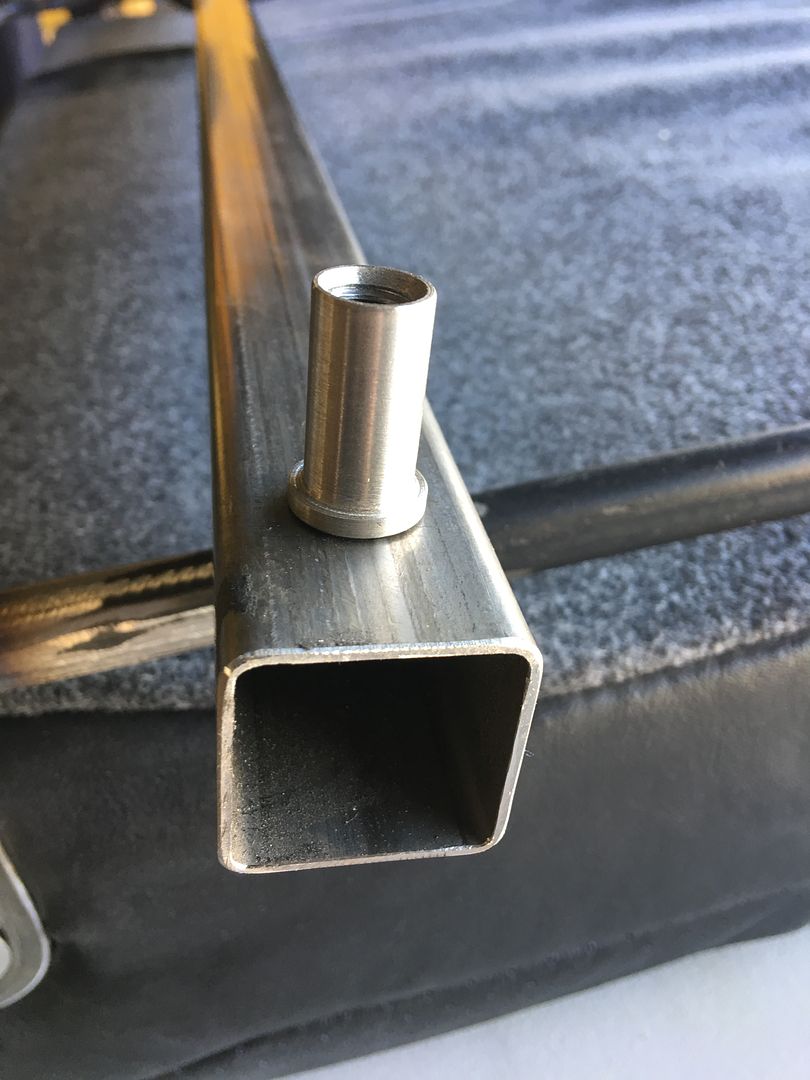
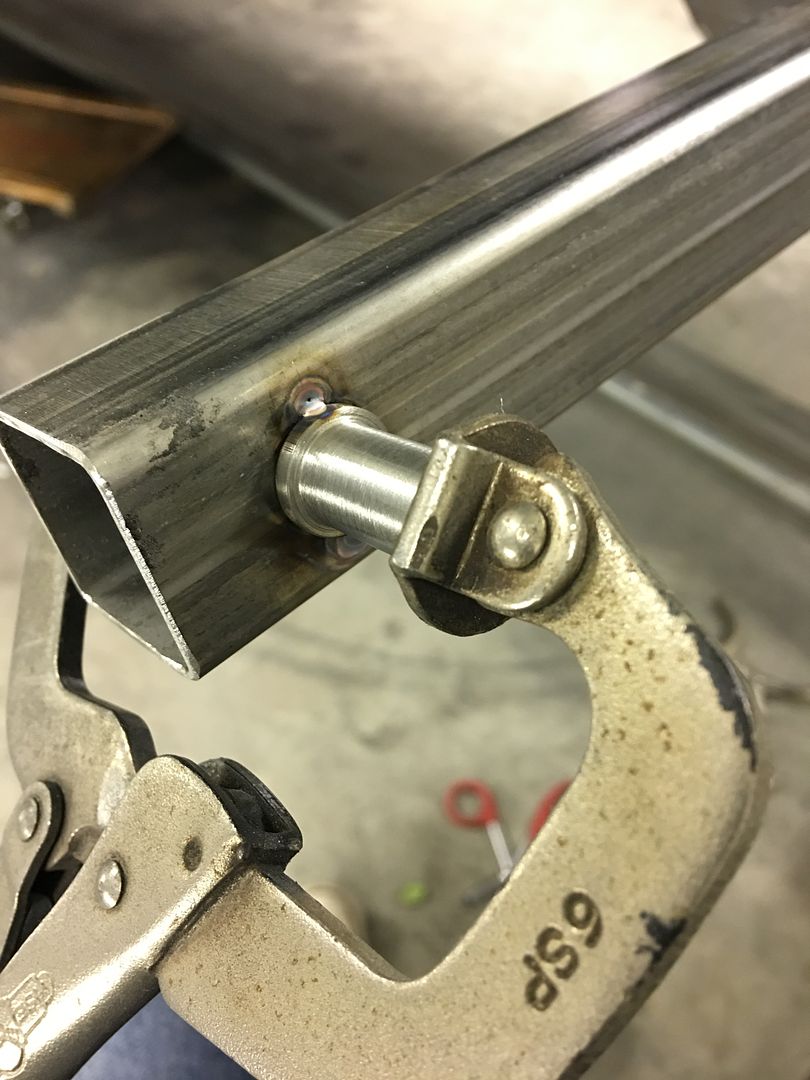
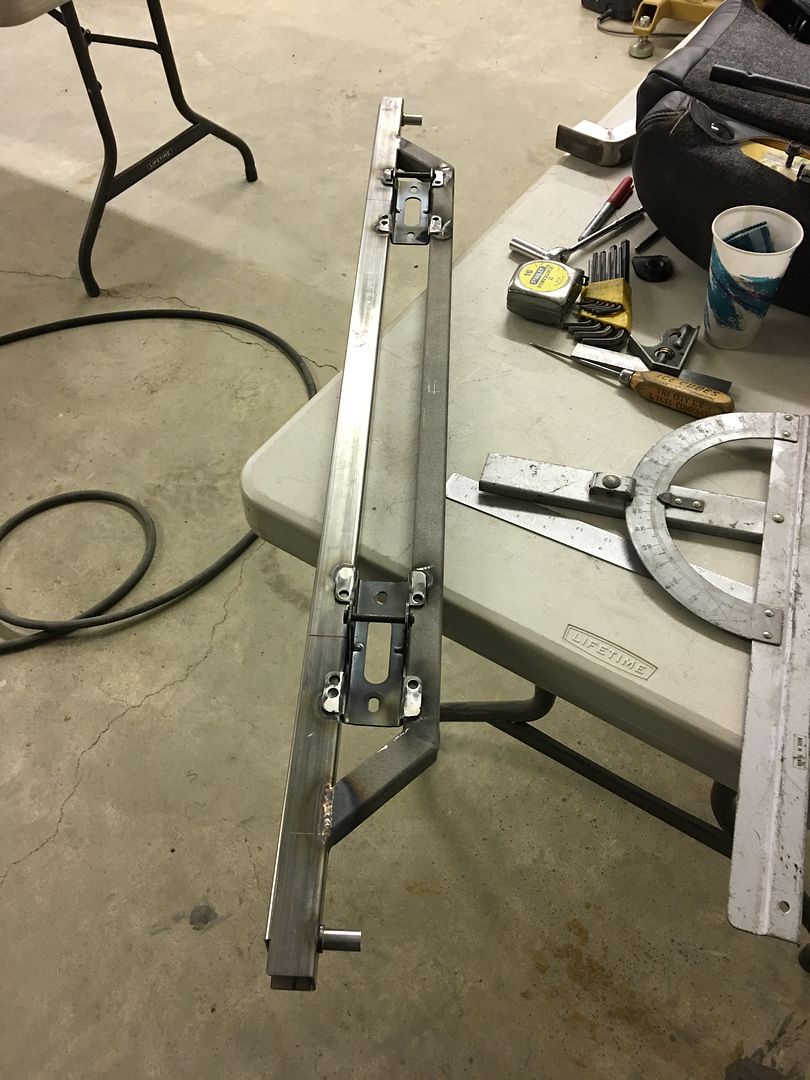
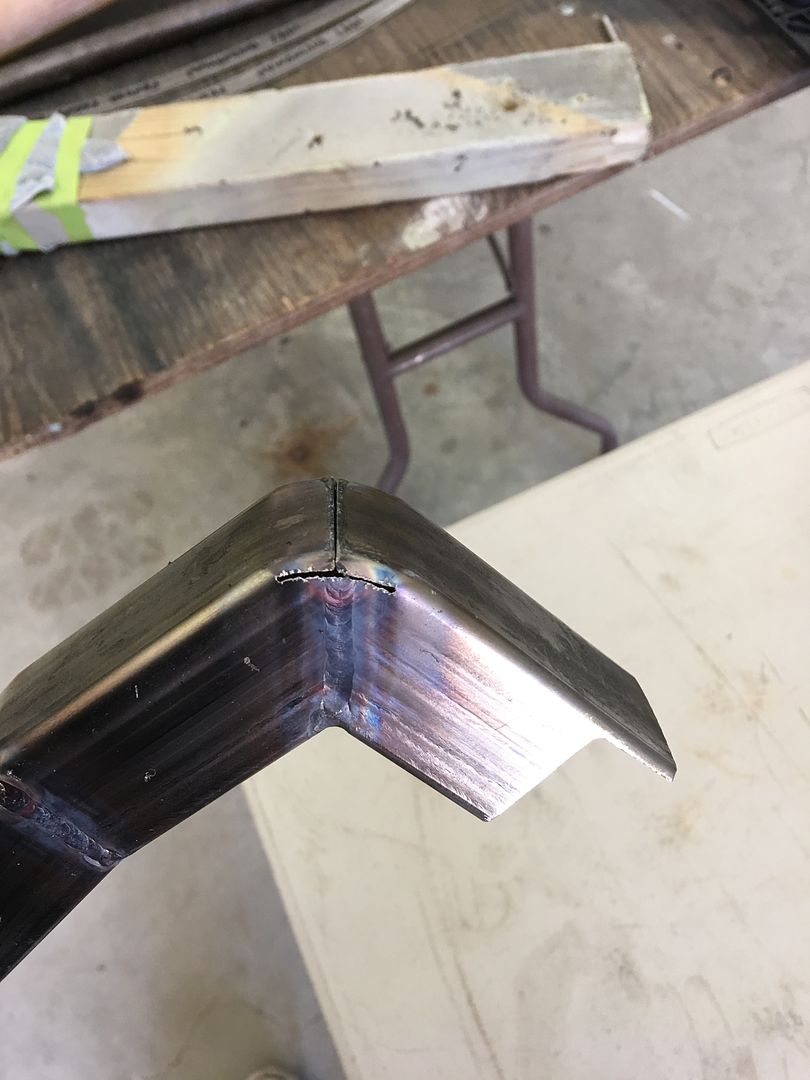
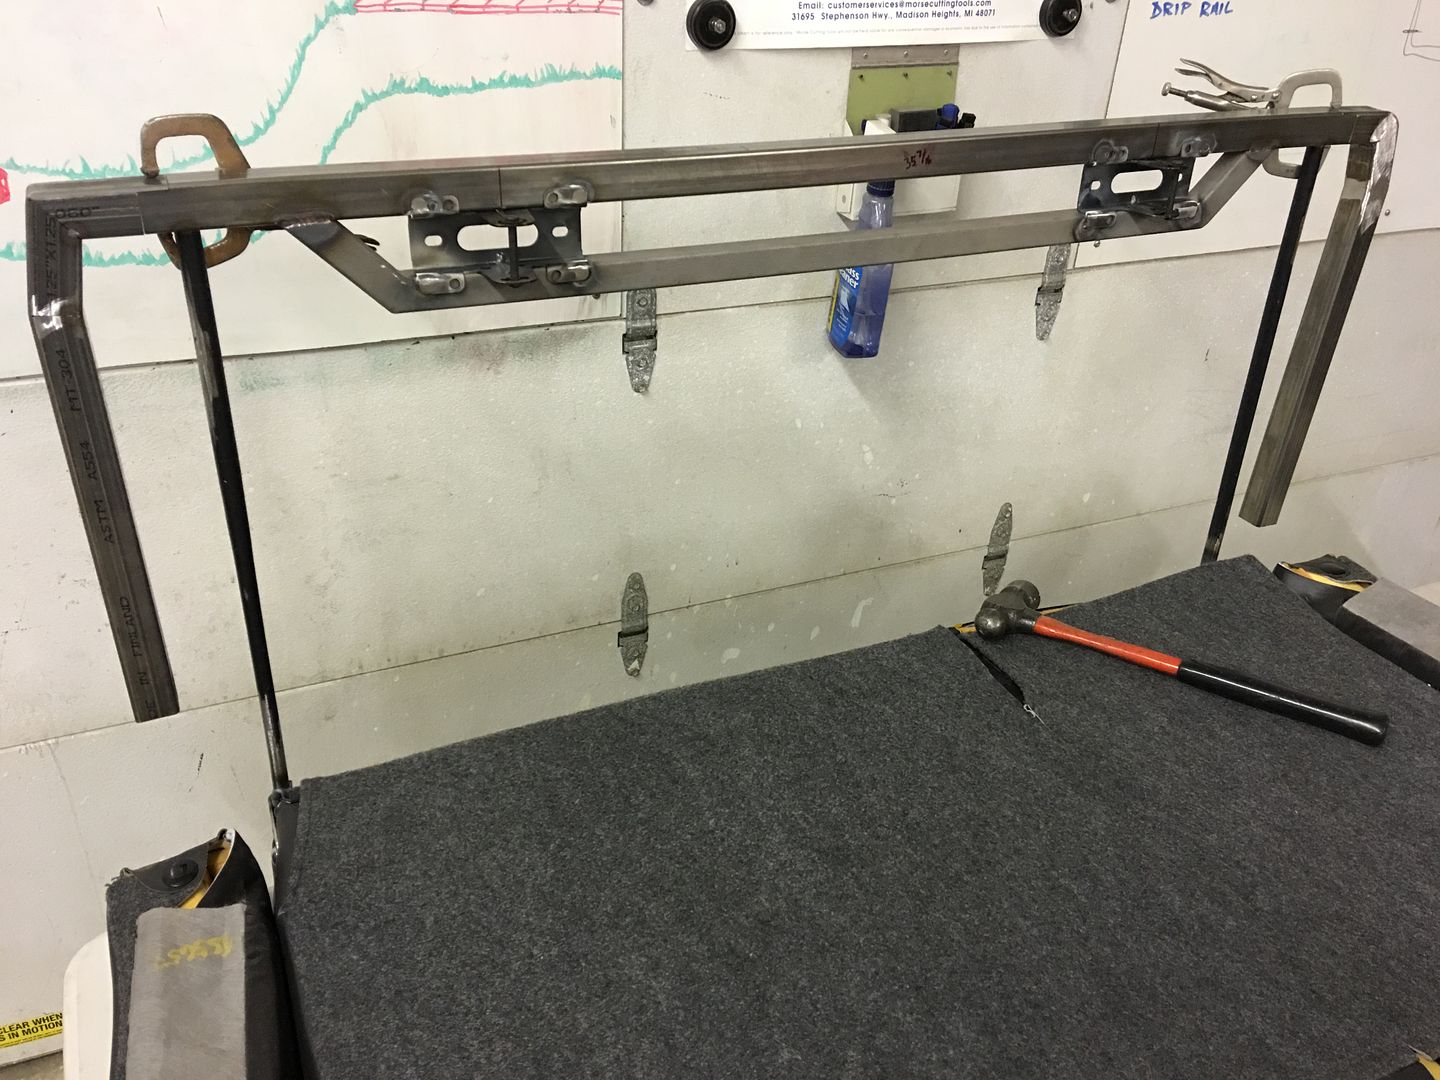
Now for the top of the seat frame... We started with some 3/8-16 standoffs that are 5/8 diameter, and turn them to 1/2 diameter to fit inside the seat frame tube...
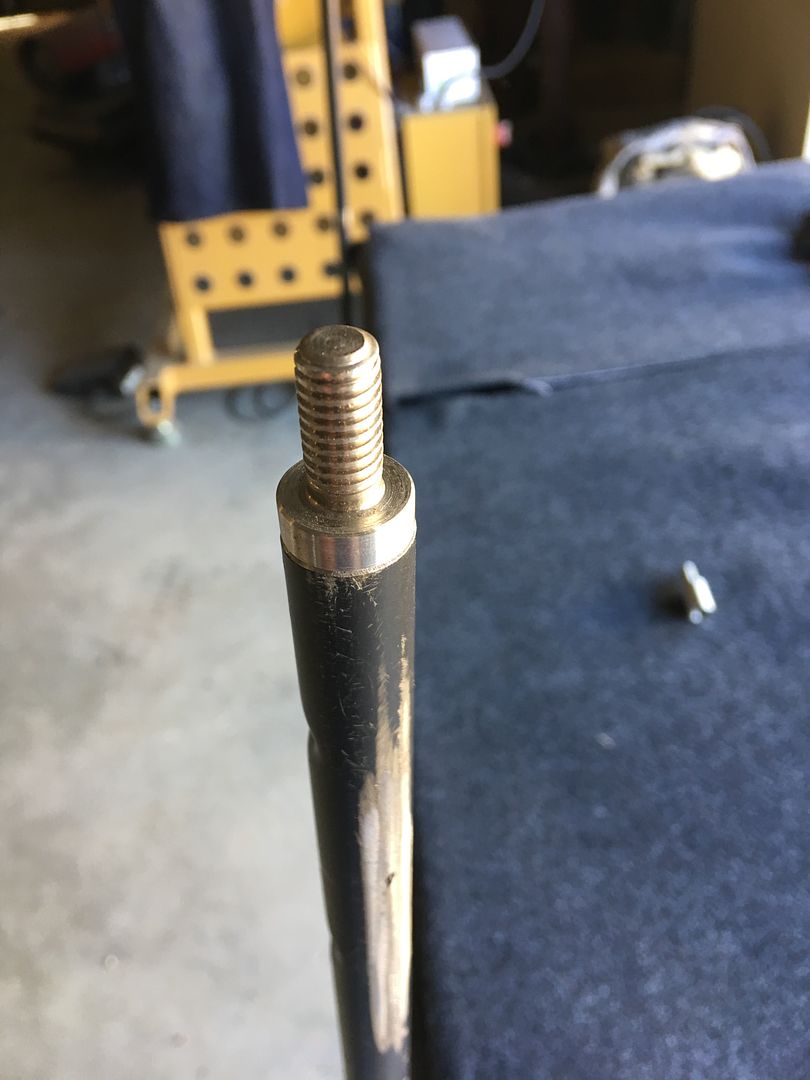
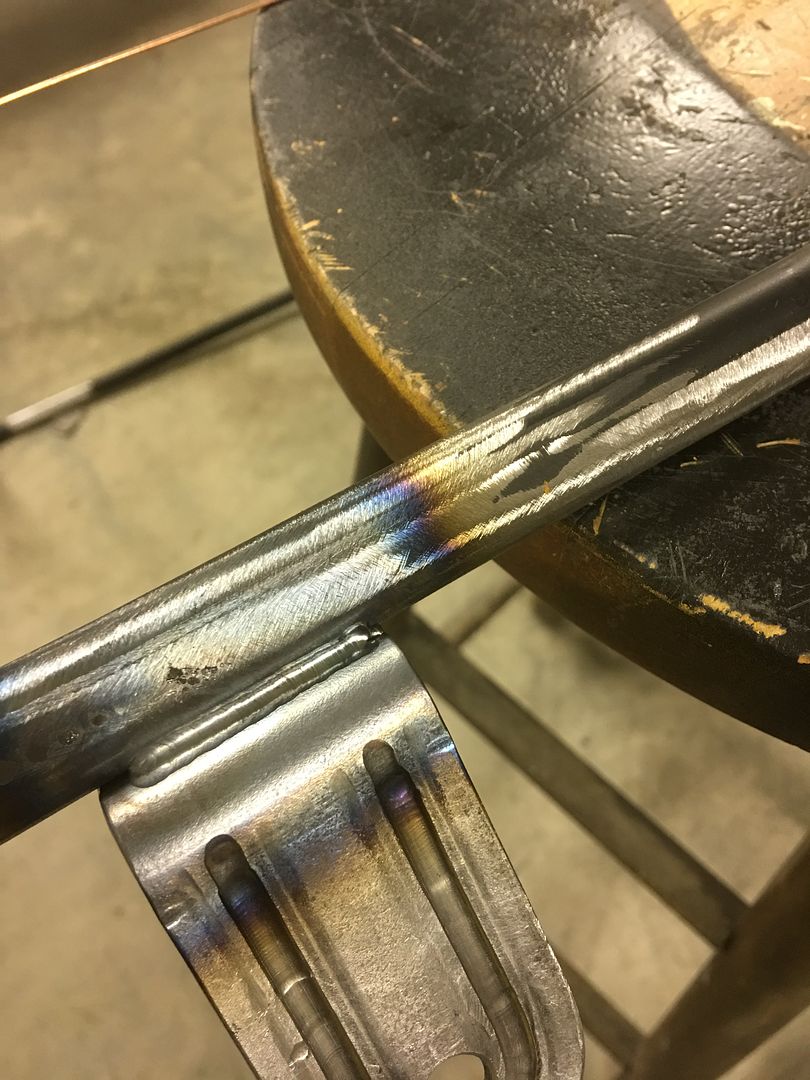
Then holes are drilled in some 1.25 square tubing...
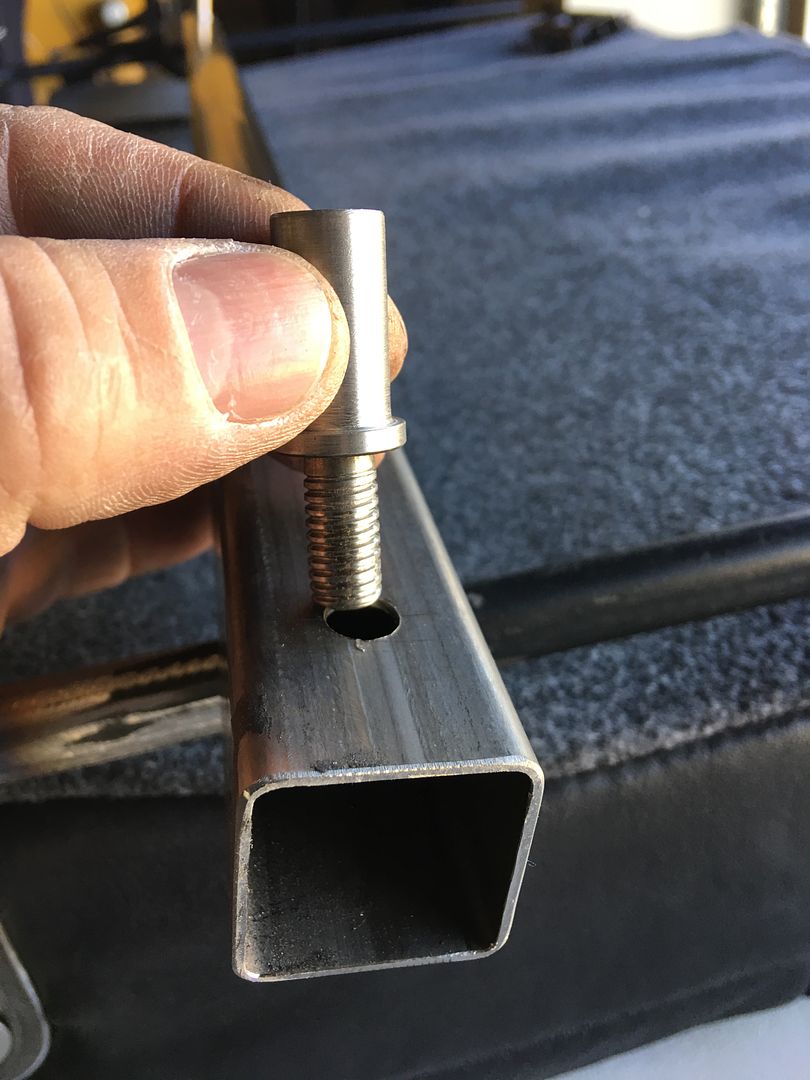
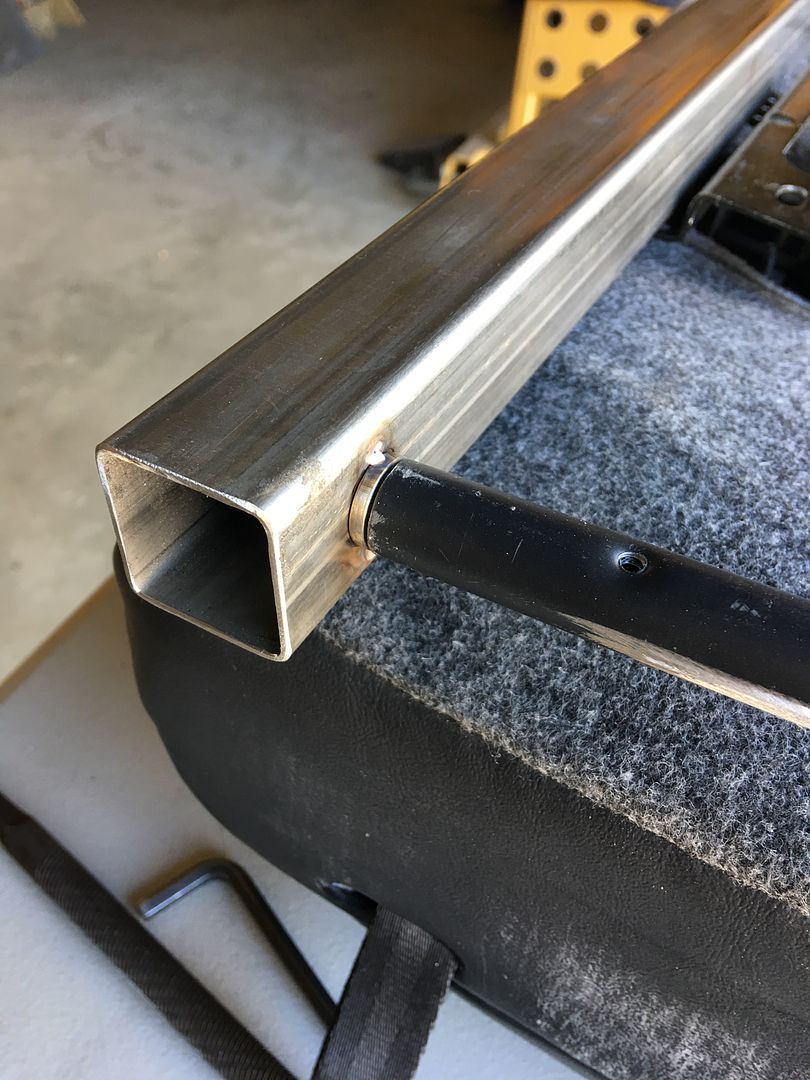
Tacked in place and a nut used for added insurance...

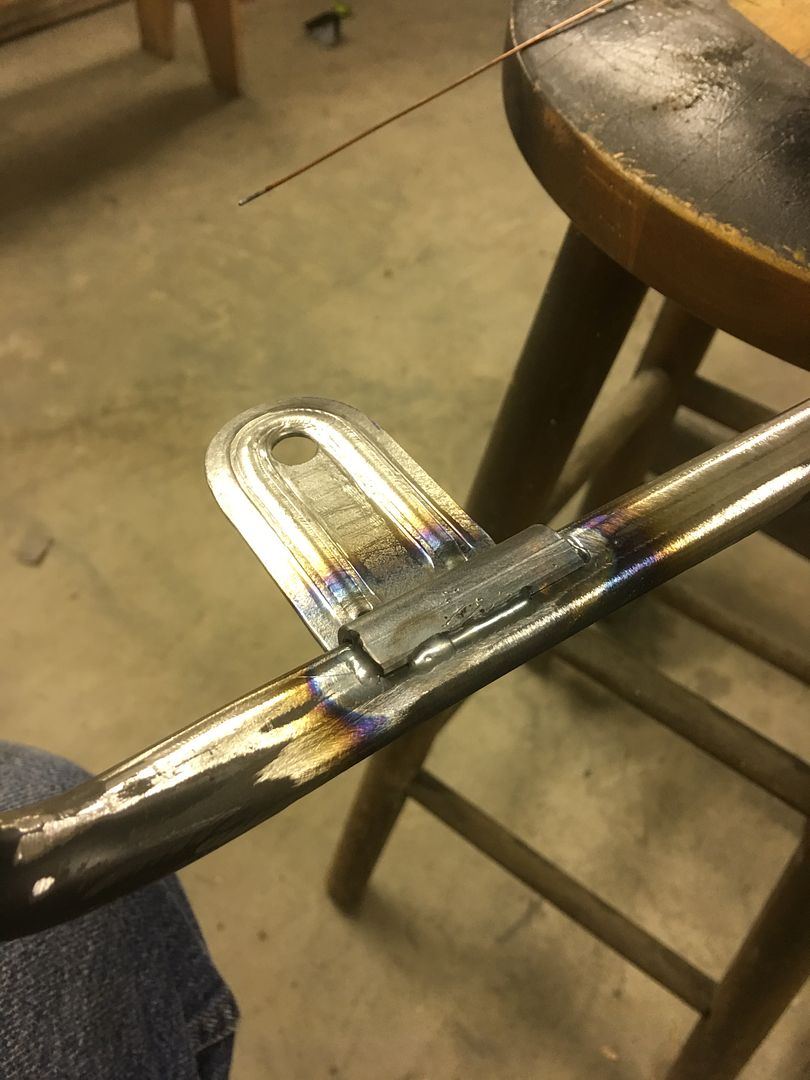
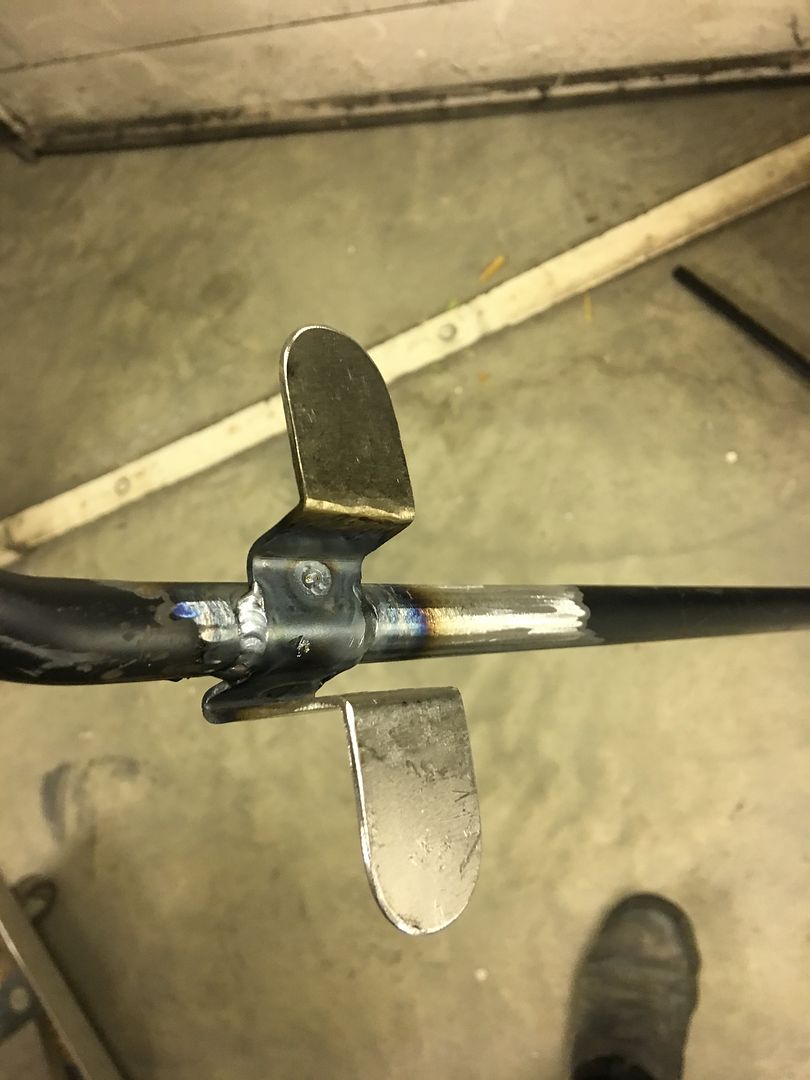
Seat latches plug welded in place...
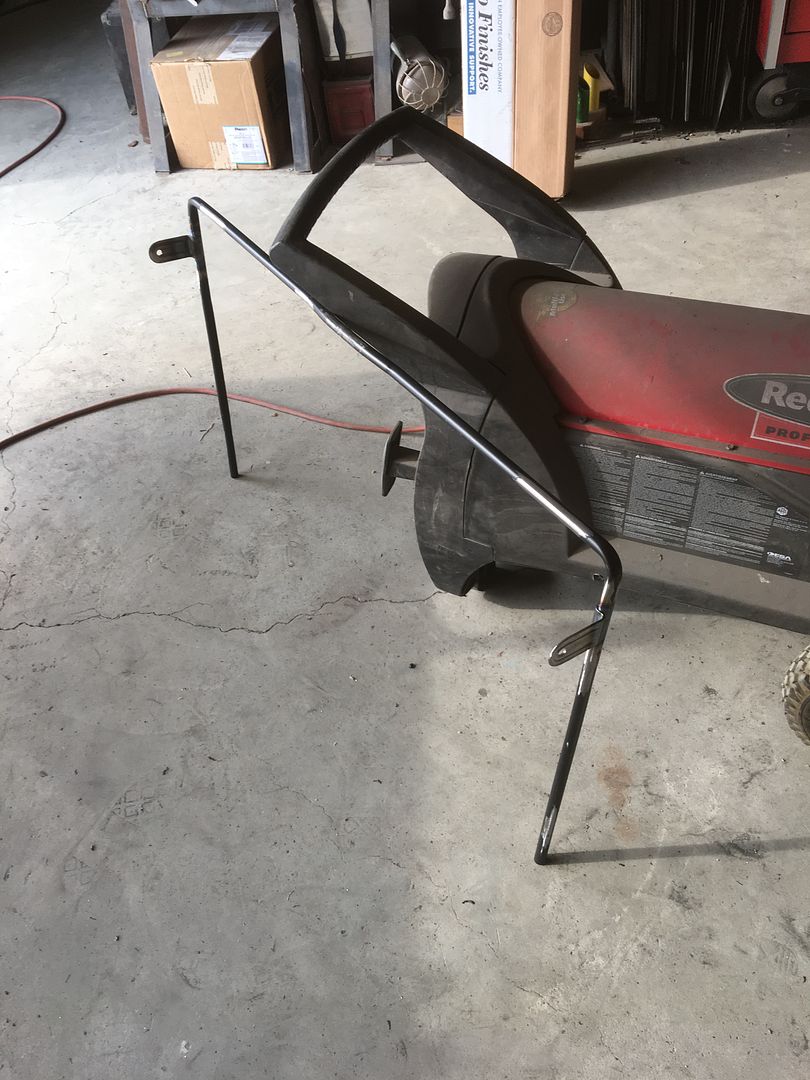
Side pieces formed....

The side pieces will be trimmed, fitted, and welded to the wheel well...
Now for the top of the seat frame... We started with some 3/8-16 standoffs that are 5/8 diameter, and turn them to 1/2 diameter to fit inside the seat frame tube...
Then holes are drilled in some 1.25 square tubing...
Tacked in place and a nut used for added insurance...
Seat latches plug welded in place...
Side pieces formed....
The side pieces will be trimmed, fitted, and welded to the wheel well...
larry4406
Well-known member
Very stout rear seat frame!
How did you cut the inside radius on the tube steel to convert from a square corner to a rounded edge? Portaband?
How did you cut the inside radius on the tube steel to convert from a square corner to a rounded edge? Portaband?
jimkinney
Well-known member
That is a slick way to put a radius on the corner. I will remember that.
Thanks,
Jim
Thanks,
Jim