
You are using an out of date browser. It may not display this or other websites correctly.
You should upgrade or use an alternative browser.
You should upgrade or use an alternative browser.
MP&C Shop Projects
- Thread starter MP&C
- Start date
tlmartin84
Well-known member
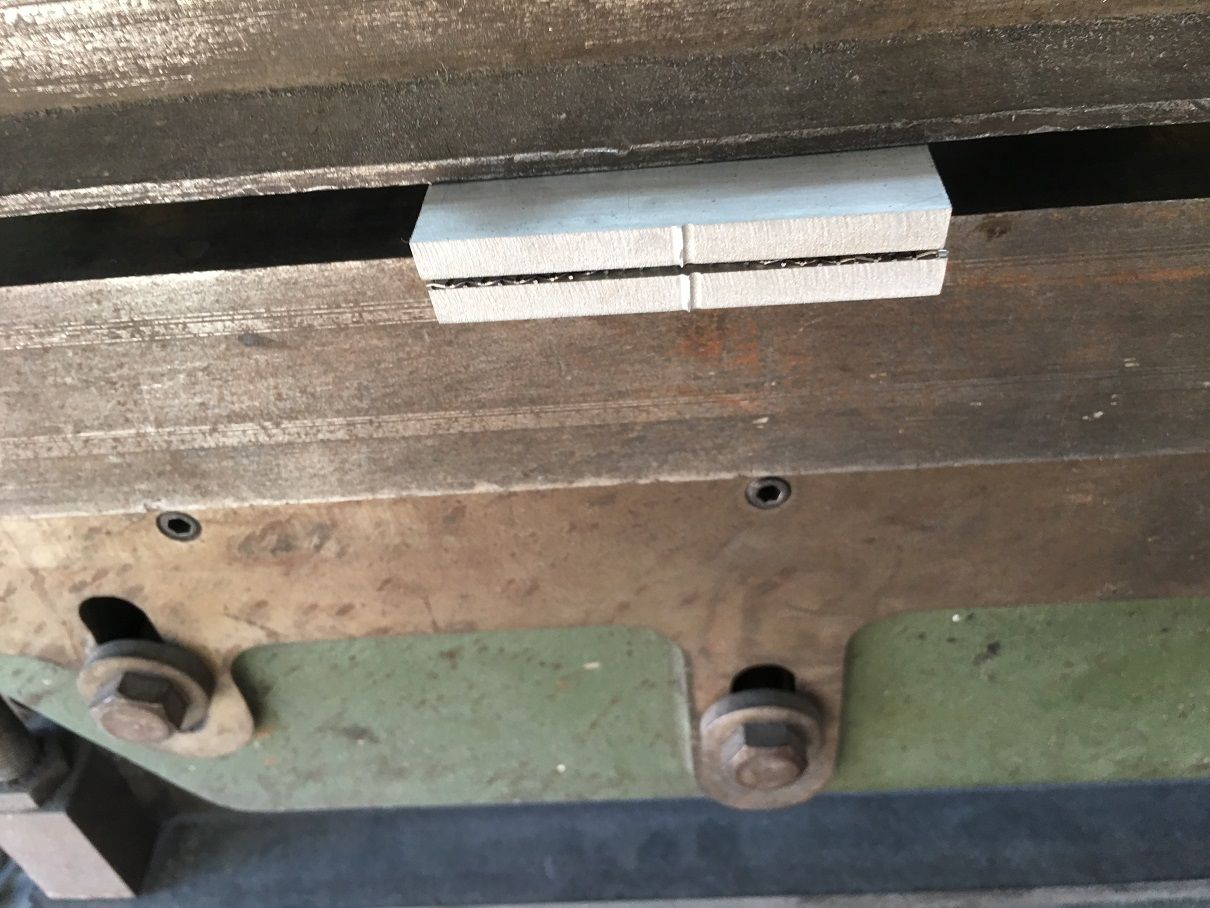
I wanted to pick your brains, I had this dash extension made up it is 63". I am debating on leaving the bottom bent as shown.
However, if I did want to finish it to a full 90 degree bend (The brake wouldn't finish them), is there a relatively easy way to do them in a home shop? Pres and dies maybe?
View media item 91900
However, if I did want to finish it to a full 90 degree bend (The brake wouldn't finish them), is there a relatively easy way to do them in a home shop? Pres and dies maybe?
View media item 91900
racer-john
Well-known member
" It's like January here,ice storm 250,000 people without power."
Claude, that's what you get for living in Quebec. lol
Claude, that's what you get for living in Quebec. lol
I wanted to pick your brains, I had this dash extension made up it is 63". I am debating on leaving the bottom bent as shown.
However, if I did want to finish it to a full 90 degree bend (The brake wouldn't finish them), is there a relatively easy way to do them in a home shop? Pres and dies maybe?
View media item 91900
Should be able to set it on a workbench at the edge, clamp a flat bar or angle inside the less than 90 crease, and use a dead blow to bump it over, working from one end to the other. Not all at once , about 5* at a time.
Way cool Robert! Short sleeves to boot! It's like January here, ice storm 250,000 people without power.
We've had snow here this late in the season before, but not often. Guess it's global warming....I mean climate change.

I think you should rename.
McCartney Custom and Paint!
Yeah, each job seem to be more metal shaping and less painting...
We need to do another spray out test panel, so we can nail down the top color to accent the green. These car bodies just aren't big enough to do a two tone...……..
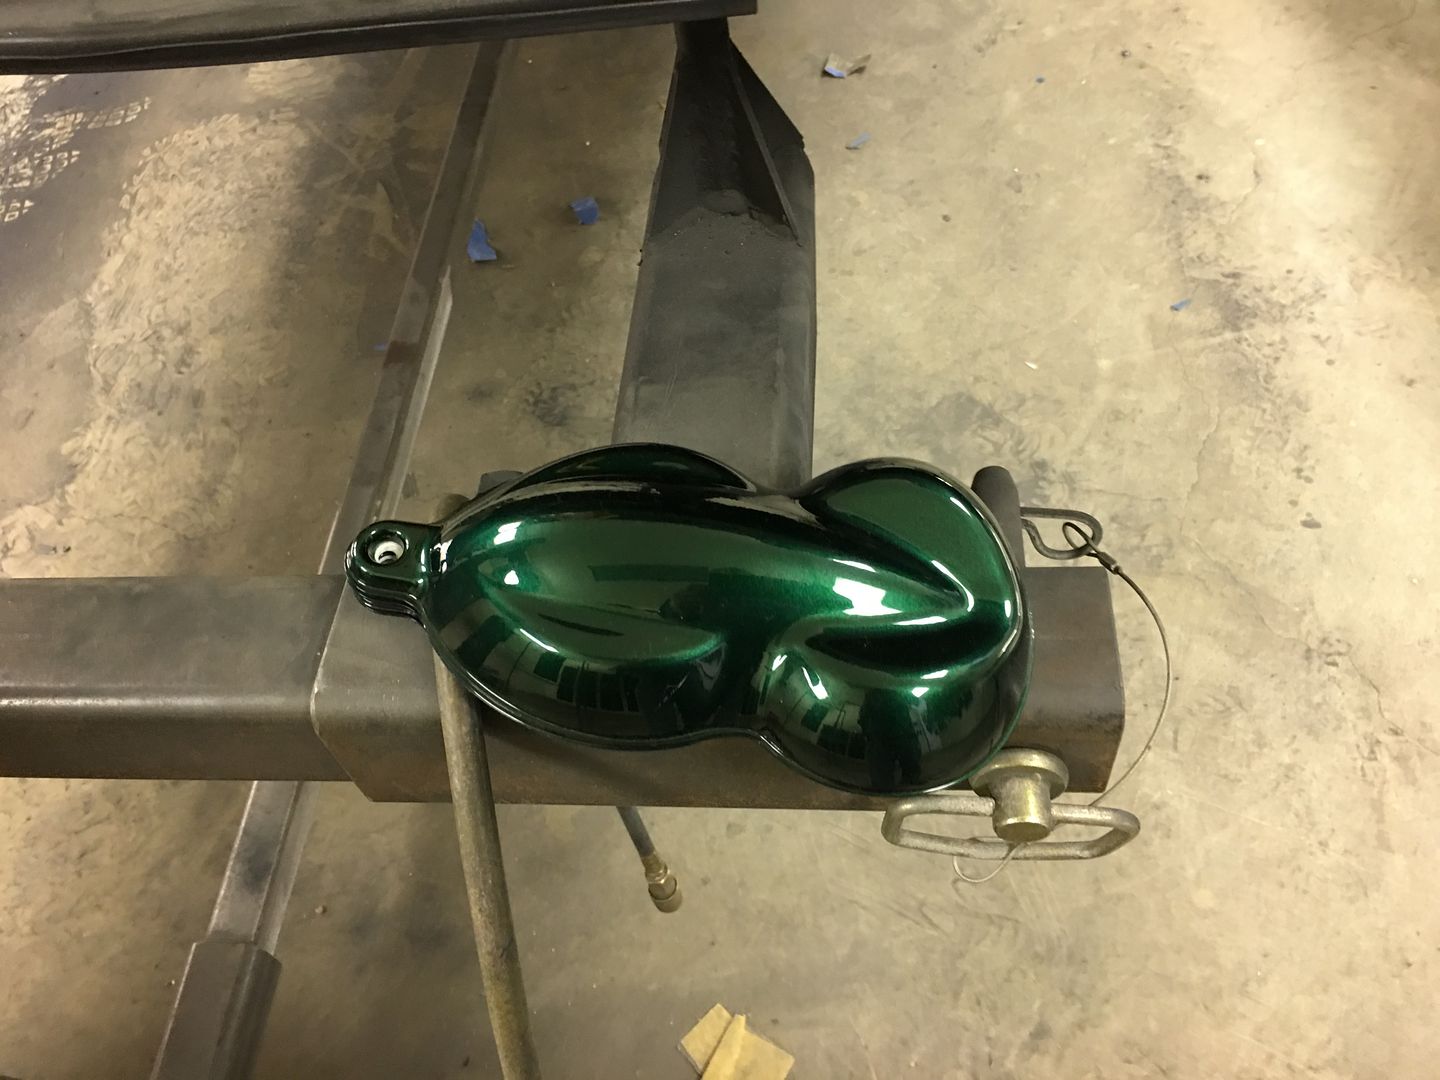
….so we fabricated a fake quarter panel using the Tommasini wheeling machine, and sprayed it with some epoxy primer. We'll get it blocked on Saturday and spray the bottom using Organic Green Kandy Basecoat, and spray the top with Galaxy gray, to see how well those two go together...


….so we fabricated a fake quarter panel using the Tommasini wheeling machine, and sprayed it with some epoxy primer. We'll get it blocked on Saturday and spray the bottom using Organic Green Kandy Basecoat, and spray the top with Galaxy gray, to see how well those two go together...
Hellpig
Well-known member
LOL, I have a pic too!
Cool to see your handiwork in person.
I'm a lurker, but have really learned a lot from your posts and pictures. You have a knack for explaining things so that even I can understand!
As for my skill level, lets just say its a good thing rat rods are a thing. Although not intentional, it provides a good cover stpry!
Attachments

gofastwclass
Well-known member
We need to do another spray out test panel, so we can nail down the top color to accent the green. These car bodies just aren't big enough to do a two tone...……..
….so we fabricated a fake quarter panel using the Tommasini wheeling machine
You do realize us mere mortals just use a spare old fender, door or hood? No one I know MAKES a test panel to spray test colours on (even for a two tone).


Man I wish we lived closer together. I learn so much from your posts, they have improved my metalworking a ton.
LOL, I have a pic too!
Cool to see your handiwork in person.
I'm a lurker, but have really learned a lot from your posts and pictures. You have a knack for explaining things so that even I can understand!
As for my skill level, lets just say its a good thing rat rods are a thing. Although not intentional, it provides a good cover stpry!
You should have stopped and said you were from GJ!!! Nice picture!
You do realize us mere mortals just use a spare old fender, door or hood? No one I know MAKES a test panel to spray test colours on (even for a two tone).
Man I wish we lived closer together. I learn so much from your posts, they have improved my metalworking a ton.
The last sample I painted for the green had some creases and really detracted from the sample... Can't have that! Thanks for following along, glad the posts help out!
Mike did some component assembly today so we could make sure things fit before powder coating brackets. Good thing we did..


The AC condenser bracket came with the Vintage Air setup, and we bought the alternator bracket to match... I'm not really keen on the mix of vintage air cleaner and AC condenser in front of it, but I think the owner would frown on the lack of cold air exiting from the dash..
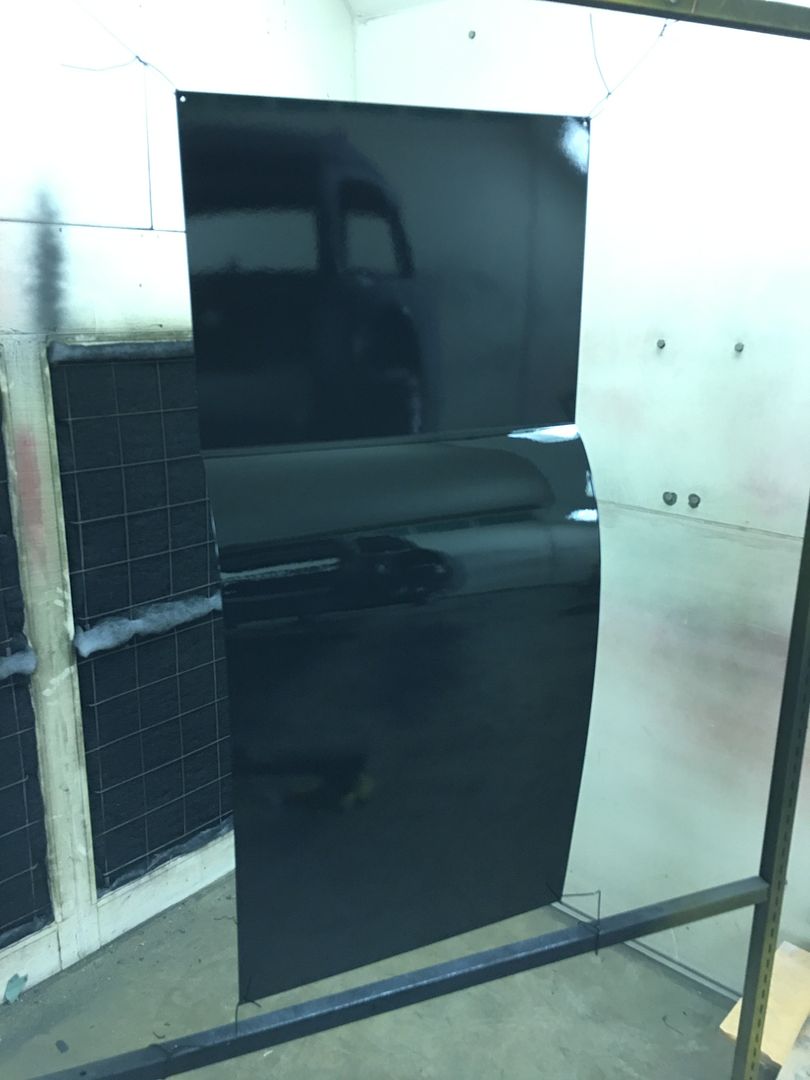
While Mike was working on those issues, I added some color to our paint sprayout sample.. It's too cloudy out today but we're hoping for sunlight tomorrow to better show what this will look like. Until then, Milwaukee Sun...


video version
The AC condenser bracket came with the Vintage Air setup, and we bought the alternator bracket to match... I'm not really keen on the mix of vintage air cleaner and AC condenser in front of it, but I think the owner would frown on the lack of cold air exiting from the dash..
While Mike was working on those issues, I added some color to our paint sprayout sample.. It's too cloudy out today but we're hoping for sunlight tomorrow to better show what this will look like. Until then, Milwaukee Sun...
video version
speed bump
Well-known member
Looking good, hard to believe this project is getting close to paint. Can't wait to see what comes next.
shortykorte
Well-known member
Just learned about the Diacritic bender and here you have one.
The colors look great. Look forward to seeing the car in paint. What is the follow up project going to be?
Sent from my iPhone using The Garage Journal mobile app
The colors look great. Look forward to seeing the car in paint. What is the follow up project going to be?
Sent from my iPhone using The Garage Journal mobile app
Just learned about the Diacritic bender and here you have one.
The colors look great. Look forward to seeing the car in paint. What is the follow up project going to be?
Sent from my iPhone using The Garage Journal mobile app
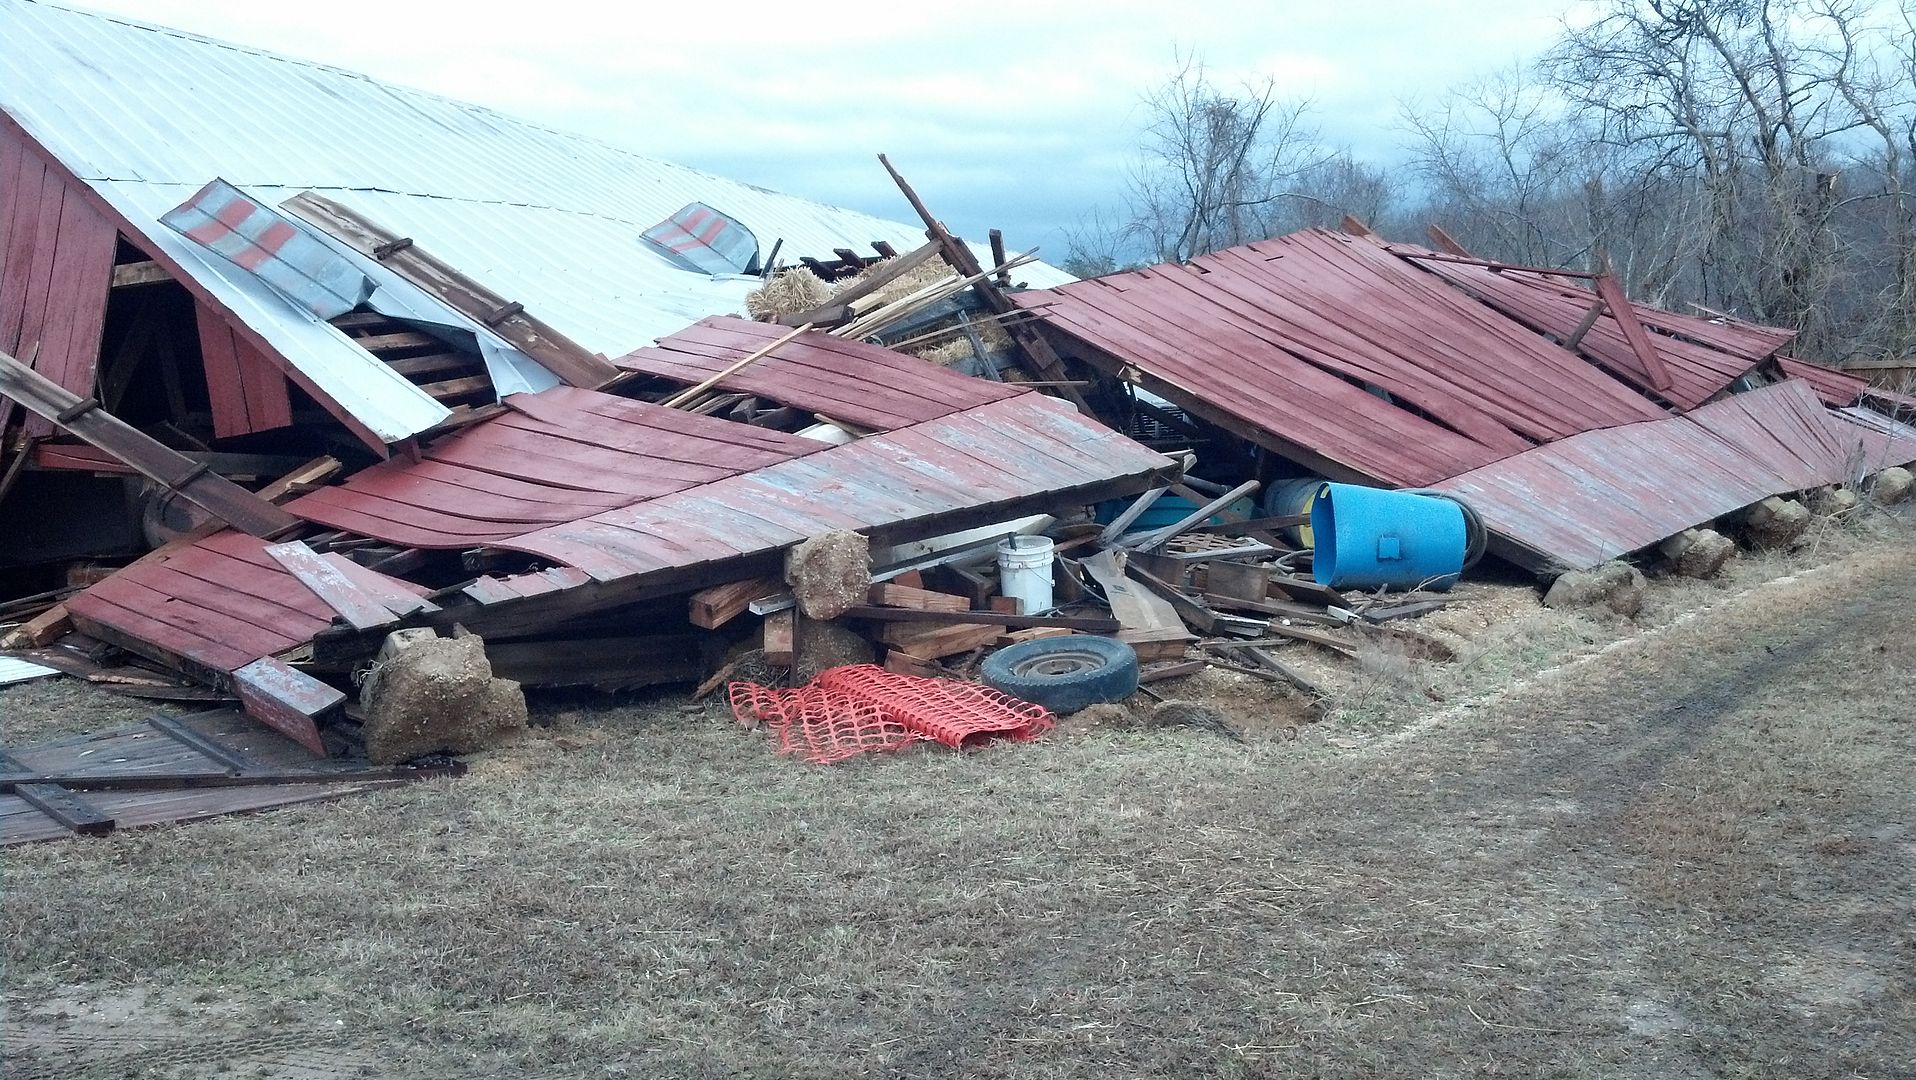
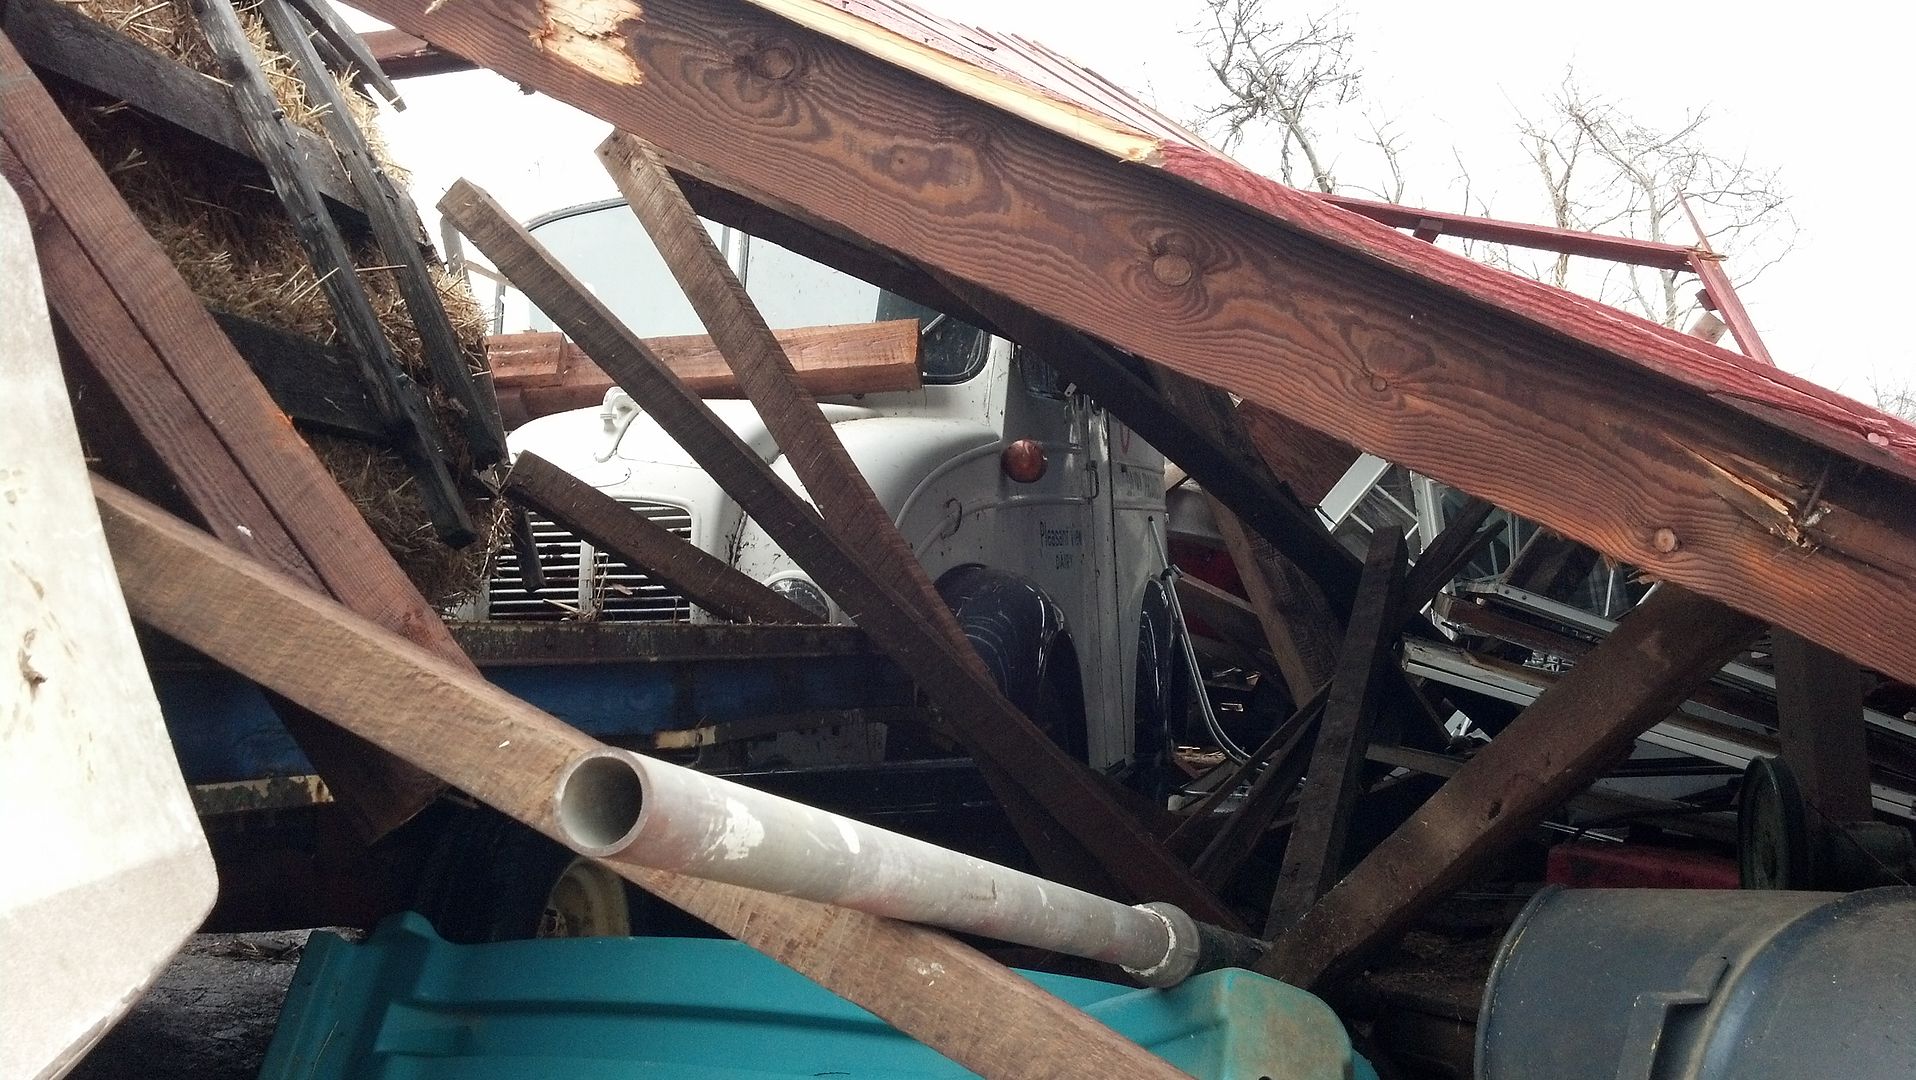
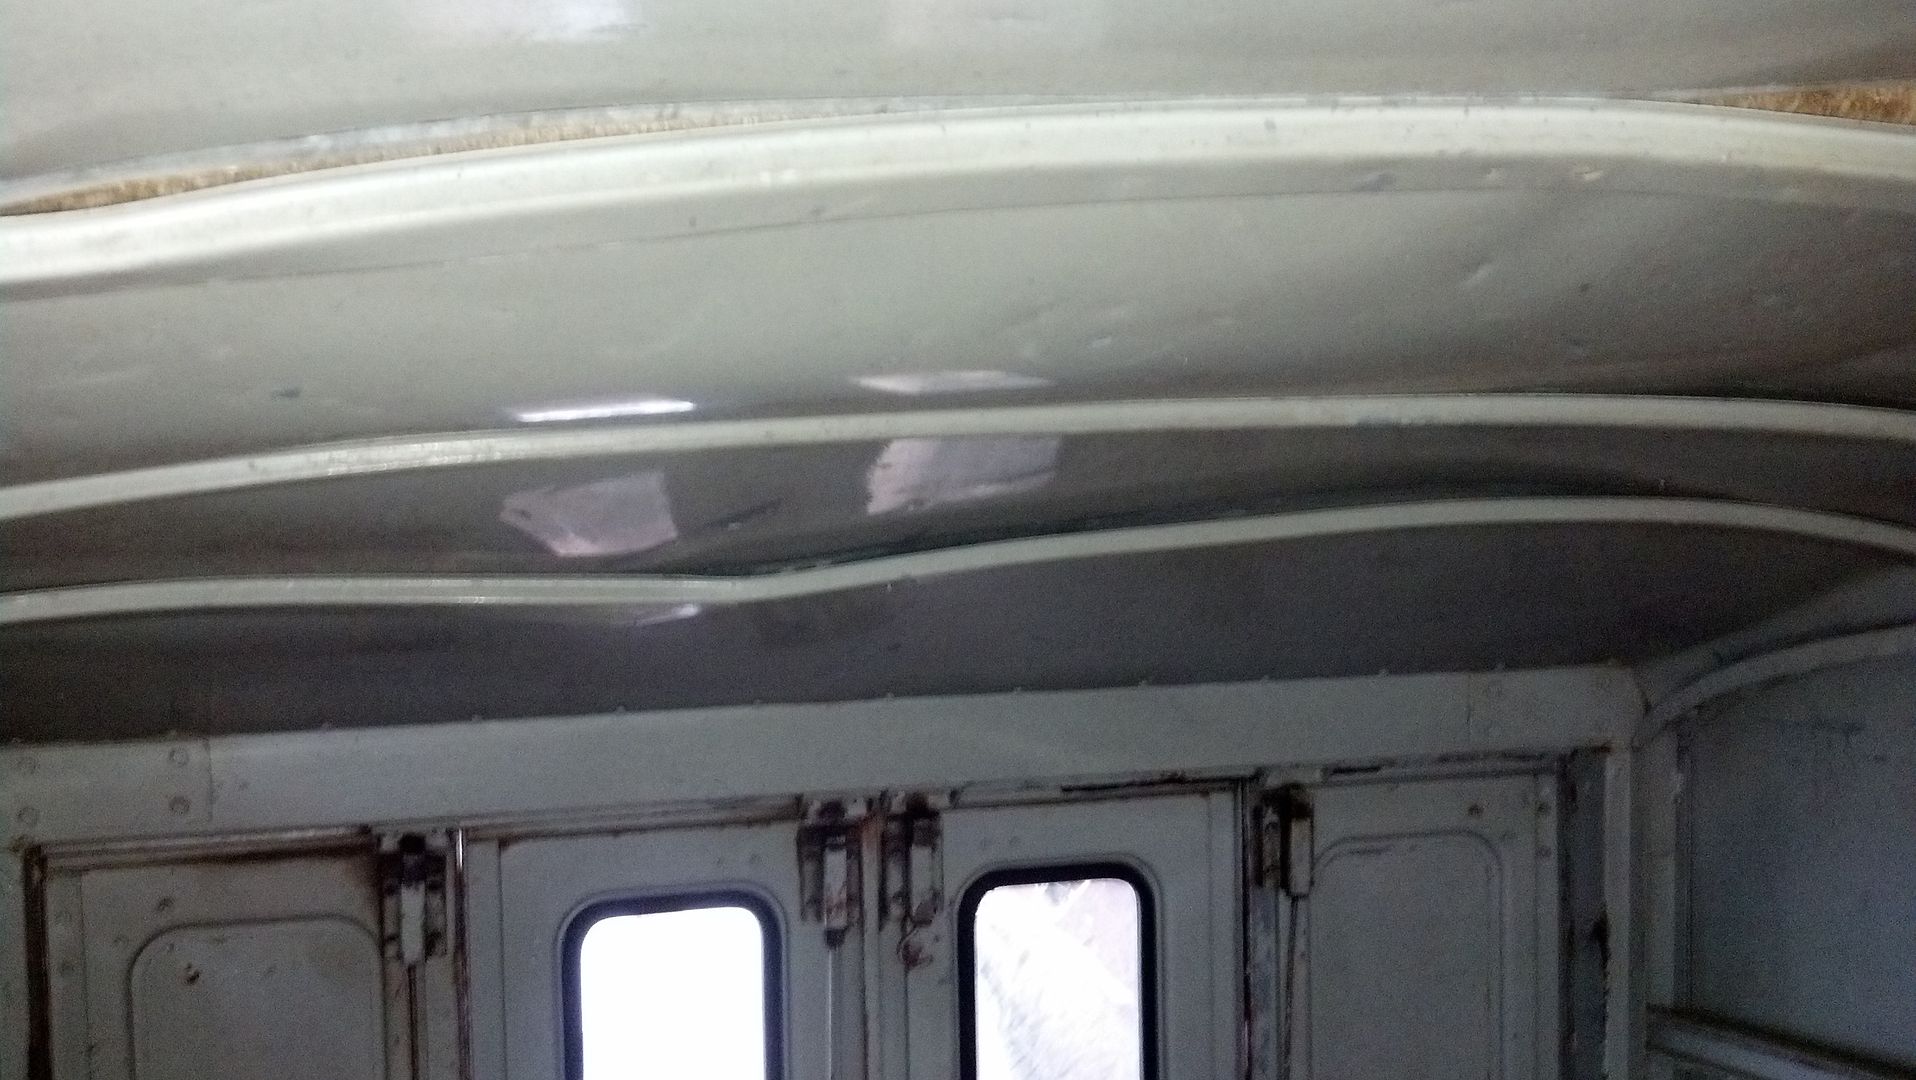
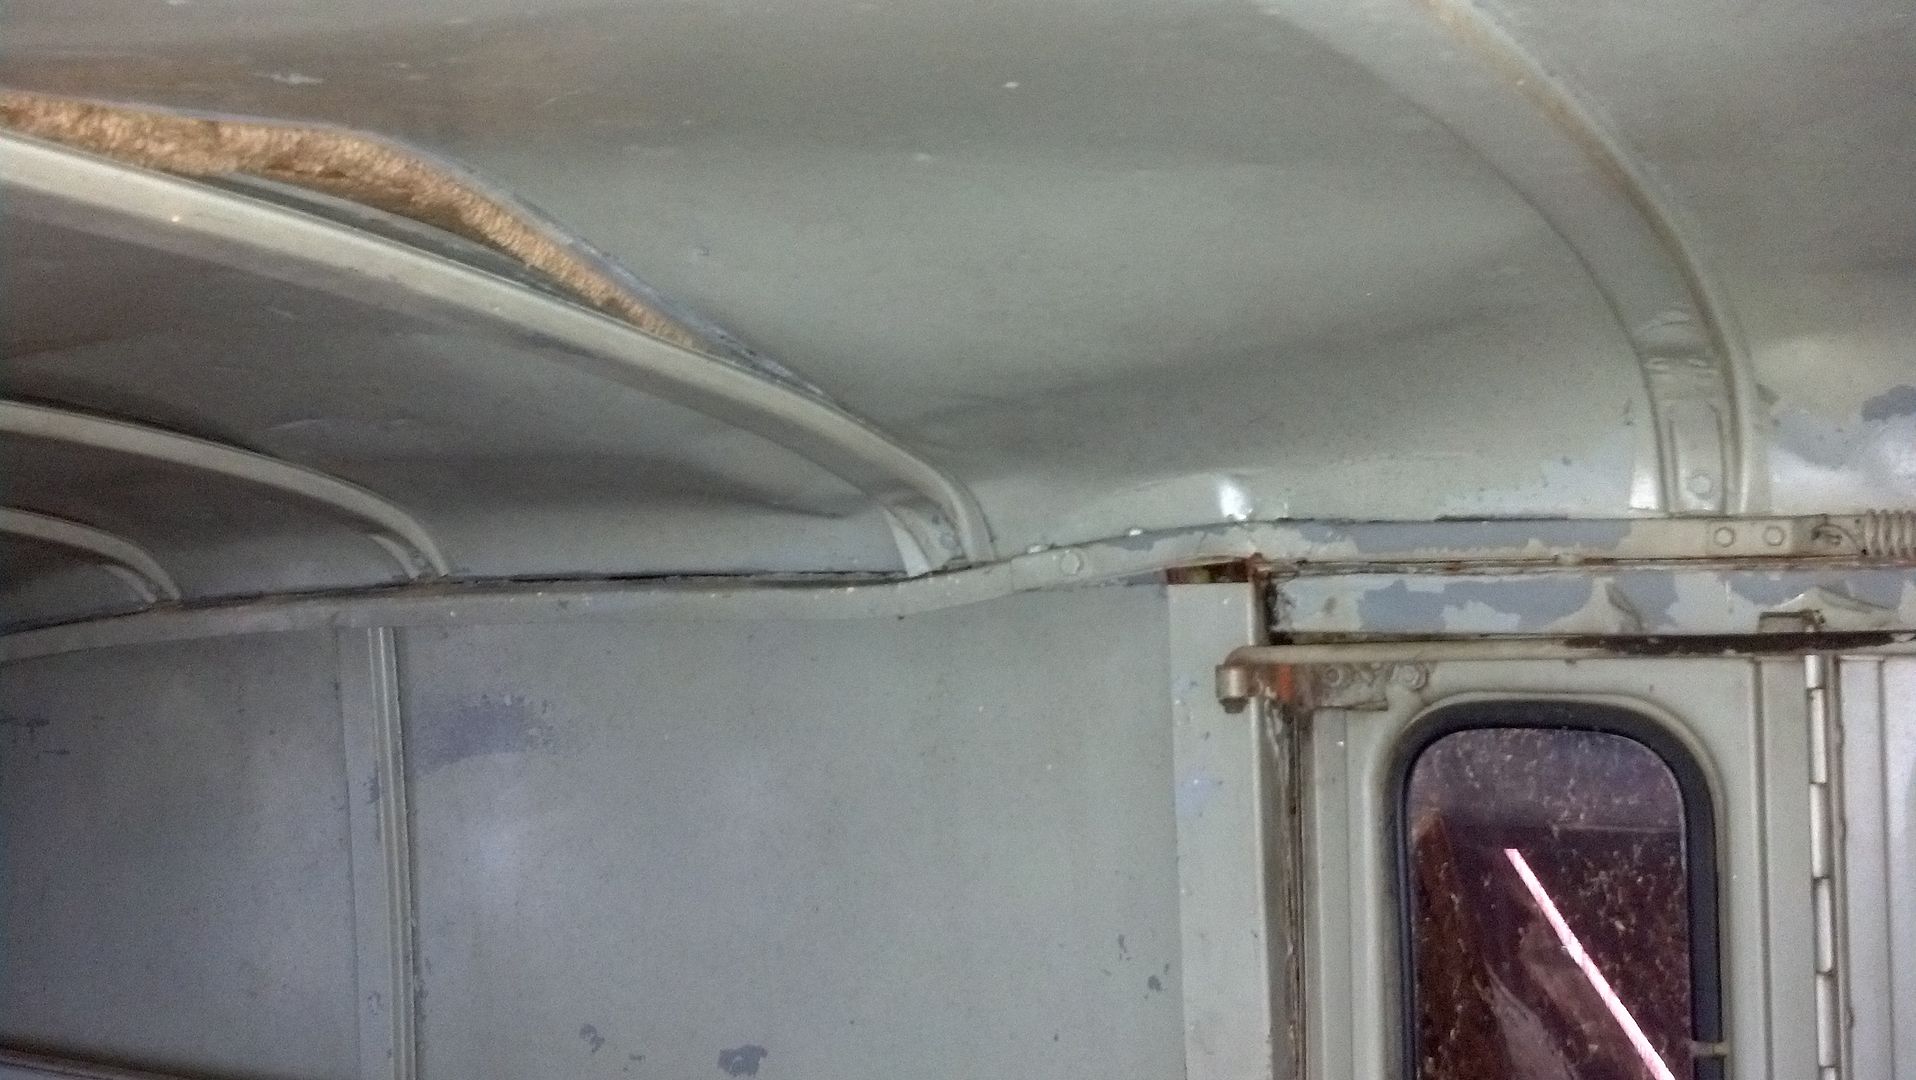
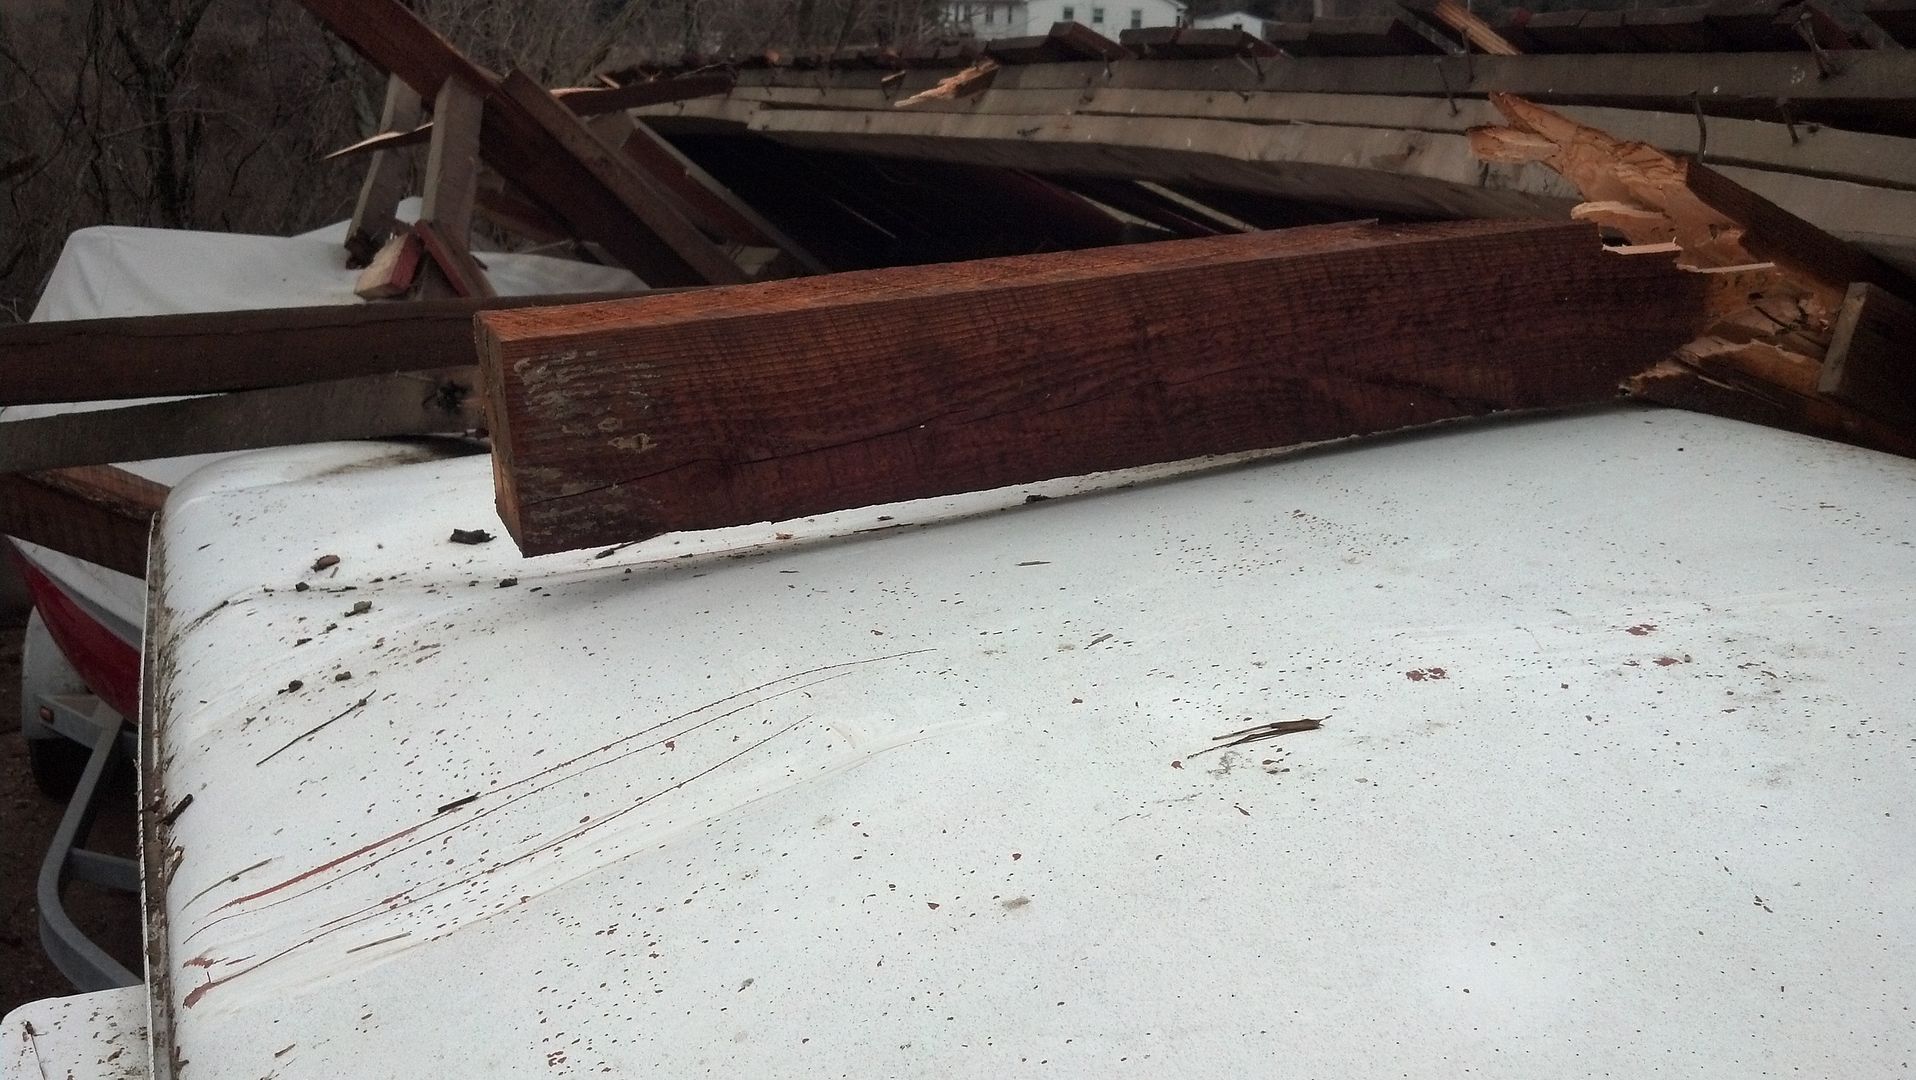
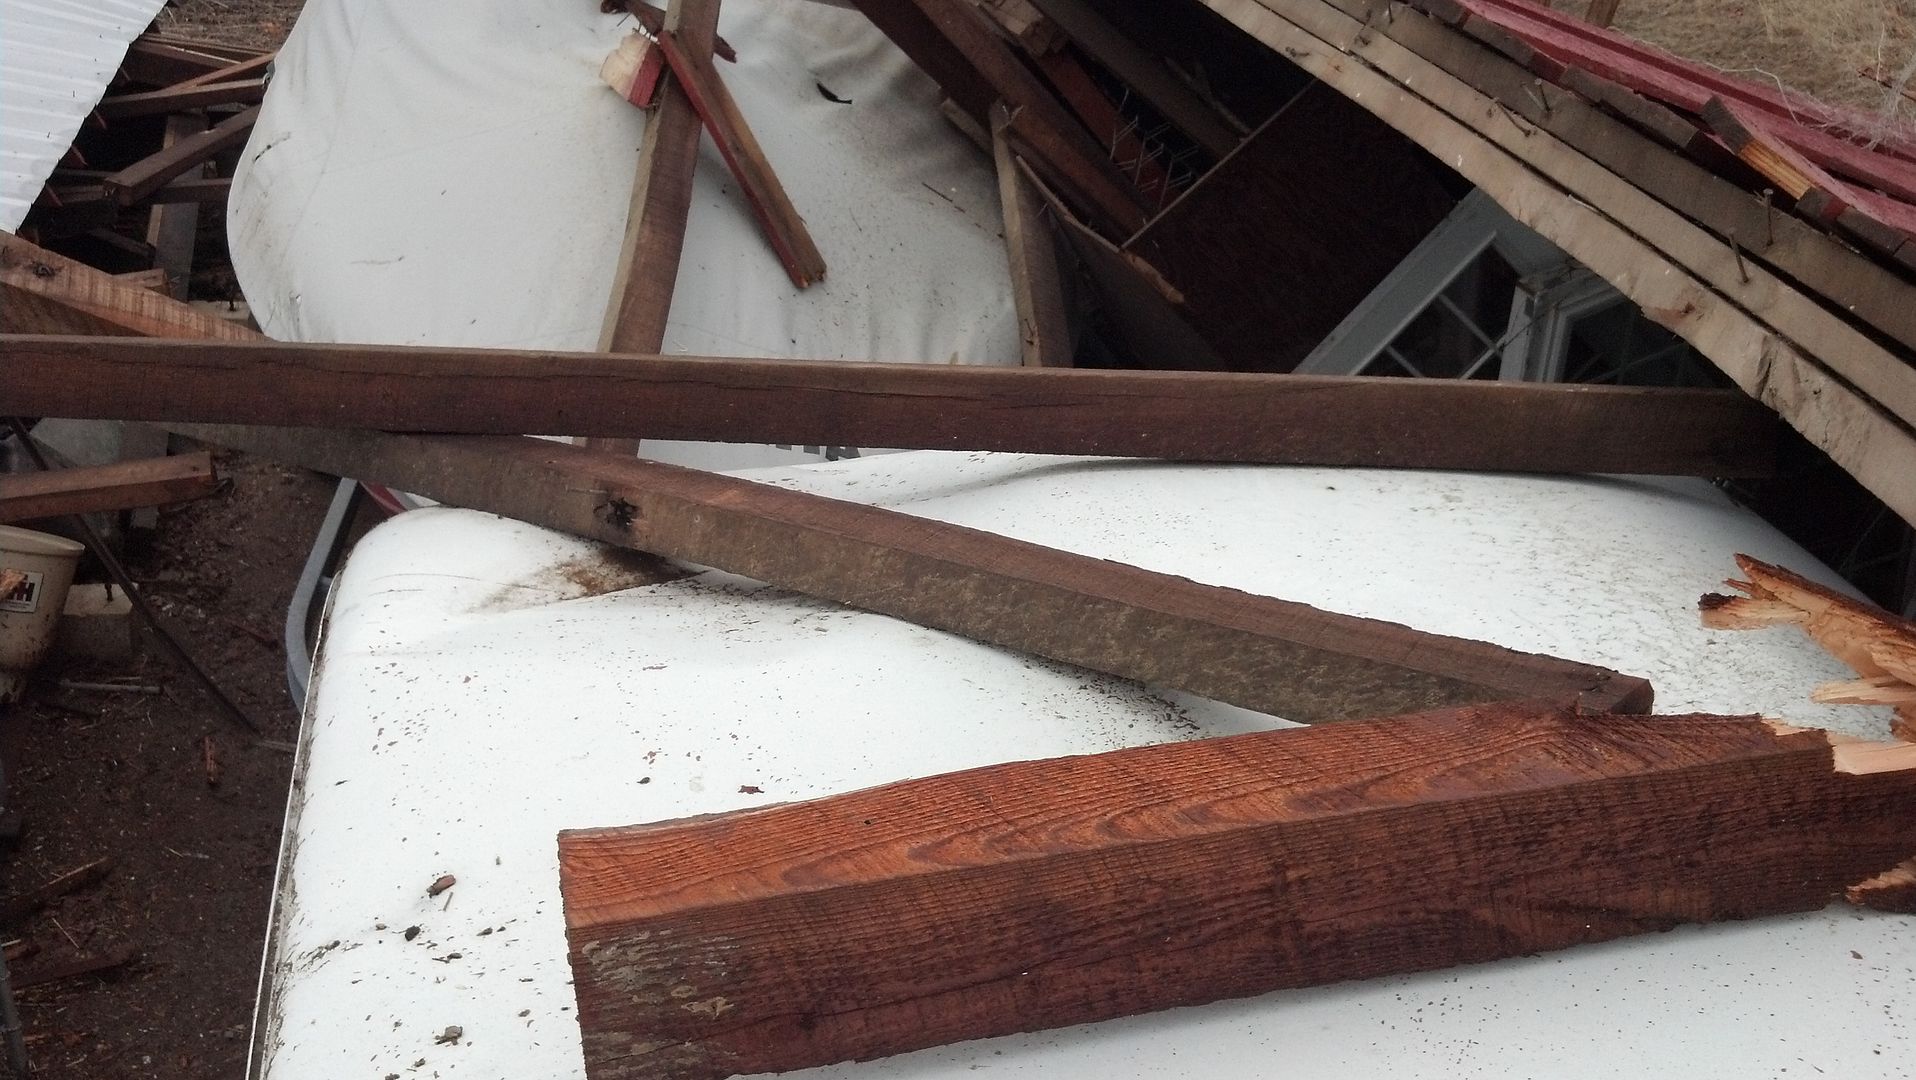
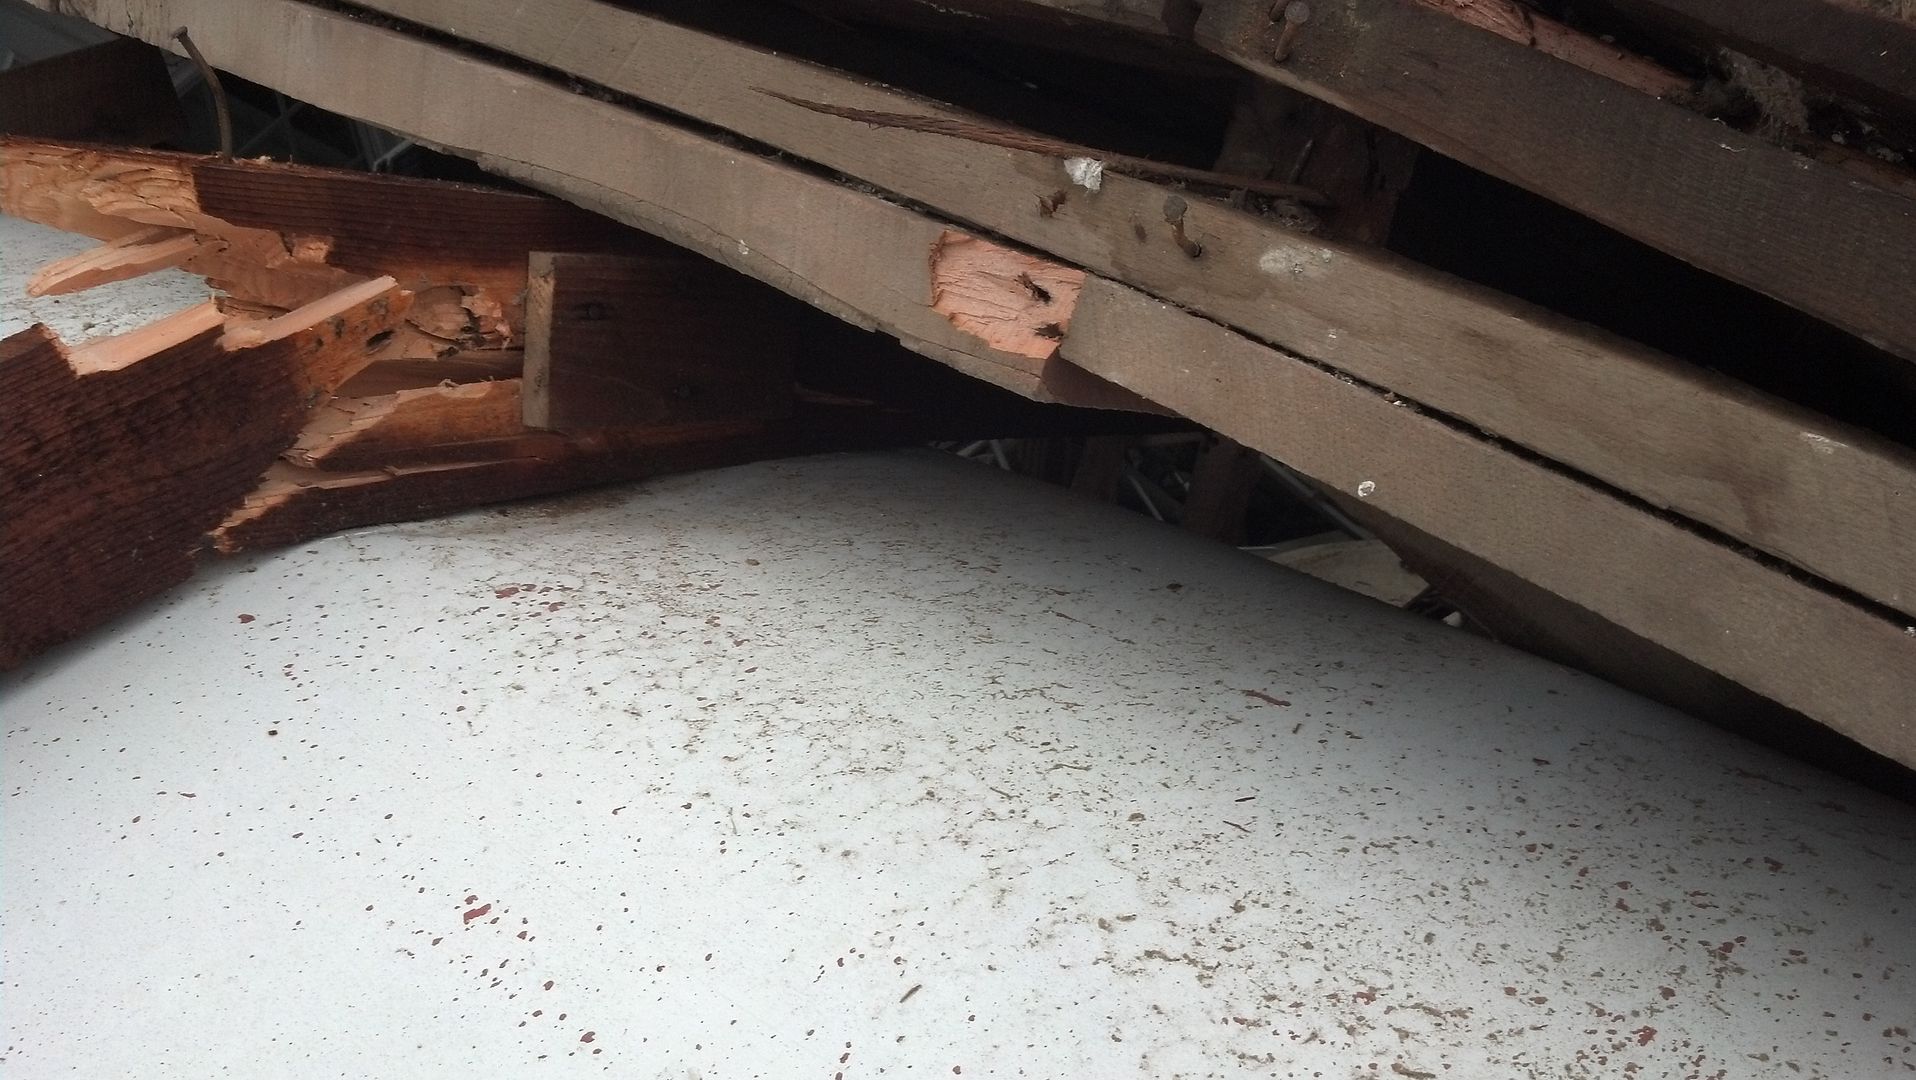
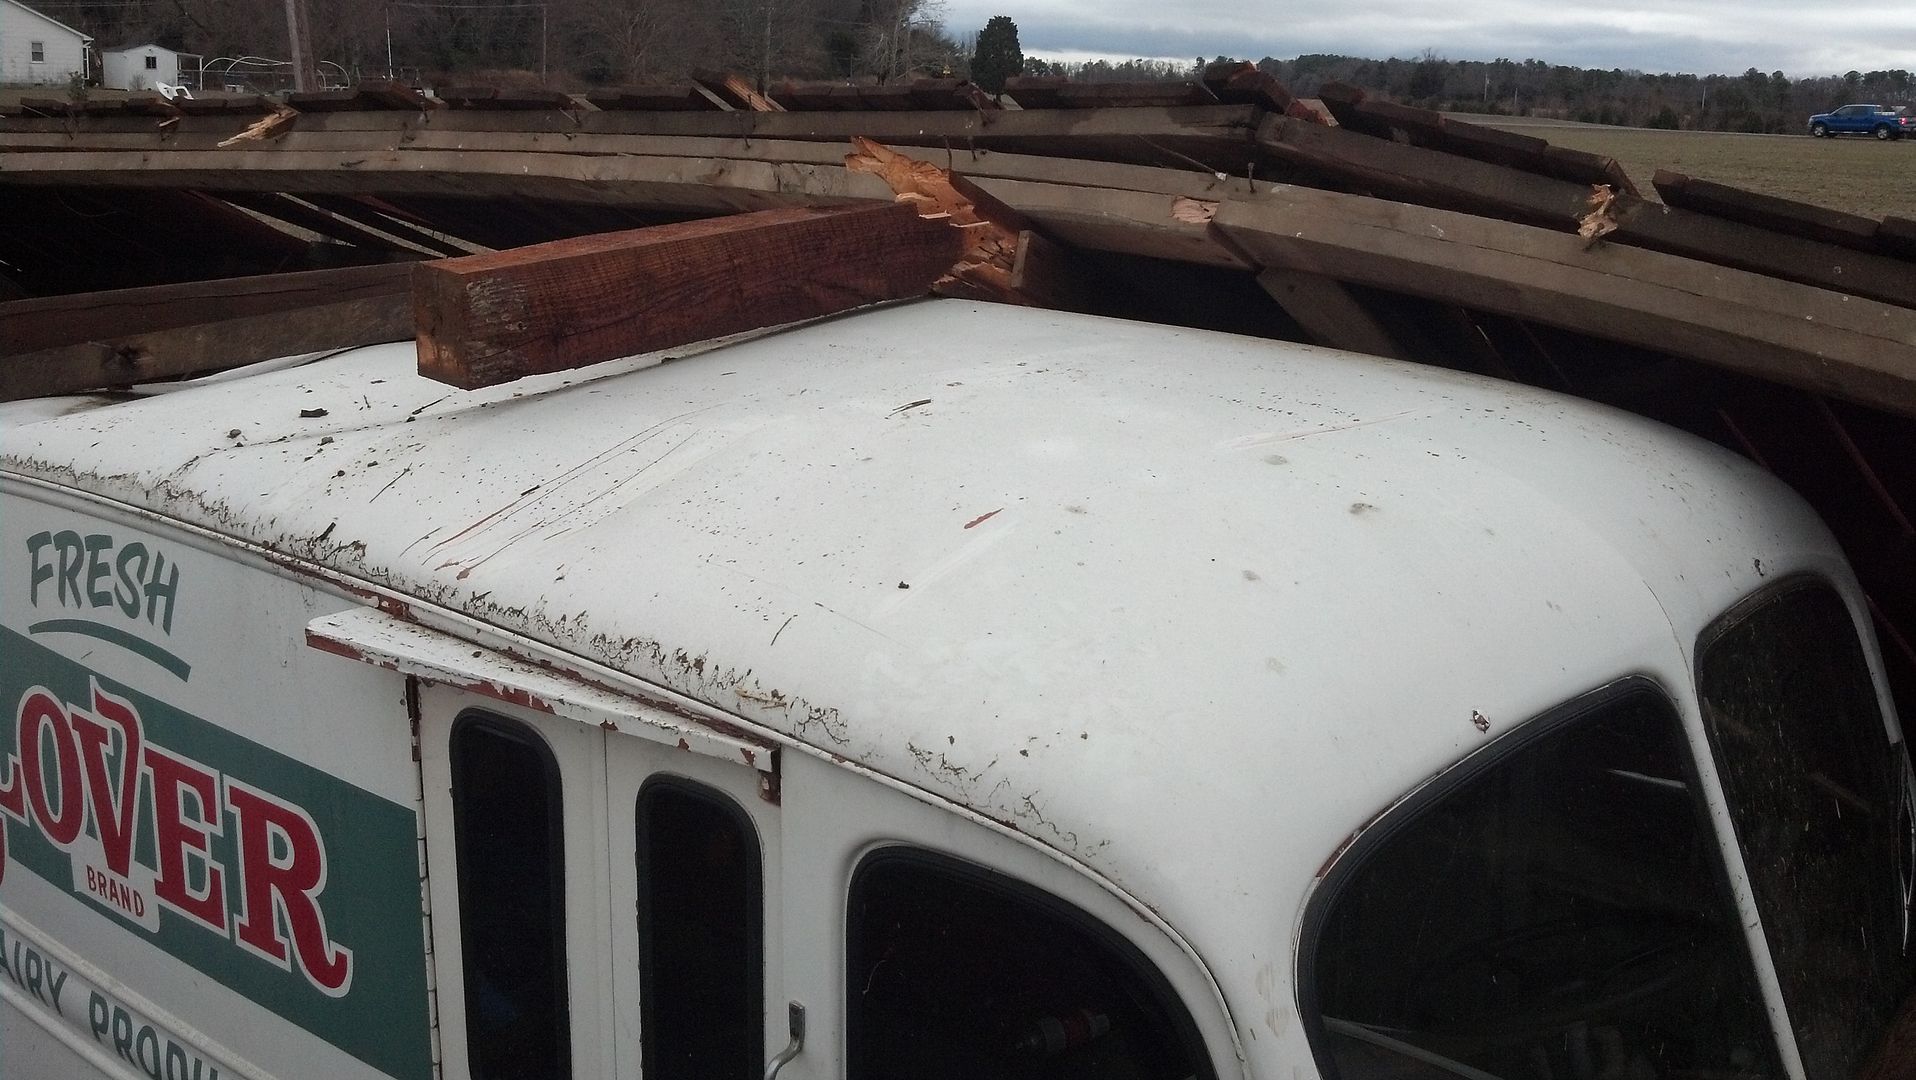
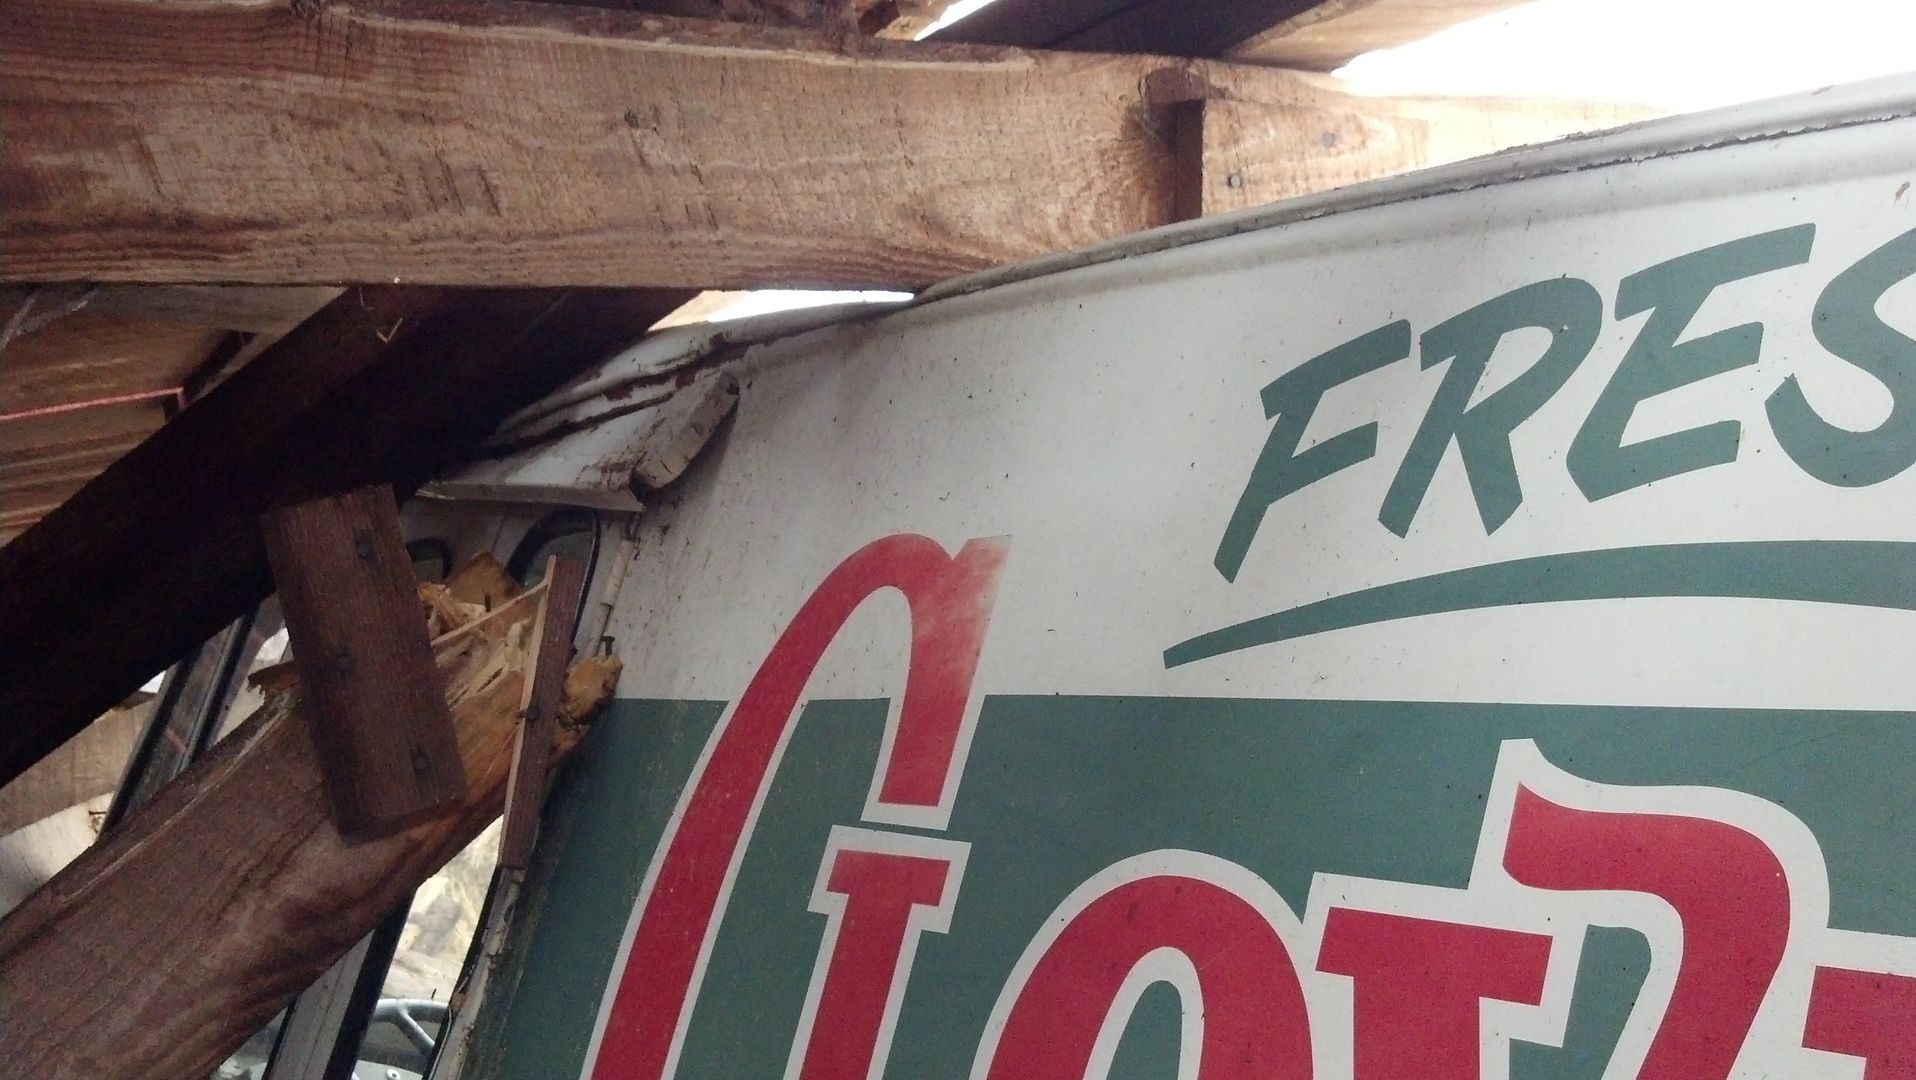
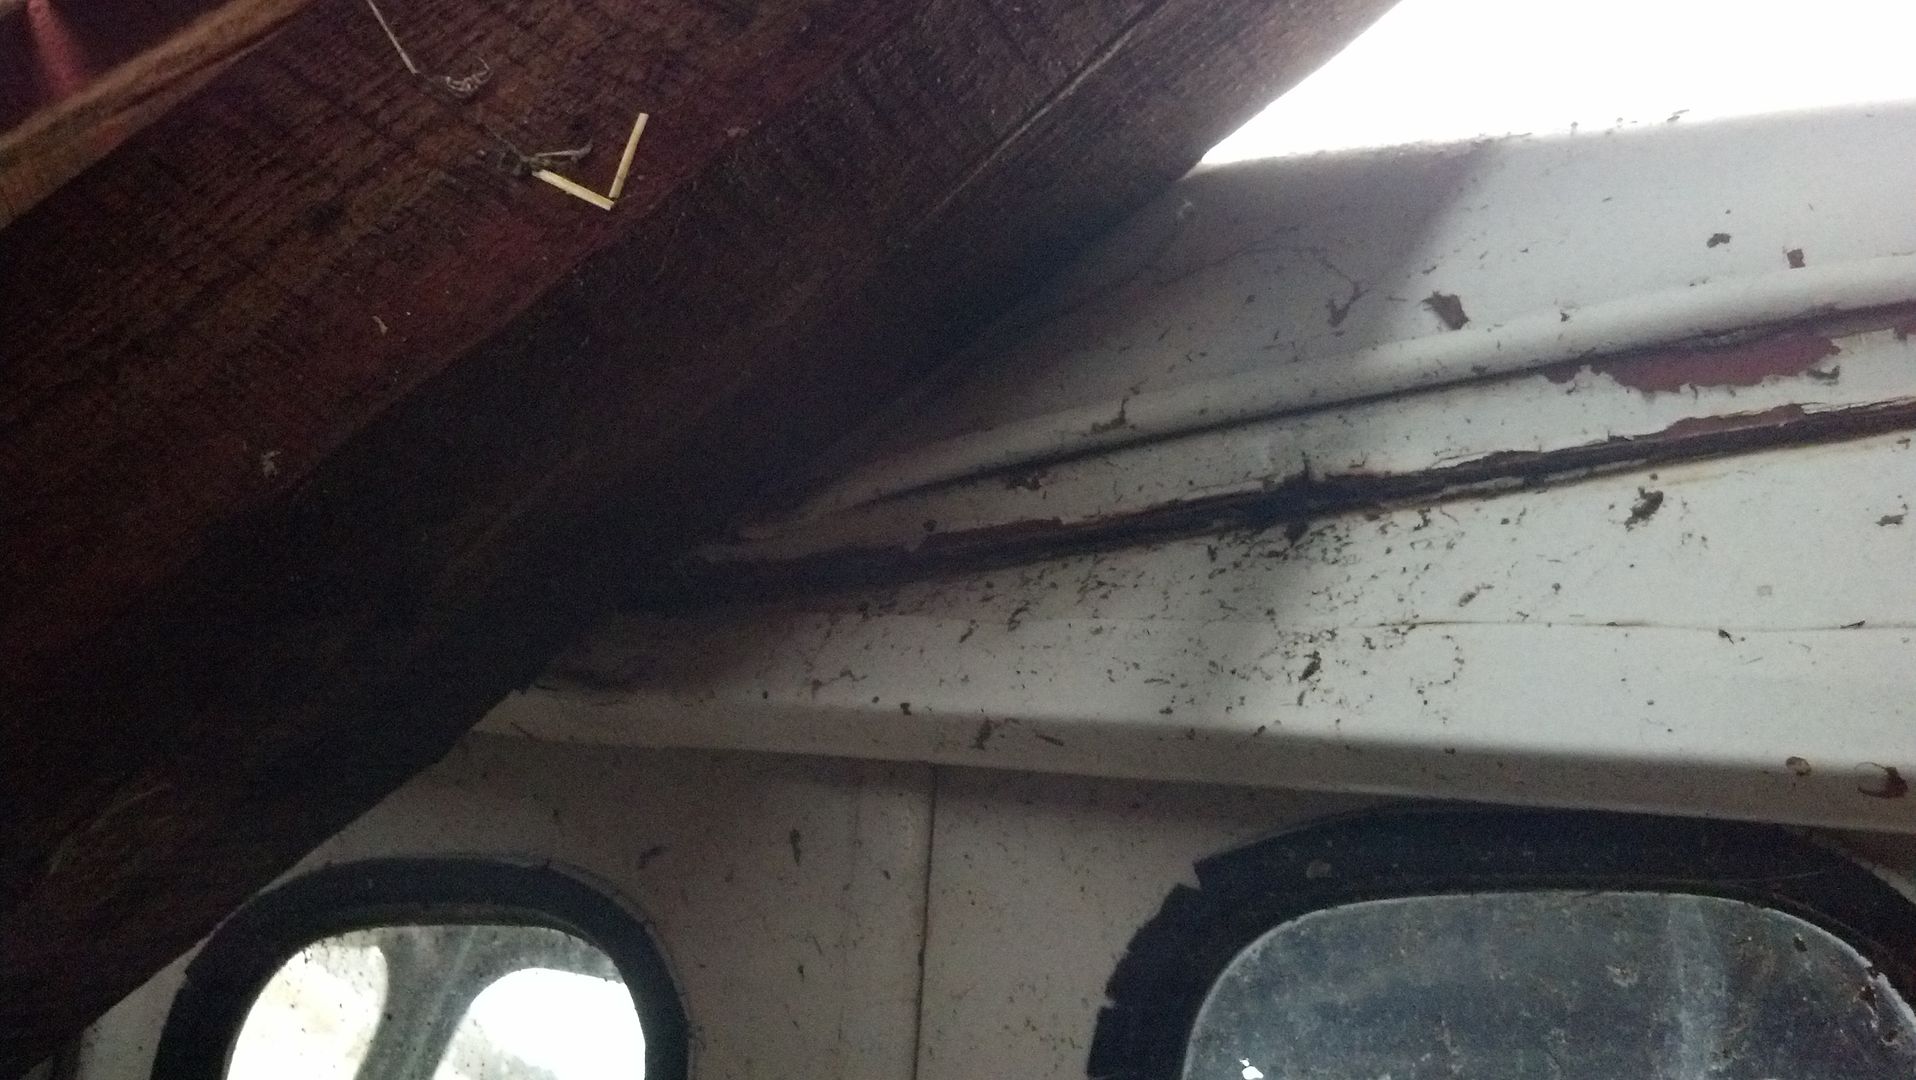
The next project is a fairly rust free Divco milk truck that was being stored in a barn, which unfortunately came down on top of it as a tornado passed by.

shortykorte
Well-known member
Pardon my CRS. You told us that already and I forgot. I like those trucks so will definitely be looking forward to seeing you work your magic.
Sent from my iPhone using The Garage Journal mobile app
Sent from my iPhone using The Garage Journal mobile app
Robert, wondering what you think about an off white top color to the wagon? I used the Chrysler cool vanilla PWG on the van. For some reason I really like that color on 50’s and 60’s cars. Not saying I don’t like the colors you have, I think they look great but think the off white and green would be timeless.
Royce
Sent from my iPhone using Tapatalk
Royce
Sent from my iPhone using Tapatalk
txvwnut
Well-known member
Man that silver went brown outside. Is the silver just going to run from the body crease up?
PugetDude
ALLIANCE MEMBER
Robert, wondering what you think about an off white top color to the wagon? I used the Chrysler cool vanilla PWG on the van. For some reason I really like that color on 50’s and 60’s cars. Not saying I don’t like the colors you have, I think they look great but think the off white and green would be timeless.
Royce
Sent from my iPhone using Tapatalk
+1
My 2010 Dodge Ram truck is Cool Vanilla... I get more compliments on it than any vehicle I've ever owned. It would look great with the green, IMO.
I'm seriously considering painting the '32 with it.
gofastwclass
Well-known member
The green is working but the silver doesn't seem to have the same pop. Maybe it's an angle thing but I'm not sure about the silver in the video even though it looked fine in the still.
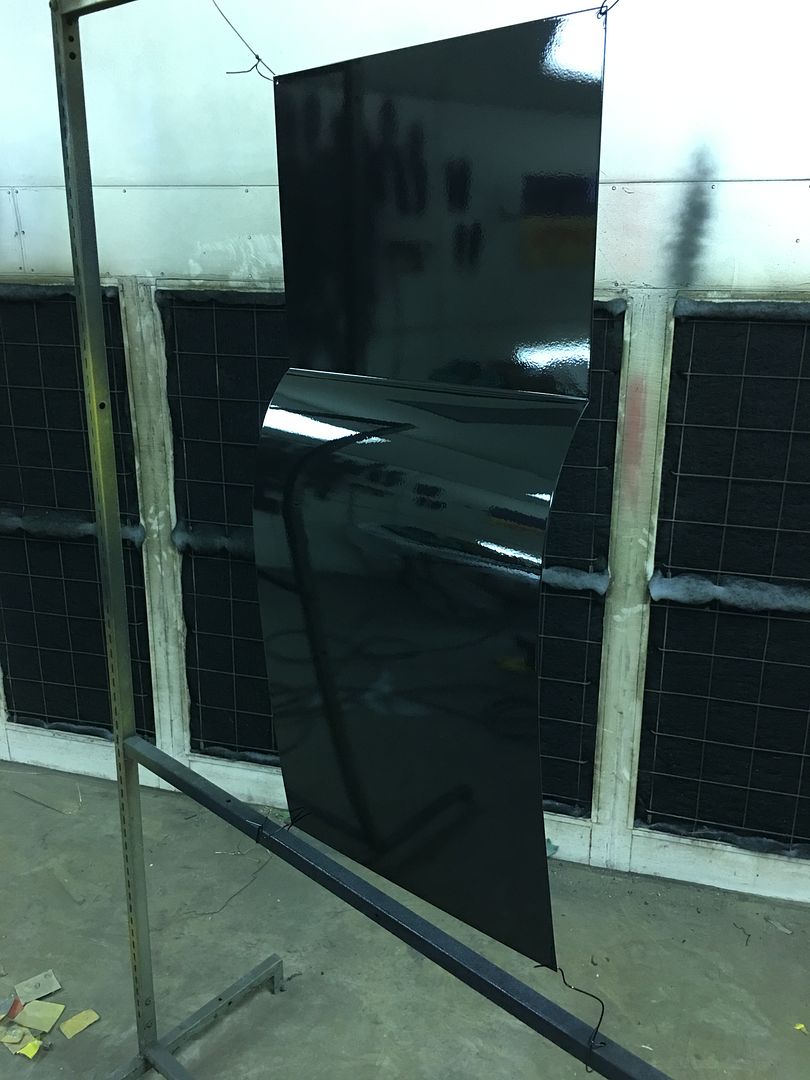
the top color is Galaxy Gray, the bottom is Organic Green Kandy Basecoat. The gray is darker due to the reflection and the sun being indirect. Inside the booth it was using an LED light aimed directly at the panel.. Here's the gray with a bit more direct sunlight, as it would see on the roof..
.
.
gofastwclass
Well-known member
I figured that what was the issue but wasn't sure.
My vote... spray it!
My vote... spray it!
shortykorte
Well-known member
Gorgeous paint panel. Was it color sanded and buff to get that final finished? Assume so. Can’t wait for the video tour of the finished car.
Sent from my iPhone using The Garage Journal mobile app
Sent from my iPhone using The Garage Journal mobile app
Since we got our freshly chromed speaker trim rings back from DGM Chrome in Philly, it only stands to reason that we need to put another sample together for the car show in Leonardtown on Sunday. So today I stopped by Norris Upholstery and picked up a scrap to cover one of the kick panels to make it more presentable. Fake upholstery, if you will..

We planned on adding a plateau to the stainless speaker mesh rather than flat, so some pressing fixtures had been cut out on a water jet for us..


Comparing the flat to the plateau....


installed...


This might even work....
We planned on adding a plateau to the stainless speaker mesh rather than flat, so some pressing fixtures had been cut out on a water jet for us..
Comparing the flat to the plateau....
installed...
This might even work....
akdiesel
Well-known member
Robert,
Your work amazes me. Very creative approach on things.
Thanks for sharing.
Your work amazes me. Very creative approach on things.
Thanks for sharing.
Redwolf947
Well-known member
Love it wow..
Boosted1
Well-known member
Nice work.
stinkity stoink
Well-known member
I am constantly amazed at the attention to detail.
Thanks for the comments fellas! On these grills, to clarify, the smaller (tweeters) use a smaller opening pattern (more holes per inch) than the midrange speaker next to them, so they would appear the same proportionally. McMaster Carr sells a sample kit of the mesh to help in picking out the size, p/n is 9231T11. For the sub we used 5 x 5 mesh (5 openings per inch) p/n 85385T31. For the midrange, 8 x 8 mesh, p/n 85385T42. For the tweeters, 10 x 10 mesh, p/n 85385T48. The grill for the sub will have multiple pressings, one to include a recessed crest emblem. That one will be the test..
gofastwclass
Well-known member
Absolutely awesome details, I love it Robert!
shortykorte
Well-known member
PugetDude
ALLIANCE MEMBER
Nice job on the speakers, Robert! 
Thanks Guys!!
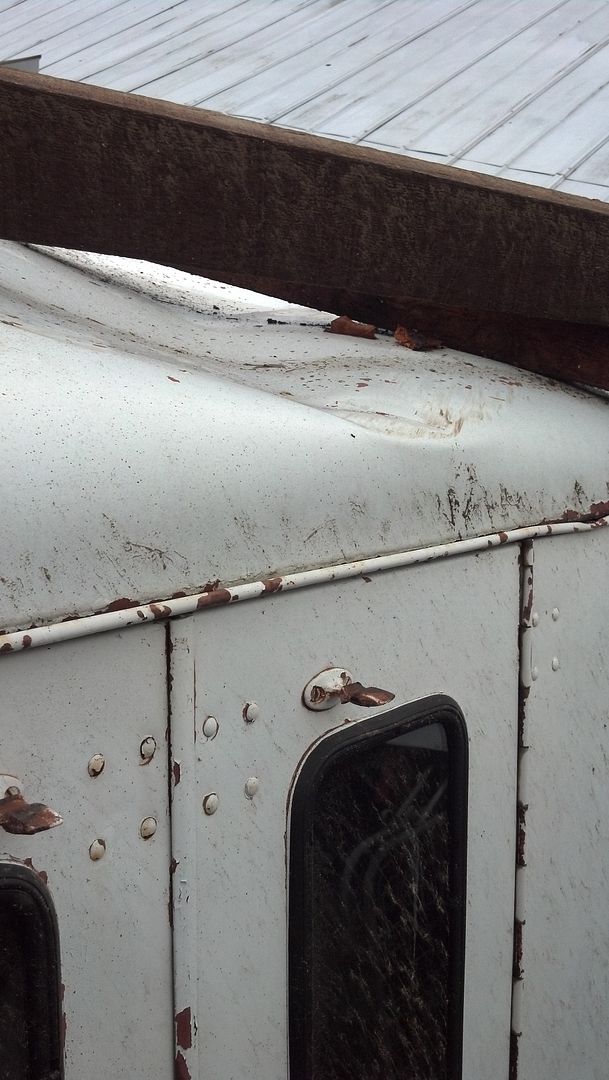
John stopped by the shop last night so we could fit up the running board skirts on the Biederman.

I know he will be glad to close off this gaping hole.
After taking some measurements we got the top flange folded over using the magnetic brake. The flange will be bolted to the underside of the cab to support the weight as we will leave about a 1/4" or so gap above the running board to allow for frame flex.


Rivet Nuts installed under the cab...
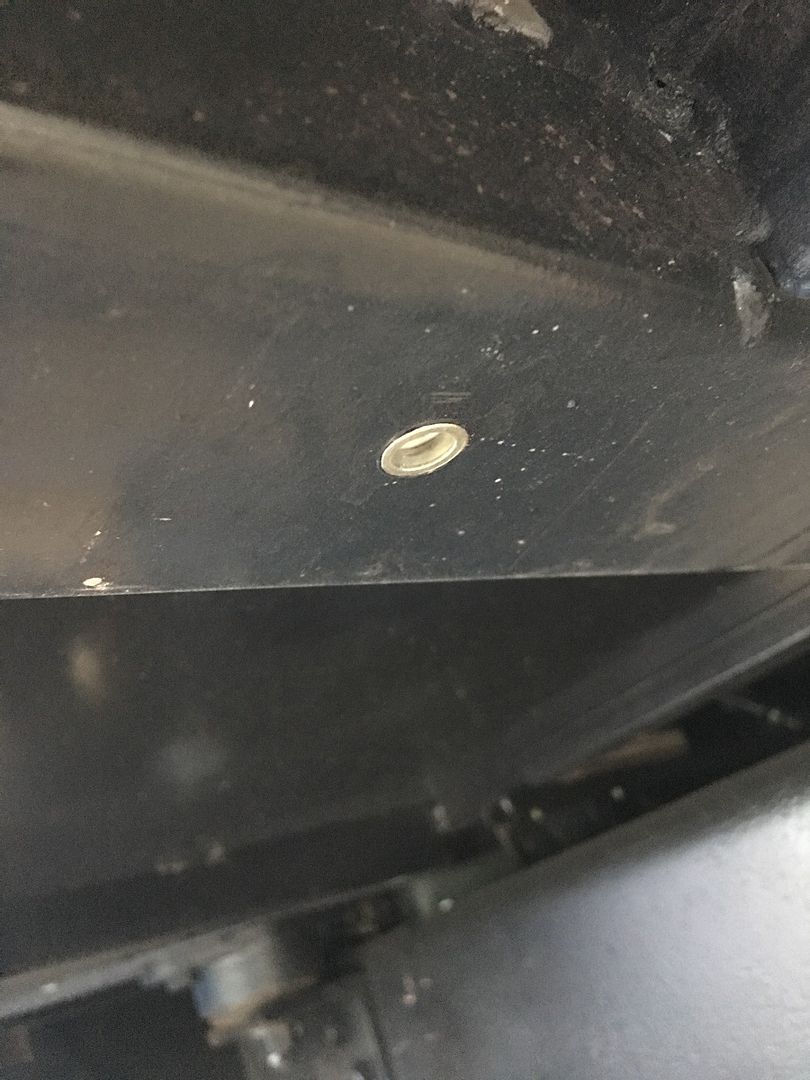

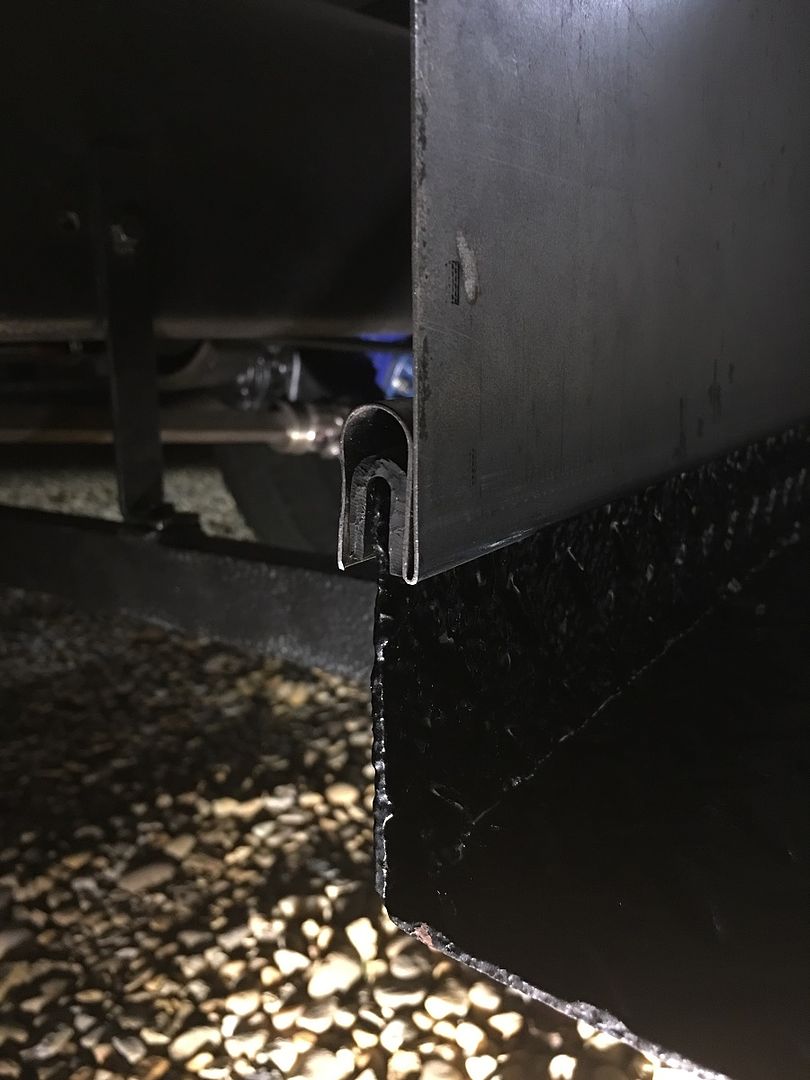
The rubber edge trim is our attempt to keep the paint from rubbing off, and these are held in place using weatherstrip adhesive.
The dump bed had been painted over when John bought it, but closer inspection showed where some additional layers of paint in the hand painted lettering, "Phone 60" had staved off surface rust in it's previous life and was still visible...

John stopped by the shop last night so we could fit up the running board skirts on the Biederman.
I know he will be glad to close off this gaping hole.
After taking some measurements we got the top flange folded over using the magnetic brake. The flange will be bolted to the underside of the cab to support the weight as we will leave about a 1/4" or so gap above the running board to allow for frame flex.
Rivet Nuts installed under the cab...
The rubber edge trim is our attempt to keep the paint from rubbing off, and these are held in place using weatherstrip adhesive.
The dump bed had been painted over when John bought it, but closer inspection showed where some additional layers of paint in the hand painted lettering, "Phone 60" had staved off surface rust in it's previous life and was still visible...
Last edited:
xtremek
Well-known member
That's a gorgeous ride.
zmotorsports
ALLIANCE MEMBER
Robert, the grille covers turned out amazing.
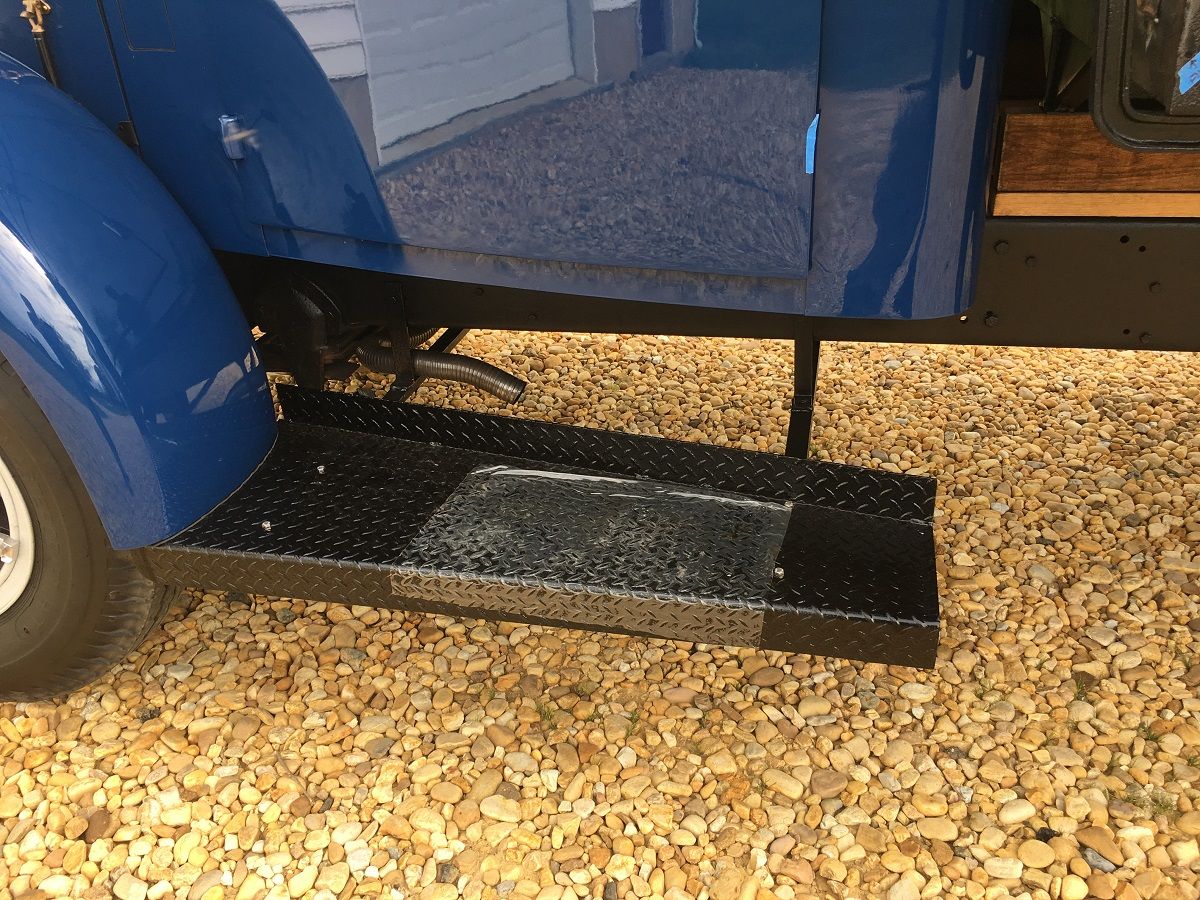
I liked how on the filler panel on the truck that you wrapped it over the existing step vs. a solid connection with another set of fasteners. That will stand it off the paint better and just looks fantastic. The sad thing I have found with little details like that are that very few people recognize them. They simply look at something and say "that looks nice" but they don't know the how or why behind the design. Especially when so much time and effort go into these little details. The little details make or break a car but seldom are recognized for just how much work went into them.
You have my utmost respect for the amount of time, effort and talent that goes into all of your "little" details.
Mike, thanks, I would say you recognize because you live it as well!
The old version of the running board skirt was actually in two pieces, and the lower portion formed a pocket for the skirt to rest in. Needless to say, any movement removed paint from all parts involved, and our "sample" we had to work from was in bad enough shape (hardly there) from the dirt and rust trap design that we knew a revamp was in order (right side of picture). We wanted something more forgiving on paint (rubber cushion between) and something that would allow for cab movement/frame flex without paint removal or buckling, so our improved method sits up a bit to allow that. (left side of picture) When we get to the paint stage, the inside of the hem will get flooded with a bath of epoxy primer, then seam sealer, then another dose of epoxy, in hopes that this will be a permanent fixture.

As I have been told by someone very knowledgeable in this matter from the ATHS, this is most likely the only example of this truck that has been restored. Most others, if they did exist, would have running board skirts in similar "remnants" condition. So I'm going to hide the rusty scraps I have and consider the "new improved" the factory standard.
The old version of the running board skirt was actually in two pieces, and the lower portion formed a pocket for the skirt to rest in. Needless to say, any movement removed paint from all parts involved, and our "sample" we had to work from was in bad enough shape (hardly there) from the dirt and rust trap design that we knew a revamp was in order (right side of picture). We wanted something more forgiving on paint (rubber cushion between) and something that would allow for cab movement/frame flex without paint removal or buckling, so our improved method sits up a bit to allow that. (left side of picture) When we get to the paint stage, the inside of the hem will get flooded with a bath of epoxy primer, then seam sealer, then another dose of epoxy, in hopes that this will be a permanent fixture.
As I have been told by someone very knowledgeable in this matter from the ATHS, this is most likely the only example of this truck that has been restored. Most others, if they did exist, would have running board skirts in similar "remnants" condition. So I'm going to hide the rusty scraps I have and consider the "new improved" the factory standard.
Attachments

Last edited:
zmotorsports
ALLIANCE MEMBER
Mike, thanks, I would say you recognize because you live it as well!
The old version of the running board skirt was actually in two pieces, and the lower portion formed a pocket for the skirt to rest in. Needless to say, any movement removed paint from all parts involved, and our "sample" we had to work from was in bad enough shape (hardly there) from the dirt and rust trap design that we knew a revamp was in order (right side of picture). We wanted something more forgiving on paint (rubber cushion between) and something that would allow for cab movement/frame flex without paint removal or buckling, so our improved method sits up a bit to allow that. (left side of picture) When we get to the paint stage, the inside of the hem will get flooded with a bath of epoxy primer, then seam sealer, then another dose of epoxy, in hopes that this will be a permanent fixture.
As I have been told by someone very knowledgeable in this matter from the ATHS, this is most likely the only example of this truck that has been restored. Most others, if they did exist, would have running board skirts in similar "remnants" condition. So I'm going to hide the rusty scraps I have and consider the "new improved" the factory standard.
Robert, based on the drawing of the original design, yours is definitely an improvement. The original design just screams moisture and debris trap whereas yours will deflect and prevent. Great idea/design.