merim123
Well-known member
In this thread I started http://www.garagejournal.com/forum/showthread.php?t=121958 , I was looking for ideas for what to do in the garage. I knew I wanted deeper cabinets and I wanted a clean look. After seeing what everyone did, I did some more research and landed on this design from family handyman magazine and decided this is what I was going to build: http://www.familyhandyman.com/DIY-P...rage-Storage/installing-large-garage-cabinets
Mine is 16 feet long across the entire back of my garage and they are 24" deep and 48" tall. My garage ceiling is only about 8'6" so I don't have too much room, but it's not too bad either.
Here's the progress from today. The biggest modification I did to the design was around using 2x3 instead of 2x2 for the base. I couldn't trust that I'd find a lot of 2x2 stock that was straight and I was right. Plus 2x3s were easier to work with and I could use my air nailer to put the ladders together. The other thing I did is use some 3 1/2" lag screws that did not require predrilling. Enough setup, here's the first step, laying out the back wall:

After that I put the end panels on as the instructions laid out:

Then I assembled the lower and upper ladders. The upper ladders I did use 2x2 stock as I had enough in my own supply that was straight and so I followed the plans.

and this is with both top and bottom ladders

finally the dividers

and all dividers complete now

some close ups of how the panels go together

this is the end panel


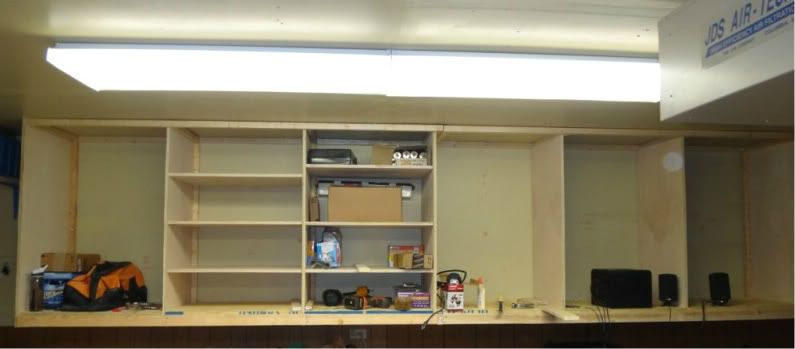
and finished for the day.

Still have the rest of the bottom shelves to cut and put in and then need to trim it all out and put in my sliding door mechanism and then some paint
Mine is 16 feet long across the entire back of my garage and they are 24" deep and 48" tall. My garage ceiling is only about 8'6" so I don't have too much room, but it's not too bad either.
Here's the progress from today. The biggest modification I did to the design was around using 2x3 instead of 2x2 for the base. I couldn't trust that I'd find a lot of 2x2 stock that was straight and I was right. Plus 2x3s were easier to work with and I could use my air nailer to put the ladders together. The other thing I did is use some 3 1/2" lag screws that did not require predrilling. Enough setup, here's the first step, laying out the back wall:
After that I put the end panels on as the instructions laid out:
Then I assembled the lower and upper ladders. The upper ladders I did use 2x2 stock as I had enough in my own supply that was straight and so I followed the plans.
and this is with both top and bottom ladders
finally the dividers
and all dividers complete now
some close ups of how the panels go together
this is the end panel
and finished for the day.
Still have the rest of the bottom shelves to cut and put in and then need to trim it all out and put in my sliding door mechanism and then some paint