I briefly looked through your thread so far, looks great! If you don't mind, roughly what have you spent in slab and block? I'm in tampa and getting plans drawn up for a similar sized building but 15ft high block, just curious roughly what you have invested.

You are using an out of date browser. It may not display this or other websites correctly.
You should upgrade or use an alternative browser.
You should upgrade or use an alternative browser.
my Florida dream garage project
- Thread starter LutzTD
- Start date
I briefly looked through your thread so far, looks great! If you don't mind, roughly what have you spent in slab and block? I'm in tampa and getting plans drawn up for a similar sized building but 15ft high block, just curious roughly what you have invested.
the 20x40 slab and block, grouted solid with beams set ( I placed them) and filled in was around 24K, I had bids ranging from 24K to 45K. the 24K bid was because I told the guy to use it as fill in work, no hurry and I helped as a hod carrier and general laboror. I also removed the foundation dirt myself. I think he lost money on the job. When I did the second 40x40 slab I let him up the price from the original quote to even himself out. Either way he did a good job, and the concrete finish is excellent. I think if I had it to do over I would have tried harder to get a local architect. The guy that designed the block from my sketched outline added a lot of over engineered (read costly) strengthening features like the solid columns and the 2 part keyed foundation and way overkill on the rebar. I think it would have been substantially cheaper if the arch had followed a more residential type design. I had a hard time finding anyone who wanted to do a garage alone, in the end the steel roof manufacturer found the architect for me, but he was from Arkansas so Im not sure how familiar he was with hurricane force wind mitigation and a sand foundation base and he seems to have pushed to the safe side of the calculations
Last edited:
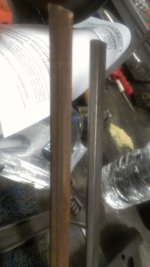
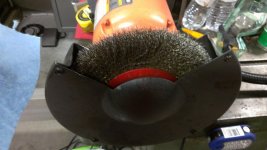
tonight I went and got a HF 8inch bench grinder with a 25% coupon it was $41, cant beat that. I also got an 8 inch brass wire wheel and an 8 inch steel wire wheel. Starting with the brass wheel I cleaned one 8ft vee-rail, seems to work OK the pics show the first one and a rusty one right from the router way. The second one still had surface bumps, but I was able to use a utility knife to scrape it clean. I think I will be able to make these ways servicable, as new ways cost as much as I paid for the whole thing this is good. I guess if it effects the router accuracy more than I can tolerate I will replace the ways and bearings later. But for now Im satisfied with how its coming out. I didnt get a picture of the grinder. I modified the guard so that the opening is at the top. now I can work on the 8 and 12 foot vee-rail sections easily without my shirt getting sucked in
Attachments

Last edited:
Wingnut65
Well-known member
Nice score on the router. Should be a fun project to restore.
If the wire wheels don't get the rails to the finish you want, look into getting a 3M EXL Wheel for the grinder. It is amazing the polish those wheels put on metal.
If the wire wheels don't get the rails to the finish you want, look into getting a 3M EXL Wheel for the grinder. It is amazing the polish those wheels put on metal.
Nice score on the router. Should be a fun project to restore.
If the wire wheels don't get the rails to the finish you want, look into getting a 3M EXL Wheel for the grinder. It is amazing the polish those wheels put on metal.
sounds good, im not excited about scraping the rails. I will look into the 3m wheel
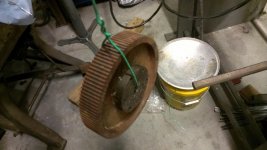
one of my buddy's here in FLA uses 10:1 molassas and water to derust parts. It does no harm to anything but the rust. I got a gallon of molassas at the feed store yesterday and Im going to get some 3" pvc pipe and put all of my guides and racks and the leftover bucket will get the gears and shafts. It takes about 3 weeks, but I need to build a base for the router anyway. I will take some pics tonight, anyone have experience with molassa de-rusting? the stuff my buddy does is 30's car parts, he did a frame member that was way worse than these parts and it came out really nice. He mixed weaker than 10:1, but he also left it in for a couple months....
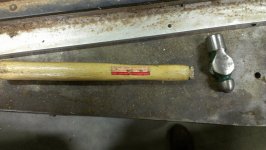
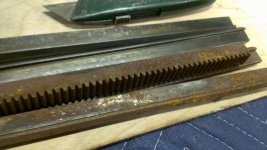
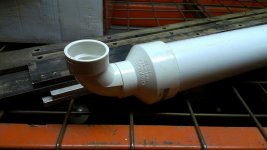
continuing on with the router tear down. I removed all of the rails and racks. The impact driver was required to get all of the screw out without damage, except for the Chinese made hammer anyway.... I put all of them in the 3in pvc and filled it all up with the 10:1 water molasses mix. I also made a bucket and threw all of the screws and small parts in. Looks like the z-axis is broken. Since the mud dauber nest is in between the two halves of the part a assume it was broken before it was put in storage. There was no way for me to see this when I bought it. hopefully this lead nut is not going to be too hard to find or too expensive..... Now all of this gets to stew for 3 weeks. I need to start on the base next week. I have some left over pallet racking I think may do the trick.
Attachments



Last edited:

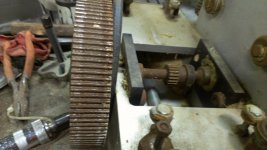


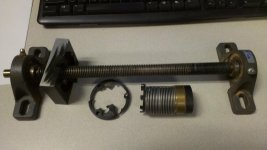
well I pulled apart the z-axis drive lead screw and nut. Looks like the only part not turned to dust actually has the maker name on it, so after some research there is good and bad news. The nut is made by a company still in business, but they no longer make that pitch of lead nut. It was a special for this company or so they say. Still looking at getting it done custom, but it may be cheaper to go to their standard pitch with same lead screw OD, then its off the shelf standard parts except then I would have to machine the lead screw ends to fit the bearings and drive coupling... Will post resolution, still emailing back and forth as of now.
Attachments
Last edited:
madoc1
Well-known member
amazing shop..be good to see the car in there.
pulled a few things out of the molasses soup. did a great job on the big gears. Also replaced all of the rail wiper bolts with stainless. also pulled one broken limit switch. the plunger popped back out with a little help from some pliers. Im going to order a spare anyway.
Attachments


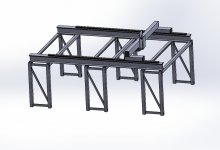
also worked on the base. first with CAD design. then for real. I bought a bunch of tear down racking a while back at 16 feet and cut off 8 feet to make my storage racks. I went back to get some more but the guy doesnt have it anymore. Its a shame because you can make whatever size you need with this stuff. Everything else Ive found is prewelded. Anyway, I had just enough to make 3 sets of stands at 24" wide. I had 2 left over 8 foot beams but Ill need to get 4 more to complete the base. So I cut my 8 foot rack uprights down to 4 and the 6 of the 45" upright rails to 22-1/2" and drilled new holes, 6 others stay at 45" to triangulate.
Attachments


Last edited:


Bib Overalls
Well-known member
Your uprights are well braced. However, the cross beams are relying on two closely placed interlocking "buttons" at each end for stability. My experience with this kind of shelving is that it gets more stable as additional cross beams are added. I have rarely assembled this kind of staged shelving with less than three shelves and four is the norm. I have also assembled similar shelving that had corner braces that extended down and triangulated the joint. My point - You may need to fabricate bolt on angle braces to get the stability you will need.
Your uprights are well braced. However, the cross beams are relying on two closely placed interlocking "buttons" at each end for stability. My experience with this kind of shelving is that it gets more stable as additional cross beams are added. I have rarely assembled this kind of staged shelving with less than three shelves and four is the norm. I have also assembled similar shelving that had corner braces that extended down and triangulated the joint. My point - You may need to fabricate bolt on angle braces to get the stability you will need.
you are right, I am going to try it out, if it turns out to be unstable I will likely bracket it to the wall on the right side in the picture. I did a similar thing with my mezzanine, its more stable than I thought it would be. I had plans to also tie that to the wall but didnt feel it was needed, it doesnt move at all. I did put one cross beam down lower on the mezzanine but I cant do it on this set up as I have to have it open below for the car to fit.
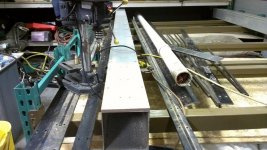
this weekend I finished the uprights and got some new 96x4 beams. the 2 beams I had were 96x3 and they of course didnt have 4 so I had to buy 6 so they matched in size. I was also looking to buy 2 6x6x12ft aluminum I-Beams when I found these 6x6x.125 aluminum structural tubes at the scrap yard. they are only 10 feet instead of 12, but I got then cheap enough and I dont have room for the full travel anyway, so it worked out great. I had to lower the beams one notch, I think that took longer than anything..... I also got the rails and rack out of the tube of molassas. for some reason it didnt work very well on the rails. the racks cleaned up like new but the rails were still grungy. So back to the original plan of the wire wheel. heres a pic of the covers turned so I could do the 12 foot rails. I also had roller stands to catch it as I worked it back and forth over the wire wheel
Attachments


Last edited:
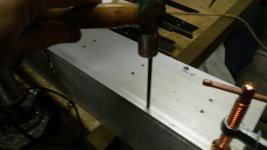
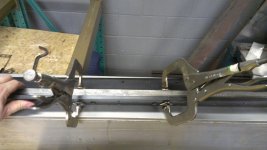
today I started working on the rails to get them mounted on the beams. I cleaned the router rails up good with some bleach water and a scouring pad. Then clamped the rail straight on the 6x6 beam and spotted the hole with a transfer punch. I flipped the head on my little bench drill press to drill the holes, then tapped and added a stainless screw. I use tap magic religously on these projects to get good finish on the threads and extend the tap life.
Attachments



rixtrix1
Well-known member
What are your plans for this machine when you get it assembled? Looking good so far! Tap Magic works wonders, doesn't it?
What are your plans for this machine when you get it assembled? Looking good so far! Tap Magic works wonders, doesn't it?
I will have to play with it a little to understand its capabilities. I want to see how well it cuts aluminum, I dont do much wood work. If it turns out not to be good for aluminum I may convert it to a plasma cutter once the full shop is done.
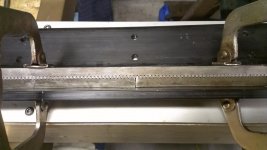
got both rails together. then apart, then together then apart then together again. funny how you sometimes forget a good lesson from the past. I marked these to put back together but I did a poor job. so I had to trial and error it. Then finally on the fourth try I also clamped the y axis rack at the seam of the 8 and 4 foot x axis racks to get a smooth transition. long two days. with that finally done I am starting to assemble the bridge
Attachments

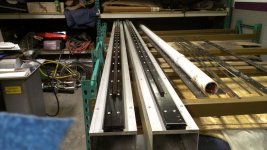
had to reconfigure the rack this weekend. the rails need to be 8 ft apart and the ends on the rack beams prevented this by about 3/16". once again I had to flip the rrack beams. ended up wrenching my back lifting the bridge off and then back on, so no pics. back feels better today but im out of town for a few days. hopefully next weekend ill get the bridge bearings installed and I can set the beam width and get those attached to the rack beams. I have a line on some more aluminum to use for the bottom so I want to see if that works out before I screw it all down solid.

rixtrix1
Well-known member
Sorry about your back; happens to me, too. Is that an original Schwinn Stingray in the back of the pic of the racks? Childhood friend had one, wishes he still had it for what they're worth now.
Great thread and an amazing endeavor! I almost have to take exception to calling this a garage, it's a full blown shop facility.
Wally
thanx, been planning this for many many years

Sorry about your back; happens to me, too. Is that an original Schwinn Stingray in the back of the pic of the racks? Childhood friend had one, wishes he still had it for what they're worth now.
HAHA, I was wondering if anyone was going to comment on the Lemon Krate. Its a parts bike I bought and never did restore. I also got hold a really toasted disk apple krate a year or so ago. I want to get them in nice enough shape to hang from the shop roof for decoration. Im too tall to ride one without flipping off the back. I had plans to make a scaled up version but those ideas are on the back burner. I am drooling over 44's bike builds, Id like to make a 24 or 26 inch version that bigger guys can ride, I see his stuff and want to give it a go but I know I cant put the time in it requires to do it well
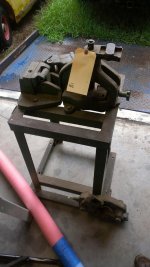
worked on some house stuff this weekend. But I took monday off work to drive across state to pick up this little gem. Its a Roper Whitney no455 2x2x1/4 angle combination machine. basically a manual iron worker. got a steal of a deal on a surplus auction. they had it listed as a pipe bending machine......
Attachments
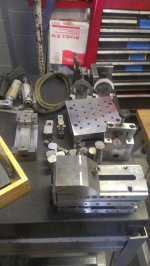
not much going on this weekend. still working on honeydo's around the house. I did score a set of machinists tools and fixtures from a retired toolmaker. very nice stuff at a great price. these will get me a little closer to adaquately tooled . Also, I hope to get the section one garage stucco'ed this week. I need to get an inspection in before Aug4 to keep my permit.... thanx LilRichard for the contact, guy was really nice
. Also, I hope to get the section one garage stucco'ed this week. I need to get an inspection in before Aug4 to keep my permit.... thanx LilRichard for the contact, guy was really niceAttachments
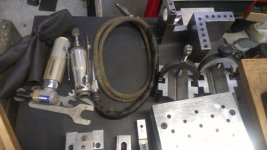
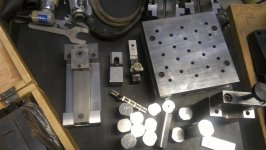
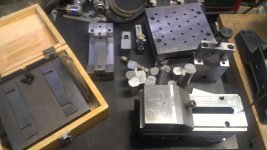
Last edited:


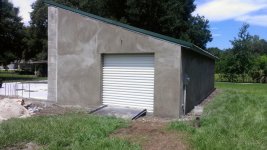
good news bad news, bad news first. the stucco did not qualify as an inspectable improvement... bummer. Good news is I found out filing for a permit extension is all about the money. So they didnt care about reason, just that I paid the $25.50 extension fee. So I am good to stretch the build out another 3 months. Im hoping to get the money together to start the block work, if not another $25.50
also still planning the router base. I had a line on some 1/8 thick 4x8 sheets of alumiunm, but I just wasnt comfortable with the layout. I wish I would have just bought them at $60 a sheet it was a givaway, but I was just not sure. Anyway, I am now leaning toward MDO plywood. I found some local. This is used for outdoor wood signs and is supposedly very flat. They said MDF would be sure to be flat, but Im afraid the environment in the garage will just potato chip MDF over time. I think I will cover it with a couple sheets of .080" 4x12 5052 aluminum for a good hard surface, I was thinking formica at first, but the aluminum is not much more and would be a lot nicer. Anyway, I am still menally choking the chicken on this so Im frozen in place on the router for now...... so many options

its really hot here, so not much done this weekend. I drilled and tapped holes for eyebolts in the top beam of the bridge to keep from wrenching my back on this thing again. Raised it up with hoists off a roof beam and roughly laid in the crossing supports and MDO plywood. I wrangled the x travel beams back up, dropped the bridge back down on them and pretty much called it a day....
I need to go on McMasters and get some stainless hardware to screw it all together. still working on the best way.
I need to go on McMasters and get some stainless hardware to screw it all together. still working on the best way.
Attachments


Last edited:
upon inspecting the Y-Z axis for cleanup and reassembly I found that the base of one of stepper motors was cracked. I sourced another stepper through ebay and it arrived yesterday. still too hot to work outside so not much else going on, hopefully in another couple of weeks we'll be through the dog days
Kevin54
MEMBER EMERITUS
Lutz......what is that item to the immediate right of the wood box? Can you post a closer pic of it?
As far as your sine plate....spray a rag down with WD-40, and spray the foam inside the box with WD-40. Keep the rag on top of the plate. This will prevent any rust from starting on them from any humidity. I have a compound sine plate that has been sitting on my bench or shelf for a few years now, and I keep a rag that has been soaked with WD covering it, and so far, no surface rust at all.
BTW....if you don't mind saying, what did you have to pay for the machinist tools?

As far as your sine plate....spray a rag down with WD-40, and spray the foam inside the box with WD-40. Keep the rag on top of the plate. This will prevent any rust from starting on them from any humidity. I have a compound sine plate that has been sitting on my bench or shelf for a few years now, and I keep a rag that has been soaked with WD covering it, and so far, no surface rust at all.
BTW....if you don't mind saying, what did you have to pay for the machinist tools?
Wingnut65
Well-known member
The CNC is coming along well. I can't wait to see what you have in mind to make with it.
Stucco looks great. Yes, unfortunately building departments consider stucco a finish, just like paint.
Stucco looks great. Yes, unfortunately building departments consider stucco a finish, just like paint.
psychorugby
Well-known member
Just read from the beginning... ho-lee ****. Nice shop you have there! Now I know where to go when I need some machine work or custom fab work done!
Lutz......what is that item to the immediate right of the wood box? Can you post a closer pic of it?
As far as your sine plate....spray a rag down with WD-40, and spray the foam inside the box with WD-40. Keep the rag on top of the plate. This will prevent any rust from starting on them from any humidity. I have a compound sine plate that has been sitting on my bench or shelf for a few years now, and I keep a rag that has been soaked with WD covering it, and so far, no surface rust at all.
BTW....if you don't mind saying, what did you have to pay for the machinist tools?
the thing to the right of the wood box is a sine dresser, handmade. this guy told me he learned to make 1-2-3 blocks and such with a file from an old German! ill get pics when Im out there next week. I have it all Boe-shielded and put away
I got everything for $300, just the grinders were worth that, they are the older ones with real bearings and long term high speed capabilty
Last edited:
The CNC is coming along well. I can't wait to see what you have in mind to make with it.
Stucco looks great. Yes, unfortunately building departments consider stucco a finish, just like paint.
its slow going. its so hot I am sweating too much to work on the table top. I made a little bracket for a friend on the mill and I was able to drill and bolt the table down in 12 places of the total of 48 places I have planned.
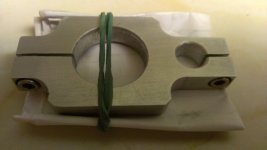
heres a picture of the bracket. 4hrs to make manually, most of the time was to set up the rotary table to do the larger hole and the smaller hole diameters and the center to center distance, which were the tight tolerances on the part. I figure I can do it in a 1/4 to 1/3 that time with the router.
Attachments
Last edited:
still too hot to do much of anything in the shop. I try to go out early but even then its just too much. I will definitely be considering insulation the top priority on the next phase of the building......
I did at least get the remainder of the screws in the MOD. I will try this weekend to get the rear X axis rail srews in, then I can get the X axis rolling and attach the front X axis rail. Then it should be smoother sailing.
I did at least get the remainder of the screws in the MOD. I will try this weekend to get the rear X axis rail srews in, then I can get the X axis rolling and attach the front X axis rail. Then it should be smoother sailing.