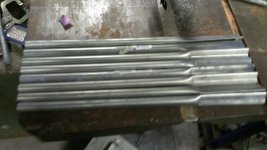
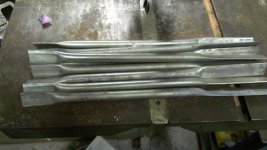
started bending conduit to use as light hangers. got 4 done, there will be 8 total of this length. I stopped because as I built them it seems like I might do it cheaper. I was planning to use 2 screw emt clamps, but I will need to keep the light from twisiting, so as I thought about the cost of the clamp and then the 4 screws and nuts it seems I can do it better. So Im going to think about it some more. I think rather than a conduit loop, maybe straights and screw them to the ends of the housing, then I get more spread for stability and they wont twist, on the side I can use 2 self drill/tap screw which I already have left over from the roof and then self drill/taps on the purlins. Im the end it should be cheaper and more stable. I was also worried how I was going to make the loops of conduit at the peak which will be too long to use a 10ft conduit all together. Will post pics of the new arrangement this week.

You are using an out of date browser. It may not display this or other websites correctly.
You should upgrade or use an alternative browser.
You should upgrade or use an alternative browser.
my Florida dream garage project
- Thread starter LutzTD
- Start date

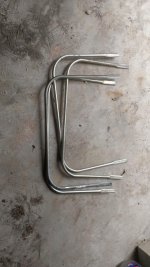
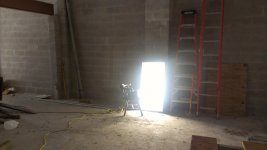
here's my cheaper solution. I cut the 1/2 conduit in 18" lengths. Then flattened one end 4", this will screw to the side of the troffer light. Then I flattened the other end 2-1/2" at 90 degrees from the long flat. This I bent to fit the profile of my purlins. I like this because it is the most efficient use of material. I don't have to buy and mount the emt clamps either, and it should be more stable than if I clamped the light to the conduit horizontal round bar. Once on the lights I just hang it on the purlin, I can add a screw too, but I don't think Ill need it. This is also scalable so I can make longer ones to get all of the lights at 14 feet hanging from the 4-12 pitched roof
Attachments
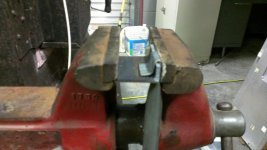

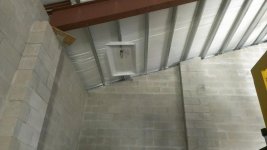
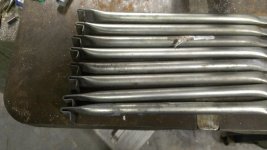
finished bending the set of hangers for the first row of 4 lights. set up a temp light so I can work after dark and got one light hung before my lift battery died. not counting labor, since its my hobby  . these hangers are $0.38 each. they will get progressively more expensive due to the roof pitch and having them at the same height but never more then $2.30 each. #1 x 10 ft. Double Loop Chain Zinc-Plated was $0.70ft and I would have to buy S hooks as well as triangulate. I like these because the light is rigid and wont swing. Also If I want to move the light I tilt it one way and I can slide it down the lip of the purlin. All in all Im happy with the way this came out. Now to build and hang 23 more.
. these hangers are $0.38 each. they will get progressively more expensive due to the roof pitch and having them at the same height but never more then $2.30 each. #1 x 10 ft. Double Loop Chain Zinc-Plated was $0.70ft and I would have to buy S hooks as well as triangulate. I like these because the light is rigid and wont swing. Also If I want to move the light I tilt it one way and I can slide it down the lip of the purlin. All in all Im happy with the way this came out. Now to build and hang 23 more.Attachments
rixtrix1
Well-known member
Good idea and execution !
Sent from my SCH-I435 using Tapatalk
Sent from my SCH-I435 using Tapatalk
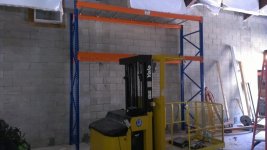
not much to post about for a while, the roof went way over budget so im in a holding pattern. I also got a surprise from up north, my mother decided to sell her house so I had to clear out the building behind her house. I did the trip and its all on my floor here. I ended up going ahead and getting a rack to put all of the Ohio car parts up off the ground. Its 12 feet high and 12 feet wide, I put the low shelf at 8 ft like my others so I can eventually put machines below it. I still need to get it loaded but I want to see if I can find some plastic pallets first as I dont like to have wood in the building unless its treated. I dont want to put stuff right on the shelf but all I have now are wood pallets.
Attachments
shortykorte
Well-known member

Hey your man lift is similar to mine. Since mine is having technical difficulties I wish I had gotten a brand still in business.
Have you had to have it serviced? If so who?
I have not had it serviced. It is currently having issue backing up when it is in the up position. I knew this when I bought it, but that helped me drive the price way down. The guy I got it from said it was the cable that goes from the top to bottom through the pulley. I haven't looked at it yet but plan to just replace the cable myself. I called Yale locally and they said if they had it that's all they would do, there is no part number, they just get the right number of conductor cable and re-terminate the ends. I would bet if you call the Yale guys they service other brands, they were really helpful over the phone. You may also be able to find the service manuals there or on ebay.
shortykorte
Well-known member
Looking at your light brackets may I suggest looking at Gripples. http://www.gripple.com/gb/en/p1/a8/standard-hanger
My brother works with electrical supplies and hooked my up with 8 high bay lights and used Gripples to hang them. We ran conduit to the center then a main line down middle of the building, purlin to purlin. From there we tee'd off each side and terminated with with an outlet box. The Gripples are nice because the are very adjustable and easy to level.
Post 59 and 60 of my thread you can get an idea.
My brother works with electrical supplies and hooked my up with 8 high bay lights and used Gripples to hang them. We ran conduit to the center then a main line down middle of the building, purlin to purlin. From there we tee'd off each side and terminated with with an outlet box. The Gripples are nice because the are very adjustable and easy to level.
Post 59 and 60 of my thread you can get an idea.
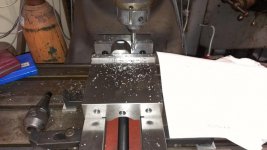
long time since Ive had a chance to work in the shop. I got a quicky paying job for the shop so here is my first cuts on the cnc bridgeport. I did these flats with the pendant. Im programming a couple of pockets to try tomorrow. I cant wait to get this mill up and get a couple of cnc runs under my belt. so far so good. I did tweak the motor profiles and Im not sure yet if the motors are going to run without skipping pulses, but I have to run it to see.
Attachments

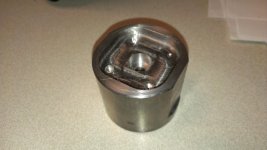
got the 2 profiles cnc'ed on my project. Came out great. I have a lot to learn about feeds and speeds in the conversion from running a manual mill to cnc. I will need to take much bigger bites at a much greater speed, but its a learning curve. So far Im very happy with the accuracy and ease to go from drawing to part.
Attachments

jbmatth
Well-known member
What is that supposed to be, or be used for, a coupling of some kind?
JB
JB
jbmatth
Well-known member
You can't show us because you don't want to give it away, or because you are not allowed to?
JB
JB
You can't show us because you don't want to give it away, or because you are not allowed to?
JB
not everyone can be open source
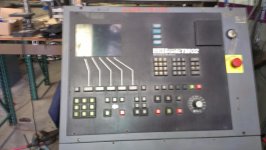
, much as I admired that on a few products its not a long term strategy. On another front. I have been wanting to also get a small cnc lathe. finally the one I want popped up 5 miles from where I work. I went and looked at it friday and brought it home today. Will be on the back burner as it needs some repair but Im excited to finally at least get a good set of bones for a latheAttachments

Last edited:
SkinnyPedal
Active member
- Joined
- Apr 18, 2014
- Messages
- 33
Would like to convert my mill to cnc but will never happen. Update what u find out and fix in the lathe.
subscribed
subscribed
Would like to convert my mill to cnc but will never happen. Update what u find out and fix in the lathe.
subscribed
yeah I was going to convert my hardinge second op with a gang tool setup but this one is much much nicer. The only things wrong with it are the display and the floppy drive. I will convert it to lcd with a cga to vga converter card. The floppy will be a little more difficult but I think I can figure out a way to read the interface and use a different medium anyway. but I have another project ahead of that.
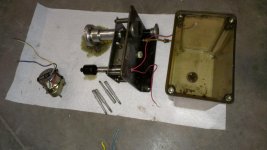
some final details on the bridgeport. The auto oiler is supposed to work manually too but never did, so I have to fix it before I keep running the mill. I pulled it apart and turns out its all ok, its just that the auto portion was in the top of the travel and wouldn't let me manually oil. So that's good news, nothing broken. I cleaner everything and am waiting for new gaskets. An old UPS gave up its power cord to the cause so once I get the gaskets ill plug it in and it should be all good.
Attachments
I have been turning multiple 2" diameter parts on the lathe. I started out using my big band saw to cut the blanks but its a lot of work pushing 2" steel through a bandsaw. I was looking for a horizontal bandsaw but kept coming up with $1000 used ones that were of acceptable quality, but its $1000. So I figured short term I would just use the HF 14" abrasive cut off saw. Its dirty and I figured I would have to leave a lot of stock (=time) to allow for the cut. What a surprise, I cut off 2" cold rolled blanks and they took a .020" face cut to clean up. pretty impressive. So I gradually adjusted my stop over and was down to taking .04" per side to clean up to finish dimensions. Probably could have went even closer but wasnt comfortable with less. So I am not usually an advocate of HF tools, but this was impressive. Im going to make a set up with this saw to use as a cutoff long term. I want to set it up on a bench rigidly mounted, have a weight system to pull the saw down into the work, a measured stop system to get accurate length measurements for the cut and a saw travel stop for when it gets through that kills the power and keeps it from dropping the hub into the part and a vacuum to pull the dust away. The cutting wheels are cheap and easier to change than a bandsaw blade, so I think the only drawback is the heat and dust which I will vacuum. will post when I have something built. probably going to be a while . I have rigged a weight on it for now for the feed, and I hold my foot on the bed and hold the power cord in my hand. It works well but the hub still drops and hits the work piece at the end of the cut. It gets removed with a large chamfer but it cant be good for the hub either. I will try to put a mechanical stop today to get me through this round of cutting. I looked on their website and they dont have this particular one, they look different. I have the orange one from 5-6years ago, I dont know how well the new ones work, but it looks like they now have a 3-1/2hp version, the one I have is 2hp.
. I have rigged a weight on it for now for the feed, and I hold my foot on the bed and hold the power cord in my hand. It works well but the hub still drops and hits the work piece at the end of the cut. It gets removed with a large chamfer but it cant be good for the hub either. I will try to put a mechanical stop today to get me through this round of cutting. I looked on their website and they dont have this particular one, they look different. I have the orange one from 5-6years ago, I dont know how well the new ones work, but it looks like they now have a 3-1/2hp version, the one I have is 2hp.
Last edited:
RedVise
Well-known member
Lutz, I see you are just up the road a bit from me ! Nice garage.
One question / suggestion for you. Are you planning on painting the interior, that will make a big difference in the brightness.
Brian
One question / suggestion for you. Are you planning on painting the interior, that will make a big difference in the brightness.
Brian
Lutz, I see you are just up the road a bit from me ! Nice garage.
One question / suggestion for you. Are you planning on painting the interior, that will make a big difference in the brightness.
Brian
yeah in the working shop it is painted white on top and gray below with a purple band. The other shop is still unfinished as I am awaiting a few details to get the final and awaiting an influx of cash to move forward. I will likely paint it the same as the first phase but its likely not for a while. just had an unexpected hit to the garage fund to buy the lathe.
Looking at your light brackets may I suggest looking at Gripples. http://www.gripple.com/gb/en/p1/a8/standard-hanger
My brother works with electrical supplies and hooked my up with 8 high bay lights and used Gripples to hang them. We ran conduit to the center then a main line down middle of the building, purlin to purlin. From there we tee'd off each side and terminated with with an outlet box. The Gripples are nice because the are very adjustable and easy to level.
Post 59 and 60 of my thread you can get an idea.
my light brackets sucked in application. The rigid mount seemed good to me until I tapped it with my forklift and the light had no give. I have now moved toward 1/16 cable with crimps, I have some ordered to try out. I plan to just drill 3 small holes in the purlin and snake the top of the cable through to adjust. the friction should hold it but once its adjusted I will likely shoot a screw through one of the holes to lock it. Sometimes I over think things
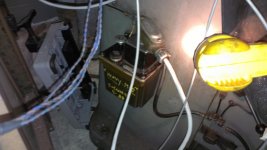
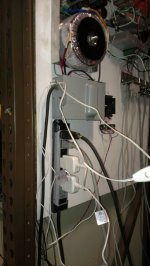
, but thanx for the link as it pushed me in the right direction.got my gaskets so I re-assembled the auto oiler, thats working now. I also added a power strip to the control so that now I flip one switch and it starts the control, the oiler and 2 Ikea LED lights for the work area. doesnt seem very exciting but Im really happy with the setup.
Attachments
shortykorte
Well-known member
Having lights that swing when hit is a good thing. Ask me how I know.
Having lights that swing when hit is a good thing. Ask me how I know.
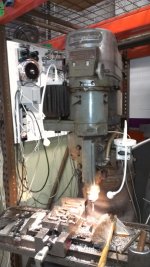
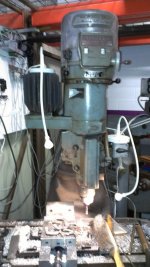
yea Im really happy with the ikea led lamps. I have one pulled back for general lighting and one close at the spindle. They are just on the standard base and are very stable, one on top of the z stepper and one on the spindle motor switch. I was going to drill the base and put some magnets on them but they dont budge and Ive cut quite a few parts already
Attachments
Last edited:
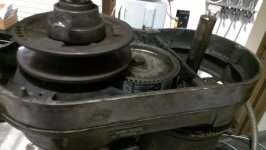
bummer, cutting away on the cnc bridgeport and the main spindle drive belt broke. Pulled the head apart and it was pretty cracked, so not too much of a surprise. Did take a $50 cutter with it. I have a new belt on order. While in the machine maintenance mood, I looked up how to rebuild a southbend 13 spindle, as the lathe I got for $50 back in the 80's was had because it was so loose, .045" spindle play and .25" thrust play. made for cutting on it very interesting but it has been somewhat useful. Anyway, looking for spindle bearings (used is all that's out there now) I found there are 2 kinds. A split and a cut sleeve. Since I didn't know what I had I pulled the spindle cap off. Turns out this lathe has new bearings in it. So I went through the shimming process and now the spindle play is a solid .002". woowhoo. So what about the huge endplay? The PO apparently upgraded to a roller thrust bearing, but didn't bother to tighten the collar, so couple turns of the locknut and set the set screw and zero endplay, possible because of the roller thrust bearing. I'm more than pleased by this turn of good fortune. I have been oiling it since I cleaned it up and started sparingly using it, so this was all that was lacking. I guess my bad for not looking at the cause sooner, but I haven't really done much with it because it was so loose. so first thing I turned a .300 OD part and got an excellent finish, since there was so much play before I could not get a good finish without some sanding.
jbmatth
Well-known member
I love it when I find stuff like that. I'm happy for you, it just makes your day so much brighter when you get a project for nothing, repair it for nothing and then have a valuable asset to be used.
JB
JB
I love it when I find stuff like that. I'm happy for you, it just makes your day so much brighter when you get a project for nothing, repair it for nothing and then have a valuable asset to be used.
JB
thanx, it was a nice surprise for sure. I got this lathe with some tooling and a 1/2hp bridgeport m-head with a 2x speed motor on it for $50 each . The m-head was so cheap because the motor was small and 2x speed and the lathe because it was so loose. they just wanted them out of the shop and the $50 token payment was good for them because I had to take care of moving them out of the shop. I cleaned up the mill and put a VFD on it to take care of the speed and have been using that off and on since I brought them down from Ohio. but the lathe has just been sitting other than a few sanding and rough cut jobs I havent used it. Now that the play is gone Ive been using it nonstop for small parts.
Its actually causing another project. since the cnc has been pretty reliable running on its own, I find I can do more than one thing at a time. This presents the problem that my phase converter was designed with the idea I would only run one machine at a time, which is now wrong. I need to figure out how to add plugs. My first thought is to move to a load center with breakers, but then I have to make things more permanent. Im wondering if I can make a y-plug, with 1 male y'ed to 2 females. I dont think I would ever use more than 2. maybe If I can get a small enough load center I can attach it to my cart.
Last edited:
madoc1
Well-known member
its all your fault that I had to go and spend money! I found the ikea light on amazon and had to buy it. got in black. I too was going to use a magnet, but don't think I will need it. it lights up the dp and extends far enough to light up the vise area. thx for the tip.
jim
jim
jbmatth
Well-known member
I'm certain I'll run into the problem of building a phase converter soon enough. I have passed on a few decent deals on 3 phase equipment just so I don't have to deal with the 3 phase part of it. If I were to run across any screaming deals like your lathe and mill, I would surely take the plunge.
JB
JB
I'm certain I'll run into the problem of building a phase converter soon enough. I have passed on a few decent deals on 3 phase equipment just so I don't have to deal with the 3 phase part of it. If I were to run across any screaming deals like your lathe and mill, I would surely take the plunge.
JB
I bought an american rotary phase converter rather than building one, you can also find them on craigslist all the time. I built a cart for it but thats not necessary. Its really pretty straight forward, I wouldnt let that stop you getting a machine. If you only get one or two machines a VFD is another solution, then you can run a mill or lathe through a dryer plug. I have a vfd on my band saw, which was made for wood but with the speed control it works for metal now and one on the small bridgeport to slow it down for steel cutting. Once they are set up its pretty simple. I stick with the same brand and model (Hitachi) so that I only have to learn the button pushes once.
its all your fault that I had to go and spend money! I found the ikea light on amazon and had to buy it. got in black. I too was going to use a magnet, but don't think I will need it. it lights up the dp and extends far enough to light up the vise area. thx for the tip.
jim
yea tell me about it. I bought 5 of the vintage style twin beam machine lights to use on the machines before I thought about the ikea leds, those are constantly drifting off target or into the work from the machine vibration, so now Im going to throw those in the trash and replace them with the ikea leds.
jbmatth
Well-known member
I guess I'd forgotten you purchased your phase converter, I'd just assumed with you skill set you would have built one. I'll have to keep an eye on craigslist to see if I can fine one floating around, thanks for the tip. I have 200 amp service in my shop with lots of empty space. Also I can run as much wire as I want around within reason so most likely I'd skip the VFD's for now unless they became necessary for a particular application.
JB
JB
I guess I'd forgotten you purchased your phase converter, I'd just assumed with you skill set you would have built one. I'll have to keep an eye on craigslist to see if I can fine one floating around, thanks for the tip. I have 200 amp service in my shop with lots of empty space. Also I can run as much wire as I want around within reason so most likely I'd skip the VFD's for now unless they became necessary for a particular application.
JB
yea, if your shop is done and the layout is set I would set up a phase converter with its own distribution box then run hard lines to the machines. The American rotary even allows for remote on/off switch so you can put the converter/distribution where ever it makes sense then put a remote on/off near the machines.
I'm in transition right now so if I mount a distribution box and hard lines I may have to move them later. Don't want to do that. Also since my final is pending I want to wait until after to do any serious wiring.
Having lights that swing when hit is a good thing. Ask me how I know.
missed the point on your post. Yes its important to have them swing, the one I hit with the forklift fell the full 14 ft to the ground and was demolished, luckily it wasnt wired yet or it may have ripped off the e-box. The next go round they will be cable hung and attached solid not just hooked.
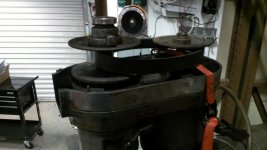

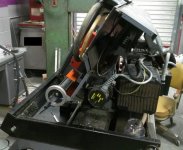
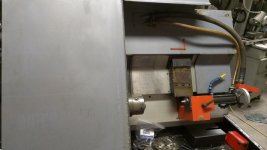
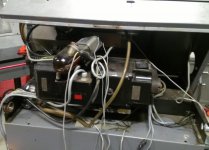
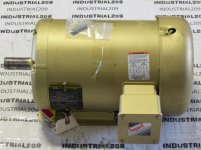
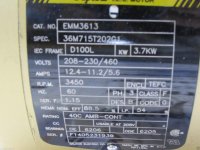
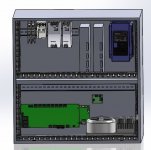
started gathering parts for the Emco cnc lathe. I've decided not to try to resurrect the original late 80's control. The beginnings of the retrofit to a mach3 system are in the works. I have ordered and received a new 3ph 5hp spindle motor and I have ordered 2 stepper drivers compatible with the stock 5ph axis steppers. There are a few retrofit projects published on the web so I have been able to gain a lot of insight on the requirements to make this work. Also, since my Bridgeport boss retrofit the available options has multiplied tenfold. I like the offerings from cnc4pc and will likely use their input/output breakout board along with my smooth-stepper, they have done some really nice small components boards which make the whole layout very efficient. The added benefit of the new board is that it incorporates a watchdog circuit to monitor the OS system status and shut any movement down if the windows or mach3 crashes, this offoers a great primary layer of safety which I may go back and add to my router and Bridgeport conversions as well. will try to post up pictures here as well as on a cnc site for those interested
Attachments

shortykorte
Well-known member
So I'm thinking a Florida Garage Life meet up and schooling in all things 3ph is in order.