
You are using an out of date browser. It may not display this or other websites correctly.
You should upgrade or use an alternative browser.
You should upgrade or use an alternative browser.
My new build in Collage Station, TX.
- Thread starter mgh
- Start date
Update 08-11-2013...First the concrete work out the front of the house to the road where the mail box will be.

Side walk across the ditch, all exposed culverts have to have concrete side treatment (HOA rules)

Two series of steps from the steep grade from the house to the road.

The front door...8-1/2 foot tall

Now for the concrete drive.

View from street straight on.

Looking at the attached garage.

looking at the work shop.

View half way down the drive.

View of the shop from the other side of the patio.

The shop looking from the attached garage.

The attached garage looking from the shop.

Now the most important part of the shop...toliet and wash sink. Builder still needs to install the door.

View of rear patio from the shop.

The kitchen.

View of kitchen from the family room, paper on the floor is covering the wood floor.

View of family room from study, notice our high dollar furniture.

And at last the next important room the study.

Walk thru will be next Friday and probably close at the end of the month.
Side walk across the ditch, all exposed culverts have to have concrete side treatment (HOA rules)
Two series of steps from the steep grade from the house to the road.
The front door...8-1/2 foot tall
Now for the concrete drive.
View from street straight on.
Looking at the attached garage.
looking at the work shop.
View half way down the drive.
View of the shop from the other side of the patio.
The shop looking from the attached garage.
The attached garage looking from the shop.
Now the most important part of the shop...toliet and wash sink. Builder still needs to install the door.
View of rear patio from the shop.
The kitchen.
View of kitchen from the family room, paper on the floor is covering the wood floor.
View of family room from study, notice our high dollar furniture.
And at last the next important room the study.
Walk thru will be next Friday and probably close at the end of the month.
el Pedro
Well-known member
Beautiful house. I love the exposed timber in the vaulted ceiling.
honda_fox3
Well-known member
- Joined
- Jun 14, 2013
- Messages
- 327
Beautiful!! Great looking home. We are build one currently and your pics make me excited to see progress.
Thanks, Exposed timber is the wife's idea.Beautiful house. I love the exposed timber in the vaulted ceiling.
Thanks,Unreal! Beautiful house, location, concrete work, garage space, EVERYTHING!
Thanks, and good luck with with your new build...we expect pics.Beautiful!! Great looking home. We are build one currently and your pics make me excited to see progress.
vvk645
Well-known member
very nice house and shop, keep us updated on your progress.
Well I have my stone mailbox built and no I didn't build it. I thought I was because no one would call me back for a quote, but my landscaper knew someone and here is the end result. I drew up a sketch and they built it to the sketch perfectly.
All that's left is a few items on the walk thru. Closing on the 30th then move all my stuff out of storage into the house.
My vert would be the happiest, she not happy at my daughter garage. She'll be all tucked in, in a couple weeks.

All that's left is a few items on the walk thru. Closing on the 30th then move all my stuff out of storage into the house.
My vert would be the happiest, she not happy at my daughter garage. She'll be all tucked in, in a couple weeks.

Sunbimmer
Well-known member
Just WOW!!  ....no other word for it.
Love these concrete driveways you guys have over there in the US.
....no other word for it.Love these concrete driveways you guys have over there in the US.
chenthu
Well-known member
Nice house, congrats!!
Thanks, Especially in the south, asphalt melts where we live, and gets wagon wheel rutts in it after vechiles run on it for awhile.Just WOW!!
Love these concrete driveways you guys have over there in the US.
Thanks, we are closing on the new digs today.....YEEEEEEEEEEE.......HAAAAAAAAAAWWWWWNice house, congrats!!
Finally got my girl to her new home. You can't tell from the photos but she has a big smile on her face. I still have a few more loads for the shop to move out of my last storage in Houston.
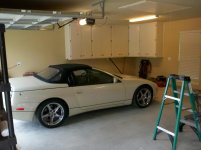
For now she stays in the attached garage, but she is home.

This garage is so much bigger than my last one.

For now she stays in the attached garage, but she is home.

This garage is so much bigger than my last one.

lethal-6
Well-known member
Great build on the home and the shop. Did you have any issues with building the shop along with home at the same time with appraisal? Every builder I have talked to doesn't want to build a shop along with house. They want to do it after closing. They say the shop will cause the appraisal to be lower.
sean Buick 76
Well-known member
I love this build! We do not have too many brick buildings here, but I wish we did they look great!

turbowoodworker
Well-known member
Good to see you back at it.
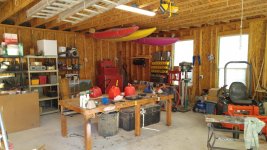
Well after just filling up my shop with everything under the sun. Now that I'm retired and have time to finish out the inside of my shop, I figured I'd share some progress. These two pics show the clutter I've collected since moving in.
That’s not full, I can still see the walls n plenty of floor. Gezzz

Congrats on retiring and now being able to enjoy the fruits of your labor. We’re in the process of moving into a rental for now until either just the right place comes up for sale but are very much considering just building our last home. I figure not unlike you, if we start construction late this year sometime around 2028 I’ll be posting the same thing. Just retired and finally getting into the shop.

ned911
Well-known member
I miss TWS!!! Such a great race track.
Love the place!!!
Love the place!!!
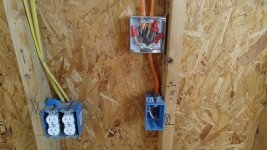
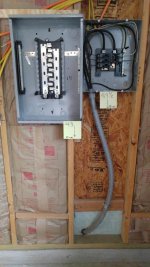
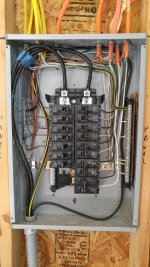
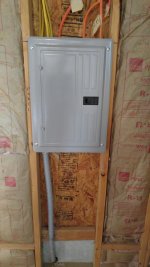
The first thing I wanted to do was upgrade my electrical. I have 100 amp service but a box that holds just 10 breakers and want to add a wood planer, larger bad saw, joiner, and a air compressor. I went with a 125 amp box with 20 breakers and added more 120V plugs, six 240V plug outlets, and extra over head lights.
Attachments

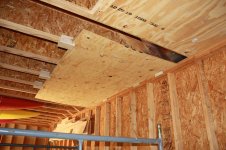
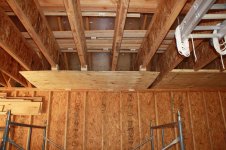
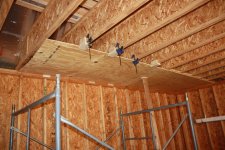
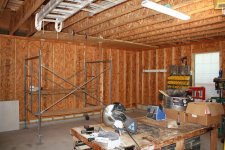
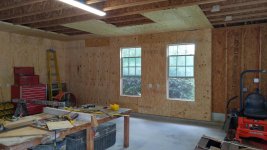
Now that the electrical is pretty much done it's time to clear out a corner and start installing the ceiling. Instead of sheet rock I'm going to use 1/2" x 4' x 8' plywood. I know it's going to be at a higher cost, but I figured any time I want to screw something to the wall i don't have to worry to much where a stud is. I also had to figure out how to get the plywood on the ceiling by myself. I used some scaffolding I had and with the engineered trusses it turned out to be fairly easy.
Attachments

txvwnut
Well-known member
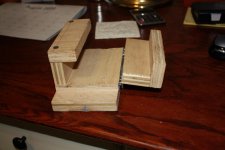
Those sliders are slick as hell.
txvwnut
Well-known member
I agree....it's now becoming a neighborhood
My brother has the distinction of winning the very last race at TWS. I miss the track but don’t miss the hot summers on pit road.


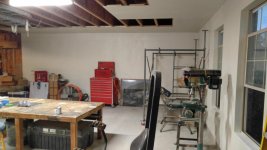
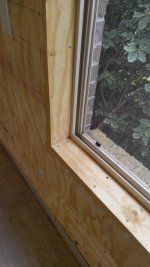
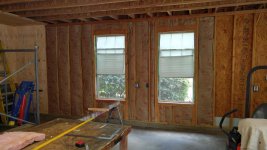
My next phase is to put insulation in the walls for A/C in the future. I also chose this corner of the shop to finish so I could put up storage cabinets. This is so I could free up shop floor space to have room to finish the install of the ceiling panels.
View media item 105699
Here I have this corner of the shop ready for paint before install of cabinets.
View media item 105700
View media item 105701
I find it hard to believe that these 18 sheets of plywood took 2 gallons of paint
View media item 105703
View media item 105704
Now for the cabinet build, this will get rid of 7 of the free standing storage shelf's like you get at your home improvement stores.
View media item 105699
Here I have this corner of the shop ready for paint before install of cabinets.
View media item 105700
View media item 105701
I find it hard to believe that these 18 sheets of plywood took 2 gallons of paint
View media item 105703
View media item 105704
Now for the cabinet build, this will get rid of 7 of the free standing storage shelf's like you get at your home improvement stores.
Attachments

Last edited:
Now it's time to start the storage cabinets. My plan is to build 24 foot long by 4 foot tall wall hanging storage cabinets with a corner cabinet and three adjustable shelf's in each section, and also doors. I'm going to built them in 4 foot sections.
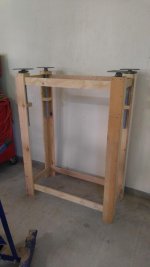
The cabinets will be against the shop wall and hang from the ceiling. This is so I can maximize as much floor space as possible. My engine hoist worked perfect for lifting each section on to my homemade jack lift.
View media item 105705
View media item 105706
The first section on the lift, so far the plan is working as planed.
View media item 105707
Side view
View media item 105708
I also discovered that the ceiling in my shop is not level. In 24 foot it's out of level by 0" to 3/4" so adjustment will be made.
The storage will look pretty much like what I built in my garage, just larger.
View media item 105742
The cabinets will be against the shop wall and hang from the ceiling. This is so I can maximize as much floor space as possible. My engine hoist worked perfect for lifting each section on to my homemade jack lift.
View media item 105705
View media item 105706
The first section on the lift, so far the plan is working as planed.
View media item 105707
Side view
View media item 105708
I also discovered that the ceiling in my shop is not level. In 24 foot it's out of level by 0" to 3/4" so adjustment will be made.
The storage will look pretty much like what I built in my garage, just larger.
View media item 105742
Attachments



Last edited:
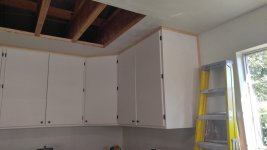
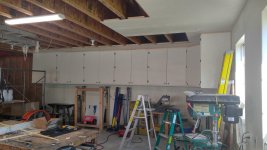
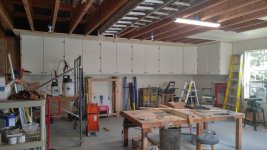
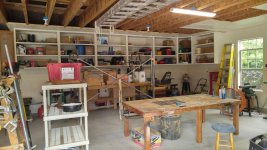
After figuring out the out of level ceiling, I finally got the cabinets installed and fill up.
View media item 105709
Now some pic with the doors installed
View media item 105713
View media item 105710
View media item 105712
View media item 105711
Now to finish installing the ceiling panels.
View media item 105709
Now some pic with the doors installed
View media item 105713
View media item 105710
View media item 105712
View media item 105711
Now to finish installing the ceiling panels.
Attachments

txvwnut
Well-known member
Looking good.
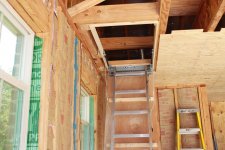
I got side tracked on the finishing the shop inside and now discovered that if I'm going to deck my shop attic, I need to do it before I get any more ceiling panels installed. The position of the attic ladder opening wouldn't allow me to get a 4 x 8 sheet thru it.
Just so happened a good friend gave me 14 sheets of 7/16" OSB, I still might have to buy a few more sheets to finish the attic but not bad for a free start.
View media item 105780
The opening in the attic ladder is large enough, but it is so close to edge of the shop that the rafters are in the way.
View media item 105782
So here is my opening that I'll be using.
View media item 105781
Now setting up my scaffolding to get the OSB halfway into the attic.
View media item 105783
Next step
View media item 105784
Now standing it upright
View media item 105788
Now the final stage, then go top side and pull it into the attic.
View media item 105786
I know it was a lot of steps, but it was easy and no straining of the body. Next is to add more lighting so I can see better in the shop attic. Right now it's a dark hole.
View media item 105789
Just so happened a good friend gave me 14 sheets of 7/16" OSB, I still might have to buy a few more sheets to finish the attic but not bad for a free start.
View media item 105780
The opening in the attic ladder is large enough, but it is so close to edge of the shop that the rafters are in the way.
View media item 105782
So here is my opening that I'll be using.
View media item 105781
Now setting up my scaffolding to get the OSB halfway into the attic.
View media item 105783
Next step
View media item 105784
Now standing it upright
View media item 105788
Now the final stage, then go top side and pull it into the attic.
View media item 105786
I know it was a lot of steps, but it was easy and no straining of the body. Next is to add more lighting so I can see better in the shop attic. Right now it's a dark hole.
View media item 105789
Attachments




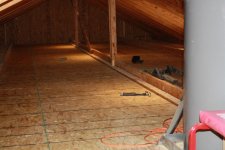
Finally got the attic decked above the shop finished, along with three more light fixtures. The free 14 sheets of OSB worked out perfect. I just decked the middle 12 foot x 40 foot, this will be more storage than I'll ever use. Now I can get back to finish the install of the ceiling panels.
View media item 105854
View media item 105854
Attachments
Well back at finishing the ceiling panels. Saved the hardest for last, the panels above where the shop/garage door is.
This is my process to getting the panel on the ceiling.
View media item 106017
I use my scaffolding to position the 4 x 8 and use these slider brackets to hold the panel in place, then use 2 x 4 to brace up any sagging spots in the center of the panel.
View media item 106015
This is the opposite view looking at the garage and man way door.
View media item 106016
With the extra heat now with the door shut. I hopefully will be finished in a few days.
This is my process to getting the panel on the ceiling.
View media item 106017
I use my scaffolding to position the 4 x 8 and use these slider brackets to hold the panel in place, then use 2 x 4 to brace up any sagging spots in the center of the panel.
View media item 106015
This is the opposite view looking at the garage and man way door.
View media item 106016
With the extra heat now with the door shut. I hopefully will be finished in a few days.