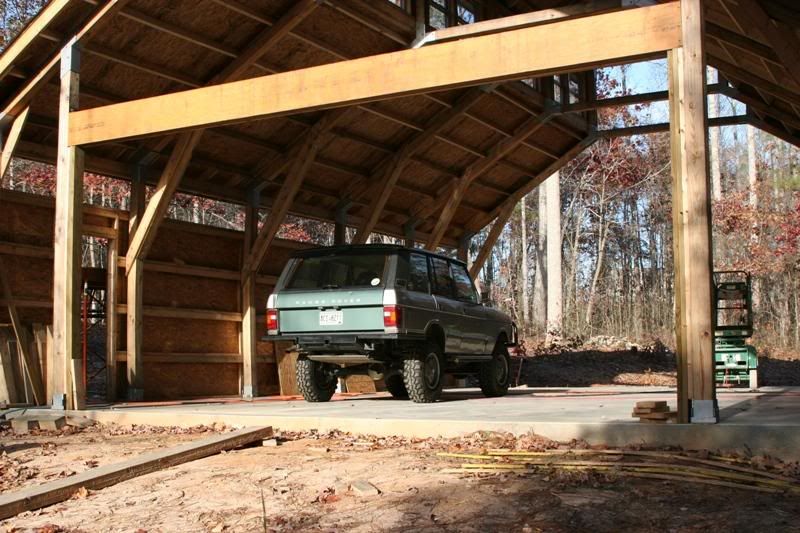
To avoid these ads, REGISTER NOW!

My New Garage Build

To avoid these ads, REGISTER NOW!

cdrewferd

Well-known member
Joined
Apr 5, 2006
Messages
402
Location
Westminster, CO
That's a good looking building. If you don't mind me asking, what did you pay for the Socket system? I've thought about using them, but wasn't sure if the cost was worth it.
 
OP
D

d110pickup

Well-known member
Joined
Feb 4, 2005
Messages
265
Location
Canton, Ga.
This weekend we removed the 2x6 spacers in every brace,
IMG_6579P.jpg


and replaced them with solid 6x6 timbers like the rest of the structure. It's definitely over-kill but I don't want to worry about any sagging of the building plus it looks pretty cool. :)
IMG_6582P.jpg


Now the hard part is cleanly cutting a 60 degree angle on each end of the timbers.
Those photos will be in the next post.
Mike
 
OP
D

d110pickup

Well-known member
Joined
Feb 4, 2005
Messages
265
Location
Canton, Ga.
This is your typical circular saw.
IMG_6584P.jpg

This is your circular saw after a HUGE dose of steroids.
IMG_6586P.jpg

When you squeeze the trigger on this monster you better be holding on! Both photos were taken on a 6x6.
IMG_6588P.jpg

IMG_6590P.jpg

The big Makita has a 415 MM blade, that's just over 16" in diameter! A good friend thats been helping me borrowed it from a friend.
Mike
 

V-10 Killer

Well-known member
Joined
Feb 11, 2007
Messages
1,011
Location
Midland, MI
This is your typical circular saw.
IMG_6590P.jpg

The big Makita has a 415 MM blade, that's just over 16" in diameter! A good friend thats been helping me borrowed it from a friend.
Mike

:eek2:
Wow!
You might as well have used a concrete demo saw!
That thing's beyond huge!
 

Rte66Charlie

Well-known member
Joined
Jun 21, 2007
Messages
210
Location
Ozark Mountains
Awesome looking project d110!! This has joined my "subscribed threads"!! I'm anxious to see how this turns out!!! Do you have a link for the Socket System folks??

Charlie
 
OP
D

d110pickup

Well-known member
Joined
Feb 4, 2005
Messages
265
Location
Canton, Ga.
Well it's been a month since my last update but I've made some good progress and I've got a bunch of new photos.
Mike
Here's inside and outside views of the windows installed.
IMG_6594P.jpg

IMG_6596P.jpg

Me installing siding. You can see why I didn't install the roof yet.
IMG_6603P.jpg
 
OP
D

d110pickup

Well-known member
Joined
Feb 4, 2005
Messages
265
Location
Canton, Ga.
Cutting Hardi-Plank is nasty.
IMG_6616P.jpg

Here the siding is installed and we've got all the purlins in place.
IMG_6621P.jpg

With decking ready for felt paper.
IMG_6626P.jpg

Mike
 

cdrewferd

Well-known member
Joined
Apr 5, 2006
Messages
402
Location
Westminster, CO
I too am curious as to what you will use the extra space for in the middle up top. Maybe do a small storage loft, though that would require you to keep the scissor lift. Though that might not be a bad idea incase you ever have to replace or reseal one of those windows.
 
OP
D

d110pickup

Well-known member
Joined
Feb 4, 2005
Messages
265
Location
Canton, Ga.
The upper area is supposed to stay open for light and ventilation. This is a fairly common style for barns in this area; we routinely hit 90 - 100 degrees in the summer here. If you open the high windows and the ground level doors there is a nice convection current that draws in the cooler air and it flows out the windows. I'm also installing three industrial ceiling fans and a whole house exhaust fan.
With all that said I took the lift up to check out the flashing job the roofers did and realized that there's a pretty cool space up there so I'm thinking of flooring one 8 x 10 section, adding a railing and ladder, and I've got a crows nest that's 16 ft above the floor. Add a small desk, computer, and a comfortable chair and I'm set. (My wife thinks I'm trying to get away from her)
Mike
 
To avoid these ads, REGISTER NOW!

rrovergb

New member
Joined
Mar 25, 2005
Messages
2
Location
atlanta
Mike,

It looks great! It is amazing how much usable floor space you'll have. It was difficult to grasp the overall size when just the timbers were up. Now that you have installed the windows and roof it looks huge. You'll have to pull one of the trucks into the space and take a picture so we can get an idea of how big the work space really is.

rRoVeR
 

bluesman2a

Well-known member
Joined
Aug 16, 2005
Messages
1,312
Location
Atlanta, Ga.
Looking good, Mike!!!

What are your plans for the end-walls and doors? Are you going to get it weather-tight for the "winter" such as it has been so far?
 
OP
D

d110pickup

Well-known member
Joined
Feb 4, 2005
Messages
265
Location
Canton, Ga.
Looking good, Mike!!!

What are your plans for the end-walls and doors? Are you going to get it weather-tight for the "winter" such as it has been so far?

The front will have a 20' wide opening with four 5' sliding sections so it'll actually look like a barn from the front.
The rear will have a 10' roll-up door, I think it's called a "cartridge door" offset to the right and that will open to a 20 x 20 carport area built with the same timbers and steel fittings as the shed.
Mike
 
OP
D

d110pickup

Well-known member
Joined
Feb 4, 2005
Messages
265
Location
Canton, Ga.
Sorry for the delayed answer, we've been out of town.
Grim, haven't heard anything about that yet.
Toad, I'll probably use a long pole unless you've got a connection for some really cheap pneumatic cylinders.
Mike
 

toadjammer

Well-known member
Joined
Apr 14, 2007
Messages
296
Location
WI
No ideas, I was interested in so much that there is alot of them and a pole could damage them. Maybe put a hook or bar from the top of the lower sash that way you could push the window up from under the overhang and stay away from the glass. Then you could hook the bar and pull the window closed.
 

peth

Member
Joined
Jun 22, 2005
Messages
22
Location
Guelph Ontario Canada
Hey Mike thanks for keeping this thread updated. There are plenty of old churches that use a pole with a hook on the end of it to open the upper windows in the sanctuary. I'm sure you can develop something that works for you.
 
OP
D

d110pickup

Well-known member
Joined
Feb 4, 2005
Messages
265
Location
Canton, Ga.
RRover requested some photos of the shed with a truck parked in it so the scale would be more apparent. So here's a few with the Range Rover parked about where the lift will be.
I got some work done this weekend but haven't taken any photos yet.
Mike
IMG_6659P.jpg

IMG_6657P.jpg

IMG_6647P.jpg

IMG_6646P.jpg
 
OP
D

d110pickup

Well-known member
Joined
Feb 4, 2005
Messages
265
Location
Canton, Ga.
Hey guys,
It's been awhile since my last update but I've got a bunch of photos to post.
The first three show the final concrete pours for the driveway and the slab out back for the outside covered work area.
IMG_6673P.jpg

IMG_6675P.jpg

IMG_6677P.jpg
 
OP
D

d110pickup

Well-known member
Joined
Feb 4, 2005
Messages
265
Location
Canton, Ga.
In the first photo we've started to frame the front wall. The LVL beam over the door has flexed inward an inch or two so we pulled it just past the straight point and used three layers of plywood to keep it straight. When we released the pressure on the beam it stayed straight. I love it when a plan comes together!
The guy in the left foreground is Joecaver from this forum.
IMG_6683P.jpg

Next we framed the wall above the beam.
IMG_6684P.jpg

The last one shows how I've had to use 1x6's to flush out each beam and post to make up for the thickness of the steel fittings and bolt heads.
IMG_6688P.jpg
 
OP
D

d110pickup

Well-known member
Joined
Feb 4, 2005
Messages
265
Location
Canton, Ga.
These photos show the center section of the rear wall that we built laying down and then stood up. It's 16' tall and about 10' wide. We used a couple of tree straps to attach a ****** block to the peak and then tied off one end of the rope to the peak, ran it through two ****** blocks to get leverage. One of us could easily lift it while the other went up in the lift and lined up the top as required.
As you can see I also found yet another use for my HF auto dollies. In the last photo you can see the tall wall and we've framed for the garage door to the portico.
IMG_6690P.jpg

IMG_6691P.jpg

IMG_6692P.jpg

IMG_6696P.jpg
 
Last edited:

Rte66Charlie

Well-known member
Joined
Jun 21, 2007
Messages
210
Location
Ozark Mountains
Looking good, man! I was wondering when you'd be back with a progress report and some pictures. This has been a subscribed thread for me from the start and I'm really looking forward to seeing how it turns out!
 
OP
D

d110pickup

Well-known member
Joined
Feb 4, 2005
Messages
265
Location
Canton, Ga.
It's been a few months but here's another update to the build. The first is front and then a detail shot of the "doors" I faked for the "loft".
IMG_6718P.jpg

IMG_6719P.jpg

Next are some more photos of the exterior, we spent a lot of time doing some landscaping around the building and the back yard. We wanted to get the plants going before the summer got too hot.
IMG_6732P.jpg

IMG_6729P.jpg

IMG_6725P.jpg

I'll get some interior shots up next.
Mike
 
OP
D

d110pickup

Well-known member
Joined
Feb 4, 2005
Messages
265
Location
Canton, Ga.
Here's three of the interior. I passed the rough framing and rough electrical inspections.
IMG_6720P.jpg

IMG_6723P.jpg

IMG_6726P.jpg

Thanks for looking,
Mike
 
To avoid these ads, REGISTER NOW!
Top Bottom