To avoid these ads, REGISTER NOW!

My own 'Mahal

Kevin54

MEMBER EMERITUS
Joined
Jan 12, 2005
Messages
29,341
Location
Urbana, Ohio
Those are some good looking awnings. But with a rain, unless it is straight down, they won't do much to stop the rain from pounding against the door. If your seals are all hitting the door correctly and your sill plate it up against the bottom, you really shouldn't get any water coming in.

As far as your corner details in the window with the bullnosed corner beads...yes, they should have mitered them in the corners.
 
To avoid these ads, REGISTER NOW!

snipes

Active member
Joined
Dec 24, 2009
Messages
27
Hey I am from G-ville to. I currently work overseas and miss Greenville. Your build is really nice. The awnings look great and they should really help (10 years as a home builder lets me say all doors will leak and it is not just the driving rain, stopping the splash back will help).
 
OP
J

JakeKohl

Well-known member
Joined
Feb 23, 2012
Messages
1,365
Location
Greenville, SC
Those are some good looking awnings. But with a rain, unless it is straight down, they won't do much to stop the rain from pounding against the door. If your seals are all hitting the door correctly and your sill plate it up against the bottom, you really shouldn't get any water coming in.

As far as your corner details in the window with the bullnosed corner beads...yes, they should have mitered them in the corners.


Well, we got four inches of rain in about four hours yesterday...and how right you are. Door is still leaking (not as bad as it would have previously - but still leaking). I've adjusted the threshold and inspected/fixed everything I could short of pulling the whole jam out. I suspect that there might be a problem with the siding trim allowing water to get behind the door jam but it's hard to tell. I'm going to pull the door out this weekend after letting a sprinkler loose on the side of the building for an hour...while waiting for my self-applied drywall mud to dry.

I initially had real issues with the way the door was installed by by building contractor. They had installed the entire latch side of the jam with three finishing nails and no shims. The contractor said this was "the way it is done" to which I replied, "not on my building". I would have expected the door to go flying down the stairs in a few months. I knew I should have just pulled the thing out and done it myself like I did with my downstairs door (I could see light through 1/2 of the door seal on that one).
 

Antique

New member
Joined
Aug 3, 2012
Messages
3
Had the same problem with leaking around my shop door. Installed a storm door and it stopped the leaking.
 
OP
J

JakeKohl

Well-known member
Joined
Feb 23, 2012
Messages
1,365
Location
Greenville, SC
While I struggle to get contractors to show up and finish their stuff, I have found myself letting out a big depressing sigh every time I step into the garage. After trading voice mails for two days, I discovered that my sheetrock guy was out of town all last week (vacation or family emergency unknown). I'm giving him four days next week to finish or I’m finding someone else/doing it myself.

On another topic, I have a sign project for the graphics business and I’ve really needed a new drill press to finish out 24 signs with about 8 holes each. I sniffed around on craigslist for a drill press and stumbled across a guy that had six factory refurbished units listed at about 1/2 of retail. I was scheduled to meet him one afternoon last week and he failed to show up. Feeling like being stood up provided enough of an excuse, I tried the warehouse door and found it open. I sniffed around and found the drill presses and decided that it was indeed a great deal. After picking out the one I wanted, I also found several table saws on pallets in various conditions. One of them appeared to be a 110V unit with very little use (most of the larger saws are 220V). By the time I finally met with the guy a couple of days later, I had talked myself into both the drill press and the table saw. The drill press was a “damaged box” that was reinspected by the factory and found to have no issues. The table saw was a show room demo unit that was barely used and it has a 64" (or something ridiculously long around that) Biesmeyer fence and a mobility kit with a kick down wheel.

The table saw weighs about 400lbs and unloading it was going to be quite a chore. That proved as enough motivation to get the I-beam and hoist installed on my ceiling. The beam and hoist were solely intended to help loading and unloading boats from trailers (or double-stacked boats on/off trailers). After loading up the saw (with a hand operated fork lift at the warehouse), the truck was backed into the shop, a strap arranged around the saw, and the hoist put in action. Once lifted, the 400lbs saw easily rolled back eight feet out of the back of the truck and was gently put on the ground back on it's included mobility kit. Nothing groaned, nothing creaked, the hoist stayed put in any position. It was buttery smooth lifting and moving the load. This operation would have taken at least four guys to unload that saw. Wow...I felt like that beam and hoist just paid for itself - and I'm just getting started! However, I'm finding that I not used to having it yet - while assembling a wheeled mobility kit for the 300 lb drill press, I must have downed a whole beer scratching my head about how I was going to lift the drill press onto the mobility kit before it dawned on me to use the hoist again. All big items will be on wheels in the shop so they can be moved and rearranged. With about 30 minutes of rearranging, I will be able to switch the shop from fiberglass/boat work mode to cabinet / sign shop mode. I may eventually need to re-wire the tablesaw for 220V because it causes all the fluorescent lights in the old shop (on one old 15amp circuit) to flickr out when it starts up! Now, I also need a dust collection unit (it never ends).

I need to get out there tonight and wrap the new tools in plastic to protect them from the paint and dust.


DSC_3573 by Team Seacats, on Flickr

I still have some work to do with the beam – this particular hoist was borrowed. It’s going to take a little fabrication work to mount the hoist I have purchased to this trolley. The ceiling will receive some trim work around the hoist soon. And, yes, there is some weldrous bubble-gumus on those end stops - I couldn't get my little 110V unit hot enough to lay down something prettier given the thickness of the beam.


DSC_3571 by Team Seacats, on Flickr
 
Last edited:
OP
J

JakeKohl

Well-known member
Joined
Feb 23, 2012
Messages
1,365
Location
Greenville, SC
Had the same problem with leaking around my shop door. Installed a storm door and it stopped the leaking.

That's a good idea and I also considered it. However, it gets tricky because the entry is a 48x48" platform at the top of a long staircase and we'll be frequently carrying things in and out of the office (at least until the dumb-waiter is finished). And, if it's water getting in from behind the vinyl siding, the storm door won't help the situation. I meant to re-install the door this weekend so I could get a look at the how it's sealed to the siding to see if I could find the issue but didn't get to it (ended up playing with the new toys - see above). It also needs to have the jam aligned a little better to the door.
 
OP
J

JakeKohl

Well-known member
Joined
Feb 23, 2012
Messages
1,365
Location
Greenville, SC
Things are flying now, and I’m not getting much sleep… but I finally have the building back in my own hands and have been working non-stop on fitting out the electrical, audio, and network. I have help coming this week to starting getting the cabinet and floor installation started. I haven’t had a chance to upload much in the way of photos, but here are a few from a week ago after the painters were (mostly) finished. The upstairs green was after only one coat of paint so it’a little brighter and mottled than it looks now with two coats. It’s a bold color – but we love it. The bathroom needs something lighter but I have planned to ask the painter back to address that and touch up the trim after I get it up.

I’ve also really come to appreciate my new chalk-line laser level – this thing is super handy for installing all sorts of things from the wall striping, lighting, and soon to be the upstairs cabinets.

As business is getting ready to erupt with several large projects in the next several weeks, my focus has moved completely to the upstairs area and anything required to have the county inspections signed off so we can start moving in and setting up our production cells. More photos soon.


DSC_3590 by Team Seacats, on Flickr


DSC_3591 by Team Seacats, on Flickr


DSC_3585 by Team Seacats, on Flickr


DSC_3593 by Team Seacats, on Flickr
 

Kevin54

MEMBER EMERITUS
Joined
Jan 12, 2005
Messages
29,341
Location
Urbana, Ohio
I’ve also really come to appreciate my new chalk-line laser level – this thing is super handy for installing all sorts of things from the wall striping, lighting, and soon to be the upstairs cabinets.

You ****!!!!! :beer: I really have to get me one of those new fangled contraptions!!! :lol:

I had a Bullseye Black & Decker laser level and the way it was made.....well lets just say I tore it apart to see what made it tick. My cabinets I mounted have a bow in them from side to side. :mad:
 
OP
J

JakeKohl

Well-known member
Joined
Feb 23, 2012
Messages
1,365
Location
Greenville, SC
You ****!!!!! :beer: I really have to get me one of those new fangled contraptions!!! :lol:

I had a Bullseye Black & Decker laser level and the way it was made.....well lets just say I tore it apart to see what made it tick. My cabinets I mounted have a bow in them from side to side. :mad:

hah! yeah, I waffled on investing in one of those for about two years now...but I'm glad I finally did. With it sitting in on a tripod at one end and center of the wall (at the garage door) and shooting a line along one of the the long walls in the garage, it's off by about 3/16"~1/8" on the far end roughly 40 feet away....which isn't too bad. That's certainly good enough to hang eight feet worth of cabinets and my wall stripping isn't THAT critical.
 
OP
J

JakeKohl

Well-known member
Joined
Feb 23, 2012
Messages
1,365
Location
Greenville, SC
Another late night...a few more pics. The stripping worked out well with the vinyl tape. It's certainly faster than painting it though the glossy finish brought out the surface irregularities. I do own a graphics shop and have a little experience applying vinyl and it only took about 35 minutes to apply the stripe with a second pair of hands and I'm pretty happy with it...I think I've officially retired from painting.

Upstairs is coming out nice. I've been experimenting with different types of light and am really not happy with anything I've tried yet. We'll get there.

Unloaded 2400 lbs of flooring and huffed it up 12 feet with help from two friends and got it stacked upstairs so it could acclimate just minutes before a storm and downpour...my poor truck. Oooomph.

Also finished up the installation of the first jack-shaft liftmaster door opener...extremely happy with these too! Very clean an unobstructed.

Flight departing at 5:30am tomorrow morning for Chicago for a couple of days...I'm wondering if I should even bother with going to bed.....yawn.


DSC_3608 by Team Seacats, on Flickr


DSC_3611 by Team Seacats, on Flickr


DSC_3612 by Team Seacats, on Flickr


DSC_3617 by Team Seacats, on Flickr

My shy help...Tim-eh.


DSC_3613 by Team Seacats, on Flickr

Dear lord, the outlets and network plugs....three days of wiring....

DSC_3596 by Team Seacats, on Flickr


DSC_3602 by Team Seacats, on Flickr

coming together

DSC_3604 by Team Seacats, on Flickr
 
OP
J

JakeKohl

Well-known member
Joined
Feb 23, 2012
Messages
1,365
Location
Greenville, SC
Once again, I find myself reminded at how poor I am at estimating time. I thought I could install the 860 square feet of flooring in a weekend with Tim’s help. I was about 50% correct! I selected a thicker 12mm laminate flooring for the additional durability (heavy’ish equipment) and it requires a good bit of force to get everything locked together. It’s going very well and looks terrific…but I have to stop and shift back to some production shirt and commemorative plaque work we have coming quickly for several big events. We can, at least, carry out the bulk of the work in the new office space as the air conditioning, lighting, and music situation is completely functional…we’re just limited to half the workspace and the bathroom isn’t functional yet.

I also went through about 6 different types of bulbs before settling in on a 50w equivalent LED PAR20 bulb. I had thought I would wait a couple of years for the LED prices to come down a little more – but I came in a little under budget with drywall and painting so I splurged on the bulbs. with 22 can lights, I can flood the space with (dimmable) light with an equivalent 1100 watts while consuming less than 200….and the mean time to failure on these bulbs is 23 years (at that point, 50% of them would have been exhausted).

I’ve also completed almost all of the electrical downstairs and can actually plug things in and turn on lights now. I have one more garage door opener to mount…will have more information on that soon.

Cabinets for the small wet snack bar are mounted so we can floor around them.

DSC_3619 by Team Seacats, on Flickr


DSC_3661 by Team Seacats, on Flickr


DSC_3673 by Team Seacats, on Flickr


This is about where we hung it up....

DSC_3675 by Team Seacats, on Flickr
 

Shoottx

Well-known member
Joined
Jan 30, 2011
Messages
314
Location
Plano Tx
Jake

I missed the little deal about the Delta stuff. What a great find, you should be very proud of that find.

Oh and the rest of the build is spectacular.
 
OP
J

JakeKohl

Well-known member
Joined
Feb 23, 2012
Messages
1,365
Location
Greenville, SC
Jake

I missed the little deal about the Delta stuff. What a great find, you should be very proud of that find.

Oh and the rest of the build is spectacular.


I'm definitely going to owe that table saw and my miter saw a new blade after all this flooring....this stuff is REALLY harsh on a blade!
 
OP
J

JakeKohl

Well-known member
Joined
Feb 23, 2012
Messages
1,365
Location
Greenville, SC
Well, this thread is in sad need of an update – but, as usual, that’s not necessarily an indication that things haven’t been happening. Quite the opposite. The Mahal has been coming along nicely as I push through tiny details (my ~favorite~ {sarcasm}). As I near the end of this project, I tend to want to keep my head down and push through these tiny laborious details ignoring just about anything else. I’m happy to report that things are totally functional up and downstairs! We found out that our main print capability in our home business was going obsolete (no more ink) in January so I’ve also had a big focus on getting the new office and new equipment functional – which is accomplished. The new print capability will provide a lot of new fun options. Final inspections have been signed off on by the county and, for the most part, we’re done. I have some cleaning, a few trim details, and some touch-up paint to work on. Downstairs will see a big cabinet project, car lift, and flooring next – but that can wait while I get the business back under control and have a little fun. I need to weigh where the dumb-waiter stands in the project list too. We’ll be planning for a party in January but, for now, I’m heading to Florida to do some distance sailing/racing soon. This was the first weekend in a while that I had some time to spend on the F18 double handed boat fixing some nagging issues that plagued me this year and getting it ready for a distance run around Key Largo. I also had a day to tend to the neglected paint on my poor truck with some polishing and two coats of wax….still some work to go on the truck the next evening or so – but it can sit in the garage while I work on it as time permits. Though we’ve been fortunate with some nice weather the last couple of days, I still enjoy working in the conditioned space. A lot has taken place from finishing details, granite counter tops, water heater, trim, flooring, etc….for now, I’ll let it suffice with a bunch of photos…

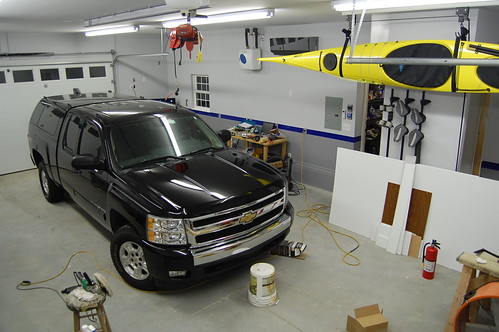
Truck still needs a lot of cleaning but the water spots are gone and the paint looking really fresh. It's unreal how much surface area this thing has compared to my little Audi two seater:

DSC_3711 by Team Seacats, on Flickr


Watchin' a little football - this cabinet space, Garage TV/entertainment section is going to be the next major project:

DSC_3716 by Team Seacats, on Flickr

My $30 dry erase board I scored recently at an auction:

DSC_3709 by Team Seacats, on Flickr

One air hose reel by the back door:

DSC_3707 by Team Seacats, on Flickr

I wish I had spent a little more $ on this guy - not really happy with it because it doesn't roll up very well. It may get a shorter hose and get reduced to carport duty.

DSC_3705 by Team Seacats, on Flickr

F18 getting some attention:

DSC_3697 by Team Seacats, on Flickr


DSC_3695 by Team Seacats, on Flickr


The graphics studio desk will get some real attention soon. I thought about replacing it but I like this huge 90 degree desk shape and couldn't find a replacement...so we'll refresh it soon with a printed wrap (now that we have the technology!...stay tuned). Bonnie and I are negotiating the scheme - I want a panoramic beach scene with clouds for a desk top. She's more inclined for a hammered bronze scene with a printed faux leather top. The new Harmon Karden receiver with built-in Airplay is fantastic for running around in the office.


DSC_3719 by Team Seacats, on Flickr


upstairs kitchenette and bathroom:

DSC_3732 by Team Seacats, on Flickr


DSC_3730 by Team Seacats, on Flickr


DSC_3728 by Team Seacats, on Flickr


DSC_3725 by Team Seacats, on Flickr
 
Last edited:
OP
J

JakeKohl

Well-known member
Joined
Feb 23, 2012
Messages
1,365
Location
Greenville, SC
I'm knocking off a few little tasks in the garage - but have been doing some sailing and a good bit of actual work lately. I pre-wired for my speakers downstairs during framing and had intended to put some old cabinet style speakers I already owned on some shelves on the far wall of the downstairs garage. I was getting close to installing the speaker terminal plates when a friend of mine, who owed me a little money, came across a good deal on some nice wall speakers and he bought me a pair - which was pretty cool. I got to hear his previously and was impressed with them. Because these are on an exterior wall, I had to remove some insulation and out of concern for insulation and the speaker vibration potentially shaking loose some of the blown in cellulose, I built a box out of foil backed foam insulation and, after slitting it in two so it would fit through the opening, installed that in the wall behind the speakers. The speakers have a slight grey tint to the frame and the grill - I'm quite happy with the look.


Untitled by Team Seacats, on Flickr


Untitled by Team Seacats, on Flickr


Untitled by Team Seacats, on Flickr


Untitled by Team Seacats, on Flickr

I've also been researching work tables and plan on building several this weekend. The design is neat - lightweight, mobile, but sturdy. My shop table will have a torsion box top so it stays super flat with little chance of warping over time. I'll have some more detail on that next week. Then I'll need to really dig my heals in and start to attack some of the smaller, motivation killing, tasks that are left because they're starting to weigh on me.
 
OP
J

JakeKohl

Well-known member
Joined
Feb 23, 2012
Messages
1,365
Location
Greenville, SC
About stinkin' time for an update....here's a torsion table for the garage (exceptionally flat, sturdy, table to build cabinets and anything else that needs a really strong flat surface). This table came out well...it's 4x6' and will have a leaf on the end to extend it to 8' if needed. The 4'x6' part is within 1/16" inch flat from any corner to any corner.

well...forum won't let youtube videos post....so...here's a link:


JoeyBones

New member
Joined
Aug 16, 2013
Messages
3
Location
Greer, SC
Holy ****! I think I saw your house for sale. I recently purchased a house, and if I had seen ANY of the interior of that place I would have begged to buy that place! Incredible!
 
To avoid these ads, REGISTER NOW!

jesse72

Well-known member
Joined
Sep 26, 2011
Messages
352
Location
California
I hadn't seen this build before but it looks great and you have a well planned out garage and office! Good work man
 
OP
J

JakeKohl

Well-known member
Joined
Feb 23, 2012
Messages
1,365
Location
Greenville, SC
I need to post more often in this thread...finally got back to working on my workbench (I think I meant to make a post about that as well but never did?). Anyway, the workbench has a torsion top and has a pneumatic lift system. It's been in a raw state with no doors or drawers on it for a while. A couple of snow days gave me the time to put some cabinet doors together.

the doors have the first coat of poly drying on them now and should hopefully be finished up this weekend.


Last edited:

Woodman11

Member
Joined
Nov 26, 2013
Messages
14
Location
Eastern SC
Awesome looking place Jake!!!
Hopefully y'all made it through the weather with no problems.
Is the place that you got the table saw still open?
 

KCarGuy

Well-known member
Joined
Feb 5, 2009
Messages
2,075
Location
50 miles outside Chicago, illinois
I Love going through your Build-up.
Your Office area is Great, along with the Entire Garage.
I was looking to build my own Fence-Gate for my place and It looks like I will be ripping off your Design....Sorry and Thank You!
My Kids lived in Cleveland Tenn., and then Outside Atlanta (Woodstock), before coming back home after finishing school...They Loved that area of the country.
My Son is always Running out to South Carolina to hang with an Old High School Buddy.
(free Flights through Delta).
Thanks For Sharing!
 
OP
J

JakeKohl

Well-known member
Joined
Feb 23, 2012
Messages
1,365
Location
Greenville, SC
Awesome looking place Jake!!!
Hopefully y'all made it through the weather with no problems.
Is the place that you got the table saw still open?

Yeah, no problems this time. We managed to avoid the wet stuff that sticks to the trees and just got dry snow and solid sleet.

I don't think they have any tools left (that was a while ago) - but it was the manager of a major woodworking store in town that was selling the stuff and renting a corner of a warehouse from someone else. I'm not sure how much of a conflict of interest that was for him - but he is a nice guy. I see him in the store from time to time. Next time I see the door open to that warehouse, I'll turn in and see if there is anything of interest still in there.
 
OP
J

JakeKohl

Well-known member
Joined
Feb 23, 2012
Messages
1,365
Location
Greenville, SC
I'm pretty pleased at how these cabinet doors turned out. This is my first attempt at ever making a door with a matched router bit set. The hinges are Blum with soft close (figured I might as well learn how to set those up). I learned a good bit making these...things like, build the door a little taller than it's final dimension so you can trim up the ends in the table saw and get the joined ends perfectly flush after glue-up. Large grain panels have a visual "up" and "down". By my eye, three of these doors have the center panel with the grain looking upside down. Lastly, I need more of the large Jorgensen clamps. Some of the smaller cheaper clamps I have left indentations in the sides of the panels. I'll post some more about this workbench in a bit....and drawers are the next project which I'll start in a few months.


Last edited:
OP
J

JakeKohl

Well-known member
Joined
Feb 23, 2012
Messages
1,365
Location
Greenville, SC
Stepping back in time, here's a little about how this workbench was constructed. It is intended to be a main part of my workshop for woodworking or other projects but, like all the other major items in my shop, it HAS to be mobile to accommodate the various things I like to do. The top was built using MDF in interlocking pieces to make a 7" thick torsion top. Basically, sandwiched between an upper and bottom sheet are interlocking pieces that form a ton of 6" box structures. These make the top very stiff and stable. I built it while frequently referencing a laser level and the top is exceptionally flat. I'm estimating it's within at least 1/16" from corner to opposite corner. Hopefully it will stay that way. Here's a short time lapse of building some of the top:

Jake's time lapse torsion top

The base itself is a fairly standard frameless cabinet construction - although I went a little overboard with the dados. My ceiling mounted hoist was critical to being able to glue and screw this together myself. I'll do another post about the wheel system later this afternoon.


Last edited:
OP
J

JakeKohl

Well-known member
Joined
Feb 23, 2012
Messages
1,365
Location
Greenville, SC
I Love going through your Build-up.
Your Office area is Great, along with the Entire Garage.
I was looking to build my own Fence-Gate for my place and It looks like I will be ripping off your Design....Sorry and Thank You!
My Kids lived in Cleveland Tenn., and then Outside Atlanta (Woodstock), before coming back home after finishing school...They Loved that area of the country.
My Son is always Running out to South Carolina to hang with an Old High School Buddy.
(free Flights through Delta).
Thanks For Sharing!

No problem! I would share plans with you if I had drawn any up. The gates have been up for a couple of years now and they're holding up terrifically. I haven't had to adjust or address anything. One day, I'll get around to installing the remote actuators I bought for them ;-).
 
OP
J

JakeKohl

Well-known member
Joined
Feb 23, 2012
Messages
1,365
Location
Greenville, SC
The wheel system is a little complicated. This table is going to be heavy once it's loaded down with drawers and tools. Heck, it's heavy just in it's framing. The top weighs nearly 200lbs alone and I'm figuring all loaded up, it's probably going to crest over 1,000lbs. I had some heavy duty urethane coated steel casters that I scarfed out of a scrap bin and started pencil sketching components around those on some scrap MDF. The motive power was to be compressed air since I have plenty of access to it around the shop. Crunching some rough numbers at 80 psi lead me toward some 25mm cylinders that should be capable of pushing 250lbs each. I mounted these so they have a mechanical advantage of roughly 2:1 so all four combined at 80psi should be able to lift 2,000 lbs. I then started sketching and fabricating the rest of the pieces parts. The hinges are run of the mill door hinges (the heaviest I could find at a box store) and I welded up the loops and tacked the pins to close them up and give them some additional strength. I bought the aluminum and steel from metalsonline and though I had to take the steel to work to shear it and bend it, I used wood working tools in my shop to machine the aluminum (slowly and carefully). The main brackets that mount the air cylinder have a stop plate welded in the bottom to act as a stop for the air cylinder and the hinge plate. This way the wood structure only needs to carry the weight of the cabinet and not the full brunt of the air cylinder. The full load of the air cylinder is supported between that stop plate and the shoulder bolt that acts as a pivot.

Other components (valves, adjustable feet, shoulder bolts, vinyl tubing, etc.) came from Mcmaster.com. I found two one gallon tanks on Ebay for about $28 each and installed these coupled with a three way mechanical toggle valve and a tire fill nozzle to build a system where I could charge the tanks by hitting them with an air chuck and flip a switch to let the air pressurize the cylinders. Flipping the switch back closes off the tanks and bleeds the pneumatic cylinders to the air. I also installed a tiny oriface fitting behind the valve switch to slow down the motion of the air cylinders so they don't move too quickly. It takes about 4 seconds to lift or lower the table once you actuate the switch...which kinda makes it look like it's "alive".

My only regret is not using an oak veneer plywood now that the other parts are being trimmed out...the pine looks really yellow.


sean Buick 76

Well-known member
Joined
May 7, 2013
Messages
3,221
Location
Edmonton Alberta
that's a great question - I see gates made the other way all the time and I never realized that it's because the thought is that the bracing might tie in the load to the bottom of the post. This is actually a flawed concept. First, my background - I'm a mechanical engineer by degree, an electrical engineer trade, and now in sales.

Nothing in this system (other than the hinges, obviously) is designed to move...the box frame of the gate is intended to not rack and the post is steady. You have two stationary systems connected at the hinge points. With the post holding the gate in any normal position, regardless of what the bracing in the gate looks like, the gate weighs the same and is extended out the same distance from the post. Because of this simple fact, the vertical endpost has to support the total weight of the cantilevered gate at the two same hinge points and nothing you change with respect to the angle of the bracing inside that box frame will change the loading on these points or the load / angle /moment / leverage loading that the post has to carry. The bracing can be from bottom to top, or top to bottom - but the post will see no difference as long as the gate remains the same weight and doesn't droop to the ground. So, in short, the gate weighs what the gate weighs and the post has to hold it up.

With this in mind, the only consideration for the design of that bracing inside the box frame of the gate should pertain to the stresses inside the box frame of the gate itself. Steel and wood structural members can support higher loads with less dimensional distortion when the member is in tension instead of compression. The cross brace in the gate carries the highest amount of load and is the critical member. With this cross brace inside the gate box frame angled from top at the post to the bottom of the extreme edge of the gate, it places this member with all of it's loading in tension where it can support much more weight. With it in the opposite direction, it is in compression and more susceptible to buckling or bending.

In summary, having the cross brace running for the top of the gate frame at the post to the bottom of the extended end of the gate is a stronger, more structurally sound, design.

Great thread, you are doing a really good job on this build! :beer:

I agree, especially about the "tension vs compression" statement... :thumbup:
 
OP
J

JakeKohl

Well-known member
Joined
Feb 23, 2012
Messages
1,365
Location
Greenville, SC
Did you ever get your garage floor tile installed?

No, no tile installed yet. I've started seeing a surprising amount of movement in the slabs where the relief joints were cut. 3/16" height shift in a spot or two. This has me really concerned about putting in the tile. The two pallets of it are in there and eating up plenty of space, though!

There's no steel in the slab and while I considered questioning that, it was really too late by the time I noticed it and I had pretty good faith in the guys that were doing to floor so I let it go. Added to which, I didn't think to specify having steel in the slab so it would have been a complete do-over and with a concrete truck idling in the driveway it would have been pricey. That was probably a mistake.

I'm rethinking the tile and thinking about trying to sell it and just going with an epoxy floor. At least epoxy won't look any worse than the slab if it starts to come apart and I won't have quite so much invested in the floor if it has to come out and be redone (heaven forbid).
 
Last edited:
OP
J

JakeKohl

Well-known member
Joined
Feb 23, 2012
Messages
1,365
Location
Greenville, SC
I guess it's probably time for an update! My second work (the graphics shop) has been going gangbusters and spare time has been a little hard to come by. What spare time I do have has been spent repairing a major structural issue on one of my racing sailboats.

This boat usually stays in the water in a slip and I've owned it for a little over a year. I brought it home to spend a couple of weeks freshening it up with some new bottom paint and changing around some of the rigging. I found a gigantic spot of rotted hull core (it's balsa) and it had to be fixed.


Oh God. by Jake Kohl, on Flickr

The repair is structurally sound and water tight...I just need to get back to the fairing and water barrier coats and so forth.


20140525_180047 by Green Room Graphics, on Flickr

I did manage to spend some time in the shop working on some improvements this weekend. I'm working on some quarter boards for a friends newly acquired Chris Craft motor yacht and in the process I bought some plywood to build drawers for my mobile worktable. I got frustrated with the thought of piling that plywood ontop of the sheet materials I have leaning up against a wall, so I set out to build a cart to put all of those materials on. It will also help me keep some of the scrap wood stuffs tidy and accessible too. I've been collecting some scraps from projects of exotic woods and I just can't bring myself to throw away stuff like 3" x 7' x 3/4" mahogany stock. It would be nice to have it somewhere safe and accessible.

I'm mostly copying a design I found on the interweb here.
115420.jpg


The base is done and now, after making a poor-man's track saw, I'm ready to start piecing together the structure.


20140824_161323 by Jake Kohl, on Flickr


20140824_160444 by Jake Kohl, on Flickr
 
Last edited:
To avoid these ads, REGISTER NOW!
Top Bottom