
You are using an out of date browser. It may not display this or other websites correctly.
You should upgrade or use an alternative browser.
You should upgrade or use an alternative browser.
Need help identifying subpanel
- Thread starter rocco24
- Start date

Thanks for your valuable advice. I forgot to mention that my main panel is Challenger. Anything different Nema 3R I should watch out for?Im glad you realize it's wired wrong.
Spend your $ on a new NEMA 3R panel and scrap the one you have.
wyliesdiesels
Well-known member
Yikes
Does the feeder run underground?
Does the cover have a label?
I agree with above. Ditch this panel and get a new one.
Where is the main in relation to this panel? Same building?
Does the feeder run underground?
Does the cover have a label?
I agree with above. Ditch this panel and get a new one.
Where is the main in relation to this panel? Same building?
I saw the Challenger cb in this sub panel and assumed it was a Challenger also but spared you from that discussion. (Google Challenger Electrical Panels)Thanks for your valuable advice. I forgot to mention that my main panel is Challenger. Anything different Nema 3R I should watch out for?
NEMA 3R is an enclosure rating typically used for outdoor locations. Probably all manufacturers offer this enclosure rating. The enclosure rating typically found inside a home would be NEMA 1.
I suggest you look into more cb space for the exterior panel....16, 20, 24 circuits. Not much difference in cost when considering # cb spaces. Depends on future needs. No body ever complained about too many.
A 120/240VAC, single phase 100A panel in NEMA 3R enclosure is common. You may find it cheaper to buy one with a main cb instead of main lugs. Look into Siemens, Square D, Cutler Hammer brands.
If this panel is in/attached to the same building as the main panel, then a main cb is not needed (sparing you all the code minutia.)
Your next concern is checking out the main panel......Challenger panels had a special feature.....cb's and the buss lug connections weakened over time causing poor connections leading to heat, arcing,
 , etc. At least get that inspected by a sparky and consider changing that out before any trouble starts.
Thank you so much very helpful information. Subpanel is attached to the same wall outside not too far behind main panel (150 amp) inside the garage. I included a picture.I saw the Challenger cb in this sub panel and assumed it was a Challenger also but spared you from that discussion. (Google Challenger Electrical Panels)
NEMA 3R is an enclosure rating typically used for outdoor locations. Probably all manufacturers offer this enclosure rating. The enclosure rating typically found inside a home would be NEMA 1.
I suggest you look into more cb space for the exterior panel....16, 20, 24 circuits. Not much difference in cost when considering # cb spaces. Depends on future needs. No body ever complained about too many.
A 120/240VAC, single phase 100A panel in NEMA 3R enclosure is common. You may find it cheaper to buy one with a main cb instead of main lugs. Look into Siemens, Square D, Cutler Hammer brands.
If this panel is in/attached to the same building as the main panel, then a main cb is not needed (sparing you all the code minutia.)
Your next concern is checking out the main panel......Challenger panels had a special feature.....cb's and the buss lug connections weakened over time causing poor connections leading to heat, arcing,
 However subpanel is serving the shed and pool equipment plus ac compressor. I want to use square d but not sure with compatibility with Challenger? Here's what I have been looking at SQ d. It's 125 amp my mp is 150 is that a concern?
Eventually I will be changing the mp too but it's going to be a while before I can do that. Thanks again for your contribution.
Last edited:
You need to run a 4-wire feed from main panel to sub panel. Panel mfr's doesnt matter for either.
SQ D is fine for either or both.
Subpanel ampacity rating has no impact on main panel. It's the load that matters.
The cb in the main panel protects the cable feeding sub panel. That cb cant be greater than the lower of cable ampacity or subpanel (assumong main lug panel).
SQ D is fine for either or both.
Subpanel ampacity rating has no impact on main panel. It's the load that matters.
The cb in the main panel protects the cable feeding sub panel. That cb cant be greater than the lower of cable ampacity or subpanel (assumong main lug panel).
Got it thank you so much. I will probably reach out as I am doing it never know what am I going to run into. Hopefully it will be a smooth implementation.You need to run a 4-wire feed from main panel to sub panel. Panel mfr's doesnt matter for either.
SQ D is fine for either or both.
Subpanel ampacity rating has no impact on main panel. It's the load that matters.
The cb in the main panel protects the cable feeding sub panel. That cb cant be greater than the lower of cable ampacity or subpanel (assumong main lug panel).
rhodessam1990
Member
found this reference at Oregon breakers:
Challenger became part of Westinghouse in 1987 and eventually part of Eaton, when Eaton purchased Westinghouse in 1993. The Challenger brand was dropped in 2005, however many Eaton labeled products can be use in Challenger panels.
You have westinghouse and challenger breakers in this box and a 1961 date. I would say it is a Westinghouse. I would like to recommend that you change the entire thing out to Square D load center with more spaces in it. I worked for two electricians in the past and they both put Square D in their homes, as have I. I just recently upgraded one of my load centers in my shop.
If not go get an Eaton part from Lowes.
sparky 1971
Well-known member
When the old feeder comes out, chip out some of the brick and mortar so that a terminal adapter can be mounted to the panel and fit back in to the hole. I've been known to hack a few things occasionally, but even I can't stand a cable not being sleeved into a box. Adapters are cheap and I doubt the hole is large enough for the new four wire feeder as well as the 12/2 that is there now anyway.
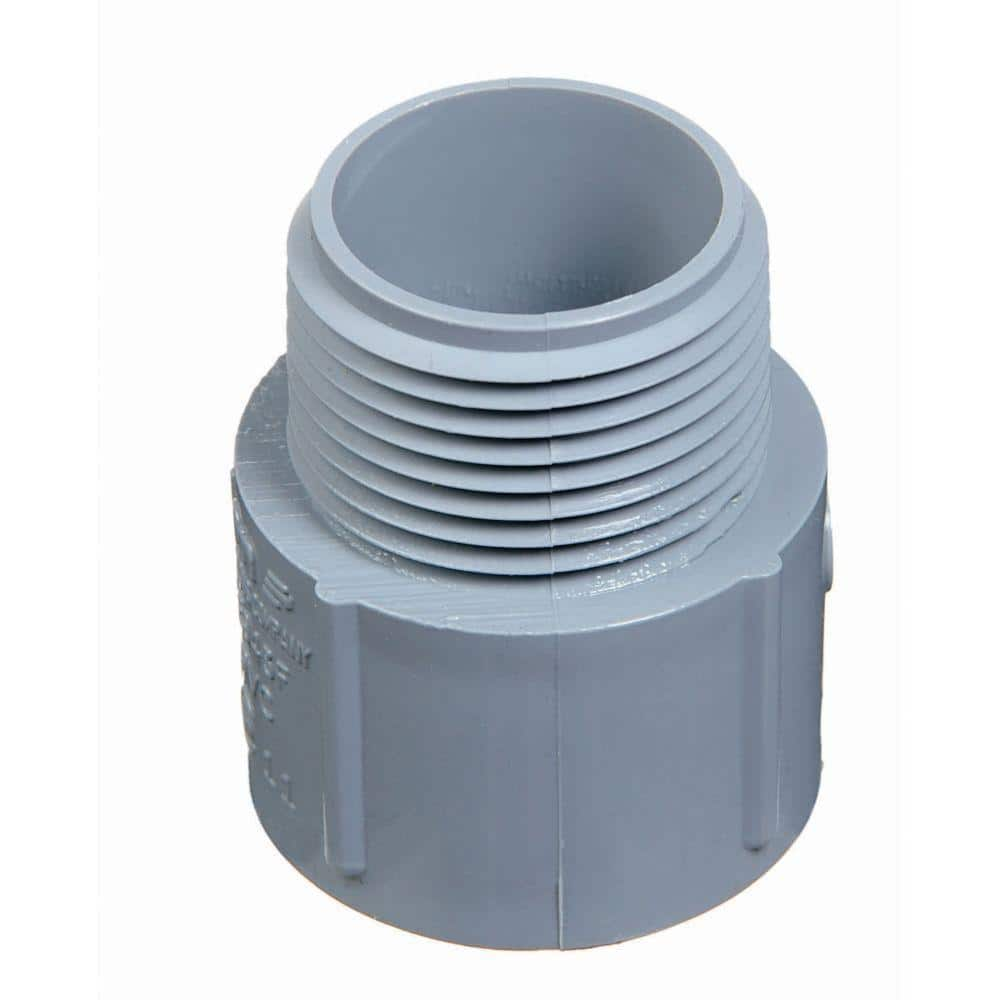
Carlon 1 in. PVC Male Adapter E943FR-CTN - The Home Depot
The 1 in. Non-Metallic Terminal Adapter is designed for use with Schedule. 40 and Schedule. 80 RIGID non-metallic conduit (RNC). It features male threads at 1 end and a socket end at the other and the
www.homedepot.com
If the breaker is changed in the main panel, Eaton BR is the listed breaker for Challenger, Square D is not permitted in any panel other then SQ D, Eaton CL is UL classified for competitive makes of panels but will cost more then the listed Eaton BR.
That Blue ENT "Smurf Tube" should be replaced, not proper for where it was used and will probably shatter if touched.
That Blue ENT "Smurf Tube" should be replaced, not proper for where it was used and will probably shatter if touched.
rhodessam1990
Member
Totally agree with sparky on the cable connector on the new panel. I looked at your Sq D choice of Homeline 125 amp 12 space panel. It would do the job but see if you can find one with more spaces in it like https://www.homedepot.com/p/Square-...9RymX6QnW1Fc58AvBqEaAmuoEALw_wcB&gclsrc=aw.ds
You just never know when you are going to want more space. Most likely when you change out your main panel you will go with a 200 amp and that will help too. 20 years ago I moved my shop out of my garage into a new 30 x 40 metal building. I put a Square D QO 125 amp - 12 space load center. Then 4 years later I added a second load center that had 12 spaces (an old one salvaged from a job). Last week I changed that one out with a 24 space panel. As I added and updated equipment I started using up space going from 120 to 240 vac. My load didn't go up much but the space needed did. Just an fyi. You can have a load center that is a different make than your main you just can't swap brands of breakers in a panel.
You just never know when you are going to want more space. Most likely when you change out your main panel you will go with a 200 amp and that will help too. 20 years ago I moved my shop out of my garage into a new 30 x 40 metal building. I put a Square D QO 125 amp - 12 space load center. Then 4 years later I added a second load center that had 12 spaces (an old one salvaged from a job). Last week I changed that one out with a 24 space panel. As I added and updated equipment I started using up space going from 120 to 240 vac. My load didn't go up much but the space needed did. Just an fyi. You can have a load center that is a different make than your main you just can't swap brands of breakers in a panel.
Last edited:
sparky 1971
Well-known member
If the wire size is #8, it is only good for 40 amps. #6 is required for 50 (when it's Romex). Honestly, the size doesn't matter, it's the wrong cable type no matter the size of the wire. They may have only needed 40, and maybe the 40/30 quad breaker was the only thing available. Personally, I have never seen a quad breaker in the wild, only pictures. I've never needed one, but there have been times I could have used one.Thank you all for all the pro tips. I have included a picture of the main panel for all of you to review if I am on the right track. I'm not sure why previous owner was using only 40 amps even though wires can support up to 50 amps.
~4.jpeg")
What breaker size do you recommend upgrading to since I am going to be changing the wires anyways?If the wire size is #8, it is only good for 40 amps. #6 is required for 50 (when it's Romex). Honestly, the size doesn't matter, it's the wrong cable type no matter the size of the wire. They may have only needed 40, and maybe the 40/30 quad breaker was the only thing available. Personally, I have never seen a quad breaker in the wild, only pictures. I've never needed one, but there have been times I could have used one.
sparky 1971
Well-known member
It depends on the route to get from panel to panel, but based on the what I see in the pictures, I would run a 6/3 with ground Romex and use a 50 amp breaker. The AHJ's I deal with don't care if a 60 gets thrown in because it's good for 55 amps and there is no such breaker size.What breaker size do you recommend upgrading to since I am going to be changing the wires anyways?
EDIT. I forgot the inside panel is a Challenger. Run the 6/3 but keep the 40 amp breaker. When the inside panel gets replaced (it will happen) put in the larger breaker. You may be able to source an Eaton quad, but I don't think it's worth it.
Last edited:
Another question maybe not related to the subpanel but where's the link between the neutral and ground bars in the mp? Also I don't see a bonding jumper (green screw). Am I missing something or because this panel is so old it has a different mechanism?It depends on the route to get from panel to panel, but based on the what I see in the pictures, I would run a 6/3 with ground Romex and use a 50 amp breaker. The AHJ's I deal with don't care if a 60 gets thrown in because it's good for 55 amps and there is no such breaker size.
sparky 1971
Well-known member
I can't see it, but there may be a strap that connects to the can and neutral bar. There may be a screw that isn't green. Do a continuity test between the neutral bar and some exposed metal of the panel. I usually use a screw hole.Another question maybe not related to the subpanel but where's the link between the neutral and ground bars in the mp? Also I don't see a bonding jumper (green screw). Am I missing something or because this panel is so old it has a different mechanism?
rhodessam1990
Member
From the one picture outside it looks like your main and your load center share the same wall inside and outside. I would run a conduit out the back of the main and down the wall to the new load center. Remember future use capabilities and run a bigger conduit.It depends on the route to get from panel to panel, but based on the what I see in the pictures, I would run a 6/3 with ground Romex and use a 50 amp breaker. The AHJ's I deal with don't care if a 60 gets thrown in because it's good for 55 amps and there is no such breaker size.
EDIT. I forgot the inside panel is a Challenger. Run the 6/3 but keep the 40 amp breaker. When the inside panel gets replaced (it will happen) put in the larger breaker. You may be able to source an Eaton quad, but I don't think it's worth it.
sparky 1971
Well-known member
Easier said than done when getting out of the main panel and through the brick. The hole through the wall has to be larger than the knockout to allow the adapter/connector to fit through. It will also have to cross the service entrance conduit or meter socket so the conduit will have to go up and over it, it's probably too close for a saddle. Then the fence has to dealt with. Easiest is going to be to cut out some drywall and run it through the studs then through a hole through the wall that doesn't have to be perfect. Patch the drywall and be done with it.From the one picture outside it looks like your main and your load center share the same wall inside and outside. I would run a conduit out the back of the main and down the wall to the new load center. Remember future use capabilities and run a bigger conduit.
And you quoted the wrong post, it's not my project.
rhodessam1990
Member
Didn't mean to quote you, sorry.
Op gets the info still. Conduit through brick is not hard for some installers.
Op gets the info still. Conduit through brick is not hard for some installers.
sparky 1971
Well-known member
True that conduit through brick isn't hard, but lining up with an existing knockout can be tough for anyone. After the battle to get the proper knockout hole opened up bass ackwards from the direction it was designed to get punched, all it will take is the pilot hole just a little crooked or not quite centered in the hole, or it winding up on a mortar joint or two and having to go through two or three partial bricks and the whole project just took a turn for the worse. I've been there and done all of those. The OP didn't even know what kind of panel he has, which in my mind makes his install experience a 0. I doubt he has a bender and by the time he buys that, an LB, rain tight fittings, 20' pieces of black, red, and white #6 and a #10 ground, and enough EMT to do the job as well as make a ton of rookie mistakes. Then there is the issue of how to drill the hole. If he doesn't have an SDS, he's going to have to buy or rent and get a big enough bit for the connector to fit. He could probably rip all the drywall off the garage wall, run the cable, and have everything patched up in less time than the exterior conduit and be money ahead.Didn't mean to quote you, sorry.
Op gets the info still. Conduit through brick is not hard for some installers.
rhodessam1990
Member
I wasn't trying to argue with you sparky. I assumed he was getting a professional to do this as he should. He asked for opinions on the best way and I offered my experience and what I thought the best way was. The wire is better protected in metal conduit. And most people abhor sheet rock repair and drilling large holes in old studs sideways. Let him decide what he wants to do.
The panel looks to be a Westinghouse era Challenger, they kept the Challenger panels for both lines, & discontinued the breakers & had BR breakers listed for them, & the OP's breakers are the BR design, they continued to use those Zinsco main breakers until Eaton took over.It depends on the route to get from panel to panel, but based on the what I see in the pictures, I would run a 6/3 with ground Romex and use a 50 amp breaker. The AHJ's I deal with don't care if a 60 gets thrown in because it's good for 55 amps and there is no such breaker size.
EDIT. I forgot the inside panel is a Challenger. Run the 6/3 but keep the 40 amp breaker. When the inside panel gets replaced (it will happen) put in the larger breaker. You may be able to source an Eaton quad, but I don't think it's worth it.
You are absolutely right I don't have that much experience neither the tools. I am looking for a simple way yet safe to get this done. Definitely not willing to mess with bricks and concrete, LB etc.True that conduit through brick isn't hard, but lining up with an existing knockout can be tough for anyone. After the battle to get the proper knockout hole opened up bass ackwards from the direction it was designed to get punched, all it will take is the pilot hole just a little crooked or not quite centered in the hole, or it winding up on a mortar joint or two and having to go through two or three partial bricks and the whole project just took a turn for the worse. I've been there and done all of those. The OP didn't even know what kind of panel he has, which in my mind makes his install experience a 0. I doubt he has a bender and by the time he buys that, an LB, rain tight fittings, 20' pieces of black, red, and white #6 and a #10 ground, and enough EMT to do the job as well as make a ton of rookie mistakes. Then there is the issue of how to drill the hole. If he doesn't have an SDS, he's going to have to buy or rent and get a big enough bit for the connector to fit. He could probably rip all the drywall off the garage wall, run the cable, and have everything patched up in less time than the exterior conduit and be money ahead.
@ rhodessam1990 I appreciate your input I would surely consider your advice if I was having this installed by a pro.
Last edited:
I am back with more questions I feel this is the best place to ask so forgive me if I am mixing things out.
While I was looking at the inspection report I noticed some overheating breakers or wires.
Is anyone able to tell which ones from looking at the pictures? What are the complications of this situation?
I appreciate all your help and time.
BREAKER — OVERHEATING
GARAGE
One or more breakers and wires in the service panel showed signs of overheating with a thermal camera.
dave*99
Well-known member
It certainly does align with this discoloration:

That's one of them for sure. Do you happen to know if that's a breaker or bus issue?It certainly does align with this discoloration:
wyliesdiesels
Well-known member
Wow definitely getting hot in there.
that looks like it would be a buss issue since there is a connection point there between 2 metal pieces
also looks like the upper lug on the main breaker has a bad connection. any discoloration on that lug or terminal?
that looks like it would be a buss issue since there is a connection point there between 2 metal pieces
also looks like the upper lug on the main breaker has a bad connection. any discoloration on that lug or terminal?
Shut off the main and pop out cb's looking for burns, pitting and poor retention of the cbs. Take pics of both mating surfaces where issues appear.
If any insulation looks discolored/brown next to a terminal, it could be loose.
I'm thinking the discoloration you see is coming from the buss side of the bolted connection and not the main cb.


If any insulation looks discolored/brown next to a terminal, it could be loose.
I'm thinking the discoloration you see is coming from the buss side of the bolted connection and not the main cb.
Voilà I don't see any major burn or significant discoloration looks normal to m.Shut off the main and pop out cb's looking for burns, pitting and poor retention of the cbs. Take pics of both mating surfaces where issues appear.
If any insulation looks discolored/brown next to a terminal, it could be loose.
I'm thinking the discoloration you see is coming from the buss side of the bolted connection and not the main cb.


The thermal images are not necessarily telling you the exact temps due to many factors. However, looking at the temp range scales in each pic, for 60/75C (140-167F) conductors/hardware, the conductors seem fine. But the 206F pinpoint should be looked into further.
The top 2 adjacent quad cb's are sharing the same 2 buss stabs. It would be good to move the right quad down two slots so it is opposite 2 random lightly loaded circuits. This could lower the stab temps as 2 opposite 240v circuits seem to be heavy draw in present position.
As for the 206F pinpoint, I can't tell exactly which is the hot spot.....is it emanating from the main cb or the screw connection below it into the cb and buss? Start with checking the screw connection with power off. Don't over-torque it, just make sure it is tight so both surfaces are in full contact.
The good news is, I don't see focused hot spots on the wires connected to the cb's and then starting to cool down at further distances from the cb. Any circuit under load will show heat and the temp profile should be reasonably consistent along its length. The main conductors in the bottom image are a good example.
FYI - Amp readings are always good to take to help relate the image temp to the load. Having that info helps to better understand the thermal images. Images taken under light/no load are somewhat useless.
A contact thermometer could be a good calibration check, but that could also be too dangerous in the wrong locations/wrong person. (It would not be used the touch energized parts.)
Heat rises and the 2 uppermost quad cb's could be contributing to the 206F hot zone. Move one and try to re-image under the same conditions. Need to see if that 206 pinpoint is just noise or signs of future trouble.
Also lining up the thermal images next to a pic of the same hardware is a good practice.
rhodessam1990
Member
Really good points MM08822. Moving tandems around helps. I think your overall electrical problem is that you need to to upgrade/replace both of your panels. You need more load capability. You have quite a few tandem breakers. The American home has changed a lot over the last 30 years. We love our appliances and more, more , more electrical stuff. Design loads from 40 years ago are drastically different from current design specs. Be safe and find a couple of electricians who you can get estimates on this project. Most home fires start in the kitchen, the next place is electrical...
I had a sparky looking at the panel/subpanel he said that the existing feed wires are 4awg and I can replace the quad breaker with double pole 60 amps to feed the subpanel and double pole 30 for the topstove. He also mentioned adding an extra single 4awg wire for the neutral. Does that sound code compliant?It depends on the route to get from panel to panel, but based on the what I see in the pictures, I would run a 6/3 with ground Romex and use a 50 amp breaker. The AHJ's I deal with don't care if a 60 gets thrown in because it's good for 55 amps and there is no such breaker size.
EDIT. I forgot the inside panel is a Challenger. Run the 6/3 but keep the 40 amp breaker. When the inside panel gets replaced (it will happen) put in the larger breaker. You may be able to source an Eaton quad, but I don't think it's worth it.
sparky 1971
Well-known member
I don't remember ever seeing a 4/2 or 4/3 romex, but I've lived a sheltered life. It looks to me like the old #6 that had the TW insulation on it, and it could very well be. He's right that you can put a #4 on a 60, but he's wrong about adding an individual wire in addition to the romex for a neutral and if he told you that, get that and everything else he told you out of your head. Everything needs to be contained in the cable assembly or conduit. Even if you could, in order to get there, you would have to run it through the same pathway as you would a new cable. Since it's not far, just run a new cable and get it over with correctly. My vote is for a 6/3 romex.I had a sparky looking at the panel/subpanel he said that the existing feed wires are 4awg and I can replace the quad breaker with double pole 60 amps to feed the subpanel and double pole 30 for the topstove. He also mentioned adding an extra single 4awg wire for the neutral. Does that sound code compliant?
Last edited:
Thanks a lot for confirming. That was my understanding per code all wires need to be contained.I don't remember ever seeing a 4/2 or 4/3 romex, but I've lived a sheltered life. It looks to me like the old #6 that had the TW insulation on it, and it could very well be. He's right that you can put a #4 on a 60, but he's wrong about adding an individual wire in addition to the romex for a neutral and if he told you that, get that and everything else he told you out of your head. Everything needs to be contained in the cable assembly or conduit. Even if you could, in order to get there, you would have to run it through the same pathway as you would a new cable. Since it's not far, just run a new cable and get it over with correctly. My vote is for a 6/3 romex.
Got this
Is this a 4/3 Romex? or am I missing something? 4/3 Romex
Last edited: