To avoid these ads, REGISTER NOW!

Above 1200 Sq/FT New Garage/Barn Build

Wokspaces above 1200 squarefeet.
To avoid these ads, REGISTER NOW!
OP
S

Samh

Well-known member
Joined
Aug 16, 2006
Messages
482
Location
Canton GA
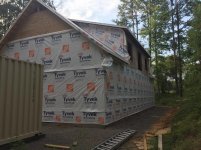
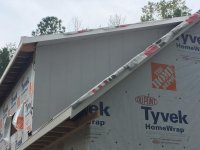
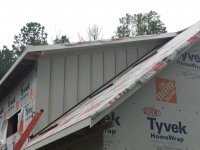
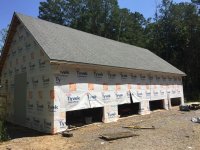
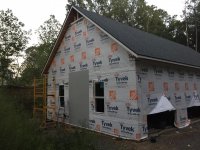
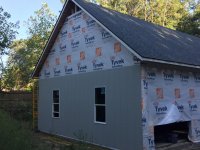
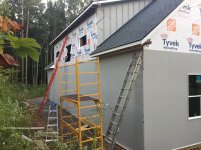
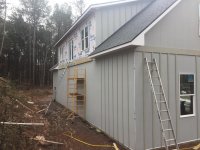
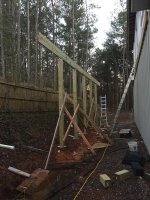
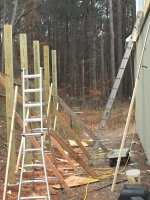
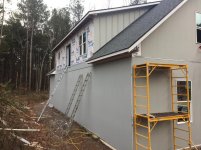
More house wrap done. Not looking forward to taping the seams. And doing those gable ends alone isn't much fun.
 

Attachments

  • 135.jpg
    135.jpg
    154.2 KB · Views: 187
  • 136.jpg
    136.jpg
    156.7 KB · Views: 159
  • 137.jpg
    137.jpg
    154 KB · Views: 151

ANGRYBEARD

Member
Joined
Jul 31, 2019
Messages
22
Location
Texas
I'm in the process of having a shop built right now. It's really cool to see what others are doing. I've de ided to make a video chronicling my journey. Need to figure out where to post a link on here.
 
OP
S

Samh

Well-known member
Joined
Aug 16, 2006
Messages
482
Location
Canton GA
I'm in the process of having a shop built right now. It's really cool to see what others are doing. I've de ided to make a video chronicling my journey. Need to figure out where to post a link on here.

I had originally thought about doing a time lapse, but it seemed like it might be a pain. Kind of wish I had now though.

Should be able to start e new thread in the Garage Gallery of your build. And good luck.
 
OP
S

Samh

Well-known member
Joined
Aug 16, 2006
Messages
482
Location
Canton GA
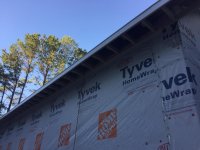
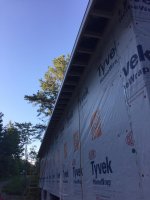
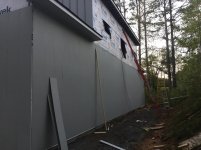
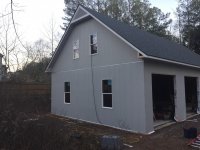
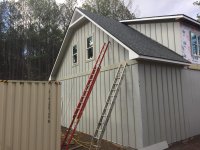
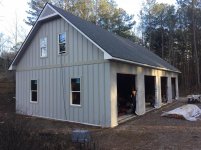
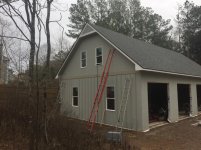
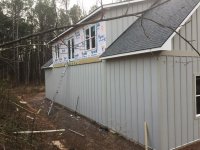
Tyvek is pretty much done. Need to clean up a corner on the shed dormer and cut out the windows and doors. Was going to wait to do the windows and doors until I get the doors and the flashing for them.

Picked up the siding on Friday. Plan is to use 16" wide solid hardie soffit run vertically with 1x3 hardie boards for battens. Plan is to try to get the soffits and siding done on the shed dormer side wall, so the roofing company can shingle it. I will say, picking up the siding was an experience. I miscalculated on the weight, figured they weighed around 20lbs a piece. Ended up weighing around 32lbs a piece. Had to put more air in the tires on the trailer to get them home.
 

Attachments

  • 138.jpg
    138.jpg
    157.5 KB · Views: 105
  • 139.jpg
    139.jpg
    156.4 KB · Views: 95
  • 140.jpg
    140.jpg
    152.4 KB · Views: 90
  • 141.jpg
    141.jpg
    155.9 KB · Views: 94
OP
S

Samh

Well-known member
Joined
Aug 16, 2006
Messages
482
Location
Canton GA
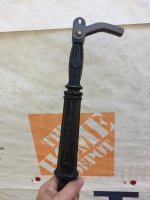
Thought I would take a moment to talk about/mention two tools that have been awesome for the build. One of which, I wish I had since the beginning, as it would have made things a lot easier.

First is the nail puller. This thing is awesome. Works similar to a slide hammer, where you open the jaws just outside the width of the nail head, slide the handle a few times like a slide hammer to drive the jaws into the wood, then just pull the nail out. this will pull out a flush nail, a nail below flush from an air nailer, a nail where the head broke off, and even pull a nail out backwards if that is the only part you can get to.

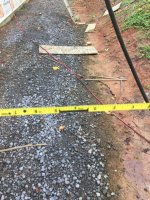
The second is a loggers tape. It is a 100ft self retractable steel tape, with 16"O.C markings clearly defined. This would have been awesome on the wall layout, since both walls were over the length of all my other tape measures, and would have helped prevent some of the cumulative error along the long walls/runs. It made lining up the rafters a snap when I was nailing the sheathing.
 

Attachments

  • 144.jpg
    144.jpg
    154.4 KB · Views: 145
  • 143.jpg
    143.jpg
    106.6 KB · Views: 114
  • 142.jpg
    142.jpg
    59.5 KB · Views: 110
OP
S

Samh

Well-known member
Joined
Aug 16, 2006
Messages
482
Location
Canton GA
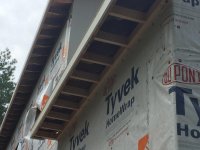
Working on getting all the TyVek edges taped. Have been putting up the soffit and siding on the shed dormer wall so the roof can get shingled. Also starting on framing on the overhangs so I can get the rest of the soffits put up. Was originally planning on using the hardi soffit with the pre-punched holes, but noticed it only provided about 5.5 sq/in of venting/linear foot, which doesn't seem like much at all.
 

Attachments

  • 145.jpg
    145.jpg
    113.1 KB · Views: 105
  • 146.jpg
    146.jpg
    149.7 KB · Views: 93
  • 147.jpg
    147.jpg
    101.1 KB · Views: 94
  • 148.jpg
    148.jpg
    117.1 KB · Views: 92
OP
S

Samh

Well-known member
Joined
Aug 16, 2006
Messages
482
Location
Canton GA
Got the batten strips up on the shed dormer wall, and the bird box framed out. Roofers want me to go ahead and paint that part before they start.
 

Attachments

  • 149.jpg
    149.jpg
    133.7 KB · Views: 102
  • 150.jpg
    150.jpg
    131.9 KB · Views: 91
OP
S

Samh

Well-known member
Joined
Aug 16, 2006
Messages
482
Location
Canton GA
Got the front soffits framed. Just need to to finish the bird boxes on the end, and/or decide if I want to do a brow. Plan is to do a bird box on the back, and decide if I like the way it looks. If I do, will do the same on the front, if not, I will probably do a brow.

Also need to figure out what I am going to use for vented soffit. Had originally planned to using hardi soffit, but those only allow 5sq/in of vent per lineal foot, which I don't think will be enough.
 

Attachments

  • 153.jpg
    153.jpg
    152.8 KB · Views: 71
  • 152.jpg
    152.jpg
    143 KB · Views: 71
  • 151.jpg
    151.jpg
    77.9 KB · Views: 71
OP
S

Samh

Well-known member
Joined
Aug 16, 2006
Messages
482
Location
Canton GA
Got the bird boxes done on the back side and started on the siding. That is when I realized, regardless of doing bird boxes on the front or a brow, the siding would be below it, so I can go ahead and do the first floor siding before making a decision.
 

Attachments

  • 154.jpg
    154.jpg
    157.4 KB · Views: 130
  • 155.jpg
    155.jpg
    154 KB · Views: 114

Motoman1100

Well-known member
Joined
Oct 2, 2014
Messages
443
Location
GA
Getting close! I'm sure it'll feel good to get that roof on. It'll also feel good to get some temps below 95 dang degrees!
 
OP
S

Samh

Well-known member
Joined
Aug 16, 2006
Messages
482
Location
Canton GA
Roof is done.
 

Attachments

  • 156.jpg
    156.jpg
    153 KB · Views: 124
  • 157.jpg
    157.jpg
    153.8 KB · Views: 104
OP
S

Samh

Well-known member
Joined
Aug 16, 2006
Messages
482
Location
Canton GA
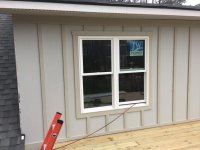
Got the two lower front windows in. Still need to finish the flashing at the top of them.
 

Attachments

  • 158.jpg
    158.jpg
    154.3 KB · Views: 80
OP
S

Samh

Well-known member
Joined
Aug 16, 2006
Messages
482
Location
Canton GA
Got the bottom row completed on the side. Plan is to do z-flashing about this course, and then run the next course, and do horizontal battens over that seam.

Going to start on the front and back. Thinking about breaking up where I have a large batten strip between each bay on the front, and then on the back, breaking it up by the shed dormer. Part of the reasoning for this is due to the 16" wide boards gaining 1/16" for every one. On the 32' it isn't as big of a deal. On the 60' it will be more of an issue.
 

Attachments

  • 159.jpg
    159.jpg
    153.7 KB · Views: 82
OP
S

Samh

Well-known member
Joined
Aug 16, 2006
Messages
482
Location
Canton GA
Got the back side first level done, and halfway through the front before I ran out of siding. Looks like I'll need another 75 pieces.
 

Attachments

  • 162.jpg
    162.jpg
    154.4 KB · Views: 92
  • 161.jpg
    161.jpg
    149.4 KB · Views: 88
  • 160.jpg
    160.jpg
    155 KB · Views: 100
OP
S

Samh

Well-known member
Joined
Aug 16, 2006
Messages
482
Location
Canton GA
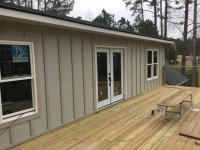
Some more progress. Has been slow going lately it feels like, since I have been having to work on a lot of small items. And SWMBO decided she wanted 2 windows on the back gable end.
 

Attachments

  • 163.jpg
    163.jpg
    152.2 KB · Views: 95
  • 164.jpg
    164.jpg
    153.4 KB · Views: 96
  • 165.jpg
    165.jpg
    149.6 KB · Views: 104
To avoid these ads, REGISTER NOW!
OP
S

Samh

Well-known member
Joined
Aug 16, 2006
Messages
482
Location
Canton GA
Looks great. Making some good progress!

Thanks. It is starting to come together. Hoping to get started on the deck this week so I can finish the siding on the shed dormer so I don't have to be going up and down ladders like I have been having to do.
 
OP
S

Samh

Well-known member
Joined
Aug 16, 2006
Messages
482
Location
Canton GA
Next tasks I am going to focus on is
  • trim/batten strips on the back and gable ends.
  • The deck, shed dormer eaves/soffit, siding and battens
  • Trench for power and install the meter base and main panel
  • Build and install the carriage doors
  • Install the batten strips on the front/garage door side. Waiting to do this, as I might need to replace the siding on the sides of each door depending on how I build the doors.

After that, it will be moving to the inside with insulation, wall covering, and electrical.
 

isonic

Well-known member
Joined
Aug 1, 2018
Messages
213
Location
Ham Lake, MN
Build looks great and nice job doing the work your self. Where did you get a shipping container from? Are you renting it or did you purchase one?
 
OP
S

Samh

Well-known member
Joined
Aug 16, 2006
Messages
482
Location
Canton GA
Build looks great and nice job doing the work your self. Where did you get a shipping container from? Are you renting it or did you purchase one?

I'd need to look up exactly where, but the company was based out of Michigan. I purchased, because I figured I could use it for material storage once the barn is done. And went with a 1-trip 20' high cube. One thing I seemed to notice when trying to buy, was while it seemed like there were a lot of sellers, it seemed like they all had access to the same inventory. Went through about 10 dealers before I was able to get one, and even then, I had to wait about a month and a half.
 
OP
S

Samh

Well-known member
Joined
Aug 16, 2006
Messages
482
Location
Canton GA
Some updates. Work has been slow. Doing the batten strips has taken longer than I anticipated.

When doing the batten strips on the top front, I had my phone in my pocket, and the health app tracked the number of flights of stairs I climbed...LOL
 

Attachments

  • IMG-2856.jpg
    IMG-2856.jpg
    150.7 KB · Views: 132
  • IMG-2854.jpg
    IMG-2854.jpg
    155.2 KB · Views: 135
  • IMG-2851.jpg
    IMG-2851.jpg
    153.5 KB · Views: 147
  • IMG-2845.jpg
    IMG-2845.jpg
    153.4 KB · Views: 163
  • IMG-2840.jpg
    IMG-2840.jpg
    150.4 KB · Views: 143
  • IMG-2839.jpg
    IMG-2839.jpg
    151.9 KB · Views: 155
  • IMG-2848.jpg
    IMG-2848.jpg
    48.4 KB · Views: 138
Last edited:

Motoman1100

Well-known member
Joined
Oct 2, 2014
Messages
443
Location
GA
I was just thinking about you yesterday, wondering how the project was going. It's looking great! Nice job.
 
OP
S

Samh

Well-known member
Joined
Aug 16, 2006
Messages
482
Location
Canton GA
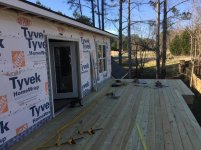
Got a little bit more done. Finished the trim on the gable ends, and the back lower portion. Waiting to do the trim on the front based on what I decide to do about doors. Current plan is to build some carriage doors out of 3 ply laminated 1x material. Also planning on digging the holes and setting posts for the deck on the rear. Wanted to get the deck at least to the point where I can use it to finish the soffits and siding on the shed dormer portion.
 

Attachments

  • IMG-2858.jpg
    IMG-2858.jpg
    154.8 KB · Views: 87
  • IMG-2857.jpg
    IMG-2857.jpg
    121.6 KB · Views: 80
OP
S

Samh

Well-known member
Joined
Aug 16, 2006
Messages
482
Location
Canton GA
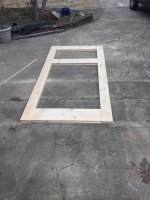
Working on laying out/building my carriage doors. Figured I'd buy material to build one to make sure this is doable. First attempt I had a 3ft tall window, and it seemed a little too big, so scaled it back down to 2ft.
 

Attachments

  • IMG-2877.jpg
    IMG-2877.jpg
    132.2 KB · Views: 58
  • IMG-2878.jpg
    IMG-2878.jpg
    120.9 KB · Views: 63
OP
S

Samh

Well-known member
Joined
Aug 16, 2006
Messages
482
Location
Canton GA
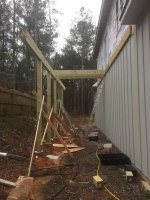
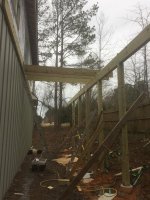
Been working on the porch and the doors. Took awhile waiting for decent weather to be able to pour the footers for the posts. Putting up the 6x6x12 posts and the tripled 2x12x12 beam was quite a chore to do by myself. One of the things that made it especially challenging was the slope where the posts are. There was no real good place to put a ladder.
 

Attachments

  • 7.jpg
    7.jpg
    156.4 KB · Views: 97
  • 6.jpg
    6.jpg
    155 KB · Views: 101
  • 5.jpg
    5.jpg
    101.2 KB · Views: 94
  • 4.jpg
    4.jpg
    132.1 KB · Views: 92
  • 3.jpg
    3.jpg
    127.7 KB · Views: 88
  • 2.jpg
    2.jpg
    146 KB · Views: 84
  • 1.jpg
    1.jpg
    122 KB · Views: 91
OP
S

Samh

Well-known member
Joined
Aug 16, 2006
Messages
482
Location
Canton GA
Also got some more work done on the carriage door. Plan was to try to build one and see how it turns out. If it works, will build the rest, otherwise will need to decide a different direction.
 

Attachments

  • IMG-2910.jpg
    IMG-2910.jpg
    147.1 KB · Views: 129
OP
S

Samh

Well-known member
Joined
Aug 16, 2006
Messages
482
Location
Canton GA
Got the trim finished on the shed dormer minus the corner boards. Ran out of material.
 

Attachments

  • 191.jpg
    191.jpg
    115.3 KB · Views: 93
  • 190.jpg
    190.jpg
    151.5 KB · Views: 111
OP
S

Samh

Well-known member
Joined
Aug 16, 2006
Messages
482
Location
Canton GA
Got the first set of doors put together and stood them up to see what it is going to look like. Still need to figure out what I am going to do about glass. Am also reconsidering the tongue groove boards on it. Looks like the gap I left for expansion was enough to have it separate at the groove.

The few options that I have thought of, would be
  • have a plywood insert on the inside portion of the door and screw the tongue and groove pieces to it
  • remove the tongue and groove, and fill the center section with plywood, and then do boards at a 45 degree angle on the front and back
  • Live with it.
 

Attachments

  • BarnDoor.jpg
    BarnDoor.jpg
    147.3 KB · Views: 196
OP
S

Samh

Well-known member
Joined
Aug 16, 2006
Messages
482
Location
Canton GA
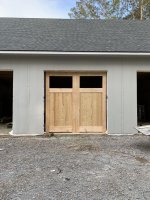
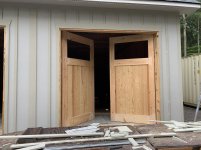
Been working on the doors. Finally got them squared away, glued and assembled. Will need to get them painted before I put them up, but I did put a set up to make sure my plan for hanging them worked. Decided to have them open inward. Given the depth of the garage, figured losing 5ft to open isn't a big deal. Besides, didn't want them opening outward in case there is a blizzard and keeps me from being able to open them.

Also got the siding/batten strips finished up on the front.

Next steps after painting and hanging the doors
trenching for power, installing the meter base
wiring the inside(after I decide where all my outlets, lights, and fixtures are going.
insulation and sheathing. Will probably going with rock wool and plywood. Actually considered cutting the plywood in 16in strips and running vertically, but probably won't so I can hurry up and get this thing done.

For power, I inquired about the feasability of getting 3 phase run to it. Cost would be $13K for the 1200 ft run. I keep trying to justify that cost as whatever CNC machine I get(If I ever do) would just be more expensive because of it.
 

Attachments

  • 199.jpg
    199.jpg
    148.4 KB · Views: 104
  • 198.jpg
    198.jpg
    153.7 KB · Views: 98
  • 197.jpg
    197.jpg
    152.6 KB · Views: 88
  • 196.jpg
    196.jpg
    150.3 KB · Views: 88
  • 195.jpg
    195.jpg
    152.9 KB · Views: 79
  • 194.jpg
    194.jpg
    153.4 KB · Views: 89
OP
S

Samh

Well-known member
Joined
Aug 16, 2006
Messages
482
Location
Canton GA
Man those doors are legit. What kind of glass you putting in? Clear, Wavy. Opaque?

Thanks. Going to use clear 3/16" lexan. Planning on making a 24"x42" window that can just be inserted, and then will probably run some trim around the edge like you'd see on an entry door.
 
OP
S

Samh

Well-known member
Joined
Aug 16, 2006
Messages
482
Location
Canton GA
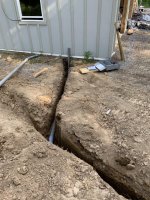
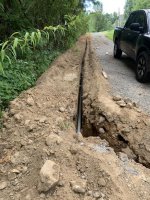
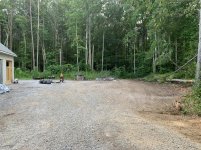
Thought I would wait till we got some good ole fashion 90 degree Georgia heat to do my trench for electrical. Also started painting my doors. Let the wife pick out the color for the outside, and am just doing a urethane finish on the inside. Also cleared out the trees I was originally going to use to build this thing. Gave me quite a bit more space in front. Hoping to get the rest of the doors hung this week, and the one that is hung taken down and painted.
 

Attachments

  • 206.jpg
    206.jpg
    150.1 KB · Views: 83
  • 205.jpg
    205.jpg
    147 KB · Views: 77
  • 204.jpg
    204.jpg
    148.4 KB · Views: 77
  • 203.jpg
    203.jpg
    58.3 KB · Views: 83
  • 202.jpg
    202.jpg
    145.4 KB · Views: 82
  • 201.jpg
    201.jpg
    143.2 KB · Views: 73
  • 200.jpg
    200.jpg
    143.8 KB · Views: 74
Last edited:
OP
S

Samh

Well-known member
Joined
Aug 16, 2006
Messages
482
Location
Canton GA
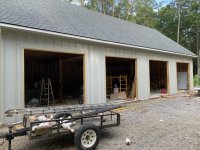
Got the doors up. Will need to bring the first set down to paint. I had decided they were throw away doors if my plan for hanging them didn't work. Since it did work, I won't have to make another set, and will just treat them with Wolman Wood Classic and then paint.

Next up is getting the windows done for them. Then the meter base installed. Then start on the interior. Will be ordering some rock wool insulation and plywood for the walls. Have a crazy idea I might try, and cut the plywood for the walls into 16" strips and run them vertical. Had originally thought about getting rough sawn lumber and running vertically for the inside. Was a little unsure about the gaps being over air, and debris getting behind them.
 

Attachments

  • IMG-0427.jpg
    IMG-0427.jpg
    152 KB · Views: 87
  • IMG-0428.jpg
    IMG-0428.jpg
    150.9 KB · Views: 89
  • IMG-0429.jpg
    IMG-0429.jpg
    148.8 KB · Views: 89
OP
S

Samh

Well-known member
Joined
Aug 16, 2006
Messages
482
Location
Canton GA
This build looks awesome! I may have to steal your door ideas for mine. Question though, why bifold doors vs a overhead?
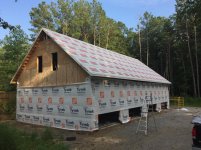
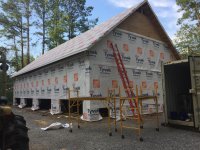
Thanks.

Meaning why didn't I just get overhead vs having these open overhead?
Main driver was cost. Building them ran at about half the price as overhead rollup, and about 25% the cost of traditional overhead.
 
To avoid these ads, REGISTER NOW!
Top Bottom