You are using an out of date browser. It may not display this or other websites correctly.
You should upgrade or use an alternative browser.
You should upgrade or use an alternative browser.
New Millscott project
- Thread starter royce
- Start date


PugetDude
ALLIANCE MEMBER
You;ll get it, Royce.
Are you thinking detents, shot pins. or locking cams?
Are you thinking detents, shot pins. or locking cams?


WoodsTruck
Well-known member
- Joined
- Jan 12, 2013
- Messages
- 1,040
I'm picturing this thing having some weight in it when done. Not sure why I have that hunch.
Too bad you can't integrate a spring at least at the lower swivel to counteract the weight. I think a worm gear at each pivot would be kind of interesting so it could be "screwed" into position then locked down.
Too bad you can't integrate a spring at least at the lower swivel to counteract the weight. I think a worm gear at each pivot would be kind of interesting so it could be "screwed" into position then locked down.
Yes, fairly heavy.I'm picturing this thing having some weight in it when done. Not sure why I have that hunch.
Too bad you can't integrate a spring at least at the lower swivel to counteract the weight. I think a worm gear at each pivot would be kind of interesting so it could be "screwed" into position then locked down.
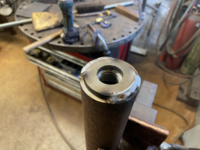
The telescoping strut will be sprung to counteract the weight.
PugetDude
ALLIANCE MEMBER
Overkill at it's finest. I love it!


Garage Junkie
Well-known member
It would be really cool to use a foot pedal to release the holding mechanism, so that you could raise and lower the vise with your hands.
I wouldn't be too hard on yourself in "designing a spring mechanism"- you can start with too much spring and let the spring always return the stand to a certain position, such as all the way up. Then push it down to where you want it for the job you are doing.
You can always swap out springs with different rates until you get the stiffness you need. Or, you can also adjust force on a spring using what you designed above to pre-load the spring. You just need enough spring length to do everything you want to do.
Could use and air bag or an air cylinder instead of a spring and a foot pedal air valve to raise and lower, or perhaps find an old barber's chair lift mechanism might be neat....
Just some thoughts, awesome project you have going on here!
I wouldn't be too hard on yourself in "designing a spring mechanism"- you can start with too much spring and let the spring always return the stand to a certain position, such as all the way up. Then push it down to where you want it for the job you are doing.
You can always swap out springs with different rates until you get the stiffness you need. Or, you can also adjust force on a spring using what you designed above to pre-load the spring. You just need enough spring length to do everything you want to do.
Could use and air bag or an air cylinder instead of a spring and a foot pedal air valve to raise and lower, or perhaps find an old barber's chair lift mechanism might be neat....
Just some thoughts, awesome project you have going on here!
It would be really cool to use a foot pedal to release the holding mechanism, so that you could raise and lower the vise with your hands.
I wouldn't be too hard on yourself in "designing a spring mechanism"- you can start with too much spring and let the spring always return the stand to a certain position, such as all the way up. Then push it down to where you want it for the job you are doing.
You can always swap out springs with different rates until you get the stiffness you need. Or, you can also adjust force on a spring using what you designed above to pre-load the spring. You just need enough spring length to do everything you want to do.
Could use and air bag or an air cylinder instead of a spring and a foot pedal air valve to raise and lower, or perhaps find an old barber's chair lift mechanism might be neat....
Just some thoughts, awesome project you have going on here!
Simple, fast acting and balanced was the design goal.
If I can get it sprung right, the screw could be omitted.
Lots of ways to skin a cat
Thank you
RivennHewn
Well-known member
I think I’d go Bluetooth, with a phone app to control duel motors for the positioning .
WoodsTruck
Well-known member
- Joined
- Jan 12, 2013
- Messages
- 1,040
CNC vise?
Useless in a power out situation.
Useless in a power out situation.
PugetDude
ALLIANCE MEMBER
Hey Riv, you remember when a telephone was just a phone!!!
That was before he got “ woke”.
RivennHewn
Well-known member
I’m so “Woke” , my cell phone has pronounsThat was before he got “ woke”.



PugetDude
ALLIANCE MEMBER
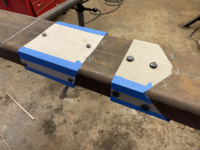
Looks like you have a limitless supply of used heavy gauge steel plate, bar, and tubing up there, Royce.
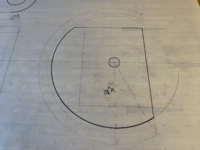
Wish I still had my old drafting machine, would greatly improve my CAD skills.
Wish I still had my old drafting machine, would greatly improve my CAD skills.
Puget,Looks like you have a limitless supply of used heavy gauge steel plate, bar, and tubing up there, Royce.
Wish I still had my old drafting machine, would greatly improve my CAD skills.
I used to have a large stock of materials but the "bone pile" has dwindled down to mostly junk.
The drafting machine is a fine asset, really shortens drawing time.
Monza Harry
Well-known member
And pretty's up the drawing, I wish I had one, my square and triangles will have to do for now. HarryPuget,
I used to have a large stock of materials but the "bone pile" has dwindled down to mostly junk.
The drafting machine is a fine asset, really shortens drawing time.
PugetDude
ALLIANCE MEMBER
I paid the bills with a drafting machine for a couple of years in the early 1980's; detailing tanks and pressure vessels; got off the drawing board and took an estimating postion before CAD came along.


PugetDude
ALLIANCE MEMBER
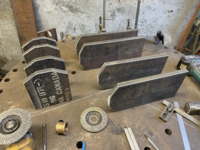
Royce, your weldments are never boring. Always a nice design twist.


PugetDude
ALLIANCE MEMBER
Royce, did you run a jig borer in a previous life?


PugetDude
ALLIANCE MEMBER
When I first started my career in the fab business, an old guy told me
"Everyone makes mistakes, experience teaches you how to recover from them"
Nice save.
"Everyone makes mistakes, experience teaches you how to recover from them"
Nice save.
Last edited:
KMScott
Well-known member
Nice fix Royce. I agree with Puget. Shucks, you only made a couple mistakes, I am jealous since I remember how many mistakes I made starting out. Keep up the good work.
RoninB4
Well-known member
Wow, good thing I've never made a scrap part..........
You recovered, it'll be good.
You recovered, it'll be good.


Only two people don't make mistakes.... One is not doing anything.... the other is a liar....When I first started my career in the fab business, an old guy told me
"Everyone makes mistakes, experience teaches you how to recover from them"
Nice save.
Lynn
PugetDude
ALLIANCE MEMBER
Unfortunately, there are a lot of people who are so afraid to make a mistake they will never make a decision.
I worked with a few of them during the course of my career, ended up replacing or reassigning most of them.
I called it paralysis by analysis...
Sorry for the post hijack, Royce... it's clear you're not afraid to try new things and think out of the box. I mean, who drags home a 5-ton jig borer that never ran one before?
I worked with a few of them during the course of my career, ended up replacing or reassigning most of them.
I called it paralysis by analysis...
Sorry for the post hijack, Royce... it's clear you're not afraid to try new things and think out of the box. I mean, who drags home a 5-ton jig borer that never ran one before?
Puget I don't mind at all.Unfortunately, there are a lot of people who are so afraid to make a mistake they will never make a decision.
I worked with a few of them during the course of my career, ended up replacing or reassigning most of them.
I called it paralysis by analysis...
Sorry for the post hijack, Royce... it's clear you're not afraid to try new things and think out of the box. I mean, who drags home a 5-ton jig borer that never ran one before?
I say, if you don't hang it out there, how will you find the limit?
Without striving to find the limit, living is just existing.
RoninB4
Well-known member
Doing what has never been done before also means you won't fail. Mistakes? Design development is what I call it.
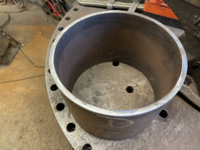
Got the hub rough cut today.
10"x .365W
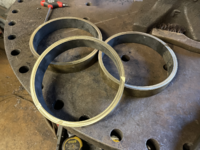
Also started cutting some bronze for bearings, between the body and hub.
The material I have is 7-3/4OD x .350W
With the bronze being smaller in diameter than needed, I'll have to make them in two segments and reform them.
10"x .365W
Also started cutting some bronze for bearings, between the body and hub.
The material I have is 7-3/4OD x .350W
With the bronze being smaller in diameter than needed, I'll have to make them in two segments and reform them.