To avoid these ads, REGISTER NOW!

New Post-Modern Garage/Workshop

To avoid these ads, REGISTER NOW!

cjcrazy8

Well-known member
Joined
Jul 24, 2009
Messages
161
I used the 3D printer today to make a present for my son. I combined an Arduino with an MP3 shield and accelerometer to make a talking Minion that reacts to motion:

p39655579-3.jpg

p272450175-3.jpg


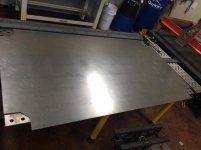
I also set up the printer on the stand. Works pretty well:

p468770849-3.jpg


I will be making a cover and drawers for the stand after the holidays.

Happy Holidays!

Awesome build!

Quick question, where did you get the scissor light fixture...
tthx
 
OP
W

works4me

Well-known member
Joined
Aug 11, 2011
Messages
250
Location
Houston Texas
I've tested each part, but I haven't been able to run it extensively until I build the water pan. I got sidetracked on that by various other tasks. But this weekend I cut the sheet metal with the plasma cutter and bended up the sides with my homemade brake. It fits very snugly (a bit too snug actually).

Because of the corner brackets, I cut the corners at a 45 degree angle. I am going to cut & bend corner brackets and then double weld them to the sheet. That should insure it is water-tight.

BTW I'm trying using attachments for the pictures instead of links. What do you(all) think?
 

Attachments

  • Photo Jan 19, 5 07 07 PM.jpg
    Photo Jan 19, 5 07 07 PM.jpg
    61.3 KB · Views: 123
  • Photo Jan 19, 6 10 00 PM.jpg
    Photo Jan 19, 6 10 00 PM.jpg
    83.6 KB · Views: 134
OP
W

works4me

Well-known member
Joined
Aug 11, 2011
Messages
250
Location
Houston Texas
Links! My preference because it's hard to view attachments on mobile devices.

What do you mean by double weld? What's the word on the shear?

Ok, makes sense (regarding pictures). I'll use links from now on.

Regarding the double weld, I'm going to overlap the sheets in the corner by about 1", and then weld both the inside seam & outside seam. That'll give it a bit of extra thickness, as well doubling the number of welds to help seal it. I've been practicing low-power welding of thin materials for this (since the sheet is 18 gauge). As part of that practice, today I tried bending & welding together some wire mesh to an armature wire. I'm testing it as a sculpture technique for a yard sculpture I'm working on. It's crude, but shows that the technique will work:

p717015855-3.jpg


Do you mean bender/brake? That's what I used to bend this up. It works well, but could be even better with a bit more adjustment. I forgot to take pictures with the metal in it. The hardest part was holding down the angle iron on the top once the sides were bent up. I put a 2" square tube on top to help clamp it down.

All the cuts were made with the plasma. Perfect clean cuts the first time!
 
OP
W

works4me

Well-known member
Joined
Aug 11, 2011
Messages
250
Location
Houston Texas
Dope! My brain just woke up! Now I remember what you mean by the shear.

I think I'm just going to cut the slats to go in the pan myself with the plasma cutter. I'm getting good enough with my speed control that the cuts now are very clean and straight. I'm pretty sure I can cut them well enough myself for what I need.
 
OP
W

works4me

Well-known member
Joined
Aug 11, 2011
Messages
250
Location
Houston Texas
Big Screen TV Anyone?

Ok my next experiment! I've been thinking about covering the silver insulation on the roll-up door with something. Killing two birds with one stone I bought some self-adhesive whiteboard/projection screen material. It was a risk, since I didn't know how well it would adhere nor how it would look once it rolled/unrolled.

Here is what it looked like when I first installed it:

p367594633-3.jpg


And this is what it looks like after I rolled up the door once:

p50409534-3.jpg


You can see lines where the panels bended, but it's still very useable. Since that worked, I'll probably buy a second roll to fill in the area above/below the current area.

Now I just need to get a TV projector and I'm ready for the Superbowl!
 
OP
W

works4me

Well-known member
Joined
Aug 11, 2011
Messages
250
Location
Houston Texas
Designing to your tools

Ok, making progress! I cut the supports for the Plasma CNC water table today!

I cut the curved strips out of the remnants of the sheet I used for the pan using the plasma. Then I chopped 1" slots every 4.5" in some angle iron using my chop saw. The width of the cut was just enough to fit the strips in snugly, thus holding everything together very firmly:

p327236315-4.jpg


p425201835-4.jpg


It's not the most elegant design, but it was easy to fabricate using the tools I have, and it is easy to take in & out to clean. I'm going to drill holes in the angle iron to help water flow around the table.

Tomorrow I'll do "dry run" with it (literally). Then I can finish sealing the pan and put in the drains next week.
 
Last edited:

Jason Lister

Well-known member
Joined
Mar 1, 2011
Messages
135
Location
Coarsegold, CA
Re: Designing to your tools

Depending on your usage. I would definitely recommend a smaller slat spacing. Mine is 2" and cutting 4" items all the time I am thinking of going to 1.5". Of course, 4.5" will work just fine if you plan to cut things that are larger than 10" always.
 
OP
W

works4me

Well-known member
Joined
Aug 11, 2011
Messages
250
Location
Houston Texas
Good point! I can easily add more slats with this design if necessary. But I have a slightly different approach I want to try first :)
 

Jason Lister

Well-known member
Joined
Mar 1, 2011
Messages
135
Location
Coarsegold, CA
Awesome... the garage is coming along great. I've been subscribed for quite a while. I will warn you; with much usage, that water will get nasty quick and you may not want to get in there modifying too much after that point.
 
To avoid these ads, REGISTER NOW!
OP
W

works4me

Well-known member
Joined
Aug 11, 2011
Messages
250
Location
Houston Texas
A different view of the garage!

Something a bit different. I finally received a cheap little quadcopter I ordered a while ago. They had a special deal before Christmas & I got it for $50. What's cool about this is that it actually has a little camera attached to it and some decent electronics.

p307223176-3.jpg

p96655872-3.jpg


My first impression is that it's pretty easy to fly and *very* rugged. The hardest thing is to keep it at a steady altitude. Here is my first rough video:


Definitely need to work on my control before going "pro" :bounce:
 

LCG

Well-known member
Joined
May 27, 2012
Messages
512
Location
GDL :: MX
good work on the plasma table, I'm anoxious to buy one but still looking for a taller Y axis to mill foam
 
OP
W

works4me

Well-known member
Joined
Aug 11, 2011
Messages
250
Location
Houston Texas
good work on the plasma table, I'm anoxious to buy one but still looking for a taller Y axis to mill foam

Another approach for that would be to lower the interior bed height and put an extension bar on the Z-axis. I've considered this approach for using it as a 3D printer.
 

LCG

Well-known member
Joined
May 27, 2012
Messages
512
Location
GDL :: MX
Another approach for that would be to lower the interior bed height and put an extension bar on the Z-axis. I've considered this approach for using it as a 3D printer.


Take a look at this kids gantry. I mailed him but yet no response.
230mm of Y travel, just what I could work with.
and the feed speed of alu... pffttt!


Hot Chop shop

Well-known member
Joined
Apr 12, 2013
Messages
628
Location
Las Vegas
Just read your thread straight through... Very cool stuff! You got a lot of fun toys in there that I will have to add to my dream tool list... Or maybe I'll just have to move down the street from you and start borrowing some tools.


Sent from my iPad using Tapatalk HD
 

Kevin54

MEMBER EMERITUS
Joined
Jan 12, 2005
Messages
29,341
Location
Urbana, Ohio
Re: A different view of the garage!

Something a bit different. I finally received a cheap little quadcopter I ordered a while ago. They had a special deal before Christmas & I got it for $50. What's cool about this is that it actually has a little camera attached to it and some decent electronics.

p307223176-3.jpg

p96655872-3.jpg


My first impression is that it's pretty easy to fly and *very* rugged. The hardest thing is to keep it at a steady altitude. Here is my first rough video:


Definitely need to work on my control before going "pro" :bounce:

Good Lord, that thing needs a muffler on it :scared: My volume was up on the computer. :spit:
 
OP
W

works4me

Well-known member
Joined
Aug 11, 2011
Messages
250
Location
Houston Texas
Take a look at this kids gantry. I mailed him but yet no response.
230mm of Y travel, just what I could work with.
and the feed speed of alu... pffttt!


That looks like a very good design. The gantry itself is higher, but I'm not sure the vertical axis has a larger range of motion than the Grunblau. Hard to tell. One advantage appears that the ends are lower, so you can slide a larger thick piece into it from the end.

FYI the feed rates should be pretty comparable to the Grunblau, since the motors and drivetrain appear to be very similar. I know the Grunblau can do over 300mm/s (if you really wanted to push it).
 
OP
W

works4me

Well-known member
Joined
Aug 11, 2011
Messages
250
Location
Houston Texas
More thin-wall welding practice today & first rough work on the corners of the water table. It looks ugly, but I'm not burning through anymore, and I have enough control to seal up any leaks:

p709146115-3.jpg

p842304038-3.jpg


I've been working on a bracket design for upgrading the 3D printer to dual heads. Being able to print it out quickly has had a big impact on the design process. I'll worry about how I'll CNC mill it after I have the design finalized:

p846833723-3.jpg


You can print some pretty amazing things with the printer without any supports:

p713445694-3.jpg


Any thanks to my wife's digging around ebay, I'm starting to collect some cool old gauges for my "functional steampunk" sculpture idea:

p856480661-3.jpg


I'm going to refinish and then retrofit them to run off of a small electric motor so that they can react to various inputs.

Too many things to do, too little time.
 
OP
W

works4me

Well-known member
Joined
Aug 11, 2011
Messages
250
Location
Houston Texas
Looks good. Micro stepper for those gauges? Or shape memory alloy? I'm certainly intrigued.

My current idea is to use micro steppers driven by wires in the pipes and a microcontroller hidden somewhere to control it all. One example would be a steam powered desk lamp. The "switch" is an air valve. When you turn it the pressure gauges start increasing to the point a belt drive starts turning running a small "generator" (with a spinning regulator , if I can find/fabricate one) causing the voltmeter gauge to jump up and the light to sputter on. Everything connected via copper pipes, antique gauges, cool gears, etc.

By using a microcontroller I can create complex compound actions. For example, I could add switches to change the brightness that also impact the generator speed & voltage gauge.
 

Kiwi Tinbender

Active member
Joined
Dec 13, 2013
Messages
28
Location
Vancouver, WA
Try using less amperage, smaller filler rod and better fit for your welding practice.What settings and material are you using now? How thick is your material?
 
OP
W

works4me

Well-known member
Joined
Aug 11, 2011
Messages
250
Location
Houston Texas
Try using less amperage, smaller filler rod and better fit for your welding practice.What settings and material are you using now? How thick is your material?

Very good input! Thanks!!

Fitment was the biggest issue here, since I had to bend the corner brackets with multiple small angles and then fit it to the bent-up sides with the curves at the bottom. So I had some gaps to fill in. In retrospect a simpler design would have made it easier to get good fitment and made the whole process easier.

Currently I'm using 3/32 filler, 3/32 2% thoriated tungsten, and the sheet is 18 gauge mild steel. I'm currently pulsing at 5 pulses/sec.
 
Last edited:
OP
W

works4me

Well-known member
Joined
Aug 11, 2011
Messages
250
Location
Houston Texas
3/32 filler is pretty huge for 18 gauge... I would use 1/16" or smaller. Also, turn the pulse off.

I tried 1/16 gauge. It was difficult to fill the gaps. I'll try it again. More practice! And definitely more work on my initial fitment.

FYI the pulse helped considerably to control the temperature spread. The picture I showed above was before I turned it on. After turning it on the welds are more smooth and I see a nice even color change and a very feint line where the weld is on the backside showing that I'm getting full penetration without any burn-through. I will try a side-by-side comparison turning it off & lowering the power to see if I can produce a similar effect. But my analysis at this stage is that using pulse provides the equivalent functionality as lowering the power but with improved pedal sensitivity/control.
 

Jason Lister

Well-known member
Joined
Mar 1, 2011
Messages
135
Location
Coarsegold, CA
Ya, it's definitely just a function of hood time and getting used to it. The better your fitup, the better your welding will turn out. It's just like painting.... 90% of it is in the prep work.

Dont let the pulse function become a crutch...

18 gauge with a gap is a pretty steep learning curve for a newer tig welder, but if you can make that turn out nice... more power to you!
 
OP
W

works4me

Well-known member
Joined
Aug 11, 2011
Messages
250
Location
Houston Texas
18 gauge with a gap is a pretty steep learning curve for a newer tig welder, but if you can make that turn out nice... more power to you!

Tell me about it! At least I gave up early on welding the whole sides on (rather then bending them). I'm really excited to finish it all up this weekend.
 
To avoid these ads, REGISTER NOW!
Top Bottom